One of the worst problems users can encounter on their computers is Blue Screen of Death errors as some of them are quite hard to fix. One of them is the “The driver detected a controller error” Blue Screen error. It could be followed by “DeviceIdeIdeport0 OR”, “on deviceharddisk0dr0”, or “DR3” or the name of the drive or port that’s causing the problem. If you are one of the users who encountered this error, then the suggestions provided in this post would definitely help you in fixing the problem.
Option 1 – Try to disconnect and reconnect all hardware and cables
A lot of users reported that they were able to fix the problem by disconnecting and reconnecting cables and hardware like scanners, printers, cameras can help in fixing the problem. In addition, you can also boot your computer in a Clean Boot State so that you can find the problematic hardware by hit and trial method. Refer to the steps below to do so:
Log onto your PC as an administrator.
Type in MSConfig in the Start Search to open the System Configuration utility.
From there, go to the General tab and click “Selective startup”.
Clear the “Load Startup items” check box and make sure that the “Load System Services” and “Use Original boot configuration” options are checked.
Next, click the Services tab and select the “Hide All Microsoft Services” check box.
Click Disable all.
Click on Apply/OK and restart your PC. (This will put your PC into a Clean Boot State. And configure Windows to use the usual startup, just simply undo the changes.)
Option 2 – Update the device drivers
Updating the outdated device drivers in your computer can also help in fixing the problem. To do so, refer to these steps:
First, boot your computer into Safe Mode.
After that, tap the Win + R keys to launch Run.
Type in devmgmt.msc into the box and tap Enter or click OK to open the Device Manager.
After that, a list of device drivers will be displayed. From there, look for any outdated device drivers and click on each one of them.
After that, right-click on each entry of the device drivers and select the “Uninstall Device” option from the menu.
Now restart your computer.
After restarting your computer, go to the Settings app and Check for Updates in the Windows Update section.
Option 3 – Try to update the BIOS
Updating the BIOS can help you fix the ATTEMPTED_WRITE_TO_READONLY_MEMORY BSOD error but as you know, BIOS is a sensitive part of a computer. Even though it is a software component, the functioning of the hardware depends on it largely. Thus, you must be careful when modifying something in the BIOS. So if you don’t know much about it, it’s best if you skip on this option and try the other ones instead. However, if you are well-versed in navigating the BIOS, then follow the steps below.
Tap the Win + R keys to open the Run dialog box.
Next, type “msinfo32” in the field and press Enter to open System Information.
From there, you should find a search field on the bottom where you have to search for the BIOS version and then press Enter.
After that, you should see the developer and version of the BIOS installed on your PC.
Go to your manufacturer’s website and then download the latest version of BIOS on your computer.
If you are using a laptop, make sure that you keep it plugged in until you have updated the BIOS.
Now double click on the downloaded file and install the new BIOS version on your computer.
Now restart your computer to apply the changes made.
Option 4 – Try running the Blue Screen Troubleshooter
You might also want to run the Blue Screen troubleshooter. It is one of the built-in tools in Windows 10 that helps users in fixing system issues including Blue Screen errors. It can be found in the Settings Troubleshooters page. To use it, refer to these steps:
Tap the Win + I keys to open the Settings panel.
Then go to Update & Security > Troubleshoot.
From there, look for the option called “Blue Screen” on your right-hand side and then click the “Run the troubleshooter” button to run the Blue Screen Troubleshooter and then follow the next on-screen options. Note that you might have to boot your PC into Safe Mode.
Option 5 – Try running the Memory Diagnostic Tool
The Memory Diagnostic tool in windows can help resolve the “The driver detected a controller error” Blue Screen error by checking and automatically fixing any memory-based issues. To run it, refer to these steps:
Tap the Win + R keys to open Run and type mdsched.exe and hit Enter to open the Windows Memory Diagnostic Tool.
After that, it will give two options such as:
Restart now and check for problems (Recommended)
Check for problems the next time I start my computer
Once your computer has restarted, perform a basic scan or you could also go for the “Advanced” options such as “Test mix” or “Pass count”. Simply tap the F10 key to start the test.
Note: After you select your preferred option, your computer will restart and check for memory-based issues. If it finds any issues, it will automatically fix them and if there’s no issue found, then it’s most likely not a memory-based issue so you should try the other options given below.
Option 6 – Replace your motherboard
If your computer is still under warranty, you should consider replacing your computer’s motherboard in case the options given above failed to work in fixing the Blue Screen error.
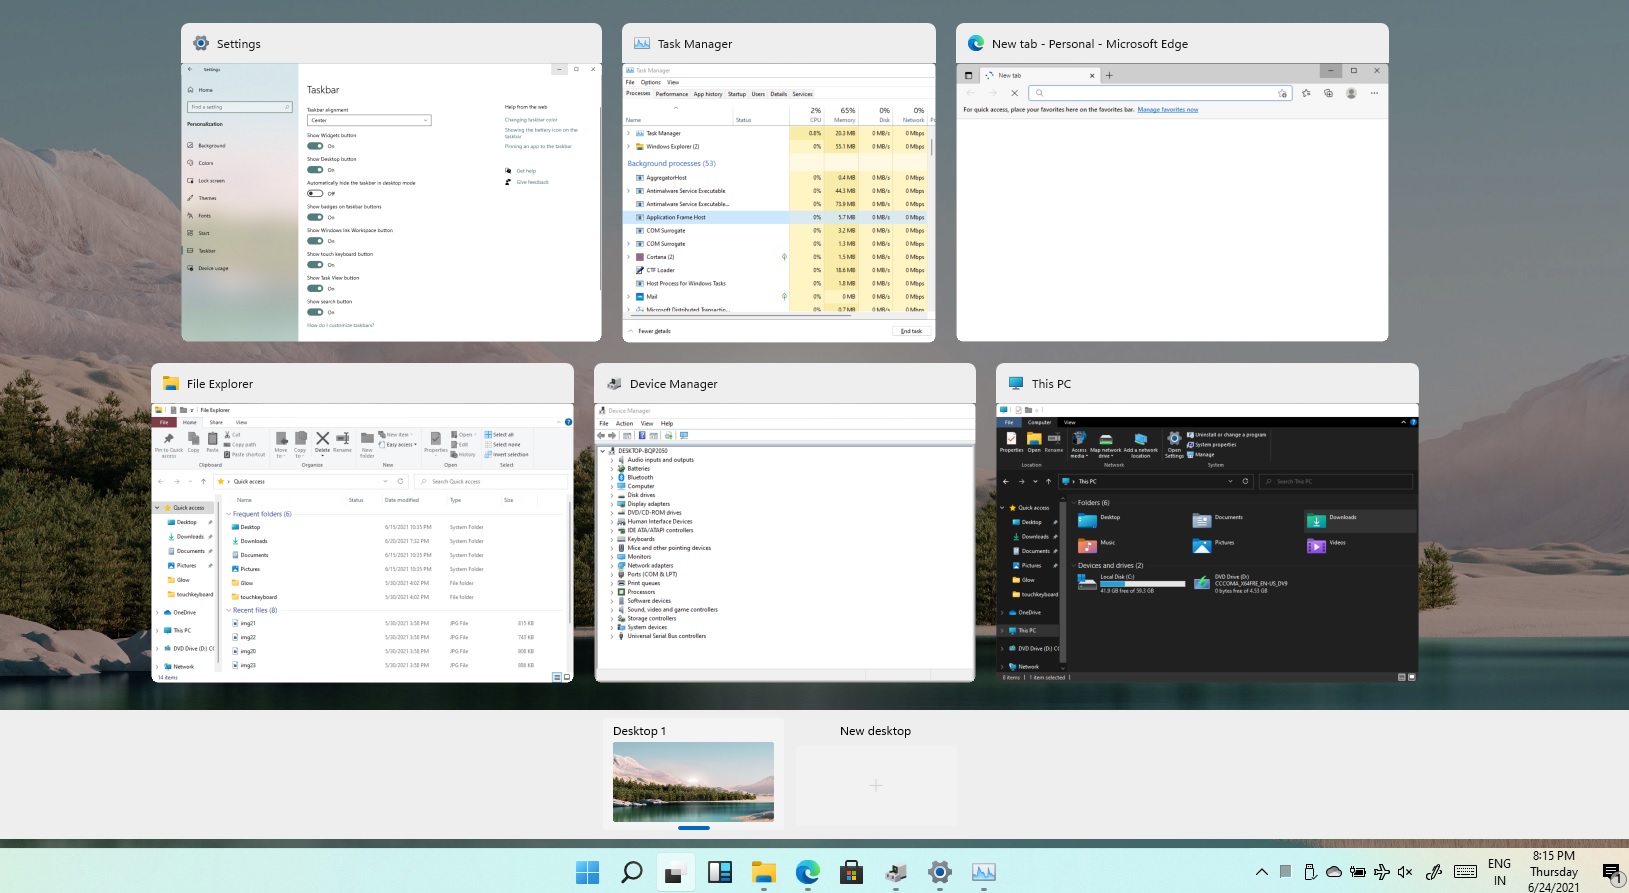
Task View feature inside Windows 11 is actually a great feature, letting you quickly view open windows and virtual desktops. How Task view itself could be reached with keyboard shortcut combination of ⊞ WINDOWS + TAB some users will prefer this way of using it and thus button on the taskbar is something you do not want or need.
There is a very easy way to remove mentioned button and I will show you how to do it.
Right-click the taskbar button itself and click on Hide From Taskbar.
That’s it, you have done it.
Now in order for you to bring it back if you change your mind, you will have to do some extra steps but it is nothing difficult.
Right-click on the taskbar and click on Taskbar settings, you will be lead to Personalization > Taskbar.
Inside locate Taskbar Items and switch Task View to ON, you will see the Task View button right away showing itself again.
If you are a person which spends a lot of time in front of the computer doing work, then you are aware of the importance of having a proper backup of your archive so if anything bad happens you will lose almost none of the work.
We can never tell when we might experience HDD failures or when we might be a victim of cyber attacks, natural disasters,s and other unpredictable circumstances where we could lose all of our data in a matter of minutes. Having a backup of our data is very important but sometimes we are too busy or not around and we miss that data backup we wanted to do, and if in this case disaster strikes we are out of luck and data is lost. To avoid such circumstances, you can set up automatic Windows Backups at a scheduled time. This way it will help to have the loss of important files and documents from unexpected hazards.
in order to create automatic backups of your files, you have several options, and below we will explore each one in hopes that you will find one that best suits your needs.
Create automatic file backup with OneDrive
This is probably the best way to do it because each time when you sign in OneDrive files get backed up right away, files are stored in the cloud and can be accessed on any device via a Microsoft account.
To get started, open the Settings app first.
Click on the Update & Security category
Select the Backup tab from the left pane.
Move to the right page and click on the Back up files button that is available under Back up files to OneDrive.
Select the folders you want to backup in the cloud, and remove those ones you don’t want to backup.
On the next page, click the Start backup button to start the procedure.
Create a backup using File History
File History is an inbuilt feature that allows users to create automatic file backup on Windows 10. File History allows the users to back up their files in an external or cloud drive at different intervals of time. To create automatic file backup using File History:
Press the ⊞ WINDOWS + I to open the Settings app.
Click on the Update & Security category and then select the Backup tab from the left pane.
Under the Back up using File History section, click on Add a drive button.
Now choose the drive to store the backup files. Windows will use this drive for File History.
Then turn on the toggle button under Automatically back up my files. This will back up your data to the drive automatically whenever you connect it to the system.
Below the toggle button, click on the “More options” link to set how frequently File History will back up.
Use the Keep my backups drop-down menu to get the option to configure the time for how long you want to keep your backups. By default, it will keep your backups forever.
Under the section Back up these folders, tap on the Add a folder button in order to add one more folder to the backup. Then click on the Add a folder button, under Exclude these folders. This will exclude the files that you don’t want to back up.
You can stop the drive from storing backup files to change the backup storage location. To do this, click the Stop using drive option under the Back up to a different drive category.
Backup using Windows backup & restore tool
Open Control Panel
Click on the System and Security option
Scroll down and select the Backup and Restore (Windows 7) button
Next click on the Set up backup button, available under the Back up or restore your files section
Under the Save backup on section, select the Backup Destination where you want your backup files to get stored
On the “Set up backup” page, Windows will ask you to choose the way to backup, check Let me choose checkbox, and then hit the Next button
Under the section Computer, select the files and folders you want to backup. Then uncheck the box next to the Include a system image of drives option, and then hit the Next button
Now click on the Change schedule link. Set the time and check the box beside Run backup on a schedule button
Click OK then select the Save settings and run backup option
It is common to run multiple programs and applications at the same time and it’s important to be able to switch between them using their Taskbar icons or using the usual Alt + Tab shortcut. However, there are times when you might suddenly find that neither of the aforementioned methods worked and you will no longer be able to switch between programs in the Windows Taskbar. To fix this issue, refer to the options given in this post.
For instance, when you have multiple instances of Microsoft Edge running and every time you press the Alt + Tab combo nothing happens so you are left with no choice but to minimize everything and then hover your mouse on the icon and switch between the instances of Edge. You will also notice that the right-click on the taskbar won’t respond back and will only keep on showing the loading circle icon.
Here are a few tips you can follow to fix the issue with the Windows 10 Taskbar.
Option 1 – Try to restart the Windows Explorer
This is one of the basic things you can try as restarting Windows Explorer helps in refreshing the user interface and makes most of the things work in relation to the user interface.
To get started, tap the Alt + Ctrl + Del keys to pull up the Windows Task Manager.
After opening Task Manager, look for “explorer.exe” under the list of programs.
Once you find the explorer.exe, right-click on it and click Restart.
Option 2 – Try changing the Foreground Lock Time
Aside from restarting Windows Explorer, you could also try changing the Foreground Lock Time to fix the issue with the Taskbar.
Tap the Win + R keys to open the Run dialog box.
Then type in regedit in the field and tap Enter to open the Registry Editor.
Next, go to this registry key – HKEY_CURRENT_USERControl PanelDesktop
Next, change the ForegroundLockTimeout value from200000 to 0. After that, it will make sure that no other application will take away the focus from your current program or application. It could be that some other application has taken away the focus and even when you try to actually switch, the focus gets back to the old one. Anyhow, since you already changed the value of ForegroundLockTimeout, it will ensure that the focus is not switched.
Note: If you are running some Full-Screen applications there are some devices especially the gaming ones, disable the Windows key to make sure that you won’t be able to switch. If this is the case, you need to make some modifications to the Full-Screen games.
As we near the end of 2022 we look at the current best antivirus software for popular platforms, why they are the best, and why you should get them.
Avira, a great free Antivirus
Avira has been around a long time with its free antivirus version of the larger protection suite. It had its ups and downs but the latest versions are really great. With high-speed scans and low system impact, Avira antivirus is really one of the best free antivirus software currently on the market.
The software itself has also received UI & UX updates making it straightforward and easy to use. The virus scanning engine is the same as in paid version that ranks among the top engines in the world for this type of work. The package also gives you some great browser protection and a good firewall as well, there is really no excuse to skip on this if you want a free solution.
The only thing that we would say is not so great in Avira is reporting some false positives, sometimes even for MS updates, it is rare but it can happen.
Malwarebytes, a powerful Windows antivirus
Malwarebytes Premium is easy to use, simple antivirus solution that shies away from complicated UI, and simply put, it just works. Its scanning engine is well-known and places among the top and best in the world often finding some malware that other can miss.
Another great thing is its integration with Windows itself, it is one of the rare applications that can and will work incredibly well beside your typical Windows protection tools so you can have both of them running at the same time.
Installation and running are really simple and every typical PC user will find it as easy as walking in the park. On the other hand, sadly system impact is a little high and it will have issues running on lower-end systems due to its memory requirements.
Intego MAC Internet Security X9, the best Mac antivirus
Gone are the days when MAC had no virus issues, since MAC rose in popularity among the users, also rose the number of viruses and malware. The system itself has some great protection built it inside but for more security and better control of it, you will need a third-party dedicated solution.
Intego was made by Mac antivirus experts who have been building this kind of software last 25 years. The interface is easy to use and premade presets are really helpful, but the security suite can also be customized to fit your needs and desires.
Since this is only available as a security suite, you are getting a firewall and some other security tools along with your antivirus that will run as a part of it.
The bad side is that scans can sometimes run slow, most of the time they are OK in terms of speed but occasionally they can switch to slower speeds and impact scanning time to some annoying times. Also, there is no webcam protection nor VPN service included where others on this list have them.
Bitdefender mobile security: best Android protection
While protection is not only needed for your gaming or workstation, software suites that are dealing with mobile and tablet security exist. The best of them is the Bitdefender antivirus mobile suite. Low on system resources and low on performance impact with the really great virus detection rate Bitdefender is at the top of suites for your phone.
Consistent high virus detection packed with low battery impact is great but the suite comes with tons of other tools as well like browser security tools, email protection, and real-time link and notification protection.
The application will always scan each file and newly installed application in the background and alert and cut off any found threat. App itself is easy to install and use and most of the time it will do everything in the background for you but offer you customization if you need it.
The package also includes VPN and application lock that will let you protect the critical applications from being accessed as well as an online account scanner. Anti-theft and anti-loss tools, which allow you to find, remotely lock or wipe a stolen or lost device, add yet another layer of protection.
One thing that is missing from this great package is fraudulent call protection. Newer Android phones have this feature inside but it would be nice if Bitdefender had it as well.
Bitdefender, the best antivirus software
Now that we have covered specific cases of each platform, there is one player that has all of them covered and with a quality product, that player is BitDefender and it is great. Personally, this is my protection suite of choice and as I type this it is running in the background.
Bitdefender has it all, low system impact, as a matter of fact, it is one, if not, the lowest performance impact engine on the market currently and that is packed with a great and highly consistent virus & malware detection suite. Along with real-time malware protection, browser security, and anti-spam tools, you also get anti-phishing defenses, ransomware protection, and a strong firewall.
Bitdefender scores are very high in both the zero-day threat and real-world protection tests at AV-Test, an established organization that tests antivirus software. Despite being tested against tens of thousands of well-known and widespread malware threats, the software consistently achieves a 100% blocking rate.
The suite also comes with a restricted free VPN and with parental controls as well. Webcam and microphone protection are also included in the suite and on top of all, it has great pricing plans and constant discounts.
BitDefender is really a great package and it might sound too good, but after years and years of personally using it I have not had single malware or virus issue, the only thing that I would put as a negative is that system is severely slowed down when system scans are performed so be sure to run or schedule them when you are not using your computer. This, of course, can put some people off and I will admit it is a serious drawback but for me, the security of my workstation is more important than leaving the computer for 20 or so minutes in order to perform a full scan of the system.
There are times when you encounter some issues while your Windows 10 computer. One of the errors you can encounter in the update process is the “Something went wrong, error code 0x8007042B”. This kind of error might be caused by several reasons and it could also pop up in lots of cases like upgrading to a new feature update or a new build using the Media Creation tool or Windows Update Assistant.
There are times when the Windows Update error code 0x8007042B is followed by another error code like 0x2000d. Whatever the extra error code that follows, the core issue still remains the same. To resolve the problem, here are some options that could help. And while going over these troubleshooting tips, you have to keep clicking the Update button right after you carry out a troubleshooting option.
Option 1 – Try to restart the Background Intelligent Transfer Service
The Background Intelligent Transfer Service or BITS is a part of the Windows Update service and is the one that manages the background download of Windows Update, as well as scans for new updates and so on. And if Windows Update is experiencing some problems, you can try restarting BITS but make sure that you have admin privileges to do so.
Tap the Win + R keys to open the Run dialog box.
Next, type “services.msc” in the field and hit Enter to open Windows Services.
From the list of Services, look for the Background Intelligent Transfer Service and double-click on it to open Properties.
After that, you need to set the Startup type to “Automatic (Delayed Start) and click on Apply.
Now click the Stop button to stop BITS and then click the Start button to restart the service.
Click OK to save the changes made and then restart your PC.
Option 2 – Try creating Windows 10 ISO media
In this option, you will have to create a Windows 10 bootable media and use it to install the latest Windows 10 version. The most user reported that this option works and the reason why it does have something to do with the Windows Update client since the Windows Updates downloaded from the regular Windows Update client seems to create issues such as the Windows Update error code 0x8007042B. However, issues like this one don’t occur when the very same Windows Updates are downloaded and installed via an ISO file. Take note that when using a Windows ISO file, you will be asked to choose what you want to do with the previous settings and apps. A lot of users opted for the “Not to keep the old Windows settings” option which has resolved the issue. So if you want to keep the previous settings then you must try to update Windows first while keeping the old settings. However, if it doesn’t work, you have to try installing the latest version of Windows without keeping the previous settings.
Click this link and then click the Download Tool Now button.
Next, click the “Use the tool to create installation media (USB flash drive, DVD, or ISO file)…” option and follow the next given instructions on the screen.
Now select the ISO file option in step 5.
After that, you should now have an ISO file.
Next, go to the location where you’ve downloaded the ISO file.
Then right-click on the Windows 10 ISO file and select the Open with option and then select File Explorer.
Now click on “setup.exe” and follow the next instructions that appear on the screen. When asked, you have to select either the Nothing (clean install) or the Keep personal files only option. Take note that you must not select the “Keep personal files, apps, and Windows settings since it doesn’t really work.
Option 3 – Run the DISM tool
You can run the DISM tool as well to help fix the error code 0x8007042B during Windows Update. Using this built-in tool, you have various options such as the “/ScanHealth”, “/CheckHealth”, and “/RestoreHealth”.
Open the Command Prompt with admin privileges.
Then type in the following commands and make sure to hit Enter right after you type each one of them:
Dism /Online /Cleanup-Image /CheckHealth
Dism /Online /Cleanup-Image /ScanHealth
exe /Online /Cleanup-image /Restorehealth
Do not close the window if the process takes a while as it will probably take a few minutes to finish.
Option 4 – Perform a System File Checker scan
The SFC or System File Checker scan could detect and automatically repair damaged system files that could be causing the Windows Update Error 0x8007042B to appear. SFC is a built-in command utility that helps in restoring corrupted files as well as missing files. It replaces bad and corrupted system files with good system files. To run the SFC command, follow the steps given below.
Tap Win + R to launch Run.
Type in cmd in the field and tap Enter.
After opening Command Prompt, type in sfc /scannow and hit Enter.
The command will start a system scan which will take a few whiles before it finishes. Once it’s done, you could get the following results:
Windows Resource Protection did not find any integrity violations.
Windows Resource Protection found corrupt files and successfully repaired them.
Windows Resource Protection found corrupt files but was unable to fix some of them.
Option 5 – Run the Windows Update Troubleshooter
You might also want to run the Windows Update Troubleshooter as it could also help in fixing Windows Update Error 0x8007042B. To run it, go to Settings and then select Troubleshoot from the options. From there, click on Windows Update and then click the “Run the troubleshooter” button. After that, follow the next on-screen instructions and you should be good to go.
Option 6 – Contact Microsoft Support for assistance
If you’re at your wits’ end in trying to update your Windows 10 computer, you should consider contacting Microsoft Support for help as they can offer you various options that would make fixing Windows Update Error 0x8007042B a lot easier and faster.
Error Code 49 is a common device driver error that users encounter on any Windows 2000 and later operating system versions.
The error occurs when the connected peripheral devices fail to function properly due to an overload of the system hive’s size.
The error when prompted pops up on your screen with the following message:
"Windows cannot start new hardware devices because the system hive is too large (exceeds the Registry Size Limit). (Code 49)”
The error causes unattached devices to be displayed on the system hive list.
Solution
Error Causes
Error Code 49 mainly results from problems in Windows registry system files; the system hive in the Windows registry exceeds its size limit.
The system hive is part of the Windows registry and it is where files regarding devices are contained along with user preferences and applications.
The devices will not work until the system hive size is brought back to normal levels.
Further Information and Manual Repair
There are several ways you can use to fix your error code. Here are the following.
Method 1 – Uninstall unused devices
One of the best ways to address the error code is to uninstall the unused devices which are listed on your computer’s system hive. To do this:
Log in using an Administrator account
Click the Start button and then click ‘Run’
In the box, enter the command:
"set devmgr_show_nonpresent_devices=1 cd%SystemRoot%System32 exit"and click enter
Open Device Manager, click ‘View’, and then choose ‘Show hidden devices’ to see unused devices.
When you can see the list, click on the device you want to uninstall by selecting the ‘Driver’ tab and then select ‘Uninstall’.
After uninstall is complete, restart your computer.
Method 2 – Use System Restore
If the error still persists, you can use system restore to eliminate the problem. Here is how you can do so:
Log in using an Administrator account
Click ‘Start’ button and select All Programs > Accessories > System Tools > System Restore
Click ‘Restore my computer to an earlier time’ and click ‘Next’
Select the last Windows restore point from the ‘On this list, click a restore point’ list, and click ‘Next’
Click ‘Next’ on the confirmation window to proceed
Restart your PC after restoration is complete
By restoring the system via a last saved system checkpoint, you can obtain undamaged Windows system files that can help avert the error code.
Method 3 – Manually uninstall and reinstall the device driver
If using system restore does not work in resolving the error code either, you may have to resort to manually uninstalling and then reinstalling the device driver causing the problem.
This would be necessary since the remaining incomplete files due to a partial removal or installation of programs is what results in the error code. By uninstall and reinstalling the device driver program, it would lead to the completion of the files.
You can do this by firstly logging in as Administrator and open Device Manager. Select the device that is causing the problem and double click it and make sure that the peripheral is connected properly to the PC.
Upon opening, click on the ‘Driver’ tab and then select ‘Update Driver’. Make sure to refer to the system documentation that you received with your PC or computer to check for the motherboard details and driver specifics.
Method 4 – Use software to automatically download the driver
Manually uninstalling and reinstalling the driver will do the trick; however, it may be time-consuming, especially when you would have to resort to your hardware user manual.
Therefore, using a program such as DriverFIX can save you a lot of time and frustration in having your device work properly on your computer.
DriverFIX, with its user-friendly approach to help you fix your PC issues, comes with an integrated database that detects which drivers you need to reconfigure within just a few seconds and downloads it automatically.
It further ensures that your drivers are installed in their entirety leaving no room for any incomplete files to remain that create Error Code 49.
It also has the added advantage of being able to backup and restore your files should there be the slightest possibility of system file damage. DriverFIX is the answer to fixing your PC error codes accurately and quickly.
Click here to download DriverFIX to fix Error Code 49 quickly and effectively!
If you suddenly encounter a PNP_DETECTED_FATAL_ERROR Blue Screen error, then this post can help you out. The PNP_DETECTED_FATAL_ERROR BSOD usually occurs when any new hardware that is mostly the Plug and Play type is attached. In such cases, when the device is plugged, and the driver for that device crashes or isn’t found or is not compatible, you will most likely encounter this particular BSOD error.
There are several error codes that come under this category, some of them are 0x000000CA (0x01681690, 0xEA96A7BE, 0x938A81AD, 0xF8362881. This BSOD error can also occur at any time. However, the only constant thing here is when you plug a PNP device like earphones, microphones, USB drives, and many more.
The PNP_DETECTED_FATAL_ERROR bug check has a value of 0x000000CA which indicates that the Plug and Play Manager encountered some severe error which is most likely have something to do with a problematic Plug and Play driver. To fix this error, here are some possible solutions that could help.
Option 1 – Run the Blue Screen Troubleshooter
The Blue Screen troubleshooter is a built-in tool in Windows 10 that helps users in fixing BSOD errors like PNP_DETECTED_FATAL_ERROR Blue Screen error. It can be found on the Settings Troubleshooters page. To use it, refer to these steps:
Tap the Win + I keys to open the Settings panel.
Then go to Update & Security > Troubleshoot.
From there, look for the option called “Blue Screen” on your right-hand side and then click the “Run the troubleshooter” button to run the Blue Screen Troubleshooter and then follow the next on-screen options. Note that you might have to boot your PC into Safe Mode.
Option 2 – Try disabling or removing newly installed hardware
In this option, you will have to disable or remove the hardware you’ve just installed recently since external devices could be the one that’s causing the Blue Screen of Death error to appear. To do that, just disconnect any external device that’s connected to your computer physically and then check if it fixes the PNP_DETECTED_FATAL_ERROR Blue Screen error.
Disabling the BIOS Memory options such as Caching and Shadowing can help you in fixing the PNP_DETECTED_FATAL_ERROR Blue Screen error. All you have to do is enter the BIOS first and then use the Arrow and Enter keys to select your choices. And if you can’t seem to find it, look for specific instructions from your OEM or you could also look out for instructions from the manufacturer of your motherboard.
Option 4 – Try to run the CHKDSK utility
Running the CHKDSK utility might also help you resolve the PNP_DETECTED_FATAL_ERROR Blue Screen error. If your hard drive has issues with integrity, the update will really fail as the system will think that it’s not healthy and that’s where the CHKDSK utility comes in. The CHKDSK utility repairs hard drive errors that might be causing the problem.
Open Command Prompt with admin privileges.
After opening Command Prompt, execute the following command and hit Enter:
chkdsk /f /r
Wait for the process to be completed and then restart your computer.
Option 5 – Try to uninstall programs you’ve installed recently
Chances are, some programs that you just installed might be the one that’s causing the BSOD error. Thus, you need to uninstall the program to resolve the problem.
In the search box, type in “control” and then click on Control Panel (desktop app) among the search results.
After that, select Programs and Features from the list which will give you a list of all the programs installed on your computer.
From there, look for the concerned program and select it and then uninstall it.
Option 6 – Update the Device drivers
Tap the Win + R keys to launch Run.
Type in devmgmt.msc into the box and tap Enter or click OK to open the Device Manager.
After that, a list of device drivers will be displayed. Look for the device driver you and then select either “Update driver” or “Uninstall device”. And if you find any “Unknown device”, you need to update it as well.
Select the “Search automatically for updated driver software” option and then follow the instructions to complete the process.
If you have chosen to uninstall the driver, follow the screen options to complete the process and then restart your PC.
Connect the device and Scan for hardware changes – you can see this option under Device Manager > Action.
Option 7 – Perform a System Restore
Performing System Restore might help you in fixing the PNP_DETECTED_FATAL_ERROR Blue Screen error. You can do this option either by booting into Safe Mode or in System Restore. If you are already in the Advanced Startup Options, just directly select System Restore and proceed with the next steps. And if you have just booted your PC into Safe Mode, refer to the steps below.
Tap the Win + R keys to open the Run dialog box.
After that, type in “sysdm.cpl” in the field and tap Enter.
Next, go to the System Protection tab then click the System Restore button. This will open a new window where you have to select your preferred System Restore point.
After that, follow the on-screen instructions to finish the process and then restart your computer and check if the problem is fixed or not.
Kindle is, without doubt, a great piece of hardware, perhaps it is the closest thing to a book within the domain of digital devices. With its low price and usability, it has found itself in many homes and within the grasp of many readers in the world. You can buy digital books in the Amazon store for fraction of a regular price if it digital Kindle edition. You keep your library in the cloud and download just books you want to read on your device.
In this article, we will explore how you can send your existing PDF or any other supported file that you already have to your kindle device so you can read it on it.
Before we begin, you should make sure the file you're trying to convert is compatible with the Kindle:
HTML
RTF
JPEG
GIF
PNG
BMP or
PDF
The compatible file types cover most formats you're likely using, but if you find the document you want on your Kindle isn't compatible, there are a few ways to convert it. In the program it typically opens into, like Microsoft Word for .doc files or an image editing apps for .PNG ones, select 'Save As', and in the drop-down menu, see if any of the compatible options are available.
If not, you could try a PDF converter tool. There are plenty of great paid options and a few good free ones too.
Transfering PDF
To get a PDF on a Kindle, you're going to need to know your Kindle's email address. You'll need to head over to the Amazon website and sign in first. Select 'Your devices and content', click 'Manage Devices'. You should see a list of the books you have assigned to your Kindle account, above this list, in a toolbar should be some options - you'll currently be on 'Content', which should be followed by 'Devices', 'Preferences' and 'Privacy Settings'. Click on 'Devices', and in the next menu, select the option for the Kindle you want the document on. You'll be brought to a Device Summary page which tells you your Kindle email as well as the type of device it is.
You now need to approve your personal email, so that when the Kindle receives your PDF, it knows to download this. Make sure the email you approve is the one you're planning to send documents to your Kindle from otherwise it won't work. To approve your email address follow the steps for finding your Kindle email address but instead of selecting 'Devices' in the top bar, click 'Preferences'.
Scroll down this list until you find Personal Document Settings, and select this option so it expands into more options. From here, scroll down until you find 'Approved Personal Document E-mail List'. This list will show people who can email stuff to your Kindle, Below the emails is an option to 'Add a new approved e-mail address', which you should select. Enter your email address and click 'Add address' to get yourself approved.
Head over to your email client of choice, attach the file to an email, and send the email to your Kindle email address. You're able to send multiple documents at once, so if you have loads of files you want on your Kindle, you don't need to send separate emails. If you're sending over a PDF file, you can ask Amazon to automatically convert the file into a Kindle one, which lets you annotate the sections and change the font size. Simply put the word 'convert' as the subject line and the rest will be handled for you. 'Sync Your Kindle'.
If you suddenly encounter a Blue Screen error that points out to either the mfewfpk.sys and epfwwfp.sys files, then this post might help. Both of these files are created by third-party software. The mfewfpk.sys file is created by the McAfee security software while the epfwwfp.sys is created by the ESET Antivirus. These files are residual files and sometimes it blocks upgrading Windows 10.
Aside from blocking Windows 10 upgrade/update, these files can also cause a Blue Screen error after an upgrade which leaves your Windows 10 computer useless. When you get a Blue Screen error caused by any of these files, you will see an accompanying error message that states, “DRIVER IRQL NOT LESS OR EQUAL”. To fix this Blue Screen error, you can check out the suggestions laid out below but before you do that, you need to create a System Restore point first as it can help you undo any unwanted changes. In addition, make sure to also boot your computer into Safe Mode with Networking before you troubleshoot.
Option 1 – Try to remove the epfwwfp.sys file
You can try to remove the epfwwfp.sys file using Command Prompt. To do so, refer to the following steps:
Right-click on the Start button and click on Command Prompt (Admin) from the menu to open Command Prompt with admin privileges.
Next, type the following command and hit Enter to delete the epfwwfp.sys file:
DEL /F /S /Q /A “%systemroot%System32driversepfwwfp.sys”
After the scan is completed, restart your computer and see if it fixed the Blue Screen error.
Note: You can also use the ESET AV Remover tool to uninstall Eset security software to remove the epfwwfp.sys file.
Option 2 – Try to remove the mfewfpk.sys file
The same with the first option, you can remove the mfewfpk.sys file using CMD.
First, right-click on the Start button and click on Command Prompt (Admin) from the menu to open Command Prompt with admin privileges.
After, type the following command and hit Enter to delete the epfwwfp.sys file:
DEL /F /S /Q /A “%systemroot%System32driversmfewfpk.sys”
Once the scan is completed, restart your computer and see if it fixed the Stop error.
Note: You also have the option to remove the mfewfpk.sys file using McAfee Product Removal tool to uninstall the McAfee security software. All you have to do is download the McAfee Product Removal tool and run it and then follow the onscreen instructions to install it. Once it is installed, click on Next. After you select the radio button to agree to the terms of use, click on Next once again. Finally, restart your computer and check if it is able to resolve the problem or not.
Option 3 – Run the Blue Screen Troubleshooter
Troubleshooting Blue Screen of Death errors wouldn’t be complete without the Blue Screen troubleshooter. As you know, it is a built-in tool in Windows 10 that helps users in fixing BSOD errors. It can be found on the Settings Troubleshooters page. To use it, refer to these steps:
Tap the Win + I keys to open the Settings panel.
Then go to Update & Security > Troubleshoot.
From there, look for the option called “Blue Screen” on your right-hand side and then click the “Run the troubleshooter” button to run the Blue Screen Troubleshooter and then follow the next on-screen options. Note that you might have to boot your PC into Safe Mode.
Option 4 – Try running the DISM tool
You can try running the Deployment Imaging and Servicing Management or DISM tool to fix the Blue Screen error. Using this built-in tool, you have various options such as the “/ScanHealth”, “/CheckHealth”, and “/RestoreHealth”.
Open the Command Prompt with admin privileges.
Then type in the following commands and make sure to hit Enter right after you type each one of them:
Dism /Online /Cleanup-Image /CheckHealth
Dism /Online /Cleanup-Image /ScanHealth
exe /Online /Cleanup-image /Restorehealth
Do not close the window if the process takes a while as it will probably take a few minutes to finish.
If you have the HP printer, then you may come across this error. HP Printer Spooler not running errors does not mean there is anything wrong with your printer. It indicates printer driver issues.
Solution
Error Causes
There can be multiple causes behind the HP printer Spooler not running error code such as:
The poor or unsuccessful printer driver installation
Invalid registry entries
Though this is not a critical error code as it does not pose serious damage threats to your PC, however, it is advisable to resolve it as it can cause you a great deal of inconvenience especially if you want to take out printouts every now and then.
Further Information and Manual Repair
Here are some ways you can try to resolve HP Printer Spooler Not Running Error on your system:
1. Reinstall the HP Printer driver on Your System
Simply go to the control panel and then click on the Device Manager option
Once you click it you will see details pane with a list of devices. Now simply click on the printer, to reinstall the driver software.
Double click on it to open the properties dialog box
After that click on the driver tab and then click update driver
Once you update the driver, try using the Printer to see if it works. Sometimes you may come across a pop-up displaying the following message: ‘Driver installed correctly, Device is ready to use however, you may not see the printer under the printer’s pane. This triggers registry issues.
2. To resolve registry issues, install Restoro on your system.
This is a highly functional registry cleaner integrated with a powerful antivirus. It helps resolve registry issues, malware, and guarantees system optimization. This feature-filled tool is the answer to all your PC-related issues.
Restoro is a next-generation PC repair software that extends outstanding usability and helps PC users resolve errors efficiently.
Its simple navigation and user-friendly interface make it so easy to use that even novice users can also work around it and repair issues without any hassle or difficulty.
It’s a smart and intuitive in-built registry cleaner that wipes out all the unnecessary and obsolete files on your hard disk. This includes junk files, internet history, invalid registry keys, and files from the uninstalled old program versions.
Sometimes the files from the uninstalled programs hamper your ability to update new program versions thus leading to unsuccessful driver installation. Nonetheless, all such files are removed in seconds with this helper and you are then ready to reinstall the driver.
This registry cleaner cleans the clutter from your hard disk and optimizes your system's speed, lowering your PC boot time significantly. Total System Care can be used on all Windows versions
To fix the HP printer spooler not running error on your computer, simply click here to install Restoro. Run it to scan for the error and fix it in seconds. Once the issue is resolved, update the printer driver. You’ll see the driver will be updated successfully and the HP printer will also appear in the printer’s panel.
By installing Restoro on your system, you can also resolve several other issues like privacy errors triggered by malware and virus infections. With this tool, you will not have to download and run a separate anti-virus on your system.

 Task View feature inside Windows 11 is actually a great feature, letting you quickly view open windows and virtual desktops. How Task view itself could be reached with keyboard shortcut combination of ⊞ WINDOWS + TAB some users will prefer this way of using it and thus button on the taskbar is something you do not want or need.
There is a very easy way to remove mentioned button and I will show you how to do it.
Right-click the taskbar button itself and click on Hide From Taskbar.
That’s it, you have done it.
Now in order for you to bring it back if you change your mind, you will have to do some extra steps but it is nothing difficult.
Right-click on the taskbar and click on Taskbar settings, you will be lead to Personalization > Taskbar.
Inside locate Taskbar Items and switch Task View to ON, you will see the Task View button right away showing itself again.
Task View feature inside Windows 11 is actually a great feature, letting you quickly view open windows and virtual desktops. How Task view itself could be reached with keyboard shortcut combination of ⊞ WINDOWS + TAB some users will prefer this way of using it and thus button on the taskbar is something you do not want or need.
There is a very easy way to remove mentioned button and I will show you how to do it.
Right-click the taskbar button itself and click on Hide From Taskbar.
That’s it, you have done it.
Now in order for you to bring it back if you change your mind, you will have to do some extra steps but it is nothing difficult.
Right-click on the taskbar and click on Taskbar settings, you will be lead to Personalization > Taskbar.
Inside locate Taskbar Items and switch Task View to ON, you will see the Task View button right away showing itself again. 


