Upgrading your Windows computer may not always go as expected as you could end up getting some error messages along the way. One of the error messages you can encounter is the “STOP 0XC000021A or STATUS_SYSTEM_PROCESS_TERMINATED” error. This error indicates that is some security issue within the Windows operating system. It could be that the system files have an issue and they have been modified incorrectly. Although this does not necessarily mean that malware is behind the modification, one of the applications you installed recently might have something to do with the problem. The application might have modified or corrupted some of the core system files. When you encounter this error, you will see a blue screen along with the following error message:
“Your PC ran into a problem and needs to restart. We’re just collecting some error info, and then we’ll restart for you. (0% complete)
If you’d like to know more, you can search online later for this error: 0xc000021a”
This error pops up when a user-mode subsystem like the WinLogon or the Client Server Run-Time Subsystem or CSRSS has been compromised fatally and security can no longer be guaranteed in the system. Thus, the operating system switches to kernel mode, and Windows won’t be able to run without the WinLogon or the Client Server Run-Time Subsystem. This is why it’s one of the few cases where the failure of a user-mode service can shut down the system. To resolve the issue, here are some fixes that might help.
Option 1 – Uninstall programs you installed lately
In the search box, type in “control” and then click on Control Panel (desktop app) among the search results.
After that, select Programs and Features from the list which will give you a list of all the programs installed on your computer.
From there, look for the concerned program and select it and then uninstall it.
Note: If you have downloaded the app from the Windows Store, you can simply right-click on it from the application list and then uninstall it.
Option 2 – Perform System Restore
Performing System Restore can also help you fix the “STOP 0XC000021A or STATUS_SYSTEM_PROCESS_TERMINATED” error. You can do this option either by booting into Safe Mode or in System Restore. If you are already in the Advanced Startup Options, just directly select System Restore and proceed with the next steps. And if you have just booted your PC into Safe Mode, refer to the steps below.
Tap the Win + R keys to open the Run dialog box.
After that, type in “sysdm.cpl” in the field and tap Enter.
Next, go to the System Protection tab then click the System Restore button. This will open a new window where you have to select your preferred System Restore point.
After that, follow the on-screen instructions to finish the process and then restart your computer and check if the problem is fixed or not.
Option 3 – Run the System File Checker or SFC scan
System File Checker or SFC is a built-in command utility that helps in restoring corrupted files as well as missing files. It replaces bad and corrupted system files to good system files that might be the cause why you’re getting the “STOP 0XC000021A or STATUS_SYSTEM_PROCESS_TERMINATED” error. To run the SFC command, follow the steps given below.
Tap Win + R to launch Run.
Type in cmd in the field and tap Enter.
After opening Command Prompt, type in sfc /scannow
The command will start a system scan which will take a few whiles before it finishes. Once it’s done, you could get the following results:
Windows Resource Protection did not find any integrity violations.
Windows Resource Protection found corrupt files and successfully repaired them.
Windows Resource Protection found corrupt files but was unable to fix some of them.
Option 4 – Rebuild the BCD and fix MBR
Rebuilding the BCD can help you in fixing the “STOP 0XC000021A or STATUS_SYSTEM_PROCESS_TERMINATED” error.
You can start by booting into the installation environment for Windows 10 from an installation media.
After that, click on Repair your computer and on the blue screen, select Troubleshoot and then select the Advanced options menu.
Next, select Command Prompt and type in the commands below one by one, and tap Enter right after you do so.
exe /FixMbr
exe /FixBoot
exe /RebuildBcd
The commands you entered should rebuild the BCD and repair MBR.
Option 5 – Run the CHKDSK utility
You can also run the Chkdsk utility to resolve the problem. If your hard drive has issues with integrity, the update will really fail as the system will think that it’s not healthy and that’s where the Chkdsk utility comes in. The Chkdsk utility repairs hard drive errors that might be causing the problem.
Open Command Prompt with admin privileges.
After opening Command Prompt, execute the commands listed below, and don’t forget to hit Enter right after you type in each one of them.
If you have encountered the “YOU ARE NOT AUTHORIZED TO ACCESS THIS WEB PAGE AS PER THE DOT COMPLIANCE” error while trying to visit a website using either Firefox or Chrome browser, then read on as this post will guide you on how you can fix this error.
Apart from this error message, you might also see an alternative message that says, “Web Page Blocked! The page you have requested has been blocked because the URL is banned as per the Government Rules”.
When you get any of the aforementioned error messages when visiting a website, this means that it has been marked. It is mostly recommended to not access the site as it might be blocked for some illegal reason. However, if you are certain that the website is legitimate and safe and you believe that it has been blocked by accident, then you can check out the given methods in this post to unblock and access the blocked or restricted website.
There isn’t actually a straightforward way to remove the restriction on the website or the DOT compliance. And it won’t matter what browser you use as you will still get the same error. Thus, the best way to go about this issue is for you to bypass the ISP restriction. But before you proceed, keep in mind that the ISPs (Internet Service Providers) can block any website when a request goes through their servers.
Option 1 – Try changing the DNS
If the request to access the website does not go through the ISP’s DNS server, you might have a chance in accessing it by changing your DNS settings. You can try using the Google Public DNS.
Tap the Win + R keys to open the Run dialog box.
Then type “inetcpl.cpl” in the field and hit Enter to pull up the Internet Properties.
After that, go to the Connections tab and select the LAN settings.
From there. Uncheck the “Use a Proxy Server” option for your LAN and then make sure that the “Automatically detect settings” option is checked.
Now click the OK and the Apply buttons.
Restart your PC.
Note: If you are using a third-party proxy service, you have to disable it.
Option 2 – Try to install a Proxy Extension
You could also try installing a Proxy extension or Proxy software as it could also help you access the website you are trying to open as it allows you to access the blocked websites by routing the request through their server. Aside from that, it can also hide it from ISPs to make them look like the content is coming from the proxy servers.
Option 3 – Try using a VPN connection
There are instances when the network that your computer is logged on might have blocked your access to the website you are trying to open and so to fix it, you can try to use a VPN connection. There is a lot of free VPN software out there but just make sure that you install a trusted one. Once you’ve connected using VPN, try to open the website again and see if you can now access it.
Option 4 – Check the Windows Host file
You can also try to cross check the Windows Hosts file to find out if the website you are trying to open has been blocked because if it is, then it’s no wonder why you’re getting the ERR CONNECTION TIMED OUT error in Chrome. There are instances when some third party application modifies the file and add some websites to the block lists. So if the website is indeed blocked, you need to remove it from the list.
Option 5 – Try to contact your ISP
If none of the options given above worked, then you can try to contact your ISP as there are times when DOT clears a website, the ISPs are still blocking it. Thus, it’s probably better if you reach out to them and ask them to unblock the website from their end.
Windows 10 setup is a bit complicated which is why it’s uncommon to encounter errors along the way. One of these errors you can encounter when running Windows Setup is the error code 0x80070006. If you are trying to fix this error, you’ve come to the right place as this post will guide you on how to do so.
When you get the error code 0x80070006, you will see the following error message:
“Windows cannot install required files. Network problems may be preventing Windows from accessing the file. Make sure the computer is connected to the network and restart the installation. Error code: 0x80070006.”
As stated in the error message, this kind of error in Windows Setup is due to an unstable or unreliable network connection. Such problems can also be triggered by network hardware which includes the network adapters and the network routers. To fix this error, you need to check your internet connection and router or run the built-in network troubleshooter. You could also try using a different USB port or recreate a bootable USB drive as well as get a new Windows image file.
Option 1 – Try checking your internet connection and router
As mentioned, this Windows 10 setup error could be due to an unstable internet connection. To fix it, the first thing you have to do is to check the status of your internet connection and see if it is stable and has enough speed to run the setup. If it’s slow, then it’s no wonder that the setup process failed. To fix that, you can try to reboot your router from its admin panel or you can just turn it off manually and then turn it back on after a couple of seconds. In addition, you also have to check if it’s plugged in properly.
Option 2 – Try to run the Network Adapter troubleshooter
The next thing you can do is to run the Network Adapter troubleshooter. This built-in troubleshooter can help resolve any network issues. It can reset the adapters, remove cached settings, and many more. To run it, follow these steps:
Go to Settings > Update & security and from there select Troubleshoot.
Next, scroll down and select the “Network Adapter” option from the right pane.
Then click on the Run Troubleshooter” button.
After that, your computer will check for any possible errors and will pinpoint the root cause of the problem if possible.
Option 3 – Try to use a different USB port
You might want to check the integrity of the USB port where connected the device if you are using a bootable USB storage device to run the setup for Windows 10. All you have to do is switch the USB port or try to use another bootable USB device and see if it fixes the problem.
Option 4 – Try recreating the Windows 10 installation USB
Recreating the Windows 10 installation USB might help in fixing the problem. You can use a USB drive to do so but make sure that it has a great read-write speed. Follow the steps below to recreate Windows 10 installation USB”
Click this link and then click the Download Tool Now button.
Next, click the “Use the tool to create installation media (USB flash drive, DVD, or ISO file)…” option and follow the next given instructions on the screen.
Now select the ISO file option in step 5.
After that, you should now have an ISO file.
Next, go to the location where you’ve downloaded the ISO file.
Then right-click on the Windows 10 ISO file and select the Open with option and then select File Explorer.
Now click on “setup.exe” and follow the next instructions that appear on the screen. When asked, you have to select either Nothing (clean install) or Keep personal files only option. Take note that you must not select the “Keep personal files, apps, and Windows settings since it doesn’t really work.
Option 5 – Try getting a new Windows image file
If none of the four given options above worked, you might want to get a newer installation image using the Windows Media Creation tool. After that, create the bootable USB drive and once completed and then try to run the Windows 10 setup again.
The Makecab.exe process that’s running on your Windows 10 computer is a program that compresses the Component-Based Servicing log or CBS log files and they can get really huge if they’re not compressed. As a result, it would utilize important space on your operating system although makecab.exe does not consume high CPU resources in doing so. However, there are times when it recreates thousands of instances of itself and could cause overconsumption of system resources which slows down your computer. So when the makecab.exe process causes high CPU usage in your system, this could mean that there is a failed Windows Update. In addition, the high CPU usage of the makecab.exe process could also mean that your computer is infected with a virus or malware. Whichever the case is, you can check out several possible solutions that are given in this post to resolve the problem.
Option 1 – Try to delete log file using File Explorer
The CBS log files could reach up to 20GB size and so if you delete them, it would help in saving space in your computer and since they’re not much of use, deleting them won’t negatively affect the system at all. To delete the CBS log files, all you have to do is open the File Explorer and then go to C:/Windows/Logs/CBS and from there, open the CBS log files and delete them all. Doing so should ease the load in the makecab.exe process since it no longer has to compress the CBS log files. As a result, the process would be more relaxed. After that, you can restart your computer and check if the problem’s now fixed.
Option 2 – Try deleting the log file via Command Prompt
You can also try to delete the log files using an elevated Command Prompt. Refer to these steps to do so:
Type “command prompt” in the Windows Search bar and then right-click on the related search result and select the “Run as administrator” option.
Next, type the following command and hit Enter to execute it:
del /f %windir%logscbs*.log
Restart your computer afterward once the command has been executed. This should end the high disk usage by makecab.exe, if not, proceed to the next given options below.
Option 3 – Uninstall any suspicious programs you’ve installed recently
If you have recently installed some programs on your Windows 10 computer, and since then you’ve experienced high CPU usage brought on by makecab.exe, then you might want to uninstall those programs.
Tap the Win + R keys to open the Run dialog box
Then type “appwiz.cpl” in the field and hit Enter to open the Programs and Features in Control Panel.
From there, look for the suspicious programs you’ve installed, select them and then click on Uninstall to remove them.
After that, restart your computer and try to install the latest version of the program again. It should work now. If not, proceed to the next available option below.
Option 4 – Try running Disk Cleanup
You might want to run the Disk Cleanup utility as it is a useful tool that could delete temporary and useless files on your computer.
Tap the Win + R keys to open the Run dialog box and then type “cleanmgr” in the field and hit Enter to open the Disk Cleanup window.
After that, select the drive you want to clean.
Now click OK to clean the disk and restart your computer.
Option 5 – Try to run System File Checker scan
System File Checker or SFC is a built-in command utility that helps in restoring corrupted files and missing files. It replaces bad and corrupted system files to good system files. To run the SFC command, follow the steps given below.
Tap Win + R to launch Run.
Type in cmd in the field and tap Enter.
After opening Command Prompt, type in sfc /scannow
The command will start a system scan which will take a few whiles before it finishes. Once it’s done, you could get the following results:
Windows Resource Protection did not find any integrity violations.
Windows Resource Protection found corrupt files and successfully repaired them.
Windows Resource Protection found corrupt files but was unable to fix some of them.
Restart your PC.
Option 6 – Try scanning your computer using Windows Defender
As mentioned, the high CPU usage of makecab.exe might be caused by some malware or virus in the system and so to eliminate it, you have to scan your computer using security programs like Windows Defender.
Tap the Win + I keys to open Update & Security.
Then click on the Windows Security option and open Windows Defender Security Center.
Next, click on Virus & threat protection > Run a new advanced scan.
Now make sure that Full Scan is selected from the menu and then click the Scan Now button to get started.
Recently, a number of Windows 10 users getting an error on their computers that state, “Windows can’t find one of the files in this theme”. According to the affected users, this error occurs at random times even when they didn’t make any changes to their computer’s theme prior to getting the error. If you are one of these users, read on as this post will help you resolve this problem.
If you click on the Yes button of the dialog box where the error is displayed, it won’t fix the problem as you will still get the same error from time to time. This kind of error could be caused by the executable file named “SettingSyncHost.exe”. It is possible that this executable file is unable to sync your theme all over your computer. On the other hand, it could also be due to some problems with the active theme. To resolve this issue, you can try to change the active theme, or disable the custom screensaver or disable theme syncing on your computer, as well as run a System File Checker or run the DISM tool. For more instructions, follow the options given below.
Option 1 – Try to change the active theme
The first thing you can do to fix the error is to change the active theme of your computer since the SettingSyncHost.exe file might not be able to properly sync the theme on the computer.
Go to Settings and click on Personalization.
Next, click on Themes and scroll down to apply a theme, and change the theme of the operating system.
After that, tap the Win + R keys to open the Run dialog box and type “%windir%ResourcesThemes” in the field, and then tap Enter to open the folder where the theme files are located.
Once you’re done, right-click and select delete for the active theme to remove the theme and its resources. This should fix the root cause of the problem. If not you can try to create a new Windows 10 theme and save it.
Option 2 – Try to disable the custom screensaver
The custom screensaver is a part of the mechanism of the lock screen. Although they were needed in the earlier Windows versions to prevent the discoloration of CRT monitor screens, they are no longer needed in the current version of Windows. Thus, you can try to disable it as it could be the one that’s causing the problem.
Click on the Start button and go to Settings > Personalization > Lock screen.
Here, scroll down and click on the Screen Saver settings.
After that, select the “Screen saver to (None)” option from the drop-down menu. This will disable the custom screensaver.
Option 3 – Try to disable theme syncing on your computer
You could also try to disable the theme sync feature to fix the problem. This has worked out for some users. To do so, follow these steps:
Click on the Start button and go to Settings > Account > Sync your settings.
From there, toggle off Themes in the individual sync settings column. This will disable the Theme syncing.
Restart your computer and see if the problem is now fixed.
Option 4 – Run the DISM tool
The next thing you can do is run the DISM tool. This tool is known to repair potentially corrupted files in your system as having them could also system issues like the “Windows can’t find one of the files in this theme” error. To repair these corrupted system files, you can run the DISM commands:
Tap the Win + X keys and click on the “Command Prompt (Admin)” option.
After that, input each one of the commands listed below sequentially to execute them:
Dism /Online /Cleanup-Image /CheckHealth
Dism /Online /Cleanup-Image /ScanHealth
Dism /Online /Cleanup-Image /RestoreHealth
Once you’ve executed the commands given above, restart your computer and check if the problem is now fixed.
Option 5 – Run the System File Checker
System File Checker or SFC is a built-in command utility that helps in restoring corrupted files as well as missing files. It replaces bad and corrupted system files to good system files that might be the cause why you’re getting the “Windows can’t find one of the files in this theme” error. To run the SFC command, follow the steps given below.
Type “cmd” in the Start search and then right-click on the appropriate search result.
Next, select “Run as administrator” to open Command Prompt with admin privileges.
After opening Command Prompt, type in sfc /scannow
The command will start a system scan which will take a few whiles before it finishes. Once it’s done, you could get the following results:
Windows Resource Protection did not find any integrity violations.
Windows Resource Protection found corrupt files and successfully repaired them.
Windows Resource Protection found corrupt files but was unable to fix some of them.
Now restart your computer and see if the problem is fixed or not.
There are cases when you want to undo some changes you’ve made to your computer and to do that you have to perform the System Restore task. However, if you encounter an error that states “To use System Restore you must specify which Windows installation to restore”, when doing so, read on as this post will help you fix the problem.
This kind of error in System Restore could be due to corrupted files in the system. There are also situations where you are not able to boot up once you encounter this error which could be a big problem. On the other hand, this error might have something to do with corrupted BCD files. Whatever the cause is, here are some potential fixes you have to try.
Option 1 – Try to run System File Checker offline
Like pointed out, since the error might be due to corrupted system files, you can try to run System File Checker offline. How? Refer to these steps:
You need to go to the Advanced Startup Options and from there select Troubleshoot.
Next, select the Advanced Options and then Command Prompt.
After opening Command Prompt, type the commands given below and tap Enter right after you type each one of them.
Cd /
Dir
If you can see the “Users” folder, that is your system’s drive. However, if you can’t see it, you can just change the drive-by assigning “D” as its alphabet volume.
Then execute this command where “C” is the system drive: sfc /scannow /offbootdir=C: /offwindir=C:Windows
Now repeat the given steps sequentially.
Option 2 – Try to run DISM tool
You can also run the DISM tool to repair the potentially corrupted system image. First, you have to check the health of the system like checking the integrity of the system files and Windows services. To run DISM, follow the given steps below sequentially.
Open Command Prompt from the Advanced Startup options.
After that, execute this command where “C:” is the system volume: DISM /Image:C:Windows /Cleanup-Image /RestoreHealth /Source:C:WindowsWinSxS
If you encounter an error after executing the given command, insert the Windows USB or DVD and then execute this next command where “E:” is the USB or DVD drive: DISM /Image:C:Windows /Cleanup-Image /RestoreHealth /Source:esd:E:SourcesInstall.esd:1 /limitaccess
In some cases, “install.esd” would be “install.wim” and in such case, you have to modify and execute this command: DISM /Image:C:Windows /Cleanup-Image /RestoreHealth /Source:wim:E:SourcesInstall.wim /limitaccess
Option 3 – Try to repair corrupted BCD
As mentioned, the error could also be due to corruption in BCD, and to fix it, you can use Bootrec.exe – a built-in command-line tool used to troubleshot issues related to boot up and Windows Startup. Before you run this tool, make sure that you have inserted a bootable USB or DVD into your computer. Once you have that covered, follow these steps:
You need to go to the Advanced Startup Options.
Then click on Troubleshoot.
Next, select the Advanced Options and then Command Prompt.
Once Command Prompt has been pulled up, enter each one of the following commands and in the sequence that they are given to rebuild BCD files and repair MBR files:
Bootrec /Fixmbr
Bootrec /FixBoot
After you execute the commands given above, you should see a confirmation message that says, “The operation completed successfully”.
Now type the “Bootrec /RebuildBCD” command to rebuild BCD.
Finally, close Command Prompt and then restart your computer to successfully apply the changes made.
Option 4 – Try to run the Automatic Repair Utility
You might also want to use Automatic Repair in fixing the error. To do so, follow the steps below.
You can start by creating and booting from a bootable Windows 10 USB Stick.
After that, click on Repair your computer located in the bottom left corner when you are on the initial Windows Startup screen.
Next, click on Troubleshoot, and then on the other screen, click the Startup Repair option.
Now select the operating system you want to repair. Once you do that, it will start to repair your operating system. Wait until the process is completed and then check if the problem’s now fixed.
Option 5 – Try to use the Windows Recovery Environment
If the four options given above didn’t help fix the problem, you could try running Windows Repair and a Windows bootable USB or DVD.
First, insert the bootable USB or DVD and boot into it, and select the “Repair your computer” option.
Next, once you see the manufacturer logo on your computer, tap the key to enter into Windows Recovery Environment.
After that, change the Boot sequence to DVD drive under the UEFI Firmware settings and restart your computer.
Once your computer has restarted, select the boot order and make changes accordingly as displayed in the BIOS.
Option 6 – Try running System Restore in Advanced Startup Options
Since you probably can’t boot into your Windows 10 computer, you can try to run System Restore again in the Advanced Startup Options.
Boot your computer into the Advanced Startup Options screen.
From there, you will see some options to troubleshoot when you can’t log in to Windows in the usual way.
Now select Troubleshoot > Advanced Options > Command Prompt.
After that, type “exe /OFFLINE:C:Windows” and hit Enter to execute the command which will start the System Restore process.
Note: You need to replace “C” with the drive where Windows Installation is located.
Have you been feeling anxious in the digital space? Feeling like you have a million eyes on you each time you visit a website? It can definitely make you uneasy. Luckily there’s an easy fix, and it’s called a VPN.
In this article we’ll take you through the basics of what a VPN does and some of the biggest benefits you can reap from buying one.
VPN: definition and how it works
VPN stands for Virtual Private Network, so its name already says a lot about what it does.
A VPN is specialized software that keeps your browsing private and secure. Essentially it hides your identity, preventing possible cyberattacks and data theft. This is especially important in cases of public network use, where you’re highly exposed to potential threats.
To be more specific, this software encrypts your Internet Protocol (IP) address by filtering it through a server hosted by the VPN provider first. That way, it prevents your Internet service provider, third parties and lurking online thieves from tracking the actual you.
Credit: FLY:D on Unsplash
Some providers, such as Surfshark VPN with its IP Rotator feature, even make it a habit to frequently change your IP address to further protect your identity. With most VPN providers, you can also appear to be in a completely different country, adding to your disguise.
There are tons of advantages you can look forward to if you decide to use a VPN. Take a look at some of the crucial ones.
Benefits of using a VPN
When choosing a VPN, you can find both free and paid options. We recommend you go with the paid ones, since they have stronger security, encryption and data protection, as well as more advanced features. Free VPNs come with limitations and risk of malicious attacks on the software itself.
You can choose to buy a singular VPN service or opt for antivirus software that has a VPN built in, for example Bitdefender’s Ultimate Security plan. That depends on what you use your computer for and how much.
When you pick one, here’s what it can do for you.
1. Access region-specific content
When we said you could change your location, we meant it. Say you’re using a streaming service and a show you desperately want to watch isn’t available in your country. You can use your VPN to make it look like you’re browsing from a country where it’s unlocked.
This option is also convenient for gamers who want to access maps, skins and other in-game items unavailable in their location.
In addition, you can use this powerful feature when you’re traveling to a region where some of your favorite content may not be accessible.
Do keep in mind that you need to read the Terms and Conditions (yeah, we know - who does that?) of your games and services before doing this, since you could end up getting a penalty. It’s also important to remember that there are entire countries that have strict regulations or even bans on VPNs, for example Belarus, Russia and China. So make sure to be very cautious with your VPN use, friends.
2. Browse like no one’s watching
VPNs shield your browsing habits from prying eyes on the web. Those can be malicious hackers or just third-party cookies tracking your every move to later bombard you with targeted ads. For example, Surfshark VPN features a Cookie blocker that blocks all cookie-related pop-ups and lets you browse in peace (and secret). It works even when the VPN is turned off, which is also pretty neat.
In addition, their CleanWeb 2.0 technology makes sure ads and especially malware don’t stand a chance at all, since they’re blocked before they can even load.
The inability of sites to track your browsing means they can’t collect and analyze any of your data. So, your personal information - or your company’s information in case that’s what you’re using your computer for - is entirely hidden and secure.
3. Save money
It’s well-known that the prices of certain items and services vary based on your location, browsing time, age and many other factors. This most commonly goes for airline tickets and hotel stays.
You can use your VPN to avoid high prices and surcharges. Clear all cookies, turn on your VPN and visit an online shopping site to check out their prices. Then compare your findings with the offers you see when your VPN is off, when you spend a long time on the site or have an active account with the company.
Sometimes this can really help you find the best deals and avoid breaking the bank. But again, check the Terms and Conditions before you purchase something using a VPN.
4. Secure your smart home
The more smart devices you have connected to your network, the more exposed you are to potential cyberattacks. Phones and computers are generally designed to be decently secure even without a VPN or antivirus, but smart home devices leave a lot to be desired in that regard.
Protecting your home network with a VPN software means all devices connected to it are secure, be it an air purifier or Alexa.
Credit: Bence Boros on Unsplash
5. Prevent connection slowdown
Your ISP can intentionally slow down your internet speed based on how much data you’ve consumed (data throttling) or your activities online (bandwidth throttling).
But with a VPN, what kind of data you send and receive and how much is entirely hidden. Therefore, if your ISP can’t see you, they can’t control you and they can’t throttle down your speed.
The bottom line
You can never be too safe online. So definitely think about getting yourself a solid VPN to pump up your privacy and security as much as you can. And if you have any questions or need help choosing the perfect software for you, feel free to reach out to us.
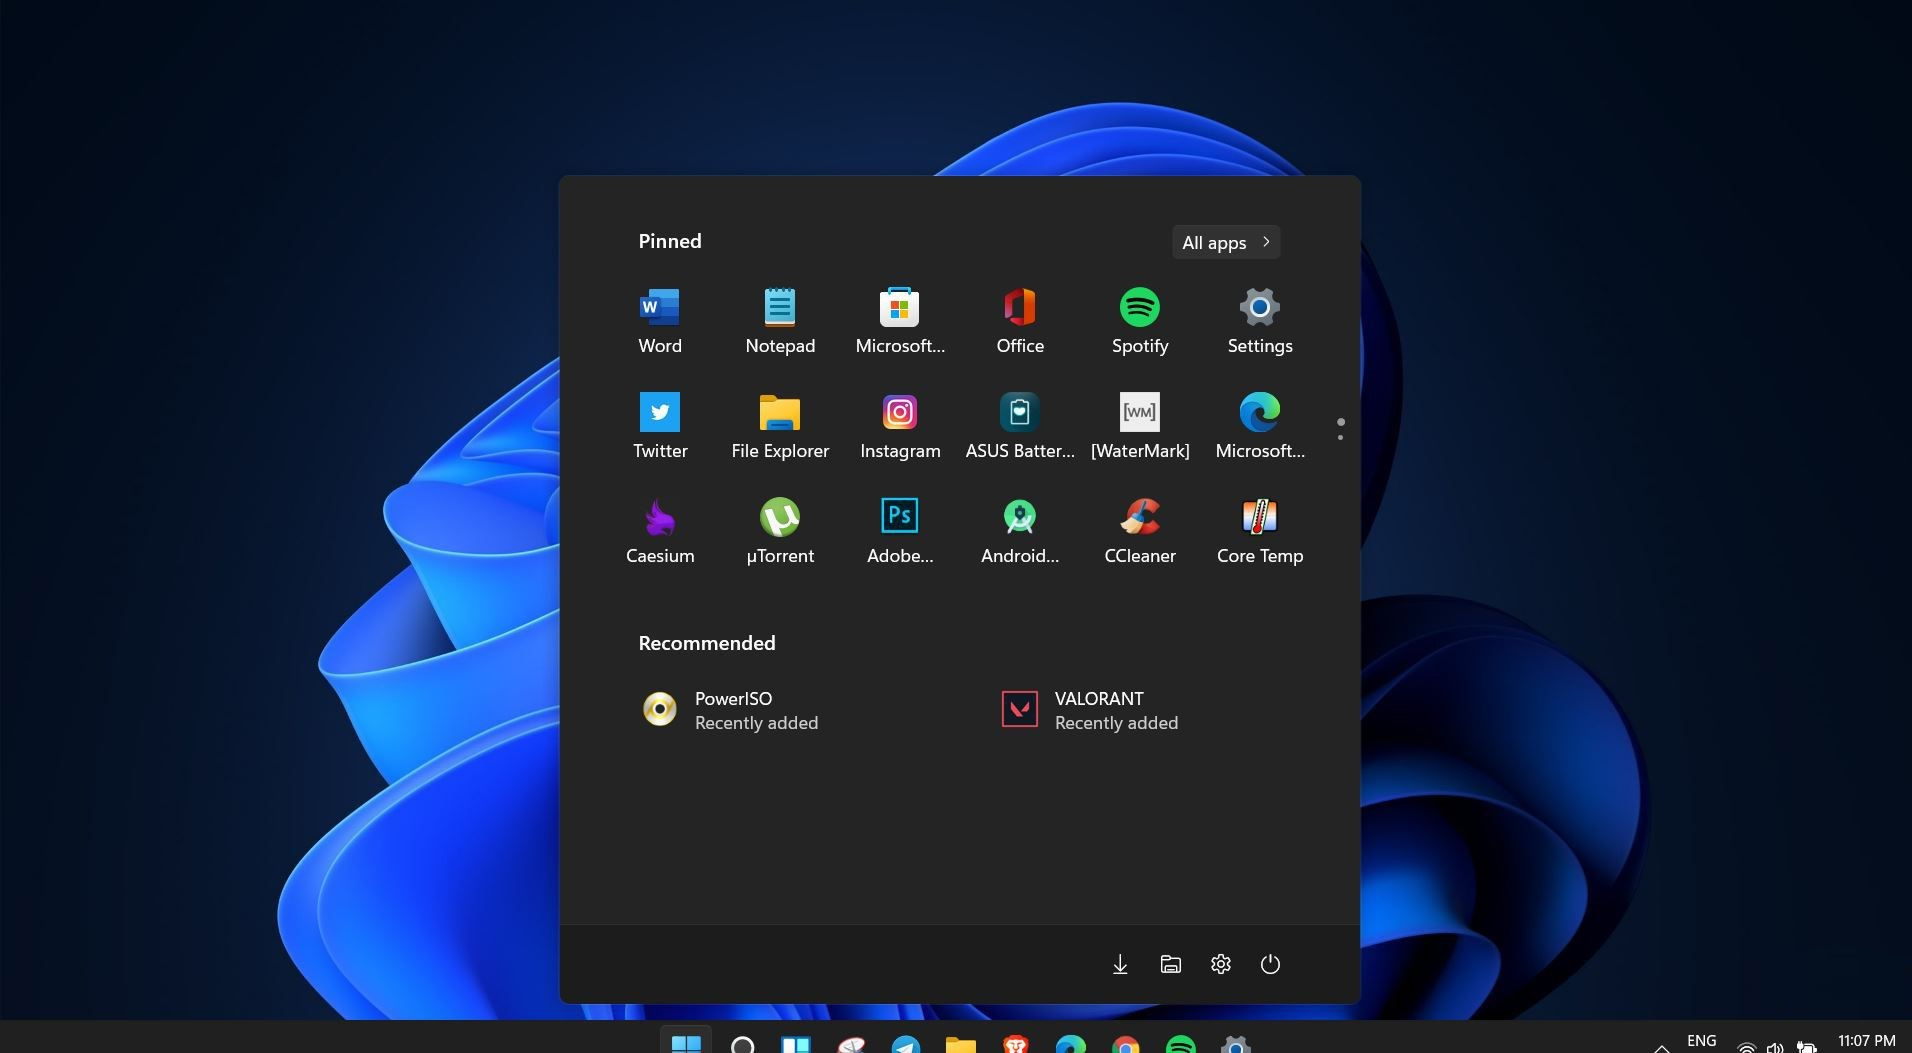
Windows 11 is coming soon, from its typical view and color scheme, Windows 11 will natively support dark mode.
The dark mode is very popular in many applications today, some large companies like Adobe, Autodesk, and many more have already adopted a dark color scheme for their software so it is logical for others to follow and Microsoft is aboard for it.
The dark mode itself has its benefits, for people who work on computer for longer period of time dark mode inside applications will throw less white and blue light on their eyes making workhours easier and pleasant on them.
As a person who does indeed spend a lot of time in front of the screen, I would advise you to switch to dark mode regardless of the time that you spend with a computer, your eyes will be grateful.
Switching to Dark mode in Windows 11
Open Windows 11 Settings by pressing ⊞ WINDOWS + I
Click on Personalization on the left sidebar
On the right side click on Color
In color options click on the drop-down menu right next to Choose your color
Select Dark
Your choice will be applied right away and you can safely close settings.
The Error Code 0x80200056 will appear in a few different instances, though always applies to an interrupted download. Windows 10 will quickly discover that their upgrade and/or download did not work correctly. Not every user who upgrades to Microsoft Windows 10 will face this issue, only a select few random instances will occur.
Common symptoms include:
A dialog box appears with the Error Code 0x80200056
Microsoft Windows 10 upgrade is unsuccessful
Users are unable to open any applications after completing the Microsoft Windows 10 install
Solution
Error Causes
This error can be caused by a number of common problems, the first of which is the easiest to diagnose.
If during the upgrade process, you accidentally restarted your PC, or inadvertently signed out of your PC, the error will occur.
Third-party software conflicts can cause this error message during the Microsoft Windows 10 upgrade.
Error Code 0x80200056 may also appear if you have corrupted system files on your PC.
A change in date and time during the Microsoft Windows 10 upgrade could potentially cause this error.
None of these causes should overtly affect the operation of your PC, but merely prevent the upgrade and/or download from functioning correctly. If your PC is exhibiting other operating system errors in addition to Error Code 0x80200056, it would be wise to contact Microsoft Support before the issues lead to a possible catastrophic failure.
Further Information and Manual Repair
With the very recent release of Microsoft Windows 10, we are seeing a number of users discuss Error Code 0x80200056. Luckily, there are three different methods that any home user can perform to alleviate the error and complete the Microsoft Windows 10 download successfully.
Method 1
Use if your PC restarted accidentally during the upgrade, or if you accidentally signed out of Windows during the upgrade.
Make sure that your PC or Laptop is plugged in, to avoid another accidental restart.
Turn your PC on, or make sure that it is running. (Close any and all unnecessary programs)
Attempt the upgrade again, you should be able to run the upgrade successfully without further issue.
The following solution methods will apply if corrupted files, date/time changes, or third-party software interference is the issue causing Error Code 0x80200056.
Method 2
The following solution methods will apply if corrupted files, date/time changes, or third-party software interference is the issue causing Error Code 0x80200056.
Click on your “start” icon and choose the CMD (command prompt) option.
Right-click on “command prompt” and choose “run as administrator”.
Paste the command “bitsadmin.exe /reset /allusers” into the command prompt and press ENTER.
Restart your PC and attempt the Microsoft Windows 10 upgrade again.
Method 3
Click on your “start” icon and choose the CMD (command prompt) option.
Select “run as administrator” (enter a password if asked to do so).
Enter the following command into the command prompt- “sfc/scannow”, press ENTER.
Do not close the command prompt window until the entire process is complete.
The scan will determine if you have any missing or corrupted files. You will receive a message that says either: “Windows Resource Protection did not find any integrity violations”.Or “Windows Resource Protection could not perform the requested operation”.
If you received the first message, then your files are fine. The second message indicates that there are file corruption issues.
To repair the disjointed files, restart your PC in SAFE MODE, and reopen the command prompt window.
Enter the following command into the command prompt- “sfc/scannow”, press ENTER.
After the scan is run again, you will receive a message stating that the files have been successfully repaired.
Restart your PC in normal mode and start the Microsoft Windows 10 upgrade again.
To use a powerful tool to resolve Windows 10 upgrade Error Code 0x80200056 issue, download a powerful tool.
Click here to download Restoro.
If any of these methods do not allow for the successful upgrading of your Windows system, contact the Microsoft Support team. Make sure to include in your message to support what fixes you have attempted, and what the outcomes were. As Microsoft Windows 10 is so incredibly new, there are bound to be issued while the program is in its infancy. Fortunately, a majority of these issues should be worked out by Microsoft relatively quickly.
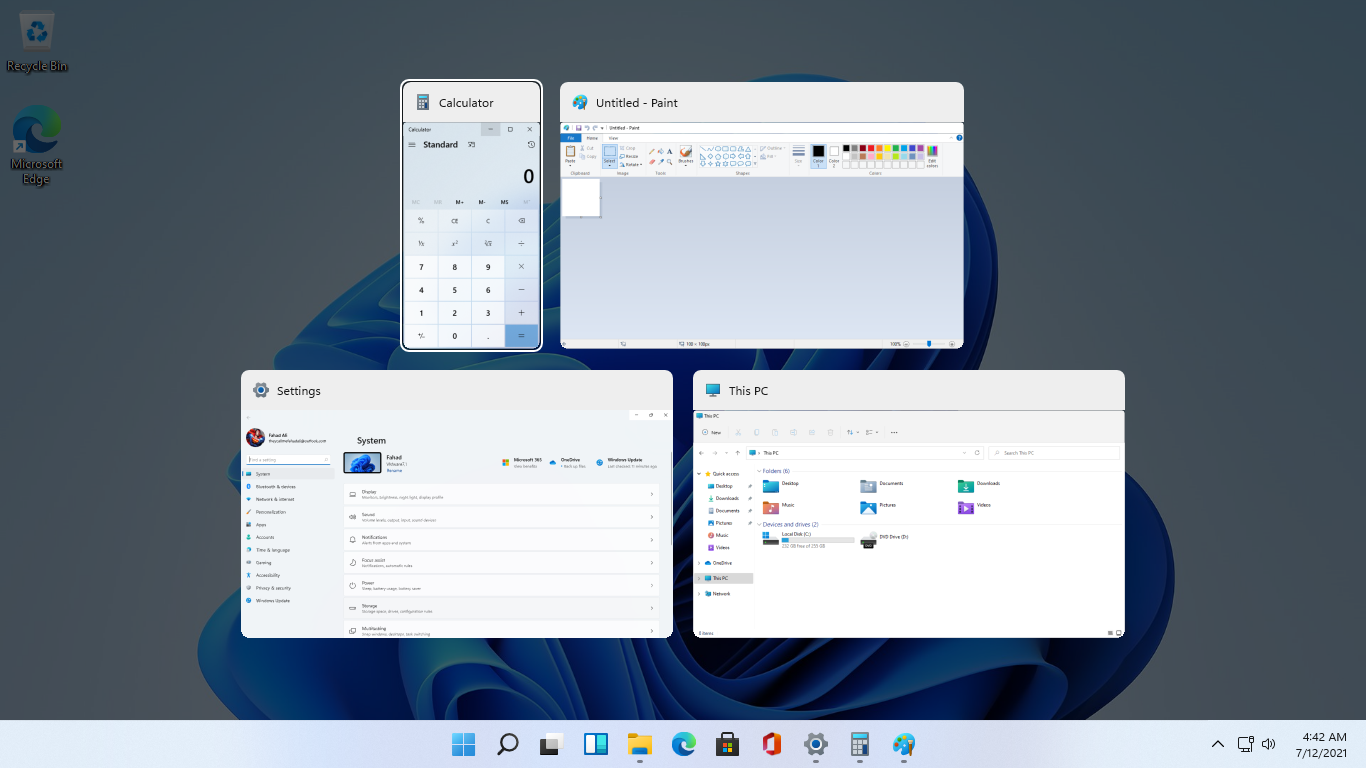
As in previous Windows 10, inside Windows 11 also when you press the ALT + TAB key combination you will get a preview of all running applications along with all Browser tabs so you can go through them and pick the one you want to switch to.
Alto, I personally am a big fan of alt-tabbing, I must admit that I am not a big fan of having multiple browsers tabs on screen when I do press key combo. Luckily there is a very easy way to turn this feature off.
Turning browsers tabs thumbnails off
Press ⊞ WINDOWS + I to open settings
Click on System in the sidebar
Scroll down and select Multitasking
Find Alt + Tab section and click on the drop-down menu
Pick Open Windows Only
Close settings
Now when you press the ALT + TAB key combination you will still see your browser but only an active tab in it instead of all tabs as different preview thumbnails.
Program and features are Control panel section where once accessed contains all programs installed on the operating system. From these windows, any logged-in user can modify applications, uninstall them, etc. If for whatever reason you want to limit this access to users and remove this group from the control panel please do keep reading as we show you how you can achieve this desired result using two methods: via policy editor or registry editor. Feel free to use any provided method as both works (except on Windows 10 Home edition) and achieve the same thing, it all comes down to preferred preference on how you wish to do things.
Local group policy editor method
This method is more straightforward and easier perhaps than its counterpart but it has one significant drawback, it will not work on Windows 10 Home edition which does not have in itself a policy editor included. If you are using Windows 10 Home edition then feel free to skip this method and do it via registry editor. That being said let's start:
Press ⊞ WINDOWS + R to open the run dialog
Inside run dialog type in gpedit.msc followed by ENTER to open Group policy editor
Go to User Configuration\ Administrative Templates\ Control Panel\ Programs\
Double-click on the setting named Hide Programs and Features page
Change the toggle option from Not Configured to Enabled
Click on the Apply button and then the Ok button to save the changes
at this point, everything is supposed to be applied and your changes should take effect immediately. However, it has come to our attention that sometimes this is not the case. If you are one of these users which for whatever reason have not experienced applying to set momentarily do not despair and follow this quick guide on how to refresh settings and apply them right away.
Press ⊞ WINDOWS + X to open the hidden menu
Click on command prompt (admin)
In command prompt type in gpupdate /force and press ENTER in order to force update and set setting right away
Registry editor method
The registry editor method is a more complex one but it will be your only way of doing it if as mentioned you are running Windows 10 Home edition. As always it is highly recommended to make a backup of the Windows registry before tempering with it.
Press ⊞ WINDOWS + R to open the run dialog
Inside run dialog type in regedit and press ENTER to open the registry editor
If you would like to make a backup of the Windows registry go to File > Export and save the backup on a secure location naming it as you wish
Locate the following key inside the registry editor HKEY_CURRENT_USER\Software\Microsoft\Windows\CurrentVersion\Policies\Programs
Right-click on the right pane of the Programs key and choose the New > DWORD (32-bit) Value option
Name the value as NoProgramsAndFeatures
Double-click on the NoProgramsAndFeatures value to open it
Change the value data to 1
Save the changes
Reboot the computer in order for changes to take effect.
note: you can always change values back in order to show again panel by changing the value to 0 in registry editor or choosing Not Configured or Disabled in the local group policy editor


 Windows 11 is coming soon, from its typical view and color scheme, Windows 11 will natively support dark mode.
The dark mode is very popular in many applications today, some large companies like Adobe, Autodesk, and many more have already adopted a dark color scheme for their software so it is logical for others to follow and Microsoft is aboard for it.
The dark mode itself has its benefits, for people who work on computer for longer period of time dark mode inside applications will throw less white and blue light on their eyes making workhours easier and pleasant on them.
As a person who does indeed spend a lot of time in front of the screen, I would advise you to switch to dark mode regardless of the time that you spend with a computer, your eyes will be grateful.
Windows 11 is coming soon, from its typical view and color scheme, Windows 11 will natively support dark mode.
The dark mode is very popular in many applications today, some large companies like Adobe, Autodesk, and many more have already adopted a dark color scheme for their software so it is logical for others to follow and Microsoft is aboard for it.
The dark mode itself has its benefits, for people who work on computer for longer period of time dark mode inside applications will throw less white and blue light on their eyes making workhours easier and pleasant on them.
As a person who does indeed spend a lot of time in front of the screen, I would advise you to switch to dark mode regardless of the time that you spend with a computer, your eyes will be grateful.

 As in previous Windows 10, inside Windows 11 also when you press the ALT + TAB key combination you will get a preview of all running applications along with all Browser tabs so you can go through them and pick the one you want to switch to.
Alto, I personally am a big fan of alt-tabbing, I must admit that I am not a big fan of having multiple browsers tabs on screen when I do press key combo. Luckily there is a very easy way to turn this feature off.
Turning browsers tabs thumbnails off
As in previous Windows 10, inside Windows 11 also when you press the ALT + TAB key combination you will get a preview of all running applications along with all Browser tabs so you can go through them and pick the one you want to switch to.
Alto, I personally am a big fan of alt-tabbing, I must admit that I am not a big fan of having multiple browsers tabs on screen when I do press key combo. Luckily there is a very easy way to turn this feature off.
Turning browsers tabs thumbnails off