If you encounter a blank page with an error message saying, “Origin Error” when you try to load a webpage, then this post will surely help you resolve this error. As you can see, this error is a very uncommon one and it is not about the popular game known as Origin where all you have to do is reinstall the client.
Although this error message is a very uncommon one, you will see a blank page with a message saying, “Origin Error” when you attempt to load a webpage. To fix this error, this post will provide you some potential fixes that might help. Follow the fixes given below carefully and see which one fixes the problem.
Option 1 – Use Ctrl + F5 keys to clear browser cache
The first thing you can try is to “Hard Refresh” to clear the cache of your browsers. You can do that by using the Ctrl + F5 keys on your keyboard. On the other hand, you can also clear the cache manually for Chrome, Edge, and Firefox.
Option 2 – Remove the Proxy
You might also want to try removing the Proxy as it could also help you in fixing the Origin error. Here’s how you can do it:
Tap the Win + R keys to open the Run dialog box.
Then type “inetcpl.cpl” in the field and hit Enter to pull up the Internet Properties.
After that, go to the Connections tab and select the LAN settings.
From there. Uncheck the “Use a Proxy Server” option for your LAN and then make sure that the “Automatically detect settings” option is checked.
Now click the OK and the Apply buttons.
Restart your PC.
Note: If you are using a third-party proxy service, you have to disable it.
Option 3 – Try to flush the DNS, reset Winsock and the TCP/IP
You might also want to flush the DNS and reset Winsock as well as reset TCP/IP as it could help in fixing the Origin error. To do so, refer to these steps:
Click the Start button and type in “command prompt” in the field.
From the search results that appear, right-click on Command Prompt and select the “Run as administrator” option.
After opening Command Prompt, you have to type each one of the commands listed below. Just make sure that after you type each command, you hit Enter
ipconfig /release
ipconfig /all
ipconfig /flushdns
ipconfig /renew
netsh int ip set dns
netsh winsock reset
After you key in the commands listed above, the DNS cache will be flushed and the Winsock, as well as the TCP/IP, will reset.
Now restart your computer and open Google Chrome then try opening the website you were trying to open earlier.
Option 4 – Try using Google Public DNS
You might want to try changing your current DNS to the Google Public DNS. All you have to do is change the DNS settings explicitly on your operating system by using the DNS IP addresses. Here’s are the steps to do that:
The first thing you have to do is right-click on the network icon in the Taskbar and select Network and Sharing Center.
Next, click on the “Change Adapter Settings” option.
After that, search for the network connection that you are using to connect to the internet. Note that the option might be “Wireless Connection” or “Local Area Connection”.
Right-click on your network connection and click on Properties.
Then select the new window to choose the “Internet Protocol 4 (TCP/IPv4)” option.
After that, click on the Properties button and click the checkbox in the new window for the option “Use the following DNS server addresses”.
Type in “8.8.8” and “8.8.4.4” and click OK and exit.
Microsoft office has set itself as one of the most used and best suites for business use and MS Word as the most widely used word processor. But how even best are not immune to some small bugs and unexpected behaviors so is not Word. Word has stopped working is probably know to a wide audience of its users, I think I could safely say that each Word user has experienced this error at least once, luckily the error is not anything to worry about since it is an easily fixable issue.
Try automated solutions
There are some fully automated solutions that could fix any PC issues, some are available in free versions. If you prefer to do things manually however keep on reading and follow the instructions below.
Manual FIXES:
Update MS Word
Make sure that you are running the latest build of Word in order to eliminate all bugs and to have a smooth running experience. Go to File > Account > Product Information > Update Options and click Enable Update and then select Update Now.
Check the file
Corrupted files can cause this crash and this error, try opening another text file inside the Word to eliminate file corruption.
Run Word in safe mode and disable add-ins
Did you know that MS Word has a safe mode like Windows? In this safe mode, Word will boot up just the application without any add-ins installed and in this environment, you can start one add-in by one to see which one is causing the issue.
Press ⊞ WINDOWS + R to open the run dialog
Inside run dialog type in winword /safe followed by ENTER to run Word in safe mode
If MS Word works fine in Safe mode, disable all COM Add-ins (while being in safe mode) and restart Word. Re-enable the add-ins one at a time to identify the problematic one.
Click on File and then on Options
Click on Add-Ins from the options list
Select COM Add-ins from the drop-down menu and click on Go
Uncheck all the add-ins and click OK to confirm
Close the Dialog Box and MS Word. Now try running MS Word normally and see if it works
Repeat steps to enable the add-ins, one at a time, and check which add-in is causing this error
Repair Word installation
Press ⊞ WINDOWS + R to open the run dialog
In run dialog type in control panel and press ENTER
Inside Control Panel click on Programs and Features
Locate and click on Microsoft Office to select it
Once selected click on change located on top of the application list
Once Office Windows loads click on Repair
Wait for the process to finish
Reinstall MS office
If all the previous solutions failed next step would be to completely uninstall MS Office and install it again once the old one has been completely removed from the system.
Go to the control panel as explained in the previous step and select Office
Instead of Change this time click on uninstall and follow on-screen instructions
Once uninstall is finished, install a new copy of MS Office.
In previous versions of Windows changing the system, the font was a pretty straightforward process, but it seems Microsoft did not want this feature to keep for whatever reason and there is no option as of the time of the writing of this article to do it in standard options in Windows 10.
But do not worry, you are still able to customize your Windows and choose which font would you like to see inside it in all of its dialogs. You can choose whichever font you desire, the only prerequisite is it to be installed on your system.
This guide will require you to change values in the registry of Windows itself so please follow step-by-step instructions and always make a backup of the registry before changing it in order to prevent some permanent Windows issues.
All of that being said, let's start.
Setting new font
First thing is to open notepad, in the notepad paste the next block of code:
Windows Registry Editor Version 5.00[HKEY_LOCAL_MACHINE\SOFTWARE\Microsoft\Windows NT\CurrentVersion\Fonts]"Segoe UI (TrueType)"="""Segoe UI Bold (TrueType)"="""Segoe UI Bold Italic (TrueType)"="""Segoe UI Italic (TrueType)"="""Segoe UI Light (TrueType)"="""Segoe UI Semibold (TrueType)"="""Segoe UI Symbol (TrueType)"=""[HKEY_LOCAL_MACHINE\SOFTWARE\Microsoft\Windows NT\CurrentVersion\FontSubstitutes]"Segoe UI"="NEW_FONT"
Where in "Segoe UI"="NEW_FONT" instead of NEW_FONT you need to write the exact name of the font that you wish to use as a system font.
Once you have replaced the default system font with your desired one, go to File and save as, from file type drop-down menu, choose all files and save this file as .REG type giving it whatever name you wish.
When the file is saved, close notepad, right-click on the saved file and choose the merge option. Confirm with YES and click on OK. Reboot your system and your Windows will now use the font of your choice as its default system font.
Restoring default font
If you wish to return the old default system font as it was, follow the same steps but in your notepad paste this code:
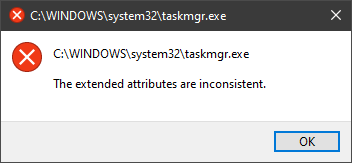
One of the most critical errors inside your Windows operating system is The Extended Attributes Are Inconsistent error. This error means that your operating system has been corrupted and it may produce many annoying issues like for example time lags, random crashes, and even freezing of the system when running multiple applications.
There are a lot of reasons for this error, from the registry to faulty application installations to sometimes even hardware issues like bad RAM memory or bad hard drive. Mostly issue is due to corrupted files inside Windows and most often people only think that resetting the PC or complete reinstallation is the only way to fix this problem.
Although reinstalling the system or resetting the PC will solve this error for sure there are other less time-consuming ways to fix this error.
In this guide, we will show you common ways in fixing Extended Attributes are inconsistent errors inside your Windows that are easy to do and less time-consuming than complete reinstallation of the system.
Fixing Extended Attributes Are Inconsistent error
Run SFC scan
Press ⊞ WINDOWS + X to open the hidden menu
Click on command prompt (admin)
In command prompt type in SFC /scannow and press ENTER
Wait for the operation to complete
Reboot your PC
Use System Image Repair Tool
Press ⊞ WINDOWS + X to open the hidden menu
Click on command prompt (admin)
In command prompt type in Dism /Online /Cleanup-Image /RestoreHealth and press ENTER
Wait for the operation to complete
Reboot your PC
Change all user accounts to the administrator
Press ⊞ WINDOWS + R to open the run dialog
Type in netplwiz and press ENTER
Select a first user account and click on Properties
Click on the Group Membership tab
Choose Others from the options
Select administrator (if all accounts are already administrators change all to users)
Repeat process for all other accounts
Click OK to save settings
Change Windows Sound scheme to default
Right-click on the sound icon in the taskbar
Click on Sound options
Go to the Sounds tab
In Sound Scheme click and choose Windows Default
Under Program Events choose Windows User Account Control
Click on the drop-down menu and choose None
Click on Apply
Click on OK
Downgrade the Sound driver
Press ⊞ WINDOWS + X to open the hidden menu
Click on Device Manager
Find your Audio driver and right-click on it
Click on uninstall and then on OK
Reboot your system
Do System Restore
If none of the provided solutions have worked, perform a system restore to the last point where everything was working fine.
Reset PC
If even system restore has not solved the issue or you do not have valid point in system restore time, perform Reset this PC and hopefully, the error will be finally fixed.
Conclusion
If all of the provided methods have not managed to repair this error that checks your hardware, your computer might have some faulty components if after complete PC reset error persists.
Error code 0x800704c7 occurs when Windows users attempt but fail to update their system. It affects various Windows users including those using Windows 8 and 8.1. This error code has common symptoms such as the following:
Inability to upgrade your Windows operating system
Message box that includes error code 0x800704c7 message
Solution
Error Causes
Error code 0x800704c7 in Windows 8 often occurs due to a poorly maintained system. It can occur when system files become corrupted or missing. It may also occur when malware infects your system. To resolve this error code, Windows users will need to select at least one of the manual repair methods listed below and follow the instructions given.
Further Information and Manual Repair
Manual repair methods enable users to address the underlying issues causing error code 0x800704c7. These repair methods are not very technical. However, you may need to get help from an IT professional if you find them to be difficult or if your attempts to implement these instructions fail to fix the error code.
Method One: Scan Your System for Missing or Corrupt System Files
The System File Checker Tool (SFC) enables Windows users to check their system for missing or corrupt system files. This utility tool is present on all Windows 8 systems and even other versions of the Windows operating system. Run this tool by following the steps below:
Step one: Go to Start and type Command Prompt or CMD.
Step two: Run as Administrator
Step three: Type sfc /scannow.
After running these procedures, check if the error code has been resolved by reattempting to update your system. If you are unable to complete the process and the error message reoccurs, try the next manual repair method below.
Method two: Use Powerful Antimalware Tool
Various forms of malware, including viruses, can infect your system, causing error codes to occur or even more serious problems. That’s why you’ll need to ensure you have a powerful antimalware program installed on your device. Once this is present on your system, start scanning for viruses, worms, and Trojan horses so as to resolve error code 0x800704c7 in Windows 8.
If the issue causing error code 0x800704c7 on your device is a virus or worm, cleaning your system with a powerful antimalware program will successfully resolve the error code. However, if the error code remains unresolved after completing this manual repair method, proceed to the next method below.
Method three: Restore your System
System Restore is a simple method that users can implement to resolve error code 0x800704c7. This enables users to restore their system to a period of time in which their device was not affected by the error code. If done correctly, it can enable users to successfully complete the update process. Follow the steps below.
Step one: Click the Start button and type Control Panel in the search box
Step two: Select Control Panel, then Recovery
Step three: Select System Restore, then Next
Step four: Select a restore point before appeared on your Windows8 system
Step five: Select Next, then Finish
Method Four: Use an Automated Tool
If you wish to always have at your disposal a utility tool to fix these Windows 8 and other related issues when they do arise, download and install a powerful automated tool.
As you know, Airplane mode is the one that gets devices in such a state where all the wireless connections are turned off. However, recently, there are some reports from users claiming that the Airplane Mode turns on by itself in their Windows 10 computers. This kind of problem could be due to an error with the Network driver, third-party applications, and many other factors. Other users also reported that the Airplane Mode automatically flickers, while some stated that they aren’t able to toggle the option for Airplane mode.
There are several options you can try to resolve this problem. You can try to configure the Power Management settings for the driver or run the Network troubleshooter. You could also roll back, reinstall or update the Network driver, as well as troubleshoot the problem in a Clean Boot State. For more details, follow each one of the given options below.
Option 1 – Try configuring the Power Management settings for the driver
The first thing you can do to fix the problem is to try configuring the Power Management settings for the driver. How? Refer to these steps:
Tap the Win + X keys to open the WinX menu and from there, select the Device Manager to open it.
Next, expand the Network adapters and select the entry for your Wi-Fi hardware.
After that, right-click on it and select Properties.
From there, go to the Power Management tab and uncheck the “Allow the computer to turn off this device to save power” option.
Once done, restart your computer and see if it has fixed the problem.
Option 2 – Try to run the Network troubleshooter
To run the Network Troubleshooter, refer to these steps:
Open the Search bar on your computer and type in “troubleshoot” to open the Troubleshoot settings.
Next, scroll down and select the “Network Adapter” option from the right pane.
Then click on the Run Troubleshooter” button.
After that, your computer will check for any possible errors and will pinpoint the root cause of the problem if possible.
Restart your computer.
Option 3 – Try to update, rollback or reinstall the Network adapter drivers
The next thing you can do to resolve the problem is to update the Network Adapter drivers by following these steps:
Tap the Win + R keys to launch the Run window and then type in the “devmgmt.msc” command and hit Enter to open the Device Manager window.
Under the Device Manager, you will see a list of drivers. From there, look for the Network Adapters and expand them.
Look for the Broadcom Network Adapter and right-click on it, as well as other network adapters that have an exclamation icon, and update them all.
Restart your PC and see if it helped in fixing the problem.
Note: If updating the network drivers didn’t help in fixing the problem, you can also try to roll back the very same drivers from their previous versions and restart your Windows 10 PC. After that, the system itself will reinstall the drivers you just uninstalled. Alternatively, you can also download and install the drivers from the manufacturer’s website directly.
To reinstall the network adapter drivers, refer to these steps:
Open the Devices Manager from the Win X Menu.
Then locate the device drivers and right-click on them to open the Properties.
After that, switch to the Driver tab and click on the Uninstall Device button.
Follow the screen option to completely uninstall it.
Finally, restart your computer. It will just reinstall the device drivers automatically.
Option 4 – Try to reset the Network Adapter
You can also try to perform a Network Reset to resolve the problem. This will reset the entire network configuration including your IP address. To perform Network Reset, follow these steps:
Tap the Win + I keys to open Settings.
From there, go to the Network and Internet section.
Next, scroll down and look for “Network Reset” under the status pane.
After that, click on Network Reset and then on Reset now to start resetting the network configuration. Once done, check if it is able to fix the error or not.
Option 5 – Try putting your computer in a Clean Boot State
You can also troubleshoot the problem in a Clean Boot state. It could be that there are some third-party applications in your computer that are causing the Airplane Mode to behave in a strange way. So, to isolate this possibility, you need to boot your computer in a Clean Boot State be using these steps:
Log onto your PC as an administrator.
Type in MSConfig in the Start Search to open the System Configuration utility.
From there, go to the General tab and click “Selective startup”.
Clear the “Load Startup items” check box and make sure that the “Load System Services” and “Use Original boot configuration” options are checked.
Next, click the Services tab and select the “Hide All Microsoft Services” check box.
Click Disable all.
Click on Apply/OK and restart your PC. (This will put your PC into a Clean Boot State. And configure Windows to use the usual startup, just simply undo the changes.)
After you’ve set your computer into a Clean Boot State, try to observe if the Airplane mode is now back to normal or not.
As you know, all computer mouse devices are designed ergonomically for users who are right-handed. Although that’s mostly the case, there are also other mouse devices that are designed specifically for left-handed users or the ones that can be used by either the right or left hand. But before you look for these kinds of mouse devices, there is actually an option you can try so that your mouse device can work with either the left or right hand. All you have to do is configure your mouse device. Aside from setting the device to work on either hand, you can also switch mouse buttons, from left to right, using only a couple of simple steps.
As mentioned earlier, most mouse devices are created for right-handed users. Meaning to say, these mouse devices are configured to be right-handed with their primary button on the left and the second one on the right. The primary button is used for certain functions such as selecting and dragging. Now you can configure your mouse to be left-handed by swapping its predefined functionality. How? Refer to each one of the given instructions below.
Option 1 – via Control Panel
First, go to the Start Menu and search for “control panel” in the Start search.
Once you see it from the search results, click on it to open it and then go to the Hardware and Sound section.
From there, click on Mouse under the Device and Printers section. This will open the window for Mouse Properties.
Now you have to check the Switch primary and secondary buttons box.
Then click on OK to save the changes made. After that, your primary select button on your mouse device is your right button while the secondary button, also known as right-click, is now the left button.
Option 2 – via Windows 10 Settings
This is the second option you can check out to change the configuration of your mouse from being right-handed to being left-handed.
First, right-click on the Windows icon and select Search.
Next, type “mouse” and from the search results that appear, click on Mouse Settings.
After that, select “Right” from the “Select your primary button” drop-down menu. This should set the mouse device from being right-handed to being left-handed.
There are not many applications for creating mind maps, even fewer that are completely free, so it is with great pleasure to present you with Freeplane. Freeplane is mind mapping, Knowledge Management, and Project Management software completely free and open source.
You can it here: https://sourceforge.net/projects/freeplane/files/latest/download
And from developers git page and I quote:
Freeplane is a free and open-source software application that supports thinking, sharing information, and getting things done at work, in school, and at home. The core of the software is tools for mind mapping (also known as concept mapping or information mapping) and using mapped information. Freeplane is written in Java using OSGi and Java Swing. It runs on any operating system that has a current version of Java installed. It can be run locally or portably from removable storage like a USB drive.
We use Github only as of the main code repository, all other project parts are hosted at the source forge. So all bugs and feature requests are managed in a separate issue tracker. There is a drop-down box for selecting different types of issues. Other sources of inspiration are our new forum and old forum. Some users write their ideas there. Every contributor and every team member freely decides what task he is going to work on, but for making the best decision we can communicate our self-set goals in the above forum. It is supposed to enable early discussions and community feedback and also to motivate you and other people.
How to start hacking and contributing
People new to the project can start with implementing a new small feature or doing some refactoring or documentation and not with the bug fixing. Not all bug reports seem to be equally important, and if there are important bugs they usually get fixed by people who broke the functionality. I think you should first get there :).
For internal developer discussions, there is a private mailing list. It is held private to avoid spam mails. If you want to be subscribed let us know what mail address you are going to use with it. This list is the preferred way to ask all code-related questions because they usually get answered soon and by the most competent team member.
Some documentation for new developers is available in Freeplane wiki https://www.freeplane.org/wiki/index.php/How_to_build_Freeplane and also here and here. It is written for new guys and should also be maintained by the new guys to stay up to date.
Looking forward to any questions and contributions,
Freeplane development team
One of the errors you can encounter while browsing the web using your Google Chrome browser is the ERR_TUNNEL_CONNECTION_FAILED error. If you happen to encounter this error, then this post could help you resolve it. This kind of error in Chrome can occur due to incorrect website domain configuration, conflicting browser data, incorrect proxy settings, and DNS connection issues.
To resolve the ERR_TUNNEL_CONNECTION_FAILED error in Chrome, here are some suggestions you can check out.
Option 1 – Try disabling the proxy server for your LAN
If your PC was just attacked by some adware or malware as of late, it is possible that it has changed the network settings in the system and might display spam advertisements. Thus, you have to disable the proxy server for your LAN. To do that, refer to these steps:
Tap the Win + R keys to open the Run dialog box.
Then type “inetcpl.cpl” in the field and hit Enter to pull up the Internet Properties.
After that, go to the Connections tab and select the LAN settings.
From there. Uncheck the “Use a Proxy Server” option for your LAN and then make sure that the “Automatically detect settings” option is checked.
Now click the OK and the Apply buttons.
Restart your PC.
Note: If you are using a third-party proxy service, you have to disable it.
Option 2 – Try to reset Winsock, TCP/IP & Flush DNS
Resetting Winsock, TCP/IP, and flushing DNS might help you resolve the ERR_TUNNEL_CONNECTION_FAILED error. To do so, follow these steps:
Right-click on the Start button and click on Command Prompt (administrator) so you can pull up an elevated Command Prompt.
After that, execute each one of the commands listed below. And after you typed in one after the other, you have to hit Enter.
netsh winsock reset – type in this command to reset Winsock
netsh int ip reset resettcpip.txt – type in this command to reset TCP/IP
ipconfig /flushdns – type in this command to flush the DNS cache
Next, restart your PC and check if the problem’s fixed.
Option 3 – Try using a VPN connection
There are instances when the network that your computer is logged on might have blocked your access to the website you are trying to open and so to fix it, you can try to use a VPN connection. Once you’ve connected using VPN, try to open the website again and see if you can now access it.
Option 4 – Try clearing browser data
There are times when some data in the browser is conflicting with the loading of the website and triggers errors like ERR_TUNNEL_CONNECTION_FAILED. And so you can try to clear your browser’s data. This might be a very basic solution but oftentimes it works in fixing this kind of error in Google Chrome. Follow the steps below to clear the data in your browser.
Open your Google Chrome browser.
After that, tap the Ctrl + H keys. Doing so will open a new panel that allows you to delete the browsing history and other data in your browser.
Now select every checkbox that you see and click on the Clear browsing data button.
Then restart your Chrome browser and check if you can now open any website or not.
Option 5 – Get rid of any conflicting browser extensions
Open Chrome and press Alt + F keys.
Go to More tools and click Extensions to look for any suspicious browser extensions or toolbars.
Click the Recycle bin and select Remove.
Restart Chrome and press Alt + F keys again.
Proceed to On Startup and mark Open a specific page or set of pages.
To check if the browser hijacker is still active, click Set pages, if it is active, overwrite the URL.
Note: If removing the browser extensions or toolbars didn’t work, you can also try to reset your Google Chrome browser.
Open Google Chrome, then tap the Alt + F keys.
After that, click on Settings.
Next, scroll down until you see the Advanced option, once you see it, click on it.
After clicking the Advanced option, go to the “Restore and clean up option and click on the “Restore settings to their original defaults” option to reset Google Chrome.
As more and more people get into insider preview of upcoming Windows 11 we will see more and more different takes and opinions on it.
Generally speaking, the first wave was quite positive when it was previewed but how time is passing more and more limitations and frustration comes to the surface.
Some of the limitation that is inside it, which have been confirmed by Microsoft itself includes features missing that we had in Windows 10 like moving the application to the taskbar in order to pin it, moving the file in the taskbar to open it in default application and some big annoyances like Windows opening widgets always in Edge no matter what is your default browser. Not being able to move the taskbar from the bottom is also one of many illogical things.
There is not really a point in these missing features since they were working fine in Windows 10 and many users liked them since they could customize Windows more to their liking, now with this new look at limitations it reminds me personally much of apple macOS and I will be honest, I am not a big fan of that kind of thinking.
If I wanted that kind of OS I would have gotten myself a MAC, not custom build PC, but hey, Linux is always a free alternative, and how Microsoft itself is pushing limitations and in my opinion bad design choices along with awful system requirements that might just be a case for a lot of users.
I am really not sure what is logic behind these moves and I am sure they have their reasons but this time it seems that their take on the new OS is not resonating well with the overall user population, well at least what I have heard so far. Things of course can still be changed and made for the better and I would rather see release postponed and issues addressed than getting more system hogging and limited new OS that at its current state looks like reskinned Windows 10 with limitations.
Windows 11 is a good-looking operating system but people love to make things personal and to their liking so we decided to help you in this mission with small customization of changing default system fonts inside Windows 11.
Since there is no really easy way to just switch the font windows is using for itself we will have to tweak a registry a little so before we start please do make a backup of the registry file and follow the steps as they are presented in order to avoid any errors and break the system.
So, if all precautions are made and you are ready to change your Windows appearance let's dive right into it:
Find and/or install the font that you wish to use
There are vast free font sites on the internet where you can find fonts that you like and wish to use but be very careful with your desired font selection. The font that you choose needs to be a complete typeface, meaning that it has to contain all glyphs, large and small font sizes, all special characters, etc or you will experience that in certain areas nothing will be displayed.
Once you have found the font that you like and made sure it is a complete font, install it on your system (you can skip this step if you just want to change the system font with one already installed on your system)
Create REG file
Open notepad or a similar plain text editor in order to create a file that will apply changes directly into the registry and create a new file. Inside the file paste this text:
All the way to the bottom where it says: "Segoe UI"="NEW-FONT", change NEW-FONT with the font name that you have chosen or installed in the previous step. For example: "Segoe UI"="Ubuntu".
Now go to File > Save As and name your file however you want but give it REG extension so it looks like: my_new_windows_font.REG
Apply changes
Now that you have your registry entry saved, locate it and double-click on it, at this stage Windows warning will probably pop up, you can just ignore it and click on YES since you wrote the file and know what it is. After registry entry is applied reboot your PC in order for changes to take effect.
Rolling back
If you want to change the font to another one, just repeat this procedure again. If you want to roll back to using the default Windows font, repeat the process but with this code instead of the one provided in the REG file:

 In this guide, we will show you common ways in fixing Extended Attributes are inconsistent errors inside your Windows that are easy to do and less time-consuming than complete reinstallation of the system.

 You can it here:
  As more and more people get into insider preview of upcoming Windows 11 we will see more and more different takes and opinions on it.
Generally speaking, the first wave was quite positive when it was previewed but how time is passing more and more limitations and frustration comes to the surface.
Some of the limitation that is inside it, which have been confirmed by Microsoft itself includes features missing that we had in Windows 10 like moving the application to the taskbar in order to pin it, moving the file in the taskbar to open it in default application and some big annoyances like Windows opening widgets always in Edge no matter what is your default browser. Not being able to move the taskbar from the bottom is also one of many illogical things.
There is not really a point in these missing features since they were working fine in Windows 10 and many users liked them since they could customize Windows more to their liking, now with this new look at limitations it reminds me personally much of apple macOS and I will be honest, I am not a big fan of that kind of thinking.
If I wanted that kind of OS I would have gotten myself a MAC, not custom build PC, but hey, Linux is always a free alternative, and how Microsoft itself is pushing limitations and in my opinion bad design choices along with awful system requirements that might just be a case for a lot of users.
I am really not sure what is logic behind these moves and I am sure they have their reasons but this time it seems that their take on the new OS is not resonating well with the overall user population, well at least what I have heard so far. Things of course can still be changed and made for the better and I would rather see release postponed and issues addressed than getting more system hogging and limited new OS that at its current state looks like reskinned Windows 10 with limitations.
As more and more people get into insider preview of upcoming Windows 11 we will see more and more different takes and opinions on it.
Generally speaking, the first wave was quite positive when it was previewed but how time is passing more and more limitations and frustration comes to the surface.
Some of the limitation that is inside it, which have been confirmed by Microsoft itself includes features missing that we had in Windows 10 like moving the application to the taskbar in order to pin it, moving the file in the taskbar to open it in default application and some big annoyances like Windows opening widgets always in Edge no matter what is your default browser. Not being able to move the taskbar from the bottom is also one of many illogical things.
There is not really a point in these missing features since they were working fine in Windows 10 and many users liked them since they could customize Windows more to their liking, now with this new look at limitations it reminds me personally much of apple macOS and I will be honest, I am not a big fan of that kind of thinking.
If I wanted that kind of OS I would have gotten myself a MAC, not custom build PC, but hey, Linux is always a free alternative, and how Microsoft itself is pushing limitations and in my opinion bad design choices along with awful system requirements that might just be a case for a lot of users.
I am really not sure what is logic behind these moves and I am sure they have their reasons but this time it seems that their take on the new OS is not resonating well with the overall user population, well at least what I have heard so far. Things of course can still be changed and made for the better and I would rather see release postponed and issues addressed than getting more system hogging and limited new OS that at its current state looks like reskinned Windows 10 with limitations. 