 For anyone who is not aware, when Windows 11 was released if you wanted to switch to another browser you had to go into the settings app and choose the default browser for different types of file extensions like HTML, HTM, PDF for opening on the web, etc. Of course, this was completely unnecessary and it was not well received by users. So after some time, Microsoft backpedaled to standard one click, choose your default browser solution that existed in the previous version of Windows OS.
0x800ccc92 - What is it?
The 0x800ccc92 is a Microsoft Outlook error. The error restricts your ability to send and receive emails on your Outlook email address successfully. This error is very similar to 0x800cc90 and 0x800ccc91 Outlook error codes. The 0x800ccc92 error message is often displayed as:This error is quite common and is faced by many Microsoft Outlook users. It is advisable to fix this error immediately because besides restricting you from sending and receiving emails via Outlook, due to this error the data on your Outlook also becomes inaccessible and unreadable, and sometimes Outlook also begins to freeze unexpectedly.‘Receiving reported error (0x800ccc92): Your email server rejected your login.’
Error Causes
Some of the most common causes of the error code 0x800ccc92 are:- PST files get corrupt
- Incorrect Outlook configuration settings
- PST file crosses its fixed file size limit
- Failure of POP3 and Protocol STMP in database server connection
- Improper synchronization between Outlook and the server
- Usage of invalid password or username
- Virus Infection
Further Information and Manual Repair
Any of the above causes may result in the 0x800ccc92 error message display. If you encounter this Outlook error, you don’t need to panic and call the network personnel in your office to fix and repair the error. In fact, it is very easy to fix and you can repair it by yourself: Here are some of the best and easy ways to resolve this error in the shortest time:- If the error message 0x0800ccc92 is displayed as POP3: Invalid Password, then in this case it is advisable to cross-check your Outlook account ID and password. Sometimes this error message may pop up if you insert an incorrect password or ID. Therefore the best way to resolve it to check where you went wrong and then re-enter your ID and Password correctly.
- Another alternative is to install the latest available Server Service Pack for Exchange. This solution works best if compatibility is the issue.
- However, when nothing works, then it is advisable to download PST repair tool. The PST repair software is designed to scan, detect, repair, and resolve Outlook errors like 0x800ccc92. The PST repair software is built with special algorithms that help repair PST corrupt files in seconds. This tool works on all Windows Operating Systems including Windows 8, Windows 7, Windows Vista, Windows XP, Windows 2003, and Windows 2008.
- All you need to do is, download and install this software on your system.
- Once you download it, run it on your PC to detect errors.
- Press scan to get started
- The scanning may take about a couple of minutes to complete.
- Once it is complete, click on the repair tab to fix the errors.
- Now restart your Outlook again and now try sending emails. This solution is likely to work if the above-mentioned solutions don’t.
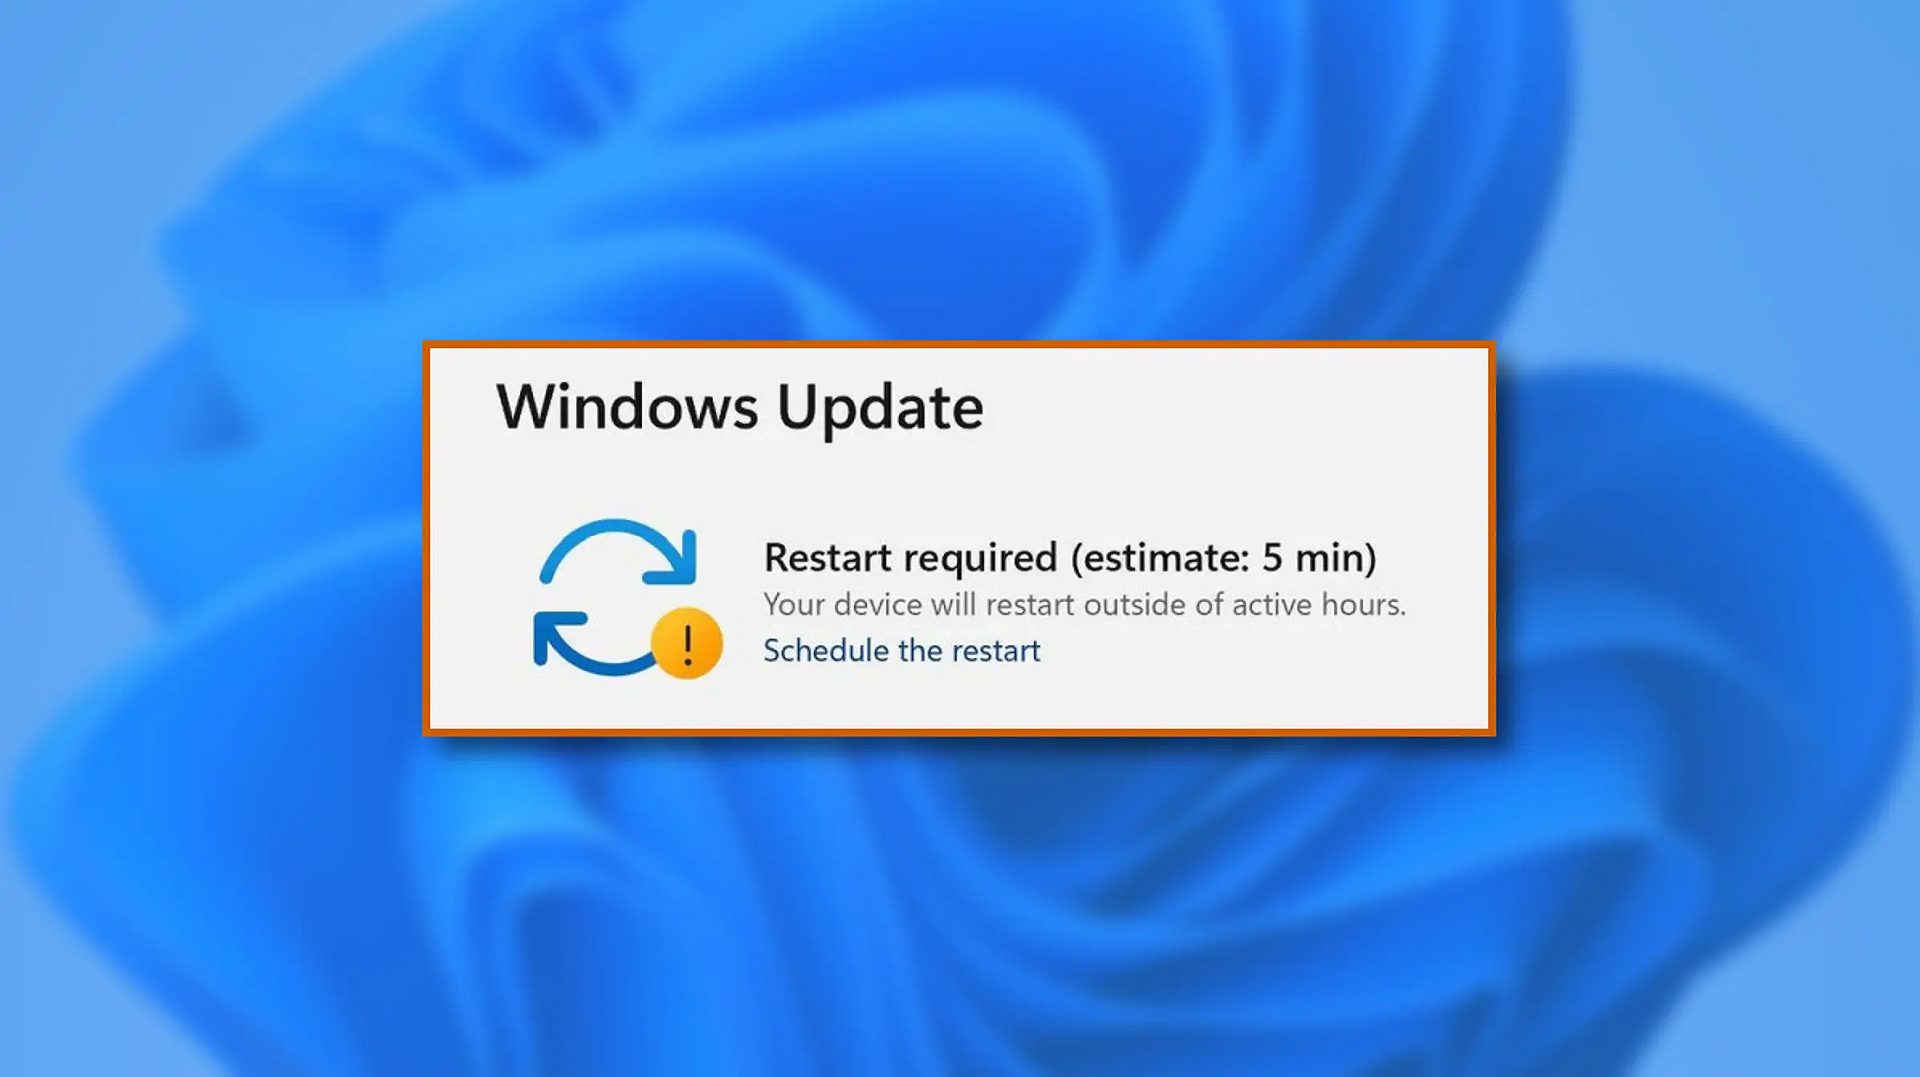 When Windows 11 update is available but you do not wish to restart right away because you are in the middle of using a computer, you can schedule a restart for up to 7 days. It is very easy and we will show you how to do it.
 Odyssey Neo G9 is a successor to Odyssey G9 curved gaming monitor and it is aimed again at the gaming community with its specifications but of course, it can be used for work as well.
Gapping at a stunning $2500 USD price it is not really a cheap piece of hardware so it is normal to see what do you get for this kind of price and do features justify it, so let’s dive in.
Odyssey Neo G9 is a successor to Odyssey G9 curved gaming monitor and it is aimed again at the gaming community with its specifications but of course, it can be used for work as well.
Gapping at a stunning $2500 USD price it is not really a cheap piece of hardware so it is normal to see what do you get for this kind of price and do features justify it, so let’s dive in.
 What is RTX
 Hacker group recently came up with claims that they have stolen data from 100 million T-Mobile customers. T-Mobile has responded with confirmation it has been compromised and that over 40 million records were stolen, among them are not just present customers, but anyone who has applied for T-Mobile service as well as past accounts.