DLL files have certain functions that help the programs in the computer run properly. One of these DLL files is the Msvcr120.dll_clr0400.dll. This particular DLL file is responsible for the extraction of the required resources during the installation of a program and is used when the program is launched or when games are launched in the C++ language. However, a number of users recently reported that they’ve encountered an error that says, “Msvcr120.dll_clr0400.dll is missing” when they tried to install an application or when they tried opening an application.
This kind of error could be due to several factors. It is possible that the DLL file is corrupted or there are some programs that interfere with the DLL file. On the other hand, it is also possible that it has been infected by a virus. To resolve this error, here are some potential fixes you need to check out:
Option 1 – Run System File Checker scan
The first thing you can do to fix the error is to try running the System File Checker or SFC scan. System File Checker is a command utility built into your computer that helps restore corrupted files and missing files. Refer to the following steps to run it:
Hit the Win + R keys to launch Run.
Type in cmd in the field and tap Enter.
After opening Command Prompt, type in sfc /scannow
The command will start a system scan which will take a few whiles before it finishes. Once it’s done, you could get the following results:
Windows Resource Protection did not find any integrity violations.
Windows Resource Protection found corrupt files and successfully repaired them.
Windows Resource Protection found corrupt files but was unable to fix some of them.
Reboot your computer.
Option 2 – Troubleshoot the missing Msvcr120.dll_clr0400.dll error in a Clean Boot State
You can also troubleshoot the isDone.dll error in a Clean Boot state. It could be that there are some third-party applications in your computer that are preventing the application from getting installed and to isolate this possibility, you need to boot your computer in a Clean Boot State and then try installing the program again. Putting your computer in this state can help you identify which program is the culprit and thus isolates the problem. In a Clean Boot state, your computer will start using only the pre-selected minimal set of drivers and startup programs. Note that you have to disable and enable one process at a time.
Log onto your PC as an administrator.
Type in MSConfig in the Start Search to open the System Configuration utility.
From there, go to the General tab and click “Selective startup”.
Clear the “Load Startup items” check box and make sure that the “Load System Services” and “Use Original boot configuration” options are checked.
Next, click the Services tab and select the “Hide All Microsoft Services” check box.
Click Disable all.
Click on Apply/OK and restart your PC. (This will put your PC into a Clean Boot State. And configure Windows to use the usual startup, just simply undo the changes.)
After you’ve set your computer into a Clean Boot State, make sure that you’re signed in as administrator and then try to install the application again.
Option 3 – Try to re-register the problematic DLL file
You can also try to re-register the DLL to resolve the problem. The Regsvr32 tool is a command-line utility that can be used to register and unregister OLE controls like DLL and ActiveX (OCX) controls in the Windows operating system. Follow the steps below to use it.
Open Command Prompt as admin from the WinX menu.
Next, type the following commands in the elevated Command Prompt and hit Enter to execute the command. This will re-register the affected DLL file using the Windows operating system tool, regsvr32.exe.
exe /[DLL file]
exe [DLL file]
Note: Replace “[DLL file]” with the name of the DLL file that was pointed out in the error.
After you execute the given commands, you should see a message saying, “DllRegisterServer in vbscript.dll succeeded” if the Regsvr32 tool was able to run successfully. After that, try to install the program again and see if it now works.
Option 4 – Try to replace the DLL file with a trusted source
First, you need to get the new DLL file from another computer with preferably the same file version number.
After that, you need to boot your PC into Safe Mode and navigate to the paths listed below and then replace the file using a USB drive or other external storage devices.
x86: This PC > C:WindowsSystem32
x64: This PC > C:WindowsSysWOW64
Next, type “cmd” in the Cortana search box and right-click on Command Prompt, and select “Run as administrator” to open it with administrator privileges.
Now type the “regsvr32 ntdll.dll” command and hit Enter.
Restart your PC and check if the error is now fixed.
Option 5 – Scan your computer using Windows Defender
The DLL file might also be infected with malware or virus and to eliminate it which could explain why you’re getting the “Msvcr120.dll_clr0400.dll is missing” error. Thus, you have to scan your computer using security programs like Windows Defender.
Tap the Win + I keys to open Update & Security.
Then click on the Windows Security option and open Windows Defender Security Center.
Next, click on Virus & threat protection > Run a new advanced scan.
Now make sure that Full Scan is selected from the menu and then click the Scan Now button to get started.
In case you don’t know, Microsoft has included an Enhanced Search Mode in the new Windows 10 v1903. This new Enhanced Search mode, compared to the Classic Mode, indexes everything on your Windows 10 computer, and in this post you will be guided on how you can disable this new feature as well as discuss how it is different from the Classic Search mode.
Over the years, the Windows 10 Start Search has changed. When you tap the Start button and when you type, the results that appear are categorized into Apps, Documents, Email, Web, Folders, Music, People, Photos, Settings, Videos, and many more. This is the reason why the Enhanced Mode was brought into the picture. So unless everything is indexed, this new feature wouldn’t be of much use.
A Classic Search is the term used for the old search technique in Windows 10. The Classic Search mode is restricted to Libraries and Desktop and end-users can only select to customize the search location by adding them manually to the indexer. To simply put it, it would only index files and folders which you want to get indexed and if the search term is not in the index, it would initiate the regular search which would take quite a while and this is where the Enhanced Windows Search comes in. It indexes everything as it is its default nature which is the exact opposite of the Classic Search mode. This feature allows you to exclude folders where the Search will not look and index anything that could be personal to you. In addition, it can also impact the life of the battery of laptops, if you are using one. The initial crawl of your data will take place only when connected to power and during that time, both the CPU usage and battery will take a bit of a hit.
To enable the Enhanced Search Mode in your Windows 10 computer, here’s what you have to do:
Step 1: Go to Settings > Search > Searching Windows.
Step 2: Next, click on the radio button for Enhanced.
Step 3: After that, select the folders which the Windows Indexer should exclude from the Enhanced Search mode.
And that’s about it. The next time you search anything on your computer, Windows will be looking at all the locations except for the ones you excluded and the results will be a lot faster compared to the Classic Search.
Now that you’ve enabled the Enhanced Search mode, there are two settings you need to check out.
Advanced Search Indexer Settings – this setting allows you to configure how or where Windows will search or what file types it will search in your computer. It will also open the same setting that’s available in the Classic Search.
Run the Indexing Troubleshooter – when you click on the Indexing Troubleshooter, it will start to troubleshoot any Search and Indexing issues on your Windows 10 computer and fix them automatically.
One of the most sophisticated Artificial Intelligence or AI assistants there is in the market is Cortana. However, no matter how sophisticated this AI assistant may be, there are still times when you encounter issues with it. So if your Cortana is not connecting to the internet, worry not for this post will guide you in fixing the problem.
This connection issue in Cortana might have something to do with the settings, network connectivity, or your Microsoft account. In addition, it could also be that the Firewall or antivirus program interferes with its connection. Whichever the case is, here are some possible solutions that could help you resolve the problem.
Option 1 – Try to power cycle the modem, router, and computer
Connect the modem, router, and the PC hard-wired and then switch all of these three devices off.
Turn on the modem and wait for 30 seconds.
Turn on the router and wait for 30 seconds as well.
Finally, turn on the computer and check if you can now successfully connect to the internet.
Option 2 – Check if your router or ISP is properly working
Since the basis for this issue is that Cortana is not connecting to the internet even though you are able to access websites using your browser, you might want to check your router or ISP (Internet Service Provider) and see if they’re functioning properly.
Option 3 – Try changing your internet connection
You can also try changing your internet connection and see if it fixes the problem. If you are using Ethernet, you can try connecting to a Wi-Fi connection and see if Cortana is able to connect or not.
Option 4 – Try to run the Search and Indexing troubleshooter
You might also want to run the Search and Indexing troubleshooter in Windows 10 as it checks whether the settings for Cortana are in place and automatically corrects any issues if the update or software installation has changed the settings. To run it just click on the Start button and select Settings > Updates and Security > Troubleshoot. From there, select the Search and Indexing Troubleshooter.
Note: You can also run the Network Troubleshooter as it can also help in resolving the issue especially if the problem is in the network.
Option 5 – Try to remove Proxy
Removing the Proxy might also help you in fixing the connection issue in Cortana. Here’s how you can do it:
Tap the Win + R keys to open the Run dialog box.
Then type “inetcpl.cpl” in the field and hit Enter to pull up the Internet Properties.
After that, go to the Connections tab and select the LAN settings.
From there. Uncheck the “Use a Proxy Server” option for your LAN and then make sure that the “Automatically detect settings” option is checked.
Now click the OK and the Apply buttons.
Restart your PC.
Note: If you are using a third-party proxy service, you have to disable it.
Option 6 – Verify your Microsoft account
In some cases, Cortana might not be able to connect to the internet because your Microsoft account is no longer verified. This usually happens when you use a two-step authentication system with your Microsoft account. To verify it, just open Settings and click on Accounts. After that, check if you have a Verify hyperlink under your Microsoft account or not then click on Verify. Afterward, follow the next on-screen prompts to verify your Microsoft account. Once your account is verified, restart your computer.
Option 7 – Try resetting Cortana
Open Cortana and go to the Settings section where you’ll see the “Turning off Cortana clears what Cortana knows on this device, but won’t delete anything from the Notebook. After Cortana is off, you can decide what you’d like to do with anything still stored in the cloud” option. Turn this option off.
Restart your PC.
After your computer boots, launch Cortana again and check.
Option 8 – Try to reinstall Cortana
If none of the options given above works, you must consider reinstalling Cortana.
First, right-click on the Start button and click on the Windows Powershell (Admin) option from the list.
Next, type the following command and hit Enter to execute it:
Hello and welcome to our software series review. Weel this time we could say this is more of a service review since the application we are going through today is online and you can use it freely without ever needing to install it.
When we choose software that we are going to review and recommend we really try to recommend something that is worth your time and money, Cartoonize fits in both categories in my opinion.
First of all basic plan of this graphic software is completely free and as mentioned it is working online, also as one more feature basic plan does not even require you to have an account of any kind, all you need to do is go to the website of the application and you can start using it right away. There is also paid plan for extra features if you need them billed monthly or annually.
Features
First things first, this is not Photoshop or GIMP and it does not aim nor want to be. This is something else, directed and pointed at the different types of users. This application is aimed at people that want to make some quick graphics and post them on social media and it does that very well. Even without knowledge to use graphic software this one is so well designed and straightforward that even a complete newcomer can do something right away.
So as the application that wants to be used by people that want to place some cool pictures or ads on their social media what it offers. For starters simplicity and ease of use, every option that you can use is on the left side of the screen nicely packed into the vertical toolbox. Inside the toolbox, you have access to various tools, effects, and filters that you can apply to your image.
Tools explained
Image manager
The first section on the tool panel is the image manager, here you can upload your images, delete them, search stock images, and so forth. nothing more to say about this one as it is only a basic file manager.
Edit
In this tool panel, there are a lot of basic settings for your image manipulations divided into 3 sections: Basics, Enhance, and Creative. In the basic section, you can crop, resize and rotate your image. Enhance panel will let you set exposure, color, vibrance, tint, and details (sharpen). Finally, the Creative part will let you remove the background with AI in a single click, replace colors in the image, and add a vignette and round image.
Effects
In the effects panel, you will be given 4 options to choose from Cartoonizer, Digital art, Sketcher, and painting. Each option once clicked will open another set of options tied to chosen preset where you will be able to choose a different style from chosen template. Once you click on the desired template it will be applied to your image and in the upright corner, you will have edit options to tweak it to your liking. You can play around as much as you want because only once you click on the apply button, the effect will be applied to your image.
Filters
Same as in the effects tool panel here you will also get a series of different filters that you can apply to your image. As in the previous tool once clicked on the chosen filter, you will be given options for its variations and details edits. How there is really plenty of filters options and combined with its own presets I will not focus on explaining what each one is doing since picture thumbnails are pretty accurate and just one look at them will explain to you everything you need to know.
Overlays
In the overlays panel, you can as the name says overlay different kinds of effects on your image. You can add snow, fog, sun flares rain, and many more. Presets work identically to previous effects and filters.
Masks
If you want to place your image in a certain shape or in-text this is the section for you. You will be presented with sections as custom text, shapes, brushes, floral, animals, and patterns. Each section will once again lead to plenty of variations on the chosen subject where you can pick one that you like the most and tweak its options.
Text
As the name suggests, this section is to add text to your picture or design. If you are making some cool ad for Facebook, Instagram, or other social media I believe that you will spend most of your time in this section adding text and tweaking it so it looks best. You have all the tools that you will need to make a catchy title or smaller block of text and you can add multiple texts to your picture tweaking their own visual appearance, the font used, color, and some effects like a drop shadow.
Draw
In the draw section, you will be able to freely draw whatever you like with your mouse or pen if you have one. you have basic options for a brush and eraser so you can erase stuff. Pretty basic tool but it gives a nice touch to underline something, circle it, etc.
Graphics
This panel will let you place various already made graphic assets into a picture. You have hearts, hats, glasses, etc. There really are tons of premade graphics along with thematic ones like new year, st. Patric day and more.
Frames
As the name suggests this section will place a frame of your choice around your picture. You can choose the style of frame, position, color, and many more. There are various styles and each style has its own options.
Conclusion
Cartoonize is a great online application that will let you quickly and easily do cool and nice image edits. As mentioned you can also add various effects, text, and graphics and use this app to make some quick and nice ads for social media. You have the option to publish to your social media right from the app in the save dialog but you can also of course download your image or design to your local computer.
Please note that for this review we used the pro, paid version so all of the features were unlocked. We wanted to give you a full overview of the full potential of the app. In my opinion, the small monthly fee that they charge is well worth it when you see all things that you can do with it.
Go to the cartoonize website and check it out, basic option is completely free and it does not even require making an account. Have fun, be creative and take care, I hope to see you again tomorrow.
If you suddenly encounter a Blue Screen error that points out to either the mfewfpk.sys and epfwwfp.sys files, then this post might help. Both of these files are created by third-party software. The mfewfpk.sys file is created by the McAfee security software while the epfwwfp.sys is created by the ESET Antivirus. These files are residual files and sometimes it blocks upgrading Windows 10.
Aside from blocking Windows 10 upgrade/update, these files can also cause a Blue Screen error after an upgrade which leaves your Windows 10 computer useless. When you get a Blue Screen error caused by any of these files, you will see an accompanying error message that states, “DRIVER IRQL NOT LESS OR EQUAL”. To fix this Blue Screen error, you can check out the suggestions laid out below but before you do that, you need to create a System Restore point first as it can help you undo any unwanted changes. In addition, make sure to also boot your computer into Safe Mode with Networking before you troubleshoot.
Option 1 – Try to remove the epfwwfp.sys file
You can try to remove the epfwwfp.sys file using Command Prompt. To do so, refer to the following steps:
Right-click on the Start button and click on Command Prompt (Admin) from the menu to open Command Prompt with admin privileges.
Next, type the following command and hit Enter to delete the epfwwfp.sys file:
DEL /F /S /Q /A “%systemroot%System32driversepfwwfp.sys”
After the scan is completed, restart your computer and see if it fixed the Blue Screen error.
Note: You can also use the ESET AV Remover tool to uninstall Eset security software to remove the epfwwfp.sys file.
Option 2 – Try to remove the mfewfpk.sys file
The same with the first option, you can remove the mfewfpk.sys file using CMD.
First, right-click on the Start button and click on Command Prompt (Admin) from the menu to open Command Prompt with admin privileges.
After, type the following command and hit Enter to delete the epfwwfp.sys file:
DEL /F /S /Q /A “%systemroot%System32driversmfewfpk.sys”
Once the scan is completed, restart your computer and see if it fixed the Stop error.
Note: You also have the option to remove the mfewfpk.sys file using McAfee Product Removal tool to uninstall the McAfee security software. All you have to do is download the McAfee Product Removal tool and run it and then follow the onscreen instructions to install it. Once it is installed, click on Next. After you select the radio button to agree to the terms of use, click on Next once again. Finally, restart your computer and check if it is able to resolve the problem or not.
Option 3 – Run the Blue Screen Troubleshooter
Troubleshooting Blue Screen of Death errors wouldn’t be complete without the Blue Screen troubleshooter. As you know, it is a built-in tool in Windows 10 that helps users in fixing BSOD errors. It can be found on the Settings Troubleshooters page. To use it, refer to these steps:
Tap the Win + I keys to open the Settings panel.
Then go to Update & Security > Troubleshoot.
From there, look for the option called “Blue Screen” on your right-hand side and then click the “Run the troubleshooter” button to run the Blue Screen Troubleshooter and then follow the next on-screen options. Note that you might have to boot your PC into Safe Mode.
Option 4 – Try running the DISM tool
You can try running the Deployment Imaging and Servicing Management or DISM tool to fix the Blue Screen error. Using this built-in tool, you have various options such as the “/ScanHealth”, “/CheckHealth”, and “/RestoreHealth”.
Open the Command Prompt with admin privileges.
Then type in the following commands and make sure to hit Enter right after you type each one of them:
Dism /Online /Cleanup-Image /CheckHealth
Dism /Online /Cleanup-Image /ScanHealth
exe /Online /Cleanup-image /Restorehealth
Do not close the window if the process takes a while as it will probably take a few minutes to finish.
Graphic cards are essential to our computers but from time to time in the race to make better GPU and to grab a large portion of the market bad drivers get released and can create really unwanted and unpleasant experiences, from Windows freezes to the black screen of death, to AMD driver Windows crashing down and many more.
This article will cover basic troubleshooting with AMD drivers and offer you solutions on how to fix them.
Rollback the previous version of the driver.
Installing the new driver version is the reason for this particular error, so naturally rolling back the previous version which was stable and did not cause issues will solve the problem.
To roll back the previous version of drivers follow the next steps:
Open Start menu and click on settings, go to system and choose Apps and features
Find: AMD Catalyst Install Manager, right-click on it, and choose to uninstall
Go to AMD official website and download the previous driver version, install it on your computer
Turn off automatic driver updates and reboot your system
Reinstall the driver
Sometimes it is not a bug in the released driver, it is a corruption of files because of file transfer or any other specific reason. The reinstalling driver will fix an issue if this is the case.
To reinstall the driver Press ⊞ WINDOWS + X and choose Device Manager
Expand Display adapters, right-click on AMD device and choose to uninstall
Go to the official AMD website, download the latest driver and install it
Reboot your system
Disable browser extensions
Some users have reported that error occurs only when they are watching videos online, if this is your case, go to your browser options and disable extensions to see if this will remove the problem.
Remove Lucid Virty MVP
If by any chance have this relic installed on your system, go to Applications and remove it. It is an old program shipped with old drivers and it is usually present in your Windows that was upgraded from 8.1 to 10. Uninstall it and see if this fixes your issue.
Clean your graphic card
Sometimes this error can happen due to excessive dust on your GPU, if you have the expertise, clean it or take it somewhere to be cleaned.
The latest Windows 11 update has brought with it not so popular widget from Windows 10, the weather widget that will reside into the taskbar and constantly show stuff like temperature, weather conditions, etc. The weather widget is not a bad thing but most users found it a little annoying and turned it off in Windows 10. If you wonder how can you do the same but this time inside Windows 11 please keep reading.
The first step is to right-click anywhere on the taskbar (in empty space) and choose Taskbar settings
Once the taskbar settings are opened, find Widgets and click on the switch on the far right to turn it off, immediately no more information will be shown on the taskbar and it will be free again. And that is all there is to it.
If you find that the scroll bar in your Google Chrome browser is missing all of a sudden, and it becomes difficult for you to scroll down the web page and see its content, worry not for this post will guide you on what you can do to resolve this problem.
Usually, when the mouse cursor stays hidden in the corner and only appears when you point it to the edge of the screen. However, there are instances when it won’t appear which makes navigating the web page you are visiting quite impossible. So if you encounter this kind of strange behavior on your Google Chrome browser, there are several suggestions you can check out to resolve it. In most cases, updating the browser resolves the problem, but if it does not, you can try restoring the browser’s settings to their default state by resetting Chrome or you could also disable hardware acceleration or disable the overlay scrollbars flag. For more information, follow each one of the options provided below.
Option 1 – Reset Google Chrome
Before you proceed, make sure that the Chrome browser is not running anywhere in the background via Task Manager. Once you’ve made sure that it’s no longer running, refer to these steps:
Tap the Win + R keys to open the Run dialog box.
Then type “%USERPROFILE%AppDataLocalGoogleChromeUser Data” in the field and tap Enter to open this location.
From there, look for the Default folder and then tap the Shift + Delete button and if a confirmation prompt appears, click on Yes.
After deleting the Default folder, open Google Chrome and click on the three vertical dots icon located in the top-right corner to open the menu.
Next, click on Settings and scroll down and then click on Advanced to open the Advanced Settings.
Then scroll down until you see the “Reset and clean up” section and click the “Restore Settings to their original defaults” option.
After that, you will see a confirmation box and from there, click on the Reset settings button to reset your Google Chrome browser.
Option 2 – Try to disable the Hardware Acceleration
For better performance, Google Chrome uses the Hardware Acceleration by default. Unfortunately, there are just some cases when your hardware, GPU to be specific, might not be able to cope with the requirements, resulting in the black screen issue. And if this is your case, you should try to disable the hardware acceleration from your Google Chrome browser settings panel. To do so, follow the steps below.
Open the Google Chrome settings page.
Click on the Advanced button to get more options.
Look for the option called “Use hardware acceleration when available” and then disable it by toggling the button to the left.
After that, check if the screen flickering issue in Chrome is fixed.
Option 3 – Try to disable “Smooth Scrolling” in Chrome
Disabling “Smooth Scrolling” in Chrome might also help you fix the issue. To do so, follow these steps:
Open Chrome and type “chrome://flags” and hit Enter.
Next, look for a flag named “Smooth Scrolling”. You can scroll down until you find it or search it in the Search Flag bar. Note that Smooth Scrolling is enabled by default in the newer versions of Chrome.
After that, select the drop-down menu and select Disabled.
Thorconnwndclass error is an Outlook error that has recently reared its head.
Known to create several problems in the proper functioning of the Outlook application, this error is essentially a constituent of the Norton Antivirus Crash Guard Symantec component. That’s why those using the Norton Antivirus program are most likely to encounter this error.
Solution
Error Causes
When the Thorconnwndclass error occurs, the Outlook closes unexpectedly, users encounter problems while sending or receiving emails and, performance of Outlook is degraded and this happens because issues arise while accessing the PST file. Because of this damaged PST file, stored data is unavailable for access.
Other factors that trigger the Thorconnwndclass error are listed below.
Corrupt or damaged Outlook Add-ins
Corrupt or damaged Outlook bar
Unfinished Outlook installation
Faulty settings
Thorconnwndclass Norton is being used with Outlook
Regardless of the underlying factors that lead up to the occurrence of this error, it's of paramount importance that workarounds are implemented to ensure desired performance of Outlook in the long run.
Further Information and Manual Repair
While there are several ways to rectify this error, some of the most common ones are listed below as follows.
The most effective solution is the PST file repair tools available online. These tools use a complex algorithm and thoroughly scan the PST file and repair it as needed. This resolves the Thorconnwndclass error that one encounters in Outlook. Usually such software have an easy to use interface and can easily be used, without the need for the user to have a strong technical background. Another advantage of using these software available online is that they not only repair the file, but they often play a pivotal role in retrieving inaccessible or lost data.
Some other tips for manually resolving this problem are listed below as follows.
First and foremost, disable your Norton Antivirus program if it’s installed on your system. Now, open the Outlook application in Safe Mode. Since this problem may also be triggered by damaged or corrupt Outlook add-ins, it is strongly advised that you disable or uninstall them. Now, you will come across some .dat files. Rename them by changing the existing .dat files to new .dat.
Another useful approach is to employ the Inbox Repair tool offered by Outlook.
Finally, one can also use the scanpst.exe file to fix any problem or error that resides within the Outlook application.
Windows 11 release date is closing in, some people have tried it via insider build, some have decided not to. It has come to our attention that there is a little website made by BlueEdge that offers a virtual Windows 11 desktop.
Opening the Website will put you right inside Windows 11 desktop, now take note that this is not Windows 11, it is a simulation of Microsoft’s newest OS and therefore many things will not work like File Explorer, etc.
One thing you can make sure it is working is UI itself, you can see how you do like the new Taskbar, start menu, widgets, and some other things. You can just pop up on the site and check how you do like the overall new look and feel of Windows 11 UI before installing it or trying it.
We are sure that many more options will come in time but even now you can get a feel of the newest OS.
Windows 11 BlueEdge site: https://win11.blueedge.me/
If you are trying to install a Windows 10 upgrade but was interrupted with an error saying, “0x80070003 – 0x2000D, The installation failed in the SAFE_OS phase with an error during MIGRATE_DATA operation”, then you’ve come to the right place as this post will help you sort this problem out.
When you get this kind of error while trying to upgrade your computer, although there could be various reasons for this, the primary one is that when you upgrade from one update to another, something stopped the upgrade process to migrate the user data. To fix this error, you can try to run both the DISM tool and the System File Checker to automatically repair any corrupted system files. You could also try checking the free storage space of your primary drive and if you have any file lock apps like BitLocker, consider disabling them for they could also be the reason why you’re getting the error.
Option 1 – Run the DISM tool
Running the DISM Tool helps in repairing the Windows System Image as well as the Windows Component Store in Windows 10 which might be the reason behind the Windows Upgrade error 0x80070003 – 0x2000D. Using this built-in tool, you have various options such as the “/ScanHealth”, “/CheckHealth”, and “/RestoreHealth”.
Open the Command Prompt as admin.
Then type in this command: exe /Online /Cleanup-image /Restorehealth
Do not close the window if the process takes a while as it will probably take a few minutes to finish.
Once it’s done, restart your computer and then check if the issue is resolved or not on the next startup.
Option 2 – Run the SFC scan
The SFC or System File Checker scan could detect and automatically repair damaged system files that could be causing the Windows Upgrade error to appear. SFC is a built-in command utility that helps in restoring corrupted files as well as missing files. It replaces bad and corrupted system files to good system files. To run the SFC command, follow the steps given below.
Tap Win + R to launch Run.
Type in cmd in the field and tap Enter.
After opening Command Prompt, type in sfc /scannow and hit Enter.
The command will start a system scan which will take a few whiles before it finishes. Once it’s done, you could get the following results:
Windows Resource Protection did not find any integrity violations.
Windows Resource Protection found corrupt files and successfully repaired them.
Windows Resource Protection found corrupt files but was unable to fix some of them.
Reboot your PC.
Option 3 – Try checking the free storage space on your primary drive
The next option you can try to resolve the error is to see if you have enough free storage space on the primary drive because if you don’t then it’s probably the reason why you’re getting this error. To fix it, you need to free up some storage space by following these steps:
Open Setting > System > Storage from the WinX Menu.
From there, you will see a list of all the local and connected storage devices along with the details on the free space.
Now make sure that the Storage Sense feature is turned On then go find a link that says “Free Up Space” and click it to open.
After that, a screen which is the built-in program in Windows 10 will appear and will scan your computer for the following junk files so you can free up disk space:
Windows Upgrade Log Files
System created Windows Error Reporting Files
Thumbnails
Temporary Internet Files
Previous Windows Installation Files
Delivery Optimisation Files
DirectX Shader Cache
Note: Once you’re done freeing up space on your drive, try to run the setup file again.
Option 4 – Try disabling BitLocker and other file lock apps
If you are using BitLocker or other file lock apps, then it could be the reason why you’re getting the error. Usually, file lock apps don’t cause any kind of issue, however, if you have something that works on file level like BitLocker, you can try to disable it. Once you’ve disabled it, try to install the Windows 10 Upgrade again and after you do, enable BitLocker again. This should fix the problem.


 The first step is to right-click anywhere on the taskbar (in empty space) and choose Taskbar settings
Once the taskbar settings are opened, find Widgets and click on the switch on the far right to turn it off, immediately no more information will be shown on the taskbar and it will be free again. And that is all there is to it.
The first step is to right-click anywhere on the taskbar (in empty space) and choose Taskbar settings
Once the taskbar settings are opened, find Widgets and click on the switch on the far right to turn it off, immediately no more information will be shown on the taskbar and it will be free again. And that is all there is to it.  Error Causes
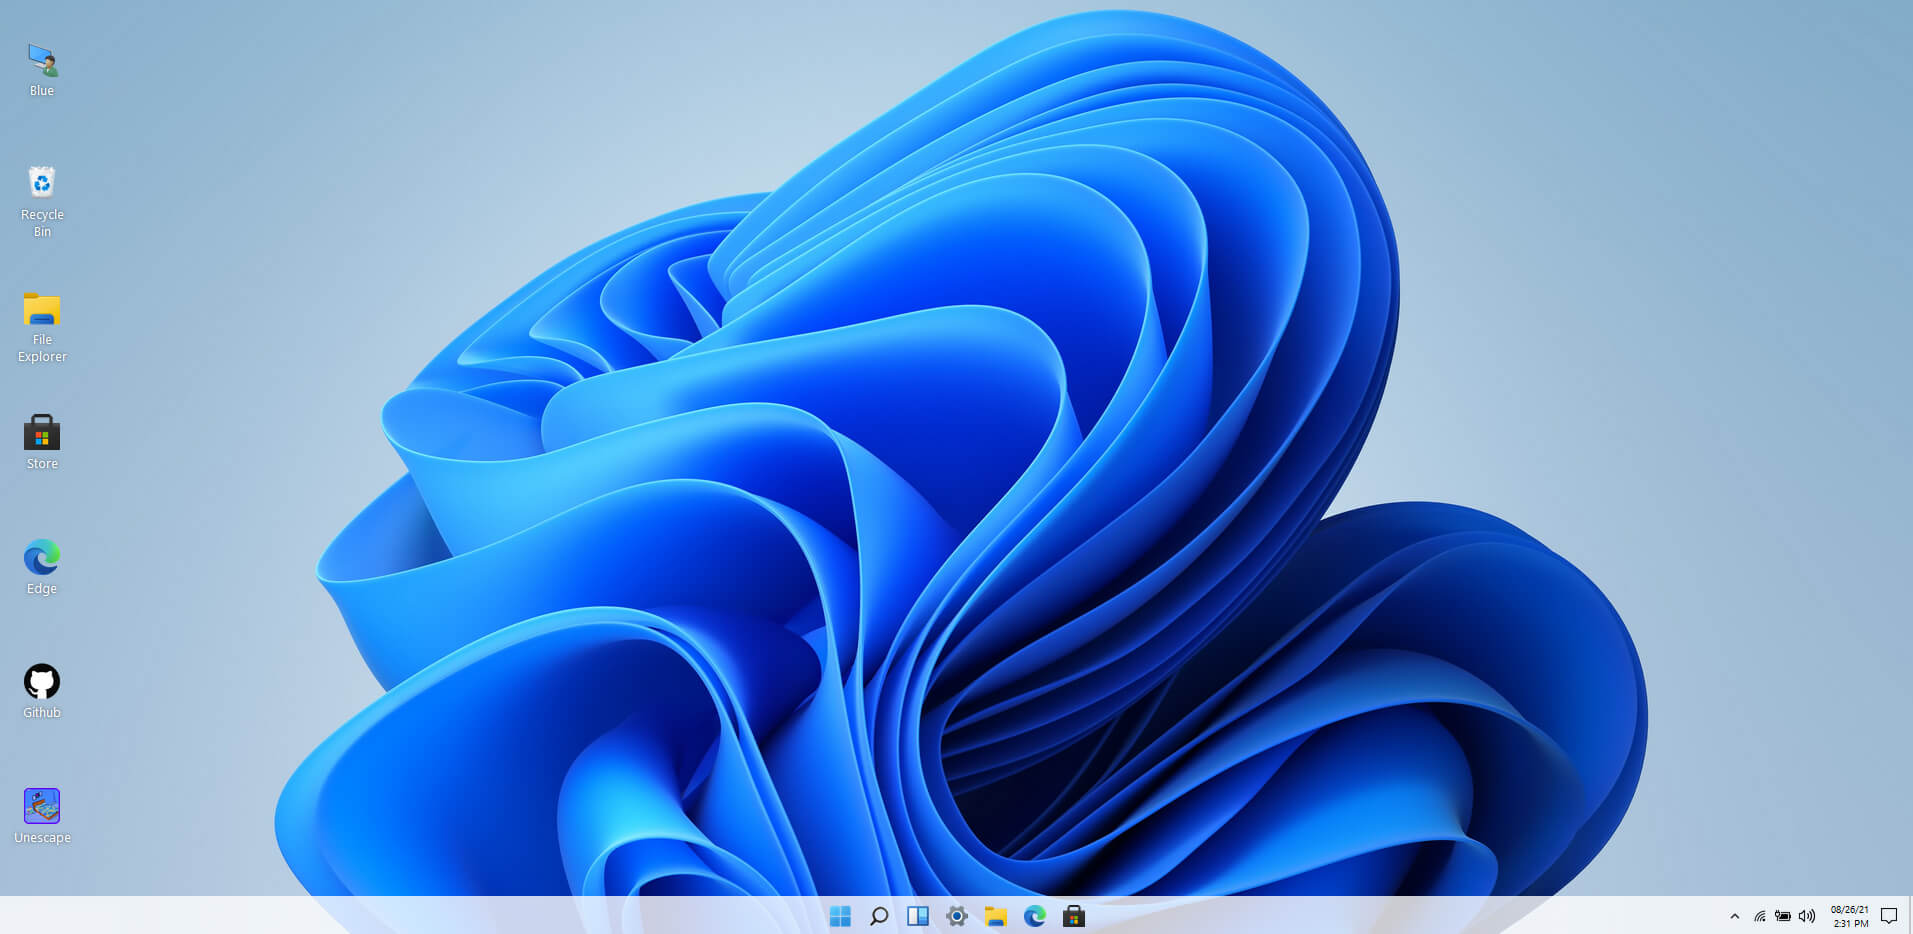 Windows 11 release date is closing in, some people have tried it via insider build, some have decided not to. It has come to our attention that there is a little website made by BlueEdge that offers a virtual Windows 11 desktop.
Opening the Website will put you right inside Windows 11 desktop, now take note that this is not Windows 11, it is a simulation of Microsoft’s newest OS and therefore many things will not work like File Explorer, etc.
One thing you can make sure it is working is UI itself, you can see how you do like the new Taskbar, start menu, widgets, and some other things. You can just pop up on the site and check how you do like the overall new look and feel of Windows 11 UI before installing it or trying it.
We are sure that many more options will come in time but even now you can get a feel of the newest OS.
Windows 11 BlueEdge site:
Windows 11 release date is closing in, some people have tried it via insider build, some have decided not to. It has come to our attention that there is a little website made by BlueEdge that offers a virtual Windows 11 desktop.
Opening the Website will put you right inside Windows 11 desktop, now take note that this is not Windows 11, it is a simulation of Microsoft’s newest OS and therefore many things will not work like File Explorer, etc.
One thing you can make sure it is working is UI itself, you can see how you do like the new Taskbar, start menu, widgets, and some other things. You can just pop up on the site and check how you do like the overall new look and feel of Windows 11 UI before installing it or trying it.
We are sure that many more options will come in time but even now you can get a feel of the newest OS.
Windows 11 BlueEdge site: