To function properly and as intended, Windows 10 depends on a number of resources and software components. Even with a simple task as powering the machine, there are already several smaller software components supporting it. However, if any of these resources or components experience issues, it will affect the overall function of the computer. One of the errors reported is the Kernel Power Blue Screen error which is triggered by the Windows Kernel that mostly comes with a Windows Kernel Event ID 41 error. This kind of error can turn off and reboot the computer randomly.
Here’s an example of a Bugcheck code entry with the same event:
“EventData
BugcheckCode 159
BugcheckParameter1 0x3
BugcheckParameter2 0xfffffa80029c5060
BugcheckParameter3 0xfffff8000403d518
BugcheckParameter4 0xfffffa800208c010
SleepInProgress false
PowerButtonTimestamp 0Converts to 0x9f (0x3, 0xfffffa80029c5060, 0xfffff8000403d518, 0xfffffa800208c010)”
This kind of BSOD error is caused by an issue with the Power Supply components in both the software and hardware parts of your computer. In such cases, if your computer is stuck in a reboot loop, you need to troubleshoot the problem via Safe Mode or in the Advanced Startup options screen.
Option 1 – Try disabling Overclocking
If you have enabled Overclocking, you might have to disable it as some users reported that the Kernel-Power Blue Screen error started to appear right after overclocking. To disable it, follow the steps below.
Go to the Start Menu and open Settings.
Next, select Update and Security and go to the Recover tab.
From there, click on Restart now in Advanced startup. This will restart your computer.
Once you’re in the Advanced startup, go to Troubleshoot and then select Advanced Options.
From there, select the UEFU Firmware Settings.
Now click on Restart. Once your computer has restarted, it will automatically open BIOS.
From the BIOS, go to the Advanced tab and navigate to Performance and then look for Overclocking.
Once you’ve found Overclocking, make sure that it is disabled. If it’s not, then disable it and then save the changes made by tapping the F10 key.
Start your computer normally and check if the Kernel-Power Blue Screen error is now fixed.
Option 2 – Try to run the Power troubleshooter
The next thing you can do is to run the Power troubleshooter. To do so, follow these steps:
Go to Settings and navigate to Update & Security > Troubleshoot.
After that, look for the “Power” option from the given list of built-in troubleshooters and click on it.
Next, click on the “Run the troubleshooter” button to run the Power troubleshooter.
Once the troubleshooter is done identifying the problems, follow the next on-screen instructions to resolve the problem.
Note: You could also try to run the Blue Screen troubleshooter to fix the Kernel-Power BSOD error. You can find it under the same page as the Power troubleshooter.
Option 3 – Try to replace the Power Supply Unit
You could also try to consider physically replacing the Power Supply Unit or PSU of your computer and see if that helps or not.
Option 4 – Run the Windows Memory Diagnostic tool
Since this error could be caused by some issues in the memory, you can try running the Windows Memory Diagnostic tool and see if it helps.
Tap the Win + R keys to open Run and type exe and hit Enter to open the Windows Memory Diagnostic Tool.
After that, it will give two options such as:
Restart now and check for problems (Recommended)
Check for problems the next time I start my computer
Once your computer has restarted, perform a basic scan or you could also go for the “Advanced” options such as “Test mix” or “Pass count”. Simply tap the F10 key to start the test.
Note: After you select the option, your PC will restart and check for memory-based issues. If it finds any issues, it will automatically fix them and if there’s no issue found, then it’s most likely not a memory-based issue so you should try the other options given below.
Option 5 – Try to check physically check your RAM
In this option, you have to check your RAM physically especially if you tend to use multiple physical RAMs on your computer so it can be quite tricky and technical. You have to check first if they are of the same frequency and then verify if the chip is compatible or not. You also have to check if the sockets are attached using some adapter or non-recommended apparatus as it can cause some problems while giving performance hit to your computer.
Option 6 – Try to update the BIOS
Updating the BIOS can help you fix the Kernel-Power BSOD error but as you know, BIOS is a sensitive part of a computer. Even though it is a software component, the functioning of the hardware depends on it largely. Thus, you must be careful when modifying something in the BIOS. So if you don’t know much about it, it’s best if you skip on this option and try the other ones instead. However, if you are well-versed in navigating the BIOS, then follow the steps below.
Tap the Win + R keys to open the Run dialog box.
Next, type “msinfo32” in the field and press Enter to open System Information.
From there, you should find a search field on the bottom where you have to search for the BIOS version and then press Enter.
After that, you should see the developer and version of the BIOS installed on your PC.
Go to your manufacturer’s website and then download the latest version of BIOS on your computer.
If you are using a laptop, make sure that you keep it plugged in until you have updated the BIOS.
Now double click on the downloaded file and install the new BIOS version on your computer.
Now restart your computer to apply the changes made.
Note: If updating the BIOS didn’t help, you might want to consider resetting it instead.
Option 7 – Disable Fast Start-up
If you want your computer to boot faster, then you might have enabled Fast Start-up. This feature is ideal for computers that are using a hard disk drive. However, turning on this feature also means that when the computer boots, it might lag some drivers that are loaded when it initially boots up. Thus, it might be the potential cause of the Kernel-Power BSOD error. Thus, you need to disable Fast Start-up. To do that, follow these steps:
Boot your PC into Safe Mode.
Then tap the Win + R keys to open the Run dialog box.
Next, type in “control” to open Control Panel.
After that, select Hardware and Sound and click on Power Options.
Select “Choose what the power buttons do” from the left side menu pane and click on Change settings that are currently unavailable.
Afterward, uncheck the “Turn on fast startup (Recommended)” entry and click on Save Changes.
Now restart your PC for the changes to take effect and then check if the problem’s fixed afterward.
When trying to run Computer Management, or when running mmc.exe or compmgmt.msc from a command prompt you get the error that the application has been blocked for your protection then keep reading in order to solve the issue. This is a permission issue where if a regular user tries to run such system tools will result in saying that it has been blocked. Along with this, you may have a Group Policy issue. This can be fixed, but you will need admin permission to achieve it. It’s because when they are run from the command prompt with elevated privileges, it works.
Change Group Policy Settings
If your account is an admin account, and you are still facing the issue, then change the group policy settings:
Open Group Policy Settings by typing gpedit.msc in the run prompt followed by pressing ENTER
Navigate to User Configuration > Administrative Templates > Windows Components > Microsoft Management Console > Restricted/Permitted snap-ins
Locate Computer Management policy, and double click to open it
Enable it, exit Group Policy.
When Enabled: The snap-in is permitted and can be added into the Microsoft Management Console or run from the command line as a standalone console.
When Disabled: The snap-in is prohibited and cannot be added into the Microsoft Management Console or run from the command line as a standalone console. An error message is displayed stating that the policy is prohibiting the use of this snap-in.
Temporarily disable UAC
UAC is the user access control panel, and if you need to run the command right away, you can choose to disable it for some time. Click on the Start button, and then type UAC to find the User Account Control Settings.
Click to open, and then slide down the notification setting at the bottom. It will temporarily allow launching the application as there is no check. However, make sure to switch to default once you are done.
Facebook has an algorithm inside it that can recognize your face in pictures and videos which is meant to help people tag friends when they upload media into Facebook. It is a neat feature meant to help all Facebook users but what if we do not want to be detected in pictures and videos? What if we do not want to be tagged?
If you are one of the Facebook users that do not wish to be detected and recognized by Facebook in media keep on reading to find out how you can disable this option.
Open the Facebook website and log into your account.
Click on the arrow visible in the top menu bar.
Select the Settings & privacy option.
Click on the Settings option.
Switch to the Face recognition tab on the left-hand side.
Click the Edit button.
Select No from the drop-down list.
And you are done, you do not need to log out or restart facebook in order for changes to have an effect. Now you are free from face recognition and detection.
It really sucks when you can’t fully enjoy the newest version of your favorite OS.
Windows 11 is still relatively fresh and consequently has some annoying little bugs that really ruin our experience. The good news is that you’re not alone and most of them are easy to fix.
Here are 5 commonly reported Windows 11 issues and what you can do to get rid of them.
1. Windows 11 audio problems
One of the absolute most irritating things in the world is struggling with the sound on your computer. Windows 11 users have reported facing the issue of low or no sound. If you’re currently experiencing the same frustration, you can be relieved. Chances are fixing it will only take a few minutes.
The first thing to check would be whether you accidentally muted your device by pressing the mute button on your keyboard. Yes, we know it sounds a lot like the old “have you tried turning it off and on again?” But it’s important to leave no stone unturned, and the most obvious things are usually the ones we easily overlook.
Moreover, if you have several audio output sources, check whether the right one is selected. You can do this via the Action Center or through Settings. If you want to use the same source every time, we also recommend you set it as the default one.
It’s also important to have a good, up-to-date audio driver. More often than not, this will be the true cause of your audio struggles. Make sure to update your driver, and if that doesn’t work out, you can always un- and reinstall it or install a different one.
Lastly, if all attempts remain unsuccessful, run the audio troubleshooter to figure out what’s actually going wrong.
2. Unable to find files
Such a powerful new operating system, yet it can’t seem to do the simplest thing imaginable? The File Explorer not responding on Windows 11 is one of the most frustrating and most common problems with Microsoft’s newest iteration of its awesome OS.
However, 9/10 times it can be fixed by simply restarting your PC. You could also try killing the Windows Explorer process in the Task Manager and then rerunning it.
If these don’t help, check whether there are any pending Windows 11 updates. A single missing update can compromise your PC’s functionality, so always make sure to install them all on time.
Should none of that work, then there are other ways to solve the File Explorer problem. However, then the issue is probably a bit deeper and it’s no longer in the ‘easy fix’ territory.
3. Start menu not working
Just like the File Explorer, the Start menu is a fundamental element of your OS. So, it’s only natural that its malfunction grinds your gears. It may be more customizable than on previous Windows versions, but it doesn’t always work smoothly.
If you’re facing the so-called Start menu critical error, there are a few things this could be caused by. Usually it means you turned off your system while an important update was still being installed, there is a corrupt file on your PC, or Windows forcefully stopped a program.
Whatever the reason, the solution should be pretty simple. Try the basic steps: restarting your File Explorer (like we explained above) and signing out and back into your account. If that doesn’t do anything, you may want to try uninstalling third-party start menu apps (if you have any), since they can interfere with your default programs’ functionality.
Now, those are the easy fixes. If you get nowhere with them, you might need to identify the root cause and search for more complex solutions than that.
4. Snipping tool not working
Our beloved screenshot tool was introduced with Windows 10 and Microsoft decided to keep it. However, you were probably just as disappointed as us when you tried to run it and failed.
Normally, this can be fixed by installing the latest Out-of-band (OOB) update, or even pending updates in general. Even if your system appears to be up-to-date, run the checker just in case.
Another cool thing Windows 11 lets you do is ‘Repair’ and ‘Reset’, which is the easiest way to troubleshoot your Snipping tool. If this fails, you can also try the good old un- and reinstall method. Simply uninstall the tool through the Control Panel and reinstall it from the Microsoft Store.
Furthermore, in the case of an upgrade from Windows 10 to 11, it may be that the old Snipping tool version is interfering with the launch of the new one. If you don’t care that much about the additional options available with the enhanced screenshot tool, you can use the old version instead.
Simply go to your C Drive, find the Windows.old folder, search for the tool and open it from there. Make sure to pin it to your taskbar as well, if you know you’re going to use it often.
5. Can’t install the latest update
The latest Windows 11 version, 22H2, has brought tons of enhancements to our dearest operating system. Unfortunately, a lot of users still haven’t had the opportunity to experience it. A mere update of your OS version should be the one thing that goes smoothly, but sometimes that’s not the case.
Failure to install 22H2 can be caused by a few things. Most commonly, the issue is caused by lack of storage space or corrupted files, but there could be other culprits.
There are a couple of things you could try. For example, it’s crucial that your drivers be up-to-date and some important services be enabled. These are: Windows Modules Installer, Background Intelligent Transfer Service, Cryptographic Service, Windows Update services.
To enable them, search ‘Services’, find the service you need and right-click on it. Open ‘Properties’ and select the startup type ‘Automatic’.
It may also be necessary to unplug all peripherals that aren’t crucial and disable third-party antivirus tools until after the update is finished.
Ultimately, you can run the Windows Update troubleshooter to detect and fix other possible issues.
Summary
Tiny bugs like these are nothing out of the ordinary. That said, we still all hate when they happen.
Hopefully some of our solutions have helped you to a smoother Windows 11 experience. But if you’re still struggling, feel free to reach out to us. We’d be happy to help!
Updating your Windows 10 computer isn’t always as easy as it should be since there are times when you might encounter some errors along the way. One of these errors is the error code 0x80246017 that comes with the error message “WU_E_DM_UNAUTHORIZED_LOCAL_USER”.
According to Microsoft, the cause of this particular Windows Update error is that “The download failed because the local user was denied authorization to download the content”. So if you got this error when you tried updating your computer, read on as this post will provide you some suggestions on how you can fix it.
Before you troubleshoot the problem using the options given below, make sure that you are logged in as administrator. If you are already logged in as an administrator, follow each one of the options carefully.
Option 1 – Try to check the status of some Windows Update Services
Tap the Win + R keys to open the Run dialog box.
Next, type “services.msc” in the field and hit Enter or click OK to open Services.
From the list of Services, look for the following services and make sure that their Startup type is as follows:
Windows Update – Manual (Triggered)
Background Intelligent Transfer Service – Manual
After that, check if the Service status of the listed services above is set to Running. If they’re not, click on the Start button to start these services and then check if you can now enable the Windows Update service or not.
Option 2 – Try to grant Full Control of the System Volume Information directory
First, tap the Win + X key combination and then select Command Prompt (Admin) from the given menu.
After opening Command Prompt with admin privileges, type the following command and tap Enter to execute it:
Once the command is executed, it will run a batch of tasks and will show each one of their statuses on the command line window and once they’re done, exit Command Prompt.
Now restart your computer and see if it fixed the problem or not.
Option 3 – Try to disable your antivirus program or Firewall
Disabling the antivirus program or Firewall or any other security software installed in your computer is always a good idea you can try when the Windows Update process does not go smoothly. So before you try updating your computer again, make sure to disable the antivirus or security program and once the Windows Update is done, don’t forget to enable the antivirus program back again.
Option 4 – Try running the DISM tool
You can try running the Deployment Imaging and Servicing Management or DISM tool to fix the Windows Update error. Using this built-in tool, you have various options such as the “/ScanHealth”, “/CheckHealth”, and “/RestoreHealth”.
Open the Command Prompt with admin privileges.
Then type in the following commands and make sure to hit Enter right after you type each one of them:
Dism /Online /Cleanup-Image /CheckHealth
Dism /Online /Cleanup-Image /ScanHealth
exe /Online /Cleanup-image /Restorehealth
After that, wait until the process is finished and do not close the window as the process will probably take a couple of minutes.
Once it’s done, restart your computer.
Option 5– Run the Windows Update Troubleshooter
If the DISM tool didn’t work in fixing the error, you could also try running the Windows Update Troubleshooter as it could also help in fixing any issues related to Windows Update including the Windows Update error code 0x80246017. To run it, go to Settings and then select Troubleshoot from the options. From there, click on Windows Update and then click the “Run the troubleshooter” button. After that, follow the next on-screen instructions and you should be good to go.
Option 6 – Run Microsoft’s online troubleshooter
Running Microsoft’s online troubleshooter might also help you fix the Windows Update error code 0x80246017. This online troubleshooter is known to help in fixing Windows Update errors, it scans your computer for issues that might be causing the problem and then fixes them automatically.
C0000135 is a blue screen of death error code (BSoD) also referred to as the ‘Stop’ error. This error code usually pops up on the screen at startup. The system stops and displays the error code:
Stop: c0000135 {Unable to Locate DLL}The dynamic link library FILE_NAME could not be found in the specified path Default Load Path
Solution
Error Causes
There are multiple reasons behind the error code C0000135 BSoD such as:
Missing and damaged .DLL files which is linked to registry corruption
Malware attack
Viral infection
When this error code pops, the computer screen turns blue and hampers your ability to use Windows successfully. Nonetheless, if the error C0000135 is not repaired timely this error can cause a great deal of damage to your PC. It puts you at risk of:
Data Loss with possibly no chances of recovery
System Failure and crash
Cybercrime if malware is the underlying cause of the occurrence of the error code C0000135
To avoid serious PC damages and inconvenience it is advisable to repair this error immediately.
Further Information and Manual Repair
There are two ways to fix the error code C0000135:
Hire a Professional
Download Error Tools PC Repair
Hire a Technician
Hiring a professional can be costly. You may have to pay hundreds of dollars to the technician to resolve this issue.
However, the latter option is not only money-saving but also time-saving, convenient, and simple. In fact, it is so easy that even if you have no technical knowledge you can still work your way around it and repair the error in seconds.
Download Restoro
Restoro is a top-quality, efficient, and multi-functional PC fixer. It is integrated with cutting-edge technology.
It has a comprehensive suite of advanced utilities like an intuitive registry cleaner, powerful anti-virus, and a smart system stability detector. All of these exciting and highly functional features are combined together in one.
With this helper, you don’t need to search for the underlying cause of the error.
When you experience the BSoD error code C0000135 on your system all you have to do is run it for a scan and its intuitive in-built technology will detect the issues and causes in no time and display them to you in the form of a comprehensive scan report.
Once the scan is complete, you just have to hit the repair tab to resolve it. It’s that easy and fast!
Restoro is powered by a highly functional registry cleaner. This cleaner helps detect all the errors related to the registry.
It cleans the unnecessary files cluttering and damaging the hard disk including the junk files, invalid registry entries, internet history, and the files from the programs that you have uninstalled on your PC.
These files acquire a lot of disk space and damage .dll files as well.
Overloaded registry also slows down the system and the CPU and RAM then require more power to start and function.
The registry cleaner embedded in the Restoro removes and wipes out all this unnecessary clutter, clears up the disk space and repairs the damaged files, and corrupted registry, and thus resolves the error code C0000135 on your system.
Restoro also serves as a system optimizer. And when you repair issues on your PC with this helper, you’ll see a massive difference in the speed and performance of your computer. It will run smoothly and boot efficiently.
Restoro is safe to use. It is bug-free and used widely by PC users experiencing different types of PC-related issues including the error code C0000135. It has easy navigation and a user-friendly interface.
You can download and run Restoro on all Windows versions.
Click here to download Restoro today!
CinematicFanatic (by MyWay) is a browser extension for Google Chrome that may come bundled with other free software that you download off of the Internet. When installed CinematicFanatic will set the homepage and search engine for your web browser to http://search.myway.com
While browsing the internet with this extension installed, you will see additional ads, sponsored content, and even pop-up ads throughout your browsing sessions.
While CinematicFanatic is active, it will log user information, visited websites, product categories. This information is later used/sold to better display targeted ads through your web pages as sponsored content and banner ads.
CinematicFanatic has been marked as a Browser Extension by several popular anti-malware scanners, and due to its information-gathering behavior, it is recommended to remove it from your computer.
About Browser Hijackers
Browser hijack is a very common type of internet fraud where your web browser configurations are modified to allow it to do things you never intend. Browser hijacker malware is developed for many different reasons. These are typically used to force visitors to predetermined sites, manipulating web traffic to generate ad revenue. Even though it may seem naive, all browser hijackers are dangerous and thus always regarded as security risks. They not only screw up your web browsers, but browser hijackers can even modify the computer registry to make your PC susceptible to other forms of hacking.
How to know if your internet browser is hijacked
There are several symptoms of browser hijacking. Here are a few of them:
1. home-page is modified2. bookmark and the new tab are likewise changed3. The default search page of your browser is altered4. you’ll see multiple toolbars in your internet browser5. you will find random pop-ups start showing regularly6. websites load slowly and often incomplete7. You simply can’t access particular sites, particularly anti-malware websites.
How they get into your computer or laptop
Browser hijackers could use drive-by downloads or file-sharing websites or perhaps an e-mail attachment in order to reach a targeted computer. Many web browser hijackings originate from add-on programs, i.e., browser helper objects (BHO), toolbars, or plug-ins added to browsers to provide them additional functionality. A browser hijacker could also come bundled up with some freeware which you unintentionally download to your PC, compromising your internet security. Some of the well-known hijackers are CinematicFanatic, Babylon Toolbar, Conduit Search, Sweet Page, OneWebSearch, and CoolWebSearch.
Browser hijackers could disrupt the user’s web surfing experience greatly, keep track of the websites visited by users and steal financial information, cause difficulty in connecting to the net, and ultimately create stability issues, making applications and systems crash.
Browser hijacker removal
Certain browser hijacking could be easily reversed by discovering and removing the corresponding malware software through your control panel. Having said that, many hijackers are really tenacious and need specialized tools to eliminate them. Additionally, manual removals demand deep system understanding and thus can be a very difficult job for inexperienced computer users.
You might opt for automatic browser hijacker removal by simply installing and running an efficient anti-malware program. One of the top tools for fixing browser hijacker infections is SafeBytes Anti-Malware. It assists you to get rid of any pre-existing malware on your system and gives you real-time monitoring and protection from new threats. Together with the antivirus tool, a system optimizer, such as SafeBytes’s Total System Care, will help you in removing all related files and modifications in the computer registry automatically.
What To Do When You Cannot Download Safebytes Anti-Malware?
Viruses could cause a lot of damage to your PC. Some malware is designed to interfere with or block things that you’d like to do on your personal computer. It may not allow you to download anything from the net or it will stop you from accessing a few or all of the sites, especially the antivirus sites. If you’re reading this, chances are you’re stuck with a malware infection that is preventing you to download and/or install the Safebytes Anti-Malware program on your PC. Refer to the instructions below to remove malware in alternate ways.
Install in Safe Mode
In Safe Mode, you can change Windows settings, uninstall or install some applications, and get rid of hard-to-delete viruses and malware. In case the malicious software is set to load automatically when the PC starts, shifting into this particular mode may prevent it from doing so. In order to get into Safe Mode or Safe Mode with Networking, press the F8 key while the computer is starting up or run MSCONFIG and look for the “Safe Boot” options under the “Boot” tab. Once you’re in safe mode, you can try to install your anti-malware software program without the hindrance of the virus. Now, you can run the anti-malware scan to remove viruses and malware without hindrance from another application.
Switch to an alternate browser
Web-based malware could be environment-specific, targeting a particular browser or attacking specific versions of the browser. If you appear to have a virus attached to Internet Explorer, then switch to a different browser with built-in safety features, such as Firefox or Chrome, to download your preferred antivirus program – Safebytes.
Install and run anti-virus from the USB drive
Another solution is to store and operate an antivirus software program entirely from a Thumb drive. Adopt these measures to use a USB drive to clean your corrupted PC.
1) Download the anti-malware on a virus-free PC.2) Plug the Flash drive into the uninfected computer.3) Double-click the Setup icon of the anti-malware software to run the Installation Wizard.4) When asked, select the location of the pen drive as the place where you would like to put the software files. Follow the instructions on the computer screen to finish off the installation process.5) Transfer the USB drive from the uninfected computer to the infected computer.6) Double-click the EXE file to run the Safebytes program right from the pen drive.7) Hit the “Scan Now” button to start the malware scan.
SafeBytes Anti-Malware - More Protection For You
If you’re looking to purchase anti-malware for your computer, there are various brands and utilities for you to consider. A few of them are excellent, some are ok types, and some will damage your computer themselves! While looking for antivirus software, choose one that provides reliable, efficient, and complete protection against all known viruses and malware. Amongst few good applications, SafeBytes Anti-Malware is the highly recommended software for the security-conscious user.
SafeBytes can be described as a highly effective, real-time antivirus application that is created to assist the regular computer end user in protecting their computer from malicious threats. This tool can easily identify, remove, and protect your PC from the most advanced malware intrusions including spyware, adware, trojan horses, ransomware, worms, PUPs, parasites along other potentially harmful software applications.
SafeBytes carries a variety of features that can help you protect your PC from malware attacks and damage. A few of them are given as below:
Best AntiMalware Protection: By using a critically acclaimed malware engine, SafeBytes offers multilayered protection that is designed to catch and remove viruses and malware that are concealed deep inside your computer system.
Real-Time Protection: SafeBytes gives round-the-clock protection for your computer limiting malware attacks instantly. This utility will always monitor your PC for suspicious activity and updates itself regularly to keep abreast of the latest threats.
Safe Browsing: Safebytes allots all websites a unique safety score that helps you to get an idea of whether the website you’re about to visit is safe to view or known to be a phishing site.
Fast Multi-threaded Scanning: SafeBytes’s virus scan engine is one of the fastest and most efficient within the industry. It's targeted scanning tremendously increases the catch rate for viruses that are embedded in various computer files.
Light-weight Tool: SafeBytes is a lightweight and easy-of-use antivirus and anti-malware solution. As it uses minimal computer resources, this application leaves the computer’s power exactly where it belongs to: with you.
Premium Support: You will get 24/7 technical support to quickly resolve any issue with your security tool.
SafeBytes will keep your computer safe from most advanced malware threats automatically with hardly any input needed from you again. Now you may understand that this software does more than just scan and remove threats on your PC. If you’re trying to find a comprehensive anti-malware program that’s still simple enough to use, SafeBytes Anti-Malware is exactly what you will need!
Technical Details and Manual Removal (Advanced Users)
If you don’t want to use a malware removal software and prefer to get rid of CinematicFanatic manually, you may do so by going to the Windows Add/Remove Programs menu in the Control Panel and delete the offending program; in cases of web browser plug-ins, you could remove it by going to the browser’s Add-on/Extension manager. It is also recommended to factory reset your web browser settings to their default state.
Lastly, check your hard drive for all of the following and clean your registry manually to get rid of leftover application entries after uninstallation. Please note that only professional users should try to manually edit the registry because removing any single critical system file leads to a serious problem or even a system crash. In addition, some malware is capable of replicating itself or preventing its deletion. It is advised that you do the removal process in Windows Safe Mode.
If you encounter a Windows Update error with an error code 0x80070652 and an error message saying, “ERROR_INSTALL_ALREADY_RUNNING”, then it indicates that there was a previous Windows Update that was not installed successfully. This kind of Windows Update error typically happens when it gets stuck and so to resolve it, here are some suggestions that might help.
Option 1 – Restart your computer and try installing the Updates again
You can restart your computer and then try installing the updates once again. There are instances when a simple restart resolves Windows Update errors. Thus, after you restart your computer, check for updates once again and see if you’re still getting the error or not.
Option 2 – Try running the Windows Update troubleshooter
You might also want to run the Windows Update Troubleshooter as it could also help in fixing Windows Update error code 0x80070652. To run it, go to Settings and then select Troubleshoot from the options. From there, click on Windows Update and then click the “Run the troubleshooter” button. After that, follow the next on-screen instructions and you should be good to go.
Option 3 – Try downloading the Windows Update that failed
If the Windows Update that has failed is not a feature update and only a cumulative update, you can download the Windows Update and install it manually. But first, you need to find out which update has failed, and to do so, refer to the following steps:
Go to Settings and from there go to Update and Security > View Update History.
Next, check which particular update has failed. Note that Updates that have failed to install will be displayed under the Status column which has a label of “Failed”.
After that, go to the Microsoft Download Center and look for that update using its KB number and once you find it, download and then install it manually.
Note: You can also use the Microsoft Update Catalog, a service from Microsoft that provides a list of software updates that can be distributed over a corporate network. With the help of this service, it can be easier for you to find Microsoft software updates, drivers as well as fixes.
Option 4 – Try to restart the Background Intelligent Transfer Service
The Background Intelligent Transfer Service or BITS is a part of the Windows Update service and is the one that manages the background download of Windows Update, as well as scans for new updates and so on. And if Windows Update is experiencing some problems, you can try restarting BITS but make sure that you have admin privileges to do so.
Tap the Win + R keys to open the Run dialog box.
Next, type “services.msc” in the field and hit Enter to open Windows Services.
From the list of Services, look for the Background Intelligent Transfer Service and double-click on it to open Properties.
After that, you need to set the Startup type to “Automatic (Delayed Start) and click on Apply.
Now click the Stop button to stop BITS and then click the Start button to restart the service.
Click OK to save the changes made and then restart your PC.
Option 5 – Try to update Windows after a couple of minutes or an hour
There are times when the issue is from Microsoft’s end. It could be that there’s some issue with Microsoft’s server so it would be better if you give it a couple of minutes or an hour or so before trying to run Windows Update again.
Microsoft has officially announced details about the newest upgrades to its office 365 suite moving forward along with its new OS release.
It seems that Microsoft has listened to its user base and feedback since Word, Excel, and PowerPoint are getting much-needed redesign taking into account many suggestions from the community.
The new office should feel more like an application suite guiding focus on the interconnection of applications themselves providing users with a much more natural experience of using them.
The new office features so far
From Microsoft themselves:
“This Office visual refresh is based on feedback from customers who asked for a more natural and consistent experience within and between your applications, specifically on Windows. With this update, we deliver an intuitive, coherent, and familiar user interface, using the Fluent Design principles, across all your applications: Word, Excel, PowerPoint, OneNote, Outlook, Access, Project, Publisher, and Visio. We aligned this visual refresh with the design of Windows 11 to provide seamless experiences on your PC.”
It is always refreshing to hear when a company listens to its user base and actually does what is needed instead of trying to invent the wheel.
How to switch
Since beta is already rolling and if you have an active 365 subscription to office suite visual refresh will be automatically available to all Office insiders running beta channel builds. It can be turned on and off using the coming soon feature in the top right corner of the menu in any application.
Just click on the megaphone icon to open the coming soon pane and apply settings to all office apps.
Note that The Coming Soon feature is not available in Access, Project, Publisher, or Visio. If you turn on the visual refresh in any of the 4 apps mentioned above (Work Excel, PowerPoint, or OneNote), it will also be available in these 4 apps.
Difference themselves
The Home tab menu still has a familiar look with a few tweaks. For example, accessing frequently used Word commands will be a lot easier. By navigating to Designer > Show Quick Access Toolbar, users can add a customizable shortcut ribbon to Word that houses conveniently placed options.
Also, the office will not match your Windows operating system color theme so if you have a dark theme enabled, the office will also have a dark color theme.
Color palettes are more neutral, corners are a bit softer but customizable ribbons are a win here for me.
Conclusion
There was not much said other than visual upgrades and small tweaks that were supposed to make your life easier but then again Windows 11 itself is in the same boat.
I am not sure if this is a great update offering just some visual tweaks and focus on workflow mechanics or just being plain lazy and trying to cash in visuals as a completely new product.
Error 2738 is associated with the VBScript engine. VBScript is the abbreviation for Visual Basic Scripting. It is an Active Scripting programming language developed by Microsoft and modeled on Visual Basic. It is used with a fast interpreter in a large variety of Microsoft environments.
Error 2738 indicates that the VBScript engine is not registered properly on your PC. It occurs when you try to install or uninstall VBScript-supported applications on your system. The error message is displayed in the following format:
"Error 2738. Could not access VBScript run time for custom action."
Solution
Error Causes
There are several reasons for the error 2738 message pop up. These include:
Incorrect or corrupt registry entries on your system. These entries interfere with VBScript support in Windows thereby generating such error codes.
Removal of McAfee Antivirus
Windows registry values are not updated accurately during the uninstallation of McAfee Software
The Visual Basic Script is registered in the registry under the local user instead of the local machine
No matter what the cause of the error may be, it is recommended that you resolve the issue immediately without any delay.
Further Information and Manual Repair
Here are some of the easy and proven DIY methods to repair error 2738 on your PC:
Method 1
If the error 2738 occurs because the VBScript is not registered correctly, then follow these steps to resolve.
Go to the start menu, open Run, and type RegEdit in the box and then press OK. This will open the Windows Registry Editor.
Now type KEY_LOCAL_MACHINESOFTWAREClassesCLSID{B54F3741-5B07-11cf-A4B0-00AA004A55E8}InprocServer32, if the key does not have a data value of C:\Windows\System32\vbscript.dll then simply add it.
Now go to the All programs option and then Accessories.
Here right-click on Command Prompt and then ‘Run as Administrator’.
Now type egsvr32 vbscript.dll then press enter. After that type regsvr32 jscript.dll and then press enter.
Restart your PC to activate changes.
Method 2
Sometimes error 2738 may occur when you uninstall preinstalled MacAfee antivirus software on your system. Un-installation usually leaves some trace components in the registry.
These components must be removed completely otherwise error codes like 2738 may keep occurring on your computer screen. In such an event, the best way to resolve it is to download the McAfee Consumer Product Removal utility from McAfee's official website.
Save this file on your desktop. Double click the file and follow the steps to remove this software completely and successfully from your PC. Proper removal of the McAfee program will resolve error 2738 right away.
But if the error still persists then try other methods illustrated below.
Method 3
Download Restoro to remove incorrect and corrupt registry entries on your system that may be interfering with VBScript support.
Restoro is a new and easy-to-use PC Repair Tool deployed with an intuitive interface and a powerful registry cleaner. The registry cleaner removes all entries corrupting the registry, cleans it, and resumes it to its normal state.
Click here to download Restoro.


 How to switch
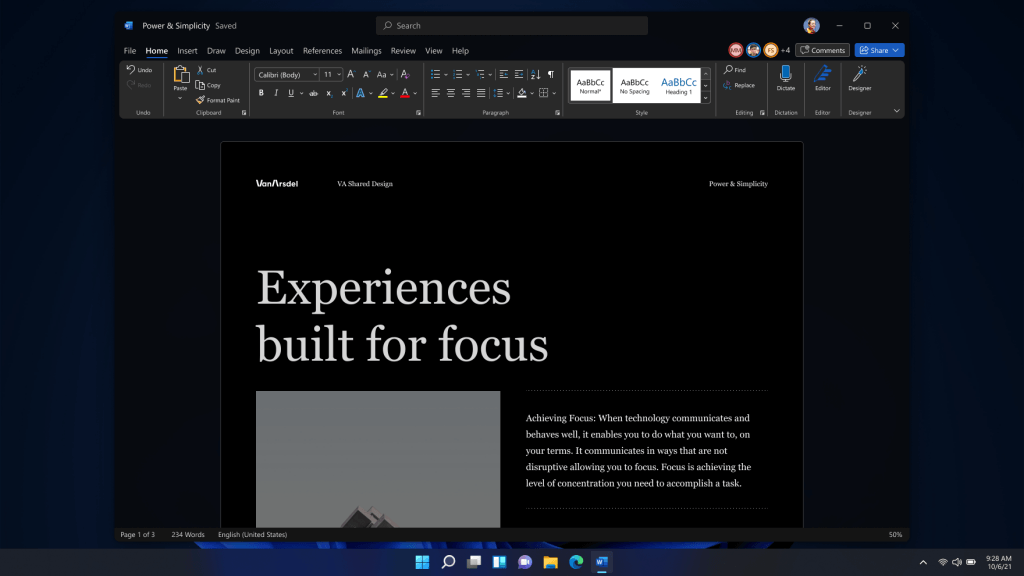 Conclusion