
Error Code 35 - What is it?
Error Code 35 is a typical Device Manager error. It indicates information missing to properly configure your device. Error code 35 is usually displayed in the following format:
“Your computer's system firmware does not include enough information to properly configure and use this device. To use this device, contact your computer manufacturer to obtain a firmware or BIOS update. Code 35”
Solution
 Error Causes
The 2 common reasons for Device Manager error code 35 are:
- Outdated BIOS
- Mis-configured, corrupted, or outdated Drivers
No matter what the reason may be, it is advisable to resolve the problem immediately without any delay otherwise you will be unable to use your hardware device.
Further Information and Manual Repair
Below is the list of the most effective and easy to perform solutions to resolve error code 35 on your PC. These solutions do not require any technical knowledge or understanding. Simply follow the instructions to resolve this error code.
Method 1 - Update the BIOS
BIOS (Basic Input/Output System) is the embedded software on the computer’s motherboard.
Though not all PCs have the same BIOS manufacturer, but the steps for updating the BIOS are similar for all versions. Before you get started with the updating process, first identify your current BIOS version.
- For this, go to the start menu and type msinfo32, and press enter.
- Now click System Summary to view your BIOS version. Here you will see the version number and date.
- Now check your PC motherboard manufacturer’s website to download the BIOS update for the model you own. Also, download any Read Me Files and documentation. These contain guidelines and precautions that you should know before you update.
- Backup all your data and existing BIOS before you update the BIOS version. This will keep your data protected in case the attempt to update BIOS fails.
- Also, when updating, make sure to use an uninterruptible power supply. Remember power outage or even a small power fluctuation can corrupt the BIOS which is something you don’t want.
- Now it’s time to perform the update. Run the downloaded installer for the BIOS updating software. Double click on the executable file.
- Look for a button names Update, Flash, or Run.
- Click on it to start updating the new version
- After the update is complete, your computer will restart automatically.
This will hopefully resolve the problem. However, if the error still persists then there is a possibility that the error code is related to outdated drivers. To resolve, try method 2.
Method 2 - Download Driver Assist to Update Drivers Automatically
Update drivers to repair error code 35 on your PC by simply downloading DriverFIX. This is a cutting-edge program deployed with an intelligent programming system.
It is compatible with all Windows versions.
It scans your PC for problematic drivers and updates them with the latest and compatible versions automatically and in a few seconds thereby repairing all Device Manager error codes including error code 35 generated due to outdated/corrupted drivers.
In addition to this, it updates all device drivers on a regular basis, so you don’t have to stress over and keep a track of what drivers on your PC need to be updated and when.
Click here to download DriverFIX to resolve Device Manager error code 35 today!
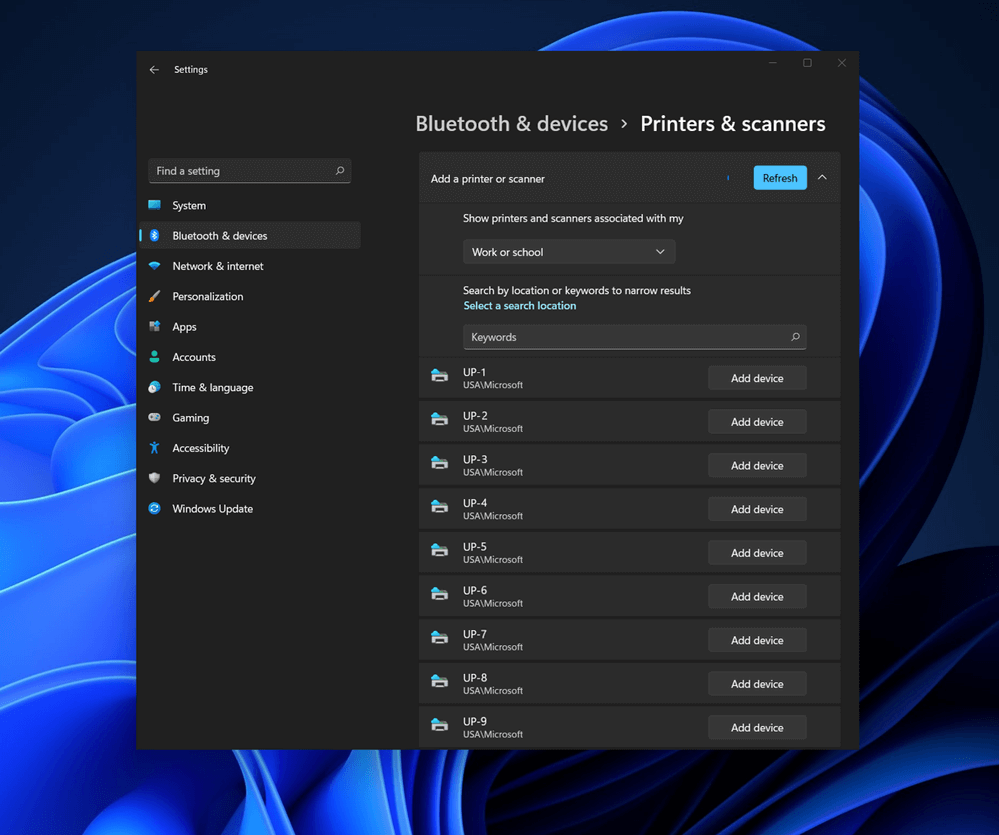 Bluetooth perhaps is slowly becoming an outdated feature but sometimes you can really used it and need it.
By default, in Windows 11 Bluetooth is turned OFF so if you need it, you will need to turn it ON first. Luckily turning it ON is easy and we will guide you through the process
Bluetooth perhaps is slowly becoming an outdated feature but sometimes you can really used it and need it.
By default, in Windows 11 Bluetooth is turned OFF so if you need it, you will need to turn it ON first. Luckily turning it ON is easy and we will guide you through the process

 Windows 11 release date is closing in, some people have tried it via insider build, some have decided not to. It has come to our attention that there is a little website made by BlueEdge that offers a virtual Windows 11 desktop.
Opening the Website will put you right inside Windows 11 desktop, now take note that this is not Windows 11, it is a simulation of Microsoft’s newest OS and therefore many things will not work like File Explorer, etc.
One thing you can make sure it is working is UI itself, you can see how you do like the new Taskbar, start menu, widgets, and some other things. You can just pop up on the site and check how you do like the overall new look and feel of Windows 11 UI before installing it or trying it.
We are sure that many more options will come in time but even now you can get a feel of the newest OS.
Windows 11 BlueEdge site:
Windows 11 release date is closing in, some people have tried it via insider build, some have decided not to. It has come to our attention that there is a little website made by BlueEdge that offers a virtual Windows 11 desktop.
Opening the Website will put you right inside Windows 11 desktop, now take note that this is not Windows 11, it is a simulation of Microsoft’s newest OS and therefore many things will not work like File Explorer, etc.
One thing you can make sure it is working is UI itself, you can see how you do like the new Taskbar, start menu, widgets, and some other things. You can just pop up on the site and check how you do like the overall new look and feel of Windows 11 UI before installing it or trying it.
We are sure that many more options will come in time but even now you can get a feel of the newest OS.
Windows 11 BlueEdge site: