If you are trying to install or reinstall a program on your Windows 10 computer but encountered an error instead that says, “Fatal error, Installation fails, Installation ended prematurely because of an error”, then you’ve come to the right place as this post will guide you how you can fix it.
This kind of error is most likely caused by some files that may have been left behind by the previous installation of the program. Each time a program is uninstalled, it leaves behind its files and if the uninstallation process wasn’t completed properly, then it would result in errors like the
“Fatal error, Installation fails, Installation ended prematurely because of an error”.
Moreover, this kind of error is a generic one that can also occur with any software reinstallation or installation. And to fix this error, there are several suggestions you must check out. You can try to install or reinstall the program in a Clean Boot State or restart the Windows Installer Service. You could also try to re-register the Windows Installer Service or re-register the VBScript.dll file.
It is possible that there are some third-party applications in your computer that are preventing the program from getting installed and to isolate this possibility, you need to boot your computer in a Clean Boot State and then try installing the program again. Putting your computer in this state can help you identify which program is the culprit and thus isolates the problem. In a Clean Boot state, your computer will start using only the pre-selected minimal set of drivers and startup programs. Note that you have to disable and enable one process at a time.
The next thing you can do to fix the problem is to restart the Windows Installer Service. To do this, follow these steps:
You may have to re-register the vbscript.dll file using the regsvr32.exe before you can successfully install the program and fix the error. The Regsvr32 tool is a command-line utility that can be used to register and un-register the OLE controls like DLL and ActiveX (OCX) control in the Windows operating system. Follow the steps below to use it.

MovieMode is a Potentially Unwanted Program developed by GenTechnologies Apps that allegedly ads a “Lights Off” function to video streaming websites like Youtube. This feature allows a user to dim the entire background around the video, allowing for better video focus. Although this sounds interesting and useful, upon further inspection it was discovered that this program does not work with modern browsers.
While installed, MovieMode may modify your browser settings, changing your home page, displaying additional ads, and other suspicious behavior. From the Terms Of Use: “Applications may be automatically enabled on your web browsers following installation. Applications or advertisements may require changing your web browser’s default home page, default page, or set of pages on startup, default search provider, and other browser settings. So that Applications can function most efficiently and with the least annoyance, Applications may modify or disable certain web browser or operating system features including, but limited to load time alerts, accelerator features, and Content Security Policy functionality. Applications may also include features to notify you when you are launching an application or visiting a web domain that may interfere with your installed Applications. “ 5 Essential IT skills everybody should know
 Error Causes
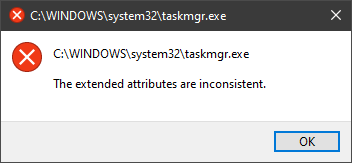 In this guide, we will show you common ways in fixing Extended Attributes are inconsistent errors inside your Windows that are easy to do and less time-consuming than complete reinstallation of the system.
Error Causes
In this guide, we will show you common ways in fixing Extended Attributes are inconsistent errors inside your Windows that are easy to do and less time-consuming than complete reinstallation of the system.
Error Causes“0x800f081E-0x20003, The installation failed in the SECOND_BOOT phase with an error during BOOT operation”In case you don’t know, Microsoft distributes special “N” editions of Windows in Europe and the “KN” editions in Korea. These editions are the same as the standard editions of Windows except that they do not have the Windows Media Player as well as the multimedia playback features. Thus, when the Windows Upgrade fails with the error code and error message and it doesn’t provide much information as to why the update couldn’t be installed, there is something you can do about it to fix the error. Since Windows uses generic error codes and so if you see the error code 0x800f081e, you have to check the error log first. For more details, follow the instructions laid out below. Step_1: You need to navigate to C:$WINDOWS.~BTSourcesPanther and from there look for the text file named “setuperr.log” and open it with a text viewer/editor program like Notepad. Step_2: After opening the setuperr.log file, you should see content that’s similar to this:
C:WINDOWSSoftwareDistributionDownload80b2677d6e15a2a206625bb25a7124feamd64_Microsoft-Windows-MediaPlayer-Package~~AMD64~~10.0.17134.1. Error: 0x800F081E 2019-09-10 20:26:57, Error SP Operation failed: Add [1] package C:WINDOWSSoftwareDistributionDownload80b2677d6e15a2a206625bb25a7124feamd64_Microsoft-Windows-MediaPlayer-Package~~AMD64~~10.0.17134.1. Error: 0x800F081E[gle=0x000000b7]Note: From the content above, it is clear that the Windows Upgrade failed due to complete due to the Windows Media Player. It could be that the log file may contain other error messages and other error codes and if you see the error code 0x800f081e from the list, then you need to uninstall the Media Feature Pack. Step_3: You have to uninstall the Media Feature Pack.
 I going to admit right here that I am a big fan of Cooler Master PC cases, I like them and they are always one of the things that I consider when building a new PC, overall I like their ideas and quality so personal for me it was quite a surprise to see that they are one that is making a new generation gaming chair.
Now truth to be told Orb X is not your typical gaming chair as you can clearly see from the pictures. The chair itself will come in two colors: white or black and RGB lighting looks to be prominently featured throughout.
I going to admit right here that I am a big fan of Cooler Master PC cases, I like them and they are always one of the things that I consider when building a new PC, overall I like their ideas and quality so personal for me it was quite a surprise to see that they are one that is making a new generation gaming chair.
Now truth to be told Orb X is not your typical gaming chair as you can clearly see from the pictures. The chair itself will come in two colors: white or black and RGB lighting looks to be prominently featured throughout.
 The chair itself is advertised as both meant and aimed for professional and gaming crowds but I believe the gaming crowd is in general more interested in this hardware piece.
Hardware is enclosed in a fully motorized shuttle dome which aims to maximize your privacy, it supports a single 49inch display or three 27inch monitors along with surround speakers if you do not wish to use headphones.
The chair itself is advertised as both meant and aimed for professional and gaming crowds but I believe the gaming crowd is in general more interested in this hardware piece.
Hardware is enclosed in a fully motorized shuttle dome which aims to maximize your privacy, it supports a single 49inch display or three 27inch monitors along with surround speakers if you do not wish to use headphones.
 It offers an adjustable headrest, lumbar support, and footrest so you can spend some time in it and be comfortable. Controls on the chair itself allow you to raise or lower the dome for easier getting in and out of it.
Orb X also has a compartment in its backside, it folds out and has a sliding tray designed to hold your PC or console. Everything is enclosed so wiring is not the issue.
Overall Orb X seems really like the computer chair of the future, Cooler Master expects to release the Orb X by December 2021, priced around $12,000-$14,000.
It offers an adjustable headrest, lumbar support, and footrest so you can spend some time in it and be comfortable. Controls on the chair itself allow you to raise or lower the dome for easier getting in and out of it.
Orb X also has a compartment in its backside, it folds out and has a sliding tray designed to hold your PC or console. Everything is enclosed so wiring is not the issue.
Overall Orb X seems really like the computer chair of the future, Cooler Master expects to release the Orb X by December 2021, priced around $12,000-$14,000.