If you are in the process of booting up your computer but suddenly encountered an error saying, “The Boot Configuration Data for your PC is missing or contains errors” with an error code of 0xc0000454, read on as this post will help you resolve the problem.
The error code 0xc0000454 occurs when you boot your computer and when the Windows Boot Manager encounters an issue with the Boot Configuration Data or BCD. The error code 0xc0000454 (STATUS_INSUFFICIENT_NVRAM_RESOURCES) signifies that there are no sufficient NVRAM or Non-Volatile Random Access Memory resources to complete the API. NVRAM is a component of the system based on the software that stores the Boot Configuration Data in an operating system. Usually, a simple restart can resolve the problem. However, if you’ve already done that and it’s of no use, then there are other potential fixes you can check out to troubleshoot the problem.
To resolve the error code 0xc0000454, here are some potential fixes that should help:
Option 1 – Try to repair corrupted BCD
As mentioned, the error could also be due to corruption in BCD, and to fix it, you can use Bootrec.exe – a built-in command-line tool used to troubleshot issues related to boot up and Windows Startup. Before you run this tool, make sure that you have inserted a bootable USB or DVD into your computer. Once you have that covered, follow these steps:
You need to go to the Advanced Startup Options.
Then click on Troubleshoot.
Next, select the Advanced Options and then Command Prompt.
Once Command Prompt has been pulled up, enter each one of the following commands and in the sequence that they are given to rebuild BCD files and repair MBR files:
Bootrec /Fixmbr
Bootrec /FixBoot
After you execute the commands given above, you should see a confirmation message that says, “The operation completed successfully”.
Now type the “Bootrec /RebuildBCD” command to rebuild BCD.
Finally, close Command Prompt and then restart your computer to successfully apply the changes made.
Option 2 – Try to run the Automatic Repair Utility
You might also want to use Automatic Repair in fixing the error. To do so, follow the steps below.
You can start by creating and booting from a bootable Windows 10 USB Stick.
After that, click on Repair your computer located on the bottom left corner when you are on the initial Windows Startup screen.
Next, click on Troubleshoot, and then on the other screen, click the Startup Repair option.
Now select the operating system you want to repair. Once you do that, it will start to repair your operating system. Wait until the process is completed and then check if the problem’s now fixed.
Option 3 – Disable the Secure Boot in the BIOS
Disabling the Secure Boot in the BIOS settings is definitely recommended to resolve the error. To disable Secure Boot, here’s what you have to do:
First, boot your computer into Windows 10.
Next, go to Settings > Windows Update. From there, check if there is anything that you have to download and install if you see any available updates. Usually, OEMs send and update the list of trusted hardware, drivers, and operating systems for your computer.
After that, go to the BIOS of your computer.
Then go to Settings > Update & Security > Advanced Startup options. If you click on Restart Now, it will restart your computer and give you all the advanced options.
Next, select Troubleshoot > Advanced Options. As you can see, this screen offers you further options including System restore, Startup repair, Go back to the previous version, Command Prompt, System Image Recovery, and UEFI Firmware Settings.
Select the UEFI Firmware Settings which will take you to the BIOS.
From there, go to the Security > Boot > Authentication tab where you should see Secure Boot. Note that every OEM has its own way of implementing the options so it varies.
Next, set Secure Boot to Disabled and set Legacy Support to On or Enabled.
Save the changes made and exit. Afterward, your computer will reboot.
Option 4 – Try to reset the BIOS
If updating the BIOS didn’t help in fixing the error, you can try to reset the BIOS instead.
Start your computer and tap the F10 key during the booting process to enter the BIOS. If it does not work, you can try tapping the F1 or F2 key as well as the Del key.
Once you’re already in the BIOS, tap the F9 key to get the prompt to RestoreLoad default configuration now for the BIOS.
Next, click on Yes and then follow the next on-screen instructions that appear to set the BIOS back to its default settings.
Once you’re done restoring the default settings of the BIOS, restart your computer and then check if it now boots properly.
Interesting information has come out from Microsoft, Windows 11 dark theme will include a different sound theme from its standard light one.
When in dark mode on Windows 11, the system sounds generally become softer, and they echo a bit, creating a more soothing experience that matches the overall look and feel of the dark mode. Flipping back to light mode brings the system sounds back to their normal level.
However, even though the light model has slightly louder sounds than the dark mode, Microsoft has taken great care to make sure the audio is more soothing, according to a report from CNBC.
The designers of Windows 11 took inspiration from an approach called calm technology. Microsoft’s Christian Koehn and Diego Baca wrote about calm technology in a post on Medium. In it, they said, “Windows 11 facilitates this through foundational experiences that feel familiar, soften formerly intimidating UI, and increase emotional connection.”
According to a Microsoft spokesperson in a statement to CNBC, “The new sounds have a much rounder wavelength, making them softer so that they can still alert/notify you, but without being overwhelming.”
Kindle is, without doubt, a great piece of hardware, perhaps it is the closest thing to a book within the domain of digital devices. With its low price and usability, it has found itself in many homes and within the grasp of many readers in the world. You can buy digital books in the Amazon store for fraction of a regular price if it digital Kindle edition. You keep your library in the cloud and download just books you want to read on your device.
In this article, we will explore how you can send your existing PDF or any other supported file that you already have to your kindle device so you can read it on it.
Before we begin, you should make sure the file you're trying to convert is compatible with the Kindle:
HTML
RTF
JPEG
GIF
PNG
BMP or
PDF
The compatible file types cover most formats you're likely using, but if you find the document you want on your Kindle isn't compatible, there are a few ways to convert it. In the program it typically opens into, like Microsoft Word for .doc files or an image editing apps for .PNG ones, select 'Save As', and in the drop-down menu, see if any of the compatible options are available.
If not, you could try a PDF converter tool. There are plenty of great paid options and a few good free ones too.
Transfering PDF
To get a PDF on a Kindle, you're going to need to know your Kindle's email address. You'll need to head over to the Amazon website and sign in first. Select 'Your devices and content', click 'Manage Devices'. You should see a list of the books you have assigned to your Kindle account, above this list, in a toolbar should be some options - you'll currently be on 'Content', which should be followed by 'Devices', 'Preferences' and 'Privacy Settings'. Click on 'Devices', and in the next menu, select the option for the Kindle you want the document on. You'll be brought to a Device Summary page which tells you your Kindle email as well as the type of device it is.
You now need to approve your personal email, so that when the Kindle receives your PDF, it knows to download this. Make sure the email you approve is the one you're planning to send documents to your Kindle from otherwise it won't work. To approve your email address follow the steps for finding your Kindle email address but instead of selecting 'Devices' in the top bar, click 'Preferences'.
Scroll down this list until you find Personal Document Settings, and select this option so it expands into more options. From here, scroll down until you find 'Approved Personal Document E-mail List'. This list will show people who can email stuff to your Kindle, Below the emails is an option to 'Add a new approved e-mail address', which you should select. Enter your email address and click 'Add address' to get yourself approved.
Head over to your email client of choice, attach the file to an email, and send the email to your Kindle email address. You're able to send multiple documents at once, so if you have loads of files you want on your Kindle, you don't need to send separate emails. If you're sending over a PDF file, you can ask Amazon to automatically convert the file into a Kindle one, which lets you annotate the sections and change the font size. Simply put the word 'convert' as the subject line and the rest will be handled for you. 'Sync Your Kindle'.
Microsoft will soon offer 4 CPU computer specifically aimed at developers and its name is Volterra. The machine as stated will come with 4 processors but the strange thing is that they will be ARM-based instead of x86.
CEO of Microsoft, mister Satya Nadella has introduced the product and Microsoft has released a youtube video promoting it.
https://youtu.be/yICVNta8jMU
The computer system will have Qualcomm's NPU or built-in neural processing unit to use AI's power to help developers write and produce better and faster code. The sad news is that besides processors used there is no other information on other components that will go into this system.
As seen in the video, the computer reminds me a lot of the apple MAC mini with its size and design, and as stated it is made from recycled plastic which in our opinion will bring the price under $1000.
Microsoft has not provided an official price tag for Volterra, but our hope is that it will be more affordable than building your own development PC. Also, there was nothing said about computer availability, we suspect that the selling model will be typical Microsoft one with first models available only in the USA and moving forward slowly opening it to other markets.
Volterra specifications
As previously said nothing except the number of CPUs and their type has been officially said but we managed to get some information about some other specific things not including its inside components.
The unit will have a fan inside of it for cooling purposes and better performance and that is what was officially stated by Microsoft. On the outside, it is known that the computer will have three USB-A ports, a mini DisplayPort, and an ethernet input. All of these will be positioned on the back of the device, on its left side there will be two USB-C ports.
The unit itself will be running on Windows 11 but it was not disclosed anything about the version, we presume since this is a model aimed for professional use that it will come with Windows 11 PRO version.
Currently available tools for ARM
Since this product is aimed at developers logically support for developing software is a must-have and at the time of this writing software that will come and that will run on Volterra is:
Visual Studio 2022
Visual Studio Code
Visual C++
Modern .NET 6 & JAVA
Classic .NET
Windows Terminal
Windows Subsystem for Android
Windows Subsystem for Linux
Conclusion
Once MAC studio has been released it showed that specific builds have their audience and can be sold for less of a price than full-fledged custom-made workstations. There is no doubt that Microsoft Volterra will find its audience but will that be enough to have more versions of this compact computer only time will tell.
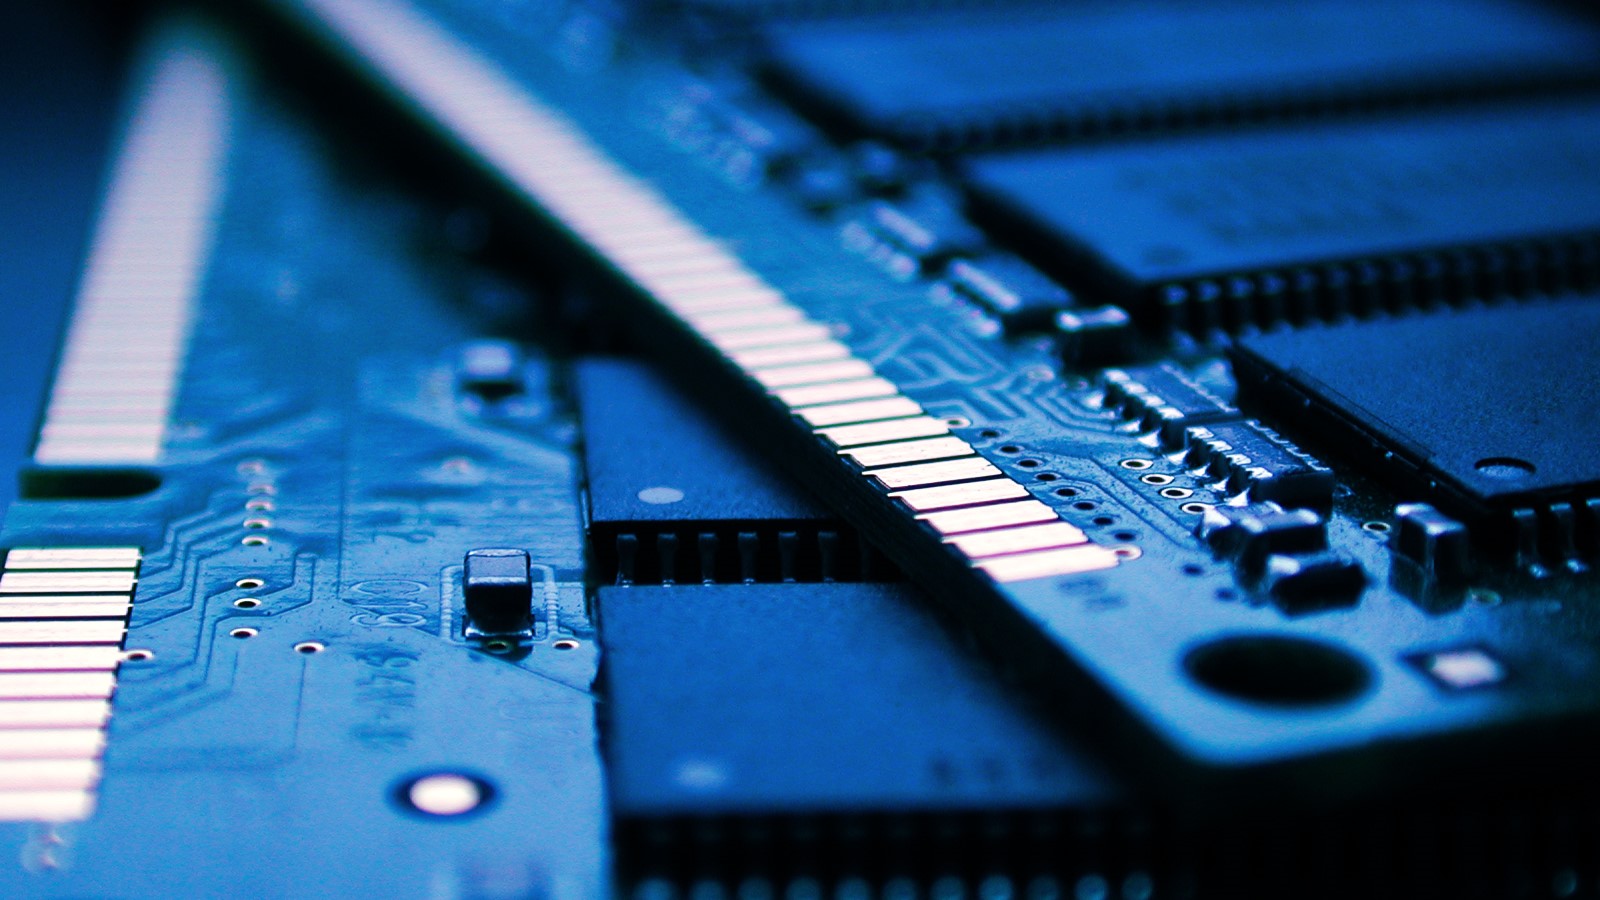
It has been reported that there are systems out there with Windows 11 operating systems that do not use the whole RAM memory installed in the system. If by any chance you are one of the unfortunate users that has encountered this issue, fear not, we have a solution for you.
Run the Windows Memory Diagnostic tool
Press ⊞ WINDOWS + S to open the search menu
Type in Windows Memory Diagnostic tool
Click on the found app
Select Restart now and check for problems
Wait for the tool to finish
Memory Diagnostic tool is a built-in tool in Windows, it was designed to automatically find and repair memory issues and should be your first step toward resolving this issue.
Check page file
Press ⊞ WINDOWS + S to open the search menu
Type in View advanced system settings
Click on the search result
Click on settings under performance
Click on the Advanced tab
Click on Change under Virtual memory
Uncheck the box for Automatically manage paging file size for all drives
Then select the drive and check the No paging file option
Click on Set
Repeat for all drives on the system
Reboot the system for changes to take effect
If after reboot system still does not see and use whole available RAM, repeat this process and turn back ON paging. After you are done move to the next solution.
Modify usable RAM
Press ⊞ WINDOWS + S to open the search menu
Type in System configuration
Click on the search result
Go to the Boot tab and click on Advanced options
Check the box for Maximum memory
Enter the installed RAM on your system in the field box and click on OK
Confirm once again on the OK and close the System configuration window
Restart the system
If the provided solution has not worked, uncheck the Maximum memory checkbox and save the changes. Move to the next solution.
Change and modify the registry
Press ⊞ WINDOWS + R to open the run menu
Type in Regedit and press the OK button or hit ENTER
Click on YES if prompted by UAC
Locate the HKEY_LOCAL_MACHINE\SYSTEM\CurrentControlSet\Control\Session Manager\Memory
On the right side find and double click on the ClearPageFileAtShutdownDWORD
Enter 1 under Value data and click on OK to save the changes
Close the registry and reboot the system
Enable memory remapping inside BIOS
In order to do this fix, you will need to enter BIOS on your system. How entering BIOS is different from system to system depending on your manufacturer, especially if it is a laptop this step you will have to do alone. Go to your motherboard manufacturer or laptop manufacturer and see how to enter BIOS.
Enter BIOS (80% of the time this can be done by pressing DEL or F12 while the system is turned ON)
Locate System Agent Configuration option
Select Memory Remap Feature and Enable it
Your BIOS might be different from ours and you might not have the System Agent Configuration option, in this case, go through the setting and try to locate Memory Remap Feature. If this feature is missing as well move to the next step.
Rearrange RAM modules on the motherboard
Sometimes RAM memory cannot be slotted properly or just purely switching them in slots can solve the issue. Take RAM out, clean memory slots, clean motherboard connectors for them, and place them back in a different order.
If by any chance none of the methods worked, then the issue might be in the hardware itself, either memory banks themselves, motherboard, power supply, etc. If this is sadly the case, you will have to locate the issue and replace the faulty part.
If you are not technical enough for this adventure, the best solution is to take a PC to a computer repair shop.
Security on your PC and on your accounts is the important thing. Security on your phone device is also very very important. That is why we are bringing you a list of 8 applications that are marked by the cybersecurity team as ones that could be used to steal data from you. If you have by any chance any of these applications installed, uninstall them immediately.
List is as follows:
Cake VPN (com.lazycoder.cakevpns)
Pacific VPN (com.protectvpn.freeapp)
eVPN (com.abcd.evpnfree)
BeatPlayer (com.crrl.beatplayers)
QR/Barcode Scanner MAX (com.bezrukd.qrcodebarcode)
We have all experienced Windows errors over time and that can range from simple ones that will do very little to no harm and can be even system breaking making us lose our work or completely making the PC unusable. No one likes them but they happen, and usually, they happen once we least expect them.
No matter how frequent and unpleasant they might be there are ways to keep them at the minimum and even avoid them.
We will discuss steps that you can take in order to do this, simple tips and guides on how to keep your computer in top form and eliminate not just Windows, but any kind of errors altogether.
Keep your hardware clean
Believe it or not, some serious Windows errors like the dreaded blue screen of death can come from hardware issues not from the software at all. It is very important to keep your computer clean and with enough air flow so it can function properly.
Keeping applications on the drive might seem harmless but sadly that is not the case. Some applications have a certain impact on the system itself after all most of them are tweaking registry entries in Windows and sometimes having too many applications means an increased possibility of conflict over certain resources even when they are not running.
Some applications like adobe creative suite, for example, will have certain services always running in the background, and more of these kinds of applications you have, more services, more places for unexpected errors when they collide. Some of them will also install certain dependencies that could be problematic.
The general idea is: if you are not using it, uninstall it and you will be safer and more resilient to errors inside OS.
Do not use pirated or cracked software
Besides moral and law implications that using pirated or cracked software might bring you there are also certain other things that might be problematic. Certain "free" software might come packet with some problematic malware, for example, it is not uncommon for attackers to use some popular software to pack their malicious application with it.
Other things might be wrong and incomplete tweaking with application in order to bypass security and thus bringing some instability due to scripts needed to run in order to achieve this goal.
Keep your drivers updated
Errors can also come from old drivers or bad drivers, device manufacturers are not all-knowing and perfect, and sometimes drivers can wreak havoc on the system. Having updated drivers can minimize any kind of unexpected behaviors inside the operating system making it more stable and reliable.
You can check your driver version in the control panel inside the Windows OS and then compare it to the ones found on the manufacturer's site, if there are newer available it is recommended to download and install them,
Keep software updated
Applications can have bugs, and bugs can lead to certain errors both in the system and when using the app as well. It is in your best interest to get the latest patch or newer version of the software in order to avoid these unpleasant experiences.
Also, certain codecs and extensions that are installed directly in Windows can also have some unpredictable behavior, updating is the best solution to keep them in line.
Keep Windows updated
Same as with drivers and applications, Windows itself is not immune from bugs and some unpredictable issues. Luckily Microsoft is always working on fixes and features of Windows but in order to actually have benefited from that work, you will need to keep Windows updated. Sometimes a bad update can introduce some errors but you can always roll back to the previous and wait for them to fix everything and then download them all.
Check the health of your hardware regularly
Hardware components have their life cycle, more quality ones tend to last longer but eventually, they will reach the end of their lifecycle. There are a lot of testers for various components in your computer that can check different things and provide you with information about the state of your components.
If you are on Windows 11, Microsoft has included a basic health app inside OS, just type PC health check in search and start the app. For some more detailed information and advanced checks, you will have to use a custom application. There are plenty of them specialized for single components like RAM, SSD, etc. A simple google search with providing you with top results and most of them are free for personal use.
Remember, a faulty component or component that is reaching its life cycle can produce many errors inside the operating system.
If you suddenly encounter a PNP_DETECTED_FATAL_ERROR Blue Screen error, then this post can help you out. The PNP_DETECTED_FATAL_ERROR BSOD usually occurs when any new hardware that is mostly the Plug and Play type is attached. In such cases, when the device is plugged, and the driver for that device crashes or isn’t found or is not compatible, you will most likely encounter this particular BSOD error.
There are several error codes that come under this category, some of them are 0x000000CA (0x01681690, 0xEA96A7BE, 0x938A81AD, 0xF8362881. This BSOD error can also occur at any time. However, the only constant thing here is when you plug a PNP device like earphones, microphones, USB drives, and many more.
The PNP_DETECTED_FATAL_ERROR bug check has a value of 0x000000CA which indicates that the Plug and Play Manager encountered some severe error which is most likely have something to do with a problematic Plug and Play driver. To fix this error, here are some possible solutions that could help.
Option 1 – Run the Blue Screen Troubleshooter
The Blue Screen troubleshooter is a built-in tool in Windows 10 that helps users in fixing BSOD errors like PNP_DETECTED_FATAL_ERROR Blue Screen error. It can be found on the Settings Troubleshooters page. To use it, refer to these steps:
Tap the Win + I keys to open the Settings panel.
Then go to Update & Security > Troubleshoot.
From there, look for the option called “Blue Screen” on your right-hand side and then click the “Run the troubleshooter” button to run the Blue Screen Troubleshooter and then follow the next on-screen options. Note that you might have to boot your PC into Safe Mode.
Option 2 – Try disabling or removing newly installed hardware
In this option, you will have to disable or remove the hardware you’ve just installed recently since external devices could be the one that’s causing the Blue Screen of Death error to appear. To do that, just disconnect any external device that’s connected to your computer physically and then check if it fixes the PNP_DETECTED_FATAL_ERROR Blue Screen error.
Disabling the BIOS Memory options such as Caching and Shadowing can help you in fixing the PNP_DETECTED_FATAL_ERROR Blue Screen error. All you have to do is enter the BIOS first and then use the Arrow and Enter keys to select your choices. And if you can’t seem to find it, look for specific instructions from your OEM or you could also look out for instructions from the manufacturer of your motherboard.
Option 4 – Try to run the CHKDSK utility
Running the CHKDSK utility might also help you resolve the PNP_DETECTED_FATAL_ERROR Blue Screen error. If your hard drive has issues with integrity, the update will really fail as the system will think that it’s not healthy and that’s where the CHKDSK utility comes in. The CHKDSK utility repairs hard drive errors that might be causing the problem.
Open Command Prompt with admin privileges.
After opening Command Prompt, execute the following command and hit Enter:
chkdsk /f /r
Wait for the process to be completed and then restart your computer.
Option 5 – Try to uninstall programs you’ve installed recently
Chances are, some programs that you just installed might be the one that’s causing the BSOD error. Thus, you need to uninstall the program to resolve the problem.
In the search box, type in “control” and then click on Control Panel (desktop app) among the search results.
After that, select Programs and Features from the list which will give you a list of all the programs installed on your computer.
From there, look for the concerned program and select it and then uninstall it.
Option 6 – Update the Device drivers
Tap the Win + R keys to launch Run.
Type in devmgmt.msc into the box and tap Enter or click OK to open the Device Manager.
After that, a list of device drivers will be displayed. Look for the device driver you and then select either “Update driver” or “Uninstall device”. And if you find any “Unknown device”, you need to update it as well.
Select the “Search automatically for updated driver software” option and then follow the instructions to complete the process.
If you have chosen to uninstall the driver, follow the screen options to complete the process and then restart your PC.
Connect the device and Scan for hardware changes – you can see this option under Device Manager > Action.
Option 7 – Perform a System Restore
Performing System Restore might help you in fixing the PNP_DETECTED_FATAL_ERROR Blue Screen error. You can do this option either by booting into Safe Mode or in System Restore. If you are already in the Advanced Startup Options, just directly select System Restore and proceed with the next steps. And if you have just booted your PC into Safe Mode, refer to the steps below.
Tap the Win + R keys to open the Run dialog box.
After that, type in “sysdm.cpl” in the field and tap Enter.
Next, go to the System Protection tab then click the System Restore button. This will open a new window where you have to select your preferred System Restore point.
After that, follow the on-screen instructions to finish the process and then restart your computer and check if the problem is fixed or not.
During the Microsoft Windows 10 upgrade, certain users have experienced an issue with error code 8024001F. Users should note that this error is also known as Windows Update 8024001F and 0x8024001F. This error code is relatively common and is usually caused by a faulty internet connection. Thanks to this common reasoning, the error is generally fixed easily, and users are able to restart their Microsoft Windows 10 upgrade.
Common symptoms include:
A dialog box appears with the Error Code 8024001F when attempting to upgrade to Microsoft Windows 10.
Your current version of Windows is unable to recognize the need for an update to Microsoft Windows 10.
Solution
Error Causes
With only three issues causing error code 8024001F, it is relatively easy to determine your particular issue and then follow the steps below to rectify the situation.
Your computer is not connected to the internet.
The Windows firewall is interfering with the Microsoft Windows 10 update.
Your third-party antivirus and firewall software is interfering with the Microsoft Windows 10 update.
Your system is infected with the Conficker worm, which is preventing the Microsoft Windows 10 update from processing correctly.
Microsoft Support asks that you contact them directly for further assistance if you are able to rule out these three reasons for error code 8024001F.
Further Information and Manual Repair
Error code 8024001F is easily corrected using one of the following methods. Each of these methods should be convenient and comfortable for a basic computer user at home. If at any time you are unsure or feel you need more assistance, Microsoft Support asks that you contact them directly for more guided support.
Windows will then run the Troubleshooter, attempting to detect any known issues with your system.
Depending upon the results you should be able to follow the on-screen prompts which will alleviate the update issue.
Method 2- Correct your internet connections
Closeout of the error code 8024001F dialog box.
Close the Microsoft Windows 10 updater.
Attempt to access the internet through your normal browser.
** If you can successfully access the internet, then an internet connection is not the cause for this error code.
If you are unable to access the internet verify that you are plugged into your network, both at the router/wall and at your computer jack.
If you use a router, verify that all of the lights are on and active (showing an active internet connection).
Establish an internet connection if possible. If you are unable to establish an internet connection, you may need to contact your internet provider.
If you are able to reestablish an internet connection, then you should have no problem running your Microsoft Windows 10 update.
Method 3- Adjust the Windows Update settings
Log into your current version of Windows as the Administrator (enter a password if prompted).
Click the START button on your keyboard or screen.
Search for the term “admin”, press ENTER
Click the “administrative tools” option
Select the “services” file, re-enter your password.
Open the Windows Update file by right-clicking on the name.
Choose the “properties” option
Under the GENERAL tab, make sure that the “startup type:” is set to AUTOMATIC (DELAYED START)
Under the “Service Status” header, click the START button.
Click OK
Restart the Microsoft Windows 10 update.
Method 4- Scan for the Conficker Worm
Access the web address to be directed to the Microsoft Safety Scanner.
Run this free scanner provided by Microsoft to verify if the Conficker Worm is your issue.
If this worm is causing your error, Microsoft will walk you through the steps necessary to remove the worm.
Method 5- Firewall and Anti-Virus software
If you are using the Windows firewall or a third-party anti-virus and firewall software, disable these programs.
Run the Microsoft Windows 10 upgrade.
After the upgrade is complete, turn your antivirus and firewall software back on.
Users should not have a problem employing the above methods. Start with the simplest solutions first, and then work your way to the more intricate methods. In some cases, depending on why this particular error code was caused, you may have to use a powerful automated tool to have it resolved.
One of the important functions in the Windows operating system is the Task Scheduler. It can automatically run various tasks at a certain time where you’ll have to add a task that needs to be executed and then choose the time it has to run at. So when that time comes, the Task Scheduler will run the task automatically. However, some users reported getting an Error 0x80070057 where the Task Scheduler fails to start.
This kind of error may be due to a disabled service that prevents the service from running. It is also possible that the antivirus program interfered with the task – it could be that the Task Scheduler is somewhat in the block list since the antivirus adds it to the list automatically when it’s installed. On the other hand, it could be that you lack administrator-level privilege which is why the Task Scheduler was not able to carry out the task. To fix this issue, here are some suggestions you can try.
Option 1 – Try to restart the Task Scheduler service
As mentioned, it is possible that the Task Scheduler service could be disabled. You could have disabled it when trying to enhance your computer’s performance and whatnot. Thus, you need to verify if it’s running or not and then restart it.
First, you need to tap the Win + R keys on your keyboard to open the Run dialog box.
Next, type “services.msc” in the field and click OK or tap Enter to open the Windows Services Manager.
You will see a list of Services and from there, look for the Task Scheduler service and double click on it.
After that, go to the General tab and click on the Startup Type options and then select “Automatically” from the given list.
Click on the “RUN” option and select the “Restart the Service” option.
And click on the “After Second Failure” option and then select the “Restart-Service” option again.
Now click on the “After Subsequent Failures” tab and select the “Restart the Service” option.
Finally, click on the Apply and OK buttons and then run the Task Scheduler and see if the issue is now fixed.
Option 2 – Try to temporarily disable the anti-virus program
As mentioned, the error could be due to the antivirus program or the Windows Defender Firewall installed in your computer. Thus, disabling them or any security software installed on your computer is always a good idea you can try when you’re not able to access the shared drive on your computer. There are times when you encounter problems like the Task Scheduler Error 0x80070057 due to interference of antivirus or security programs. Thus, you have to disable both your antivirus program for the meantime and check if it fixes the error or not.
Option 3 – Run the Task Scheduler with an administrator account
Like pointed out, the Task Scheduler Error 0x80070057 may be due to the lack of admin privileges. Thus, you have to log in to an administrator account and try running the Task Scheduler again. It is also recommended that the administrator account you’re going to use as a password when logging in.
Option 4 – Repair the Task Scheduler by deleting corrupted tasks
Note that a single corrupted file can cause big problems so this option is quite important. And for you to delete a corrupted task or any task from the Task Scheduler, you have to use the Registry Editor if you are not able to use the Task Scheduler interface. To do so, follow these steps:
Tap the Win + R keys to open the dialog box for Run.
Next, type in Regedit and click on OK or tap Enter to open the Registry Editor.
Then navigate to this path: ComputerHKEY_LOCAL_MACHINESOFTWAREMicrosoftWindows NTCurrentVersionScheduleTaskCacheTree
Note: In this path, you can see all the tasks that are currently set in the Task Scheduler. And since it would be hard to tell which one of them is corrupted, you have to delete the latest one in Task Scheduler last. But before you do so, make sure that you take note of the ID of the tasks. And for you to get the ID, you have to select the task you wish to delete and double click on the ID string located on your right-hand side, and then copy it in the Notepad.
Right-click on the task name and then delete it.
After that, delete the very same GUID which you have copied earlier from these folders:
EhRecvr.exe is an executable file located in a subfolder of C:\Windows (usually C:\WINDOWS). An executable file is denoted by the filename extension .exe.
You should only run executable files from the publisher you trust because .exe files are prone to errors. Executable files can potentially change your computer settings and harm your computer. These files can easily get corrupted.
Similarly, when the EhRecvr.exe fails to run on the computer and gets corrupt, you experience an EhRecvr.exe error on your system. This error code may pop up while playing games on the PC or using any other program.
EhRecvr.exe error may be displayed in any one of the following formats:
“ehRecvr.exe cannot be found."
“There was a problem starting [path]ehRecvr.exe. The specified module could not be found."
"Runtime Error. ehRecvr.exe pure virtual function call."
"This program can't start because ehRecvr.exe is missing from your computer."
"Unable to launch the software located at path: [path]ehRecvr.exe"
"This application requires the file ehRecvr.exe, which was not found on this system."
"ehRecvr.exe is missing."
"Access Violation File [path]ehRecvr.exe"
Solution
Error Causes
There are plenty of reasons why this error may occur these include:
EhRecvr.exe file is mistakenly deleted
EhRecvr.exe file is corrupted and damaged
Viral/Malware infection
Bad registry entries
Outdated drivers
Though this error code is not fatal but nonetheless it is advisable to fix it immediately because EhRecvr.exe error not just hampers your ability to run and access different programs on your system but it also triggers issues like viral infection and registry problems which if not resolved can put your big at greater risk like system failure, freeze, and crash.
Further Information and Manual Repair
To resolve the EhRecvr.exe error on your system, you don’t have to hire a professional and spend hundreds of dollars in repair. Here are the best and easy DIY methods that you can try to fix this error.
To work around these methods you don’t need to be a technical whiz.
Let’s get started:
Method 1 - Restore EhRecvr.exe from Recycle Bin
In the case of EhRecvr.exe file deletion, it is advisable to check the recycle bin. Search through the bin for the file. If you find it, then simply restore it, if not then if you have access to the internet, then download it from a trusted website.
Method 2 - Reinstall the Associated Software That Uses EhRecvr.exe File
If you receive this error when you want to use certain software on your PC, then try reinstalling that software again on your PC.
This will be very helpful to obtain the EhRecvr.exe file that is not provided by Microsoft. To re-install, first, uninstall the program. Go to Add/Program in the control panel and find the program and then uninstall it.
Once uninstalled, simply follow the same steps but this time round install the software. This will hopefully help resolve the EhRecvr.exe error code.
Method 3 - Update Drivers for Hardware Devices
Sometimes the error may pop up due to outdated drivers. If this is the cause then the best way to resolve the issue would be to update the driver. Use the wizard within the Device Manager to update the outdated drivers.
Method 4 - Scan for Viruses
Viruses and malware can disguise as executable files. These usually enter your PC through downloads from unreliable websites and phishing emails. In such an event, it is recommended to install a powerful antivirus. Scan your entire PC and remove all viruses to repair the issue.
Method 5 - Clean and Repair the Registry
Another method is to clean and repair the registry. If you don’t clean the registry regularly it may get accumulated with obsolete files and get corrupt. This may generate EhRecvr.exe error codes.
To resolve, simply download Restoro. This is a user-friendly PC Fixer with a powerful registry cleaner. It scans for all registry errors, wipes out all the invalid entries and obsolete files and repairs corrupted DLL and .exe files in minutes.
Click here to download Restoro and resolve the EhRecvr.exe error now!

 Interesting information has come out from Microsoft, Windows 11 dark theme will include a different sound theme from its standard light one.
When in dark mode on Windows 11, the system sounds generally become softer, and they echo a bit, creating a more soothing experience that matches the overall look and feel of the dark mode. Flipping back to light mode brings the system sounds back to their normal level.
However, even though the light model has slightly louder sounds than the dark mode, Microsoft has taken great care to make sure the audio is more soothing, according to a report from CNBC.
The designers of Windows 11 took inspiration from an approach called calm technology. Microsoft’s Christian Koehn and Diego Baca wrote about calm technology in a post on Medium. In it, they said, “Windows 11 facilitates this through foundational experiences that feel familiar, soften formerly intimidating UI, and increase emotional connection.”
According to a Microsoft spokesperson in a statement to CNBC, “The new sounds have a much rounder wavelength, making them softer so that they can still alert/notify you, but without being overwhelming.”
Interesting information has come out from Microsoft, Windows 11 dark theme will include a different sound theme from its standard light one.
When in dark mode on Windows 11, the system sounds generally become softer, and they echo a bit, creating a more soothing experience that matches the overall look and feel of the dark mode. Flipping back to light mode brings the system sounds back to their normal level.
However, even though the light model has slightly louder sounds than the dark mode, Microsoft has taken great care to make sure the audio is more soothing, according to a report from CNBC.
The designers of Windows 11 took inspiration from an approach called calm technology. Microsoft’s Christian Koehn and Diego Baca wrote about calm technology in a post on Medium. In it, they said, “Windows 11 facilitates this through foundational experiences that feel familiar, soften formerly intimidating UI, and increase emotional connection.”
According to a Microsoft spokesperson in a statement to CNBC, “The new sounds have a much rounder wavelength, making them softer so that they can still alert/notify you, but without being overwhelming.” 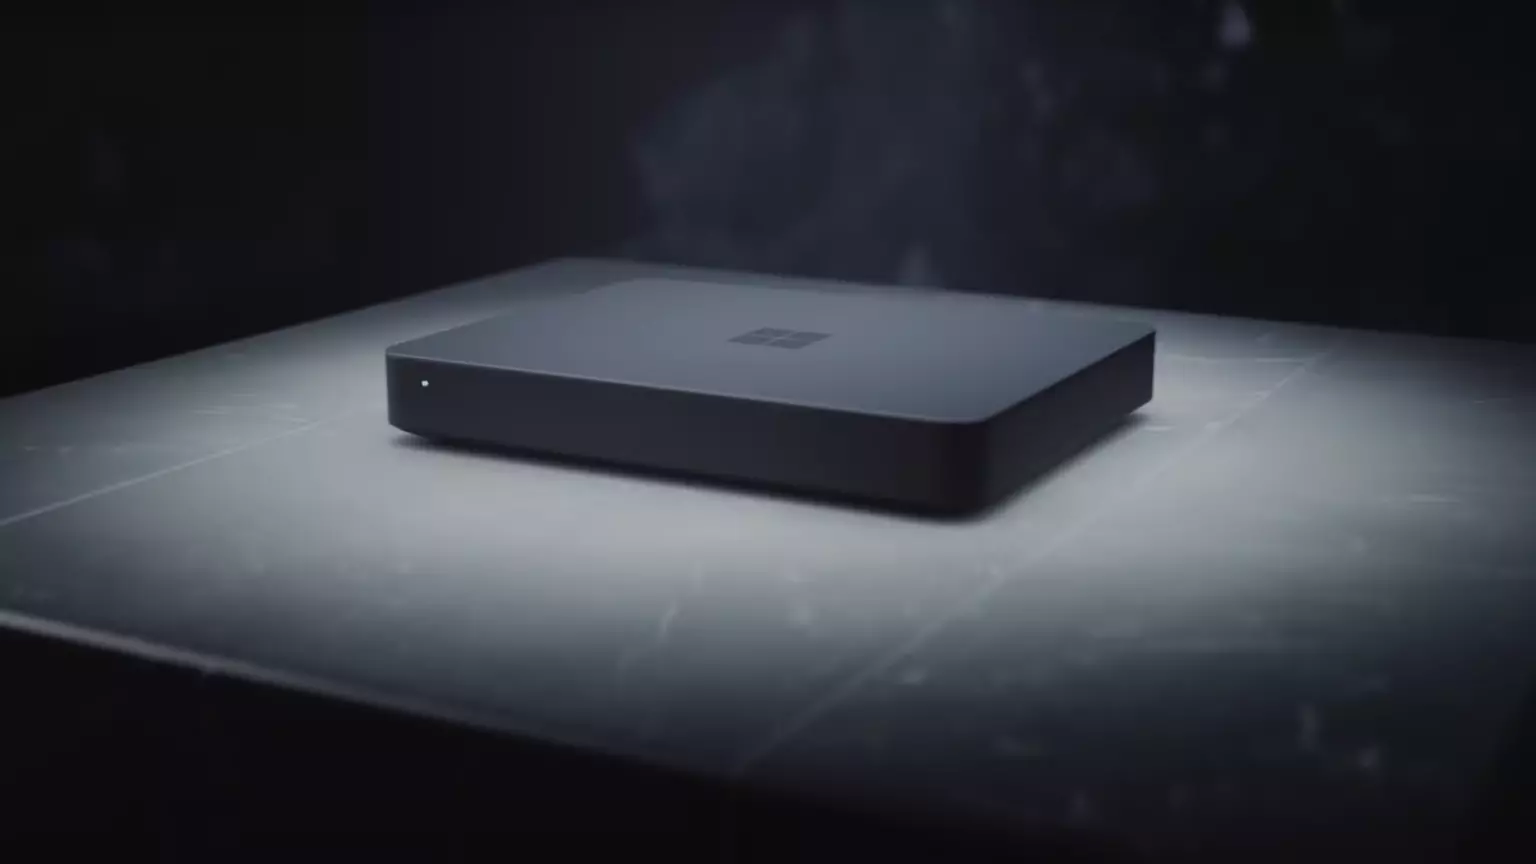
 Run the Windows Memory Diagnostic tool
