System restore is usually the go-to tool when something goes bad in Windows, we fire it up and roll back Windows in the state when everything was working fine. But what if Windows does not want to boot? Can we use system restore in that case?
The answer to that question would be yes, yes we can.
Boot interrupt Windows 10 by starting your PC and as soon as you see the Windows logo; press and hold the power button to force a shutdown.
Repeat this 2-4 times and Windows will open up the Advanced Startup Options menu for you.
At the Advanced Startup Options screen, select Advanced Options.
Select Troubleshoot.
Under the Advanced options screen, select System Restore.
or if you prefer, use Windows USB installation.
Boot the faulty PC using the Windows 10 installation media.
The Windows Setup dialog box will appear.
Set the Time and currency format, Keyboard or input method, and the language to install.
Click Next.
Click on Repair your computer from the lower-left corner.
From the Choose an option screen, click on Troubleshoot.
Click Advanced Options in the Troubleshoot screen.
In the Advanced Options screen, click System Restore.
Windows will take some time to prepare System Restore. It may even restart your computer or device.
When System Restore is ready, you will be prompted to choose a user account to continue.
Select an account that is set as administrator on your Windows 10 computer or device.
At the next screen, change the keyboard layout if you want and then input the password for that account.
Experiencing issues while using Remote Desktop connections is not uncommon. One of the issues that users encountered recently while trying to connect to their Remote Desktop network is the error saying, “Your credentials did not work, The login attempt failed”. If you are one of these users, then you’ve come to the right place as this post will walk you through fixing the problem.
When facing this kind of problem, the first thing you can try before you do some troubleshooting steps is to verify the credentials. But if you are certain that you’ve entered the correct credentials just like what other users reported, then it’s completely a different matter. Based on the reports, this error is common on newly installed versions of Windows 10 or after reinstalling the operating system which could mean that the problem might be due to the Windows security policies or the username might have been recently modified. The latter case is a possibility especially if you’ve reinstalled Windows 10 and had entered a new username. In such a case, you will really have a difficult time connecting to your Remote Desktop connection since its credentials do not really automatically change.
If you’ve verified that your credentials are correct, then now’s the time you troubleshoot the problem with the help of the potential fixes provided below. Just make sure that you follow each one of them in sequence.
Option 1 –Try to run the Network Adapter troubleshooter
To run the Network Troubleshooter, refer to these steps:
Open the Search bar on your computer and type in “troubleshoot” to open the Troubleshoot settings.
Next, scroll down and select the “Network Adapter” option from the right pane.
Then click on the Run Troubleshooter” button.
After that, your computer will check for any possible errors and will pinpoint the root cause of the problem if possible.
Restart your computer.
Option 2 – Try to change the network profile from public to private
According to some reports, this error occurs on systems where the network profile was set to public. Thus, you need to change the network profile to private to resolve the problem. How? Refer to these steps:
Go to Start and from there click on Settings > Network & Internet > Status.
Next, click on the “Change connection properties” option.
After that, set the radio button of Network Profile from Public to Private.
Wait for a couple of seconds until the system is done applying the changes you’ve made and then see if you can now connect to the Remote Desktop connection.
Option 3 – Try changing the account username
As mentioned, one of the possible causes for this error is the reinstallation of the operating system. You might have changed the username for the system but it does not really change the username of the Remote Desktop connection as well. Thus, you have to change the username back to what it was before you’ve reinstalled Windows 10.
Option 4 – Try modifying the Windows Security Policy
You can also try to edit the Windows Security Policy as it could help in resolving the error. This Windows Security Policy, when enabled, will not allow non-admin users to log on to the Remote Desktop connection. So if you want to allow non-admin users to use the Remote Desktop connection, then you need to modify this policy. Note that you can only do that if you are the admin of the system yourself.
Tap the Win + R keys to open the Run utility.
Then type “secpol.msc” in the field and tap Enter or click OK to open the Local Security Policy.
After opening the Local Security Policy window, select Local Policies > User Rights Agreement located on the left pane.
Next, double click on “Allow log on through Remote Desktop Services” located in the right pane.
And in the next window that appears, select Add user or group.
After that, type in the username of the intended non-admin user under the “Enter the object names to select” column.
Once done, click on the Check Names button to fix the username and then click OK to save the changes made.
Restart your computer.
Option 5 – Use the Group Policy Editor
Tap the Win + R keys to open the Run dialog box and then type “gpedit.msc” in the field and tap Enter to open the Group Policy Editor.
Next, navigate to this path: Computer Configuration > Administrative Templates > System > Credentials Delegation.
Double click on the “Allow delegating default credentials with NTLM-only server authentication” policy setting located on the right pane to edit it.
After that, shift its radio button to Enabled and click on Show.
Then type “TERMSRV/*” in the Value box and click OK.
Now repeat the same for the following policy settings:
“Allow delegating default credentials”
“Allow delegating saved credentials”
“Allow delegating saved credentials with NTLM-only server authentication”
Once you’re done, restart your computer and see if the problem is fixed.
The New and upcoming HAF 700 Evo from Coller master is a beast of a case, but so is its price. The case itself is still not released but as sources say it will be soon, well at least we hope so. The price will be around $500 which is a little on the expensive side of things but the features it is bringing are very impressive.
HAF 700 EVO Size and its advantages
HAF stands for High Airflow and with this case, you are going to get it but first let us talk about other characteristics of the case. Firstly case is ATX full tower, pretty big going 24.64 x 11.45. x 26.22 inches in size but like all full tower cases it can hold all motherboard types including Mini-ITX, Micro-ATX, ATX, E-ATX. The large case size also lets you place a pretty big GPU, going to 19.29 inches (490 mm) in its length covering currently all available Graphic cards on market.
Being a very big computer case is not just placing motherboard and big GPU, there are other great advantages of it, firstly that you can go wild with your CPU cooler, going all the way to 6.5 inches in cooler height will satisfy all users and having 12x 2.5 or 3.5-inch internal bays will. And if even that is not enough you have 8 expansion slots available.
Inside HAF 700 EVO
Inside the casing you will also find 2 front fans with 200mm diameter, 2 rear fans sized 120mm, and 1 bottom fan of 120mm. You can also manually mount standard 120mm fans on top of the case for maximum airflow.
Front panel and outsides
The front side is filled with 4x USB 3.2 Gen 1 Type-A (5 Gbps), 1X USB Type-C (up to 10Gbps), 3.5mm both headphone and audio jack along with a reset switch. Also, the circle in the very front is a hi-resolution LCD customizable display, you know, just to add more flavor and personal touch to the case. Fron is also filled with glass panels emitting RGB light.
Of course, you must also have a Tempered Glass Side Panel and well weight of 53.57 pounds (24.3 kg), yup you read that correctly, beside its hefty price tag this cooler master beast also is pretty heavy. Granted all of the weight comes from the glass front panel it is still a little hard on moving and taking out of the box.
This is also the case where you will not need a single screwdriver, everything is made to be assembled with your hands alone pushing easy assembly into the front row.
Conclusion
So in the end what are my thoughts about this expensive and heavy PC case? Would I recommend it? The answer to that question could depend really on your budget, let us be really honest here if you can afford it, YES, wholeheartedly I would recommend the case, it is great, it feels great, it looks great and the airflow is amazing. However, if you are tight on a budget, there are other great cases with excellent airflow and you might want to skip this one.
External hard drives have become essentials as they store data. However, they are also prone to issues and one of them is the “The device is not ready”. You could encounter this error when you try to access your connected hard drive. This error won’t allow you to access the contents of your hard drive so unless you fix it, you won’t be able to access any of the files on your hard drive.
One of the most likely causes of this error is a hardware defect. Aside from that, it could also be due to loose connections, obsolete device drivers, as well as compatibility issues between the operating system and the hard drive. Before you start troubleshooting the problem, you need to determine if you were able to access your hard drive before you encountered the error or not. If not, you need to check the compatibility of the device with your operating system as it could be the reason why you’re getting the error.
There are several potential fixes you can check out to fix this error. You can try to check the hardware connections, run the built-in Hardware and Devices troubleshooter, as well as the USB troubleshooter. You could also run the CHKDSK utility or update the drivers of the device or the USB drivers.
Option 1 – Try checking the hardware connections
The first thing you have to do before you further troubleshoot the problem is to check the hardware connections of your computer and see if there are damaged ones, just like with USB ports, it would also affect the overall connectivity of the device with the computer. So if you notice some irregularities in the connecting cable physically, you might have to buy another one and replace it and then see if it fixes the problem or not.
Option 2 – Run the Hardware and Devices Troubleshooters
The first thing you need to do is click on Start and then on the gear-like icon to pull up the window for Settings.
After opening Settings, look for the Update and Security option and select it.
From there, go to the Troubleshoot option located on the left-hand side of the list.
Next, select Hardware and Devices from the list and open the Troubleshooter and run it. Once it is doing its job, wait for it to complete the process and then restart the system.
After the system restarts, check if the problem’s now fixed. If not, refer to the next option given below.
Note: You could also try to run the USB troubleshooter as it could also resolve the problem.
Option 3 – Run the CHKDSK utility
As you know, the CHKDSK utility can help you in identifying the bad sectors in a drive and fix them automatically. Thus, you can run it to fix the “The device is not ready” error when you connect your USB drive to your computer.
Open Command Prompt with admin privileges.
Next, type and enter this command to execute it: chkdsk /f <drive>
Now, wait until the process is completed and exit Command Prompt.
Restart your computer and try connecting the USB drive again and see if the error is fixed.
Option 4 – Try to update the drivers of the device
Although you can always update the device drivers using the Device Manager, you might want to try downloading the latest set of drivers directly from the manufacturer’s website. Once you’ve downloaded them, install them right away and then correct the external hard drive.
Option 5 – Update or reinstall the Universal Serial Bus Controller driver
If updating the drivers of the device did not fix the “The device is not ready” error, you can try to update or reinstall the Universal Serial Bus Controller drivers instead of using the Device Manager. Refer to the following steps:
First, click the Start button and type “device manager”.
Then click on the “Device Manager” from the search results to open it.
From there, look for the “Universal Serial Bus controllers” option and then right-click on each one of the USB drivers and select the Update Driver from the menu.
Note: If it is a regular USB drive, then it will be listed as a USB Mass Storage Device but if you have a USB 3.0 device, then look for a USB 3.0 Extensible Host Controller.
Restart your PC and then click the “Search automatically for updated driver software” option.
Note: If updating the USB Controller drivers didn’t work, you can try to reinstall them instead.
Option 6 – Restart your computer in a Clean Boot State
If the first three given options didn’t work and you still see the error when you connect external devices, you can try putting your computer in a Clean Boot State and then try connecting them again.
Log onto your PC as an administrator.
Type in MSConfig in the Start Search to open the System Configuration utility.
From there, go to the General tab and click “Selective startup”.
Clear the “Load Startup items” check box and make sure that the “Load System Services” and “Use Original boot configuration” options are checked.
Next, click the Services tab and select the “Hide All Microsoft Services” check box.
Click Disable all.
Click on Apply/OK and restart your PC. (This will put your PC into a Clean Boot State. And configure Windows to use the usual startup, just simply undo the changes.)
Now try to connect the external devices and check if the error is now gone.
Error 1706 is a Windows PC error. It occurs when you insert a Microsoft CD-ROM either to repair an Office or to install a feature set to Installed on First Use. The error message is displayed in the following format:
Error 1706. Setup cannot find the required files. Check your connection to the network, or CD-ROM drive. For other potential solutions to this problem, see C:\Program Files\Microsoft Office\Office101033\Setup.hlp.
Solution
Error Causes
Error 1706 may occur due to several reasons. These include:
You originally installed MS Office from a network administrative installation
You are trying to use Office CD-ROM when the error is prompted by the Windows Installer for an Office source location
Viral Infection
Further Information and Manual Repair
The good news is that this error code is not fatal. However, to avoid inconvenience, it is recommended to resolve the error right away. To fix the problem you don’t have to be a computer programmer or hire one. In fact, this error code can be resolved quite easily.
Here are some of the best and easiest do it yourself methods to resolve error 1706 on your PC:
Method 1
To resolve this issue find a different administrative installation for the Office source file location.
To do this, go to the start menu and then click run. In the open box, simply type this command line new network pathSetup.exe /fvm package name.msi and press OK to continue and update changes. Once the update is complete and finished press OK to save and proceed.
Please note after you follow these steps, the Windows Installer uses this new server location whenever it needs to reinstall, repair, or add a feature to your Office Installation.
Method 2
Another alternative method to resolve this method is to use CD-ROM for the Office Source Location. To do this you will have to remove Office and then re-install Office from the CD-ROM.
Here are the steps to remove the Office program. First, quit all Office programs.
Go to the Control Panel then click on the Program and Features option.
Now double click the Add/Remove programs and remove the entry for the Microsoft Office 2003 or Microsoft Office XP product installed on your PC.
After that, click on the Maintenance Mode Options dialog box, select Uninstall Office, and then click Next to proceed.
Click Yes to confirm changes.
Now insert Office 2003 or Office XP CD-ROM and follow the setup dialog boxes to reinstall the program on your system from CD-ROM.
Download Restoro to Correct Registry Errors
However, to ensure the installation is successful this time around, it is advisable to clean the registry and ensure the uninstalled program is not located in the registry.
To do this, download Restoro and run it on your computer. This is a powerful PC Fixer integrated with a registry cleaner.
The registry cleaner wipes out all the unnecessary files and uninstalled program files saved in the registry. Once the registry is cleaned, try reinstalling MS Office again. This will resolve the error 1706.
Click here to download Restoro and repair error 1706.
If your Windows 10 computer slows down, the first thing you can do is to check the status of the resource usage in the Task Manager. In such cases, it shoots up to even 1000% which causes the system to either hang or freeze since some programs are using a major chunk of system resources. And this is the case with msrtn32.exe.
Msrtn32.exe is a malicious file that may try to steal your digital currency. It can get installed on your computer when you install a browser plugin or extension that can modify the default settings of browsers, the content of web pages, search results, as well as display tons of intrusive ads. So if you see msrtn32.exe under the Processes tab of the Task Manager
If you see msrtn32.exe under the Processes tab of your Task Manager, refer to the suggestions given below to get rid of it and restore your computer’s normal function.
Before you proceed, take note that this executable file is found in the following location:
C:/Program Files(x86)msrtn32
Option 1 – Delete the folder where msrtn32.exe is located
The first thing you can do is to go to C:/Program Files(x86)/msrtn32. From there, look for the malicious executable file and delete its folder. If you are not able to delete the folder, make sure that you’re logged in as administrator and then try again.
Option 2 – Try scanning your computer using Windows Defender
Since you are dealing with a malicious file, if you weren’t able to delete the folder where the file is located, you can scan your computer using the built-in Windows Defender program and then eliminate the malicious file. Follow the steps below to do so:
Tap the Win + I keys to open Update & Security.
Then click on the Windows Security option and open Windows Defender Security Center.
Next, click on Virus & threat protection > Run a new advanced scan.
Now make sure that Full Scan is selected from the menu and then click the Scan Now button to get started.
Msvcr100.dll is a dynamic link library file. This file is loaded into the memory at runtime for successful program execution.
This process is also referred to as runtime dynamic linking. The Msvcr100.dll belongs to the Microsoft Visual C++ Runtime Library.
It is a core Windows component used by numerous Windows-based applications to load and run smoothly on Windows PC.
Msvcr100.dll error occurs when the process of runtime dynamic linking fails. Due to this error, you are unable to access the desired application. The error code is displayed in either of the following formats:
“Msvcr100.dll Not Found"
"This application failed to start because msvcr100.dll was not found. Re-installing the application may fix this problem."
"Cannot find [PATH]msvcr100.dll"
"msvcr100.dll is missing from your computer"
"XXX.exe - System Error - MSVCR100.dll is missing from your computer."
Solution
Error Causes
Narrowing down the cause of the Msvcr100.dll error is not possible as this error can occur on your PC due to multiple reasons. However, here are some of the most common causes of Msvcr100.dll error code on Windows PC:
Msvcr100.dll file corrupt and damaged
Missing Msvcr100.dll file
Corrupt runtime code library
Registry issues
Malware attack and viral infection
Further Information and Manual Repair
Here are some of the best ways to resolve this error on your system:
Reinstall the application causing the error
As dll are shared files used by multiple programs to load and run, there is the possibility of it getting deleted when uninstalling a certain program.
If so, then the best way to fix it is to reinstall the application that is causing the error to pop up on your screen. This way you’ll be able to set up the program again and install the Msvcr100.dll file back on your system.
Download Microsoft Visual C++ 2010 Redistributable Package
Another way to resolve this error is to download Microsoft Visual C++ 2010 Redistributable Package. To do this, first, see if you are running a 32 bit or 64-bit copy of Windows. XP users go to the start menu and click run then type winver and press enter.
In Vista and Windows 7, go to the start menu and type computer and click properties. The information you require is under Windows Edition.
Once you find out whether you are using a 32 bit or a 64-bit version, accordingly, download the correct version of Microsoft Visual C++ 2010 Redistributable Package directly from Microsoft’s official website. Simply download and install the software.
Then follow the prompts to add the toolbox to your PC. After that, restart your computer; most likely the error message will be gone. If it still persists, then this means the error is either related to the registry or malware.
Download and Run Restoro
Restoro can be used to resolve both malware infection and registry issues on your PC that could be triggering Msvcr100.dll errors.
Restoro is a next-generation and multi-functional PC repair tool embedded with powerful utilities like an antivirus, a registry cleaner, and a system optimizer. The registry cleaning feature detects all registry issues and Msvcr100.dll errors.
It removes unnecessary and obsolete files on the disk, like junk files, cookies, internet history, and temporary files cluttering the disk and damaging dll files. It repairs the damaged and corrupt dll files and restores the registry.
Simultaneously the antivirus feature scans and removes all malicious software on your system. These include spyware, viruses, Trojans, adware, and malware that can damage dll files.
This software is efficient and resolves the Msvcr100.dll error in seconds. It is easy to use and has a simple navigation. It is compatible with all Windows versions.
Click here to download Restoro on your PC and resolve the Msvcr100.dll error today!
The Error Code 0x80200056 will appear in a few different instances, though always applies to an interrupted download. Windows 10 will quickly discover that their upgrade and/or download did not work correctly. Not every user who upgrades to Microsoft Windows 10 will face this issue, only a select few random instances will occur.
Common symptoms include:
A dialog box appears with the Error Code 0x80200056
Microsoft Windows 10 upgrade is unsuccessful
Users are unable to open any applications after completing the Microsoft Windows 10 install
Solution
Error Causes
This error can be caused by a number of common problems, the first of which is the easiest to diagnose.
If during the upgrade process, you accidentally restarted your PC, or inadvertently signed out of your PC, the error will occur.
Third-party software conflicts can cause this error message during the Microsoft Windows 10 upgrade.
Error Code 0x80200056 may also appear if you have corrupted system files on your PC.
A change in date and time during the Microsoft Windows 10 upgrade could potentially cause this error.
None of these causes should overtly affect the operation of your PC, but merely prevent the upgrade and/or download from functioning correctly. If your PC is exhibiting other operating system errors in addition to Error Code 0x80200056, it would be wise to contact Microsoft Support before the issues lead to a possible catastrophic failure.
Further Information and Manual Repair
With the very recent release of Microsoft Windows 10, we are seeing a number of users discuss Error Code 0x80200056. Luckily, there are three different methods that any home user can perform to alleviate the error and complete the Microsoft Windows 10 download successfully.
Method 1
Use if your PC restarted accidentally during the upgrade, or if you accidentally signed out of Windows during the upgrade.
Make sure that your PC or Laptop is plugged in, to avoid another accidental restart.
Turn your PC on, or make sure that it is running. (Close any and all unnecessary programs)
Attempt the upgrade again, you should be able to run the upgrade successfully without further issue.
The following solution methods will apply if corrupted files, date/time changes, or third-party software interference is the issue causing Error Code 0x80200056.
Method 2
The following solution methods will apply if corrupted files, date/time changes, or third-party software interference is the issue causing Error Code 0x80200056.
Click on your “start” icon and choose the CMD (command prompt) option.
Right-click on “command prompt” and choose “run as administrator”.
Paste the command “bitsadmin.exe /reset /allusers” into the command prompt and press ENTER.
Restart your PC and attempt the Microsoft Windows 10 upgrade again.
Method 3
Click on your “start” icon and choose the CMD (command prompt) option.
Select “run as administrator” (enter a password if asked to do so).
Enter the following command into the command prompt- “sfc/scannow”, press ENTER.
Do not close the command prompt window until the entire process is complete.
The scan will determine if you have any missing or corrupted files. You will receive a message that says either: “Windows Resource Protection did not find any integrity violations”.Or “Windows Resource Protection could not perform the requested operation”.
If you received the first message, then your files are fine. The second message indicates that there are file corruption issues.
To repair the disjointed files, restart your PC in SAFE MODE, and reopen the command prompt window.
Enter the following command into the command prompt- “sfc/scannow”, press ENTER.
After the scan is run again, you will receive a message stating that the files have been successfully repaired.
Restart your PC in normal mode and start the Microsoft Windows 10 upgrade again.
To use a powerful tool to resolve Windows 10 upgrade Error Code 0x80200056 issue, download a powerful tool.
Click here to download Restoro.
If any of these methods do not allow for the successful upgrading of your Windows system, contact the Microsoft Support team. Make sure to include in your message to support what fixes you have attempted, and what the outcomes were. As Microsoft Windows 10 is so incredibly new, there are bound to be issued while the program is in its infancy. Fortunately, a majority of these issues should be worked out by Microsoft relatively quickly.
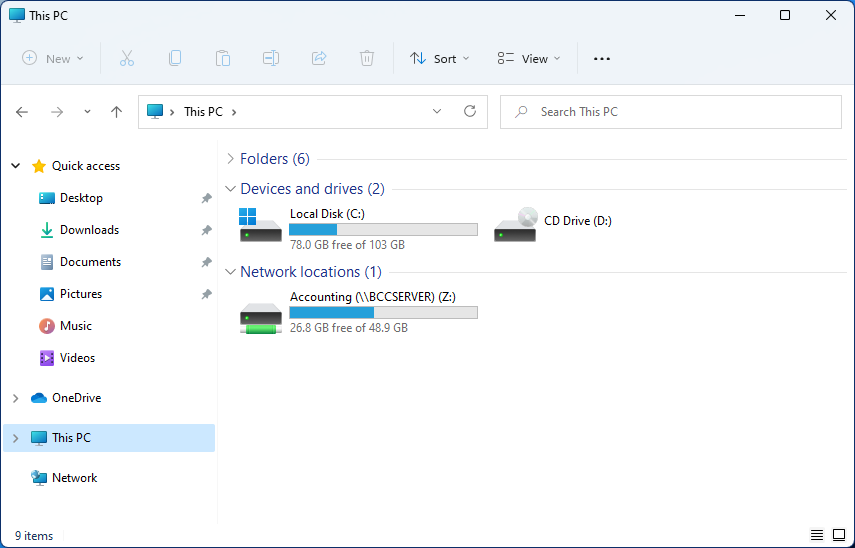
Mapping network drive has many benefits in terms of speed and ease of access of files via network. It lets you access the hard drive over the whole network like it was the hard drive inside your PC case. In order to easily and quickly map a folder as a network drive follow the guide below.
Open File Explorer
Click on the three dots icon in the Toolbar
Select Map Network Drive
Click the Drive drop-down menu
Select a driver letter that you wish to assign as a network drive
In the folder field enter network device and share name (click on browse to see all devices on local network)
Check the box beside Reconnect at sign-in if you wish to automatically connect to a network drive on Windows startup
Check Connect Using Different Credentials if you wish to connect to a network drive using different credentials that one used to login into Windows.
Click Finish
After finishing setting Windows 11 will try to connect to the network drive and if successful drive icon will appear inside File Explorer and the drive will open up to see its content.
If for any reason it cannot connect try checking user credentials, cables, network adapters, etc.
Adobe.DLL is one of the numerous Dll files you are going to encounter on your Personal Computer.
This isn't a system-established service and is usually the consequence of the sort of applications you install on your own Personal Computer.
Because adobe.dll is a low-program process, in the event that you find it present on your pc, you can easily end it. It isn't required for the normal working of your OS but might trigger permanent harm if left unchecked.
Don't forget that the Computer uses the AdobePDF.dll file for assorted tasks, and you need to make sure it's installed correctly.
Solution
Error Causes
When the adobe.dll is left un-fixed, you may shortly have to deal with sluggishness on your Computer. Simply put, this impedes the standard and amount of work you do while using your PC and impacts your productivity.
Sometimes, adobe.dll happens because your computer experiences an overload. As a result, while resolving the malfunction, you've got to look for methods of decreasing the system overload. It's possible that lots of processes are functioning on your PC concurrently. Quit these processes.
Lousy setup of the adobe.dll file causes this error too. Check and fix the files and settings that Adobe.Dll requires to run and you may not have to content with these error anymore.
Further Information and Manual Repair
Even though the adobe.dll may severely influence the functioning of your Computer, it is really a trouble or malfunction that one can fix manually.
Permanently Un-Installing the Adobe.dll Component is one of the better methods for repairing the malfunction.
Yes, you are able to completely eliminate the adobe.dll issue. The thing you really need to do is un-install it from your own computer fully, and for good.
Quit the many processes operating on your Computer and you may get rid of the adobe.dll malfunction.
Adobe.dll regularly happens due to system overload. Thus, the first thing you need to assess is if several processes are operating on the device. If they're, search for methods to stop them, and you'll not have to worry about the adobe.dll error anymore.
Utilize Microsoft System Configuration Utility
The MS System-Configuration Utility will settle the system overload problem, thus freeing up space for your programs to run smoothly and possibly avoid malfunctions, including adobe.dll. The Microsoft System-Configuration Utility manually locates and eliminates all running processes.
Perform Scans On Your Computer
Running scans on your own Computer may enhance or increase its operation. This technique may also aid in examining your Computer for adobe.dll, or such associated malfunctions, and resolve them forever.
Repair Adobe.Dll Files and Settings' Errors.
Considering that the adobe.dll malfunctions can be a result of the existence of malfunctions on your own PC's files and options, fix these properly. Begin by fixing the settings on the files and options utilized by your Computer to perform the adobe.dll, and you may have removed this issue completely.
Finally, establish the source of the error message to effectively solve it. Once you do that and fix it, your PC will resume normal operations and even boost your work and productivity.
Have you been feeling anxious in the digital space? Feeling like you have a million eyes on you each time you visit a website? It can definitely make you uneasy. Luckily there’s an easy fix, and it’s called a VPN.
In this article we’ll take you through the basics of what a VPN does and some of the biggest benefits you can reap from buying one.
VPN: definition and how it works
VPN stands for Virtual Private Network, so its name already says a lot about what it does.
A VPN is specialized software that keeps your browsing private and secure. Essentially it hides your identity, preventing possible cyberattacks and data theft. This is especially important in cases of public network use, where you’re highly exposed to potential threats.
To be more specific, this software encrypts your Internet Protocol (IP) address by filtering it through a server hosted by the VPN provider first. That way, it prevents your Internet service provider, third parties and lurking online thieves from tracking the actual you.
Credit: FLY:D on Unsplash
Some providers, such as Surfshark VPN with its IP Rotator feature, even make it a habit to frequently change your IP address to further protect your identity. With most VPN providers, you can also appear to be in a completely different country, adding to your disguise.
There are tons of advantages you can look forward to if you decide to use a VPN. Take a look at some of the crucial ones.
Benefits of using a VPN
When choosing a VPN, you can find both free and paid options. We recommend you go with the paid ones, since they have stronger security, encryption and data protection, as well as more advanced features. Free VPNs come with limitations and risk of malicious attacks on the software itself.
You can choose to buy a singular VPN service or opt for antivirus software that has a VPN built in, for example Bitdefender’s Ultimate Security plan. That depends on what you use your computer for and how much.
When you pick one, here’s what it can do for you.
1. Access region-specific content
When we said you could change your location, we meant it. Say you’re using a streaming service and a show you desperately want to watch isn’t available in your country. You can use your VPN to make it look like you’re browsing from a country where it’s unlocked.
This option is also convenient for gamers who want to access maps, skins and other in-game items unavailable in their location.
In addition, you can use this powerful feature when you’re traveling to a region where some of your favorite content may not be accessible.
Do keep in mind that you need to read the Terms and Conditions (yeah, we know - who does that?) of your games and services before doing this, since you could end up getting a penalty. It’s also important to remember that there are entire countries that have strict regulations or even bans on VPNs, for example Belarus, Russia and China. So make sure to be very cautious with your VPN use, friends.
2. Browse like no one’s watching
VPNs shield your browsing habits from prying eyes on the web. Those can be malicious hackers or just third-party cookies tracking your every move to later bombard you with targeted ads. For example, Surfshark VPN features a Cookie blocker that blocks all cookie-related pop-ups and lets you browse in peace (and secret). It works even when the VPN is turned off, which is also pretty neat.
In addition, their CleanWeb 2.0 technology makes sure ads and especially malware don’t stand a chance at all, since they’re blocked before they can even load.
The inability of sites to track your browsing means they can’t collect and analyze any of your data. So, your personal information - or your company’s information in case that’s what you’re using your computer for - is entirely hidden and secure.
3. Save money
It’s well-known that the prices of certain items and services vary based on your location, browsing time, age and many other factors. This most commonly goes for airline tickets and hotel stays.
You can use your VPN to avoid high prices and surcharges. Clear all cookies, turn on your VPN and visit an online shopping site to check out their prices. Then compare your findings with the offers you see when your VPN is off, when you spend a long time on the site or have an active account with the company.
Sometimes this can really help you find the best deals and avoid breaking the bank. But again, check the Terms and Conditions before you purchase something using a VPN.
4. Secure your smart home
The more smart devices you have connected to your network, the more exposed you are to potential cyberattacks. Phones and computers are generally designed to be decently secure even without a VPN or antivirus, but smart home devices leave a lot to be desired in that regard.
Protecting your home network with a VPN software means all devices connected to it are secure, be it an air purifier or Alexa.
Credit: Bence Boros on Unsplash
5. Prevent connection slowdown
Your ISP can intentionally slow down your internet speed based on how much data you’ve consumed (data throttling) or your activities online (bandwidth throttling).
But with a VPN, what kind of data you send and receive and how much is entirely hidden. Therefore, if your ISP can’t see you, they can’t control you and they can’t throttle down your speed.
The bottom line
You can never be too safe online. So definitely think about getting yourself a solid VPN to pump up your privacy and security as much as you can. And if you have any questions or need help choosing the perfect software for you, feel free to reach out to us.


 Mapping network drive has many benefits in terms of speed and ease of access of files via network. It lets you access the hard drive over the whole network like it was the hard drive inside your PC case. In order to easily and quickly map a folder as a network drive follow the guide below.


