Error code 0xc004fc03 occurs when Windows users fail to activate their Windows operating system due to a networking problem. The error code’s common symptoms include the following:
 Error Causes
Error code 0xc004fc03 in Windows 10 usually occurs due to issues related to a Windows user’s network. Your computer may be having problems connecting to the Internet or your firewall may be blocking or interrupting your device’s ability to activate Windows 10. In some cases, users may simply need to wait a day or two to reattempt to activate their system using a valid product key, as there may be an issue with the Windows activation servers. Failure to promptly fix this error code might result in other Windows 10 error messages, such as error code 0xc004f034.
To rectify the error code, Windows 10 users will need to perform manual repair procedures that fix the underlying problems causing error code 0xc004fc03. These procedures may include reconnecting to one’s network, checking your firewall settings, or activating your Windows operating system via phone. The manual repair methods are simple and do not require technical knowledge of the Windows operating system. If your attempts at manually repairing this error code fail, however, you may need to try a few other procedures.
To check your Internet connection, you’ll need to access the Network & Internet tab in Windows 10. Follow the instructions below to access this tab and fix Internet connectivity issues if they are preventing you from activating Windows on your machine.
If your status shows that you are not connected to a network, you will need to fix your connection. Simply use the Network Troubleshooter to troubleshoot your connection. You will be able to activate your copy of Windows once your connectivity issues are resolved.
If, however, the problem persists and error code 0xc004fc03 occurs during the activation process, this simply means that the existence of the error code is not due to connectivity or networking problems. In such a case, move to the next manual repair method listed below and follow the exact instructions given.
Windows Firewall protects your PC from hackers, worms, and other malicious programs. However, in some cases, it may result in error codes like error code 0xc004fc03. If your firewall is interfering with the Windows 10 activation, you’ll be able to rectify the problem by simply adjusting your settings. Follow the steps below to check – and adjust if necessary – your Windows Firewall settings.
In some cases, Windows users may not be able to adjust settings within the Windows Firewall tab, as your firewall settings may be controlled by a third party antivirus software. If this is the case, open the antivirus software and turn off the firewall if the software does not prevent you from making such changes to its settings.
Note, however, that you will need to readjust the settings as soon as you activate your version of Windows 10. This is due to the fact that turning off your firewall settings permanently may lead to exposure to worms and other malicious programs.
Activation of Windows via phone is another option for individuals experiencing error code 0xc004fc03. The activate by phone option in the Update & Security tab will be available once you fail to activate Windows 10. To complete this manual repair method, follow the steps below.
This is one of the most effective ways to fix error code 0xc004fc03. If the issue persists, however, you can proceed to the last resort.
If you wish to always have at your disposal a utility tool to fix these Windows 8 and other related issues when they do arise, download and install a powerful automated tool.

“Windows cannot find the Microsoft Software License Terms. Make sure the installation sources are valid and restart the installation.”The only option given when you encounter this error is to click on the OK button and nothing else and then the setup gets interrupted and won’t push through. To fix this error and proceed with the installation, you can try to get a new installation image or switch ports, or fix the CFG file. For more details, follow each one of the potential fixes provided below.
 You can it here: https://sourceforge.net/projects/freeplane/files/latest/download
Error Causes
You can it here: https://sourceforge.net/projects/freeplane/files/latest/download
Error Causes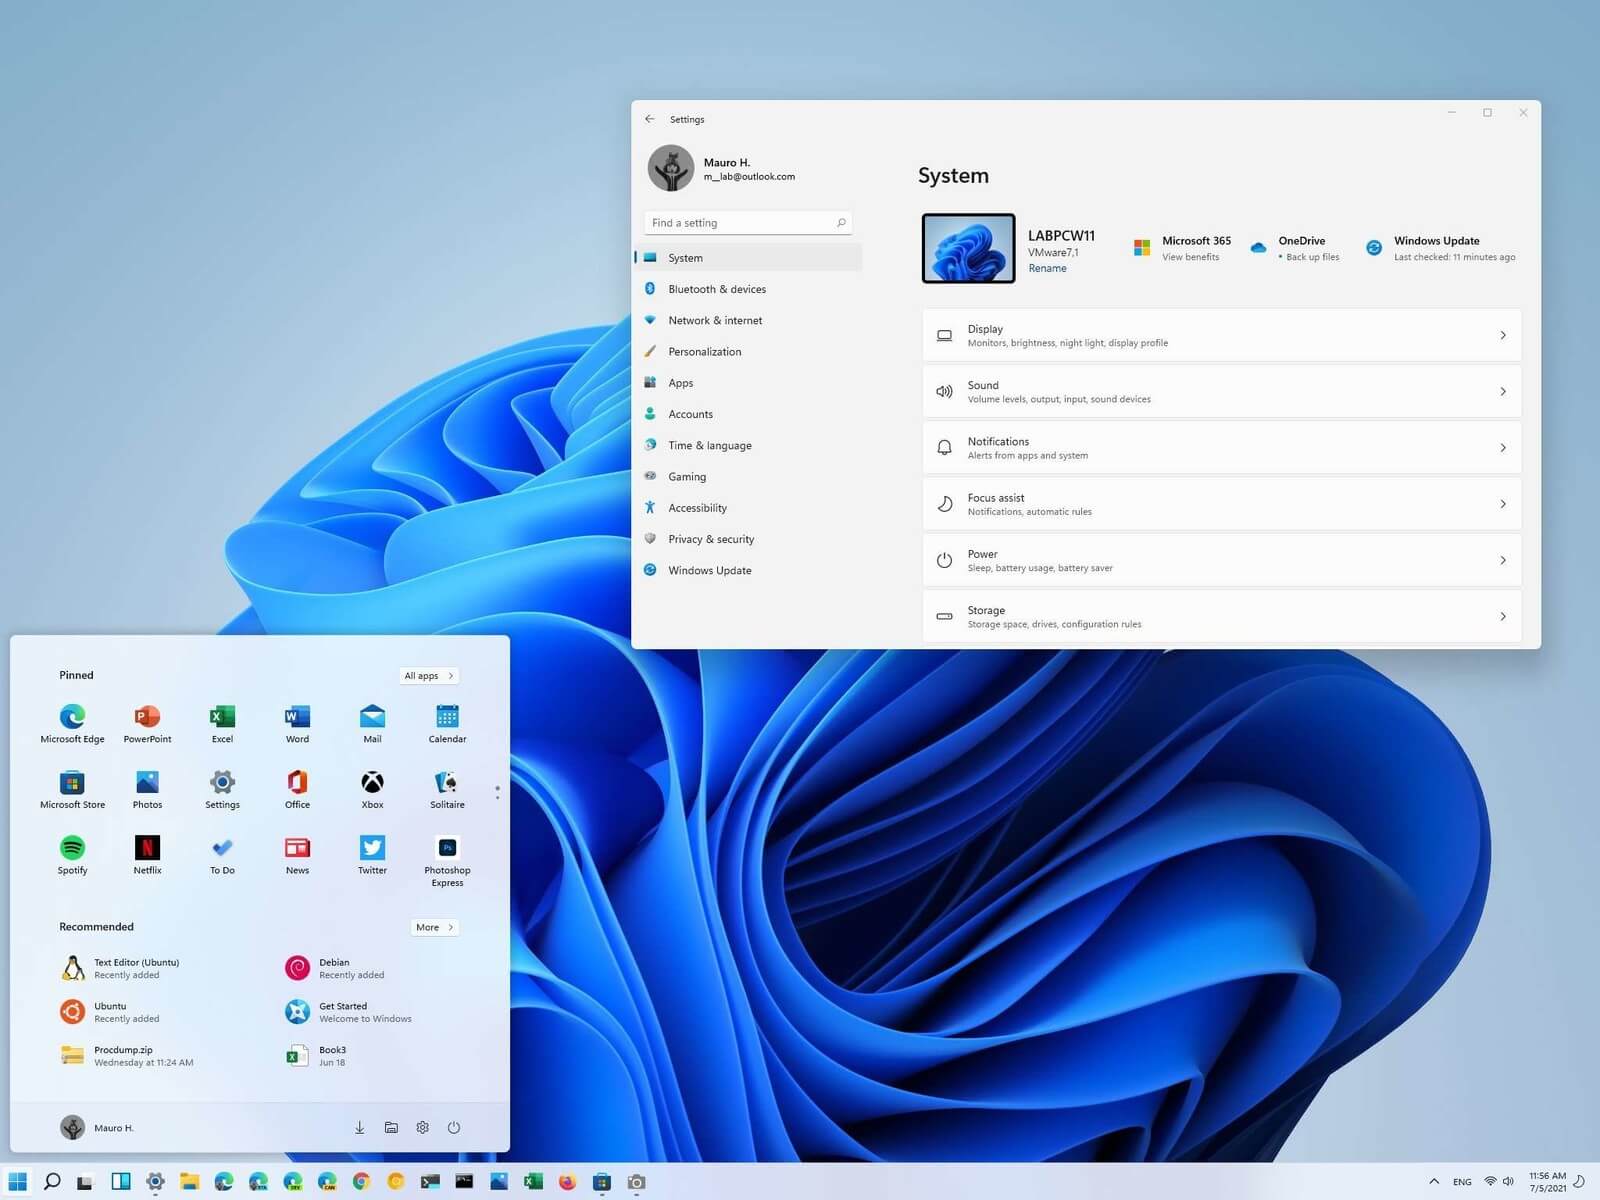 Most scrollbars are hidden by default if they are not used in Windows 11. If you are not ok with this feature and want scrollbars to be always visible and available do not worry, turning them ON is very easy.
Windows 11 will save settings automatically and apply setting right away. Close settings and continue with work.
Just click here Download and install Stellar Phoenix Outlook PST Repair tool in your computer. Run it to regain all of your data within your e-mail account and to regain your lost MS-Outlook PST File Password.Besides assisting you to regain your PST file password, it can be utilized to solve malfunctions in the PST Files and any other associated problems. For instance, this repair tool can help to fix damaged and corrupted PST file size limit errors as well as PST files. If you use MS Outlook 2002 version on your PC and you use it quite often and prefer not to delete emails in it, then you might come across the PST file size 2GB limit error. This error occurs when you reach or exceed the 2 gigabytes memory limit. If this happens, your ability to send and receive emails through your MS-Outlook account is greatly hindered. You can't add new contacts either. In instances such as these, Stellar Phoenix Outlook PST Repair Tool is useful. It helps increase the GB limit twice as much as normal. This means that your memory limit rises from 2-4GB making Stellar PST Outlook Repair a crucial tool for all MS Outlook users.
Error Causes“The application failed to initialize properly (0xc0000005). Click on OK to close the application.”This kind of application error can occur due to several reasons which include damaged installation of the application or system files may have gotten corrupted or damaged. It could also be caused by a malware infection. There are a couple of suggestions provided in this post to help you resolve the error. You can try to run both a System File Checker scan and the DISM tool or reinstall the problematic application or repair-install Windows 10 as well as run a malware scan. Note that the options provided below do not have to be followed in sequence.