How to Fix Propsys.dll Error

Isn’t it annoying when you get an error message pop up stating ‘Cannot find propsys.dll” or “propsys.dll not found” when you start your computer or open a particular program?

The propsys.dll file is crucial to the Windows operating system. This file is located in one of the following locations: "C:\Windows", C:\Program Files, C:\WINDOWS\system32, or C:\Program Files\Common Files". And the propsys.dll error indicates that the propsys digital library file is damaged and corrupt.

The propsys.dll error may lead to a very unstable operating system.

It may also hamper your ability to access many programs on your computer, lead to program and system crash and slow down the system’s performance. Therefore, to avoid these system threats, it is advisable to fix the error immediately.

Solution

Restoro box imageError Causes

The common causes of propsys.dll file error are:

  • Registry problem
  • The propsys.dll file is damaged due to a virus or spyware
  • Improper software removal
  • Hardware Failure

The propsys.dll error message is displayed in either of the following forms:

  • Propsys.dll not found
  • Cannot find [Path]propsys.dll
  • This application failed to start because propsys.dll was not found. Reinstalling the application may fix this problem
  • The propsys.dll file is missing

Further Information and Manual Repair

There are many ways to fix the propsys.dll error. However, for optimum results from the fix, you must first identify the cause of the error and then choose the solution accordingly.

  • Recommended Solution for Registry Issue

If you use your system daily the resulting wasted/invalid/junk entries may dilate the registries.

This can result in registry malfunctioning which may result in a propsys.dll error on your screen. When this happens, it is advisable to use a registry cleaner to fix the problem.

Registry cleaner helps clean up the junk entries and repairing the corrupted registries.

For this, you will first have to download a registry cleaner repair tool. Download and install the software on your computer. After downloading it, click the start scan button to run. This helps scan and diagnose system errors on your computer in seconds.

Once the scanning is complete, click on the fix button to repair the registry problem.

  • Recommended Solution for File Damage and Corruption

Use the ‘System Restore’ option to restore corrupt and damaged files.  The ‘System Restore’ function will help you get a fresh copy back and simultaneously help fix the error. Here’s how to use and access the ‘System Restore’ function on your computer:

Simply go to the start menu and in the search box type restore. Once you type, it will show you the system restore option. Now select ‘choose a different restore point’. After this, you will be presented with a list of restore points.

Choose a point that you believe happened before the propsys.dll error. Confirm your selection and restart.

Another alternative solution for file damage is to run a virus scan of your entire system; the damage could be related to a virus or malware infection.

  • Recommended Solution for Hardware Failure

If a propsys.dll error occurs due to hardware failure, then it is advisable to update the drivers for hardware devices that you think are related to propsys.dll. For example, if you receive the propsys.dll error when you play a 3D video game, then try updating the driver for your video card.
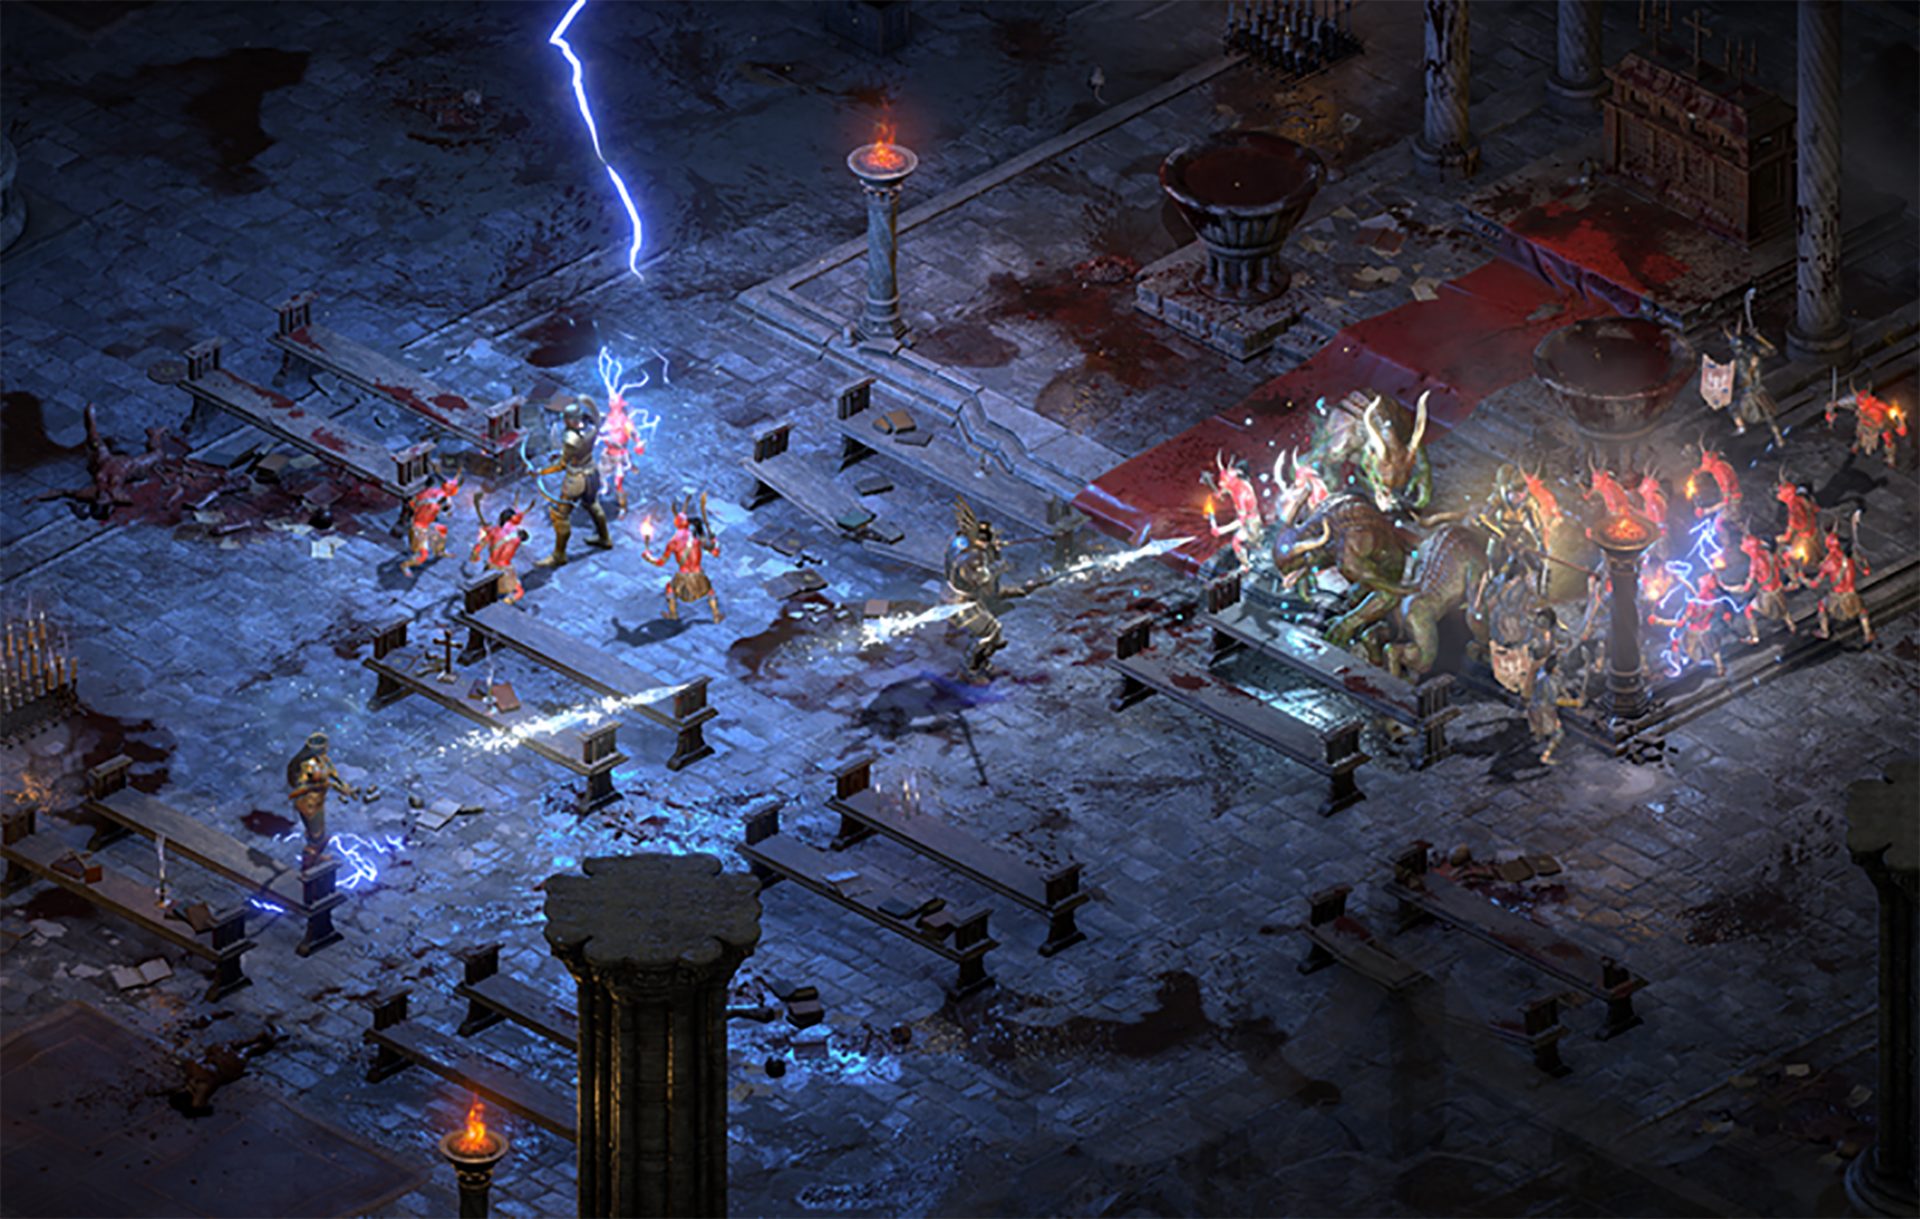
Do You Need Help with Your Device?

Our Team of Experts May Help
Troubleshoot.Tech Experts are There for You!
Replace damaged files
Restore performance
Free disk space
Remove Malware
Protects WEB browser
Remove Viruses
Stop PC freezing
GET HELP
Troubleshoot.Tech experts work with all versions of Microsoft Windows including Windows 11, with Android, Mac, and more.

Share this article:

You might also like

Fix Windows can not find STEAM.EXE in Windows
If you are getting this error even if STEAM.EXE is present on your system then follow the easy guide to solve the issue.
  1. Scan your system for malware

    Scan your complete system for viruses and other malware. If all the scans come negative then move to the next step.
  2. Disable your anti-virus software

    Some anti-virus and anti-malware software can detect steam as a potential threat and block it. Turn off your protection software and try to run Steam once all your protection is disabled. If this works you will need to either place Steam in the applications exception list or to move to another protection software.
  3. Remove administrator privileges from steam client

    Right-click on steam.exe and choose properties, go to the compatibility tab, and uncheck run this program as administrator. Try to run Steam again.
  4. Delete Steam registry value

    If everything else failed try deleting the registry value for steam. Open registry editor and locate key: HKEY_LOCAL_MACHINE\SOFTWARE\Microsoft\Windows NT\CurrentVersion\Image File Execution Options Double click on Image File Execution, find steam on left, right-click on it, and choose delete. Save and exit the registry editor.
Read More
Selected boot image did not authenticate Error
If you are using UEFI and you encountered an error message that says, “Selected boot image did not authenticate”, then read on as this post will show you what to do it fix it. This kind of error indicates that UEFI is having an issue in figuring out if the boot image has tampered with. UEFI offers Secure Boot and if the boot image seems to be invalid, you won’t be allowed to boot into your computer. Aside from that, it could be that you may be using endpoint encryption and the software can’t validate the certificate. To fix the “Selected boot image did not authenticate” error in UEFI, you need to first check if the error has given any reference to any software that you might have for encryption. If it has, then you need to disable the Encryption tool to resolve the problem. In addition, you could also try to disable Secure Boot or perform Startup Repair in case the disabling Encryption tool didn’t work. For more details, make sure to use each one of the options provided below as a reference.

Option 1 – Try to disable the Encryption tool

The first thing you can do to fix the “Selected boot image did not authenticate” error is to disable the Encryption tool. Many users reported that some encryption tools like the ESET Endpoint Encryption won’t let them boot into the computer if the system manufacturer does not include the correct certifications as a part of the UEFI BIOS. And since there is no way to bypass this, you have to disable Secure Boot in order for you to boot into your computer.

Option 2 – Disable the Secure Boot in the BIOS

Disabling the Secure Boot in the BIOS settings is definitely recommended to resolve the error. To disable Secure Boot, here’s what you have to do:
  • First, boot your computer into Windows 10.
  • Next, go to Settings > Windows Update. From there, check if there is anything that you have to download and install if you see any available updates. Usually, OEMs send and update the list of trusted hardware, drivers, and operating systems for your computer.
  • After that, go to the BIOS of your computer.
  • Then go to Settings > Update & Security > Advanced Startup options. If you click on Restart Now, it will restart your computer and give you all the advanced options.
  • Next, select Troubleshoot > Advanced Options. As you can see, this screen offers you further options including System restore, Startup repair, Go back to the previous version, Command Prompt, System Image Recovery, and UEFI Firmware Settings.
  • Select the UEFI Firmware Settings which will take you to the BIOS.
  • From there, go to the Security > Boot > Authentication tab where you should see Secure Boot. Note that every OEM has its own way of implementing the options so it varies.
  • Next, set Secure Boot to Disabled and set Legacy Support to On or Enabled.
  • Save the changes made and exit. Afterward, your computer will reboot.

Option 3 – Try to run the Automatic Repair Utility

If disabling Secure Boot did not fix the problem, you might also want to run the Automatic Repair utility in fixing the error. To do so, follow the steps below.
  • You can start by booting into the Advanced Recovery Mode.
  • After that, select Troubleshoot > Startup Repair.
  • Next, follow the on-screen instructions that appear on the screen and finish the Automatic Repair process.
  • Now check if the block is gone once the reboot is completed.
Read More
How to Repair Error Code 31

What is Error Code 31?

Device Manager Error Code 31 pops up when Windows prevents the driver for a particular hardware device from loading. The error code 31 is almost always presented in the following format:

“This device is not working properly because Windows cannot load the drivers required for this device.” Code 31

This error can occur with any hardware device; however, in most cases, it occurs with Ethernet cards. The good news is that it belongs in the easy-to-resolve category. So repairing it should not be difficult.

Solution

driverfix boxError Causes

Error code 31 is related to driver problems, and the most common causes include:
  • Outdated drivers
  • Missing drivers
  • Mis-configured drivers
  • Corrupt drivers

Further Information and Manual Repair

To resolve error code 31 on your system, try the methods given below. We have listed down some of the most effective and easy-to-perform DIY methods for fixing Device Manager code 31 on your PC.

Method 1 - Rollback the Driver to its Previous State

This simply means to return the driver back to its previous state - to the version last installed. Try this method to resolve error code 31. This is probably the easiest way to return your PC to its previous working state.

However, by doing so, you will not be able to update your drivers and run new driver versions on your system. In other words, this is a temporary method to fix this issue.

You may still want to try other methods given below to ensure you have the latest drivers installed on your system.

You can roll back the driver to its previous version by accessing the Driver Rollback feature located in the driver settings within the Device Manager. Or another way to perform a rollback is to use the Windows System Restore Utility.

It is a recovery tool built-in the new Windows versions. To access it, simply go to the start menu and type System Restore Utility in the search menu.

Access it and pick a point in the past, also referred to as the restore point, to return your PC to its previous state before the error code 31 occurred.

However, to resolve the problem permanently, try method 2.

Method 2 - Update the Driver

Error code 31, as discussed above, may occur due to outdated, misconfigured, or corrupted drivers. Whatever the reason may be, to ensure the proper functioning of your hardware device, it is important to update the drivers on your system frequently.

To start driver updates, first, it is important to find out and identify problematic drivers. You need to identify the drivers that are corrupt, misconfigured, and outdated. For this, go to the Device Manager and then look for devices with yellow exclamation marks.

The yellow exclamation marks next to the devices show that these device drivers are problematic. Once you’ve identified the problematic drivers, simply update them by finding the latest and compatible versions on the manufacturer’s website.

This process is time-consuming and can be frustrating at times, especially when doing it for the first time.

Also, once you’ve updated the drivers, you need to update them from time to time to ensure they don’t get outdated, or else you will have to encounter Device Manager error codes again.

Method 3 - Download DriverFIX to Update Drivers Automatically

To avoid the hassle and stress involved in updating drivers manually, it is advisable to download and install DriverFIX.

DriverFIX is a smart, innovative, and feature-filled software embedded with an intelligent algorithm that quickly detects problematic drivers, matches them with the latest and compatible versions, and updates them immediately and automatically in just a few seconds and a couple of clicks.

It’s as simple as it can be. Furthermore, with this software installed on your PC, you don’t have to stress and worry about when your drivers need to be updated again.

DriverFIX ensures all drivers are continuously and regularly updated before they become outdated.

Click here to download DriverFIX to repair Device Manager error code 31 and update drivers automatically and regularly.

Read More
VideoDownload Converter removal guide

Video Download Converter is a potentially unwanted toolbar distributed by Mindspark Interactive network. This toolbar offers users the ability to download and convert youtube and other online videos.

While this may seem useful at the start, this toolbar monitors user browsing activity and records visited websites, clicked links, and even personal data, that it later uses to display injected ads through your browsing session. When the toolbar is installed, it will automatically hijack your home page and search engine setting them to MyWay.com. This search engine uses google to display your search results, however, it injects ads into the search results to generate ad revenue. Several anti-virus scanners have detected VideoDownloadManager as a Browser Hijacker, and are therefore not recommended to keep on your computer.

About Browser Hijackers

Browser hijacking is actually a form of unwanted software, commonly a browser add-on or extension, which then causes modifications in the browser’s settings. There are lots of reasons why you might experience a browser hijack; however commercial, marketing, and advertising are definitely the key purposes for their creation. Usually, it will force users to predetermined sites which are looking to increase their advertising campaign earnings. It may seem naive, but the majority of these sites are not legitimate and can pose a major threat to your online safety. Browser hijackers can also allow other harmful programs without your knowledge to further damage the computer. How to determine if your browser has been hijacked There are many symptoms that indicate the internet browser has been hijacked: the home page of your browser is changed suddenly; you find yourself constantly directed to a different web page than the one you intended; the main web browser settings are modified and unwanted or insecure resources are added to the trusted websites listing; unsolicited new toolbars are added to your web browser; you may find numerous pop-up adverts on your computer screen; your browser has instability issues or exhibits frequent errors; you can’t navigate to certain websites, such as computer security software related websites.

So how does a PC get infected with a browser hijacker?

Browser hijackers can enter a PC by some means or other, for example via file sharing, downloads, and e-mail too. Many web browser hijackings originate from add-on applications, i.e., toolbars, browser helper objects (BHO), or extensions added to browsers to provide them additional features. Some browser hijackers spread in user’s computers using a deceptive software distribution method called “bundling” (commonly through freeware and shareware). Some of the popular hijackers are VideoDownload Converter, Babylon Toolbar, Conduit Search, OneWebSearch, Sweet Page, and CoolWebSearch. Browser hijackers might record user keystrokes to gather potentially invaluable information leading to privacy concerns, cause instability on computers, drastically disrupt user’s browsing experience, and eventually slow down the PC to a point where it becomes unusable.

The best ways to remove browser hijackers

Certain kinds of browser hijackers can be easily removed from your PC by uninstalling malicious software programs or any other recently added shareware. However, many hijacking codes are not very easy to get rid of manually, since they go deeper into the operating system. Moreover, manual removal demands you to do many time-consuming and complex procedures which are very difficult to carry out for beginner computer users. You can go for automatic browser hijacker removal by simply installing and running reliable anti-malware software. Safebytes Anti-Malware has a cutting-edge anti-malware engine to help you prevent browser hijacker infection in the first place, and clean up any pre-existing issues. Together with anti-malware, a PC optimizer tool, similar to Total System Care, could help you resolve registry errors, remove unwanted toolbars, secure online privacy, and improve overall system performance.

What to Do if Malware Stops You From Downloading Or Installing Anything?

Every malware is detrimental and the magnitude of the damage will vary greatly depending on the type of malware. Some malware sits in between your PC and the internet connection and blocks a few or all internet sites which you want to visit. It would also block you from adding anything to your system, particularly anti-malware software. If you are reading this article, chances are you’re stuck with a malware infection that is preventing you to download and install the Safebytes Anti-Malware program on your computer. There are a few steps you can take to circumvent this problem.

Eliminate viruses in Safe Mode

In the event the malware is set to load at Windows startup, then booting in safe mode should prevent it. Just bare minimum required programs and services are loaded when you boot your computer into Safe Mode. Here are the steps you need to follow to take out viruses in Safemode. 1) After switching on the computer, press the F8 key before the Windows splash screen begins to load. This would invoke the “Advanced Boot Options” menu. 2) Make use of the arrow keys to select Safe Mode with Networking and hit ENTER. 3) When you are into this mode, you should have an internet connection once again. Now, utilize your web browser to download and install Safebytes Anti-malware. 4) Right after installation, run a complete scan and let the software remove the threats it detects.

Obtain the security program using a different browser

Some malware mainly targets particular browsers. If this sounds like your situation, employ another web browser as it could circumvent the virus. If you appear to have a trojan attached to Internet Explorer, then switch over to a different browser with built-in security features, such as Firefox or Chrome, to download your favorite anti-malware program – Safebytes.

Install security software on a USB drive

Here’s yet another solution which is utilizing portable USB anti-malware software that can scan your computer for viruses without the need for installation. Adopt these measures to use a USB drive to fix your corrupted computer system. 1) Download Safebytes Anti-Malware or Windows Defender Offline onto a clean PC. 2) Mount the pen drive on the same PC. 3) Double click on the downloaded file to run the installation wizard. 4) Choose a thumb drive as the location when the wizard asks you where you wish to install the application. Follow the on-screen instructions to complete the installation. 5) Transfer the pen drive from the uninfected computer to the infected computer. 6) Double-click the EXE file to run the Safebytes program from the thumb drive. 7) Click on the “Scan” button to run a full system scan and remove viruses automatically.

Detect And Remove Viruses With SafeBytes Anti-Malware

If you’re looking to purchase anti-malware for your computer system, there are lots of brands and applications for you to consider. Some of them are good and some are scamware applications that pretend as legit anti-malware programs waiting around to wreak havoc on your personal computer. Make sure you choose a company that builds industry-best anti-malware and it has attained a reputation as reliable. One of the recommended software by industry analysts is SafeBytes Anti-Malware, the most dependable program for Windows computers. SafeBytes anti-malware is really a powerful, highly effective protection tool made to help users of all levels of IT literacy in detecting and removing harmful threats from their PC. Using its cutting-edge technology, this application will assist you to remove several types of malware including computer viruses, trojans, PUPs, worms, ransomware, adware, and browser hijackers. SafeBytes has got a plethora of amazing features which can help you protect your computer from malware attack and damage. Here are some of the features you will like in SafeBytes. Active Protection: SafeBytes offers a completely hands-free real-time protection that is set to monitor, block and kill all computer threats at its very first encounter. It will continuously monitor your computer for hacker activity and also provides end-users with sophisticated firewall protection. World-class AntiMalware Protection: This deep-cleaning anti-malware application goes much deeper than most antivirus tools to clean out your computer system. Its critically acclaimed virus engine locates and disables hard-to-remove malware that conceals deep inside your personal computer. Fast Scan: SafeBytes Anti-Malware possesses a multi-thread scan algorithm that works up to 5 times faster than any other antivirus software. Web Protection: Through its unique safety ranking, SafeBytes tells you whether a website is safe or not to visit it. This will make sure that you’re always certain of your safety when browsing the web. Light-weight: This software is not “heavy” on the computer’s resources, so you’ll not find any performance troubles when SafeBytes is working in the background. 24/7 Support: You could get high levels of support around the clock if you are using their paid software. To sum it up, SafeBytes Anti-Malware is pretty great for securing your computer against all sorts of malware threats. There is no doubt that your PC will be protected in real-time once you put this software program to use. So if you’re looking for the best anti-malware subscription for your Windows-based PC, we suggest the SafeBytes Anti-Malware software program.

Technical Details and Manual Removal (Advanced Users)

If you do not want to use malware removal software and like to remove VideoDownload Converter manually, you may do so by going to the Add/Remove Programs menu in the control panel and deleting the offending software; in cases of web browser extensions, you could uninstall it by going to the browsers Add-on/Extension manager. You may even want to reset your internet browser settings, and also delete temporary files, browsing history, and cookies. Finally, examine your hard disk for all of the following and clean your registry manually to remove leftover application entries following an uninstallation. Please keep in mind that this is for advanced users only and could be difficult, with wrong file removal causing additional PC errors. Furthermore, certain malware is capable of replicating or preventing removal. Doing this malware-removal process in Safe Mode is recommended.
Files: LOCALAPPDATA\VideoDownloadConverterTooltab\TooltabExtension.dll Folders: LOCALAPPDATA\Google\Chrome\User Data\Default\Extensions\ikgjglmlehllifdekcggaapkaplbdpje LOCALAPPDATA\Google\Chrome\User Data\Default\Local Extension Settings\ikgjglmlehllifdekcggaapkaplbdpje LOCALAPPDATA\Google\Chrome\User Data\Default\Sync Extension Settings\ikgjglmlehllifdekcggaapkaplbdpje LOCALAPPDATA\VideoDownloadConverterTooltab Registry: key VideoDownloadConverter at HKEY_CURRENT_USER\Software\ key VideoDownloadConverterTooltab Uninstall Internet Explorer at HKEY_LOCAL_MACHINE\Software\Microsoft\Windows\CurrentVersion\Uninstall\
Read More
A Quick Guide to Fixing Ieframe.dll Error

What is the Ieframe dll Error?

Ieframe.dll is a Dynamic Link Library, a collection of small programs. It is stored in C:\WINDOWS\SYSTEM32. The function of this dll file is to convert Html code into web pages on IE (Internet Explorer). When this file gets corrupt, you start experiencing ieframe.dll errors on your system. Ieframe.dll error is displayed in either of the following formats:
  • "Res://ieframe.dll/dnserror.htm#"
  • "Cannot find the file ieframe.dll"
  • "File Not Found C:WINDOWSSYSTEM32IEFRAME.DLL"

Solution

Restoro box imageError Causes

The Ieframe dll error code may occur due to multiple reasons. These include:
  • Incorrect Firewall settings
  • Ieframe.dll corruption and damage
  • Missing Ieframe.dll file
  • Internet Explorer issues
  • Viruses and malware attack
  • Outdated security software applications
If you wish to continue browsing on Internet Explorer, then it is important for you to resolve this error right away.

Further Information and Manual Repair

Here are some of the best solutions to resolve the Ieframe dll error on your PC:

Cause: Missing Ieframe.dll file

Solution: If Ieframe dll error file is missing, this means you have either accidentally deleted it while uninstalling a certain program that also shared this file. Therefore the best way to resolve the issue is to restore the missing Ieframe.dll file. To do this check the recycle bin. If you find the file, simply restore it in the following path C:\Windows\System32. However, if you are unable to find it, then download it from a reliable website.

Cause: Incorrect Firewall Settings

Solution:  In case the error is generated due to incorrect Firewall settings, then try disabling this software.  See if this works and resolves the error.

Cause: Internet Explorer Issues

Solution: Sometimes the Ieframe dll error can occur due to Internet Explorer issues. Here it is recommended to reinstall and update the latest version of IE on your system. This can be done by removing the program from the system. Go to the Control Panel, click Add/remove programs, and uninstall the program. After uninstalling the old version, install a new and updated version of IE on your system and try running it again. If it works, great the error is resolved. However, if it persists, then this means the problem is deeper and bigger than you think. The reason can be severe viral infection and malware attack not just damaging Ieframe.dll file but also exposing your system to privacy errors and threats.

Cause: Damaged and Corrupt Ieframe.dll files

Solution: The files can get corrupt when the registry overloads with data. It stores important and unnecessary files like junk files, cookies, internet history, temporary files, and invalid registry entries. Such files take up a lot of disk space and damages dll files. To resolve this issue it is advisable to download Restoro. This is a powerful registry cleaner, that detects and resolves all registry issues in seconds. It wipes out unnecessary and obsolete files cluttering the registry and restores the damaged Ieframe.dll files. It is efficient, safe, and compatible with all Windows versions. It has an intuitive interface and easy navigation which makes it simple and easy to use.

Cause: Viral Infection

Solution: If the underlying cause is a viral infection, Restoro takes care of that too. It is more than a registry cleaner. It is embedded with a powerful antivirus that removes all malicious software from your PC including viruses, Trojans, spyware, malware, and adware. And unlike a typical antivirus, it does not reduce the speed of your system. Its system optimizer utility boosts your PC speed dramatically. Click here to download Restoro on your PC today and resolve Ieframe dll error today!
Read More
How to Fix the EhRecvr.exe Error on Your PC

EhRecvr.exe Error Code - What is it?

EhRecvr.exe is an executable file located in a subfolder of C:\Windows (usually C:\WINDOWS). An executable file is denoted by the filename extension .exe. You should only run executable files from the publisher you trust because .exe files are prone to errors. Executable files can potentially change your computer settings and harm your computer.  These files can easily get corrupted. Similarly, when the EhRecvr.exe fails to run on the computer and gets corrupt, you experience an EhRecvr.exe error on your system. This error code may pop up while playing games on the PC or using any other program. EhRecvr.exe error may be displayed in any one of the following formats:
  • “ehRecvr.exe cannot be found."
  • “There was a problem starting [path]ehRecvr.exe. The specified module could not be found."
  • "Runtime Error. ehRecvr.exe pure virtual function call."
  • "This program can't start because ehRecvr.exe is missing from your computer."
  • "Unable to launch the software located at path: [path]ehRecvr.exe"
  • "This application requires the file ehRecvr.exe, which was not found on this system."
  • "ehRecvr.exe is missing."
  • "Access Violation File [path]ehRecvr.exe"

Solution

Restoro box imageError Causes

There are plenty of reasons why this error may occur these include:
  • EhRecvr.exe file is mistakenly deleted
  • EhRecvr.exe file is corrupted and damaged
  • Viral/Malware infection
  • Bad registry entries
  • Outdated drivers
Though this error code is not fatal but nonetheless it is advisable to fix it immediately because EhRecvr.exe error not just hampers your ability to run and access different programs on your system but it also triggers issues like viral infection and registry problems which if not resolved can put your big at greater risk like system failure, freeze, and crash.

Further Information and Manual Repair

To resolve the EhRecvr.exe error on your system, you don’t have to hire a professional and spend hundreds of dollars in repair. Here are the best and easy DIY methods that you can try to fix this error. To work around these methods you don’t need to be a technical whiz. Let’s get started:

Method 1 - Restore EhRecvr.exe from Recycle Bin

In the case of EhRecvr.exe file deletion, it is advisable to check the recycle bin. Search through the bin for the file. If you find it, then simply restore it, if not then if you have access to the internet, then download it from a trusted website.

Method 2 - Reinstall the Associated Software That Uses EhRecvr.exe File

If you receive this error when you want to use certain software on your PC, then try reinstalling that software again on your PC. This will be very helpful to obtain the EhRecvr.exe file that is not provided by Microsoft. To re-install, first, uninstall the program. Go to Add/Program in the control panel and find the program and then uninstall it. Once uninstalled, simply follow the same steps but this time round install the software. This will hopefully help resolve the EhRecvr.exe error code.

Method 3 - Update Drivers for Hardware Devices

Sometimes the error may pop up due to outdated drivers. If this is the cause then the best way to resolve the issue would be to update the driver. Use the wizard within the Device Manager to update the outdated drivers.

Method 4 - Scan for Viruses

Viruses and malware can disguise as executable files. These usually enter your PC through downloads from unreliable websites and phishing emails. In such an event, it is recommended to install a powerful antivirus. Scan your entire PC and remove all viruses to repair the issue.

Method  5 - Clean and Repair the Registry

Another method is to clean and repair the registry. If you don’t clean the registry regularly it may get accumulated with obsolete files and get corrupt. This may generate EhRecvr.exe error codes. To resolve, simply download Restoro. This is a user-friendly PC Fixer with a powerful registry cleaner. It scans for all registry errors, wipes out all the invalid entries and obsolete files and repairs corrupted DLL and .exe files in minutes. Click here to download Restoro and resolve the EhRecvr.exe error now!
Read More
How to deal with Windows random freezes
Random freezing in a Windows in the middle of work can be a very frustrating experience and can even cost us the loss of work. From time delays to sometimes complete crashes this behavior is something that every PC user wants to avoid or at least have very little of. In this article, we will cover solutions on what to do and how to fix the random freezing of computers.
  1. Run a virus scan on your computer.

    Viruses and other malware can cause freezes and other issues in your computer, run a complete system scan for any kind of viruses and malware and if needed remove them.
  2. Uninstall applications that you are not using

    Besides taking your hard drive space some applications can have and require to have some services always running on your computer which can cause some issues, if an application is not needed and it is not used, removing it might solve freezing issues.
  3. Increase RAM memory

    Sometimes the problem with freezing is not a software issue, having less RAM memory than the application requires can cause the application not to work properly and it can cause freezing of the entire system since precious RAM can not be allocated to the required application.
  4. Run system checker

    Corrupted Windows system files can cause freezing of the entire system, to fix this, start the command prompt in administrator mode and type sfc /scannow
  5. Keep running applications to a minimum

    Having too many applications running in the background can drain system resources and can cause system freezes because of lack of memory. Close applications that are running in the background and keep them minimal.
  6. Delete files and folders which you are not using

    Having many files and/or folders on the hard drive can cause a lot of system resources to be wasted, from indexing size to less free space for caching. If you have files that you no longer need, removing them will free up space and can increase performance and introduce the stability.
  7. Run memory check

    Memory issues could lead to system freezing. When an application needs to write or read to a corrupted memory cluster, freezing will occur since it can not. To check memory bring up run dialog and type in ti mdsched.exe, click on restart now and let the memory test finish.
  8. Update all drivers

    Hardware issues can cause freezing of applications and having the latest drivers can make a world of difference. Make sure that you have all device drivers to the latest versions.
  9. Optimize Disk drives and check for errors

    Windows 10 has built-in tools to check hard drives for errors and to optimize them, use them in order to see if this issue is causing freezes.
  10. Clean your registry

    A Clean registry is a happy registry and Windows is appreciating it. Make sure that you do not have any keys which you do not need in the registry and that long-forgotten application trails are deleted for good.
  11. Upgrade SSD firmware

    Like updating drivers, updating firmware is also important, and having the latest firmware for your SSD can help a lot, newer firmware can eliminate freezing if the issue was in Windows not using SSD properly.
  12. Update BIOS

    Like updating SSD firmware can help so it can update Firmware on your BIOS. Make sure that you have the latest firmware version and freezing can go away if that was the issue.
Read More
Ways to lose your Facebook account to hackers
Facebook graphicsToday most people have Facebook accounts where they keep in touch with friends and family. But large Facebook network of users is also very interesting to another party as well, hackers. There are many ways hackers can steal your data via direct hacks, trickery, and social engineering in order to get your credentials, emails, and many other things using them to wreak further havoc. Once a hacker has needed information it is very difficult to minimize impact and all of your information could be compromised from a list of friends to credit card numbers. Keep on reading to learn how can you protect yourself against these attacks and learn about common practices that hackers use in order to steal your data.

Stealing Facebook data via email

A couple of years ago there was a lot of talk about not opening suspicious emails. Well, it still holds today. The difference is that today’s fake emails have become very difficult to differentiate from official ones since hackers put the effort into creating them copying fonts and layout, making them identical to original ones. So if emails look and feel like original ones how do you know if it is fake? Very simple, you do not click anything in it. If Facebook or for that matter any company wants to contact you they will do via their platform. Clicking inside a hacker's email will lead you probably to a fake Facebook website replica where you will have to type in your username and password providing an attacker with your login credentials, etc. If you receive this kind of mail where there are threats about terminating an account, missing payments, etc. it is always the best thing to go directly to Facebook and see if you have any kind of notifications there. Do not trust any emails that ask for account information, request money, or threaten to suspend your account.

Phishing attacks

As stated previously if you click on the link inside fake mail it will probably lead you to a website replica of the original. Although hackers can pretty much copy all things from an original website like layout, fonts, colors, etc. There is one thing that he cannot, web address. Take a good look into your browser address bar to see if there is a typo or anything strange in the address of a website. Also, make sure to check for the secure icon in the web address before signing in.

Fake Facebook buttons

If by any chance and for whatever reason, you end up on a fake Facebook site be vary careful about like and other buttons since buttons themselves behave and act like links inside your browser. IF when you click on like you get a prompt to sign in, it is almost 100% that you ended up on a phishing fake website.

Password brute force attack

Having complex and long passwords is a must. If your Facebook password is 12345 there is a very high chance that if a hacker wants he can easily guess it via trying out the most used and simple passwords via simple guessing. To avoid being hacked just for having poor passwords try to think of something longer, combine letters and numerical characters, place special characters inside it or just simply as the best solution use a password manager and create passwords with it.

Password grab outside Facebook

If you use the same password for multiple accounts which is a big no-no and you should not do it then hackers can use passwords from other services and login into your Facebook in order to steal data. Avoid these situations by having different passwords for different accounts or use a password manager to keep everything in order.

Hacking via key logger

Some time ago we have made an article which explained in detail everything you need to know about key loggers here: https://errortools.com/windows/how-to-know-if-you-have-keylogger-in-windows/ Anyway, this is a more advanced hacking technique in order for hackers to steal your data and it includes placing malicious applications into your system that records your keystrokes and sends them directly to hackers. Since this is an application best protection against this type of attack is to have a security suite installed and active on your PC or device you use to go to Facebook.

Connecting and surfing on an unsecured network

Using no password and unsecured WI FI or any other type of network is risky at least. You can have all protection installed on your device and have a strong password but hackers also logged in to the same network can track all outgoing stuff going through mentioned network leaving you again exposed to attacks. It is better to connect to your mobile operator network than on free WI FI, at least there is some level of security in your operator network while free WI FI is completely unsecured. Getting a virtual private network or VPN is also one thing you could think about for protection since almost all VPN services will encrypt your data thus providing you with a security layer even on unsecured Wi-FI.

Conclusion

Hacking and stealing have come a long way from their infant stages and in today’s world when we use a lot of gadgets and have plenty of online presence taking some steps for security is a must. I hope that you have found anything here informational and helpful so you can avoid getting your data compromised.
Read More
Fix Windows Update Error 0x80071a91
Windows Update Error 0x80071a91, what it is? As you know, Windows Updates are very essential to the operating system since they push with them the important security updates that are crucial to the system. And if a Windows Update is delayed, it can the system vulnerable to potential threats. Thus, this kind of issue must be resolved right away. One of the errors that you can encounter while updating your computer is the Windows Update Error 0x80071a91. The error code 0x80071a91 occurs when the “Transaction support within the specified file system resource manager is not started or was shut down due to an error”. This happens when a service called “File System Resource Manager” or FSRM does not function due to some reason. To fix the Windows Update Error 0x80071a91, here are some suggestions that could help.

Option 1 – Run the Windows Update Troubleshooter

Running the built-in Windows Update troubleshooter could also help you resolve the Windows Update Error 0x80071a91. To run it, go to Settings and then select Troubleshoot from the options. From there, click on Windows Update and then click the “Run the troubleshooter” button. After that, follow the next on-screen instructions and you should be good to go.

Option 2 – Disable the antivirus program temporarily

There are times when the antivirus program installed in your computer blocks file access and even disk access. Thus, disabling the antivirus program or any security software installed in your computer is always a good idea you can try when the Windows Update process does not go smoothly. So before you try updating your computer again, make sure to disable the antivirus or security program and once the Windows Update is done, don’t forget to enable the antivirus program back again.

Option 3 – Try resetting the File System Resource Manager

As pointed out earlier, the error 0x80071a91 pops up when the FSRM service suddenly stops working and so resetting this service via Command Prompt might resolve the problem. To do so, follow the steps below.
  • In the Windows Search box, type “command prompt” and hit Enter.
  • Then right-click on Command Prompt from the related search results and click the “Run as administrator” option.
  • After opening Command Prompt as admin, type the following command and hit Enter:
resource setautoreset true C:
  • After that, exit Command Prompt and restart your computer and then check if the problem’s fixed by running Windows Update again.

Option 4 – Flush the contents of the SoftwareDistribution folder

You have to stop a couple of services such as BITS, Cryptographic, MSI Installer, and Windows Update Services. And to do that, you need to flush the contents in the SoftwareDistribution folder. The Software Distribution folder in the Windows operating system is a folder that can be found in the Windows directory and is used to store files temporarily which might be required to install the Windows Update on your PC. Thus, it is required by the Windows Update and maintained by WUAgent. Aside from that, it also contains all the Windows Update History files and once you delete them, you will most likely lose the Update history. As a result, the next time you run the Windows Update, it may result in a longer detection time.
  • Open the WinX Menu.
  • From there, open Command Prompt as admin.
  • Then type in the following command – don’t forget to hit Enter right after typing each one of them.
net stop wuauserv net start cryptSvc net start bits net start msiserver
  • After entering these commands, it will stop the Windows Update Service, Background Intelligent Transfer Service (BITS), Cryptographic, and the MSI Installer
  • Next, go to the C:/Windows/SoftwareDistribution folder and get rid of all the folders and files thereby tapping the Ctrl + A keys to select them all and then click on Delete. Note that if the files are in use, you won’t be able to delete them.
  • Once all the contents in the Software Distribution folder are deleted, restart your PC and then go back to Command Prompt and input the following commands again.
net start wuauserv net start bits

Option 5 – Delete the Common Log File System transaction logs

You might also want to delete the Common Log File System or CLFS transaction logs to fix the Windows Update Error 0x80071a91.
  • Open an elevated Command Prompt.
  • Then type each of the commands listed below and press Enter after you type each one of them.
    • cd /d %SystemRoot%System32SMIStoreMachine
    • attrib -s -h *
    • del *.blf
    • del *.regtrans-ms
  • After you’ve executed the commands given above, restart your computer and try to update Windows 10 again.
Read More
100sOfRecepies Removal Tutorial

100sOfRecepies is a Browser Extension developed by MindSpark Inc. that provides users with hundreds of recopies for breakfast, lunch, dinner, and dessert. This extension may appear very handy at the start, however, it may monitor your browser activity, and send it back to the developer to better serve ads. This extension injects itself into the System Registry allowing it to run each time your computer is restarted.

While browsing the internet with this extension installed you may see additional ads, sponsored links, and pop-up ads displayed in your browser. Many anti-virus scanners have detected this extension as a Browser Hijacker and are therefore not recommended to keep on your computer.

About Browser Hijackers

Browser hijacking is actually a form of an unwanted program, often a web browser add-on or extension, which causes modifications in browser settings. They are made to disrupt web browser programs for various reasons. Usually, it’ll force users to predetermined sites which are aiming to increase their advertisement income. Nevertheless, it’s not that harmless. Your internet safety is compromised and it is also very annoying. In a much worst case, your browser could be hi-jacked to download malware that may do a great deal of damage to your laptop or computer.

Major symptoms that your web browser has been highjacked

The typical symptoms that indicate having this malware on your computer are: 1. the browser’s home page is changed 2. bookmark and the new tab are also modified 3. the default search engine is changed and the browser security settings have been lowered without your knowledge 4. find new toolbars which you did not add 5. unstoppable flurries of pop-up ads show up on your personal computer screen 6. your web browser gets slow, buggy crashes often 7. Inability to navigate to certain websites, particularly anti-malware and also other security software webpages.

How does a browser hijacker infect a computer?

There are several ways your computer can become infected with a browser hijacker. They generally arrive by way of spam e-mail, via file sharing websites, or by a drive-by-download. They could also come from add-on software, also known as browser helper objects (BHO), web browser plug-ins, or toolbars. Some browser hijackers spread in user’s computer systems using a deceptive software distribution technique known as “bundling” (generally through freeware and shareware). An example of some well-known browser hijacker includes Babylon, Anyprotect, Conduit, DefaultTab, SweetPage, RocketTab, and Delta Search, but the names are continually changing. Browser hijackers could record user keystrokes to gather potentially valuable information that leads to privacy issues, cause instability on computers, drastically disrupt the user experience, and eventually slow down the PC to a point where it will become unusable.

Browser Hijacker Malware – Removal

Some browser hijacking could be quite easily stopped by discovering and eliminating the corresponding malware program from your control panel. But, most hijackers are hard to get rid of manually. No matter how much you try to remove it, it can come back over and over. Moreover, browser hijackers could modify the Computer registry so that it could be very tough to restore all of the values manually, particularly when you are not a very tech-savvy person.

Can't Install Safebytes Anti-malware due to the presence of Malware? Try This!

All malware is bad, but certain kinds of malicious software do a lot more damage to your PC than others. Some malware sits in between your computer and the internet connection and blocks some or all sites which you want to check out. It would also block you from adding anything to your machine, especially anti-virus programs. So what to do when malicious software keeps you from downloading or installing Anti-Malware? Do as instructed below to eliminate malware through alternate ways.

Eliminate malware in Safe Mode

In the event the malware is set to load at Windows start-up, then booting in safe mode should avoid it. Just the minimum required applications and services are loaded when you boot your computer in Safe Mode. Listed below are the steps you need to follow to start your computer into the Safe Mode of your Windows XP, Vista, or 7 computers (go to Microsoft website for instructions on Windows 8 and 10 computers). 1) At power-on/startup, press the F8 key in 1-second intervals. This will invoke the “Advanced Boot Options” menu. 2) Choose Safe Mode with Networking with arrow keys and hit Enter. 3) When this mode loads, you should have an internet connection. Now, use your internet browser to download and install Safebytes. 4) As soon as the software program is installed, allow the scan run to remove viruses and other threats automatically.

Switch over to an alternate web browser

Malicious program code could exploit vulnerabilities on a particular web browser and block access to all anti-virus software sites. The best way to overcome this problem is to choose a browser that is known for its security measures. Firefox contains built-in Malware and Phishing Protection to keep you secure online.

Install and run anti-malware from the Thumb drive

To effectively get rid of the malware, you might want to approach the issue of running an anti-virus program on the affected PC from a different perspective. Do these simple measures to clear up your infected computer by using a portable antivirus. 1) On a virus-free PC, download and install Safebytes Anti-Malware. 2) Insert the pen drive on the same PC. 3) Run the setup program by double-clicking the executable file of the downloaded software, with a .exe file format. 4) When asked, select the location of the USB drive as the place where you want to put the software files. Follow the instructions on the screen to finish off the installation process. 5) Now, transfer the USB drive to the infected computer system. 6) Double-click the EXE file to open the Safebytes program right from the thumb drive. 7) Simply click “Scan Now” to run a scan on the affected computer for viruses.

Protect Your Computer and Privacy With SafeBytes Anti-Malware

To help protect your computer or laptop from a variety of internet-based threats, it’s important to install an anti-malware application on your personal computer. However, with countless numbers of antimalware companies in the marketplace, nowadays it’s tough to decide which one you should buy for your laptop. Some of them are excellent, some are ok types, while some will affect your PC themselves! You need to be careful not to pick the wrong product, particularly if you purchase a premium application. Amongst few good applications, SafeBytes Anti-Malware is the strongly recommended software for security-conscious people. Safebytes is one of the well-established computer solutions firms, which provide this complete anti-malware software program. Through its cutting-edge technology, this software protects your personal computer against infections caused by different types of malware and similar internet threats, including adware, spyware, trojans horses, worms, computer viruses, keyloggers, potentially unwanted programs (PUPs), and ransomware. SafeBytes carries a plethora of wonderful features which can help you protect your computer from malware attack and damage. Here are some of the good ones: Robust Anti-malware Protection: By using a critically acclaimed anti-malware engine, SafeBytes provides multi-layered protection which is made to catch and remove threats that are concealed deep in your PC. Active Protection: SafeBytes offers complete and real-time security for your PC. It’ll check your PC for suspicious activity at all times and shields your PC from unauthorized access. Website Filtering: Through its unique safety rating, SafeBytes informs you whether a website is safe or not to visit it. This will assure that you’re always certain of your safety when browsing the online world. Lightweight Utility: SafeBytes is really a lightweight application. It consumes an extremely small amount of processing power as it runs in the background therefore you will not observe any computer performance issues. 24/7 Premium Support: Skilled technicians are at your disposal 24/7! They will immediately fix any technical issues you may be experiencing with your security software.

Technical Details and Manual Removal (Advanced Users)

If you’d like to carry out the removal of 100sOfRecepies manually rather than using an automated software tool, you may follow these simple steps: Navigate to the Windows Control Panel, click on the “Add or Remove Programs” and there, select the offending program to uninstall. In cases of suspicious versions of web browser extensions, you can easily remove them through your browser’s extension manager. You may also want to reset your web browser settings, as well as delete browsing history, temporary files, and internet cookies. To ensure the complete removal, find the following Windows registry entries on your system and delete them or reset the values appropriately. Please keep in mind that only advanced users should try to manually edit the registry because incorrect file removal leads to a major problem or even a PC crash. In addition, certain malware is capable of replicating itself or preventing deletion. It is recommended that you carry out the removal procedure in Safe Mode.
Files: %Documents and Settings%\All Users\Application Data0sOfRecipes Toolbar virus %program files %\internet explorer\ 100sOfRecipes Toolbar\[random].mof %program files (x86)%0sOfRecipes Toolbar \ %programData%\suspicious folders\ %windows%\system32\driver0sOfRecipes Toolbar %app data%\ 100sOfRecipes Toolbar virus\ Registry: [HKEY_LOCAL_MACHINE\SOFTWARE\Microsoft\MATS\WindowsInstaller\EAF386F0-7205-40F2-8DA6-1BABEEFCBE8914.07.30.07.52.18]ProductName=100sOfRecipes Toolbar [HKEY_LOCAL_MACHINE\SOFTWARE\Wow6432Node\Microsoft\Tracing\Muvic_RASAPI32] [HKEY_LOCAL_MACHINE\SOFTWARE\Wow6432Node\Microsoft\Tracing\Muvic_RASMANCS] [HKEY_LOCAL_MACHINE\SOFTWARE\Wow6432Node\Microsoft\Windows\CurrentVersion\Uninstall\EAF386F0-7205-40F2-8DA6-1BABEEFCBE89] DisplayName=100sOfRecipes Toolbar [HKEY_USERS\S-1-5-21-3825580999-3780825030-779906692-1001\Software\Microsoft\Windows\CurrentVersion\Uninstall\50f25211-852e-4d10-b6f5-50b1338a9271] DisplayName=100sOfRecipes Toolbar
Read More
1 2 3 171
Logo
Copyright © 2023, ErrorTools. All Rights Reserved
Trademark: Microsoft Windows logos are registered trademarks of Microsoft. Disclaimer: ErrorTools.com is not affiliated with Microsoft, nor claims direct affiliation.
The information on this page is provided for information purposes only.
DMCA.com Protection Status