When you get the error information, "The Software Can Not Begin Because MSVCR100.Dll Is Missing", what this implies is that the Computer will be lacking the MS Visual C++ 2010 libraries.
The malfunction is rather frequent throughout installations. It doesn't matter the number of times you try to reinstall the program.
The malfunction can happen whether you've been utilizing your pc for many years, or it's really a recent one.
 Error Causes
a) Missing MSVCR100.DLL: As the problem message indicates, you get this information mainly because MSVCR100.DLL is completely missing.
b) Broken MSVCR100.DLL: When the msvcr100.dll is broken, you will also get the same error, suggesting the software won't start.
The thing you need to understand is the fact that MSVCR100.DLL is playing an important role in the application referred to as MS Visual C++ 2010 Redistributable Package.
Without the MS Visual C++ 2010 Redistributable Package, any software that you simply make an effort to install won't start. You could possibly complete installing it by pursuing proper installation procedures, and then end up getting the "The Software Can Not Begin Because MSVCR100.Dll Is Missing" error.
If you get the "The Software Can Not Begin Because MSVCR100.Dll Is Missing" error information on an effective setup of any software, you shouldn't worry. You can really repair the issue and commence your recently installed software without any more hassle.
Start by checking whether you presently use 64-bit or 32-bit Windows. Visit the start button, in case you use Winxp. Type winver. On the window that appears, click Run, subsequently push enter. Head to Start, in case you use both Win7 or Vista.
Subsequently, click on the search box and type “Computer”. Right-click windows and subsequently click on Properties. Under Windows Edition, you'll find whether your Windows is 64-bit or 32-bit.
Search for the correct variation of MS Visual C++ 2010 Redistributable Package, as soon as you discover whether your Windows is 64-bit or 32-bit. Down load the x86 variant of MS Visual C++ Redistributable Package if your version is 32-bit and you must obtain the x64 variant of MS Visual C++, for those who own a-64-bit version of Windows Operating System.
You must never obtain MS Visual C++ 2010 Redistributable Package from third-party websites.
This is because Microsoft doesn't charge a cent for the files. The files are openly and easily available on Microsoft. These files come in many different variants. Consequently, select what's suitable for your own Computer with regards to the version of Windows which you operate.
Make use of the release date, when installing MS Visual C++ 2010 Redistributable Package. You might also look out for Service Pack 1 and obtain it for your Windows. Service Pack 1 only ensures that you simply obtain the latest edition.
As soon as you end installing the most up-to-date version of MS Visual C++ 2010 Redistributable Package as demonstrated above, reboot your computer and you'll not have to worry about getting the annoying"The Software Can Not Begin Because MSVCR100.Dll Is Missing" error message anymore.
 Error Causes
Microsoft will soon offer 4 CPU computer specifically aimed at developers and its name is Volterra. The machine as stated will come with 4 processors but the strange thing is that they will be ARM-based instead of x86.
CEO of Microsoft, mister Satya Nadella has introduced the product and Microsoft has released a youtube video promoting it.
The computer system will have Qualcomm's NPU or built-in neural processing unit to use AI's power to help developers write and produce better and faster code. The sad news is that besides processors used there is no other information on other components that will go into this system.
As seen in the video, the computer reminds me a lot of the apple MAC mini with its size and design, and as stated it is made from recycled plastic which in our opinion will bring the price under $1000.
Microsoft has not provided an official price tag for Volterra, but our hope is that it will be more affordable than building your own development PC. Also, there was nothing said about computer availability, we suspect that the selling model will be typical Microsoft one with first models available only in the USA and moving forward slowly opening it to other markets.
As previously said nothing except the number of CPUs and their type has been officially said but we managed to get some information about some other specific things not including its inside components.
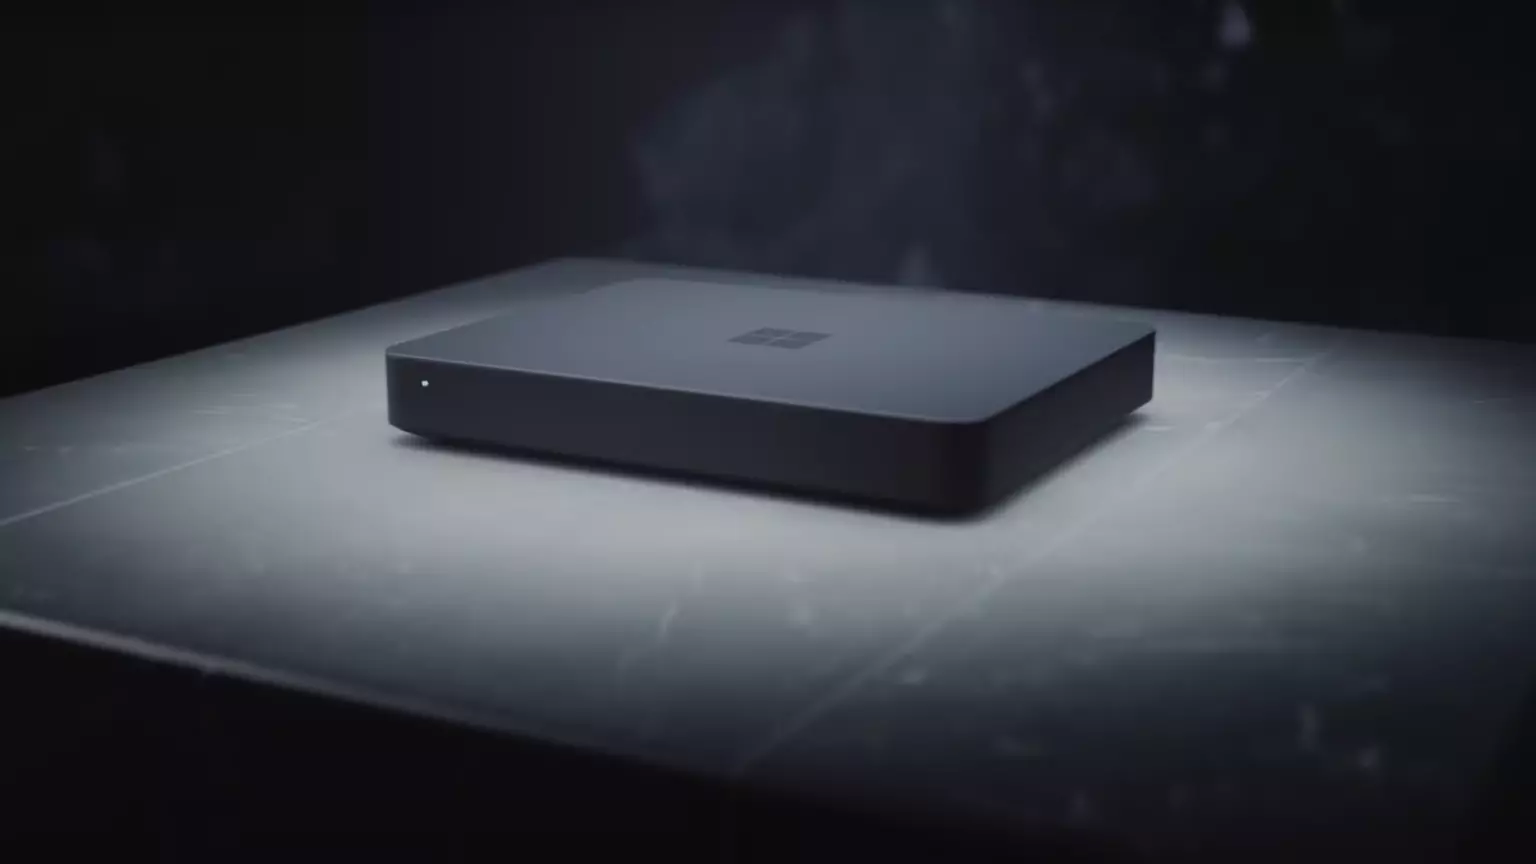
The unit will have a fan inside of it for cooling purposes and better performance and that is what was officially stated by Microsoft. On the outside, it is known that the computer will have three USB-A ports, a mini DisplayPort, and an ethernet input. All of these will be positioned on the back of the device, on its left side there will be two USB-C ports.
The unit itself will be running on Windows 11 but it was not disclosed anything about the version, we presume since this is a model aimed for professional use that it will come with Windows 11 PRO version.
Since this product is aimed at developers logically support for developing software is a must-have and at the time of this writing software that will come and that will run on Volterra is:
Once MAC studio has been released it showed that specific builds have their audience and can be sold for less of a price than full-fledged custom-made workstations. There is no doubt that Microsoft Volterra will find its audience but will that be enough to have more versions of this compact computer only time will tell.
 Once it opens, click on Device Manager to open it,
If you have a driver device error inside Windows, you should see it immediately when entering the Device Manager, it will have a yellow exclamation mark beside it. Right-click on it and choose update driver.
Once it opens, click on Device Manager to open it,
If you have a driver device error inside Windows, you should see it immediately when entering the Device Manager, it will have a yellow exclamation mark beside it. Right-click on it and choose update driver. The first thing that would pop into my mind is that I have lost tons of work and that something in my hardware has gone very wrong and it is dead. Luckily that is not the case and this error means that due to Windows update drivers were not properly transferred due to some compatibility issues, maybe it was a corrupt update file, etc. Of course, the reason could be hardware malfunction as well, but if everything was working fine before the update, it is a software issue, and I must say it is a common one and fixable. Please keep reading this guide in order to fix the Device not migrated error.
Find device inside device manager, right-click on it, and choose properties. Go to the events tab and make sure that the device has migration issues.
The first thing that would pop into my mind is that I have lost tons of work and that something in my hardware has gone very wrong and it is dead. Luckily that is not the case and this error means that due to Windows update drivers were not properly transferred due to some compatibility issues, maybe it was a corrupt update file, etc. Of course, the reason could be hardware malfunction as well, but if everything was working fine before the update, it is a software issue, and I must say it is a common one and fixable. Please keep reading this guide in order to fix the Device not migrated error.
Find device inside device manager, right-click on it, and choose properties. Go to the events tab and make sure that the device has migration issues.
 You have now 3 options for updating the driver, you can do it manually, automatically, or with the driver installer. We will cover all 3 options so you choose which one best suits you.
OPTION 1: Manually.
Close the Properties tab, go to the device manufacturer website and download the latest driver, if there are no drivers there, the only executable installer for the device skip this step and try the other 2. After you have downloaded the driver package from the website, right-click on the device and choose update driver.
You have now 3 options for updating the driver, you can do it manually, automatically, or with the driver installer. We will cover all 3 options so you choose which one best suits you.
OPTION 1: Manually.
Close the Properties tab, go to the device manufacturer website and download the latest driver, if there are no drivers there, the only executable installer for the device skip this step and try the other 2. After you have downloaded the driver package from the website, right-click on the device and choose update driver.
 Now navigate to the folder where you have downloaded your driver package and update the driver. Reboot your system.
OPTION 2: Automatic update.
Close the Properties tab, right-click on the device and choose to uninstall.
Now navigate to the folder where you have downloaded your driver package and update the driver. Reboot your system.
OPTION 2: Automatic update.
Close the Properties tab, right-click on the device and choose to uninstall.
 Once the device is uninstalled, restart your system, and Windows will automatically search and install the latest driver for the device.
OPTION 3: Via driver installer.
If you have downloaded .EXE or executable driver installer from device manufacturers web site try installing it, if the installation fails, try using compatibility mode for the installer. Navigate where the installer is located, right-click on it, and choose properties. Go to compatibility TAB and try installing it with administrator privileges in Windows 8 mode.
Once the device is uninstalled, restart your system, and Windows will automatically search and install the latest driver for the device.
OPTION 3: Via driver installer.
If you have downloaded .EXE or executable driver installer from device manufacturers web site try installing it, if the installation fails, try using compatibility mode for the installer. Navigate where the installer is located, right-click on it, and choose properties. Go to compatibility TAB and try installing it with administrator privileges in Windows 8 mode.
 Reboot your system after this step.
This should solve the issues, however, if the issue still persists, follow the next steps.
In the command prompt type in: sfc /scannow and press ENTER.
Reboot your system after this step.
This should solve the issues, however, if the issue still persists, follow the next steps.
In the command prompt type in: sfc /scannow and press ENTER.
 The scanning process and repair of files will take around 15 min. Leave it to finish completely, do not restart, work on the computer or shut it down while the process is active, and only after it is finished reboot your system.
 Go to the Windows update tab and click on DOWNLOAD or click on check for updates for the latest Windows fix.


 In the run dialog, type control panel and press enter to enter control panel, locate recovery and click on it.
 Inside the recovery screen click on Open System Restore.
 Choose a date when everything was working in order, the best bet is the date before Windows update and roll it back.
 Click on date, and then on next.
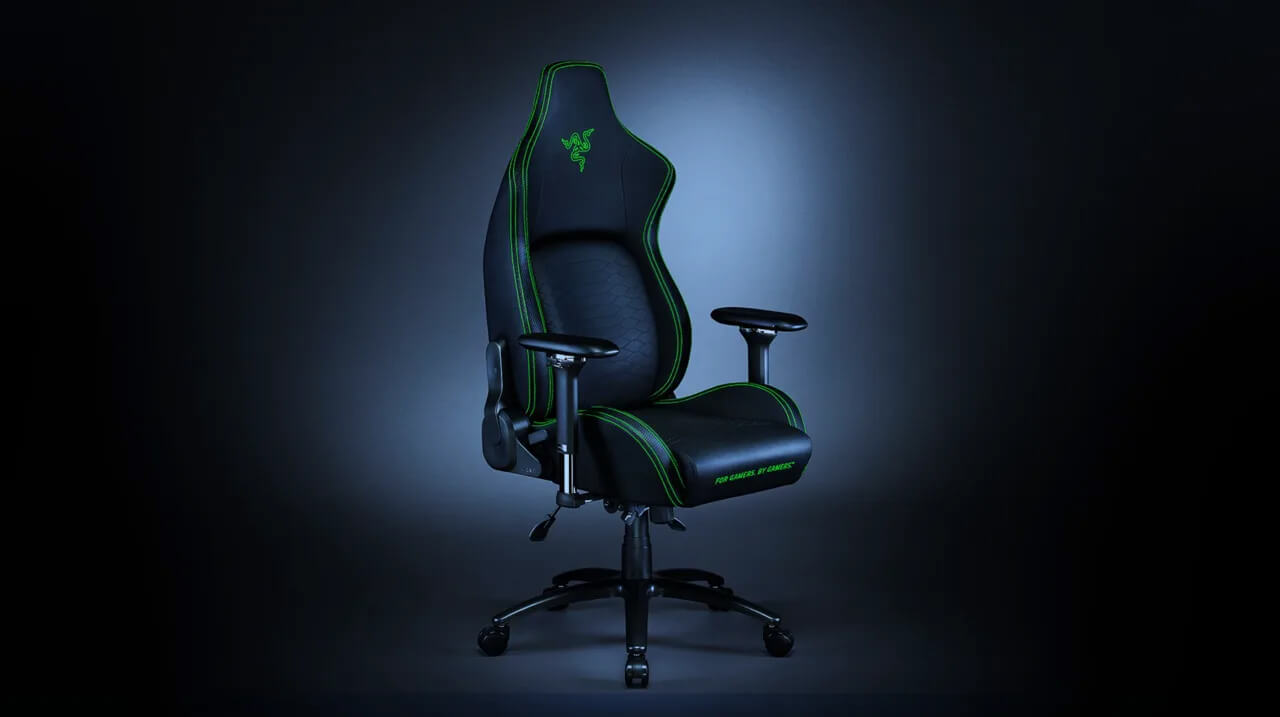 It seems that last few days we were riding some Razer bandwagon but rest assured that we are not sponsored by them in any way, truth is that simply they come up with some interesting accessories which I believe are worth covering.
Gaming Chair itself comes in two colors, fully black and green black combination and it is not really an entry-level chair if we are talking about price. The chair itself is around 600USD depending on the distributor and considering that price range it is placed in more top cream of gaming chairs but it is worth every dime.
It seems that last few days we were riding some Razer bandwagon but rest assured that we are not sponsored by them in any way, truth is that simply they come up with some interesting accessories which I believe are worth covering.
Gaming Chair itself comes in two colors, fully black and green black combination and it is not really an entry-level chair if we are talking about price. The chair itself is around 600USD depending on the distributor and considering that price range it is placed in more top cream of gaming chairs but it is worth every dime.
 Following a two-year investigation by the California Department of Fair Employment and Housing, the state has filed a lawsuit against Activision Blizzard for fostering a "frat boy" culture in which female employees are allegedly subjected to unequal pay and sexual harassment.
As reported by Bloomberg, Activision Blizzard is being accused by the state of California of discriminating against female employees at nearly all levels of employment, including in regards to compensation, promotion, assignments, and termination. The state alleges Activision Blizzard’s leadership has failed to address any of these outstanding issues or prevent them from occurring within the workplace. You can read the full details of the lawsuit here.
The suit, filed Tuesday in the Los Angeles Superior Court, says Activision Blizzard, which is made up of about 20 percent women, assigns women, and women of color, to "lower paid and lower opportunity levels" with lower starting pay for similar work as their male counterparts.
The documents also accuse Activision Blizzard of fostering a "pervasive 'frat boy' workplace culture in the office. Male employees are said to drink "copious amounts of alcohol" as they make their way through cubicles and "often engage in inappropriate behavior toward female employees."
Male employees are said to come to work hungover, play video games during work "while delegating their responsibilities to female employees, engage in banter about their sexual encounters, talk openly about female bodies, and joke about rape."
The lawsuit also cites one particular incident where a female employee, who was already subjected to intense sexual harassment at the company, committed suicide during a work trip with a male supervisor who allegedly brought inappropriate, sexual items with him on the trip.
The lawsuit is asking for an injunction that will force Activision Blizzard to comply with workplace protections, as well as deliver unpaid wages, pay adjustments, back pay, and lost wages and benefits for female employees.
Following a two-year investigation by the California Department of Fair Employment and Housing, the state has filed a lawsuit against Activision Blizzard for fostering a "frat boy" culture in which female employees are allegedly subjected to unequal pay and sexual harassment.
As reported by Bloomberg, Activision Blizzard is being accused by the state of California of discriminating against female employees at nearly all levels of employment, including in regards to compensation, promotion, assignments, and termination. The state alleges Activision Blizzard’s leadership has failed to address any of these outstanding issues or prevent them from occurring within the workplace. You can read the full details of the lawsuit here.
The suit, filed Tuesday in the Los Angeles Superior Court, says Activision Blizzard, which is made up of about 20 percent women, assigns women, and women of color, to "lower paid and lower opportunity levels" with lower starting pay for similar work as their male counterparts.
The documents also accuse Activision Blizzard of fostering a "pervasive 'frat boy' workplace culture in the office. Male employees are said to drink "copious amounts of alcohol" as they make their way through cubicles and "often engage in inappropriate behavior toward female employees."
Male employees are said to come to work hungover, play video games during work "while delegating their responsibilities to female employees, engage in banter about their sexual encounters, talk openly about female bodies, and joke about rape."
The lawsuit also cites one particular incident where a female employee, who was already subjected to intense sexual harassment at the company, committed suicide during a work trip with a male supervisor who allegedly brought inappropriate, sexual items with him on the trip.
The lawsuit is asking for an injunction that will force Activision Blizzard to comply with workplace protections, as well as deliver unpaid wages, pay adjustments, back pay, and lost wages and benefits for female employees.