To understand Logon.scr application error, it is first important to understand the function of logon.scr. Logon.scr is an important file that is located in the Windows\System32 folder. It guarantees Windows systems stability.
Logon.scr application error occurs when logon.scr file gets corrupt. It is a common system error that can happen in most Windows platforms. It usually pops up during system start-ups and when trying to launch certain programs.
Some of the common systems of this error code include: system halt, freeze, no application icons are visible on the desktop, random blue screen of death and system performance decreases dramatically.
Solution
Error Causes
Two of the most common causes of logon.scr application error is:
Corrupted and damaged logon.scr file
Viral infection
It is advisable to fix this error code immediately because it leads to serious damages. It is fatal and can result in a system crash; therefore resolve it right away.
Further Information and Manual Repair
To resolve this issue on your computer you don’t have to spend hundreds of dollars to hire a professional for the job. The good news is that it can be repaired easily and does not require any technical expertise.
Here are some of the most effective and easy DIY methods to resolve the error on your screens.
Method 1 - Replace the Damaged and the Corrupted Logon.scr File
Whether the file gets corrupted or is accidentally deleted, the best way to fix the issue is to download the Logon.scr file again from a reliable website and install in the following location C:\Windows\System32.
Alternatively you can also get the file copy form another proper functioning computer by using flash drive if you don’t have an internet connection to download the logon.scr file online.
Method 2 - Restore Points by Applying System Restore of Windows
Another way to resolve this is to restore points to bring back your system to the previous state before the error occurred. To do this, simply click the start button and type ‘System Restore’.
Now click System Restore in the result and click next. Select the restore point in the list and click the next button to proceed. To activate changes reboot your PC.
Method 3 - Scan and Remove Viruses
If Logon.scr application error still persists, then it could be due to viruses. To resolve, install a powerful anti-virus. Scan your entire PC and remove viruses.
Method 4 - Repair the Registry
Corrupt and damaged Logon.scr file also triggers issues with the registry. DLL files and other important files like Logon.scr application files may get damage due to too many bad and invalid registry entries.
Registry stores all the activities performed on the PC including unnecessary files like junk files and cookies. If these are not removed timely, these files accumulate and corrupt important files. Therefore, to fix the error it is advisable to clean and repair the registry.
The best way to go about is to download Restoro. This is a user-friendly and multi-functional PC Fixer deployed with a registry cleaner. It scans for all registry errors and removes all the invalid entries. It cleans the registry and repairs the damaged files thereby resolving the issue in seconds.
Click here to download Restoro and resolve the Logon.scr application error now!
Dism.exe error 1392 is usually displayed whenever a file or directory is corrupted, and unreadable. The location specified in the error message states that some temporary files are corrupt. Since the files are only temporary, you could delete the mentioned file in the error message and check if the issue persists. The error is caused by missing system files or broken corrupt data, which should be fixed as soon as possible. Taking action should prevent further hardware and app damage, as this can lead to system crashes, data loss, or hardware failure in most cases.
Temporarily disable the antivirus program
Antivirus applications are well known that they can detect certain things as false positives and quarantine them or cut their system access, to make sure that this is not the case in this situation, disable your antivirus and try the operation again.
Perform an SFC scan
Press ⊞ WINDOWS + X to open the windows menu
Click on Command prompt (admin)
In the command prompt window type: sfc /scannnow and press ENTER
Wait for the operation to complete
Reboot
Run Check disk to check and fix disk errors
Press ⊞ WINDOWS + X to open the windows menu
Click on Command prompt (admin)
In the command prompt window type: chkdsk /f c: where c: is hard drive with issue and press ENTER
Scan your computer for malware
Malware and other malicious software can be a problem for this type of behavior, run your security's software scan on the whole system and remove any found malware.
Perform a system restore
If anything else failed run system restore and bring Windows back to a date when everything was working fine.
It really sucks when you can’t fully enjoy the newest version of your favorite OS.
Windows 11 is still relatively fresh and consequently has some annoying little bugs that really ruin our experience. The good news is that you’re not alone and most of them are easy to fix.
Here are 5 commonly reported Windows 11 issues and what you can do to get rid of them.
1. Windows 11 audio problems
One of the absolute most irritating things in the world is struggling with the sound on your computer. Windows 11 users have reported facing the issue of low or no sound. If you’re currently experiencing the same frustration, you can be relieved. Chances are fixing it will only take a few minutes.
The first thing to check would be whether you accidentally muted your device by pressing the mute button on your keyboard. Yes, we know it sounds a lot like the old “have you tried turning it off and on again?” But it’s important to leave no stone unturned, and the most obvious things are usually the ones we easily overlook.
Moreover, if you have several audio output sources, check whether the right one is selected. You can do this via the Action Center or through Settings. If you want to use the same source every time, we also recommend you set it as the default one.
It’s also important to have a good, up-to-date audio driver. More often than not, this will be the true cause of your audio struggles. Make sure to update your driver, and if that doesn’t work out, you can always un- and reinstall it or install a different one.
Lastly, if all attempts remain unsuccessful, run the audio troubleshooter to figure out what’s actually going wrong.
2. Unable to find files
Such a powerful new operating system, yet it can’t seem to do the simplest thing imaginable? The File Explorer not responding on Windows 11 is one of the most frustrating and most common problems with Microsoft’s newest iteration of its awesome OS.
However, 9/10 times it can be fixed by simply restarting your PC. You could also try killing the Windows Explorer process in the Task Manager and then rerunning it.
If these don’t help, check whether there are any pending Windows 11 updates. A single missing update can compromise your PC’s functionality, so always make sure to install them all on time.
Should none of that work, then there are other ways to solve the File Explorer problem. However, then the issue is probably a bit deeper and it’s no longer in the ‘easy fix’ territory.
3. Start menu not working
Just like the File Explorer, the Start menu is a fundamental element of your OS. So, it’s only natural that its malfunction grinds your gears. It may be more customizable than on previous Windows versions, but it doesn’t always work smoothly.
If you’re facing the so-called Start menu critical error, there are a few things this could be caused by. Usually it means you turned off your system while an important update was still being installed, there is a corrupt file on your PC, or Windows forcefully stopped a program.
Whatever the reason, the solution should be pretty simple. Try the basic steps: restarting your File Explorer (like we explained above) and signing out and back into your account. If that doesn’t do anything, you may want to try uninstalling third-party start menu apps (if you have any), since they can interfere with your default programs’ functionality.
Now, those are the easy fixes. If you get nowhere with them, you might need to identify the root cause and search for more complex solutions than that.
4. Snipping tool not working
Our beloved screenshot tool was introduced with Windows 10 and Microsoft decided to keep it. However, you were probably just as disappointed as us when you tried to run it and failed.
Normally, this can be fixed by installing the latest Out-of-band (OOB) update, or even pending updates in general. Even if your system appears to be up-to-date, run the checker just in case.
Another cool thing Windows 11 lets you do is ‘Repair’ and ‘Reset’, which is the easiest way to troubleshoot your Snipping tool. If this fails, you can also try the good old un- and reinstall method. Simply uninstall the tool through the Control Panel and reinstall it from the Microsoft Store.
Furthermore, in the case of an upgrade from Windows 10 to 11, it may be that the old Snipping tool version is interfering with the launch of the new one. If you don’t care that much about the additional options available with the enhanced screenshot tool, you can use the old version instead.
Simply go to your C Drive, find the Windows.old folder, search for the tool and open it from there. Make sure to pin it to your taskbar as well, if you know you’re going to use it often.
5. Can’t install the latest update
The latest Windows 11 version, 22H2, has brought tons of enhancements to our dearest operating system. Unfortunately, a lot of users still haven’t had the opportunity to experience it. A mere update of your OS version should be the one thing that goes smoothly, but sometimes that’s not the case.
Failure to install 22H2 can be caused by a few things. Most commonly, the issue is caused by lack of storage space or corrupted files, but there could be other culprits.
There are a couple of things you could try. For example, it’s crucial that your drivers be up-to-date and some important services be enabled. These are: Windows Modules Installer, Background Intelligent Transfer Service, Cryptographic Service, Windows Update services.
To enable them, search ‘Services’, find the service you need and right-click on it. Open ‘Properties’ and select the startup type ‘Automatic’.
It may also be necessary to unplug all peripherals that aren’t crucial and disable third-party antivirus tools until after the update is finished.
Ultimately, you can run the Windows Update troubleshooter to detect and fix other possible issues.
Summary
Tiny bugs like these are nothing out of the ordinary. That said, we still all hate when they happen.
Hopefully some of our solutions have helped you to a smoother Windows 11 experience. But if you’re still struggling, feel free to reach out to us. We’d be happy to help!
A lot of users complain about low storage space each time a Windows Feature update is released as well as to complain about not being able to download the updates, slow update experience, and many other complaints. The main issue is that many users do not have enough storage space available on their PCs. And now to make sure that none of the updates gets stuck because of low storage space, Microsoft presented the Reserved Storage feature which comes preinstalled with v1903 or those where v1903 was clean installed. This guide will be showing you how you can enable or disable the Reserved Storage in your Windows 10 computer.
As you know, the Windows Update process should have enough space so that it can download, extract and apply the update on the computer. Usually, the size of the Reserved Storage is around 7GB which gives enough space for the update, temporary files, system caches, apps, and many more. And according to Microsoft, the size of the Reserved Storage space will vary from time to time and will depend on how you use your computer.
Explanation
The Reserved Storage space feature is enabled by default on devices that come preinstalled with the May 2019 update or after performing a clean installation of the Windows 10 OS. To check if your computer has this feature, you need to go to Settings > System > Storage and from there click on the “Show more categories” link and then click on the “System & reserved” option. However, if you can’t find the Reserved Storage from the list, then it’s probably because your computer has limited space on the hard disk or it is not a fresh or new install. On the other hand, if you have this feature but have no use for it and want to disable it instead, then read on as this post will also show you how it’s done.
Solution
Keep in mind that when you disable the Reserved Storage feature, chances are, you might be unable to enable it back so you need to make sure that it’s really what you want to do before you disable it permanently. So if you really want to disable Reserved Storage, you can do so using the Registry Editor. Before you proceed, you have to create a System Restore point first and then carry out the following steps.
Tap the Win + R keys to launch the Run utility and type “Regedit” in the field and then tap Enter to open the Registry Editor.
Next, navigate to this registry path: ComputerHKEY_LOCAL_MACHINESOFTWAREMicrosoftWindowsCurrentVersionReserveManager
From there, double click on the DWORD named “ShippedWithReserves” and set its value to “1”.
Once you’re done, restart your computer and see if the Reserved Storage feature is now gone.
On the other hand, if you want to reduce the Reserved Storage space, there are two ways you can do that. First, you can go to Settings > Apps > Apps & features > Manage optional features and from there, uninstall the optional features that you do not use. The second one is you have to go to Settings > Time & Language > Language and then uninstall the languages and their add-on which you don’t use.
Note: The Reserved Storage feature is also used by system processes and apps to create temporary files and once the Reserved Storage space fills up, Windows 10 will delete them automatically. It is undeniable a useful feature so disabling it is not recommended but if you are running on low storage space and don’t have much choice, then you may disable it at your own risk.
Error code 0x801901F7, also known as “The Server Stumbled” error because it shows a message saying “The Server Stumbled. We all have bad days” is associated with Windows Store. Server Stumbled Error 0x801901F7 is an error related to the MS server. The error occurs due to damaged registry files, malware, virus, and corrupted data. You should fix this error to prevent a system crash or a BSOD error. There are some things you can do to fix it. These are not so complex. So, anyone can try these methods to fix error 0x801901F7.
Common Symptoms for error 0x801901F7:
Problems with Windows startup
System becomes very slow or the system freezes
Blue screen of death appears
Windows fails to start some process due to Stop error code 0x801901f7
Solution
Error Causes
This error is generally caused by corrupt registry files.
Virus infection can cause this problem.
Outdated driver, missing .DLL files may also cause this error.
Microsoft server overload may cause this problem as well.
Incorrect configuration may cause this problem.
Further Information and Manual Repair
To fix error 0x801901f7, there are four methods listed below. Some might work for you and some might not. Please try all of them to fix this error.
Method 1:
Basic method to fix error code 0x801901F7: Resetting Windows Store Cache
Most of the time clearing or resetting the cache helps. It doesn't always work, but you should try this first before moving on to some advanced methods which are mentioned below.
To reset the Windows Store cache please follow the simple steps below
Open RUN by searching or pressing "Windows Key + R"
Type "wsreset.exe" and press Enter or click on OK.
Windows Store will open automatically along with a command prompt.
This will reset Windows Store and you might see it loading as it should.
This method might work but if it fails to solve Error 0x801901F7 then follow the method below.
Method 2:
Advanced method of fixing error code 0x801901F7: Deleting Windows Store database file.
By using this method, you will be deleting the database file for Windows Store. This file is located on your C drive or the drive where you installed your Operating System. Follow the steps below.
Navigate to C:WindowsSoftwareDistributionDataStoreDataStore.edb.
Delete DataStore.edb file from there.
Now Open Windows Store and see if you still get error code 0x801901F7.
The Datastore.edb file that you deleted will be automatically created once you perform Step 3 which is launching Windows Store.
If you still cannot get this error away then Close Windows Store and Reboot your PC then Launch Windows Store Again.
Method 3:
Modifying Windows update properties:
Perform the steps below only if the above-mentioned methods fail. You will be tweaking a few things in the Windows update to see if it helps.
Open Task Manager by right-clicking on Taskbar, then click on Task Manager.
Go to Services Tab. Click on Open Services at the very bottom of the Window.
Now a new window will pop up. Scroll down & find "Windows Update" from the list.
Double click on Windows update to open up its Properties.
Now from the Startup Type drop-down list, select Automatic. Click on Apply, Start, and then Ok.
Now you need to perform just one more step. Reset Windows Store again (Refer to method 1 for Steps). This should fix your Windows Store error that shows The Server Stumbled with 0x801901F7 Error Code.
Method 4:
If the error is due to a problem with a driver, then follow the method below to uninstall the current driver:
Open the Run command and type “sysdm.cpl” in the text box.
Click Enter.
Open the Hardware tab on the system properties dialog box.
Then press on Device Manager.
Double press on Device type and then press on the hardware device that is reporting error code 0x801901F7.
Go to the Driver tab and press on Uninstall button to uninstall the device driver completely.
Now, install the new driver on your computer.
Restart your computer.
Run virus scan of your PC
Try using a different USB port.
If you do not possess the technical expertise required to accomplish this yourself or do not feel comfortable doing so, download and install a powerful automated tool to get the job done.
Mswrd632.wpc is a Microsoft Office Word error message. This error message is often displayed in the following format:
‘Word cannot start the converter mswrd632.wpc’
The error message mswrd632.wpc may pop up when computer users try to open certain MS Word documents using the .doc extension.
Solution
Error Causes
Error Mswrd632.wpc may be triggered due to several reasons. Some of the common reasons for the mswrd632.wpc error code include:
Issues with Microsoft Word application
MSwrd632.wpc file corrupted
Changes in the registry configuration settings
Issues with security updates
Sometimes when you attempt to access the Word file of the older version of the MS Word application after new security updates, you may experience this error code.
This happens because the new security features that you have installed in the updated version blocks old files from being accessed.
Further Information and Manual Repair
If you can’t access important MS Word files on your PC, due to the error Mswrd632.wpc, then don’t you worry! The good news is that it is easy to fix and repair. By following a few simple methods, you can easily resolve this issue and access your MS Word files.
Try the methods listed below to repair error Mswrd632.wpc on your system:
Method 1: Copy the MSwrd632.wpc file From Another Computer
The error may also occur if the MSwrd632.wpc file is corrupted. In such as situation, copy the MSwrd632.wpc file on your PC from another computer.
You can usually find this file in the following path C:\Program Files\Common Files\Microsoft SharedTextConv.
However, please note this method is not secure and may make your PC vulnerable to a possible security hack. Do it when your PC is not connected to the internet.
Method 2: Unregister the Text Converter
This issue can also be resolved by unregistering the converter. Here is a step-by-step guide to unregister the converter.
First, go to the start menu and select RUN.
Type REGEDIT and press the OK button.
Next, what you have to do is find and click on registry subkeys. Here are the keys that you have to click on
HKEY_LOCAL_MACHINESOFTWAREMicrosoftSharedToolsText ConvertersImportMSWord6.wpc (Windows 32 bit OS)HKEY_LOCAL_MACHINESOFTWAREWow6432NodeMicrosoftSharedToolsText ConvertersImportMSWord6.wpc (Windows 64 bit OS)
Choose the key according to your Windows bit operating system. After that, click on the Edit menu, select the Delete option and click ‘Yes’ to activate changes.
This change will effectively unregister the text converter and disable it for third-party applications and for Microsoft Office enabling you to access your desired MS Word files easily.
Method 3 - Download Restoro to Resolve Registry issues
If the error is related to the registry, then the best and most efficient way to fix it is to download Restoro.
This is a powerful registry cleaner and a PC Fixer deployed with a user-friendly interface and compatible with all Windows versions. It scans and removes all registry errors and repairs the registry in seconds.
Click here and download Restoro to resolve the MSwrd632.wpc error now!
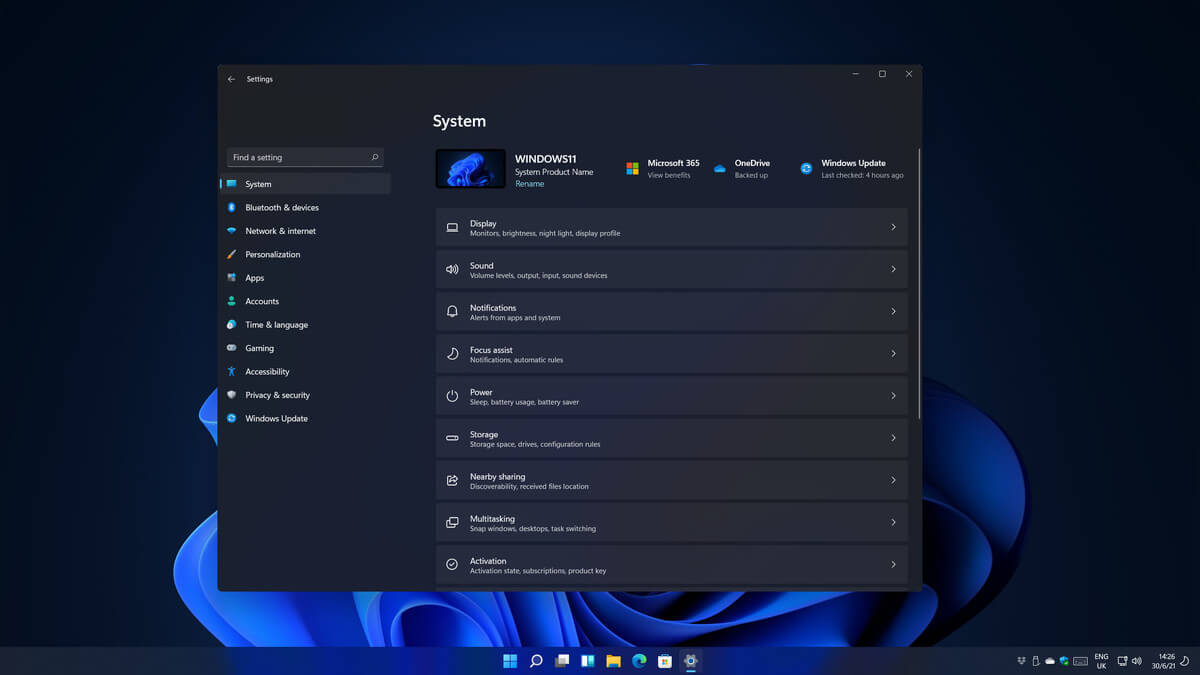
Same as Windows 10, Windows 11 also keeps track of date and time using an internet time server. But in a case that you need to change the date or time for any kind of reason here is a guide for that process:
Press ⊞ WINDOWS + I to open settings
Click on Time & Language in Taskbar
Inside Time & Language click on Date & Time
Turn off Set Time Automatically by clicking on the switch next to it
Below find Set the date and time manually and click on Change
Inside, Change Date and Time window use the drop-down menu to set desired date and time
System image backup error 0x807800A1 & 0x800423F3 appears when you are trying to create a system image backup and the operation fails to do so.
If you’re faced with any of these error codes, try our recommended solutions in the order presented below and resolve the issue.
To restart the Volume Shadow Copy Service (VSS) on Windows 10, do the following:
Press ⊞ Windows + X to bring up the Windows menu.
Click on command prompt (admin)
In the command prompt window, type the commands below and hit Enter after each line:
net stop vssnet start vss
Once the commands execute successfully, try the system image backup again. The operation should complete successfully.
You need to also check if the Software Protection Service is disabled. If it is, then Start it and ensure that it is set to default which is Automatic (Delayed Started).
Create System Image using PowerShell
Command lines are less prone to errors provided the syntax is correct, unlike GUIs that can suffer a glitch every now and then.
To create a system image with PowerShell do the following:
Open the Windows PowerShell as administrator. To create a System Image in Windows 10 using PowerShell, you will have to run the Wbadmin command.
Inside the Powershell window type, then press Enter: wbadmin start backup-backup target: E:-include: C:-quiet-allCriticalE: is the target drive where you’re going to save the system image, and C: is the system root drive where Windows is currently installed
To extract the created system image, starting over from Windows 10 USB installation media, select advanced startup or open run and type: C: \ Windows \ System32 \ Shutdown.exe / r / o
Use third-party imaging software
If the previous two solutions have not managed to solve the issue there is always an option to use a third-party imaging solution. There are free open source and buying options offering various advantages each. Find out which one works best for you and use it.
The latest update from Panos Panay on Twitter is including New and redesigned Snipping tool inside Windows 11. From the shared video, we can see that it includes modern Windows 11 UI redesign and it looks and feels like a part of Windows 11.
More things that can be seen from the shared video is that it looks like the new snipping tool is a merged version of the old with snip & sketch.
It is good to see that it is still possible to capture screen with easier way natively inside Windows 11 but some more functionality would be more welcome I guess.
Users were asking for added functions for a long time like adding simple text for example but from shared video, no new features were presented so for some users 3rd party solutions will still be the way to go.
The new and redesigned Snipping tool will roll out with the next update and we will see then about all new features inside it firsthand. Until then, take care.
If you are trying to copy a folder or file in your Windows 10 computer but encountered an error that says, “There is insufficient disk space to complete operation”, then you’ve come to the right place as this post will walk you through how you can fix the error. This kind of problem could be due to lack of disk space, corrupted disk, and many more. In such cases, this error usually pops up when you move or copy a file or folder to a particular location.
There are several potential fixes you can check out to fix this error. You can try to run the Storage Sense or Disk Cleanup or try copying or moving the file in a Clean Boot State. You could also try formatting the given partition to NTFS. For more information, refer to each one of the options provided below.
Option 1 – Try to delete the temporary files
The error could be caused by some temporary or junk files in your computer and so you need to clear them up to fix the problem. You can achieve that using the Storage Sense feature.
Open Setting > System > Storage from the WinX Menu.
From there, you will see a list of all the local and connected storage devices along with the details on the free space. Make sure that Storage Sense is on.
Next, find a link that says “Free Up Space” and click it to open.
After that, a screen which is the built-in program in Windows 10 will appear and will scan your computer for the following junk files so you can free up disk space:
Windows Upgrade Log Files
The system created Windows Error Reporting Files
Thumbnails
Temporary Internet Files
Previous Windows Installation Files
Delivery Optimisation Files
DirectX Shader Cache
Choose the files you want to get rid of and then click on the remove files option. Note that you’ll have an idea of the total size as you select any of the junk files listed above.
Now go to the “Free Up Space Now” section and click the Clean now button. This will get rid of all the temporary or junk files in your computer and should hopefully fix the “There is insufficient disk space to complete operation” error.
Option 2 – Restart your computer in a Clean Boot State
If the first options didn’t work and you still see the “There is insufficient disk space to complete operation” error when you copy folder or files, you can try putting your computer in a Clean Boot State and then again.
Log onto your PC as an administrator.
Type in MSConfig in the Start Search to open the System Configuration utility.
From there, go to the General tab and click “Selective startup”.
Clear the “Load Startup items” check box and make sure that the “Load System Services” and “Use Original boot configuration” options are checked.
Next, click the Services tab and select the “Hide All Microsoft Services” check box.
Click Disable all.
Click on Apply/OK and restart your PC. (This will put your PC into a Clean Boot State. And configure Windows to use the usual startup, just simply undo the changes.)
Now try to connect copy the folder or file once more and check if the error is now gone.
Option 3 – Try formatting the given partition to NTFS
Even though this option may take a lot of your time, it is proven to fix the “There is insufficient disk space to complete operation” error as reported by many users who also went through the same dilemma. So if the removable disk is showing the same error message no matter which computer you insert it, you might have to format the drive with the help of Command Prompt. But before you do that, you must know that all the contents of your drive will be permanently deleted after you format it.
Tap Win + R to launch Run.
Type in cmd and then tap Enter or click OK to open the Command Prompt.
And in the elevated window of Command Prompt, type in the following command:
format F: /fs:ntfs
In the command given above, “F” is the drive letter and “NTFS” is the file system you want. Just remember to replace “F” with the drive letter you want to format as well as the file system you prefer. Brace yourself as this process might take quite a while even if you only have a 4 GB USB drive – so you must not close the window under any circumstances as the drive might get corrupted and wait for the process to finish.
Microsoft’s initial Windows 11 hardware requirements were not really well received by users and they were not really clearly represented from the start making a lot of potential customers slowly drift away from the hype.
It seems that Microsoft has acknowledged this since they have changed their tune about system hardware requirements for the upcoming Windows 11.
It seems that Windows 11 will be able to be officially installed on unsupported computers but with a little inconvenience.
What is a catch?
Windows 11 will still have the same hardware requirements and if the PC meets them, that computer will be officially supported, other ones (any that can run Windows 10) that do not meet system requirements can still run Windows 11 but the system will have to be clean installed. So no upgrade option for old computer users, just a clean install.
This means of course that you will need to download the ISO image and make a bootable USB in order to install it. Also since you will be doing a clean install do a backup of the hard drive since it will need to be formatted.
Also, Microsoft has stated that with unofficially supported PC some driver updates might not be delivered leaving you with either older driver versions or relying on your hardware manufacturer on them. This is still not confirmed by Microsoft, just stated as an option. We will see how it goes.
Conclusion
It is very good that Microsoft has reconsidered its system requirements and will not stubbornly push its initiatives over the top requirements allowing even older computers to install new OS.
I am sure over time lot of users will upgrade their hardware and drive into officially supported waters, but it is good that they will be able to use new OS on their current hardware.


 Same as Windows 10, Windows 11 also keeps track of date and time using an internet time server. But in a case that you need to change the date or time for any kind of reason here is a guide for that process:
 The latest update from Panos Panay on Twitter is including New and redesigned Snipping tool inside Windows 11. From the shared video, we can see that it includes modern Windows 11 UI redesign and it looks and feels like a part of Windows 11.
More things that can be seen from the shared video is that it looks like the new snipping tool is a merged version of the old with snip & sketch.
It is good to see that it is still possible to capture screen with easier way natively inside Windows 11 but some more functionality would be more welcome I guess.
Users were asking for added functions for a long time like adding simple text for example but from shared video, no new features were presented so for some users 3rd party solutions will still be the way to go.
The new and redesigned Snipping tool will roll out with the next update and we will see then about all new features inside it firsthand. Until then, take care.
The latest update from Panos Panay on Twitter is including New and redesigned Snipping tool inside Windows 11. From the shared video, we can see that it includes modern Windows 11 UI redesign and it looks and feels like a part of Windows 11.
More things that can be seen from the shared video is that it looks like the new snipping tool is a merged version of the old with snip & sketch.
It is good to see that it is still possible to capture screen with easier way natively inside Windows 11 but some more functionality would be more welcome I guess.
Users were asking for added functions for a long time like adding simple text for example but from shared video, no new features were presented so for some users 3rd party solutions will still be the way to go.
The new and redesigned Snipping tool will roll out with the next update and we will see then about all new features inside it firsthand. Until then, take care.  Microsoft’s initial Windows 11 hardware requirements were not really well received by users and they were not really clearly represented from the start making a lot of potential customers slowly drift away from the hype.
It seems that Microsoft has acknowledged this since they have changed their tune about system hardware requirements for the upcoming Windows 11.
It seems that Windows 11 will be able to be officially installed on unsupported computers but with a little inconvenience.
Microsoft’s initial Windows 11 hardware requirements were not really well received by users and they were not really clearly represented from the start making a lot of potential customers slowly drift away from the hype.
It seems that Microsoft has acknowledged this since they have changed their tune about system hardware requirements for the upcoming Windows 11.
It seems that Windows 11 will be able to be officially installed on unsupported computers but with a little inconvenience.