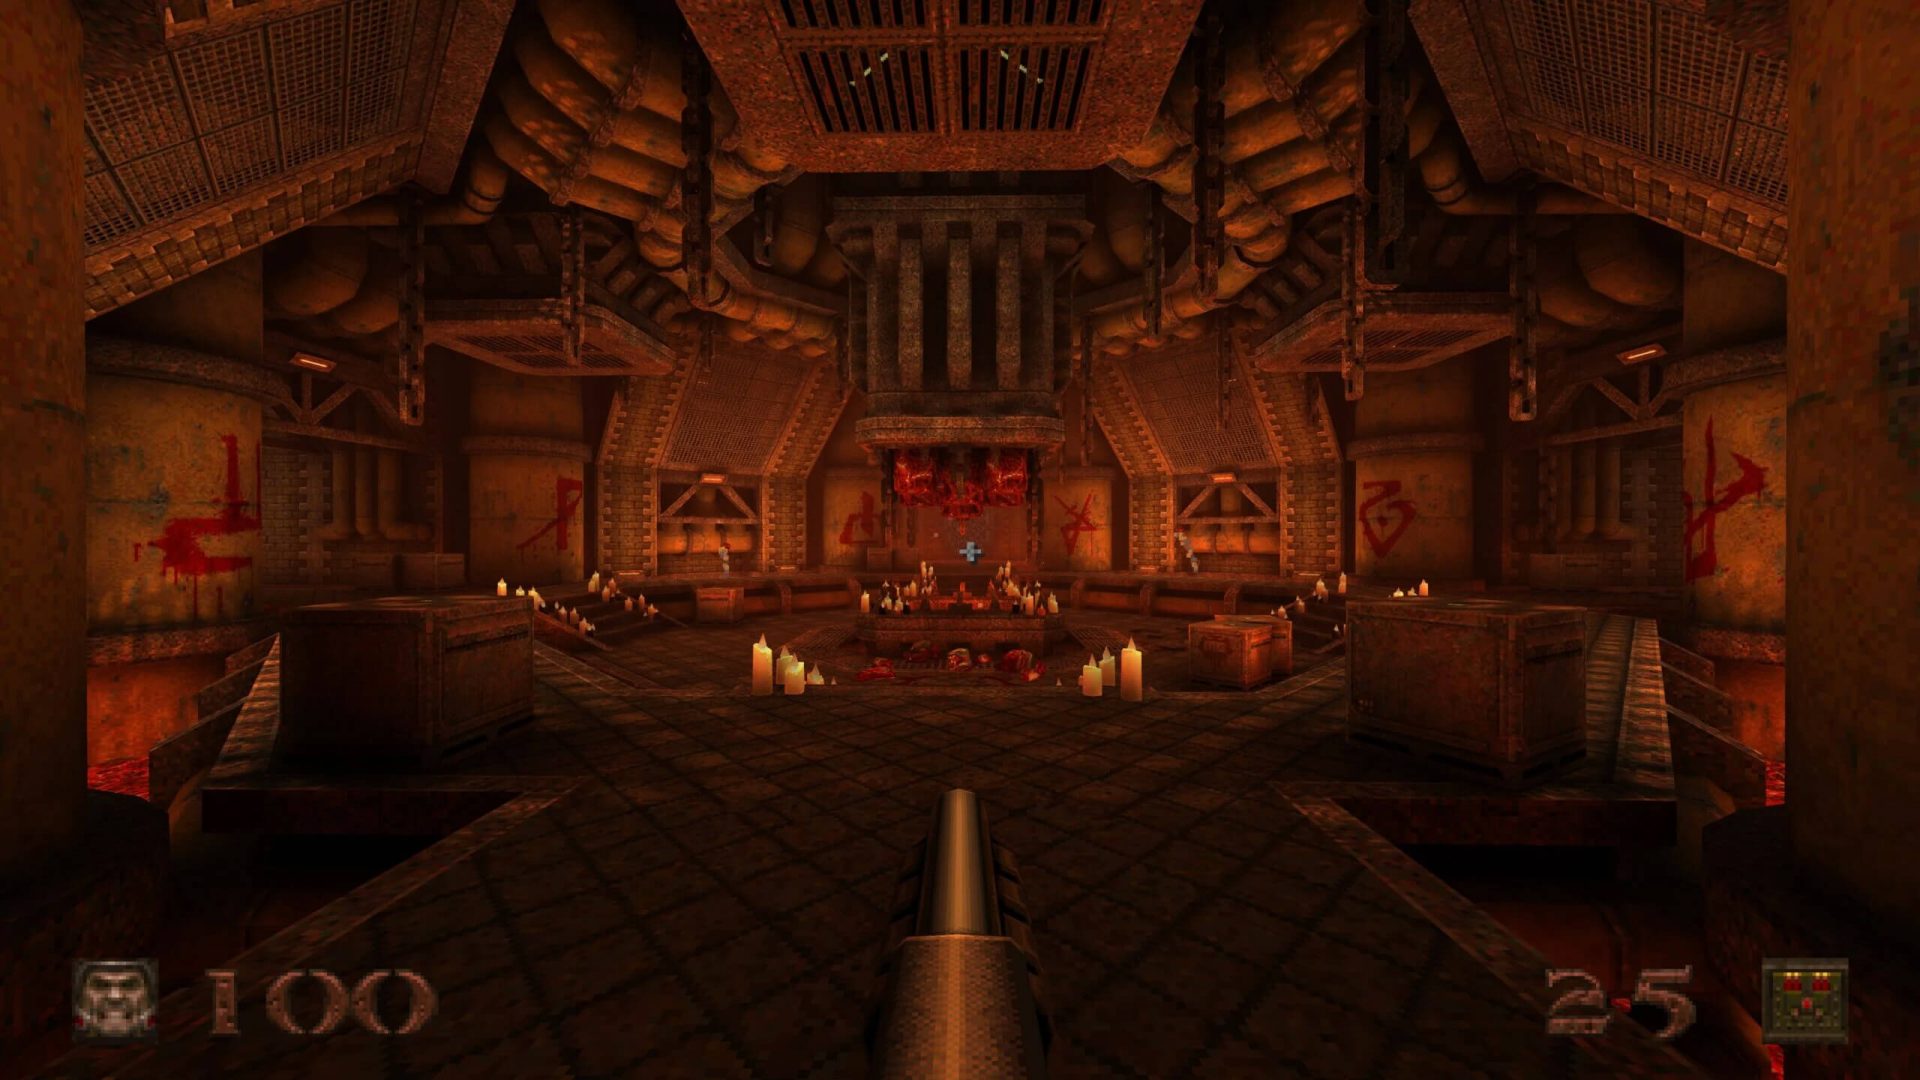
Logo

Fix Installer encountered an error 0x800f0905

Are you trying to update your Windows 11 OS and are receiving a 0x800f0905 error? Do not sweat and do not worry we have a couple of solutions that you can try in order to fix this issue. How this error is tied to various things like misconfigured settings, corrupt system files, and more there is no way to present one simple solution that will solve everything in one click.

error 0x800f0905Therefore we are presenting a couple of solutions that will fix your issue, it is advisable to follow them as presented since they will go from the most common to the more complex one.

Run the troubleshooter

The most common fix and one that will actually repair things most of the time is simply running the Windows Update troubleshooter.

  1. Press ⊞ WINDOWS + I to open the Settings app
  2. Click on System on the left
  3. Click on Troubleshoot in the right part
  4. Click on Other Troubleshooters
  5. Find the Windows Update section and click on Run
  6. Let troubleshooter finish

Reset Windows update components

If the previous solution did not work we will need to do things manually. Follow the steps as presented in order to reset Windows update components.

  1. Press ⊞ WINDOWS + S to open search
  2. Type in Terminal
  3. Select Run as administrator
  4. Click on Yes on the User account control (UAC) pop up
  5. Press CTRL + SHIFT + 2 to open Command prompt
  6. Inside command prompt type each line of a command followed by ENTER after each line:
    net stop bits
    net stop wuauserv
    Del “%ALLUSERSPROFILE%Application DataMicrosoftNetworkDownloaderqmgr*.dat”
    Ren %Systemroot%\SoftwareDistribution\DataStore DataStore.bak
    Ren %Systemroot%\SoftwareDistribution\Download Download.bak
    Ren %Systemroot%\System32\catroot2 catroot2.bak
    exe sdset bits D:(A;;CCLCSWRPWPDTLOCRRC;;;SY)(A;;CCDCLCSWRPWPDTLOCRSDRCWDWO;;;BA)(A;;CCLCSWLOCRRC;;;AU)(A;;CCLCSWRPWPDTLOCRRC;;;PU)
    sc.exe sdset wuauserv D:(A;;CCLCSWRPWPDTLOCRRC;;;SY)(A;;CCDCLCSWRPWPDTLOCRSDRCWDWO;;;BA)(A;;CCLCSWLOCRRC;;;AU)(A;;CCLCSWRPWPDTLOCRRC;;;PU)
    cd /d %windir%\system32
    regsvr32.exe atl.dll
    regsvr32.exe urlmon.dll
    regsvr32.exe mshtml.dll
    regsvr32.exe shdocvw.dll
    regsvr32.exe browseui.dll
    regsvr32.exe jscript.dll
    regsvr32.exe vbscript.dll
    regsvr32.exe scrrun.dll
    regsvr32.exe msxml.dll
    regsvr32.exe msxml3.dll
    regsvr32.exe msxml6.dll
    regsvr32.exe actxprxy.dll
    regsvr32.exe softpub.dll
    regsvr32.exe wintrust.dll
    regsvr32.exe dssenh.dll
    regsvr32.exe rsaenh.dll
    regsvr32.exe gpkcsp.dll
    regsvr32.exe sccbase.dll
    regsvr32.exe slbcsp.dll
    regsvr32.exe cryptdlg.dll
    regsvr32.exe oleaut32.dll
    regsvr32.exe ole32.dll
    regsvr32.exe shell32.dll
    regsvr32.exe initpki.dll
    regsvr32.exe wuapi.dll
    regsvr32.exe wuaueng.dll
    regsvr32.exe wuaueng1.dll
    regsvr32.exe wucltui.dll
    regsvr32.exe wups.dll
    regsvr32.exe wups2.dll
    regsvr32.exe wuweb.dll
    regsvr32.exe qmgr.dll
    regsvr32.exe qmgrprxy.dll
    regsvr32.exe wucltux.dll
    regsvr32.exe muweb.dll
    regsvr32.exe wuwebv.dll
    netsh winsock reset
    net start bits
    net start wuauserv

Well, that was a lot of typing or copy and pasting line by line followed by ENTER after each one but hopefully, your issue is solved. These provided solutions fixed most users' issues with this error but if for some reason this is not the case for you, move to the next step.

Run the SFC scan

If you are still having 0x800f0905 error after previous attempts do the following:

  1. Press ⊞ WINDOWS + S to open search
  2. Type in Terminal
  3. Select Run as administrator
  4. Click on Yes on the User account control (UAC) pop up
  5. Press CTRL + SHIFT + 2 to open Command prompt
  6. Type in sfc /scannow and press ENTER
  7. Wait for the scan to finish
  8. Reboot the computer

Perform a system restore

If for any reason previous solutions have not provided you with the solution we will try to fix the issue by performing system restore.

  1. Press ⊞ WINDOWS + S to open search
  2. In the text box type in Create a restore point
  3. Click on the closest match in search results, should be Create a restore point
  4. Click on System Restore or on Next if there are no points created
  5. Choose to restore a point from the list and click on next
  6. Review settings and click on Finish
  7. Wait for the process to finish and for the computer to restart

Manually install update

If for any reason Windows still cannot install the update, try installing it manually.

  1. Go to Windows 11 update history and find the Knowledge base (KB) number for the latest version
  2. Go to the official Microsoft Update Catalog
  3. Paste the KB number in the search box and press ENTER
  4. Click on DOWNLOAD
  5. Double click on the downloaded file to launch the installer
  6. Follow on-screen instructions and install the update

Perform Windows 11 reset

If nothing worked, reset your Windows 11 to its factory settings to fully repair and reset the whole operating system.

Do You Need Help with Your Device?

Our Team of Experts May Help
Troubleshoot.Tech Experts are There for You!
Replace damaged files
Restore performance
Free disk space
Remove Malware
Protects WEB browser
Remove Viruses
Stop PC freezing
GET HELP
Troubleshoot.Tech experts work with all versions of Microsoft Windows including Windows 11, with Android, Mac, and more.

Share this article:

You might also like

A Quick Guide to Fix Error 0x0000001e
Error 0x0000001e is when you start the Windows XP Setup and you see a message which says something like: STOP: 0x0000001E (0x80000003, 0xBFC0304, 0x0000000, 0x0000001)

Solution

Restoro box imageError Causes

You are most likely to face this error if you restart your PC while the Windows Setup is still under process and yet to complete. Other causes of this error include any of the following conditions:
  1. The drive on which you are installing Windows has insufficient disk space to accommodate the installation.
  2. An incompatible or outdated third-party driver (or more) is installed on your PC which is conflicting with the installation. For instance, this could be a problematic video driver.
  3. The system BIOS has incompatibilities with the installation.

Further Information and Manual Repair

This error is also called the “Bug check code”. The STOP 0x1E signifies that there was an unknown or illegal processor instruction detected by the Windows XP kernel. You will see the exception address which shows up to indicate the root of the problem which is usually a driver or faulty hardware. You should note this address down as well as the link date of the faulty driver or image which includes it. If at any point it becomes impossible for you to handle and you end up contacting the Windows support center to help you out with the process then this information will help you out in making things a lot easier while the support team tries to troubleshoot the problem. The parameters included in the STOP 0x1E error message are the following:
  1. is the exception code which couldn’t be handled.
  2. shows the module’s address where the exception took place.
  3. signifies the exception’s parameter 0.
  4. represents the exception’s parameter 1.
You can use this information which usually is provided in error 0x0000001e message to pinpoint the root cause of the problem and troubleshoot it. In order to fix this error, you need to follow either one of the following procedures as needed according to your situation.

Clean Up Your Disk

local disk propertiesIf your disk doesn’t have ample space to accommodate the installation then you should free up some of the space on your disk to make sure the Windows can be installed on it. You can also reinstall the Windows on another disk that has sufficient space.

Get Rid of the Third Party Driver

If the error 0x0000001e message gives you the name of the driver due to which the installation process is being halted, then get rid of that driver by disabling it or removing it. If the problem is resolved by this then you should contact the manufacturer of the third-party driver and ask them about any newer versions of the driver that wouldn’t conflict with the installation of Windows.

Upgrade System BIOS

Upgrading your system BIOS is something that you can’t do on your own. You will need to find out more about how you can upgrade. For this, you should contact either your PC’s manufacturer or your motherboard’s manufacturer. If nothing else works, you can always make use of the Microsoft Debugging Tools which will provide you ample information about the error message. You will find the Debugging Tools and further information about them including the downloading and installation process on Microsoft’s website.
Read More
System Image Backup 0x807800A1 & 0x800423F3
System image backup error 0x807800A1 & 0x800423F3 appears when you are trying to create a system image backup and the operation fails to do so. If you’re faced with any of these error codes, try our recommended solutions in the order presented below and resolve the issue.

Check Volume Shadow Copy & Software Protection Services

To restart the Volume Shadow Copy Service (VSS) on Windows 10, do the following:
  • Press ⊞ Windows + X to bring up the Windows menu.
  • Click on command prompt (admin)
  • In the command prompt window, type the commands below and hit Enter after each line:
net stop vss net start vss
Once the commands execute successfully, try the system image backup again. The operation should complete successfully. You need to also check if the Software Protection Service is disabled. If it is, then Start it and ensure that it is set to default which is Automatic (Delayed Started).

Create System Image using PowerShell

Command lines are less prone to errors provided the syntax is correct, unlike GUIs that can suffer a glitch every now and then. To create a system image with PowerShell do the following:
  1. Open the Windows PowerShell as administrator. To create a System Image in Windows 10 using PowerShell, you will have to run the Wbadmin command.
  2. Inside the Powershell window type, then press Enter: wbadmin start backup-backup target: E:-include: C:-quiet-allCritical E: is the target drive where you’re going to save the system image, and C: is the system root drive where Windows is currently installed
  3. To extract the created system image, starting over from Windows 10 USB installation media, select advanced startup or open run and type: C: \ Windows \ System32 \ Shutdown.exe / r / o

Use third-party imaging software

If the previous two solutions have not managed to solve the issue there is always an option to use a third-party imaging solution. There are free open source and buying options offering various advantages each. Find out which one works best for you and use it.
Read More
How to Fix Windows 10 Error Code 0x803f7001

Error Code 0x803f7001 – What is it?

Error code 0x803f7001 occurs when there is a failure to update your Windows operating system to Windows 10. Usually, a message box pops up with the following statement, “Windows is not activated as your previous version of Windows on this device was not activated prior to upgrade to Windows 10.” When this occurs, common symptoms of the error code will manifest themselves:

  • Inability to upgrade your Windows operating system to Windows 10
  • Message box with error code 0x803f7001

Solution

Restoro box imageError Causes

The cause for error code 0x803f7001 varies. Usually, it occurs for two reasons: 1) when during the process of upgrading to Windows 10, no valid Windows license or product key is found for your device or 2) when a user performs a clean installation of Windows 10. During a clean installation, a new license is usually required to allow you to activate your copy of Windows.

Further Information and Manual Repair

There are two main options available to fix error code 0x803f7001. Usually, the use of a valid product key can help users rectify error code 0x803f7001. You may also try an automated tool to access the best solutions.

Method One: Use a Valid Product Key

A product key is a code containing 25 characters that enable users to activate Windows. You will need to enter the product key in the exact order it appears in order to install your Windows operating system. All users will be able to access this code in an email or on a card within the Windows DVD package they receive upon purchasing a version of the Windows operating system.

To solve error code 0x803f7001, complete the following steps.

  • Step one: Click the Start button then select Settings
  • Step two: Select Update and Security then Activation
  • Step three: Click the Change product key
  • Step four: Type in your valid product key. (To do this ensure the 25 characters are accounted for and in the correct order.)

If the issue causing error code 0x803f7001 relates to your product key, then the instructions within method one will rectify the issue. You will be able to install and activate Windows 10. However, if while attempting to update your Windows operating system, the error occurs once more, you will need to follow the instructions in the manual repair below.

You may also consider contacting a Windows repair technician if you are uncertain of your ability to perform the tasks required to fix error code 0x803f7001. This IT professional will be able to use his or her technical knowledge to perform complex manual repair tasks if the need arises.

Method Two: Install an Automated Tool

Automated tools help PC users eliminate common issues such as Windows error codes. To address or rectify error codes like error code 0x8007007b download a powerful automated tool on your machine. This tool enables users to access quick solutions. It also scans for and corrects issues that may result in error codes or poor PC performance.

Read More
Remove the blue and yellow shield icon
If you suddenly see a system icon or an application icon that has a blue and yellow shield or icon overlay at the corner, this indicates that the application has to run with admin privileges and each time you run these kinds of applications, a UAC or User Account Control prompt will appear to confirm if you really want to run the application. Although this kind of behavior is for security reasons, it can get quite annoying especially if you use the application on a daily basis. To make it convenient for you, this post will walk you through how you can remove the blue and yellow shield icon from an application on your Windows 10 computer. The User Account Control or UAC setting is the one that ensures no program can run with administrative privileges unless it is allowed by the user. This stops any program that could be potentially harmful to the computer from making any changes which are why keeping this setting to its default state is for the best and making any changes in its setting is not recommended unless it is really needed. So if you really have to remove the icon overlay in an application, there are several ways you can do that. You can try reinstalling the program and set Compatibility or change the UAC level. For more information, refer to every option given below.

Option 1 – Try to reinstall the application and set Compatibility

As you know, the application icons where you can see the shields are shortcuts mostly and they signify that the User Account Control will appear each time you launch the app. Thus, if you have an app that you use regularly and you’re certain that the app can be trusted, you can try to reinstall the app and set its compatibility by following these steps:
  • You need to uninstall the app first and then install its latest version. You must not run or open the app after you reinstall it, not until you’ve completed the steps.
  • Next, you have to right-click on the shortcut icon of the app, and from the menu, select Properties.
  • Afterward, go to the Compatibility tab and look for the checkbox labeled “Run this program as an administrator” and uncheck it.
  • Now click on the Apply and OK buttons to save the changes made. This should remove the shield icon from the app.

Option 2 – Try changing the UAC level

  • Tap the Win + Q to open the search bar and type UAC to see the User Account Control setting.
  • From the UAC setting, lower the UAC level by selecting the settings that say, “Notify only when apps try to make changes to my computer”.
  • After selecting that option, you shouldn’t be getting any warning now when you run the app with the shield icon. But keep in mind that this is not a temporary setting which can be risky especially if the app can’t be trusted.
Read More
Fix Chrome is Waiting for cache in Windows
There are times when you may encounter some glitches on your Google Chrome browser in your Windows 10 computer. One of these glitches is when the connection status of Chrome keeps on saying “Waiting for cache” which is displayed at the bottom-left side of the browser in the Status bar. At the time of writing, it isn’t clear yet what could be causing this problem. Although it is possible that it’s caused by browser cache, some extensions in the browser. On the other hand, it could also be caused by the browser profile or due to some fragmented files or that the SSD is occupied. Whatever the cause is, you can check out each one of the given options below to fix the problem.

Option 1 – Try clearing browser cache

There are times when some data in the browser is conflicting with the loading of the website and triggers some problems like “Waiting for cache”. And so you can try to clear your browser’s data. This might be a very basic solution but oftentimes it works in fixing this kind of error in Google Chrome. Follow the steps below to clear the data in your browser.
  • Open your Google Chrome browser.
  • After that, tap the Ctrl + H keys. Doing so will open a new panel that allows you to delete the browsing history and other data in your browser.
  • Now select every checkbox that you see and click on the Clear browsing data button.
  • Then restart your Chrome browser and check if you can now open any website or not.

Option 2 – Try to disable writing of Cache files to the SSD

You can also disable the writing of Cache files to the SSD to stop Google Chrome’s dependency on the SSD to gather all the cache files.

Option 3 – Delete the User Profile in Chrome

You can also try deleting the User Profile folder in Chrome. To do so, follow these steps:
  • You need to first end every single process of Google Chrome. To do so, right-click on the Taskbar then select the Task Manager. And if the Task Manager is not responding, you can just use the Alt + Ctrl + Del keys and then select the Task Manager.
  • After opening the Task Manager, under Processes, look for Google Chrome’s process which would most likely be named “chrome.exe”.
  • Right-click on Google Chrome’s process and then select the End task option.
  • Next, tap the Win + R keys to open the Run dialogue box.
  • Then copy and paste “%USERPROFILE%AppDataLocalGoogleChromeUser Data” and hit Enter.
  • From there, look for a folder named “Default folder” and then copy the folder to another drive as a backup.
  • After creating a copy of the folder, delete the Default folder.
  • Next, open Google Chrome again and go to Settings > Advanced > Reset.

Option 4 – Reset Chrome

Resetting Chrome can also help you fix the error. This means that you will be restoring its default settings, disabling all the extensions, add-ons, and themes. Aside from that, the content settings will be reset as well and the cookies, cache, and site data will also be deleted. To reset Chrome, here’s what you have to do:
  • Open Google Chrome, then tap the Alt + F keys.
  • After that, click on Settings.
  • Next, scroll down until you see the Advanced option, once you see it, click on it.
  • After clicking the Advanced option, go to the “Restore and clean up option and click on the “Restore settings to their original defaults” option to reset Google Chrome.
  • Now restart Google Chrome.

Option 5 – Try to clean reinstall Chrome

There are instances when programs leave files behind after you’ve uninstalled them and the same thing can happen to Chrome so before you reinstall Chrome, you have to make sure that you have deleted the User Data folder. To do so, refer to the following steps:
  • Hit the Win + R keys to open the Run dialog box.
  • Next, type “%LOCALAPPDATA%GoogleChromeUser Data” in the field and hit Enter to open the User Data folder.
  • From there, rename the default folder and name it something else, e.g. “Default.old”.
  • After that, install Google Chrome again and check if the issue is now fixed.
Read More
How to Resolve Error Code 0xd0000272 in Windows 10

Error Code 0xd0000272 – What is it?

Error code 0xd0000272 is an activation error code that occurs when Windows users are unable to activate their Windows operating system. This error code features common symptoms which include the following:

  • Inability to activate Windows 10 operating system
  • Message box with error code 0xd0000272

Solution

Restoro box imageError Causes

When error code 0xd0000272 occurs in Windows 10, it is usually due to issues related to the Windows activation servers. In such a case where the error code occurs due to an activation server that is temporarily unavailable, users may need to wait for a few hours until the activation server is available. Their copy of Windows will then be automatically activated. Once the activation process is not done accordingly, you might encounter other Windows 10 errors such as error code 0xc004f034

Further Information and Manual Repair

As is the case with many activation error codes, Windows 10 users can perform several manual repair methods to determine the cause as well as fix the error code affecting their device. Instead of passively waiting to see if your activation error code will be fixed on its own, resolve error code 0xd0000272 through the manual repair methods available. Below are simple instructions that when followed can lead to your success.

Method One: Verify Internet Connection

Check Settings to verify if your machine is connected to the Internet. This is one of the causes of various error codes which affect Windows 10. Also, this manual method is a simple process that can help Windows users recognize or eliminate factors that may or may not be affecting their system. To check your Internet connection, follow the simple instructions below.

  • Step one: Click the Start button and select Settings
  • Step two: Select Network & Internet
  • Step three: Click the Status section of the Network & Internet tab

Once you’ve been able to verify an Internet connection or troubleshoot any issues related to your network, go to Update & security. Make an attempt to activate your system. If you are successful, you will be able to access all the features and benefits offered via your copy of Windows. However, move to the next manual method below if error code 0xd0000272 reoccurs.

Method Two: Run Windows Update Troubleshooter

Your inability to activate Windows 10 may be related to an issue with Windows Update. To verify whether or not Windows Update is functioning properly, run Windows Update Troubleshooter.

You’ll need to visit the Microsoft website to access their Windows Update Troubleshoot tool. Once you’ve downloaded the troubleshooter, run the tool. After running the tool, check if you are able to access Windows Update services as well as activate Windows 10.  If the problem with error code 0xd0000272 persists, however, follow the instructions provided for manual repair method three detailed below.

Method Three: Disable Proxy Settings

Another option available to individuals experiencing error code 0xd0000272 in Windows 10 is to manually disable their machine’s proxy settings. After disabling the proxy settings, remember to open the Windows Update tab to complete the activation process. See the instructions provided below to disable proxy settings.

  • Step one: Press Windows key + R
  • Step two: Type control then click OK
  • Step three: Select Settings then go to Network & Internet
  • Step four: View connection settings
  • Step five: Click on the Network tab
  • Step six: Click Proxy -- turn off proxy

Once you have successfully disabled your proxy settings, open Windows Update. Select the activation option to access your copy of Windows 10. If you are unable to complete the activation process, however, contact a Windows repair technician.

Method Four: Use an Automated Tool

Error codes in Windows often occur due to poor maintenance of one’s PC. To improve your system and reduce your machine’s risk of experiencing error codes, download a powerful automated tool. This tool is both powerful and user-friendly, making its benefits accessible to even the most non-technical Windows users.
Read More
Change Network from Public to Private error
You have the option to choose to configure the Network to Private or Public when you set it on Windows 10 PC. On the other hand, if the option to change the Network from Public to Private goes missing in Windows Settings then this post will surely help. You can find this setting under Settings > Network and Internet > Ethernet and appears when you click on it. If you are not able to see the option to change the network profile, then you either can’t open the settings, or the option to change it has been disabled. To resolve this issue, you can either use the Registry Editor or Windows PowerShell. Refer to the options given below for more details.

Option 1 – Change the Network Profile via Registry Editor

Changing the Network Profile can be done using the Registry Editor. But before you proceed, make sure that you create a System Restore Point first just in case. Refer to the steps below to do so.
  • Tap the Win + R keys to open the Run dialog box.
  • Then type “Regedit” in the field and hit Enter to open the Registry Editor.
  • After that, navigate to this key: HKEY_LOCAL_MACHINESOFTWAREMicrosoftWindows NTCurrentVersionNetworkListProfiles
  • Now expand the Profiles key folder located in the left pane to see one or more folders.
  • Next, expand each one of these folders and look for the “Description” sub-key which should match the name of your network.
  • After you find the Description sub-key, look for another sub-key named “Category” and double click on it to open it.
  • Now change its value from “0” to “1” to change the Network Profile from Public to Private.

Option 2 – Change the Network Profile via Windows PowerShell

Aside from the Windows Registry, you can also use Windows PowerShell in changing the Network Profile from Public to Private and so on. Take note that you have to use PowerShell with admin privileges. Just refer to the steps below to do so.
  • Tap the Win + X keys and then select the “PowerShell (Admin)” option.
  • Next, click on Yes if the User Account Control prompt appears.
  • After that, execute the commands listed below. Hit Enter right after you key in each one of them.
    • Get-NetConnectionProfile
    • Set-NetConnectionProfile -InterfaceIndex <index number> -NetworkCategory Private
Note: Since every Network Profile has an index number, you can check the label “Name” to identify the network that you want to change.
Read More
Fix FAULTY_HARDWARE_CORRUPTED_PAGE
If you got the FAULTY_HARDWARE_CORRUPTED_PAGE Blue Screen error on your Windows 10 computer then it is most likely caused by various factors. It could be caused by an incomplete installation or uninstallation of some applications or program, or it could also be caused by some exploit that intervenes with the normal functioning of the computer, as well as bad sectors on the hard disk, damaged system files, malfunctioned system drivers, modified Windows Registry files, or a Blue Screen occurrence during a Windows Update and many more. Getting this bug check means that a single-bit error was found on this page. It also indicates that this is a hardware memory error and to resolve it, you need to follow the suggestions laid out below but before that, it is recommended for you to create a System Restore Point first so that if anything goes wrong, you can always go back to the previous state.

Option 1 – Run a Memory Check to test RAM

Since the problem might have something to do with hardware memory, you need to test RAM by running a Memory Check using the Windows Memory Diagnostic. Refer to these steps to do so.
  • Tap the Win + R keys to open the Run dialog box.
  • Then type “mdsched.exe” in the field and hit Enter to open the Windows Memory Diagnostic.
  • After that, the Windows Memory Diagnostic will give out two options such as:
  1. Restart now and check for problems (recommended)
  2. Check for problems the next time I start my computer
  • Select any of the given options. After that, your computer will restart and check for memory-based issues upon the restart. If there are any issues, it will automatically them.

Option 2 – Run the System File Checker

System File Checker or SFC is a built-in command utility that helps in restoring corrupted files as well as missing files. It replaces bad and corrupted system files with good system files that might be the cause why you’re getting the FAULTY_HARDWARE_CORRUPTED_PAGE Blue Screen error. To run the SFC command, follow the steps given below.
  • Tap Win + R to launch Run.
  • Type in cmd in the field and tap Enter.
  • After opening Command Prompt, type in sfc /scannow
The command will start a system scan which will take a few whiles before it finishes. Once it’s done, you could get the following results:
  1. Windows Resource Protection did not find any integrity violations.
  2. Windows Resource Protection found corrupt files and successfully repaired them.
  3. Windows Resource Protection found corrupt files but was unable to fix some of them.

Option 3 – Check for conflicting or incompatible programs by putting your PC in a Clean Boot state

As mentioned, the FAULTY_HARDWARE_CORRUPTED_PAGE Blue Screen error might be caused by some problematic programs that clash with your existing operating system. Several users reported that numerous programs that are supposedly designed to enhance computer performance are causing conflict in the system instead. To identify which program is causing the problem, you need to put your computer in a Clean Boot State. To do so, follow the steps below.
  • Log onto your PC as an administrator.
  • Type in MSConfig in the Start Search to open the System Configuration utility.
  • From there, go to the General tab and click “Selective startup”.
  • Clear the “Load Startup items” checkbox and make sure that the “Load System Services” and “Use Original boot configuration” options are checked.
  • Next, click the Services tab and select the “Hide All Microsoft Services” checkbox.
  • Click Disable all.
  • Click on Apply/OK and restart your PC. (This will put your PC into a Clean Boot State. And configure Windows to use the usual startup, just simply undo the changes.)
  • From there, start to isolate the problem by checking which one of the programs you installed recently is the root cause of the problem.

Option 4 – Update or rollback drivers

If the first few options didn’t work for you, then it’s time to either update or roll back the device drivers. It is most likely that after you updated your Windows computer that your driver also needs a refresh. On the other hand, if you have just updated your device drivers then you need to roll back the drivers to their previous versions. Whichever applies to you, refer to the steps below.
  • Open the Devices Manager from the Win X Menu.
  • Then locate the device drivers and right-click on them to open the Properties.
  • After that, switch to the Driver tab and click on the Uninstall Device button.
  • Follow the screen option to completely uninstall it.
  • Finally, restart your computer. It will just reinstall the device drivers automatically.
Note: You can install a dedicated driver on your computer in case you have it or you could also look for it directly from the website of the manufacturer.
Read More
Fix NMI_HARDWARE_FAILURE in Windows
If you encounter the NMI_HARDWARE_FAILURE Blue Screen error while using your Windows 10 computer, then read on as this post will guide you in resolving this kind of Blue Screen of Death error. NMI HARDWARE FAILURE or “Non-Maskable Interrupt” Blue Screen error occurs when there is some hardware malfunction in your computer. When you encounter this Blue Screen error, you may get a stop code of 0x00000080 which can randomly occur while you use your computer. However, a lot of users reported encountering this error while they were trying to update or install their Graphics Card drivers. The stop code that you may get for this BSOD error is 0x00000080. The error can occur randomly during your usage of the computer – but a large number of users have reported this error while they are updating or installing their Graphics Card drivers. In this post, we will be covering all the possible fixes for this error. NMI_HARDWARE_FAILURE error on Windows The NMI_HARDWARE_FAILURE bug check has a value of 0x00000080. This bug check indicates that a hardware malfunction has occurred. There are various hardware malfunctions that can cause this kind of Blue Screen error. However, pinpointing the exact cause is quite difficult. Worry no more for the following fixes provided below can help you resolve the NMI_HARDWARE_FAILURE Blue Screen error no matter what the cause of the problem is.

Option 1 – Try removing hardware or drivers that you’ve installed recently

If you have recently installed some hardware or drivers, you might want to disable or remove them since external devices are proven to be one of the factors that trigger Blue Screen errors like NMI_HARDWARE_FAILURE. All you have to do is physically disconnect any external devices that are connected to your computer and then check if it fixes the BSOD error or not.

Option 2 – Try to rollback, update, or disable the Graphics card drivers

Since the NMI_HARDWARE_FAILURE Blue Screen error has something to do with Graphics card drivers, you can either roll back, update or disable them depending on your preference in order to resolve the error.
  • First, boot your computer into Safe Mode.
  • After that, tap the Win + R keys to launch Run.
  • Type in devmgmt.msc into the box and tap Enter or click OK to open the Device Manager.
  • After that, a list of device drivers will be displayed. From there, look for the Display Adapters and click on them.
  • After that, right-click on each entry under the Display Adapters and select the “Uninstall Device” option from the menu.
  • Now restart your computer.
  • After restarting your computer, go to the Settings app and Check for Updates in the Windows Update section.
Note: You also have the option to go directly to the website of your graphics card manufacturers like NVIDIA, Intel, or AMD and go to the section called Drivers then check if there’s a new available update – if there is, download and install it.

Option 3 – Make sure that all memory modules have the same type

This third option is quite technical and tricky. If you often use multiple physical RAMS on your Windows 10 computer, then you have to check first if they are of the same frequency. After that, the first thing you should verify is if the chip is properly compatible or not. And if the sockets are attached using some kind of adapter or non-recommended device, it could cause some issues while giving a performance hit to your computer.  If you were able to find such a setup, you have to undo it or install the proper and recommended as well as compatible hardware.

Option 4 – Try to run the Blue Screen Troubleshooter

As you know, the Blue Screen troubleshooter is a built-in tool in Windows 10 that helps users in fixing BSOD errors like the NMI_HARDWARE_FAILURE error. It can be found on the Settings Troubleshooters page. To use it, refer to these steps:
  • Tap the Win + I keys to open the Settings panel.
  • Then go to Update & Security > Troubleshoot.
  • From there, look for the option called “Blue Screen” on your right-hand side and then click the “Run the troubleshooter” button to run the Blue Screen Troubleshooter and then follow the next on-screen options. Note that you might have to boot your PC into Safe Mode.
Read More
SYSTEM_THREAD_EXCEPTION_NOT_HANDLED CMUSBDAC.sys
If you encounter a Blue Screen error that points out to the CMUDA.sys, read on as this post will guide you in fixing it. The CMUDA.sys file is a Windows operating system driver file that is related to the USB Device Audio capabilities of a computer. There are times when this file causes Blue Screen error due to some conflicts in RAM or some incompatible firmware or hard disk issues, corrupted drivers or malware infection, and so on. There are various Blue Screen errors that are related to the CMUDA.sys file such as:
  • KMODE EXCEPTION NOT HANDLED
  • PAGE FAULT IN A NONPAGED AREA
  • IRQL NOT LESS OR EQUAL
  • SYSTEM THREAD EXCEPTION NOT HANDLED (CMUSBDAC.sys)
In most cases, the CMUDA.sys file usually triggers the SYSTEM_THREAD_EXCEPTION_NOT_HANDLED Blue Screen error. Although this Blue Screen error may seem complicated, its workarounds are straightforward so you won’t have any problems in following them.

Option 1 – Try to update or rollback your device drivers

If the first option didn’t work for you, then it’s time to either update or roll back the device drivers. It is most likely that after you updated your Windows computer that your driver also needs a refresh. On the other hand, if you have just updated your device drivers then you need to roll back the drivers to their previous versions. Whichever applies to you, refer to the steps below.
  • Open the Devices Manager from the Win X Menu.
  • After opening the Device Manager, locate the device drivers that are marked with a small yellow exclamation mark icon and right-click on each one to open their Properties. On the other hand, you can also look for sub-entries under Sound, video, and game controllers like the C-Media USB Audio Class
  • After that, switch to the Driver tab and click on the Uninstall Device button.
  • Follow the screen option to completely uninstall it.
  • Finally, restart your computer. It will just reinstall the device drivers automatically.
Note: You can install a dedicated driver on your computer in case you have it or you could also look for it directly from the website of the manufacturer. You can download the as C-Media USB Audio Class driver from the cmedia.com website.

Option 2 – Try to recreate the CMUDA.sys file

The first thing you can try is to recreate the CMUDA.sys file. Every time your Windows 10 PC boots up, it looks for all the system drivers in place and if it is unable to find them, it tries to create them. Which is why if you remove your corrupt driver file, chances are, you might get a fixed file recreated just for you. How? Refer to the steps below.
  • Boot your Windows 10 PC in Safe Mode.
  • Then open File Explorer and navigate to this location: C:/Windows/System32/drivers
  • From there, look for the file named sys and rename it to CMUDA.old.
Note: As you can see, the file’s extension has changed from .sys to .old.
  • Now restart your computer and check if the CMUDA.sys Blue Screen error is now fixed.

Option 3 – Run the Blue Screen Troubleshooter

The Blue Screen troubleshooter is a built-in tool in Windows 10 that helps users in fixing BSOD errors. It can be found on the Settings Troubleshooters page. To use it, refer to these steps:
  • Tap the Win + I keys to open the Settings panel.
  • Then go to Update & Security > Troubleshoot.
  • After that, look for the option called “Blue Screen” on your right-hand side and then click the “Run the troubleshooter” button to run the Blue Screen Troubleshooter and then follow the next on-screen options. Note that you might have to boot your PC into Safe Mode.
On the other hand, you can also try running the online Windows 10 Blue Screen troubleshooter from Microsoft. It is a wizard that could help you fix any Stop errors related to the CMUDA.sys file and will offer you helpful links as you use it.

Option 4 – Try running the DISM tool

You can try running the Deployment Imaging and Servicing Management or DISM tool to fix the Wdf01000.sys Blue Screen error. Using this built-in tool, you have various options such as the “/ScanHealth”, “/CheckHealth”, and “/RestoreHealth”.
  • Open the Command Prompt with admin privileges.
  • Then type in the following commands and make sure to hit Enter right after you type each one of them:
    • Dism /Online /Cleanup-Image /CheckHealth
    • Dism /Online /Cleanup-Image /ScanHealth
    • exe /Online /Cleanup-image /Restorehealth
  • Do not close the window if the process takes a while as it will probably take a few minutes to finish.

Option 5 – Run System Restore

Running System Restore might also help in fixing Blue Screen errors related to the CMUDA.sys file.
  • Tap the Win + R keys to open the Run dialog box.
  • After that, type in “sysdm.cpl” in the field and tap Enter.
  • Next, go to the System Protection tab then click the System Restore button. This will open a new window where you have to select your preferred System Restore point.
  • After that, follow the on-screen instructions to finish the process and then restart your computer and check if the problem is fixed or not.
Read More
1 2 3 171
Logo
Copyright © 2023, ErrorTools. All Rights Reserved
Trademark: Microsoft Windows logos are registered trademarks of Microsoft. Disclaimer: ErrorTools.com is not affiliated with Microsoft, nor claims direct affiliation.
The information on this page is provided for information purposes only.
DMCA.com Protection Status