The Free Wifi Hotspot is offered to users that own a laptop and a desktop PC that has a wired connection to the Internet and no WiFi modem. The Free Wifi Hotspot is said to help users share their Internet connection with mobile devices that support the 2G/3G/4G/USB tethering connectivity. However, users will need a 2G/3G/4G modem attached to the computer/laptop with access to the Internet if they intend to benefit from the Free Wifi Hotspot software. Additionally, the Free Wifi Hotspot may collect data like your Internet history, downloads log, and software configuration for product placement optimization. PC users that run the Free Wifi Hotspot software may be shown pop-up windows with marketing materials from time to time and maybe redirected to promotional offers.
Several anti-virus applications have flagged Free Wifi Hotspot as a Potentially Unwanted Applications and may come bundled with other PUP-s that may harm your computer or steal some information, due to these risks it is marked for optional removal.
About Potentially Unwanted Applications
Everybody has experienced it – you download a piece of free application, then you see some unwanted applications on your computer or find a strange toolbar has been included with your browser. You didn’t install them, so how did they appear? These unwanted applications, which are referred to as Potentially Unwanted Programs, or PUPs in short, typically tag along as a software package when downloading the application and can ruin your PC or cause major annoyances.
PUP does not involve malware in the traditional sense. The reason is, the majority of PUPs end up in a computer not because they slip through the security holes, for example, but because the users have got installed them themselves – totally unintentionally needless to say. A PUP might not be regarded as malicious or harmful but nonetheless, it is a standard reason for clunky OSs; some PUPs are a lot more aggressive by deliberately slowing down your computer or laptop.
How does unwanted software impact you?
Unwanted programs come in many forms. Usually, they can be seen in adware bundlers that are known to utilize aggressive and misleading advertising. The majority of bundlers install many adware programs from several vendors, each of which has its own EULA policy. Safebytes Anti-malware totally eliminates this threat and safeguards your machine against PUP or adware infection. The PUPs likewise get installed into your computer in the form of browser add-ons and toolbars. They will modify web browser settings, change the default search engine, substitute the default home page with their very own websites, slow down browsing speed, and also will ruin your system also.
Potentially unwanted programs apply aggressive distribution methods to get onto your personal computer. The worst part of installing a PUP is the spyware, adware, and keystroke loggers that may hide inside. These are software programs that don’t do anything good for you; in addition to occupying space on the hard disk, they will also slow down your PC, often change settings without your approval, the list of troublesome features goes on and on.
Tips on avoiding PUPs
• When installing anything on your desktop, always read the fine print, like the license agreement. Do not accept terms of use that are for bundled programs.
• Don’t accept standard, express, default, or any other installation settings which are recommended. Always opt for “custom” installation.
• Make use of an antivirus program to boost your protection. Anti-malware programs like Safebytes Anti-malware has got real-time features that will block PUPs before they harm your computer.
• Avoid adding freeware software you won’t make use of. Nowadays ‘freeware’ isn’t actually freeware – but ‘crapware’ bundling nonsense.
• Always download programs from the original website. Most PUPs find their way onto your PC is through download portals, so avoid it entirely.
Comply with these tips and you will almost never get potentially unwanted programs on your computer.
How To Get Rid Of Malware That Is Blocking Antivirus Downloads?
Every malware is bad and the level of the damage can vary greatly depending on the type of malware. Some malware sits in between the computer and the internet connection and blocks some or all websites that you really want to check out. It will also block you from adding anything to your PC, especially the anti-virus program. If you’re reading this, you may have affected by a virus that prevents you from downloading a security application such as Safebytes Anti-Malware. There are some options you could try to get around with this particular issue.
Use Safe Mode to resolve the problem
In the event the malware is set to run at Windows startup, then booting in safe mode should avoid it. Since just the bare minimum programs and services launch in “Safe Mode”, there are rarely any reasons for conflicts to happen. Listed here are the steps you need to follow to boot into the Safe Mode of your Windows XP, Vista, or 7 computers (check out Microsoft site for directions on Windows 8 and 10 PCs).
1) At power on, press the F8 key before the Windows splash screen starts to load. This will conjure up the “Advanced Boot Options” menu.
2) Make use of the arrow keys to select Safe Mode with Networking and hit ENTER.
3) When you are into this mode, you should have access to the internet once again. Now, use your browser normally and navigate to https://safebytes.com/products/anti-malware/ to download and install Safebytes Anti-Malware.
4) Following installation, run a complete scan and allow the program to delete the threats it detects.
Switch over to some other internet browser
Certain malware might target vulnerabilities of a particular web browser that obstruct the downloading process. If you suspect that your Internet Explorer happens to be hijacked by a trojan or otherwise compromised by cybercriminals, the most effective thing to do is to switch to an alternate browser such as Chrome, Firefox, or Safari to download your chosen security application – Safebytes Anti-Malware.
Install security software on a USB drive
Another solution is to download and transfer antivirus software from a clean PC to run a scan on the affected computer. Abide by these steps to run the antivirus on the infected computer.
1) On a virus-free PC, install Safebytes Anti-Malware.
2) Plug in the pen drive to a USB slot on the uninfected computer.
3) Double-click the Setup icon of the antivirus software to run the Installation Wizard.
4) Select the flash drive as the destination for saving the software file. Follow activation instructions.
5) Now, insert the thumb drive into the infected system.
6) Double click the Safebytes Anti-malware icon on the pen drive to run the application.
7) Click “Scan Now” to run a complete scan on the infected computer for viruses.
SafeBytes Anti-Malware Benefits
If you are looking to download anti-malware software for your PC, there are lots of tools on the market to consider however, you should not trust blindly anyone, regardless of whether it is free or paid software. Some are very good ones, some are decent, and some are just bogus anti-malware software that will harm your computer themselves! You should opt for a tool that has gained a good reputation and detects not only viruses but other kinds of malware too. On the list of recommended software by industry leaders is SafeBytes Anti-Malware, a popular security application for Microsoft Windows.
Safebytes is one of the well-established PC solutions companies, which provide this complete anti-malware software program. When you have installed this software, SafeByte's state-of-the-art protection system will ensure that no viruses or malware can seep through your computer.
SafeBytes anti-malware provides a plethora of enhanced features which set it apart from all others. Below are some of the best ones:
Live Protection: SafeBytes offers an entirely hands-free active protection and is set to monitor, block, and get rid of all computer threats at its first encounter. They’re very efficient in screening and getting rid of different threats because they are continuously revised with new updates and safety measures.
World-class AntiMalware Protection: This deep-cleaning anti-malware program goes much deeper than most anti-virus tools to clean out your computer. Its critically acclaimed virus engine finds and disables hard-to-remove malware that conceals deep inside your personal computer.
Safe Web Browsing: SafeBytes checks and provides a unique safety rating to every single website you visit and block access to webpages considered to be phishing sites, thus safeguarding you from identity theft, or known to contain malware.
Lightweight Tool: SafeBytes is a lightweight and easy-of-use antivirus and antimalware solution. As it uses minimum computer resources, this program leaves the computer power exactly where it belongs to: with you actually.
Fantastic Technical Support: Expert technicians are at your disposal 24/7! They will promptly resolve any technical issues you may be encountering with your security software.
SafeBytes can keep your PC protected from most advanced malware threats automatically with almost no input needed from you again. Once you’ve downloaded and installed SafeBytes Anti-Malware, you will no longer need to bother about malware or other security worries. If you want sophisticated forms of protection features & threat detections, buying SafeBytes Anti-Malware could be worth the dollars!
Technical Details and Manual Removal (Advanced Users)
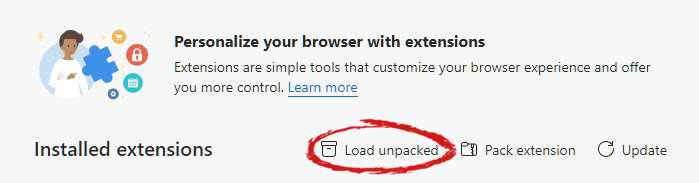
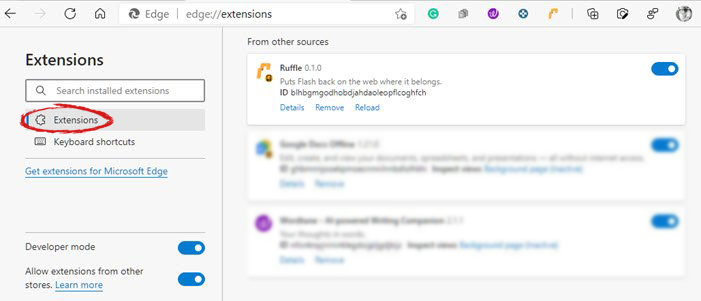
If you’d like to perform the removal of Free Wifi Hotspot manually instead of using an automated software tool, you may follow these steps: Go to the Windows Control Panel, click the “Add or Remove Programs” and there, select the offending application to uninstall. In case of suspicious versions of browser extensions, you can actually remove them via your web browser’s extension manager. You’ll probably also want to totally reset your internet browser to its default configuration settings.
To ensure the complete removal, manually examine your hard drive and Windows registry for all of the following and eliminate or reset the values accordingly. Please remember that only professional users should attempt to manually edit the registry because incorrect file removal leads to a major problem or even a computer crash. Furthermore, certain malware is capable of replicating itself or preventing deletion. It is advisable that you carry out the removal procedure in Windows Safe Mode.
Files:
%APPDATA%\Microsoft\Windows\Start Menu\Programs\Free WiFi Hotspot
%ALLUSERSPROFILE%\Microsoft\Windows\Start Menu\Programs\Free WiFi Hotspot
%ALLUSERSPROFILE%\Application Data\Start Menu\Programs\Free WiFi Hotspot
%Appdata%\Free WiFi Hotspot New Version Available
Registry:
HKEY_LOCAL_MACHINE\Software\[APPLICATION]\Microsoft\Windows\CurrentVersion\Uninstall..Uninstaller
Free WiFi Hotspot_is1


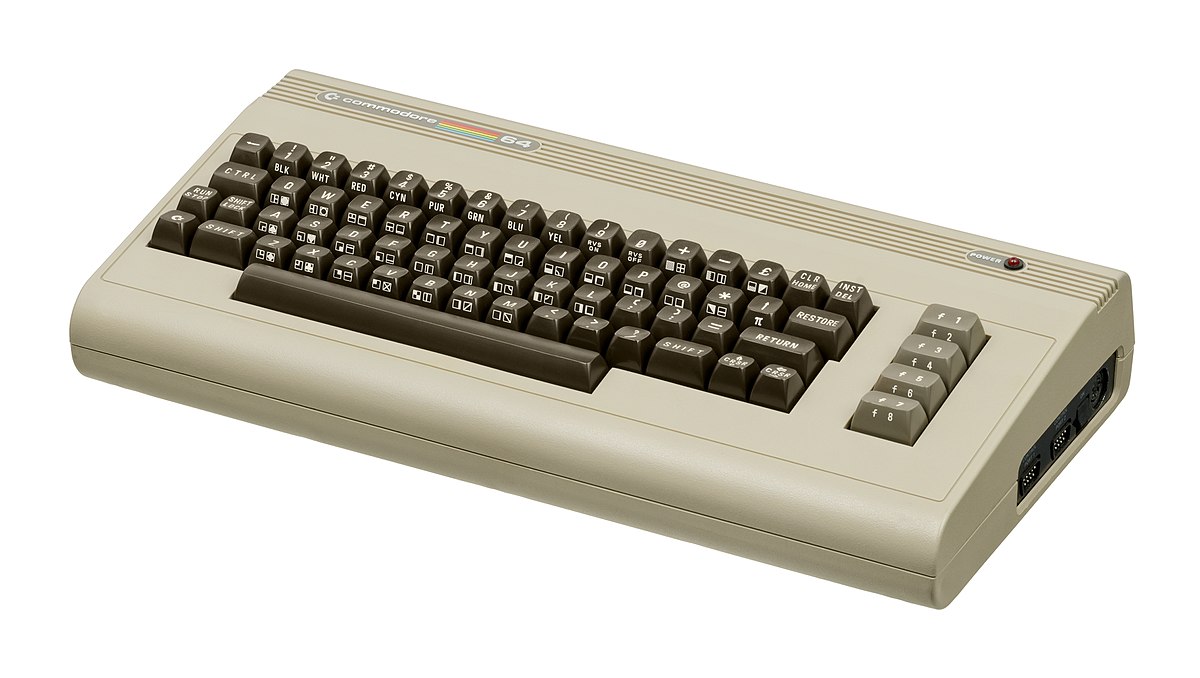 History of Commodore
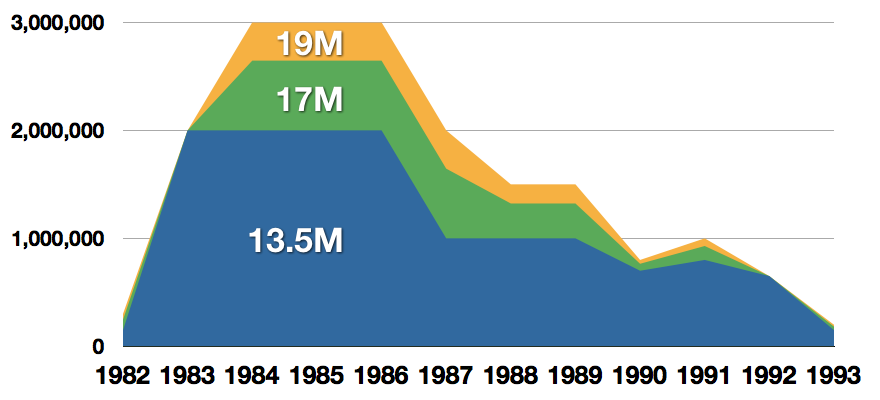
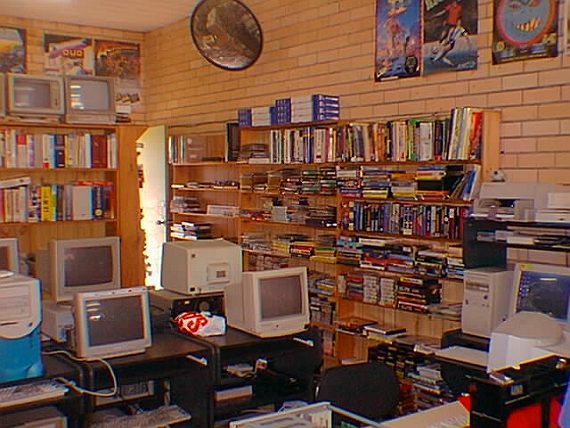 With sales booming and the early reliability issues with the hardware addressed, software for the C64 began to grow in size and ambition during 1984. This growth shifted to the primary focus of most US game developers. The two holdouts were Sierra, who largely skipped over the C64 in favor of Apple and PC compatible machines, and Broderbund, who was heavily invested in educational software and developed primarily around the Apple II. In the North American market, the disk format had become nearly universal while cassette and cartridge-based software all but disappeared. So most US-developed games by this point grew large enough to require multi-loading.
At a mid-1984 conference of game developers and experts at Origins Game Fair, Dan Bunten, Sid Meier, and a representative of Avalon Hill said that they were developing games for the C64 first as the most promising market. By 1985, games were an estimated 60 to 70% of Commodore 64 software. Over 35% of SSI's 1986 sales were for the C64, ten points higher than for the Apple II.
Everything was great for Commodore but the industry was moving forward and by the year 1988, PC compatible computers were stated to be the largest and fastest-growing home entertainment systems pushing C64 on to second place. Also, Nintendo’s gaming system has started to take hold in the world with amazing 7 million systems sold in 1988 only.
By the year 1991, many developers exited the gaming market for Commodore 64 home computer system and its popularity started to fall due to lack of software and not so many hardware changes.
With sales booming and the early reliability issues with the hardware addressed, software for the C64 began to grow in size and ambition during 1984. This growth shifted to the primary focus of most US game developers. The two holdouts were Sierra, who largely skipped over the C64 in favor of Apple and PC compatible machines, and Broderbund, who was heavily invested in educational software and developed primarily around the Apple II. In the North American market, the disk format had become nearly universal while cassette and cartridge-based software all but disappeared. So most US-developed games by this point grew large enough to require multi-loading.
At a mid-1984 conference of game developers and experts at Origins Game Fair, Dan Bunten, Sid Meier, and a representative of Avalon Hill said that they were developing games for the C64 first as the most promising market. By 1985, games were an estimated 60 to 70% of Commodore 64 software. Over 35% of SSI's 1986 sales were for the C64, ten points higher than for the Apple II.
Everything was great for Commodore but the industry was moving forward and by the year 1988, PC compatible computers were stated to be the largest and fastest-growing home entertainment systems pushing C64 on to second place. Also, Nintendo’s gaming system has started to take hold in the world with amazing 7 million systems sold in 1988 only.
By the year 1991, many developers exited the gaming market for Commodore 64 home computer system and its popularity started to fall due to lack of software and not so many hardware changes.
 Commodore announced that the C64 would be finally discontinued in 1995.
However, only one month later in April 1994, the company filed for bankruptcy. When Commodore went bankrupt, all production on their inventory, including the C64, was discontinued, thus ending the C64's 11 and a half year production.
Commodore announced that the C64 would be finally discontinued in 1995.
However, only one month later in April 1994, the company filed for bankruptcy. When Commodore went bankrupt, all production on their inventory, including the C64, was discontinued, thus ending the C64's 11 and a half year production.
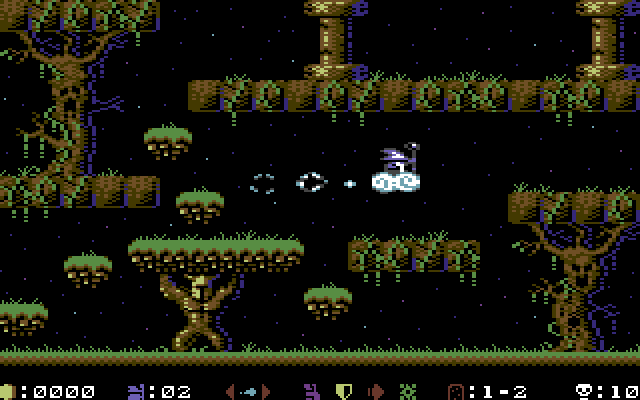 Zak McKracken and the Alien Mindbenders
 If you are not keen on spending money for reliving and checking games or software of C64 here are some links to help you to at least experience part of it completely free.
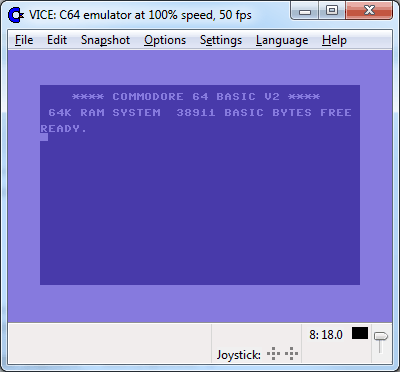
Commodore 64
If you are not keen on spending money for reliving and checking games or software of C64 here are some links to help you to at least experience part of it completely free.
Commodore 64