Error Code 0xC004F00F can appear during the Windows 10 installation and activation process. It is a fairly straightforward error code that occurs when a product key is entered in that is unable to be used to complete the final activation of the new operating system. This error code is most commonly related to the installation of new pieces of hardware on a machine that was already running Windows 10 at a previous time.
Error Code 0xC004F00F can also appear on other versions of the Windows software, so if you are not specifically trying to install and activate Windows 10 when this message appears, you may want to contact a qualified Windows technician to help resolve your system error, as the error code has different causes and resolution methods on other versions of the Windows operating system.
Solution
Error Causes
In some cases, Error Code 0xC004F00F will show up if you are attempting to install Windows 10 on a computer in which the hard drive has been replaced or significantly altered. It can also appear when other major pieces of hardware, like the motherboard, have been changed out. These pieces may be changed as part of an upgrade to new or better hardware or be changed due to the malfunction of the original pieces of equipment. Because it may appear to the Windows activation servers that you are attempting to use the same product code that you have used before to activate what appears to be a new machine (even if the machine is the same one, just with some new parts), you may see Error Code 0xC004F00F arise.
Error Code 0xC004F00F can also come up if you have installed Windows 10 on your machine in the past and have already used the product key that you are attempting to use again.
Further Information and Manual Repair
Error Code 0xC004F00F most commonly appears for users who have made major hardware or software changes done on their machine. Because this error specifically arises from the Windows activation servers believing that your computer is a new one, you’ll need to get in touch with the Windows support team in order to resolve the error. From their database, they will be able to confirm that you are not using a new computer and will be able to bypass the error, allowing you to complete the Windows 10 Activation process.
If you haven’t installed or replaced any of the hardware on the computer, but are still seeing Error Code 0xC004F00F arise during your Windows 10 installation, you will still need to get in touch with the Windows support team to bypass the error code.
Calling the Windows' Support Team
When you call into the Windows support team, you’ll want to specifically have a list of the following information readily available: Which pieces of hardware have been changed out on your computer prior to the installation and activation, what method you were using to install Windows 10, which version of Windows 10 that you were attempting to install, whether it was a single-use or multiple-use license, and basic details about your PC like its make, model, and age. You may also want to have the product key that you were attempting to use when Error Code 0xC004F00F first appeared.
By having all of this information ready and on hand ahead of time, you’ll have a greater likelihood that your error will be able to be resolved quickly and efficiently, avoiding long periods spent on the phone with customer service. Make sure that you specifically mention that you are experiencing Error Code 0xC004F00F during the Windows 10 activation process when you call into the Windows support team so that you can be connected to a representative who is equipped to help you resolve this specific problem.
Getting a Qualified Technician
If you are not comfortable in working with the Windows support team or have not been able to successfully resolve Error Code 0xC004F00F even after getting in touch with customer support, contact a qualified technician who is familiar with the Windows 10 activation process and can walk you through the things that you will need to communicate to the Windows support team in order to have them bypass or resolve the error code.
If you wish to always have at your disposal a utility tool to fix these Windows 10 and other related issues when they do arise, download and install a powerful automated tool.
When you are copying some files from your computer to your hard disk and vice versa or when you have several disks connected to your Windows 10 computer and you suddenly receive an error message saying, “The request failed due to fatal device hardware error”, then this means that there is some issue with the hardware of your computer. This issue might be caused by various reasons but whatever they may be, this post will guide you on how you can fix the “The request failed due to fatal device hardware error”. To fix the error, here are some suggestions that could help.
Option 1 – Check for any hard disk errors
On your desktop, right-click on the “This PC” or computer icon and then select Manage to open the Disk Management. Here you get to check your drive’s health.
Next, click on Disk Management on the left side panel.
From there, check the state of your drives. If it shows that all your partitions are healthy then it means all is good and that the problem may have something to do with some physical issues with your hard drive.
Option 2 – Run the CHKDSK utility
When it comes to some issues concerning the hard drive or removable devices, there is a utility in Windows that might help which is called “chkdsk”. This error check utility can help with several issues in the system including “The request failed due to fatal device hardware error”.
Tap the Win + S keys to open the Search box.
Then type “command prompt” in the field and from the search results that appear, right-click on Command Prompt and select “Run as administrator”.
After opening an elevated command prompt, copy and paste the following command and hit Enter:
Note: In the command given above, “[/F]” will try to fix the system errors while “[/R]” will be the one to fix the bad sectors.
Now if you are prompted to run CHKDSK after your reboot your PC, just tap Y and reboot your PC.
If CHKDSK is not able to find any errors, tap the Win + E keys and navigate the access window. From there, right-click on the concerned drive and click on Properties.
After opening Properties, click on the tab Tools and then click on the “Check” button under the Error-checking section.
Wait until the process is completed and then restart your computer
Option 3 – Verify the hard drive using SMART attributes
In case you don’t know, Windows has a built-in feature of SMART analysis which analyzes the hard drive/SSD and checks all the parameters by performing some minor operations. To use it, follow these steps:
Tap the Win + S keys and type “command prompt” in the field then right-click on the related search result and select the “Run as administrator” option.
After opening Command Prompt as admin, type the “wmic disk drive get status” command and hit Enter.
You should get a result after that, and if you see that it’s “normal”, proceed to the next option below.
Option 4 – Format your hard disk
You can try formatting your drive since this problem also occurs on removable hard drives. In addition, if your drive is not properly initialized, this error will really pop up. Thus, you need to make sure that the hard drive is initialized and that the correct partition style is selected.
To get started formatting your drive, tap the Win + E keys and then go to the access page of the drive.
Next, right-click on the drive and select Format.
After that, uncheck the “Quick Format” option and then format your drive properly.
Now once the formatting process is finished, unplug the drive and plug it back in afterward.
Check if the error is already fixed. If the drive is not initialized, tap the Win + R keys and hit Enter.
After opening the Run dialog box, type “diskmgmt.msc” and hit Enter to open Disk Management.
From there, right-click on the drive volume and select Initialize Disk.
Next, select the correct partition type and proceed.
If you are getting this error even if STEAM.EXE is present on your system then follow the easy guide to solve the issue.
Scan your system for malware
Scan your complete system for viruses and other malware. If all the scans come negative then move to the next step.
Disable your anti-virus software
Some anti-virus and anti-malware software can detect steam as a potential threat and block it. Turn off your protection software and try to run Steam once all your protection is disabled. If this works you will need to either place Steam in the applications exception list or to move to another protection software.
Remove administrator privileges from steam client
Right-click on steam.exe and choose properties, go to the compatibility tab, and uncheck run this program as administrator. Try to run Steam again.
Delete Steam registry value
If everything else failed try deleting the registry value for steam. Open registry editor and locate key:
HKEY_LOCAL_MACHINE\SOFTWARE\Microsoft\Windows NT\CurrentVersion\Image File Execution Options
Double click on Image File Execution, find steam on left, right-click on it, and choose delete. Save and exit the registry editor.
Gaming on the computer has become one of the most used past-time activities among people of all ages. And since we are still in pandemic it has only risen as activity. People can acquire a lot of games at various discounts on various platforms and enjoy them at the leisure of their home.
Among many game platforms and stores, Electronic art's Origin is one of the bigger ones, and having some titles that could not be found anywhere else coupled with the ability to have access to almost the whole game catalog with one monthly subscription make it one of the most used clients.
Sadly as with every piece of software Origin's client is not perfect by any means and it can behave strangely from time to time.
Hello everyone and welcome to errortools.com, today we will fix Origin error code 10 which oddly enough can appear out of nowhere and can even appear on the very end of installation for the chosen game. If you have managed to come by this error you are in luck to be here because we have a couple of fixes for it.
I know that you might be excited to play the game so let's go and do some fixing
Check Server status
Before diving into technicality and before we start deleting files and fixing things you should check the Server status. This seems maybe like something you should not do but if the server has experienced some kind of downtime or it is in maintenance Origin will throw this error in the client. Unexpected situations can cause various server issues all of a sudden and the first thing is to check are servers online and working. There are various ways to check server status from official origin website to Electronic arts twitter channel to Reddit and many more online server status websites. If it turns out that the server is to be blamed for this error then sit back and wait for EA to resolve the issue, there is not much you can do anyway.
Delete OriginThinSetupInternal.exe
After some research, it has come to light that originthinsetupinternal.exe can cause this specific error. The best solution is to delete the file and then run Origin as administrator so the file is remade new.
First, make sure that Origin is fully closed, check the taskbar and if it lurks there right-click on it and click on quit
Run file explorer and go into the folder where Origin is installed, by default it is C:\Program Files (x86)\Origin
Locate OriginThinSetupInternal.exe and delete it
Then locate origin.exe and right-click on it and then click on Run as administrator
Reinstall Origin client
If the previous solution has not solved the issue then Origin might have some corrupted files inside it. It is known that the Origin client can produce some bad files if the installation has been forcefully canceled. The best thing is to reinstall the completely whole client.
Press ⊞ WINDOWS + R to open the run dialog
Inside run dialog type in Control panel and press ENTER
In the control panel locate programs and features group and double click on it
Locate Origin, click to select it, and on top click on uninstall
After uninstall process is completed start file explorer and go to the folder where Origin was installed, by default it is C:\Program Files (x86). Locate the Origin folder and delete it.
Go to the official origin website and download the new client installation.
After the download is finished double click on it and follow onscreen instructions.
Disable antivirus
If every solution so far has not been able to remove error then obviously something else is interfering with the origin client and installation functioning. Altho not advisable, turn OFF your security suite including both firewall and antivirus and try installing the game again. There is the possibility that the origin client or some game file has been marked as false positive by security software thus preventing it from executing properly.
It has been reported that there are systems out there with Windows 11 operating systems that do not use the whole RAM memory installed in the system. If by any chance you are one of the unfortunate users that has encountered this issue, fear not, we have a solution for you.
Run the Windows Memory Diagnostic tool
Press ⊞ WINDOWS + S to open the search menu
Type in Windows Memory Diagnostic tool
Click on the found app
Select Restart now and check for problems
Wait for the tool to finish
Memory Diagnostic tool is a built-in tool in Windows, it was designed to automatically find and repair memory issues and should be your first step toward resolving this issue.
Check page file
Press ⊞ WINDOWS + S to open the search menu
Type in View advanced system settings
Click on the search result
Click on settings under performance
Click on the Advanced tab
Click on Change under Virtual memory
Uncheck the box for Automatically manage paging file size for all drives
Then select the drive and check the No paging file option
Click on Set
Repeat for all drives on the system
Reboot the system for changes to take effect
If after reboot system still does not see and use whole available RAM, repeat this process and turn back ON paging. After you are done move to the next solution.
Modify usable RAM
Press ⊞ WINDOWS + S to open the search menu
Type in System configuration
Click on the search result
Go to the Boot tab and click on Advanced options
Check the box for Maximum memory
Enter the installed RAM on your system in the field box and click on OK
Confirm once again on the OK and close the System configuration window
Restart the system
If the provided solution has not worked, uncheck the Maximum memory checkbox and save the changes. Move to the next solution.
Change and modify the registry
Press ⊞ WINDOWS + R to open the run menu
Type in Regedit and press the OK button or hit ENTER
Click on YES if prompted by UAC
Locate the HKEY_LOCAL_MACHINE\SYSTEM\CurrentControlSet\Control\Session Manager\Memory
On the right side find and double click on the ClearPageFileAtShutdownDWORD
Enter 1 under Value data and click on OK to save the changes
Close the registry and reboot the system
Enable memory remapping inside BIOS
In order to do this fix, you will need to enter BIOS on your system. How entering BIOS is different from system to system depending on your manufacturer, especially if it is a laptop this step you will have to do alone. Go to your motherboard manufacturer or laptop manufacturer and see how to enter BIOS.
Enter BIOS (80% of the time this can be done by pressing DEL or F12 while the system is turned ON)
Locate System Agent Configuration option
Select Memory Remap Feature and Enable it
Your BIOS might be different from ours and you might not have the System Agent Configuration option, in this case, go through the setting and try to locate Memory Remap Feature. If this feature is missing as well move to the next step.
Rearrange RAM modules on the motherboard
Sometimes RAM memory cannot be slotted properly or just purely switching them in slots can solve the issue. Take RAM out, clean memory slots, clean motherboard connectors for them, and place them back in a different order.
If by any chance none of the methods worked, then the issue might be in the hardware itself, either memory banks themselves, motherboard, power supply, etc. If this is sadly the case, you will have to locate the issue and replace the faulty part.
If you are not technical enough for this adventure, the best solution is to take a PC to a computer repair shop.
If you encounter a Blue Screen error that points out to the CMUDA.sys, read on as this post will guide you in fixing it. The CMUDA.sys file is a Windows operating system driver file that is related to the USB Device Audio capabilities of a computer. There are times when this file causes Blue Screen error due to some conflicts in RAM or some incompatible firmware or hard disk issues, corrupted drivers or malware infection, and so on.
There are various Blue Screen errors that are related to the CMUDA.sys file such as:
KMODE EXCEPTION NOT HANDLED
PAGE FAULT IN A NONPAGED AREA
IRQL NOT LESS OR EQUAL
SYSTEM THREAD EXCEPTION NOT HANDLED (CMUSBDAC.sys)
In most cases, the CMUDA.sys file usually triggers the SYSTEM_THREAD_EXCEPTION_NOT_HANDLED Blue Screen error. Although this Blue Screen error may seem complicated, its workarounds are straightforward so you won’t have any problems in following them.
Option 1 – Try to update or rollback your device drivers
If the first option didn’t work for you, then it’s time to either update or roll back the device drivers. It is most likely that after you updated your Windows computer that your driver also needs a refresh. On the other hand, if you have just updated your device drivers then you need to roll back the drivers to their previous versions. Whichever applies to you, refer to the steps below.
Open the Devices Manager from the Win X Menu.
After opening the Device Manager, locate the device drivers that are marked with a small yellow exclamation mark icon and right-click on each one to open their Properties. On the other hand, you can also look for sub-entries under Sound, video, and game controllers like the C-Media USB Audio Class
After that, switch to the Driver tab and click on the Uninstall Device button.
Follow the screen option to completely uninstall it.
Finally, restart your computer. It will just reinstall the device drivers automatically.
Note: You can install a dedicated driver on your computer in case you have it or you could also look for it directly from the website of the manufacturer. You can download the as C-Media USB Audio Class driver from the cmedia.com website.
Option 2 – Try to recreate the CMUDA.sys file
The first thing you can try is to recreate the CMUDA.sys file. Every time your Windows 10 PC boots up, it looks for all the system drivers in place and if it is unable to find them, it tries to create them. Which is why if you remove your corrupt driver file, chances are, you might get a fixed file recreated just for you. How? Refer to the steps below.
Boot your Windows 10 PC in Safe Mode.
Then open File Explorer and navigate to this location: C:/Windows/System32/drivers
From there, look for the file named sys and rename it to CMUDA.old.
Note: As you can see, the file’s extension has changed from .sys to .old.
Now restart your computer and check if the CMUDA.sys Blue Screen error is now fixed.
Option 3 – Run the Blue Screen Troubleshooter
The Blue Screen troubleshooter is a built-in tool in Windows 10 that helps users in fixing BSOD errors. It can be found on the Settings Troubleshooters page. To use it, refer to these steps:
Tap the Win + I keys to open the Settings panel.
Then go to Update & Security > Troubleshoot.
After that, look for the option called “Blue Screen” on your right-hand side and then click the “Run the troubleshooter” button to run the Blue Screen Troubleshooter and then follow the next on-screen options. Note that you might have to boot your PC into Safe Mode.
On the other hand, you can also try running the online Windows 10 Blue Screen troubleshooter from Microsoft. It is a wizard that could help you fix any Stop errors related to the CMUDA.sys file and will offer you helpful links as you use it.
Option 4 – Try running the DISM tool
You can try running the Deployment Imaging and Servicing Management or DISM tool to fix the Wdf01000.sys Blue Screen error. Using this built-in tool, you have various options such as the “/ScanHealth”, “/CheckHealth”, and “/RestoreHealth”.
Open the Command Prompt with admin privileges.
Then type in the following commands and make sure to hit Enter right after you type each one of them:
Dism /Online /Cleanup-Image /CheckHealth
Dism /Online /Cleanup-Image /ScanHealth
exe /Online /Cleanup-image /Restorehealth
Do not close the window if the process takes a while as it will probably take a few minutes to finish.
Option 5 – Run System Restore
Running System Restore might also help in fixing Blue Screen errors related to the CMUDA.sys file.
Tap the Win + R keys to open the Run dialog box.
After that, type in “sysdm.cpl” in the field and tap Enter.
Next, go to the System Protection tab then click the System Restore button. This will open a new window where you have to select your preferred System Restore point.
After that, follow the on-screen instructions to finish the process and then restart your computer and check if the problem is fixed or not.
Hello everyone and welcome to our Windows 10 security basics where we will provide you with common practices you should aim to follow in order not to cough some viruses, malware, keylogger, worm, etc.
As you are all aware, we live in a digital age where we are surrounded by luxuries of unlimited information, video chats all over the globe, free calls via the internet, applications that track stuff for us, and many many more things that make our lives easier. Sadly with this kind of technology comes risks of cyber attacks that aim to steal your information, credit card numbers, or any other relevant stuff which could be used illegally in order to make purchases, loans, and other theft in your name so ones doing that could not get caught.
Think of data stealers the same as you think of armed robbers in a dark alley, just this time their pray is data about your life so they can make purchases for themselves more than once.
This article aims to provide you with some common logic, tips, and tricks of what should you do and where should you pay attention in order not to provide wrong people with your crucial information and data. we hope that you will find reading informative and helpful.
Keep Windows updated.
Microsoft is working hard on their Windows defender and firewall to provide protection to its users and fixing any introduced security leaks which are found in Windows itself. By updating and keeping Windows updated you make sure that every security leak that is found is patched and removed from Windows and that you have the latest database of known malware inside the firewall and defender.
This common practice, however, should not be limited to Windows only, you should update every application you are using for the same reasons.
Use antivirus, anti-malware, and firewall
These applications exist for a reason and that reason is to protect your data. Dedicated applications specifically made for purposes of defending your data are better than any kind of I am careful mentality since sometimes is enough to just visit a website or just click on some link and you are compromised. You can use Windows Defender and firewall if you wish, they are already in Windows but if you are serious about your data and like to surf the internet some better protection is worth the investment.
Get a dedicated password manager
Your password is bad, if you use the same password everywhere then it is even worse. Computers have come a long way in the last 50 years and so have cyber attack applications which make your commonsense passwords extremely vulnerable and all of your accounts open to cyber attacks. Dedicated password managers that can hash passwords and automate them are your safest bet that your passwords will not be compromised, get one, and get it today.
Do not click on anything inside emails
Cyber attacks come in vast variety and one of them is sending you emails informing you that for example your Paypal or anything else has been hacked and that you must click this link to reset your password. These you do not click, no matter how convincing they sound or how good they look, if you need to update your information on a specific service or website, you delete email, open browser and go to that service and change stuff. The same goes with different offers, discounts, women seeking you, men seeking you, prince sending you 1 billion in gold. Only click on links in emails from a trusted and verified source.
Do not click on pop-ups
Similar to clicking on links in emails you should not click on pop-ups, the same rules, same stuff apply as with emails.
Be careful what you are downloading
Be careful from where you download your software and be careful what are you downloading and stop using pirated software, any kind of malicious applications, keyloggers, viruses, etc could be hidden in these downloads, and by downloading them you are opening doors to your private information. Only use legal software from trusted sources.
Never leave your phone or computer unattended
You can never tell who can implement malicious software or get some crucial information from unattended devices, lock them all time and take them with you.
There you go, 7 common tips and tricks for the basic security of your computer. Thank you for reading and I hope to see you again on our site.
So, you just made some popcorns, dimmed light, relaxed in from of the TV, pressed play on your application and Blu-ray drive can not read your movie.
Your movie night failed sadly, but there is hope and in this article, we are going to explore and offer you solutions on what to do when something like this happens so you do not miss another movie night and some hard-earned relaxation.
Please note that in this article we are assuming that you are using a Blu-ray player on your PC, so some of the solutions presented are meant only for this case.
So the first thing that you are supposed to do is to check the disc itself. You can turn the disc around and visually check the disc for fingerprints and scratches which can be fatal for disc playing, alternatively, you can try to play the same disc on another device and if it fails there also it is not the disc, it is your drive.
So if it is no issue with the disc let's see that seems to be a problem with the drive. The common thing that could stop disc reading are cables, check all connections and cables in the back of your device to be sure that everything is plugged in correctly and nicely.
After checking cables if the issue persists lens cleaning is the next step. Over time lens from the Blu-ray, the device becomes dirty and dust accumulates on it, there are special cleaning discs on market made especially for this purpose, to clean the dirty lens of optical devices. If you have one put it in and clean your lens. After lens cleaning with a specialty disc, a good idea would be to use compressed air in a can to reduce the dust inside so no excess dust will accumulate quickly again on the lens itself.
So the device is cleaned and checked and still no disc playing?
Update firmware first. In order to accomplish this visit your device manufacturer's website and follow instructions there on how to upgrade firmware.
If this did not helped also update or reinstall device drivers. Go to device manager and update drivers for your device by right-clicking on it and choosing update driver.
If none of the things helped, go to command prompt as administrator and type in SFC /scannow, leave the process to finish, and reboot.
In today's modern world many households have internet access, most of the connection nowadays is done via Wi-Fi or wireless but there is a high probability that you have also a few devices connected via cable. There are of course many disadvantages and advantages between cable connection and wireless connection.
The main advantages of a hard cable connection are of course faster speed and stability compared to Wi-Fi. But if we look into the cables themselves there is also a big difference between them. Not all cables are the same and quality as well as speed vary a lot between them. Choosing the right cable is essential in order to make a maximum of your internet and we have some great tips and explanations of what cables do so you can make the right choice and enjoy your full internet potential.
Not all cables are the same
Cheap cables and expensive ones are not the same no matter what everyone tells you. The old proverb you get what you pay is true and more expensive cables will be made from better materials and will have a higher transfer rate.
Quality network cables are separated into different categories with proper markings and when buying one you should always look for these markings on the cables themselves, do not buy cables that do not have markings since they will often provide lower transfer rates or will not be shielded from outside influences resulting in packet drops and instability in a network.
Categories and what they mean are:
Cat-5 with a maximum speed of 100Mbps, typically unshielded.
Cat-5e with a maximum speed of 1Gbps, available in both shielded and unshielded varieties.
Cat-6 with a maximum speed of 10Gbps for runs under 55 meters (around 180ft), available in both shielded and unshielded varieties.
Cat-6a with a maximum speed of 10Gbps, shielded.
Cat-7 uses a proprietary GG45 connector rather than the standard RJ-45 connector seen on other cables for speeds of 10Gbps, shielded.
Cat-8 with a maximum speed of 25Gbps (Cat-8.1) or 40Gbps (Cat-8.2) at a distance of around 30 meters (around 100ft), shielded.
Unless stated, these standards are typically rated at their quoted speeds for a run of around 100 meters (around 330 ft) and use a standard RJ-45 Ethernet connector. Each generation of cable is designed to be compatible with the generations that came before it, so it’s possible (for example) to use a Cat-6a cable with a router that only supports speeds of 1Gbps.
Shielded cables
When purchasing higher quality cable you might not be able to choose if you have shielding or not since some standards like Cat-6a, Cat-7, and Cat-8 are always shielded. But if you do not have the need for these and you are satisfied with Cat-5e for example you can choose.
Shielded cables are a little more expensive but they will provide you with a coating that will eliminate interference from outside waves making cables more reliable. Of course, if the cable will go through a room that does not have many radio waves or some other interferences then buying a shielded cable is a waste of money.
Cable platings
Usually, there are two types of connector platings on connectors, silver, and gold, and people usually think that gold is much better but there are major differences between silver and gold platings and truth to be told there is no better one, both are different and should be considered depending on your need.
Silver plating will provide you with faster speed since its conductivity is larger than gold, but gold is slower on the oxidation front so its life span is longer. On the other hand, if your cables are always connecting and disconnecting gold will be first to be scrubbed off from the surface since the gold coating is much thinner.
Overall if you would only connect cable once and have slower internet than cable capacity gold is the way to go, in another case if you would use the cable as always connecting and switching and your internet plan is the same as cable transfer capacity you might want to go with silver one.
Cable material quality
Network cables are made from copper, your standard conduction material but even here there are differences in quality and therefore the chance of pocket losses over it. More quality less loss and more stable connection and this will depend on the purity of copper that is used in the cable itself. More purity in copper, more stability, simple as that.
Conclusion
So as you can see, there are a lot of different things that will influence your pick of proper network cable but the overall best advice is to get one that will fit well into your needs and setup. pair it up with your router and your internet plan since just simply buying something that you can not use is really a waste of money.
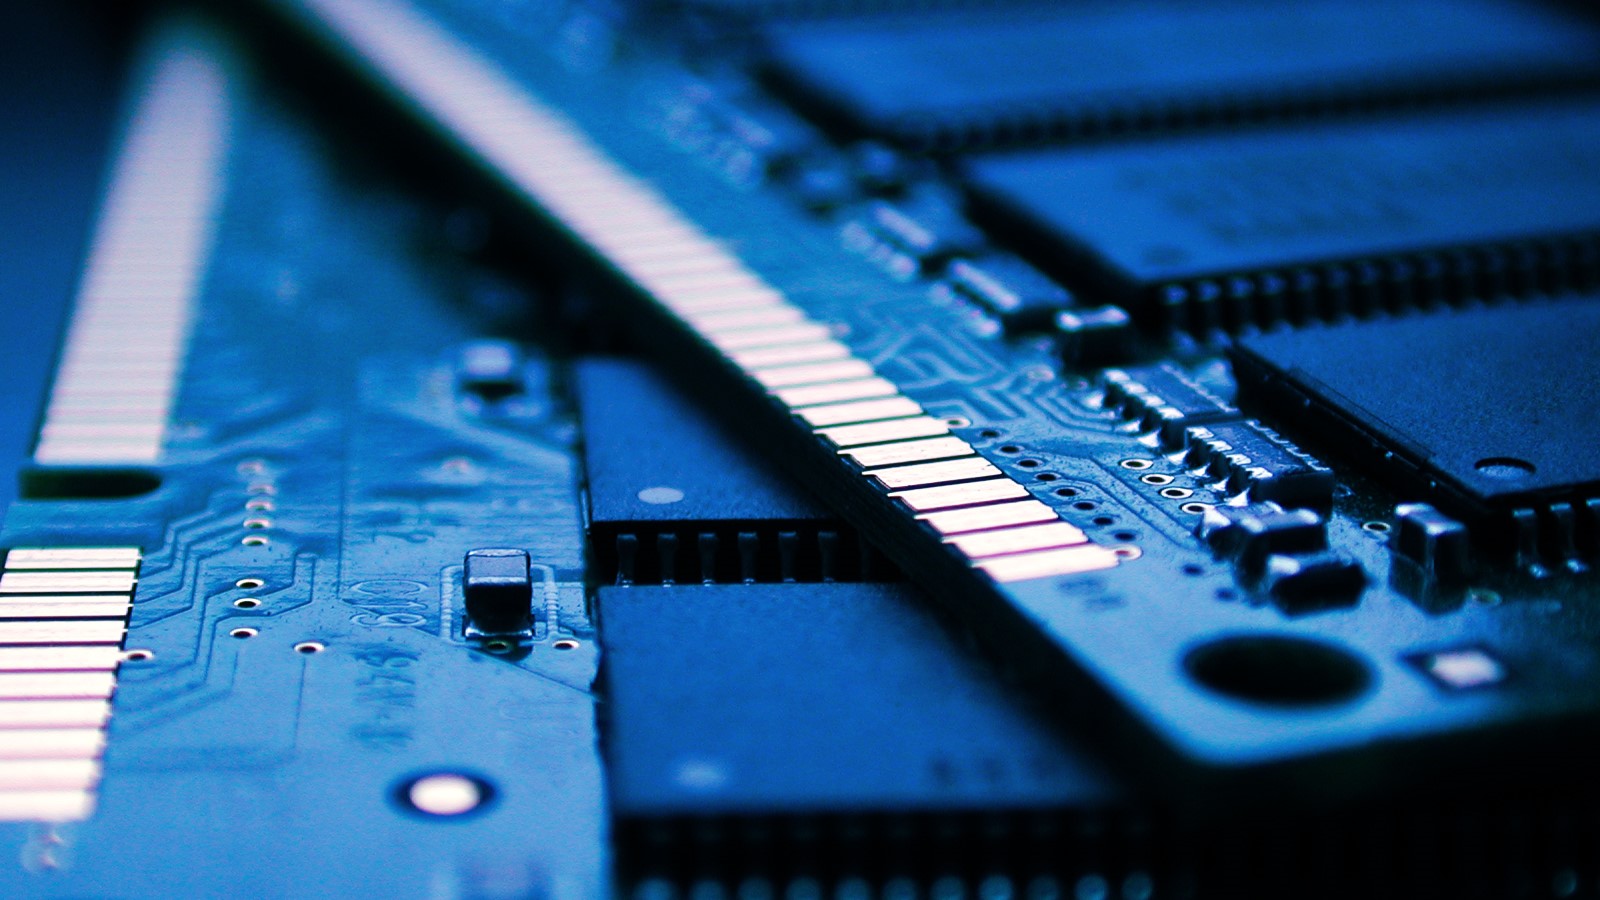
RAM drive is basically a hard drive made of your RAM memory. Altho this kind of drive can not and is not available to save any data when the computer is shut down its advantage is lightning fast speed since the application is installed in RAM itself, it is loading from there and executing from there.
Creating this kind of drive which will use your RAM memory, well part of it can not be done natively in Windows, you will need some kind of application for this task. Luckily there is a free open source application for this kind of task.
ImDisk, you can download the application here.
ImDisk Toolkit is an application for managing virtual drives. It also includes a utility that allows the creation of RAM drives.
Download the application and install it, make sure that you select all components on the installation selection screen. After installation is finished double click on icon labeled RamDisk Configuration.
Once the application is running adjust the disk size in the box at the top of the window for your RAM drive. Click “OK” at the bottom of the window. This will create your RAM drive, which is just a virtual disk that’s assigned to your computer’s RAM. The process happens transparently, so there’s nothing you need to do. If you get a warning about shutdown settings, click on the “Shutdown Settings” button. Then unlock the settings pane with your administrator password. Finally, uncheck the checkbox next to “Turn on fast startup (recommended)” and click “Save Changes” at the bottom of the window. Your RAM drive is now ready for use.
Fast Startup speeds up the process of turning on your computer by saving a system state between completely off and hibernation to your hard drive. This happens when the computer writes the contents of your RAM to a stable hard drive. As you may guess, this could mess with your RAM drive’s ability to preserve and track its data. With Fast Startup off, boots may take slightly longer, but it’s doubtful that you’ll notice much.
Disabling a fast startup will satisfy the warning window, but let’s consider why. This will also allow ImDisk to save your RAM drive’s data to an image file when you shut down your computer. If you don’t, the contents of your RAM drive will be erased completely every time, with no saved image storage.
It would also disable the RAM drive’s ability to load the previous content. Basically, the drive would act much more like RAM and much less like a disk. Depending on your use case, that may be disappointing or unusable.
You can access and use it just like any normal hard drive. It shows up in Windows’s file explorer just like any other drive. However, a Ram drive is exponentially faster than traditional types of storage. And we mean exponentially. Whereas an SSD might offer 300 to 500 MB when reading from the disk, a RAM drive can offer more than 5000 MB, even on mediocre memory sticks.
If you always use Google Chrome when browsing the internet, then you might have come across an error saying, “This webpage is not available, DNS PROBE FINISHED BAD CONFIG”. If you do, then this problem certainly has something to do with the DNS since any error code which has “DNS” in it points out a network issue in the computer.
Getting the DNS_PROBE_FINISHED_BAD_CONFIG error indicates that your computer is not able to connect the website because the Domain Name Server or DNS wasn’t able to resolve the website name into IP address or it is not available at all. So in this guide, we’ll help you sort out this issue in Chrome on your Windows 10 PC.
Option 1 – Check the Network Cables and restart your router then reconnect
The most obvious thing you can do first is to try checking if the network cables connected to your computer or router are properly connected or not. If it turns out that some network cables are not connected properly, then it’s probably why you’re getting the DNS_PROBE_FINISHED_BAD_CONFIG error in Chrome.
And if your computer is connected via Wi-Fi, you need to make sure to restart your router once. In addition, you can also forget the Wi-Fi your computer is currently connected to and then try reconnecting again to see if it would work.
Option 2 – Flush the DNS and reset TCP/IP
Flushing the DNS and reset TCP/IP could also help in fixing the DNS_PROBE_FINISHED_BAD_CONFIG error in Chrome. To do so, refer to these steps:
Click the Start button and type in “command prompt” in the field.
From the search results that appear, right-click on Command Prompt and select the “Run as administrator” option.
After opening Command Prompt, you have to type each one of the commands listed below. Just make sure that after you type each command, you hit Enter
ipconfig /release
ipconfig /all
ipconfig /flushdns
ipconfig /renew
netsh int ip set dns
netsh winsock reset
After you key in the commands listed above, the DNS cache will be flushed and the Winsock, as well as the TCP/IP, will reset.
Option 3 – Try to remove the Proxy
You can also try to remove the Proxy as it might also help you in fixing the DNS_PROBE_FINISHED_BAD_CONFIG error. Here’s how you can do it:
Tap the Win + R keys to open the Run dialog box.
Then type “inetcpl.cpl” in the field and hit Enter to pull up the Internet Properties.
After that, go to the Connections tab and select the LAN settings.
From there. Uncheck the “Use a Proxy Server” option for your LAN and then make sure that the “Automatically detect settings” option is checked.
Now click the OK and the Apply buttons.
Restart your PC.
Note: If you are using a third-party proxy service, you have to disable it.
Option 4 – Change the DNS
Try to use the Google Public DNS
If the first option didn’t work, you can try to use the Public DNS by Google and see if it can help fix the DNS error. You have to modify the DNS settings in your system explicitly and use the DNS IP addresses.
The first thing you have to do is right-click on the network icon in the Taskbar and select Network and Sharing Center.
Next, click on the “Change Adapter Settings” option.
After that, search for the network connection that you are using to connect to the internet. Note that the option might be “Wireless Connection” or “Local Area Connection”.
Right-click on your network connection and click on Properties.
Then select the new window to choose the “Internet Protocol 4 (TCP/IPv4)” option.
After that, click on the Properties button and click the checkbox in the new window for the option “Use the following DNS server addresses”.
Type in “8.8.8” and “8.8.4.4” and click OK and exit.
Option 5 – Clear Chrome’s browsing data
If your browsing data in Chrome hasn’t been cleared for some time now then that might be the reason why you’re suddenly getting the DNS_PROBE_FINISHED_BAD_CONFIG error when you browse the web. To fix this error, you need to clear your web browsing data. Refer to the following steps to do so.
Tap the Ctrl + Shift + Delete buttons to go to the Clear browsing data section in Chrome.
Next, set the time range to “All time” and tick all the boxes and then click on the Clear data button.
After that, restart the Chrome browser and try to open the website you were trying to open earlier.
Option 6 – Try running the Chrome Cleanup tool
In case you don’t know, there is actually a built-in malware scanner and cleanup tool in Chrome that helps you get rid of any unwanted ads, pop-ups, and even malware, as well as unusual startup pages, toolbars, and other things that could affect the performance of the browser.


 Run the Windows Memory Diagnostic tool