The error 103 may occur either due to issues in your Google Chrome browser or system issues. If error 103 occurs when using Chrome, this means there is a conflict between Google Chrome and the antivirus program running on your PC.
It is displayed in either of the following formats:
However, if this is a system error code, it may be displayed in the following format ‘The semaphore cannot be set again’ or as ‘ERROR_TOO_MANY_SEM_REQUESTS’ or as the value 0x67.
Solution
Error Causes
The error 103 is triggered due to multiple reasons such as:
The conflict between Google Chrome and anti-viruses arises because when the web browser attempts to update, the anti-virus programs on your PC may view the update as a threat.
Due to this, the connection to the internet is terminated and the error 103 message is displayed on your computer screen. And besides, this keeps you from upgrading your Google Chrome browser too.
Other causes include:
Viral infection
Missing Windows component called ‘expand.exe’
Registry overlaps
Incompatible drivers
Further Information and Manual Repair
Here are some of the easy and efficient ways to resolve error 103. Choose a method according to the error 103 messages displayed on your screen.
Method 1: Check for the ‘Expand.exe’ Windows component
This method is workable if the error 103 is triggered due to browser issues. To get started, follow these steps.
First, go to the start menu, and in the search bar type ‘expand.exe’. If you are able to find it, move it to the following directory C:\Windows\system32. However, if you are unable to locate it, then copy the file from Windows installation CD. Once you copy the file to the directory, reinstall the updated version of Google Chrome.
Method 2: Change the Location of the Temporary File
If the error still persists, try method 2.
Go to the start menu and open the Run window. Now type C: and press OK. Then go to File, then New, and then Folder. Now create a temporary folder and name it ‘test’. After that go back to the start menu and open the Run window again. Now enter the following text in the text field:cmd.exe then press OK. In the command prompt type set TMP=C:\test.
After that try reinstalling Google Chrome by typing the following in the command prompt: start ChromeSetup.exe.
Method 3: Update Drivers
If the error message 103 is generated due to system issues, then try updating drivers. Sometimes the error may occur due to incompatible drivers.
Method 4: Perform an Entire PC Scan for Viruses
To resolve error 103, perform an entire PC Scan for viruses. Sometimes the error may occur due to viral infection. Removing viruses may fix the error.
Method 5: Clean and Restore the Registry
If the error is triggered due to registry issues, then it is advisable to download Restoro.
This is a multi-functional PC repair tool integrated with powerful utilities including an anti-virus, a registry cleaner, Active X controls, and class scanner, and a system optimizer. The registry cleaner feature wipes out all the unnecessary files including cookies, junk files, and bad registry keys that corrupt the registry. It cleans and restores the registry instantly.
The anti-feature removes all viruses and spyware while the system optimizer utility ensures your system works at its optimum speed.
It can be downloaded on all Windows versions. It is safe and efficient. This software is a one-stop solution for all PC-related errors.
intelppm.sys blue screen of death is linked to an outdated driver, if you received this error do not sweat we have simple solutions for you. Please keep on reading in order to find out what can you do to fix this error.
Update driver
Go to the device manager and manually update old-dated drivers. Note that this will take some time because you will need to update each device manually through the device manager but in the end, it will fix the issue.
Use automated application
Instead of going through each device one by one manually get a dedicated driver fixing device like DRIVERFIX and update all drivers automatically.
A solid reason to switch to Mac from Windows PC is Mac OS. Based on Linux, offers more stability and better security than Windows but you will not be able to find a vast array of applications on it.
Even when Mac OS X (the first big one) was first introduced, it looked and felt like ages beyond Windows (Microsoft just recently made a slick and modern design with Windows 11). Under the hood, it turned out that the operating system itself is stable and incredibly fast & responsive. If you value stability and easiness of use, Mac OS is the Operating system for you.
Apple ecosystem
This one is easy, if you are already invested in apple devices like iPhone and iPad, having an apple computer is one step forward into the apple ecosystem and one more step into easy sharing of documents and data between devices.
Calendars, emails, photos, videos, documents, and many more can easily be shared and synched between devices with a single apple ID making workflows much easier than on other operating systems.
Development
Developers all around the world say that developing on Mac is much better and smoother than on PC, this has probably to do something with OS being based on Linux but whatever the case is, it is much smoother and it just feels better. Apple laptops are often the go-to choice of developers for a reason.
Also if you are in the development business for applications and services aimed at iPhone or iPod then there is no really another way than to be into the apple ecosystem and own apple hardware.
Professional software
A lot of professional-grade software exists for both the Windows platform and Mac OS but there is some software that exists exclusively for Apple hardware like Final Cut Pro or Logic Pro. Both applications are used by professionals and are industry-standard software.
Logic pro is used by industrial audio specialists all around the world and is used in professional studios. Final Cut Pro is also used worldwide by video editors and if you are specializing in any of these two fields Mac seems like a very reasonable platform since the software can not be found on Windows. These two are examples, there are other similar applications that are only available on Mac OS
Longevity
Apple hardware is made of high-quality materials and components and it is proven over time that it lasts longer than usual. There are iPhones out there that have 13 years and they are still working, G3 and G4 Macs that are still functional.
When buying Apple products they will outlive other ones if treated properly so in the end you could be saving money by purchasing them.
What software are you using to keep your information and all your files and memories safe?
None? Yikes. Let’s hope no damage has been done to your data yet then. Because with how the digital world has evolved, your data might be getting leaked and you have no idea.
Why do you need to invest in security software?
There’s really no good excuse not to purchase a quality platform for PC protection. Especially since top security solutions are available at such affordable prices nowadays, your wallet would barely even notice it.
At this point, only people who barely use their PCs and have zero sensitive information on them can get away with simply using the built-in Windows 10/11 security software. But we guarantee that those people are extremely hard to find and that you’re not one of them, and here’s why.
Even if you don’t use your computer for things that are very obviously sensitive, such as internet banking, you still have some personal data at risk of being stolen. How so? Well, think about the data you enter into your social media profiles, for example. How devastating would it be if somebody got a hold of any of it? Yep, that’s what we thought.
Credit: FLY:D on Unsplash
In the hands of a skilled cybercriminal, your phone number alone could put you at risk of scams, ransomware, identity theft and more. Also think about the stuff you share in texts and social media chats. Think about the websites you visit and how many times you may have accidentally clicked on an ad, which could very well contain malicious software. Those all seem harmless until someone’s actually used them against you.
Now imagine the dangers involved when you actually store truly confidential data on your PC and browsers. Sends shivers down your spine, doesn’t it?
In the case of a successful cyberattack of whatever type (virus, phishing, worms, etc.), there’s so much that is at stake. Businesses/legal persons will suffer from financial loss and damaged reputation, at the very least. Natural persons may be threatened or exploited, get their banking or medical information and even their identity stolen, etc. And that’s just the tip of the iceberg.
These are our biggest reasons for investing in Windows PC protection software:
Cyberthreats are constantly evolving to the point where built-in or free software won’t cut it anymore.
Those working remotely can have peace of mind knowing both personal and business data is completely secure.
Businesses using top security solutions ensure their customers trust them.
Data breaches are a pain in the you-know-what to handle. Fighting a cyberattack and going back to normal is a demanding process, and not to mention the stress it’ll cause. We’d rather prevent all that by using trustworthy security products!
It helps parents worry a little less about their children’s safety in the online world.
Added bonus: with most products, you get an ad-free browsing experience!
Obviously, there are a lot more reasons to get your PC secured. But we think you get it. So let’s cut to the chase and take a look at our 6 favorite protection solutions and the wonders they can do for you.
*Note that in this article we’re looking at products primarily suited for households and home offices, some for small businesses. No enterprise solutions will make the list today, but stay tuned for a future article on those.
Top 6 best PC protection solutions
1. Bitdefender Total & Internet Security\
One of the biggest security product vendors out there, Bitdefender offers several awesome solutions. We want to introduce two of our favorites, Bitdefender Total Security and Bitdefender Internet Security.
Bitdefender Total Security is great for both households and smaller offices. You can choose to protect 5 or 10 devices, and not necessarily just Windows devices. It also works for macOS, Android and iOS. It offers a range of powerful features, such as:
Real-time data protection
Webcam and microphone protection
Device optimization options
Anti-phishing/-fraud/-spam technology
Ransomware protection
Anti-loss and anti-theft tools
VPN and privacy firewall
Anti-tracking technology
Parental controls
24/7 support
Bitdefender Internet Security shares almost all of these features, but there are a few important differences to note. Unlike Total Security, Internet Security has more options in terms of the number of protected devices: 1, 3, 5 or 10. However it’s only compatible with the Windows platform and it doesn’t offer device optimization tools or anti-theft options. Whether or not this is a deal-breaker depends on your needs alone - we still find it a great security tool.
Credit: Firmbee.com on Unsplash
2. ESET Internet Security
An award-winning Windows security product, ESET Internet Security is essential on this list. It has an outstanding protection rate of 99.9% and a range of amazing options you’ll definitely want to make use of. It can be installed on up to 10 devices, making it an awesome tool for your household, home office or a small business. It’s also compatible with macOS and Android.
These are ESET Internet Security’s best features:
Protection against ransomware and spyware
Protection against malware specifically designed to avoid detection
In-depth scans when the computer is not in use
Firewall to prevent unauthorized access to your PC
Anti-spam tool
Anti-phishing and botnet protection technologies
Tool to scan your router and smart devices for vulnerabilities
Special browser for secure internet banking
Parental controls
Prevention of unauthorized webcam access
If you ask us, ESET has it all!
Credit: rupixen.com on Unsplash
3. Kaspersky Total & Internet Security
Having a deja vu? Didn’t you just read Total Security and Internet Security somewhere? Oh, that’s right - the first entry on our list! But here we’re talking about Kaspersky, a vendor you’ve also definitely heard about before.
Just like Bitdefender, Kaspersky is another one of those renowned names in the cybersecurity world that always make it to every ‘best of’ list. And for good reason - its products really fulfill their purpose. So let’s take a closer look at the two we chose.
These are the features both Kaspersky Total Security and Kaspersky Internet Security have in common:
Real-time virus and spyware blocking
Webcam protection
Wi-Fi security notifications
Advanced identity theft protection
Free technical support on several channels
Remote security management
Multiple devices (up to 10)
The main difference between Kaspersky Total Security and Internet Security is that the former offers more capabilities. These are the features KTS offers that KIS does not:
System cleanup
File shredding
Password management
Data backup and encryption
Both are excellent security tools, though we do prefer KTS a little more because of these additional options.
4. Norton 360 Deluxe
Of course one of the industry-leading solutions makes the list. Norton 360 Deluxe can protect up to 5 devices, be it Windows, iOS, macOS or Android. It’s worth noting that its features are best developed for Windows. Here’s what you get with Norton 360 Deluxe:
Protection against viruses, hackers, malware
100% virus protection promise
VPN included for all devices
Unlimited VPN on Windows
Password manager
Parental controls
So is there anything aside from these standard protection features that makes it such a favorite among us techies? Let us tell you! Norton added a little bit of spice here with two really powerful capabilities. The Deluxe product offers 50GB of cloud backup and dark web monitoring. The latter means the software notifies you if any of your personal information is found on the dark web, which helps protect you against identity theft.
Credit: Luke Peters on Unsplash
5. McAfee Antivirus
Don’t be misled by the name of this product. Antivirus software may have started as protection against viruses only, but it’s developed quite a lot. The name simply stuck. All that to say that McAfee Antivirus - another award-winning security solution - protects you against several different threats.
The basic and essential plan allow 1 and 5 devices respectively, while McAfee+ Premium and Advanced work on an unlimited number of devices. The latter two also offer more capabilities, as you can imagine. Here’s what you can expect from all of them:
Secure unlimited VPN
File shredder to delete sensitive files completely
Ultimate safety while browsing
Protection against hackers
100% virus protection promise
Advanced firewall to block dangerous traffic
Online support from specialists
Protection score (shows how safe you are and detects vulnerabilities)
Identity monitoring (notifies you if any of your information is on the dark web)
Password management
Unlike the previous products, McAfee Antivirus does not offer parental controls. Otherwise it’s a pretty strong and comprehensive protection tool and might just be the right choice for you!
6. Trend Micro Maximum Security
Last but definitely not least, we’ve got Maximum Security by Trend Micro. And yes, you guessed it, Trend Micro is also an award winner in terms of cybersecurity. Its products have been recognized as industry-leading security solutions by AV-Test since 2003. Among all its fantastic solutions, our favorite for households or small offices is Maximum Security.
You can use Trend Micro Maximum Security to protect 3-5 devices for a year or two years before needing to renew your license. Aside from Windows, it’s compatible with iOS, Android, Mac and Chromebook devices. Here’s what you can expect from this protection software:
Powerful malware protection
Phishing detection and prevention (email)
Password management and protection
Maximum security for online banking and shopping
System optimization
Social media privacy protection
Parental controls
24/7 technical support
No notifications during gaming
It’s truly one of the most effective platforms out there dedicated to protecting your digital life. Using this product, ransomware, identity thieves and malicious websites don’t stand a chance.
The bottom line
If you’ve made it all the way here, congratulations, you’ve made the right choice: to invest in securing your valuable data! Now the question is: which one of these 6 awesome antivirus/antimalware products to select?
The paradox of choice is a very real thing - we feel you. As mentioned, it comes down to what your specific needs are. So before you go ahead and purchase your security software, make sure to explore all options.
And if you really can’t handle the decision-making anxiety, feel free to reach out. We’ll happily assist you in finding the right product to keep your digital life secure!
Hello and welcome to errortools articles. Today we will talk about some great and awesome tips and tricks for the command prompt. Commands which can make your life easier and your workday more pleasant.
That being said let's dive in right into muddy waters and swim out with new knowledge.
Tip 1: Read Motherboard information
There are a lot of reasons why you would like to read information from your motherboard, maybe you would like to upgrade your BIOS, perhaps you would like to know the serial number, maybe even the version number. Well, you can, type the following code into the command prompt and you will receive all information about your motherboard.
wmic baseboard get product,version,serialnumber,product
Tip 2: Copy command output to clipboard
Getting information from the command prompt to a word processor, into an email or any other medium can be somewhat troublesome, usually, people tend to screenshot or write from a command prompt into another destination, which could induce errors, and let's be honest, it is not practical. You can copy command output directly into the clipboard ready for pasting it anywhere with | clip. So for example if you would like to paste the directory structure of your c drive command would look like: dir c: | clip, now output would be placed into the clipboard ready to be pasted anywhere needed.
Tip 3: Erase data permanently
When you delete data on your hard drive, what really happens is that files are marked with a marker which marks that space for new data writing, but the data itself is still present and can be brought back. This sometimes could impose problems but if you would type: cipher /w:c Windows will write random data over each marked file deleting it forever without means to be brought back.
Tip 4: Manage your IP address
If you would like to play with your IP address and do fancy stuff with it do the following:
ipconfig /release to release your IP address
ipconfig /renew to renew your IP address
ipconfig /flushdns to flush down DNS information and enjoy a new browsing start.
Tip 5: Check to see are packets reaching the desired location
You installed a new LAN printer, or a new switch, maybe you want to check if your new site is up and running. Use ping destination in order to see if TCP packets are reaching desired information, you can use it with a specific address like ping 192.168.1.1 or you can type a web address, for example, ping google.com and see if a connection can be established.
Tip 6: Get information about a specific command
So you learned some command prompt commands, but you do not know all of their configuration or switches? No worries, just type command/? to get a list of available switches for it. For example ipconfig/? will write you a list of available switches for ipconfig command.
Tip 7: Link and execute multiple commands one after another.
Let us say that for example, you would like to copy files into a different folder, then rename some and delete others and you need to do a couple of times. Instead of writing command after command once each one is finished link them with && and they will execute one after another.
Tip 8: Scan and repair files.
In order to scan files and repair broke or corrupted ones write in the command prompt: sfc /scannow. Please know that this command can take a long time since it is solely dependant on the number of files, their size, and the power of the computer.
Tip 9: Manage and configure your computer energy
Command powercfg will let you manage and see the power configuration of your computer. Just write powercfg/? and see what you need and want to change or get information about.
Tip 10: Associate files with applications
Windows already has some file associations defined, and some applications take over some type of files but if you want to take control into your own hand use assoc command. For example
assoc.txt= "APPLICATION NAME" will associate txt files with the provided application.
Tip 11: Hide files and folder.
Do you have some folder or file with information that you do not want to be seen when someone opens file explorer? Use attrib +h <name of file> and hide file or attrib +h /D <folder name> to hide folder.
Tip 12: Get a list of installed computer drivers
Want to know which drivers are installed in your system? Use driverquery and take a look.
Tip 13: Find and locate shared folders
have you shared a folder but forgot which one and where? Do not bang your head on the wall, we have a simple solution for you. just type in command prompt net share and see everything.
Tip 14: Run commands as an administrator
You do not have administrator privileges? Do you want to bypass common blockades?
runas /user:yourdomainadministrator command
That is all that we have for you today, I certainly hope you have found something useful here and that we have managed to teach you some valuable things.
Error 2032 is a Windows stream error. The error is generated when running applications like Flash. It shows that the application is unable to request ads from server.
Error Causes
The error 2032 is triggered due to multiple reasons including:
The URL cannot be located or is blocked
HTTP Service is not found
Incorrect proxy settings
Automatic cookies handling
Corrupt Flash Player
Viral infection
Registry issues
Further Information and Manual Repair
Here are some easy and best do it yourself methods to resolve the error 2032 on your system:
Fix the Proxy Settings
To do this, first, go to the start menu and press RUN, type regedit in the RUN box and press enter. Now from the left-hand panel of the registry path open: HKEY_CURRENT_USERSoftwareMicrosoftWindowsCurrentVersionInternet Settings. Now double click the proxyenable string and replace its value with 0.
After that, right-click on proxy server and select delete option. Then exit Regedit and restart your PC to activate changes.
Verify the URL
Sometimes the error 2032 may be generated due to wrong or incorrect URL in the HTTP Service URL property. So, verify your URL and look for typos. Specifying the correct URL can fix the error right away.
Check Cookies Handling
Automatic cookies handling can also trigger this error code. Therefore, to resolve the error, it is advisable to disable automatic cookies handling. This can be done by launching your web browser.
Go to tools and then press the privacy tab. Now click on the advance tab from settings and un-check override automatic cookie handling. To confirm changes press OK.
Uninstall and then Reinstall the Flash Player
It is possible your Flash Player is corrupt. Therefore, another way to fix error 2032 is to uninstall the Flash Player and then reinstall it on your system.
Scan for Viruses
Programs usually get corrupted due to two reasons, viruses or registry issues. Therefore, to remove viruses on your PC, download and run an antivirus program.
How summer is slowly slipping away and winter is coming people will spend more time indoors, and on top of that delta variant of Covid-19 is rampaging through the world. Being the gamer is now maybe the best time to be, sitting in the comfort of your home, safely isolated from viruses and people, just pushing buttons and emerging yourself in a vast world and new adventures.
But games cost money, and sometimes being a gamer can be expensive, also the COVID situation makes it even more difficult to spend some time with friends. Do not worry, we are here to help.
I am presenting you the list of MMO games that you should try or play during this COVID Winter, and since they are MMO games, you can play them with your friends and hang out in the virtual world. Some of them are also free to play so they will not cost you any money to enjoy them.
The following list is not set in any particular order and remember that this is not a ranked list. There is no best MMO and I will not try to place any of these titles as one dominant, I will just point their style and who they might be for, it is up to you to decide which one you will pick and enjoy.
Best MMO’s in no particular order
EVE Online
EVE Online is one of the earliest MMO games out there but since its release, it is still actively developed and is receiving updates. This science-fiction Sandbox will offer space lovers everything they need and more. Large scale PvP, mining, pirating, etc. It can be daunting and complex for beginners but take your time to get familiar with its systems and you will be rewarded greatly with an immersive and complex game worth the time. Open PvP in some zones might not be everyone’s cup of tea and seeing only your ship might be a turn-off for some players, but if you do not mind these things give it a go. It is free to play with an item shop.
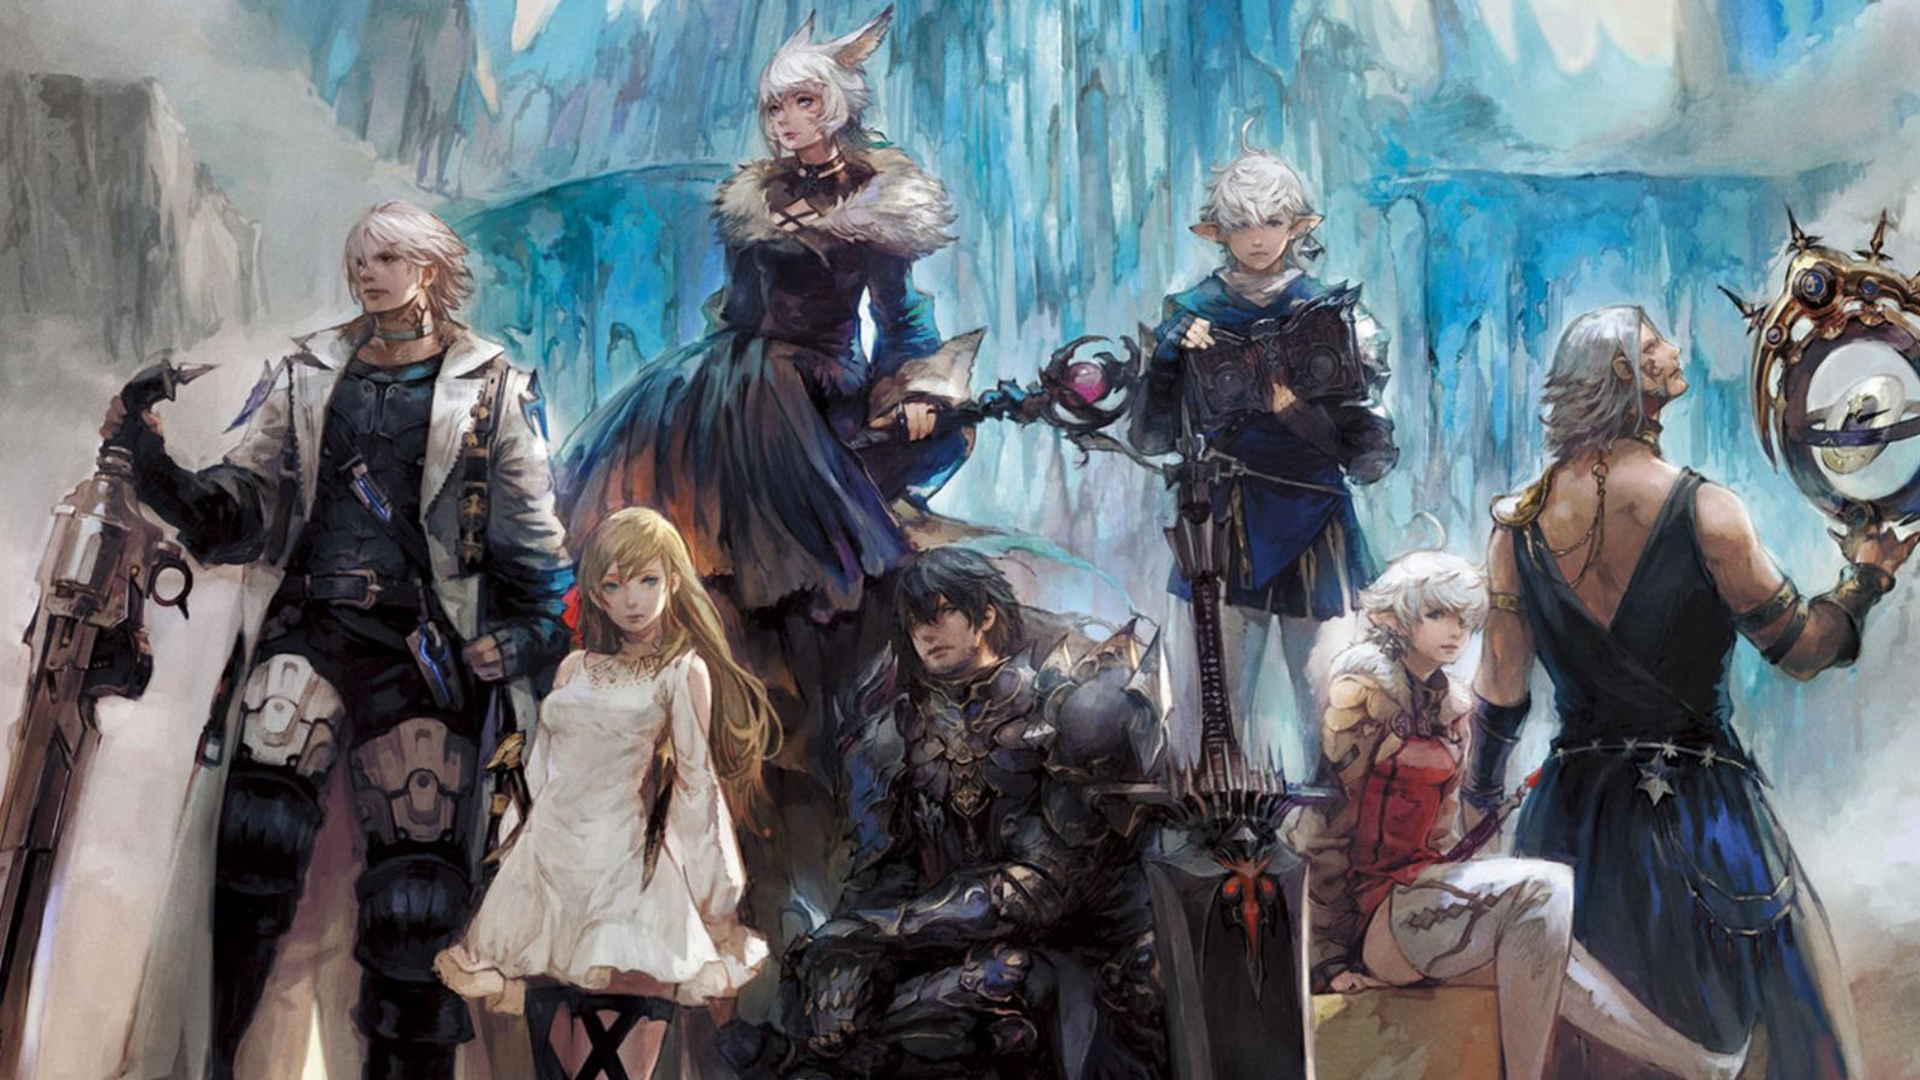
Final Fantasy XIV
FF14 had a tough start, so tough that it was scrapped and destroyed and has been remade again and that idea was great. The game now is better than ever and at this time it is experiencing large players from other games surging into it. This on the rails fantasy MMO will offer you a great story and great leveling experience. It has a free trial where you can play the whole original game for free but if you wish to continue playing you will have to buy the expansion and pay a monthly subscription but the content is well worth the money.
World of Warcraft
Let’s be honest, not a single list of MMO games cannot be without a once greatest and most successful MMO ever made, World of Warcraft. But instead of me praising the game why it was the greatest and why you should play it and how great it is I am going to take a little different approach. I am going to recommend you World of Warcraft classic, yup, you read it correctly, classic. Now World of Warcraft is a retail game with a subscription service but with that one subscription you will be able to access three games in the World of Warcraft universe: World of Warcraft retail (standard game), World of Warcraft Classic (vanilla WOW without expansions offering you experience as it once was when it was released) and World of Warcraft the Burning Crusade classic (same as WOW classic but with the first expansion the Burning Crusade). Among all solutions, I would really urge you to play either WOW classic or WOW TBC classic simply for reason that they are far superior games in comparison to typical retail ones, but if you like easier game go for retail, it is included in the sub anyway.
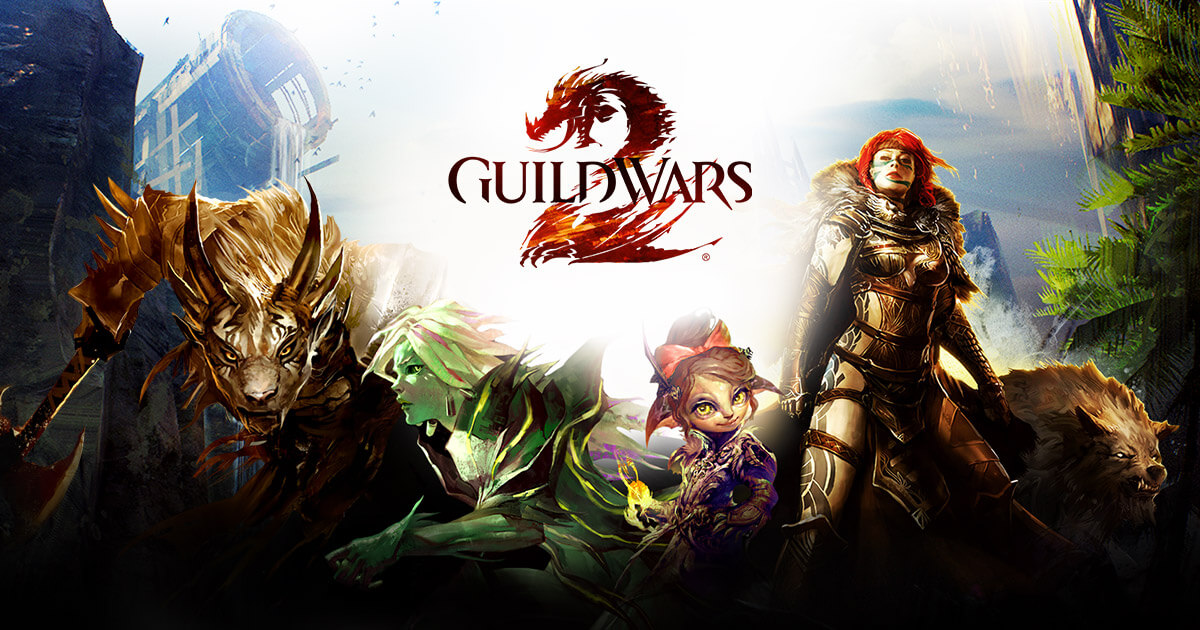
Guild Wars 2
Guild Wars 1 was one of my favorite games and I sank a lot of times in it and once Guild Wars 2 came I must admit I was pleasantly surprised with it and I would recommend it highly. The base game is completely free to play with only expansion to be purchased and it is buy to play model without monthly fees. It has specific mechanics different from other games and interesting classes to try. The living world is a great feature of the game and it is still very strong with its player base.
Star Wars: old republic
This game is made for people who enjoy, love, and like Star Wars. Mechanically besides being able to have henchmen with you and space battles (which I do not really like how they are done) game itself does not offer anything special. Where it shines is in the story and overall Star Wars experience. If you look at this game as a single-player game with multiplayer dungeons you will have a great time, since the story is really good but sadly end game lacks in comparison.
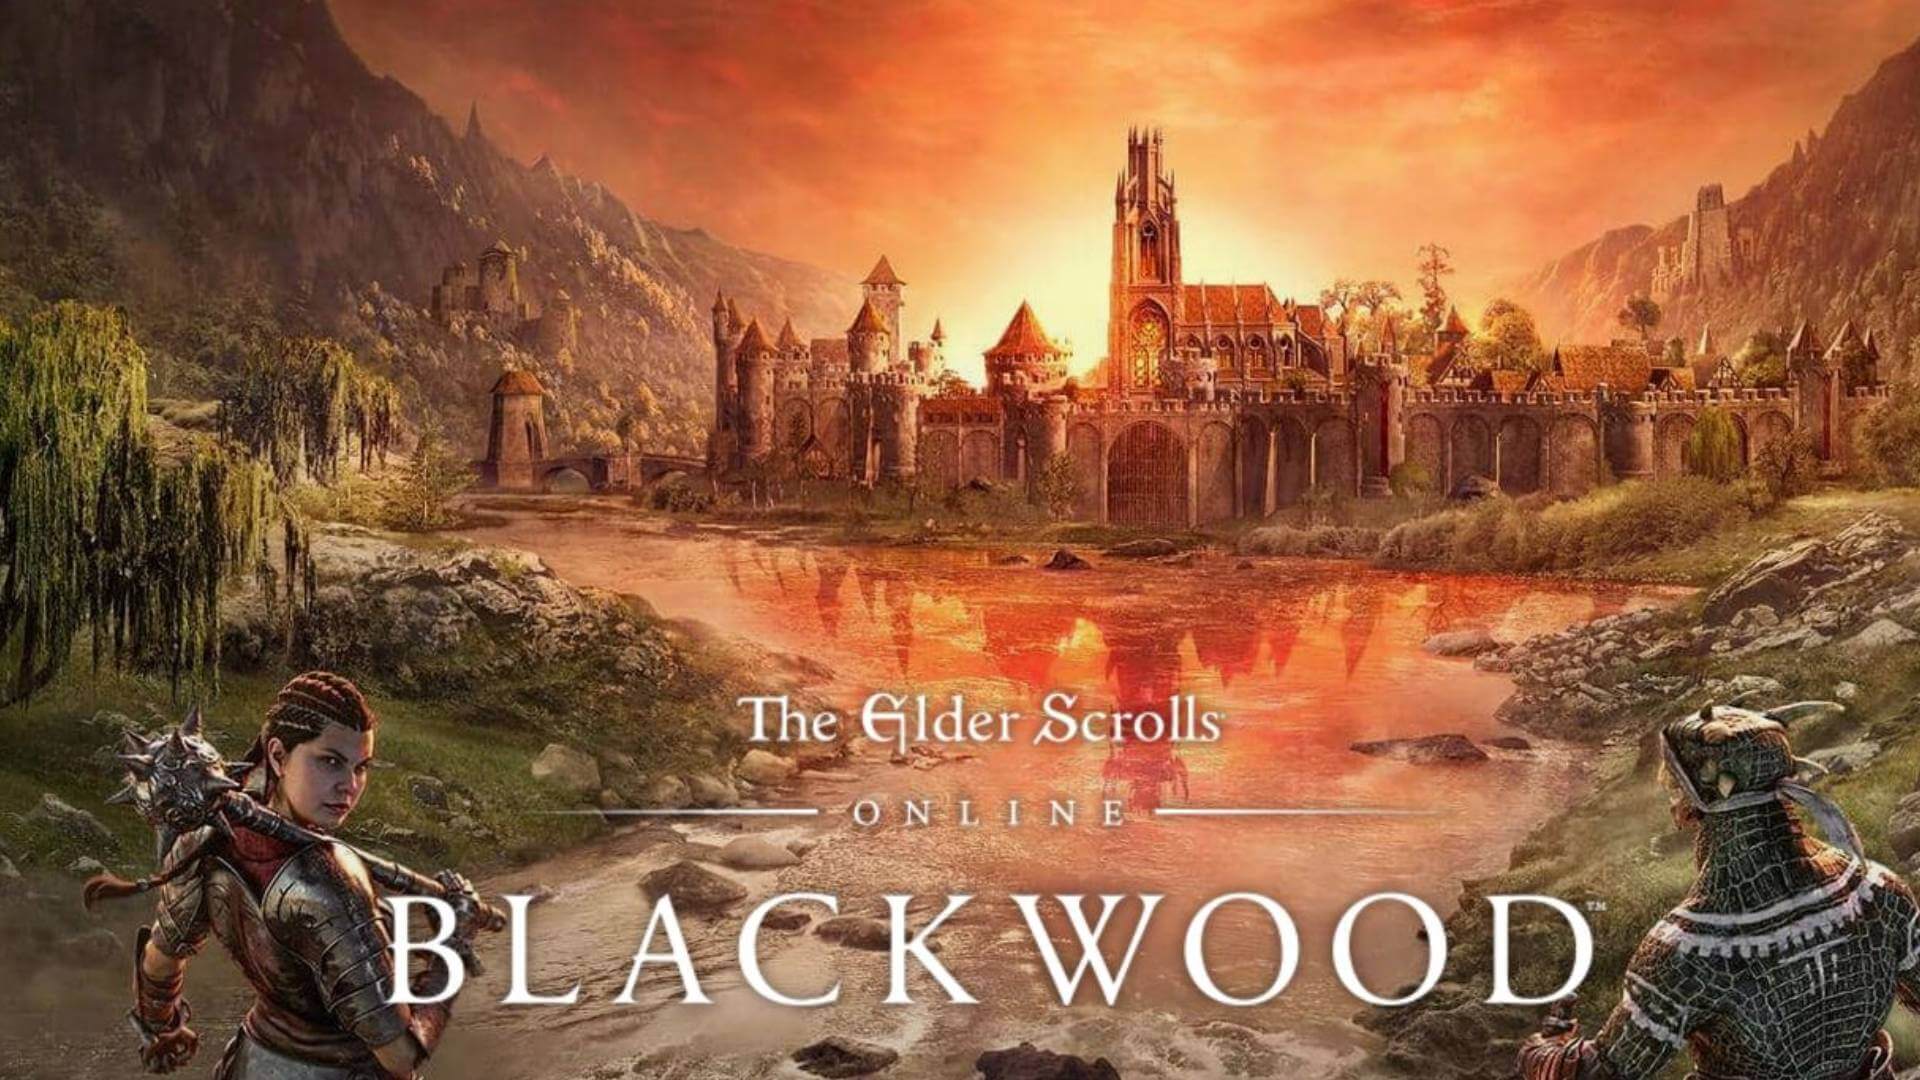
Elder Scrolls Online
I am going to admit something here, I was not fond of the idea to make the beloved Elder Scrolls series into MMO, but in time I gave it a go and I am really glad I did. This game is great and it is getting better and better as time progresses. It is buy to play without monthly fees and basic game free, same as FF14 but without fees. It has a decent community and offers a really good Elder Scrolls experience and now it is packing Morrowind expansions and other great areas. Highly recommended for any Elder Scrolls fan.
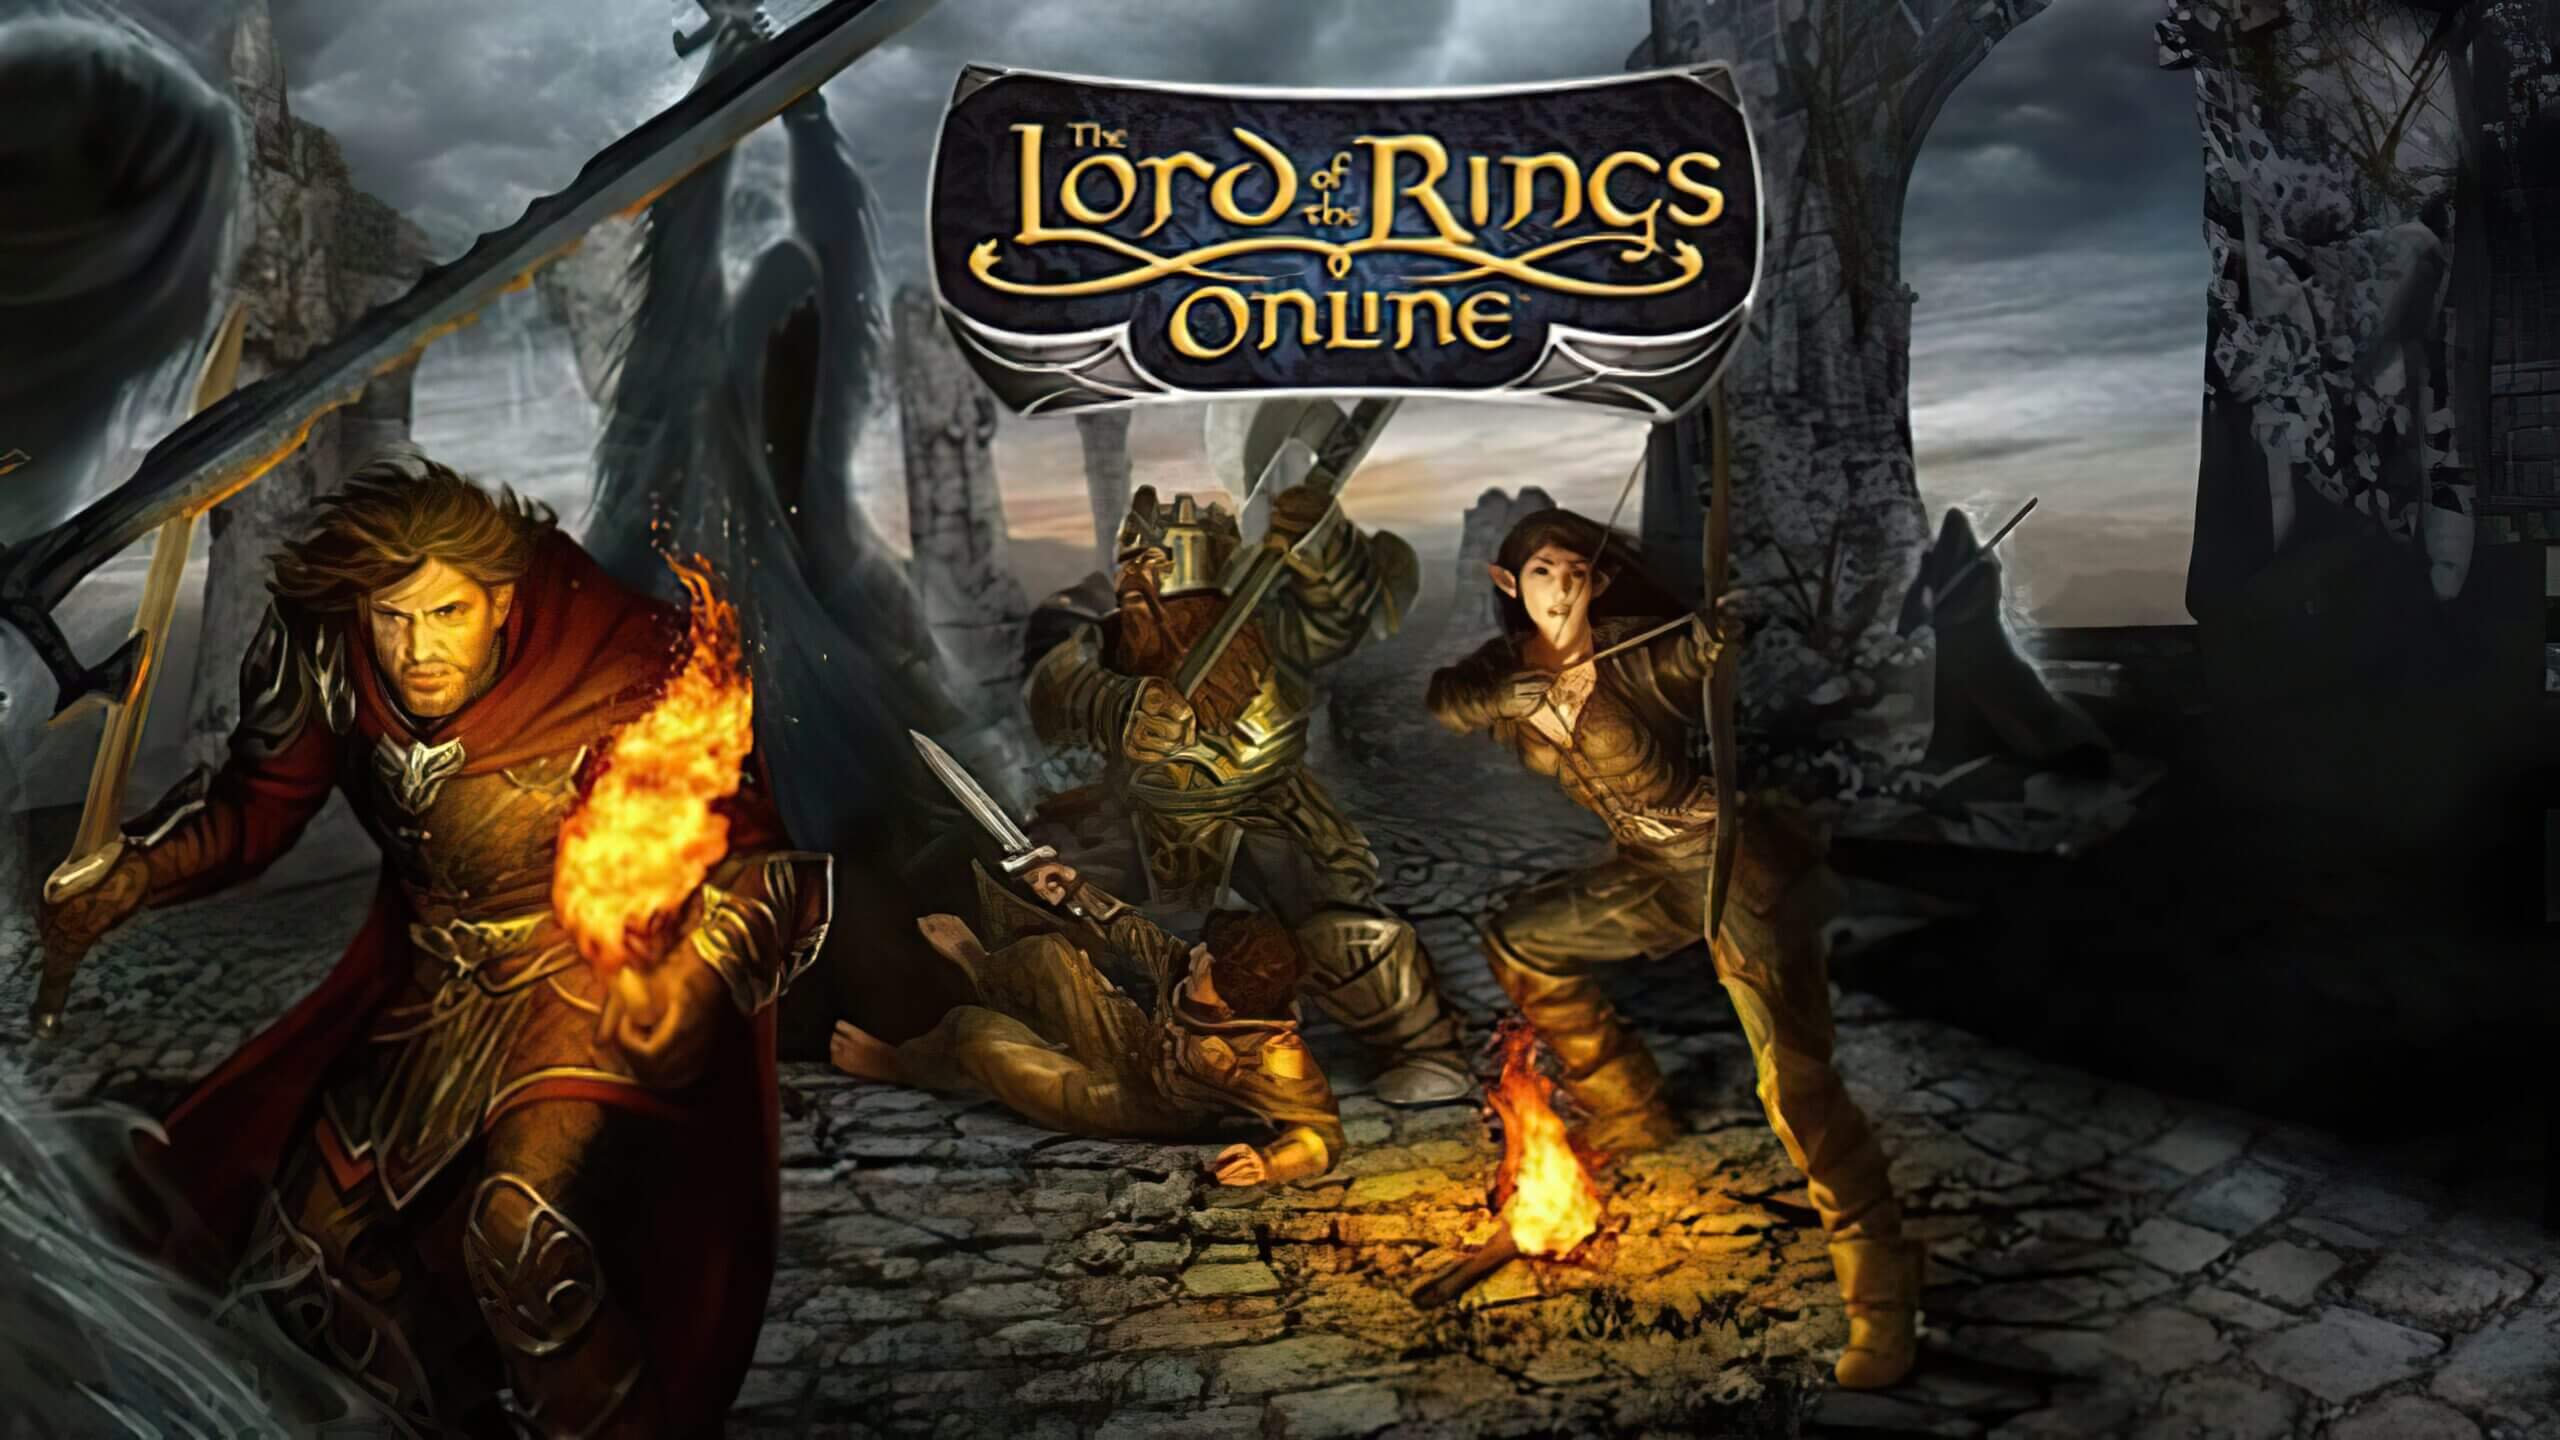
Lord of the Rings Online
This one is troublesome to recommend, on one side you have free to play games deeply inside Tolkien Lord of the Rings lore, on the other side, you have outdated graphics and some stupid item shop decisions like buys specific classes. But if you look past stupid item shop decisions and can live with playing free class in the game you will be pleasantly surprised. The game itself is surprisingly good, the story is great as expected from the game infused with lore taken from one of the best books series ever written, and the feeling when visiting iconic landscape is epic. But if I need to be real as I should, I would recommend this one to people appreciate good story and lore and ones that are fans of Lord of the Rings itself.
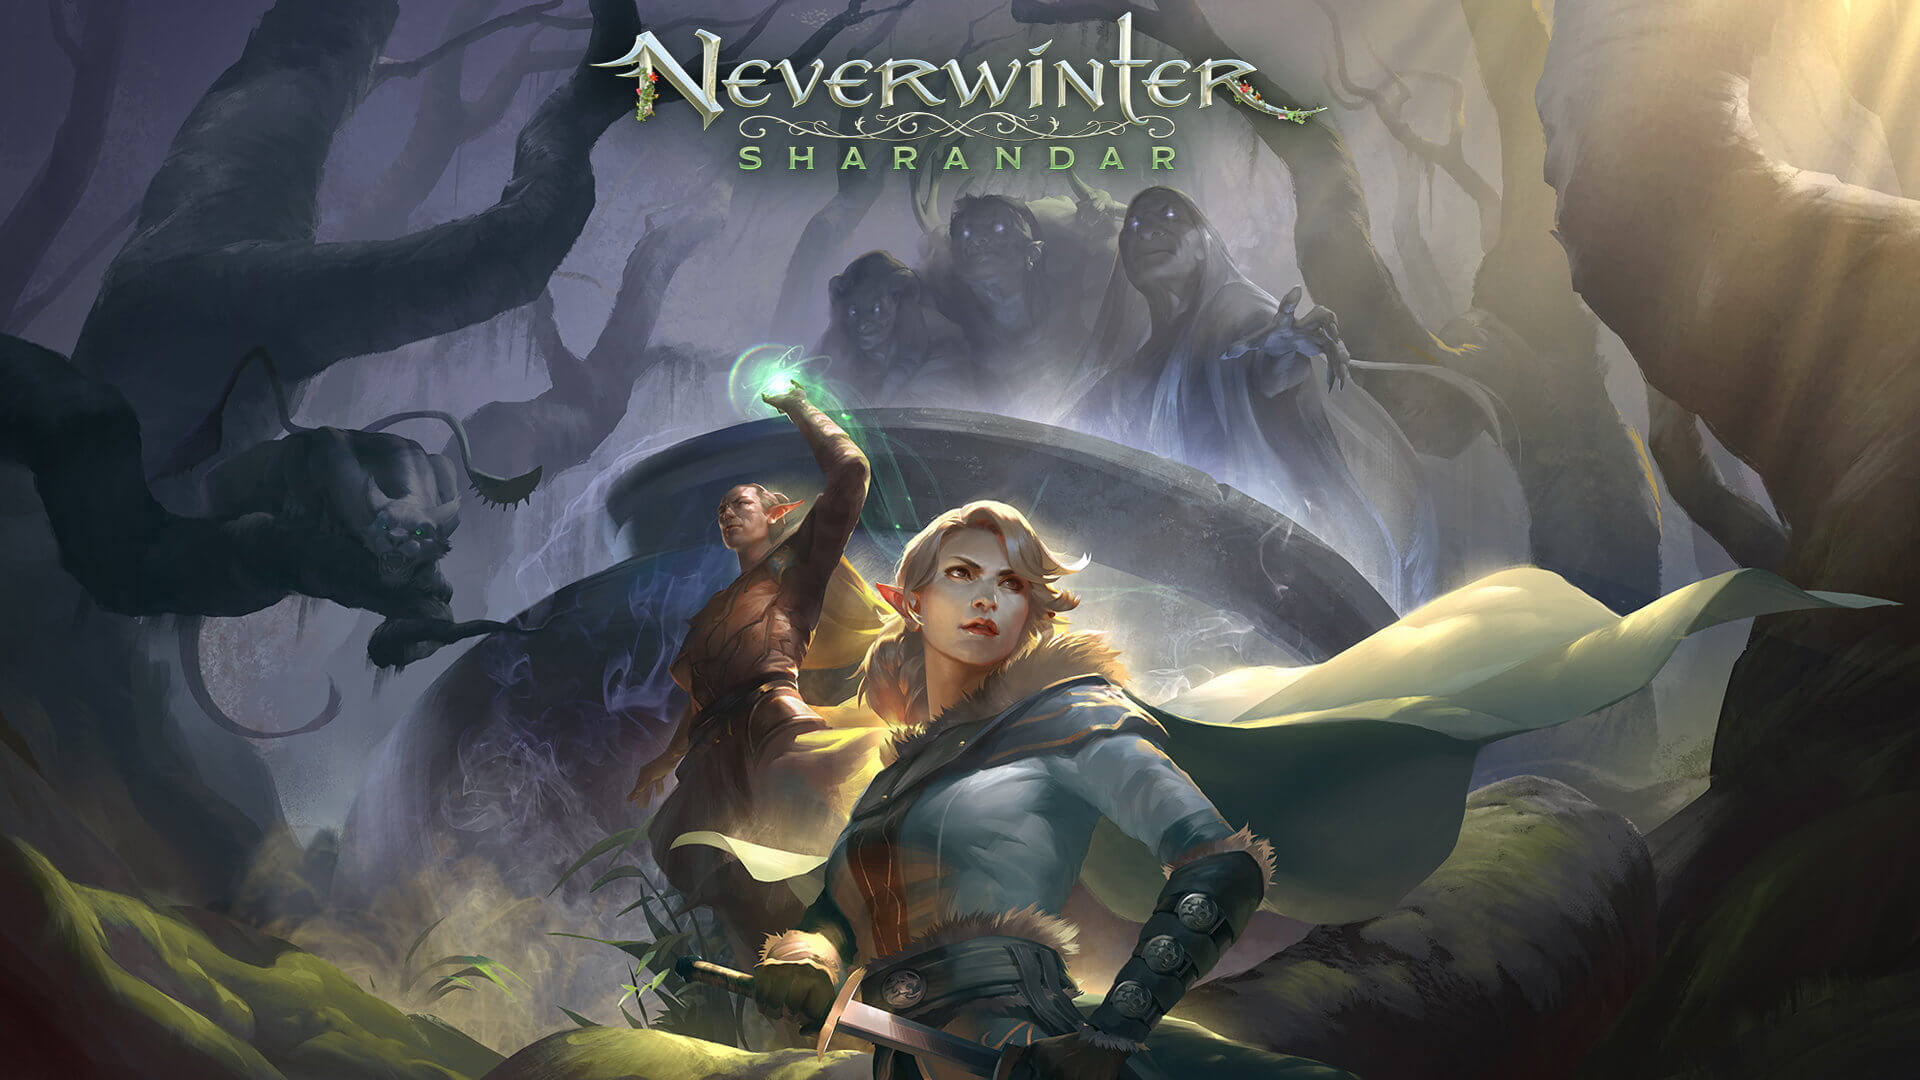
Neverwinter
Neverwinter is a premium and licensed D&D MMO game and it is well strange. The free-to-play model of the game will let you enjoy it until you hit the end game, then you will have to shell real money if you want to be competitive but the journey until then is great. I would recommend it to D&D lovers and people that love to try other people's maps, yup you read it correctly. Neverwinter has a map editor making it one of a kind MMO game where you can create your own dungeons and post them for other players to play, this user-generated content makes it a very specific beast in this list, and for that feature alone it has my recommendation.
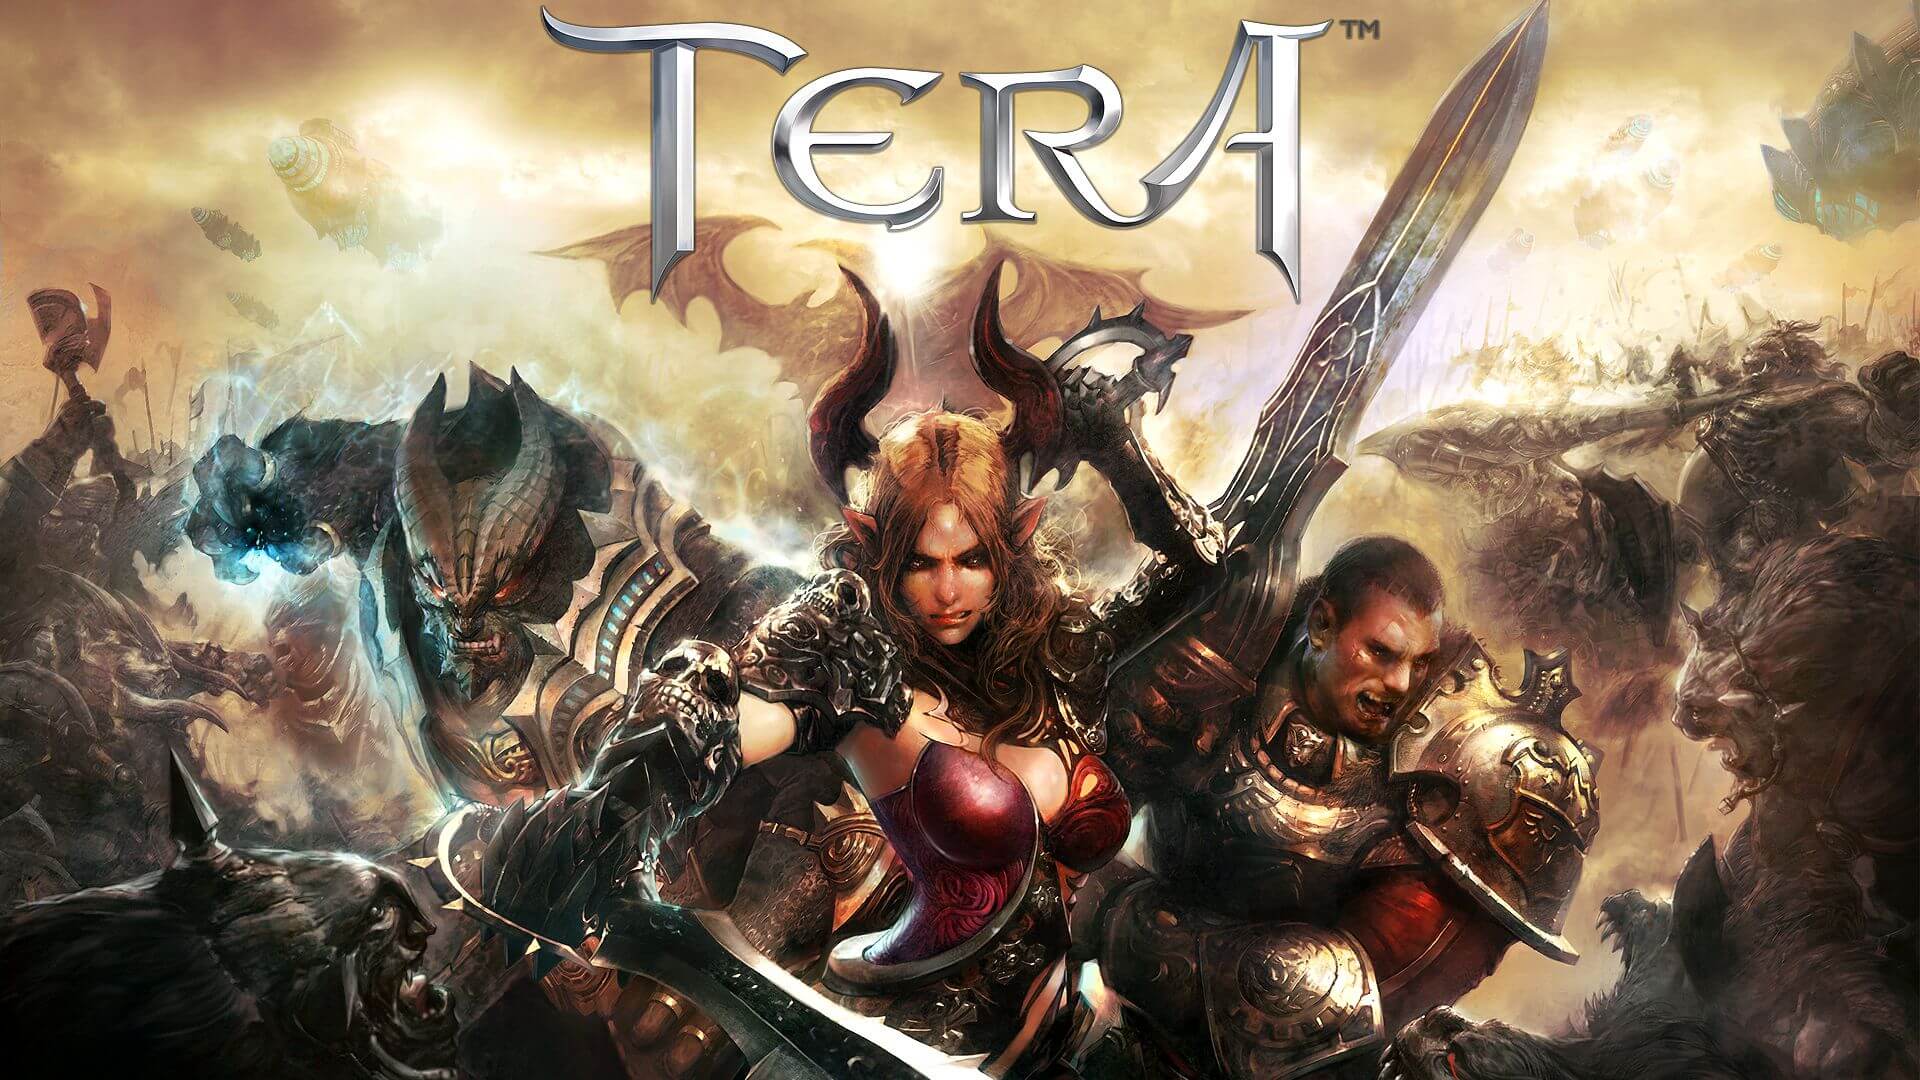
Tera
Another one of the older titles, Tera will offer you nor depth nor anything new in terms of leveling, quests, or end game except… the COMBAT. This is maybe the greatest MMO Combat game ever created and it is quite fascinating that even after so many years no other game has managed to create a better combat system than one of Tera. If you enjoy action combat and like some specific aesthetics Tera is a game for you.
Albion
Albion is a sandbox game with open-world PvP and building mechanics where you can build your own forest, house, etc. You know, sandbox stuff, including a lot of crafting and well, other sandbox stuff. If you want great quests and some occasional play then skip Albion, this game is made for a more hardcore player base not being afraid to die and spend some time crafting and going through the economy. The best comparison might be with EVE but in fantasy settings.
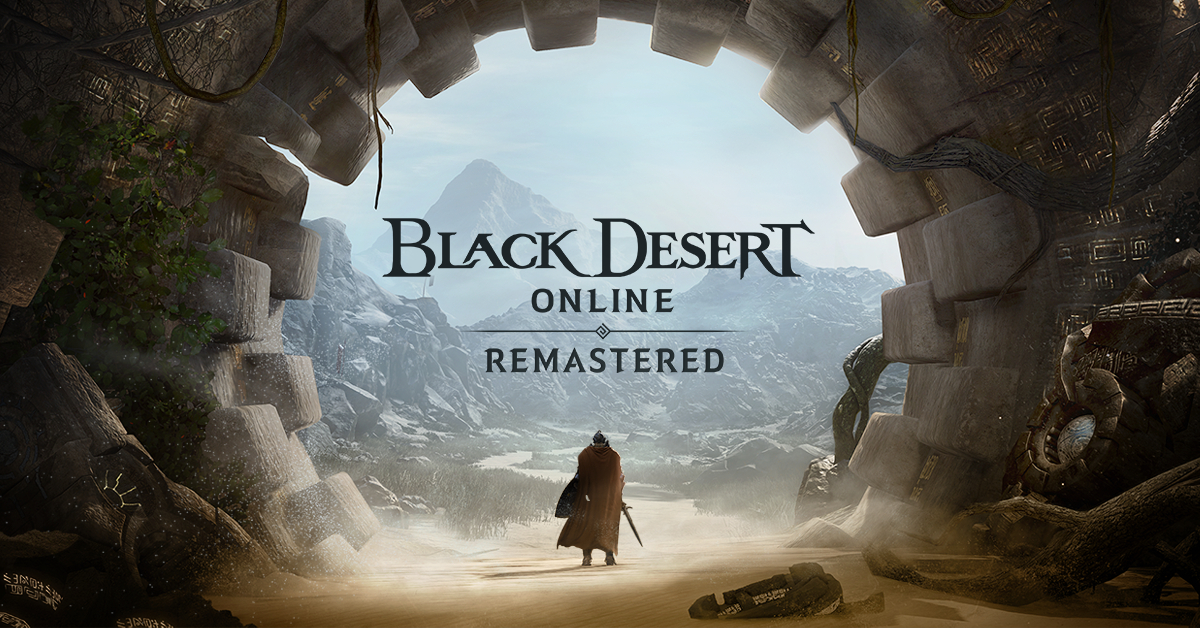
Black Desert
Black Desert is also a sandbox game but different from Albion, here you can organize and hire a workforce and send them to different nodes on a map to harvest resources and build an economy while you are on some epic adventure. Housing is also included but you can buy already made houses instead of making your own in the world. Combat is a game that comes very close to Tera combat and it is very enjoyable. The end game is money sink and PvP based so be careful when choosing this one.
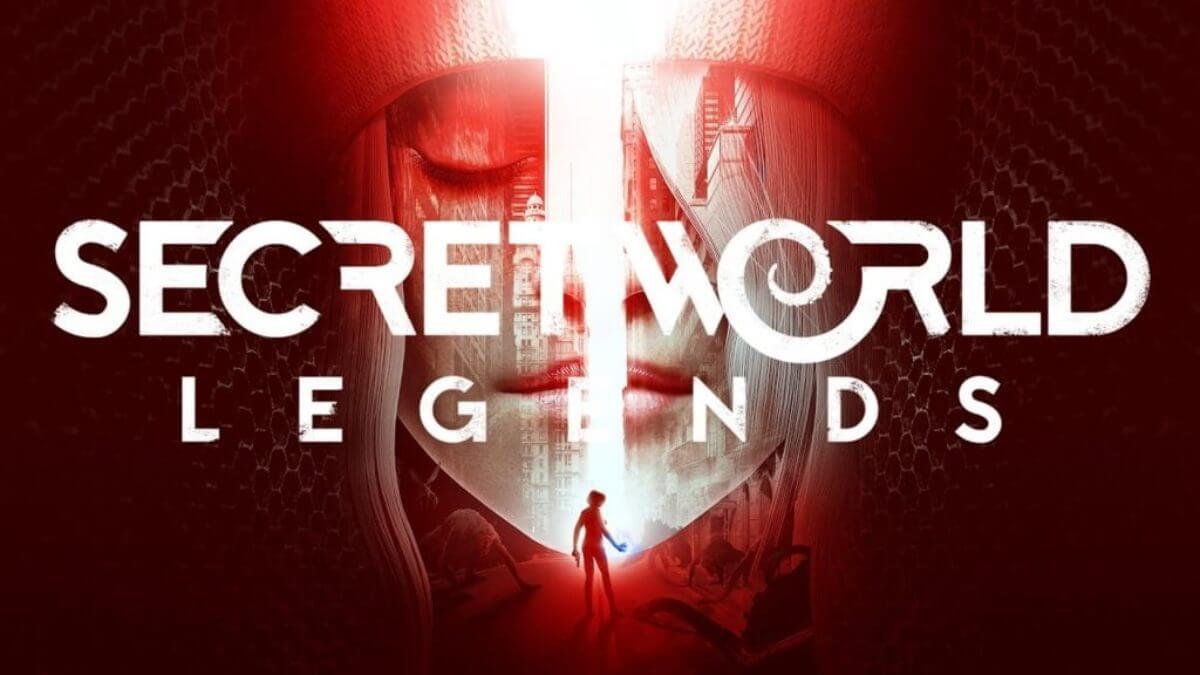
Secret World Legends
If you like occult and supernatural with new world order themes and conspiracy theories, Secret World Legends is the game for you. Somewhat little clunky its setting and story really set it apart in many many ways. It has semi-action combat and it is free to play with item shop but all the content can be experienced for free. Recommended for fans of deeper gameplay and horror lore.
Runescape
When I said no MMO list can be without World of Warcraft, it also cannot be without Runescape, one of the oldest games it was revamped with newer mechanics and graphics, free to play all the way and you can also pick old school Runescape if you really want to go all the way on a nostalgia trip. I would recommend a newer one for newer players, the game offers a great story and unusual quests infused with puzzles and interesting storylines. If you like really good quest design without fetch and grind quests along with interesting story this is a game for you.
AION
Last on my list would be AION, a very interesting game made also a long way back, but the fact that is completely free with the cosmetic shop will make it as one to recommend since you can experience the whole game for free. It has some limited flying mechanics in it and later game zone are open PvP zones, story is interesting and leveling process is enjoyable. Also game itself is not really easy and if not careful you can get yourself in danger quite quickly. Recommended for old-school feeling.
Conclusion
That's it, there are many more MMO games out there but some are on verge of closing down and some are plainly bad. I hope that I have made your choice easier and that you will find one or a few from this list to spend your time in it. Remember, stay safe and take care of yourself.
The Blue Screen of Death error or BSOD is definitely not an issue to face on your computer. Many users, if not all, have already experienced this headache at least once. One of these BSOD errors is the ATTEMPTED EXECUTE OF NOEXECUTE MEMORY error. The bug check error code for this is 0x000000FC and is usually caused by outdated or faulty drivers. In some cases, it could also be caused by an error in the Random Access Memory or RAM. This kind of error in the RAM might be physical, based on drivers, or even some kind of unwanted malware. So basically there are lots of possibilities why this particular BSOD error pops up.
If you are currently facing this BSOD error, read on and carefully follow the suggestions given below but before you do that, make sure to create a System Restore point just in case something goes wrong. This way, you can always undo those changes using the System Restore point. Once you have that covered, proceed to the options given below to fix the ATTEMPTED EXECUTE OF NOEXECUTE MEMORY error.
Option 1 – Try updating Windows 10 with all the security patches and updates
You might be able to fix the ATTEMPTED EXECUTE OF NOEXECUTE MEMORY error by simply updating your Windows 10 computer with all the security patches and updates. To do so, go to Settings then proceed to the Windows Update section > Update & Security > Windows Update, and then click on the Check for Updates option. After you do that, it will automatically find and install all the latest security patches and feature updates from Microsoft.
Option 2 – Try updating all your drivers
From time to time, drivers get corrupted or outdated so it’s no surprise that they conflict with the operating system and cause errors like the ATTEMPTED EXECUTE OF NOEXECUTE MEMORY BSOD error. To fix the problem, you need to update all your drivers. Follow the steps below to update your drivers.
Tap the Win + R keys to launch Run.
Type in devmgmt.msc into the box and tap Enter or click OK to open the Device Manager.
After that, a list of device drivers will be displayed. If you see a red or yellow sign that shows up against the driver, right-click on the driver’s name and select “Update Driver Software” or “Uninstall”. And if you find any “Unknown device”, you need to update it as well.
Select the “Search automatically for updated driver software” option and then follow the instructions to complete the process.
Restart your PC.
Note: You also have the option to go directly to the website of your graphics card manufacturer and check if there’s a new update – if there is, download it.
Option 3 – Try running a Memory Check using Windows Memory Diagnostic
As mentioned, this error might be caused by some issues in the memory. To resolve it, you need to run the Memory Check on your Windows 10 PC. Refer to these steps to do so.
Tap the Win + R keys to open the Run dialog box.
Then type “mdsched.exe” in the field and hit Enter to open the Windows Memory Diagnostic.
After that, the Windows Memory Diagnostic will give out two options such as:
Restart now and check for problems (recommended)
Check for problems the next time I start my computer
Select any of the given options. After that, your computer will restart and check for memory-based issues upon the restart. If there are any issues, it will automatically them.
Option 4 – Try using the System File Checker via Command Prompt
System File Checker or SFC is a built-in command utility that helps in restoring corrupted files as well as missing files. It replaces bad and corrupted system files with good system files that might be causing the ATTEMPTED EXECUTE OF NOEXECUTE MEMORY BSOD error. To run the SFC command, follow the steps given below.
Tap Win + R to launch Run.
Type in cmd in the field and tap Enter.
After opening Command Prompt, type in sfc /scannow
The command will start a system scan which will take a few whiles before it finishes. Once it’s done, you could get the following results:
Windows Resource Protection did not find any integrity violations.
Windows Resource Protection found corrupt files and successfully repaired them.
Windows Resource Protection found corrupt files but was unable to fix some of them.
As you know, Windows Hello offers you quick access to computers since you can log in to your Windows devices three times faster compared to passwords with the help of the camera via Face recognition and fingerprint reader. This way, Windows Hello will recognize you right away. However, there are also times when you might encounter some problems when using Windows Hello. For one, if you are trying to add the PIN method to Windows Hello on your Windows 10 computer but you suddenly encountered an error code of 0x801c004d or if you are trying to use your existing pin and you encounter an error code of 0x80070490 along with an error message that says, “Not recognized”, then read on as this post will guide you on how you can fix both of these errors. Here is the complete content for both errors:
“0x801c004d – Unable to enroll a device to use a PIN for login”
“0x80070490 - Not recognized, Pin and fingerprint are no longer options for signing in”
If you got any of these two errors, there are several potential fixes you can check out to resolve them. You can try to check for any Windows Updates or create the PIN again or check the CNG Key Isolation Service. You could also try to reset the TPM or create a new User Account. For more information, follow the instructions provided below.
Option 1 – Try checking for any available Windows Updates
The first thing you can do is to check for any available Windows Updates. It is possible that your computer may be outdated and is the reason why you’re having troubles with Windows Hello. To check for Windows Updates, just go to Settings and from there, head over to the Update and Security section and click on Windows Updates located on the left pane, and then click on the Check for Updates option. Wait until the process of checking updates is completed and if it finds new updates, install it. After you install the new Windows Updates, check if you can now add the PIN on Windows Hello or not.
Option 2 – Try creating the PIN again
The next thing you can do is to create the PIN again by signing out and signing in again and then try creating the PIN once more. If this does not work, you can try restarting your computer and creating the PIN again. You could also try removing the PIN and then change it.
Remove the PIN by going to Settings > Accounts > Sign-in options.
From there, go to the PIN section and click on the Remove button.
You will be asked to verify your account to proceed in removing the PIN, enter your credentials.
Restart your computer and then set up a new PIN.
Once you’re done, restart your computer and check if the error is gone now.
Option 3 – Try checking the CNG Key Isolation Service
The CNG Key Isolation Service is the one that stores and uses long-lived keys in a secure process complying with the common criteria requirements and it is possible that the error could be related to this service. This service is hosted in the LSA processes and provides key process isolation to private keys and associated cryptographic operations as required by the common criteria. Thus, you need to check this service to see if it’s the one that’s causing the error.
Tap the Win + R keys to open the Run dialog box and type “services.msc” in the field and hit Enter to open the Windows Services Manager.
Next, locate the “CNG Key Isolation Service” and once you find it, double click on it to open its Properties box.
After opening its Properties, check its Startup type and select Manual. This is the default setting and if it is Disabled, then it’s no wonder why you’re getting errors with Windows Hello, thus, you need to enable it.
Once done, restart your computer and check if you can now add the PIN to Windows Hello. If you still get the error, then you might want to try setting the CNG Key Isolation Service from Manual to Automatic and then click on the Start button and see if it fixes the error or not.
Option 4 – Try to reset the Trusted Platform Module or TPM
You might also want to try resetting the Trusted Platform Module or TPM to fix the error. You can do this by opening Windows PowerShell and then executing the “Clear-Tpm” command. After that, check if the error is now resolved.
Option 5 – Try to create a new User Account
You could also try to create a new User Account on your Windows 10 computer to fix the Windows Hello error. Once you have created a new local user or administrator account in Windows 10, check if you are now able to add the PIN from this newly created user account.
There is a central location in Windows 10 that allows users to view all the notifications from its Action Center. Aside from viewing notifications, users can also manage them and take necessary actions in just one single place. Notifications in Windows 10 look similar to a message icon but can be at variance in function. However, recently, a number of users reported that even though they receive notifications about new actions but when opening them, they see nothing. In other words, the notification is false, and to fix this, read on as this post will provide you a couple of workarounds.
The Windows 10 Notifications and Action Center notification messages might show a mismatch. For instance, Windows 10 may say that you have some notifications but when you open Action Center, you find it empty and there are actually no notifications there. Take the case of the following screenshot, the Windows 10 Notification says that there are 6 new notifications available for viewing but the Action Center says otherwise.
Before you troubleshoot the problem, you might want to run System Restore especially if you’ve made some changes in your computer prior to this issue which might have messed with the Windows 10 Notifications and Action Center. To perform System Restore, refer to these steps:
First, press the Win + R keys to open the Run dialog box.
After that, type in “sysdm.cpl” in the field and tap Enter.
Next, go to the System Protection tab then click the System Restore button. This will open a new window where you have to select your preferred System Restore point.
After that, follow the on-screen instructions to finish the process and then restart your computer and check if the problem is fixed or not.
If the problem wasn’t fixed and you’re still getting false notifications, you might want to troubleshoot the problem further using the options given below.
Option 1 – via Windows PowerShell
In the Start search, type “PowerShell” in the field and hit Enter to pull up the Windows PowerShell window.
Next, copy and paste this command and hit Enter to execute it: Get-AppxPackage | % { Add-AppxPackage -DisableDevelopmentMode -Register “$($_.InstallLocation)AppxManifest.xml” -verbose }
After that, reboot your computer and check if the false notifications are now gone.
Option 2 – Try renaming the Usrclass.dat file
DAT errors like the ones that are associated with the Usrclass.dat file, most likely occur during computer startup, program startup, or while you try to use a specific function in your program. Even so, it can easily be fixed. How? Refer to the given steps below.
Tap the Win + R keys to open the Run dialog box.
Then type %localappdata%MicrosoftWindows and hit Enter to get to the location of the UsrClass.dat file.
After that, look for a file named UsrClass.dat and once you’ve found it, right-click on it and select the Rename option.
Now rename the file to UsrClass.old.dat and then restart your computer and see if the problem is now fixed or not.
Error code 0x80070422 is a Windows-based error code occurring in various versions of Windows including Windows 7, Windows 8 and Windows 8.1, and Windows 10. It usually occurs when users attempt to update Windows. A message box will appear stating that the error code has occurred. Users will notice the following common symptoms:
Inability to complete Windows updates
Error message occurring during use of Windows Update service
The error code, if left unresolved, can cause serious problems for PC users as they will be unable to access the latest updates to the Windows operating system. Such a situation can expose their system to vulnerabilities. Thus, fixing Windows 10 error code is of utmost importance.
Solution
Error Causes
Among the many reasons Error code 0x80070422 is encountered includes:
Corrupted or missing registry and DLL files
Badly or poorly installed software. The software could also be infected by a virus or Trojan
Outdated or poorly installed drivers
Further Information and Manual Repair
Fixing Windows-based error codes can be a simple process. However, in some cases, it requires specialized skills. In the case of Windows 10 error code 0x80070422 consider the two (2) main solutions available through manual repair. You may also need to consider help from a certified Windows repair technician or the use of an automated tool if you are not confident you have the skills to perform the solutions below.
Method 1: Check if Windows Update is Running Properly
One of the main reasons for error code 0x80070422 is a Windows Update service that is not running on the right settings. To verify if an issue with your Windows Update service is the source of the problem applies the following steps:
Type “Windows Update” in the search bar near the Windows home button.
Select “Windows Update settings” when this option appears. (You may also click the home button, then “Settings” followed by “Update and Security”.)
Select “Advanced Options”
(You will be given an option to choose how updates are installed.) Select Automatic.
Save settings and restart the computer.
Once these settings are in place Windows will be able to download updates automatically. This enables your machine to run more smoothly. However, if after applying the steps above, Windows 10 error code 0x80070422 is not resolved, you may proceed to solution two (2).
Method 2: Disable Internet Protocol Version 6 (IPv6)
IPv6 is the latest or most current version of Internet Protocol (IP). This provides your machine with an IP address, a crucial aspect of all communications related to the Internet. By disabling this IP some users have been able to successfully resolve Windows 10 error code 0x80070422.
Like many tasks involving Windows, there are more than one ways in which you can attempt to disable IPv6. These require different types of skills and must be approached with care, as mistakes can lead to serious issues with your machine. Methods include using Command Prompt, Registry Editor, or Control Panel.
If your experience with Windows 10 is quite limited and you are not certain of your skills choose the simplest approach as listed below.
Select Control Panel.
Choose “Network and Internet”, then “Network and Sharing Center”.
Right-click your Internet Connection. The name of your connection will be listed underneath the heading – “View your basic network connection and set up connections”.
Select “Properties” then uncheck Internet Protocol version 6 (IPv6)
Save settings by clicking OK.
Restart the computer and check if the 0x80070422 error code has been corrected.
Method 3: Using An Automated Tool
If the issue persists despite following the solutions above, the best step to take is to use an automated tool. This may not be your preferred course of action, especially since it can be difficult to ascertain the safety of certain tools found online. For this reason, choose a reputable source offering automated tools which are designed to specifically fix Windows 10 error code including error code 0x80070422.
Download and install a powerful automated tool to access the best Windows 10 error code solutions. The process is simple and includes clear instructions which enable even average Windows users to completely resolve complicated errors on their machine.
How to Stop Future Error Codes from Occurring
Though it is hard to predict when an error code will occur, each Windows 10 user can take precautionary steps to prevent other errors from occurring. This includes the following:
Ensure you download software from reputable sources to avoid viruses and other forms of malware.
Clean your registry often. The registry stores settings across all applications. Regular cleaning will your machine function more efficiently as it reduces the likelihood of issues such as crashes or system errors.


 EVE Online is one of the earliest MMO games out there but since its release, it is still actively developed and is receiving updates. This science-fiction Sandbox will offer space lovers everything they need and more. Large scale PvP, mining, pirating, etc. It can be daunting and complex for beginners but take your time to get familiar with its systems and you will be rewarded greatly with an immersive and complex game worth the time. Open PvP in some zones might not be everyone’s cup of tea and seeing only your ship might be a turn-off for some players, but if you do not mind these things give it a go. It is free to play with an item shop.
 FF14 had a tough start, so tough that it was scrapped and destroyed and has been remade again and that idea was great. The game now is better than ever and at this time it is experiencing large players from other games surging into it. This on the rails fantasy MMO will offer you a great story and great leveling experience. It has a free trial where you can play the whole original game for free but if you wish to continue playing you will have to buy the expansion and pay a monthly subscription but the content is well worth the money.
 Let’s be honest, not a single list of MMO games cannot be without a once greatest and most successful MMO ever made, World of Warcraft. But instead of me praising the game why it was the greatest and why you should play it and how great it is I am going to take a little different approach. I am going to recommend you World of Warcraft classic, yup, you read it correctly, classic. Now World of Warcraft is a retail game with a subscription service but with that one subscription you will be able to access three games in the World of Warcraft universe: World of Warcraft retail (standard game), World of Warcraft Classic (vanilla WOW without expansions offering you experience as it once was when it was released) and World of Warcraft the Burning Crusade classic (same as WOW classic but with the first expansion the Burning Crusade). Among all solutions, I would really urge you to play either WOW classic or WOW TBC classic simply for reason that they are far superior games in comparison to typical retail ones, but if you like easier game go for retail, it is included in the sub anyway.
 Guild Wars 1 was one of my favorite games and I sank a lot of times in it and once Guild Wars 2 came I must admit I was pleasantly surprised with it and I would recommend it highly. The base game is completely free to play with only expansion to be purchased and it is buy to play model without monthly fees. It has specific mechanics different from other games and interesting classes to try. The living world is a great feature of the game and it is still very strong with its player base.
 This game is made for people who enjoy, love, and like Star Wars. Mechanically besides being able to have henchmen with you and space battles (which I do not really like how they are done) game itself does not offer anything special. Where it shines is in the story and overall Star Wars experience. If you look at this game as a single-player game with multiplayer dungeons you will have a great time, since the story is really good but sadly end game lacks in comparison.
 I am going to admit something here, I was not fond of the idea to make the beloved Elder Scrolls series into MMO, but in time I gave it a go and I am really glad I did. This game is great and it is getting better and better as time progresses. It is buy to play without monthly fees and basic game free, same as FF14 but without fees. It has a decent community and offers a really good Elder Scrolls experience and now it is packing Morrowind expansions and other great areas. Highly recommended for any Elder Scrolls fan.
 This one is troublesome to recommend, on one side you have free to play games deeply inside Tolkien Lord of the Rings lore, on the other side, you have outdated graphics and some stupid item shop decisions like buys specific classes. But if you look past stupid item shop decisions and can live with playing free class in the game you will be pleasantly surprised. The game itself is surprisingly good, the story is great as expected from the game infused with lore taken from one of the best books series ever written, and the feeling when visiting iconic landscape is epic. But if I need to be real as I should, I would recommend this one to people appreciate good story and lore and ones that are fans of Lord of the Rings itself.
 Neverwinter is a premium and licensed D&D MMO game and it is well strange. The free-to-play model of the game will let you enjoy it until you hit the end game, then you will have to shell real money if you want to be competitive but the journey until then is great. I would recommend it to D&D lovers and people that love to try other people's maps, yup you read it correctly. Neverwinter has a map editor making it one of a kind MMO game where you can create your own dungeons and post them for other players to play, this user-generated content makes it a very specific beast in this list, and for that feature alone it has my recommendation.
 Another one of the older titles, Tera will offer you nor depth nor anything new in terms of leveling, quests, or end game except… the COMBAT. This is maybe the greatest MMO Combat game ever created and it is quite fascinating that even after so many years no other game has managed to create a better combat system than one of Tera. If you enjoy action combat and like some specific aesthetics Tera is a game for you.
 Albion is a sandbox game with open-world PvP and building mechanics where you can build your own forest, house, etc. You know, sandbox stuff, including a lot of crafting and well, other sandbox stuff. If you want great quests and some occasional play then skip Albion, this game is made for a more hardcore player base not being afraid to die and spend some time crafting and going through the economy. The best comparison might be with EVE but in fantasy settings.
 Black Desert is also a sandbox game but different from Albion, here you can organize and hire a workforce and send them to different nodes on a map to harvest resources and build an economy while you are on some epic adventure. Housing is also included but you can buy already made houses instead of making your own in the world. Combat is a game that comes very close to Tera combat and it is very enjoyable. The end game is money sink and PvP based so be careful when choosing this one.
 If you like occult and supernatural with new world order themes and conspiracy theories, Secret World Legends is the game for you. Somewhat little clunky its setting and story really set it apart in many many ways. It has semi-action combat and it is free to play with item shop but all the content can be experienced for free. Recommended for fans of deeper gameplay and horror lore.
 When I said no MMO list can be without World of Warcraft, it also cannot be without Runescape, one of the oldest games it was revamped with newer mechanics and graphics, free to play all the way and you can also pick old school Runescape if you really want to go all the way on a nostalgia trip. I would recommend a newer one for newer players, the game offers a great story and unusual quests infused with puzzles and interesting storylines. If you like really good quest design without fetch and grind quests along with interesting story this is a game for you.
 Last on my list would be AION, a very interesting game made also a long way back, but the fact that is completely free with the cosmetic shop will make it as one to recommend since you can experience the whole game for free. It has some limited flying mechanics in it and later game zone are open PvP zones, story is interesting and leveling process is enjoyable. Also game itself is not really easy and if not careful you can get yourself in danger quite quickly. Recommended for old-school feeling.