Error 0x80070780 is a particularly nasty error since it means we can not access files on our hard drive. This might be an important file from work or anything similar and it can be frustrating when we can access it.
In this article, we will address solutions to this error so you can continue with your activities where you have left off.
Follow the guide step by step in the given order to minimize file damage and find the solution quickly.
The simple and clean solution, try first by running Windows built-in tools. Leave troubleshooter to scan and attempt repairs and try to access a file after that.
Maybe the file is corrupted or slightly damaged but repairable, run a built-in Windows disk checker and let it scan and repair any error found. Try accessing your file after the scan.
If the file is under a bad sector or cluster on a disk drive that could be a reason why you can not access it, try copying the file to another location and then opening it, if the operation fails, boot Windows in safe mode and try to copy or move file then. If you are successful with copying files in safe mode, reboot your computer and try to open the file.
Like when the driver for USB is not working and you can not access files same can happen on your hard drive. Go to the device manager and reinstall the driver for your hard drive.

 Advanced desk features
MovieMode is a Potentially Unwanted Program developed by GenTechnologies Apps that allegedly ads a “Lights Off” function to video streaming websites like Youtube. This feature allows a user to dim the entire background around the video, allowing for better video focus. Although this sounds interesting and useful, upon further inspection it was discovered that this program does not work with modern browsers.
While installed, MovieMode may modify your browser settings, changing your home page, displaying additional ads, and other suspicious behavior. From the Terms Of Use: “Applications may be automatically enabled on your web browsers following installation. Applications or advertisements may require changing your web browser’s default home page, default page, or set of pages on startup, default search provider, and other browser settings. So that Applications can function most efficiently and with the least annoyance, Applications may modify or disable certain web browser or operating system features including, but limited to load time alerts, accelerator features, and Content Security Policy functionality. Applications may also include features to notify you when you are launching an application or visiting a web domain that may interfere with your installed Applications. ““Check your connection, Microsoft Store needs to be online, It looks like you are not, error code 0x80072f30.”The error code 0x80072F30 is related to the Windows Store which prevents it from opening properly. To resolve this problem, you can try fixing the problem with the help of the options given below. Follow each one of them carefully.
Some Windows users have been experiencing errors in an attempt to upgrade to Windows 10 OS. This includes the “We Couldn’t Install Windows Technical Preview 0x80070070 – 0x20005” error code. If you’re one of the many users who’ve encountered this error, you might want to check the available space on your device. Error code 0x80070070 – 0x20005 occurs when you do not have the required space to be able to install the upgrade.
 Error Causes
In order to upgrade to Windows 10, you need to have at least 40 to 50 GB of free space in your device. Thus, you need to free up some space in order to successfully upgrade your system to Windows 10. See below for the manual methods you can employ to solve your problem.
NOTE: It would be best to seek help from an experienced technician if you are not confident enough to perform the manual methods yourself or you can alternatively make use of an automated tool.
Sometimes, there are unused applications just lying around your device. This may take up your needed space from your device for a system upgrade. Uninstalling these applications can make space that will eventually elude error code 0x80070070 – 0x20005 along with its alternatives – code 0x80070070 – 0x50011, code 0x80070070 – 0x50012, and code 0x80070070 – 0x60000.
If there are tons of images, media, videos, or documents that you rarely use but will still be needing in the future, you can move these files to another drive where Windows 10 will not be installed on.
If there are no secondary drives in your device, consider using a USB Drive or external hard disk. Another option you can do is making use of cloud storage programs like One Drive or Google Drive. In this way, you’ll still have access to these files even if it’s not in a physical location while making larger space in your device.
Most Windows users download applications or software regularly. These applications or software might come from unsafe sites where you might have accidentally downloaded a virus or malware along with the legit application or software you intended to download.
With that said, it is highly recommended to download and install in your device a reliable and powerful antivirus. Using an antivirus, you can now perform an overall scan of your device’s system. Once you’re able to detect and remove any suspected virus or malware, you’ll now be able to get rid of the error code 0x80070070 – 0x20005. After solving the issue, you can now resume upgrading to Windows 10.
Can’t seem to put up with the long and technical manual repair process? You can still fix this error by downloading and installing a powerful automated tool that will surely get the job done in a jiffy!
Runtime Error ‘429’: Active X component Can’t Create Object
Error CausesError CausesAn error has occurred Code: 0xC004F050 Description: The Software Licensing Service reported that the product key is invalid
Error Causes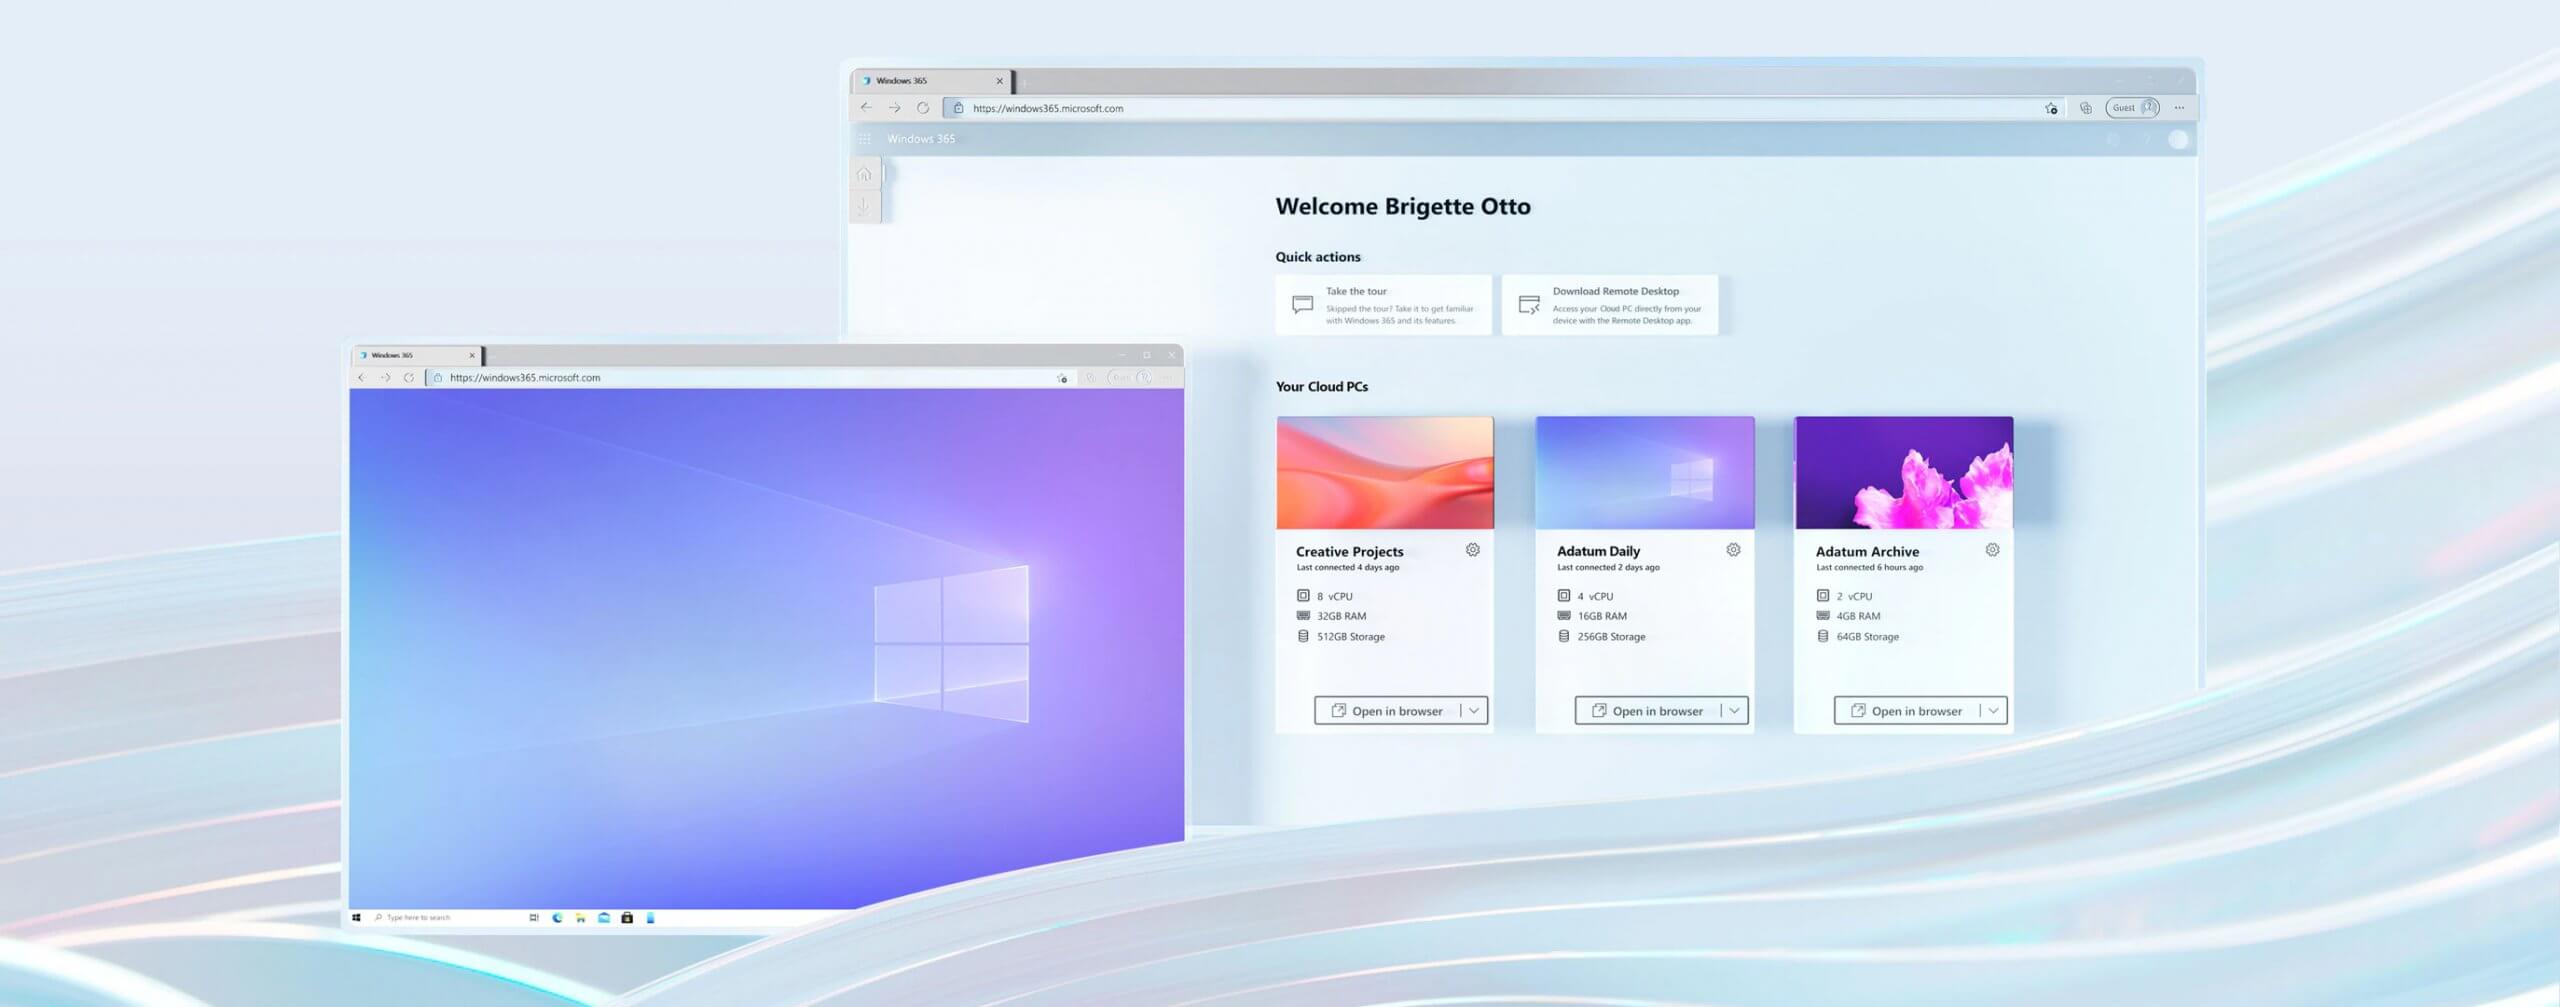 Microsoft has announced Windows 365, a new cloud-based operating system aimed mainly at businesses of all sizes.
Just after Windows 11 announcement and presentation, we are seeing another Windows announcement from Microsoft. Dive into the following text in order to find out what exactly is new Windows 365, its role in today's IT world, and do you need it?
Microsoft has announced Windows 365, a new cloud-based operating system aimed mainly at businesses of all sizes.
Just after Windows 11 announcement and presentation, we are seeing another Windows announcement from Microsoft. Dive into the following text in order to find out what exactly is new Windows 365, its role in today's IT world, and do you need it?