Why ActiveX Control May Damage Your Personal Computer
ActiveX Controls are plugins you may constantly come across when working with Internet Explorer. An illustration of these kinds of control is the MICROSOFT IE Flash Player. They frequently result into significant problems for the Computer, yet they're vital for IE to operate correctly.
You shouldn't ever overlook that after you install Active Controls in your Personal Computer, you effectively provide them with access to other areas of your PC. The ActiveX Controls not only tracks your search routines, but in addition puts malicious software, which might possibly be hazardous to your Computer.
Solution
Error Causes
ActiveX Controls make your Internet Explorer work as required and are usually great and beneficial to your own Computer. Yet, they can function as a source of problems because of the following factors.
You should stop installing ActiveX Controls from Un Trustworthy Resources
In the event they are installed by you from un trustworthy resources new threats are likely introduced by ActiveX Controls to your PC. One of the more regular types of ActiveX Controls worth necessary for installation is Flash Player. Yet, never be in a hurry to install these Controls from resources that you don't trust.
Limit The Number of ActiveX Controls You Install on your PC
Prevent installing java/oracle ActiveX controls, because of its weak security measures which could make your Personal Computer and any additional information there in, open to attacks.
Limit to the variety of ActiveX Controls that you install on your PC as these could increase the vulnerability canvas on your computer.
Further Information and Manual Repair
You can manually fix any malfunction that springs up from ActiveX Controls. Yet, more than mending the harm, produce the setting that ensures you never have troubles from them to start with. Just how do you do that?
a) Stop installing or downloading ActiveX Controls from Un Trustworthy Sources
This has been mentioned above, but it's worth repeating because it's the most common reason behind ActiveX Controls malfunctions. You might anticipate that for this kind of obvious reason for ActiveX Controls malfunctions, PC consumers would be extra cautious, however that is never true.
b) Limit ActiveX Controls Softwares
You can restrict ActiveX controls from running automatically on your PC. To limit them, head to Tools in Internet Explorer, and choose Internet Options. Proceed to the Security tab, and select Customs level
Browse completely down before you get to the area designated "ActiveX". Subsequently, mark "Prompt" under every choice that you encounter. But don't mark the choice indicated "Run ActiveX Controls and Plug-Ins", together with, "Script ActiveX Controls Marked Safe for Scripting".
By performing the measures emphasized above, you happen to be in substance stating that, you will not permit any installation of ActiveX Controls, without express authorization by you.
In this manner, you have better control over different forms of ActiveX Controls you permit to be installed, therefore reducing potential threats to your PC.
As you know, Windows Hello offers you quick access to computers since you can log in to your Windows devices three times faster compared to passwords with the help of the camera via Face recognition and fingerprint reader. This way, Windows Hello will recognize you right away. However, there are also times when you might encounter some problems when using Windows Hello. For one, if you are trying to add the PIN method to Windows Hello on your Windows 10 computer but you suddenly encountered an error code of 0x801c004d or if you are trying to use your existing pin and you encounter an error code of 0x80070490 along with an error message that says, “Not recognized”, then read on as this post will guide you on how you can fix both of these errors. Here is the complete content for both errors:
“0x801c004d – Unable to enroll a device to use a PIN for login”
“0x80070490 - Not recognized, Pin and fingerprint are no longer options for signing in”
If you got any of these two errors, there are several potential fixes you can check out to resolve them. You can try to check for any Windows Updates or create the PIN again or check the CNG Key Isolation Service. You could also try to reset the TPM or create a new User Account. For more information, follow the instructions provided below.
Option 1 – Try checking for any available Windows Updates
The first thing you can do is to check for any available Windows Updates. It is possible that your computer may be outdated and is the reason why you’re having troubles with Windows Hello. To check for Windows Updates, just go to Settings and from there, head over to the Update and Security section and click on Windows Updates located on the left pane, and then click on the Check for Updates option. Wait until the process of checking updates is completed and if it finds new updates, install it. After you install the new Windows Updates, check if you can now add the PIN on Windows Hello or not.
Option 2 – Try creating the PIN again
The next thing you can do is to create the PIN again by signing out and signing in again and then try creating the PIN once more. If this does not work, you can try restarting your computer and creating the PIN again. You could also try removing the PIN and then change it.
Remove the PIN by going to Settings > Accounts > Sign-in options.
From there, go to the PIN section and click on the Remove button.
You will be asked to verify your account to proceed in removing the PIN, enter your credentials.
Restart your computer and then set up a new PIN.
Once you’re done, restart your computer and check if the error is gone now.
Option 3 – Try checking the CNG Key Isolation Service
The CNG Key Isolation Service is the one that stores and uses long-lived keys in a secure process complying with the common criteria requirements and it is possible that the error could be related to this service. This service is hosted in the LSA processes and provides key process isolation to private keys and associated cryptographic operations as required by the common criteria. Thus, you need to check this service to see if it’s the one that’s causing the error.
Tap the Win + R keys to open the Run dialog box and type “services.msc” in the field and hit Enter to open the Windows Services Manager.
Next, locate the “CNG Key Isolation Service” and once you find it, double click on it to open its Properties box.
After opening its Properties, check its Startup type and select Manual. This is the default setting and if it is Disabled, then it’s no wonder why you’re getting errors with Windows Hello, thus, you need to enable it.
Once done, restart your computer and check if you can now add the PIN to Windows Hello. If you still get the error, then you might want to try setting the CNG Key Isolation Service from Manual to Automatic and then click on the Start button and see if it fixes the error or not.
Option 4 – Try to reset the Trusted Platform Module or TPM
You might also want to try resetting the Trusted Platform Module or TPM to fix the error. You can do this by opening Windows PowerShell and then executing the “Clear-Tpm” command. After that, check if the error is now resolved.
Option 5 – Try to create a new User Account
You could also try to create a new User Account on your Windows 10 computer to fix the Windows Hello error. Once you have created a new local user or administrator account in Windows 10, check if you are now able to add the PIN from this newly created user account.
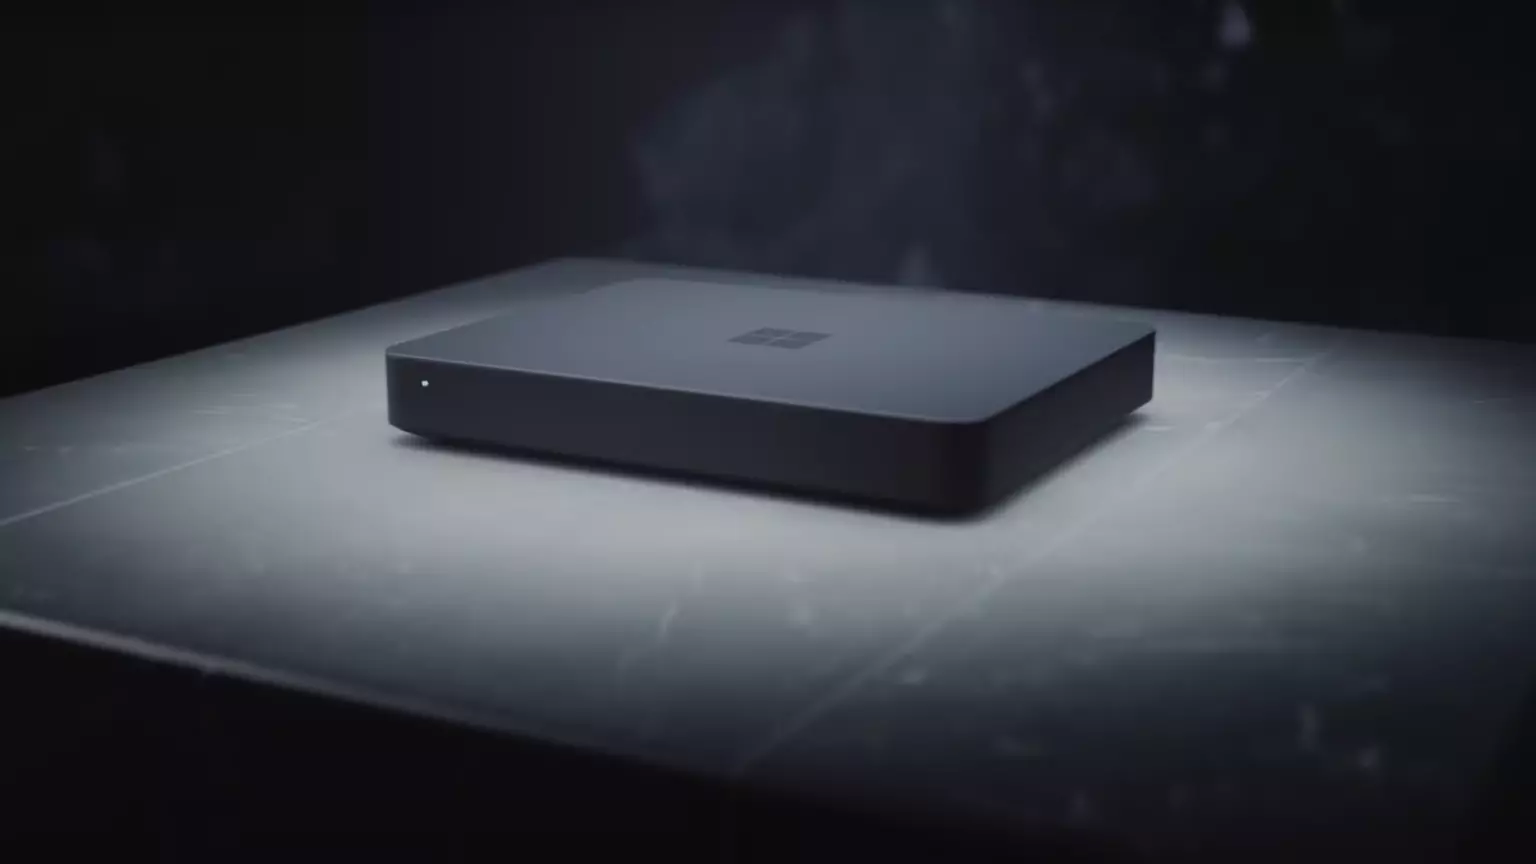
Microsoft will soon offer 4 CPU computer specifically aimed at developers and its name is Volterra. The machine as stated will come with 4 processors but the strange thing is that they will be ARM-based instead of x86.
CEO of Microsoft, mister Satya Nadella has introduced the product and Microsoft has released a youtube video promoting it.
https://youtu.be/yICVNta8jMU
The computer system will have Qualcomm's NPU or built-in neural processing unit to use AI's power to help developers write and produce better and faster code. The sad news is that besides processors used there is no other information on other components that will go into this system.
As seen in the video, the computer reminds me a lot of the apple MAC mini with its size and design, and as stated it is made from recycled plastic which in our opinion will bring the price under $1000.
Microsoft has not provided an official price tag for Volterra, but our hope is that it will be more affordable than building your own development PC. Also, there was nothing said about computer availability, we suspect that the selling model will be typical Microsoft one with first models available only in the USA and moving forward slowly opening it to other markets.
Volterra specifications
As previously said nothing except the number of CPUs and their type has been officially said but we managed to get some information about some other specific things not including its inside components.
The unit will have a fan inside of it for cooling purposes and better performance and that is what was officially stated by Microsoft. On the outside, it is known that the computer will have three USB-A ports, a mini DisplayPort, and an ethernet input. All of these will be positioned on the back of the device, on its left side there will be two USB-C ports.
The unit itself will be running on Windows 11 but it was not disclosed anything about the version, we presume since this is a model aimed for professional use that it will come with Windows 11 PRO version.
Currently available tools for ARM
Since this product is aimed at developers logically support for developing software is a must-have and at the time of this writing software that will come and that will run on Volterra is:
Visual Studio 2022
Visual Studio Code
Visual C++
Modern .NET 6 & JAVA
Classic .NET
Windows Terminal
Windows Subsystem for Android
Windows Subsystem for Linux
Conclusion
Once MAC studio has been released it showed that specific builds have their audience and can be sold for less of a price than full-fledged custom-made workstations. There is no doubt that Microsoft Volterra will find its audience but will that be enough to have more versions of this compact computer only time will tell.
So, you have finished with work, game, movie, music, email, or whatever on your PC, you look at the clock, it is late, you decide to go to sleep or outside, you click on the power button and choose shutdown. Now when a PC is shut down you feel good and go with your business but the next time you power it up you get the same error like the computer never really shut down in the first place. You wonder why and reboot it, just in case and all of the sudden error is gone.
If something similar has happened to you or you had the feeling that after shutting down your computer has not really felt like shutting it down, do not seek professional help, everything is OK with you because when you click on shut down, your computer does not really shut down!
Truth is that Microsoft has changed how to shut down works and how rebooting works in Windows with an update but has not publicly said anything about it so some users may experience this feeling of not shutdown phenomenon and might even think there is something wrong with their PC.
Why this change?
A few years ago shutdown button and option in Windows were really shutting down OS, but things changed when Microsoft wanted to increase boot-up speed. Now when that decision was made shutdown option was changed. So, what was changed? Well in order to increase Windows booting time, the shutdown will now turn off power to PC components and it will look like everything is indeed shutdown but the Windows kernel will actually be saved to a hard drive with all settings and just awaken once the PC is turned back ON. This will result in all errors and other stuff being just still present same as they were once the system was instructed to be turned off.
Rebooting your PC will now clear kernel and file from the hard drive and you will get a clean system startup without any issues tied with the kernel itself.
Workaround
Now that we know why and what change has been made to Windows logical question is can we shut down our PC at all properly? Luckily for us, the answer is yes and we will not need any external application to do it, we can still do it inside Windows itself and it is quite quick and easy.
Bringing back the old shutdown
In order to bring the old shutdown functionality of your PC please follow the instructions but be aware that by doing this your PC will boot a little bit slower since it will have to load the kernel from scratch each time computer is turned ON.
First thing is to go to settings and go to System
Then once you are inside the system, navigate to the power and sleep and click on it to select it. Once you have it selected to all the way to the right and click on additional power settings.
When you click on advanced power settings you should be led to the control panel's power options. Inside this panel click on top left link where it says Choose what the power button does.
Inside options, you will need to untick the box next to Turn on fast startup (recommended), this option has been ticked ON by the Windows update and probably without notifying you. Option means exactly what was described, it will save kernel state on the hard drive for faster boot time but sadly it can cause some issues since it will never be reloaded from 0.
If you are unable to uncheck the box click on the text beside the shield icon that says: Change settings that are currently unavailable (you will have to be logged in as administrator).
Conclusion
Altho turning off fast startup and shutting down the PC completely will for sure extend your bootup time I still believe that it is the right choice since sometimes a lot of clutter and bad things accumulate over time inside the OS and can cause a vast variety of problems in a long run. So stay safe and shut down that PC as it used to be in the past.
If you are trying to log into your user account on your Windows 10 computer but encountered an error message instead that says, “Your account has been disabled, Please see your system administrator”, read on as this post will guide you on how you can fix this problem.
In this kind of scenario, you won’t be able to access your data unless you have access to the administrator account. This problem could be caused by several problems. It is possible that malware has infected your computer and has changed some settings in your computer, especially if your system has been under a malware attack not too long ago. The malware could’ve changed the “Account is disabled” option.
The only thing you can do to resolve this kind of problem is to log into your computer using another administrator account and then change the setting. However, if you don’t have a second administrator account, you can just enable the built-in hidden administrator account on your computer. You shouldn’t have any problem enabling the hidden administrator account as it is quite easy when you can log into your account. And in this post, you will be guided on how you can enable the hidden administrator account using the Registry Editor to fix the “Your account has been disabled, Please see your system administrator” error.
To get started, follow the instructions given below.
First, you need to start your computer and ensure that you are on the error screen. From there, you will see the Power options located on the right-hand side.
Click on the Power options and tap and hold the Shift key and then select Restart.
After that, the Advanced Boot Options will appear and from there select Troubleshoot > Command Prompt.
Next, you have to select your user account and enter the user account’s password to open Command Prompt.
After opening Command Prompt, open your screen and type “Regedit” and then tap Enter on your keyboard.
Now select the HKEY_LOCAL_MACHINE in the Registry Editor and go to File > Load Hive.
Afterward, you have to open the Windows installation drive and go to the location – WindowsSystem32Config
From there, you should find a file named “SAM” – select this file and click the Open button.
Next, you have to enter a key name. You can just input whatever you prefer.
Once done, navigate to this path: HKEY_LOCAL_MACHINEkey_nameSAMDomainsAccountUsers
From this path, you will see a key named “000001F4” – select this key and double click on the “F” entry that you can find on the right-hand side of the screen.
After that, look for the value data line labeled “0038” which should show 11 in the first column. You have to replace it with 10.
Once done, click on the OK button and close the Registry Editor and the Command Prompt to restart your computer.
Now once your computer has restarted, sign in to the Administrator account and open the Computer Management window. You can just search for it using the search bar in the Taskbar.
After you open Computer Management, go to Local Users and Groups > Users – where you can find all the user accounts. Look for your deleted user account and right-click on it and select Properties and then unmark the checkbox that says “Account is disabled”. This should fix the problem.
Developed by Interesting Solutions, Webguard is a tool supposedly used for tracking those online who’ve developed a habit of tracking you. The application would provide logical analysis into a user’s website history, providing insight on what websites you’ve visited and also how persons are able to track your every move while browsing.
While Webguard is unable to dispose of who specifically is tracking your computer usage, they’re able to determine what computer installed tracking codes or cookies on your computer system. In this case, it’s then left up to the user’s discretion to determine who they want to allow or block from tracking their online use. Overall, this application allows the user some measure of freedom and control over their online experience. Like any other application, however, which has landed themselves a spot on Virus Total, Web guard has hidden agendas. At a distance, Webguard installs a service for Windows but later distributes advertisements.
Technical details about Webguard include:
Assessment of Webguard Potentially Unwanted Program
While Webguard claims to track your computer usage, information reported by the application isn’t sufficient for the common computer user. This brings us back to the ulterior motive or principal objective of developing Webguard – to advertise and generate revenue from clicks made by users on Ads displayed on Internet Browsers – namely Chrome, Internet Explorer and Firefox. Why should a computer user remove Webguard? Simply, it compromises one's Internet privacy and security and it keeps abreast of your Internet history.
If you’re online for an extended period, you’ll see what Webguard does. While the publishers behind the application did not alert users to the use of web beacons, cookies for tracking, and other related tracking technology, that’s not why Webguard is considered unwanted. The program is potentially unwanted because of the unpredictable advertisements it displays. Not all sites are trusted and so it’s difficult to determine, in some cases, what websites are legit for business.
Remove Webguard with Spyhunter
In most cases, at least from what I’ve seen, Webguard is installed as a single application. After it was installed for this assessment, it could be found in ‘All Programs”. This meant that one could manually delete the application from their computer system (see manual steps below). However, is that really sufficient to completely rid your PC of Webguard’s blueprints? While you might opt to remove Webguard manually – maybe because it’s more economical – an automated process is able to completely eradicate hidden threats from Webguard.
In comparison to manually removing Webguard, Spyhunter penetrates your computer system for all infections. In most cases, nasty threats are unable to be removed manually. Additionally, Spyhunter not only removes installed threats, but it detects incoming ones – hence, acting as a preventative tool. Furthermore, Spyhunter detects cookies placed on your computer by Webguard. These are all undetectable threats and so an automated tool, as Spyhunter, should be used to remove Spyhunter effectively from your computer.
Manual Steps for Removal of Webguard
I found this removal pretty simple. Depending on your Operating System, there will be slight discrepancies in the manual removal steps. Using the Windows 8 (8.1) OS on your computer:
Step 1: Locate the CONTROL PANEL on your computer using the SEARCH option.
Step 2: Once the search box appears , input 'CONTROL PANEL'.
Step 3: The Control Panel option will then appear. From the menu, choose the "Programs" option.
Step 4: Another menu will appear. Select "All Programs and Features".
Step 5: From the 'Programs list', search for the Webguard application.
Step 6: Right-click on Webguard when it's found.
Step 7: Choose the "Uninstall" option.
Step 8: Follow the uninstall wizard instructions until the Webguard application is fully removed.
To completely remove Bandoo from your computer, click here to download and install Spyhunter
MSASCui.exe is a digitally signed file from Microsoft located in folder C:\Program Files\Windows Defender.
It is a component of Microsoft Windows Defender Antispyware. This file is responsible for performing spyware scans. It is already installed in Windows Vista operating system. MSASCui.exe becomes an error code when it is found in another path. It is categorized as a Windows runtime error.
Solution
Error Causes
The cause of MSASCui.exe error is triggered by:
Corrupt or damaged registry entries
Virus Infection
The potential risks of MSASCui.exe error are:
Slow PC performance
Data loss
When this file becomes an error, it will display messages like:
“This application has failed to start to run on Windows because MSASCUI.exe cannot be found.”“Windows Defender cannot work properly and protect the Windows system effectively”
The message will keep popping up on your computer screen time and again.
Further Information and Manual Repair
When you experience an MSASCui.exe error on your PC, it is advisable to fix and repair it immediately before it causes serious damages to your system.
Here are some DIY quick solutions to repair MSASCui.exe error:
Solution 1:
If the speed of your PC reduces significantly and you also see MSASCui.exe error message pop on your screen, then in this case it is advisable to uninstall the Windows Defender program from your PC.
To do so, follow these instructions:
First, open the Windows Task Manager by pressing the “Ctrl, “Alt” and “Delete” keys on the keyboard.
Now click the ‘Processes’ tab. This will show the currently running processes on your system.
Scroll down and click on “MSASCui.exe” and then end the process. This will stop the program from running on your PC.
After this go to the start menu and double click on ‘My Computer’ and click on the C drive.
Choose the option ‘Program Files’ and then click on the ‘Windows Defender’ folder.
Now to delete this folder, right-click and select ‘delete’. This will uninstall the program, fix the MSASCui.exe error, and also improve the performance of your PC.
Solution 2:
If you find the MSASCui.exe file located in some other path, then this is an indication of a virus.
In this case, it is recommended to run an antivirus program on your PC to scan and delete all viruses.
If you don’t have an antivirus program already installed on your system, then you should download it. Once antivirus software is downloaded, simply run it to scan viruses and then click on delete to remove all the viruses on your system.
This will help you resolve the MSASCui.exe error caused by malware on your PC right away.
To understand the Xpcom.dll error better, first, you need to know what Xpcom.dll file is. Xpcom.dll is basically a typical DLL (Dynamic Link Library) file. It is associated with Firefox developed by Mozilla Foundation for the Windows Operating System.
DLL file contains small programs similar to exe (executable) files. Just like any other DLL file, Xpcom.dll helps loads and run programs smoothly. Xpcom.dll functions as a shared file that can be used to run multiple programs on your PC.
Xpcom.dll error code occurs when Windows cannot properly load the xpcom.dll file. The error may pop up on the screen in any one of the following formats:
"Xpcom.dll not found."
"The file xpcom.dll is missing."
"Cannot register xpcom.dll."
"Cannot find C:\Windows\System32\xpcom.dll."
"This application failed to start because xpcom.dll was not found. Re-installing the application may fix this problem."
"Xpcom.dll Access Violation."
"Cannot start Firefox. A required component is missing: xpcom.dll. Please install Firefox again."
The xpcom.dll error can occur during program installation or while rebooting your PC or when shutting it down.[/section]
Solution
Error Causes
It is difficult to narrow down a single cause of this error code simply because the Xpcom.dll error code may be triggered due to several reasons. Some of the common causes include:
Invalid or corrupt xpcom.dll registry entry
Viral infection
Outdated PC drivers
Another program overwrote the required version of xpcom.dll
Xpcom.dll file is accidentally deleted or uninstalled
Mozilla Foundation hardware failure
Further Information and Manual Repair
Here are the best, quick and easy DIY methods to resolve Xpcom.dll error code on your system within minutes:
Method 1: Update Window Drivers
To resolve the xpcom.dll error on your system, try updating Window drivers. To do this simply use the driver update wizard from within Device Manager.
The driver update wizard walks you through the entire drive update process, making it easy and hassle-free for you to update drivers.
Method 2: Download and Install Xpcom.dll File
Since DLL are shared files and used to run and load multiple programs, it is possible that you might have accidentally removed this file while uninstalling a program on your system. This is the reason why the Xpcom.dll file goes missing.
To retrieve the Xpcom.dll file simply go to the recycle bin. Reinstall the deleted program. However, if it still doesn’t resolve the error, then it is advisable to download and install the Xpcom.dll file from a trusted DLL file website over the internet.
Method 3: Scan for Viruses and Repair the Registry
If the error code occurs due to malware infection or is related to registry issues, then simply download Restoro. This is a user-friendly and multi-functional PC Fixer deployed with 6 scanners including a powerful antivirus and a registry cleaner.
It is compatible with all Windows versions. Simply run it to remove all types of viruses infecting your system and clean/repair the registry.
Click here to download Restoro and resolve the Xpcom.dll error on your PC.
PST file is the acronym for Private Storage Table. It is a proprietary file structure utilized in the ms-outlook program shop and to preserve attachments as well as e-mails, notifications, scheduled calendar events, and even more.
This structure can also be called a Personal Folder File. The storage limit or the size varies today with respect to the Outlook version you've got installed.
The PST file size limit depends on the edition you have installed. Outlook 2002 and earlier versions have a memory limitation of 2GB while later versions such as Outlook 2013 have up to 50GB memory limit.
Error Causes
You will be amazed to discover there is not a single cause behind this problem. The File can be damaged due to a number of reasons including:
Virus infection
Incorrect file system recovery
Data storage device failure
Storage size limit exceeds
Sometimes due to power failure when accessing the PST files
Once this File becomes corrupted and broken, it places you in danger of losing your important e-mails and attachments.
Moreover, this stops you from getting or sending e-mails to and from your own associates. And in case you would like to add new contacts, you are greatly hindered. It reduces your productivity.
For individuals relying completely on the Outlook program for communicating via e-mails and maintaining a track of important dates that they have set reminders for and scheduled in their calendars, the PST file problem is a nightmare.
It decreases productiveness and performance.
Further Information and Manual Repair
To regain the damaged File without removing old e-mails Install a PST File Repair Tool. The latter one is probably the best way to resolve this issue without compromising on your old important emails and contacts.
There are a number of repair resources out there. Each device provides a distinct degree of characteristics and performance. We urge you to use Stellar Phoenix Outlook PST Repair Tool.
Not only does this repair tool aid work out PST file error that is damaged, but it also helps with data recovery. With this particular tool, it is possible to recover even the erased files you've removed from your Outlook Installation before the PST file got corrupted.
Wait there is more! It is also possible to raise the memory limit by installing this repair tool on your computer.
What this means is in the event the PST file corruption's cause was associated with the storage size limit, it is easily worked out. With an increase in memory, you can keep your older emails and continue storing new mail from associates.
To begin, Click here to Download Install Stellar Phoenix Outlook PST Repair on your personal computer and run it to restore the PST files.
BIOS is software that is running in a chip located on your motherboard, you can enter BIOS usually by hitting DEL once the computer is turned ON but this sometimes varies and it depends solely on the motherboard manufacturer. Inside BIOS you can configure your computer components and set up some other important things including passwords for BIOS itself or for the entire system.
Password itself is meant to protect access to BIOS from other non-technical users or to prevent access to the system from other people if for example computer is in one household and you would like to be the only one having access to it. However, passwords can be forgotten, and sometimes you can even purchase a second-hand computer with a password on it.
In this guide, we will lead you through ways on how to remove your BIOS password so you can regain access to your BIOS settings.
Use Manufacturers master password
Most motherboard manufacturers have built-in a couple of master passwords for BIOS access. If your motherboard has one you can easily find it on the manufacturer's website. Use the master password and remove other passwords inside BIOS, save and exit.
Remove CMOS battery
If you could not find the manufacturer's master password or your motherboard model does not have one remove the CMOS battery to reset BIOS. Note that this method will reset the whole BIOS not only the password. Open on side of your computer casing and locate the round battery on it, do not worry, there is only one battery so you can not make mistake. Remove the battery and leave it outside for around 20 to 30 minutes then place it back as it was, CMOS is reset now and you can access BIOS.
Reset BIOS via jumper
If you want to remove only the password and do not touch other BIOS setting you can locate the BIOS password reset jumper. How the location of this jumper and position is different from the motherboard to motherboard we can not cover them all here and it is advisable to read the manual or find information on the official manufacturer's website.
If you would like to read more helpful articles and tips about various software and hardware visit errortools.com daily.
Although the Windows Updates do bring in new features and improvements, there are times when they also introduce issues as well. The main cause for these arising bugs is the incompatibility between the old and new software components. One of the issues brought in by such bugs is Clock is missing, invisible or black
This problem was experienced by users after they recently installed a feature update. This particular bug can make the Windows clock in the taskbar appear to be black or invisible which makes it hard for users to read the time on their computers. According to experts, this bug has something to do with the Windows Themes and Aero styling. To fix this issue, here are some suggestions that could help but before you get started, you have to restart Explorer first and see if it can help in resolving the problem – if it didn’t, follow the options given below carefully.
Option 1 – Try to disable Custom Theme
It could be that the reason behind the black or invisible Windows Clock can be an old or an incompatible theme. You might have a custom theme in place and it became incompatible after an update. Thus, you can try switching to one of the default themes and then recreate your custom theme afterward. To do so, follow the steps below.
Right-click on your desktop and select Personalize.
Next, select Themes from the left menu and then select Windows 10 as your theme.
After that, you can delete all the other custom themes and create them again from scratch. This should fix the black or invisible Windows 10 Clock.
Option 2 – Try to edit your existing themes
If you don’t want to get rid of your existing themes, there is an alternative solution you can try to fix the missing Windows 10 Clock albeit it’s a bit of a complex one. Follow the given steps below to modify the existing themes and fix the missing or black Windows Clock.
First, you need to save your existing theme. Just simply right-click on your desktop and select Personalize and select Themes from the left menu.
Next, click on the Save Theme button below your custom theme to save it. You can name the theme anything.
After that, you can now modify the saved theme by going to C:/Users/UserName/AppData/Local/MicrosoftWindowsThemes.
From there, look for the file with the theme name you just saved, and then right-click on the file and open it with notepad or any other text editing app.
Now you have to look for the line that says, “Path=%SystemRoot%resourcesthemesAeroAeroLite.msstyles” and change it to “Path=%SystemRoot%resourcesthemesAeroAero.msstyles” and then save the file and rename it with some other name.
Afterward, go back to themes and select the new theme you’ve created. This should resolve the Windows Clock issue as well as other Themes and Taskbar issues.
Option 3 – Try disabling the small icons in Taskbar
This option should help you fix any Windows Clock cases. So if your Windows Clock is nowhere to be found, you can try to disable small taskbar icons on your Windows 10 PC.
Go to Settings > Personalization > Taskbar.
From there turn off the toggle button for the “Use small taskbar buttons” option. Note that this solution is only a temporary one and it may or may not work in some cases.