Logo

Disable Touchscreen in Windows 11

The touchscreen feature inside Windows 11 is a pretty good thing but sometimes can be very impractical. The screen can easily and constantly get dirty due to fingers touching it all the time and there are users that do not wish or want to have this feature at all.

touchscreen windows 11If you are one of the mentioned users and for any reason, you do not wish to have a touchscreen-enabled then sit back and relax, we have you covered in this tutorial on how to fully disable touchscreen inside Windows 11.
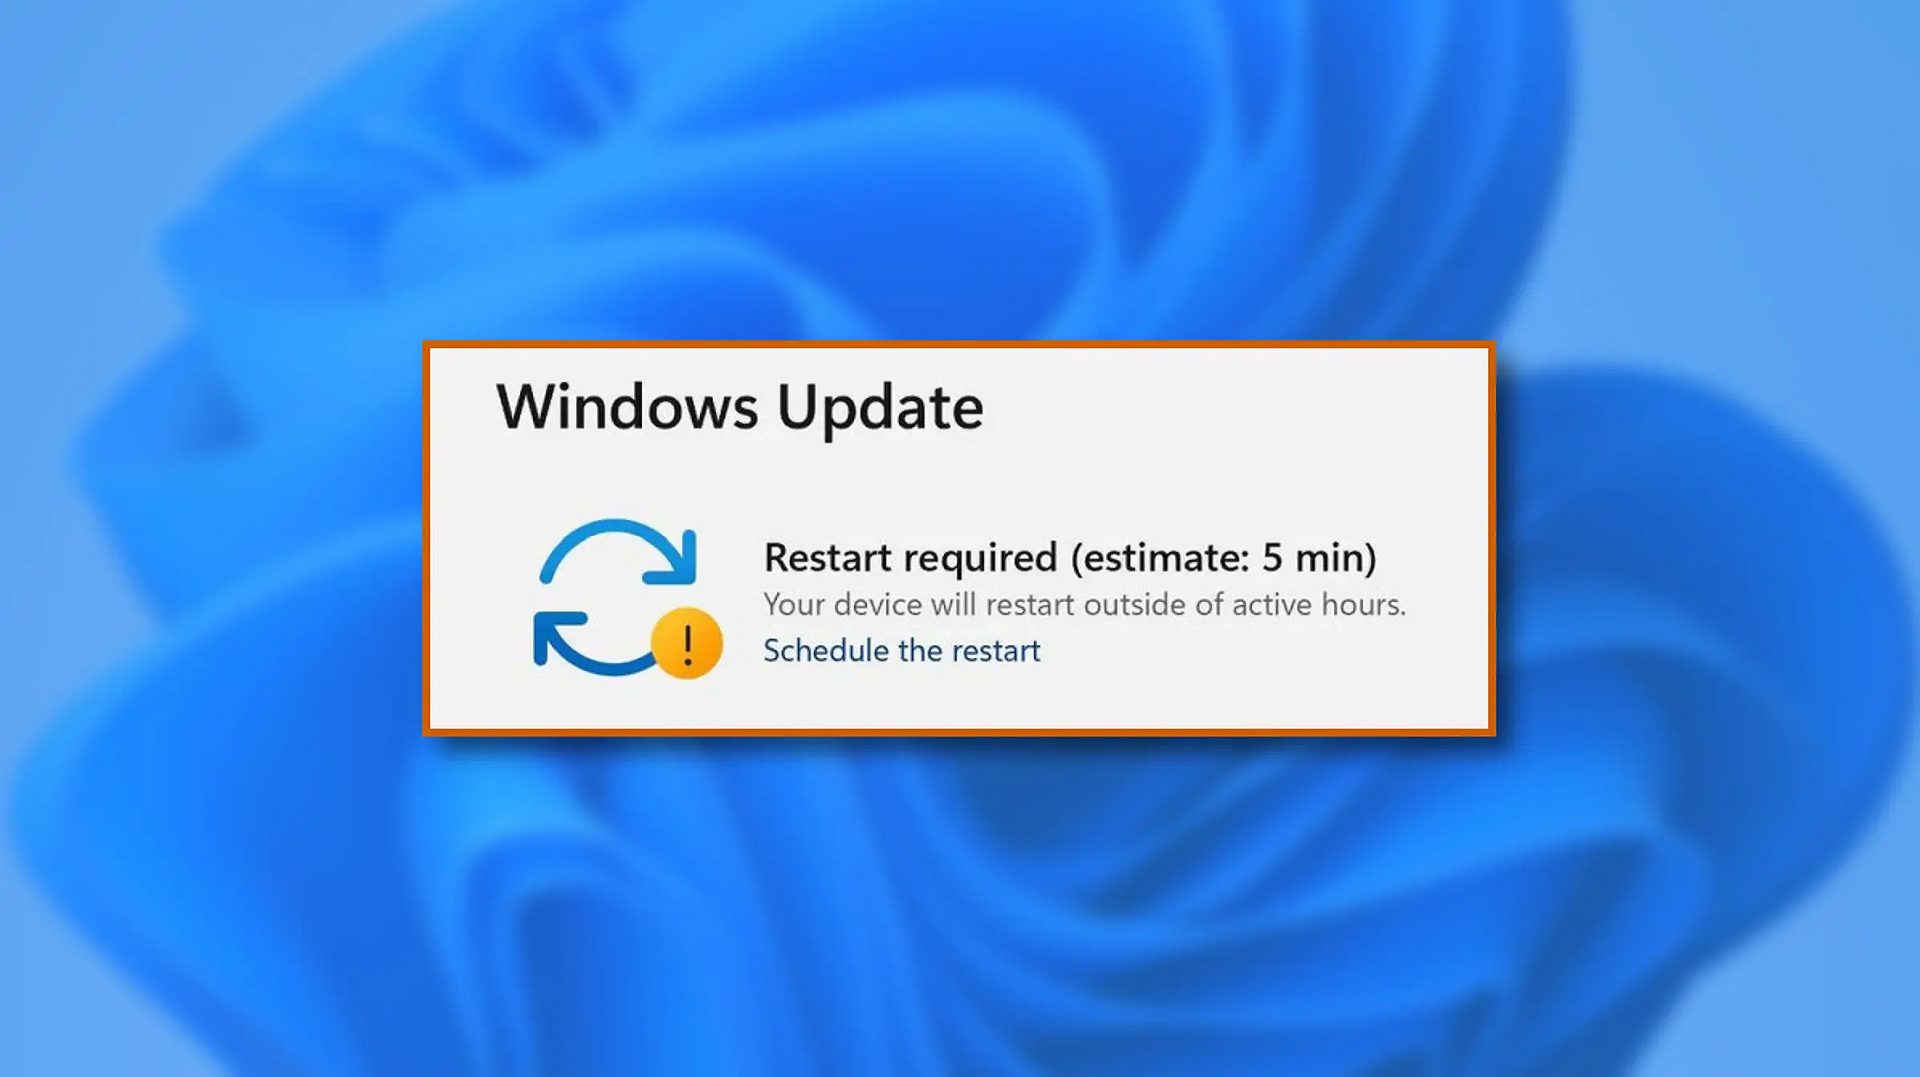
Turn off touchscreen via device manager

  1. Click on the Windows Search icon in the taskbar
  2. Type Device Manager
  3. Click on Device Manager from the list of results
  4. Inside locate Human Interface Devices and click on the right arrow
  5. In the list, find HID-Compliant Touch Screen and select Disable Device
  6. Click on Yes to confirm

Disable it via Windows Terminal

  1. Right-click on the Windows icon in the taskbar
  2. Click on Windows Terminal (admin)
  3. Inside run this command: Get-PnpDevice | Where-Object {$_.FriendlyName -like '*touch screen*'} | Disable-PnpDevice -Confirm:$false

Conclusion

No matter which method you prefer, both of them will disable the touch screen inside Windows 11. Thank you for reading trough article and I hope to see you again. Take care.

Do You Need Help with Your Device?

Our Team of Experts May Help
Troubleshoot.Tech Experts are There for You!
Replace damaged files
Restore performance
Free disk space
Remove Malware
Protects WEB browser
Remove Viruses
Stop PC freezing
GET HELP
Troubleshoot.Tech experts work with all versions of Microsoft Windows including Windows 11, with Android, Mac, and more.

Share this article:

You might also like

Fix 0xc000014C Boot Configuration Data error
If you receive the error code 0xc000014C while you boot up your computer, then this post might be of help. This kind of error usually points to the Registry of your computer that might be corrupted. As a result, the operating system was not able to read the BCD file and throws the 0xc000014C error. The error code 0xc000014C is triggered when your computer encounters an error in the first booting sector. You might receive any of these error messages:
“Info: An error occurred while attempting to read the boot configuration data.” with File: as “BootBCD” “File: Windowssystem32configsystem Info: Windows failed to load because the system registry file is missing or is corrupt” “Info: The Boot Configuration Data for your PC is missing or contains errors.”
To fix the error code 0xc000014C when booting your computer, you can check out the suggestions provided below.

Option 1 – Try running System Restore in Advanced Startup Options

Since you probably can’t boot into your Windows 10 computer, you can try to run System Restore again in the Advanced Startup Options.
  • Boot your computer into the Advanced Startup Options screen.
  • From there, you will see some options to troubleshoot when you can’t log in to Windows in the usual way.
  • Now select Troubleshoot > Advanced Options > Command Prompt.
  • After that, type “rstrui” and hit Enter to execute the command which will start the System Restore process.

Option 2 – Try to rebuild the BCD files

You can also try rebuilding the BCD files to resolve error 0xc000014C for corrupted Boot Configuration Data
  • You can start by booting into the installation environment for Windows 10 from an installation media.
  • After that, click on Repair your computer and on the blue screen, select Troubleshoot and then select the Advanced options menu.
  • From there, select Command Prompt and once you open it, enter each one of the commands given below by sequence.
    • bootrec /FixMbr
    • bootrec /FixBoot
    • bootrec /ScanOS
    • bootrec /RebuildBcd
  • Once you’re done executing the commands given above, type “exit” to close the Command Prompt window and then restart your computer and see if it fixed error code 0xc000014c.

Option 3 – Try restoring the default and uncorrupt Registry Values

This option is a bit tricky as you have to be sure about what you are doing here. However, if you are not sure, you might want to seek out a technician to fix the problem for you. But if you can handle it, then carefully follow the steps below.
  • You have to first physically remove the hard drive of the computer that’s not booting up. You can refer to it as Hard drive 1 and Computer 1, respectively.
  • After that, you need to have another computer which you can refer to as Computer 2, and refer to its hard drive as Hard drive 2. Make sure that this second computer is working properly.
  • Next, you have to attach Hard drive 1 to Computer 2 with the Hard drive 2 attached as well.
  • After that, boot Computer 2 from Hard drive 2 where Hard drive 1 will act as the second storage unit.
  • Then navigate to the following location in the System Partition of the Hard drive 2.
C:/Windows/System32/config/RegBack
  • From there, you have to replace all the files. Once you’re done, shut down your computer and then take out the Hard drive 1 from Computer 2 and put it back to Computer 1 as the only hard drive.
  • Now boot your computer normally and check if the problem is fixed.
Read More
Fix Tile Database is corrupt Error in Windows
As you know, the Start Menu in Windows 10 is quite a stable experience. However, there are times when it can encounter some issues as well like getting corrupted. If your computer is going through the same problem, you’ve come to the right place as this post will guide you on how you can fix the “Tile Data is corrupt” error. This kind of problem is actually quite common among a lot of Windows 10 users. This kind of problem prevents the Start Menu from working properly and no amount of clicking the keyboard keys or mouse will resolve the issue. Fixing it is important since the Start Menu is required for the operating system to function properly and even though there are several ways to get around in using the Start Menu, it can get quite problematic. Even if you manage to open the Start Menu, the ability to click on apps to open them is out of the question and you need to fix the problem. Worry not for the potential fixes provided in this post are not hard to follow. You can try to run the Start Menu troubleshooter or run the DISM tool. You could also reset the folder for Tile Database or re-register the Windows 10 Start Menu. For more details, refer to each one of the options provided below.

Option 1 – Try running the Start Menu troubleshooter

The first and basic thing you can do to fix the problem is to run the Start Menu troubleshooter as it can help you fix the problem automatically. Since this is not a built-in troubleshooter, you can download it from the official website of Microsoft. After you download it, run it and wait until it’s done identifying the problem and automatically fixing it.

Option 2 – Try running the DISM tool

You can run the DISM tool as well to help fix the “Tile Database is corrupt” error. Using this built-in tool, you have various options such as the “/ScanHealth”, “/CheckHealth”, and “/RestoreHealth”.
  • Open the Command Prompt with admin privileges.
  • Then type in the following commands and make sure to hit Enter right after you type each one of them:
    • Dism /Online /Cleanup-Image /CheckHealth
    • Dism /Online /Cleanup-Image /ScanHealth
    • Dism(.)exe /Online /Cleanup-image /Restorehealth
  • Do not close the window if the process takes a while as it will probably take a few minutes to finish.
  • Once it’s done, check if it was able to fix the corrupted Start Menu or not.

Option 3 – Try to reset the Tile Database folder

  • First, you need to restart your computer and log into another user account where the Start Menu works.
  • Next, navigate to this folder location, C:/Users/<userX>/AppData/Local/Tile/DataLayer.
  • From there, copy the “TdlData.xml” file and save it to another drive.
  • Once done, restart your computer and log into the user account where the Start Menu is corrupted.
  • After that, navigate to this folder location, C:/Users/<userY>/AppData/Local/Tile/DataLayer.
  • Now paste the TdlData.xml file you copied earlier and navigate to this location, %LocalAppData%MicrosoftWindowsShell.
  • Afterward, copy the DefaultLayouts.xml file from the user account that’s working fine to the user account where the Start Menu is corrupted.

Option 4 – Try to re-register the Windows 10 Start Menu

  • Tap the Win + X and select the “Windows PowerShell (Admin” option from the menu.
  • After opening PowerShell, execute this command: Get-AppXPackage -AllUsers |Foreach{Add-AppxPackage -DisableDevelopmentMode -Register "$($_.InstallLocation)AppXManifest.xml"}
  • Wait until the command is executed and then see if it fixed the problem with the Start Menu or not.
Read More
Fix DRIVER_IRQL_NOT_LESS_OR_EQUAL in Windows
DRIVER_IRQL_NOT_LESS_OR_EQUAL will cause your computer to go to the blue screen of death but do not worry there are solutions around this and we are here to instruct you on how to solve this.
  1.  Uninstall and install network drivers

    DRIVER_IRQL_NOT_LESS_OR_EQUAL is most commonly tied to bad network drivers, whatever that be a corruption of the driver files or their incompatibility. So first thing is to check if this is the case. Press ⊞ WINDOWS + X to open the hidden menu in Windows and click on Device Manager. keyboard with windows and x marked Windows menu device manager In the Device Manager expand Network adapters, choose adapter, right-click on it and choose Uninstall. network device manager Install latest driver or reboot so Windows will install the driver automatically
  2. Update driver

    If you do not want to reinstall the driver or you are unable to for whatever reason updating the driver might do the trick. To update driver: Press ⊞ WINDOWS + X to open the hidden menu in Windows and click on Device Manager. keyboard with windows and x markedWindows menu device manager In the Device Manager expand Network adapters, choose adapter, right-click on it and choose Update Driver. network device manager update
  3. Fix via Command prompt

    If both of the beforementioned solutions fail, try running the command prompt and fix the issue from there. Press ⊞ WINDOWS + X to open the hidden menu in Windows and click on Command Prompt (administrator) keyboard with windows and x markedWindows menu command prompt admin In command prompt type next line and press ENTERDEL /F /S /Q /A “C:\Windows\System32\drivers\mfewfpk.sys Reboot the system
  4. Scan your PC for malware

    Sometimes corruption in the system is caused by malware, Scan your system for malware, viruses, etc.
  5. Check connections or other hardware issues

    If all methods fail, open your PC case and check to see if connections everywhere are properly connected and tight. Clean your PC and turn it back ON
  6. Use system restore

    If anything fails, use Windows system restore and bring back computer into a state where everything was working fine.
Read More
Fix Sandbox failed to start, 0x80070057
As you already know, the Windows Sandbox is one of the new features in Windows 10. However, just like other new features, it also throws up errors and one of them is the error that states,
“Windows Sandbox failed to start, Error 0x80070057, The parameter is incorrect”.
This particular error in Windows Sandbox occurs due to its dependence on numerous components of Windows 10 that are related to Hyper-V and Virtualization mainly. To fix this error, there are several options you can check out. You can try to install any pending updates on your Windows 10 computer, as well as make sure that all the services related to Windows Sandbox are enabled.

Option 1 – Try to run the Windows Updates to install pending updates

The first thing you can do to resolve the “Windows Sandbox failed to start, Error 0x80070057” is to check Windows Updates in your computer and see if there are any pending Windows Updates you have to install. All you have to do is go to the Windows 10 Settings app and then go to the Windows Updates section and click on the “Check for updates” button to check if there are any pending updates that are needed to be installed. This could fix the Windows Sandbox error.

Option 2 – Ensure that all the supporting processes and services are running properly

If running Windows Sandbox as an administrator didn’t fix the error, you have to ensure that all related processes for Windows Sandbox are running properly. To do that, follow these steps:
  • Tap the Win + R keys to launch the Run utility and type “services.msc” in the field and hit Enter to open the Windows Services Manager.
  • Next, from the list of services, look for the following services in the given order:
    • Network Virtualization Service
    • Virtual Disk
    • Hyper – V Virtual Machine
    • Hyper – V Host Computer Service
    • Container Manager Services
  • After you find the aforementioned services, make sure to check if they are enabled or not and then restart each one of them.
  • Once done, try to open the Windows Sandbox again and see if the error is fixed or not.
Read More
Renaming items in the Win+X menu
As you know, the Win + X menu, which is the shortcut context menu, is a useful way to launch several utilizes in Windows such as Power Options, Windows PowerShell, Event Viewer, Device Manager, and so on. However, there are times when you might experience difficulty in identifying the required utility. This is actually a part of the Windows 10 shell that goes out of scope in the customization of Windows 10. However, there is an easy trick you can use to do that. So in this post, you will be guided on how you can rename the options in the Win + X menu in Windows 10. In case you don’t know, the context menu is divided into three groups. Microsoft has categorized the bottom-most part as Group 1, while the middle part is categorized as Group 2 and the first part as Group 3. To rename these options, you need to use File Explorer and follow the instructions laid out below. Step 1: First, tap the Win + E keys to open File Explorer. Step 2: Next, navigate to this path: %LocalAppdata%MicrosoftWindowsWinX Step 3: From there, you should see three folders as Group 1, Group 2, and Group 3. Open the appropriate folder of your choice. Step 4: After that, right-click on the shortcut option you want to rename and then select Properties. Step 5: Next, navigate to the Shortcut tab under the Properties window. Step 6: Now in the text field of Comment, enter the new name of the option you selected. Step 7: Click on the Apply and OK buttons to save the changes made. Note: You can now either Sign back in or sign out of your Windows 10 User Account to see the result of the changes you’ve made. You could also restart the process of File Explorer via Task Manager. This will close the File Explorer as well as the shell components and then only launch the shell components again. In addition, you can check the Win + X menu to see the customized name that you’ve just set for a particular option. As you can see, even though it does not add anything extra, it is still a lot better in knowing how you can customize it.
Read More
Malware Guide: How to Remove DownloadAdmin

What is DownloadAdmin/ Updateadmin?

As a digital creation of Blueis, the DownloadAdmin application peruses your computer system for programs/applications that are outdated. This program then makes the necessary updates/installation on your computer, as if it were the Administrator. While most people might consider this application harmful, scrutinizing the Digital Publisher/Creator of the application should be reason enough to remove DownloadAdmin (and any other associated program) from your computer. Why? Blueis is infamous for producing/distributing “adware type software”, according to herdProtect Anti-Malware. Is that not a plausible reason for you to remove applications associated with that publisher? Additionally, DownloadAdmin not only updates your outdated applications, but it installs additional programs - usually utility tools and search toolbars. This is a sly way to promote third-party software and to get ads loaded onto your computer system. Technical details about DownloadAdmin include:
Digital Publisher: Blueis Product Version: 4.0.0.1 Original File Name: DownloadAdmin Entry Point:  0x0000234A

Assessment of DownloadAdmin

For this assessment, the DownloadAdmin file was obtained and installed on a test computer. After the DownloadAdmin/Updateadmin application was installed, it made several modifications to the computer system. These modifications may class the newly installed file as a PUP (potentially unwanted program). Outlined below is what took place after the file was installed.
  • Updated an outdated application installed on the computer

Subsequent to the update made by Updateadmin, I thought the PUP had run its course. However, it was not quite finished. It was after scanning the contents/programs of my Local Drive, I stumbled on an additional program, one that I did not download or install, at least not intentionally. As predicted, the DownloadAdmin application scanned through the computer system (in the blink of an eye), during installation and made adjustments to an application already installed. This program was the Mozilla Firefox. Since Mozilla Firefox was rarely used on the PC in question, the DownloadAdmin application thought it quite appropriate to revive the Mozilla Firefox browser, by replacing it with the latest or more contemporary version.
  • Installed a search toolbar

While DownloadAdmin did request permission to install an updated version of my Browser, it provided no warning about installing a search toolbar. This is quite shady and deceptive. In addition to updating the Internet Browser, DownloadAmin also installed the SearchProtect toolbar (Conduit). This toolbar is no stranger to the market as I’ve encountered it on several occasions during my assessment of malware.

Should you remove DownloadAmin?

That decision is totally yours to make. However, here are some reasons why most people would consider that program unwanted
  • It updates your outdated programs

In most cases, at least those I’ve seen, if a user has a program installed, they don’t necessarily want a new version of that program. In fact, this PUP could spell trouble since some programs, especially paid, require a license to use the software. When that program is updated/ upgraded, you might have to acquire a new license to get it to work.
  • Unnecessary program

If you’re totally lackadaisical and loathe the idea of doing work yourself, this program might come in handy. Many users will update their computers manually by using Microsoft’s preinstalled/pre-programmed updater in their computer’s Control Panel. This option searches for and installs all the necessary programs to keep your computer safe and secure. The DownloadAdmin program only occupies needed space and resources on your computer. However, what’s good about this program is that it doesn’t operate at the start time so it doesn’t necessarily cause unnecessary lags on your computer.
  • Modifies your search experience

By installing a search toolbar called SearchProtect, Updateadmin modifies or changes the browsing experience you’re accustomed to. SearchProtect hijacks your browser and changes your homepage to their choice while removing yours. This is often hard to reverse since the publisher created this software to remain once installed. To completely remove DownloadAdmin from your computer, click here to download and install Spyhunter
Read More
Turn On or Off the Recommended Troubleshooting
For a while now, Microsoft has been working hard to add various built-in troubleshooters in Windows 10. In fact, there is a troubleshooter for almost every standard or common error in Windows 10. And now with the newly released Windows 10 v1903, Microsoft has added the Recommended Troubleshooting which allows Windows 10 to automatically fix a lot of critical issues on your computer, and in this post, you will be guided on how you can turn on or off the Recommended Troubleshooting in Windows 10. The Microsoft Diagnostic & Feedback data only provides two settings – Basic and Full. So if you want to turn off the Recommended Troubleshooting for some reason, the only way to do so is to stop it from collecting complete data from your PC. And to turn it on or off, you can choose to switch between them. To do that, navigate to Settings > Privacy > Diagnostics & feedback and from there, select Basic under the Diagnostic Data section. After that, go back to Settings and go to Update & security > Troubleshoot. Once you’re there, you should see a warning message saying, “Share Full Diagnostic data to get additional troubleshooting recommendations”. Based on the message, Microsoft will only offer the recommended troubleshooting based on the Full Diagnostic data which it collects from your computer. On the other hand, if you know how to navigate and use the Windows Registry, then you can enable or disable the Recommended Troubleshooting via Registry Editor but before you proceed, make sure that you create a System Restore point. Once that’s covered, follow these steps:
  • Tap the Win + R keys to open the Run dialog box and type “regedit” in the field and tap Enter to open the Registry Editor.
  • Next, navigate to this registry path: HKEY_LOCAL_MACHINESOFTWAREMicrosoft
  • From there, look for the key named “WindowsMigration”. If you can’t find it, just right-click on the left pane and create a new key and then name it “WindowsMigration”.
  • After that, create a DWORD “UserPreference” and double click on it to set its value to “0” if you want to turn it off or “1” if you want to turn it on.
  • Exit the Registry Editor and restart your computer to apply the changes made.
Note: The Recommended Troubleshooting functionality can look into the error logs sent back to the Microsoft team and use an algorithm to set up a solution for you and they’re nothing but Diagnostics and Feedback data that Windows collects and sends back to Microsoft. Moreover, the recommendations are only visible if you are connected to the internet, else it will show the same message.
Read More
Windows Updates failed to install, 0x80073701
Recently, a number of users reported an error while trying to update their computers. This particular Windows Update error has an error code of 0x80073701. If you are one of the users who encounter this error, then read on as this post will guide you on how exactly you can fix it. Here’s the exact context of the error:
“Updates failed. There were problems installing some updates, but we’ll try again later. 2019-07 Cumulative Update for Windows 10 Version 1903 for x86-based Systems (KB4507453) – Error 0x80073701”
The Windows Update Error 0x80073701 also comes with a code “ERROR_SXS_ASSEMBLY_MISSING” which indicates that some system files are missing on your computer that caused the update installation failure error. Although this Windows Update error does not cause any severe issues, it is still being reported in the section of Windows Update where it is marked as “Update failed”. There are several potential solutions you can check out to resolve this error. You can try to run the DISM tool or the SFC or System File Checker scan. You could also try to run the Windows Update troubleshooter. For more information, make sure to follow the options given below.

Option 1 – Restart your computer and try installing the Updates again

Restarting your computer can also help in fixing the Windows Update failed to install error 0x80073701. There are cases where the issue resolves on its own as it could just be some simple network or PC error.

Option 2 – Try to run the DISM tool

Running the DISM Tool helps in repairing the Windows System Image as well as the Windows Component Store in Windows 10. Using this built-in tool, you have various options such as the “/ScanHealth”, “/CheckHealth”, and “/RestoreHealth”.
  • Open the Command Prompt as admin.
  • Then type in this command: exe /Online /Cleanup-image /Restorehealth
  • Do not close the window if the process takes a while as it will probably take a few minutes to finish.
After you run this tool, a log file is created at C:WindowsLogsCBSCBS.log. On the other hand, if the Windows Update client is already broken, you will be prompted to use a running Windows installation as the repair source or use a Windows side-by-side folder from a network share, as the source of the files. Although the chances of this happening is less, if it turns out to be the case, you need to run an advanced command in the DISM tool to repair a broken Windows Update. Just repeat the process above but use the following command instead:
DISM.exe /Online /Cleanup-Image /RestoreHealth /Source:C:RepairSourceWindows /LimitAccess

Option 3 – Try to run the System File Checker

System File Checker or SFC is a built-in command utility that helps in restoring corrupted files as well as missing files. It replaces bad and corrupted system files to good system files that might be causing the error 0x80073701. To run the SFC command, follow the steps given below.
  • Tap Win + R to launch Run.
  • Type in cmd in the field and tap Enter.
  • After opening Command Prompt, type in sfc /scannow
  • The command will start a system scan which will take a few whiles before it finishes. Once it’s done, you could get the following results:
  1. Windows Resource Protection did not find any integrity violations.
  2. Windows Resource Protection found corrupt files and successfully repaired them.
  3. Windows Resource Protection found corrupt files but was unable to fix some of them.
  • Restart your computer.

Option 4 – Try running the Windows Update Troubleshooter

Running the built-in Windows Update troubleshooter could also help you resolve the Windows Update error 0x80073701. To run it, go to Settings and then select Troubleshoot from the options. From there, click on Windows Update and then click the “Run the troubleshooter” button. After that, follow the next on-screen instructions and you should be good to go.
Read More
PrivacyAssistant Malware Removal Tutorial

PrivacyAssistant is a browser extension developed by SearchAssistant.net. These extensions allegedly offer users a safer way to browse the internet and some other tools to customize the home page with background wallpapers and one-click links that can be added. While all this may sound appealing, PrivacyAssistant also monitors your browser activity, search quarries, clicks, visits, and possibly personal information.

This extension changes your default home page to SearchAssistant.com and rerouting all searches through its search portal, displaying sponsored links instead of your typical search results. While active you may see unwanted ads and even pop-up ads appearing while browsing the internet.

Several anti-virus programs have classified this extension as a Browser Hijacker, and are, therefore, for security reasons, not recommended to keep on your computer.

About Browser Hijackers

Browser hijacking is amongst the web’s constant risks that target internet browsers. It’s a kind of malicious software that alters your internet browser’s configuration settings and redirects you to websites or pages that you had no intention of checking out. They are created to disrupt browser functions for many different reasons. Usually, hijackers will force hits to internet sites of their choice either to increase traffic producing higher advertisement earnings, or to gain a commission for each and every user visiting there. Most people believe that these kinds of websites are legitimate and harmless but that is not the case. Almost every browser hijacker poses an existent threat to your online safety and it’s important to categorize them under privacy dangers. When the program attacks your PC, it starts to mess things up a whole that slows your computer down to a crawl. In the worst-case scenario, you might be forced to deal with serious malware threats as well.

How one can recognize a browser hijack

There are numerous symptoms that point to a browser hijacking: your browser’s home page is suddenly different; you get re-directed to sites you never meant to visit; the default web engine has been changed and your web browser security settings have been lowered without your knowledge; find new toolbars that you simply did not add; you might find many pop-up ads on your computer screen; your web browser starts running slowly or displays frequent errors; you have prohibited entry to certain web pages, for example, the website of an antivirus software developer like SafeBytes.

So how exactly does a browser hijacker infect a PC

Browser hijackers may use drive-by downloads or file-sharing websites or perhaps an email attachment in order to reach a targeted computer system. They can also originate from any BHO, extension, toolbar, add-on, or plug-in with malicious intent. Other times you might have unintentionally accepted a browser hijacker as part of a software program bundle (generally freeware or shareware). A good example of some popular browser hijackers includes Conduit, Anyprotect, Babylon, DefaultTab, SweetPage, Delta Search, and RocketTab, however, the names are constantly changing. Browser hijacking can lead to serious privacy problems and even identity theft, disrupt your browsing experience by taking control over outgoing traffic, considerably slows down your personal computer by consuming lots of system resources, and result in system instability at the same time.

How to repair a browser hijack

Some hijackers can be removed by uninstalling the free software they were included with or by deleting any extension you’ve recently added to your browser. But, the majority of hijackers are extremely tenacious and require specialized applications to eradicate them. Furthermore, manual removal requires you to execute many time-consuming and tricky procedures which are hard to carry out for inexperienced computer users.

How To Get Rid Of Virus That Is Preventing Antivirus Installation?

Viruses can cause a great deal of damage to your computer system. Some malware sits in between the computer and your net connection and blocks some or all sites that you really want to visit. It will also prevent you from installing anything on your computer, especially anti-malware software. So what to do if malicious software keeps you from downloading or installing Safebytes Anti-Malware? Although this sort of problem can be difficult to circumvent, there are some actions you can take.

Make use of Safe Mode to resolve the problem

In Safe Mode, you can actually change Windows settings, un-install or install some software, and eliminate hard-to-delete malware. In case the malware is set to load immediately when PC boots, switching into this mode may well prevent it from doing so. To enter into Safe Mode or Safe Mode with Networking, press F8 while the system is starting up or run MSCONFIG and look for the “Safe Boot” options in the “Boot” tab. Once you’re in safe mode, you can try to install your anti-malware program without the hindrance of the malicious software. Following installation, run the malware scanner to remove most standard infections.

Switch over to some other web browser

Some malware mainly targets specific browsers. If this is your situation, use another internet browser as it can circumvent the malware. In the event you suspect that your Internet Explorer has been hijacked by a computer virus or otherwise compromised by cybercriminals, the best approach is to switch over to a different internet browser like Mozilla Firefox, Google Chrome, or Apple Safari to download your favorite computer security program – Safebytes Anti-Malware.

Run anti-virus from a USB drive

Another solution is to create a portable anti-malware program on your USB thumb drive. Try these simple actions to clean up your affected PC using a portable antivirus. 1) Download Safebytes Anti-Malware or Microsoft Windows Defender Offline onto a clean computer system. 2) Plug the pen drive into the uninfected PC. 3) Run the setup program by double-clicking the executable file of the downloaded application, which has a .exe file format. 4) Choose the flash drive as the location for saving the file. Follow the on-screen instructions to complete the installation process. 5) Transfer the pen drive from the uninfected computer to the infected computer. 6) Double-click the EXE file to open the Safebytes tool from the pen drive. 7) Click “Scan Now” to run a scan on the infected computer for viruses.

A Look at the Best AntiMalware Program

If you are looking to download an anti-malware application for your computer, there are several tools out there to consider nonetheless, you cannot trust blindly anyone, no matter whether it is paid or free software. Some are really worth your money, but many aren’t. While looking for an anti-malware program, choose one that offers solid, efficient, and complete protection against all known computer viruses and malware. One of the highly recommended software is SafeBytes AntiMalware. SafeBytes carries a very good track record of quality service, and customers appear to be happy with it. SafeBytes anti-malware is really a powerful, very effective protection tool created to assist users of all levels of IT literacy in finding and eliminating malicious threats out of their PC. Once you’ve got installed this software, SafeByte's state-of-the-art protection system will make sure that no viruses or malicious software can seep through your PC. SafeBytes anti-malware comes with a plethora of enhanced features which sets it aside from all others. Listed below are some of the highlighted features included in the tool. Robust Anti-malware Protection: This deep-cleaning anti-malware software goes much deeper than most anti-virus tools to clean your computer. Its critically acclaimed virus engine finds and disables hard to remove malware that conceals deep inside your personal computer. Active Protection: SafeBytes gives round-the-clock protection for your PC limiting malware attacks in real-time. They’re extremely effective in screening and removing various threats since they’re constantly improved with the latest updates and alerts. Web protection: SafeBytes checks the links present on a web page for possible threats and alerts you whether the website is safe to explore or not, through its unique safety ranking system. Light-weight: The program is lightweight and will work quietly in the background, and that does not impact your computer efficiency. 24/7 Premium Support: Support service is readily available for 24 x 7 x 365 days through email and chats to answer your queries.

Technical Details and Manual Removal (Advanced Users)

If you wish to manually remove PrivacyAssistant without the use of an automated tool, it may be possible to do so by removing the program from the Windows Add/Remove Programs menu, or in cases of browser extensions, going to the browsers AddOn/Extension manager and removing it. You will likely also want to reset your browser. To ensure the complete removal, manually check your hard drive and registry for all of the following and remove or reset the values accordingly. Please note that this is for advanced users only and may be difficult, with incorrect file removal causing additional PC errors. In addition, some malware is capable of replicating or preventing deletion. Doing this in Safe Mode is advised.

The following files, folders, and registry entries are created or modified by PrivacyAssistant

Registry: HKLMSOFTWAREClassesAppID.exe HKEY_CURRENT_USERsoftwareMicrosoftInternet ExplorerMainStart Page Redirect=http://.com HKEY_LOCAL_MACHINESOFTWAREMicrosoftWindows NTCurrentVersionvirus name HKEY_CURRENT_USERSoftwareMicrosoftWindows NTCurrentVersionWinlogon Shell = %AppData%.exe HKEY_CURRENT_USERSoftwareMicrosoftWindowsCurrentVersionRun Random HKEY_LOCAL_MACHINESoftwareMicrosoftWindows NTCurrentVersionRandom HKEY_LOCAL_MACHINESOFTWAREsupWPM HKEY_LOCAL_MACHINESYSTEMCurrentControlSetServicesWpm HKEY_CURRENT_USERSoftwareMicrosoftWindowsCurrentVersionUninstallPrivacyAssist HKEY_LOCAL_MACHINESOFTWAREMicrosoftWindows NTCurrentVersionImage File Execution Optionsmsseces.exe HKLMSOFTWAREClassesAppIDrandom.exe HKEY_CURRENT_USERSoftwareMicrosoftInternet ExplorerMain Default_Page_URL
Read More
Fix Display driver failed to start Error
Recently, a number of users reported an error when they tried to open graphic-intensive apps like video games. According to users, when they tried to open an app, they get the “Display driver failed to start” error instead. Thus, if you encounter the same error, then you’ve come to the right place as this post will guide you on how exactly you can fix it. Here’s the full content of the error message:
“Display driver failed to start; using Microsoft Basic Display Driver instead. Check Windows Update for a newer display driver.”
This kind of error could be due to several factors. It is possible that it could be a result of a corrupted or outdated graphics driver. Aside from that, it could also be due to some issues with the system settings. Worry not though for there are potential fixes that can help you fix the problem. But before you troubleshoot the problem, you need to update your Windows 10 computer first and if it didn’t help fix the problem, then here are the potential fixes that should help resolve the “Display driver failed to start” error.

Option 1 – Try to restart the Graphics driver

Although Windows 10 can recover the graphics driver on its own when it crashes, there are times when it fails to do its job. To restart the graphics driver in your computer, simply tap the Win + Ctrl + Shift + B key combination. After that, the graphics driver will be back in less than a second.

Option 2 – Try running the Hardware and Devices troubleshooter

Running the built-in hardware and devices troubleshooter can also help you in fixing the “Display driver failed to start” error.
  • The first thing you need to do is click on Start and then on the gear-like icon to pull up the window for Settings.
  • After opening Settings, look for the Update and Security option and select it.
  • From there, go to the Troubleshoot option located on the left-hand side of the list.
  • Next, select Keyboard from the list and open the Troubleshooter and run it. Once it is doing its job, wait for it to complete the process and then restart the system.
  • After the system restarts, check if the problem’s now fixed. If not, refer to the next option given below.

Option 3 – Try to update or rollback the Graphics driver

You can try to update your Graphics card driver using the Device Manager in your computer to resolve the “Display driver failed to start” error or you can also go directly to the website of your graphics card manufacturers like NVIDIA, Intel, or AMD and go to the section called Drivers then check if there’s a new available update – if there is, download and install it. To update your Graphics driver via Device Manager, refer to these steps:
  • First, boot your computer into Safe Mode.
  • After that, tap the Win + R keys to launch Run.
  • Type in devmgmt.msc into the box and tap Enter or click OK to open the Device Manager.
  • After that, a list of device drivers will be displayed. From there, look for the Display Adapters and click on them.
  • After that, right-click on each entry under the Display Adapters and select the “Uninstall Device” option from the menu.
  • Now restart your computer.
  • After restarting your computer, go to the Settings app and Check for Updates in the Windows Update section.

Option 4 – Try setting your system for maximum performance

If the first three options didn’t fix the error, you can try setting your computer for maximum performance since Windows 10 allows you to choose the effects you want to activate your system and you can do this by adjusting the performance ratio. Adjusting the performance ratio can be done via a certain setting in your computer – and this setting should be set to “Maximum Performance” to resolve the error.
  • In the Windows Search bar, type in “performance” and from the search results that appear, select the “Adjust the appearance and performance of Windows” option.
  • Next, a mini window will appear and from there, click on the radio button that says, “Adjust for best performance”.
  • Once done, click on the Apply and OK buttons to save the changes made. This should resolve the problem.
Read More
1 2 3 171
Logo
Copyright © 2023, ErrorTools. All Rights Reserved
Trademark: Microsoft Windows logos are registered trademarks of Microsoft. Disclaimer: ErrorTools.com is not affiliated with Microsoft, nor claims direct affiliation.
The information on this page is provided for information purposes only.
DMCA.com Protection Status