Speech Recognition is a technology used to control computers using voice commands. Through this feature, you can say commands that your computer will respond to, and aside from that, you can also dictate text to your computer which eliminates the need to type words in any word processing program or text editor. All in all, the Speech Recognition feature allows you to communicate with your computer and improves your computer’s ability to understand your own voice better as well as improve its diction accuracy. However, before you can improve its accuracy, you need to “train the feature” first. And if so far you are not satisfied with its performance, you actually have the option to disable it. So in this post, you will be guided on how you can disable the Speech Recognition feature in Windows 10 v1809.
Step 1: Go to Settings > Ease of Access.
Step 2: From there, go to Speech.
Step 3: Now switch off the toggle button for Speech Recognition to disable this feature.
On the other hand, you can also disable the Online Speech Recognition feature if you really don’t want to have anything to do with it. You have two options to do that – you can either do it using Settings or using the Registry Editor.
Note: Speech services exist on your computer and even in the cloud since Microsoft collects essential information from these services in order to enhance user experience and if you want to stop this, you have to turn off the “Getting to know you” option under the “Inking and typing Personalization” section.
Before you proceed, you need to create a System Restore Point first.
HKEY_CURRENT_USERSoftwareMicrosoftSpeech_OneCoreSettingsOnlineSpeechPrivacy

get-hotfix KB1111111, KB2222222, KB3333333Note: In the command given above, you need to replace “KB1111111, KB2222222, KB3333333” with the actual update KB numbers.
Error code 0x80070070 can be presented when there is not enough drive space on the computer to install updates. It is possible to uninstall apps that are not often used, or you may delete or archive files that are no longer needed, you may even add on some removable storage space to free up the internal memory of the computer. The computer needs a significant amount of internal memory in order to be able to update the operating system properly. When the computer fails to have the amount of memory that is needed to perform the update, the error code 0x80070070 will be presented. If this error message is not resolved, your computer might be opened to other error messages, including error code 0x80072EE2.
Common symptoms include:
 Error Causes
The Windows 10 upgrade error is caused by varying factors including a lack of computer space or resources, malware or virus infestation, or a clogged registry on the computer. The error code 0x80070070 will present itself when there is not enough free space on the computer to perform the necessary updates on the computer. Too many apps or programs downloaded onto the computer, too many photos, or too much music may also contribute to the lack of storage space on the computer, thus contributing to the error, and the computer not being able to install the updates to the operating system properly.
It is important to know how much space there is on the computer to start with prior to trying to free up any space. Use the free program on the computer called the Disk Cleanup tool. This will save time and free up some hard drive space while optimizing the computer to work better.
From the Start menu, browse to the Explore option, and then select This PC. Right-click on the C drive, and then select Properties. Select Disk cleanup. From here, select the options that you would like to clear. Make sure that the recycle bin is emptied of any temporary files or any error logs. Once done, select Okay.
Use this same process to clear the system files after an update from Windows, as they may still have files from the old operating system in place.
Go through your computer and remove any unwanted apps that are present. There are sure to be some that you do not use or do not want.
Follow these steps: From the Start menu, select Settings. Then, select System, Apps, and Features. When you have found the program that you would like to uninstall, select it and then select Uninstall. NOTE: some apps that are built into Windows do not have the capability to be uninstalled. Once you have selected Uninstall for the app or program, follow all directions that appear on the screen.
If none of the above methods work, add more storage. To acquire more storage, you can incorporate devices such as SD cards, USB flash drives, and even external hard drives.
Error Causesabout:config
“toolkit.winRegisterApplicationRestart”
 Storage management Page update
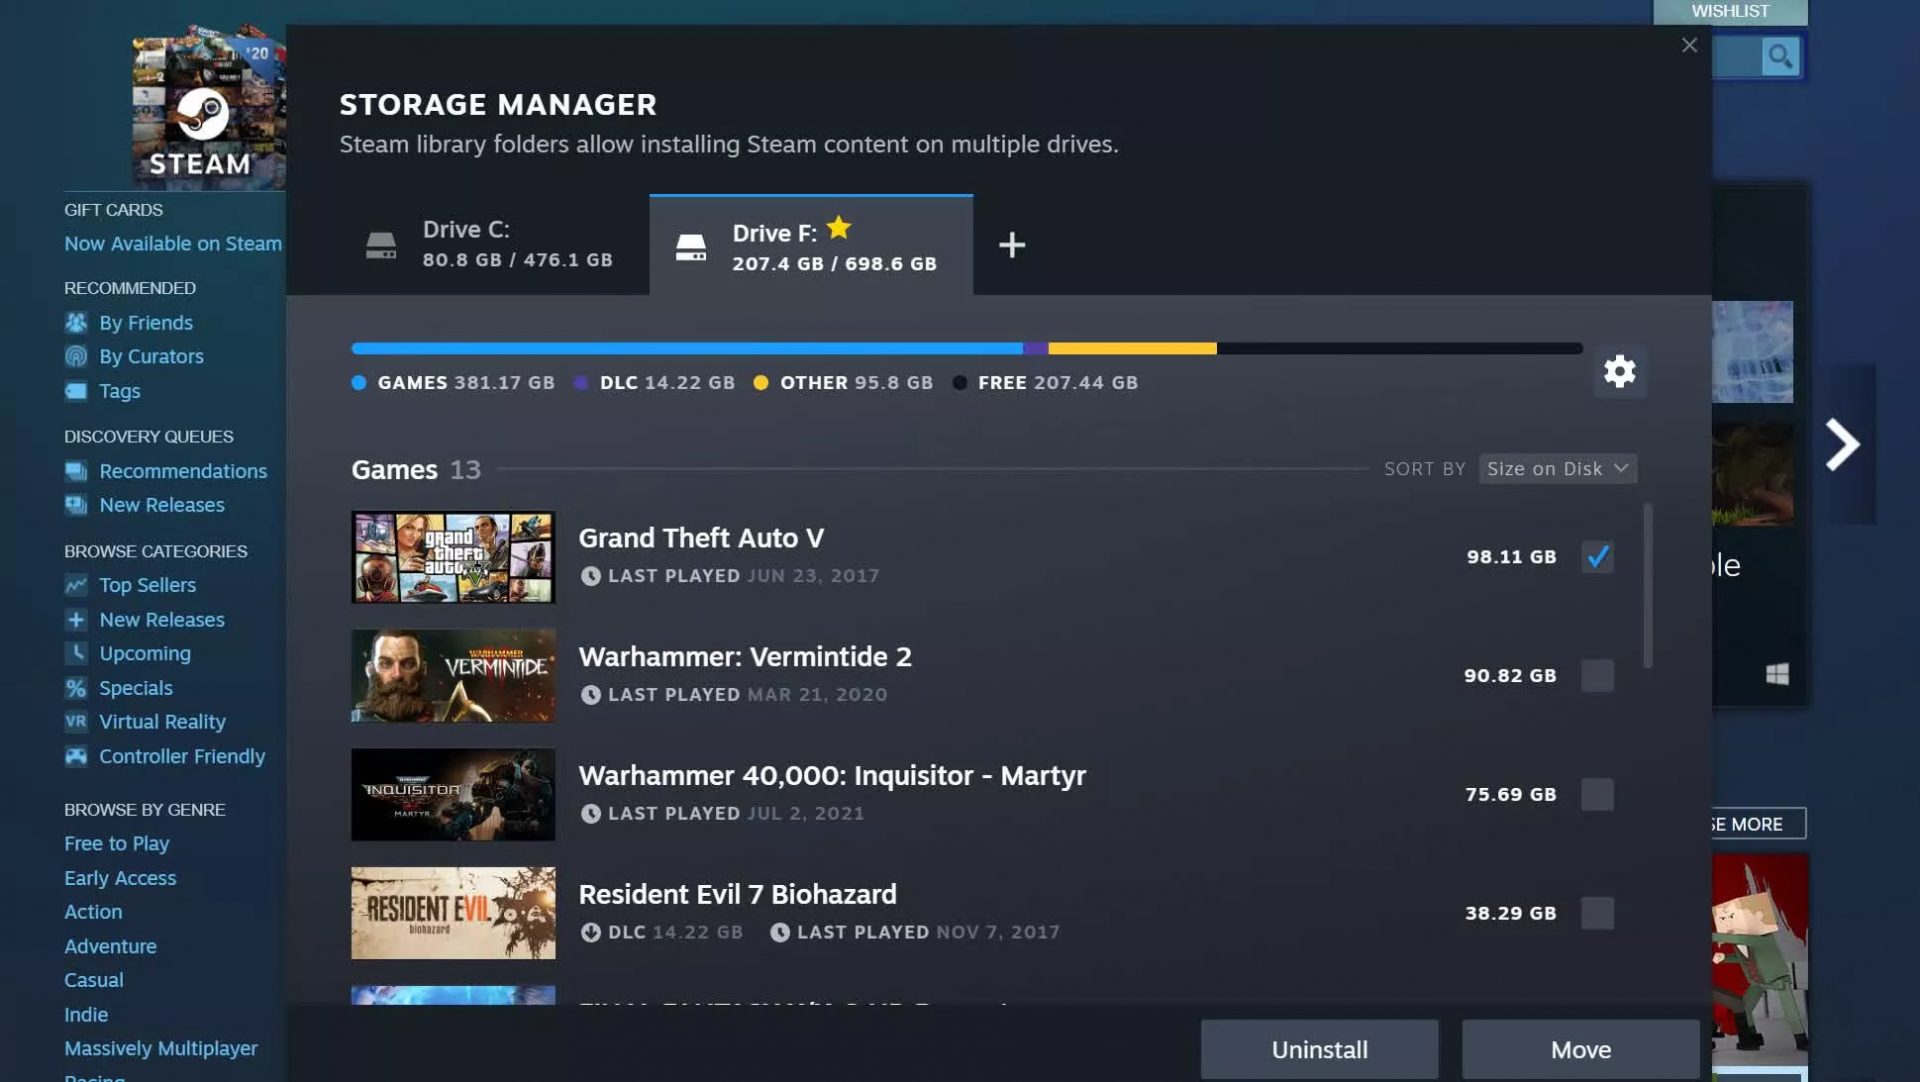 Another thing with the Steam store management page is the ability to move installation files from one location to another. Let’s say that you have two or more hard disk drivers in your machine and that you have SSD that you use for running stuff since it is fast and larger and slower one for storage. Now you can easily and quickly move one installation from one to another in order to take advantage of your faster SSD for quicker LOAD game times without making a new installation.
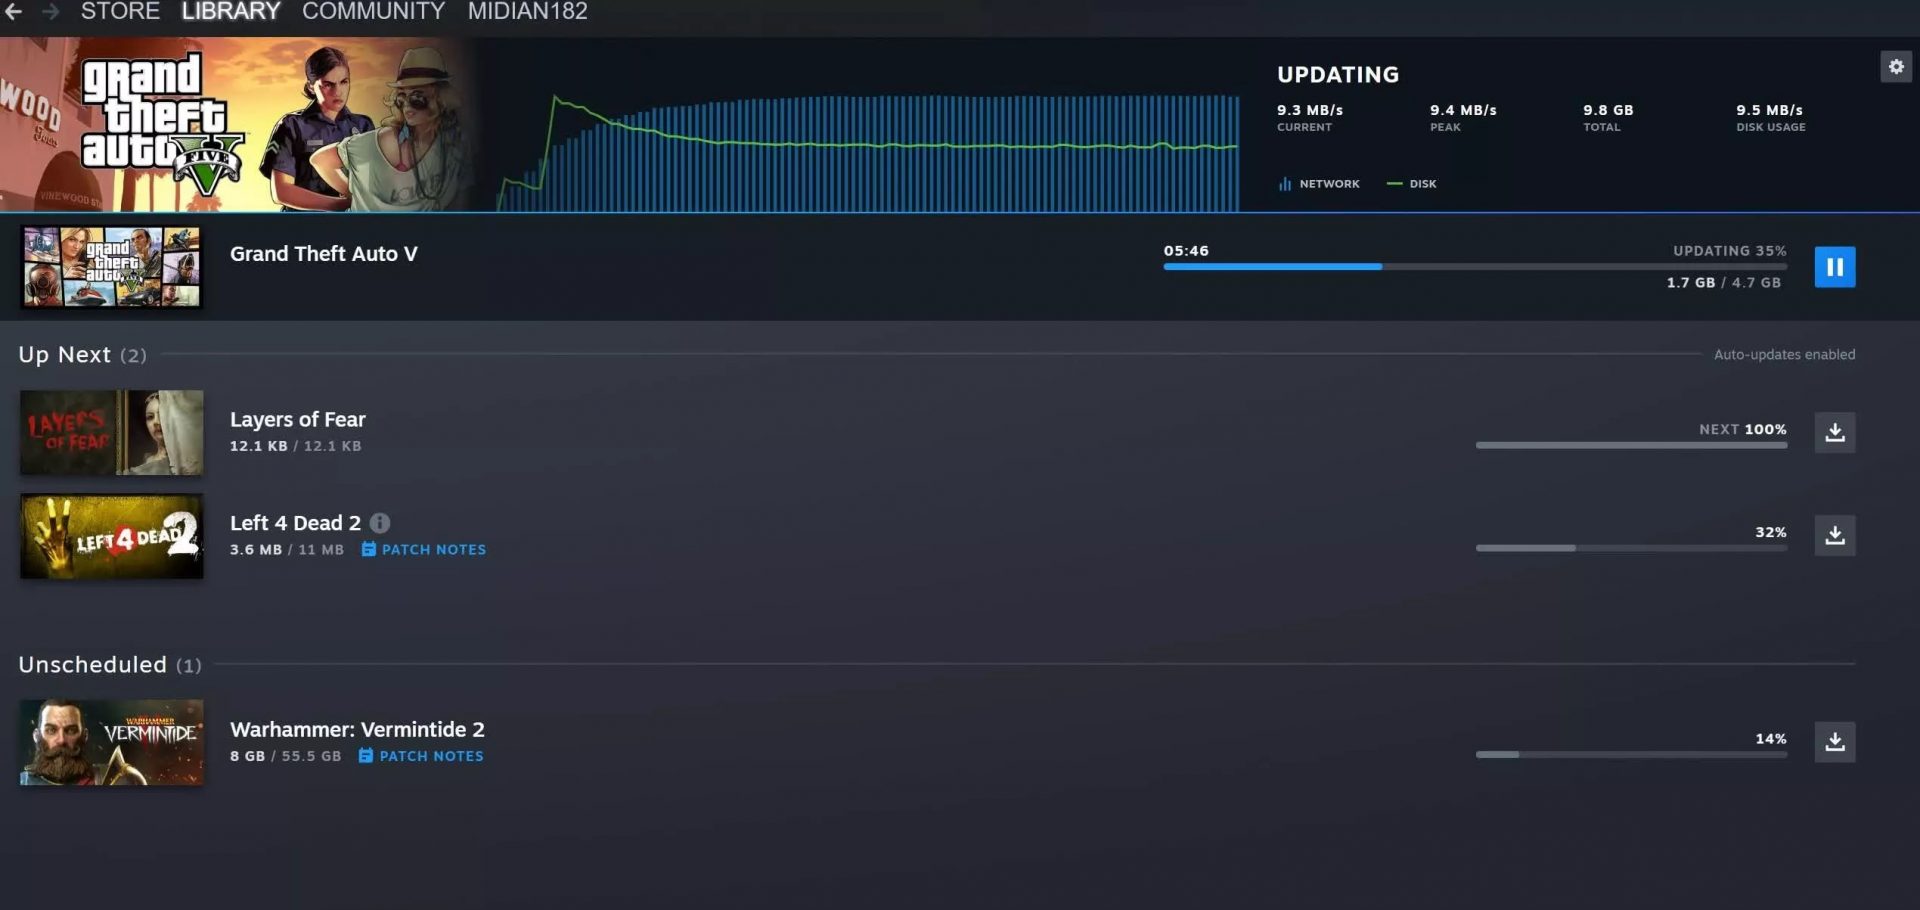 Also, you can now drag and drop items in the download bracket to reorder download orders or place them as active downloads to start downloading right away.
 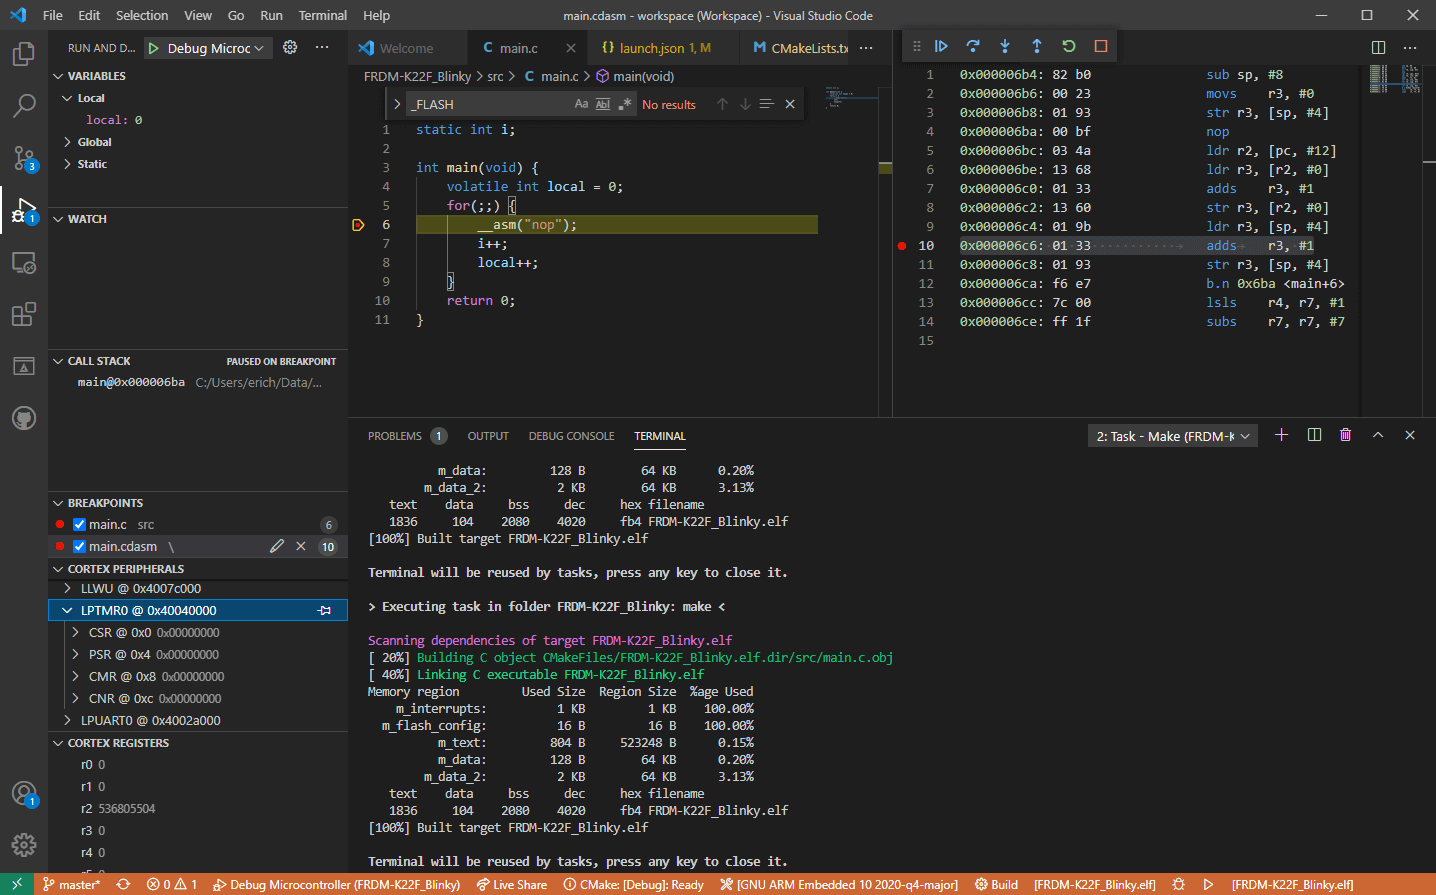 Visual studio code is a code editor available for Windows, Linux, and macOS. It is a completely free tool offering you to code in any language without the need to switch to another editor.
Visual Studio Code is part of Microsoft Visual Studio which is a complete integrated development environment (IDE). Take notice that Visual studio itself has more advanced tools for developing and testing, it has 24/7 support, training, and Azure for WEB apps.
Visual Studio Code is an editor lacking in some advanced features Visual Studio offers.
Visual studio code is a code editor available for Windows, Linux, and macOS. It is a completely free tool offering you to code in any language without the need to switch to another editor.
Visual Studio Code is part of Microsoft Visual Studio which is a complete integrated development environment (IDE). Take notice that Visual studio itself has more advanced tools for developing and testing, it has 24/7 support, training, and Azure for WEB apps.
Visual Studio Code is an editor lacking in some advanced features Visual Studio offers.