Speech Recognition is a technology used to control computers using voice commands. Through this feature, you can say commands that your computer will respond to, and aside from that, you can also dictate text to your computer which eliminates the need to type words in any word processing program or text editor. All in all, the Speech Recognition feature allows you to communicate with your computer and improves your computer’s ability to understand your own voice better as well as improve its diction accuracy. However, before you can improve its accuracy, you need to “train the feature” first. And if so far you are not satisfied with its performance, you actually have the option to disable it. So in this post, you will be guided on how you can disable the Speech Recognition feature in Windows 10 v1809.
To disable Speech Recognition on your computer, follow the steps below.
Step 1: Go to Settings > Ease of Access.
Step 2: From there, go to Speech.
Step 3: Now switch off the toggle button for Speech Recognition to disable this feature.
On the other hand, you can also disable the Online Speech Recognition feature if you really don’t want to have anything to do with it. You have two options to do that – you can either do it using Settings or using the Registry Editor.
Disable Online Speech Recognition feature via Settings:
Click on the Start button and select Settings.
Next, go to the Privacy section and click on the Speech option located at the right pane.
Then switch the toggle button off to turn off the Online Speech Recognition feature.
Note: Speech services exist on your computer and even in the cloud since Microsoft collects essential information from these services in order to enhance user experience and if you want to stop this, you have to turn off the “Getting to know you” option under the “Inking and typing Personalization” section.
Disable Online Speech Recognition feature via Registry Editor:
Before you proceed, you need to create a System Restore Point first.
Tap the Win + R keys to open the Run dialog box.
Then type “Regedit” in the field and hit Enter to open the Registry Editor.
After that, check the default value of the “HasAccepted” key located in the right pane. As you can see its value is set to “1” which means that the Speech Recognition feature is enabled. And so to change it, you have to set “0” as its new value to permanently disable the feature.
Just double click on the key and change the value from “1” to “0”. Keep in mind that even if you are using a 64-bit Windows 10 computer, you still have to create a 32-bit DWORD value.
After that, restart your computer to apply the changes made.
When you have to connect to a drive that’s on a different computer or on external storage, that’s where the mapped network drives come in. Mapped network drives make accessing files a lot easier. However, there are times when it won’t work for some reason.
Windows will notify you about the unavailability of mapped network drives in several ways. For one, Windows might display a red X on the network drives or it could be that its status will be unavailable when you try to use it from the Command Prompt or via a notification.
It is recommended that you run a few scripts when you log in to your PC as it may so happen that the network drive takes more than usual to connect. Before you start troubleshooting the problem using the given options below, keep in mind that some workouts might only work under certain scenarios. You might need some network access at logon or you might need access to the Group Policy settings. So you need to choose what you prefer more.
You can try the given workarounds below if the mapped network drives are not showing or connecting or working on your Windows 10 computer. These workarounds use scripts to make sure that you are connected to them as soon as you start to use your PC.
As mentioned, before you can troubleshoot, you need to create scripts first. There are two scripts here namely MapDrives.ps1 which is executed by the second script named MapDrives.cmd and is done at a regular and non-elevated Command Prompt. Follow the steps below to get started.
You have to create a script file named “MapDrives.cmd” first and then save it on a place where the files are safe. To do that, open a text editor like Notepad and then copy and paste the following script:
After that, save the file and name it “MapDrives.cmd”.
Next, create a script file named “MapDrives.ps1” and then copy and paste the following content. Just make sure to save both scripts in the same folder.
$i=3while($True){ $error.clear() $MappedDrives = Get-SmbMapping |where -property Status -Value Unavailable -EQ | select LocalPath,RemotePath foreach( $MappedDrive in $MappedDrives) { try { New-SmbMapping -LocalPath $MappedDrive.LocalPath -RemotePath $MappedDrive.RemotePath -Persistent $True } catch { Write-Host "There was an error mapping $MappedDrive.RemotePath to $MappedDrive.LocalPath" } } $i = $i - 1 if($error.Count -eq 0 -Or $i -eq 0) {break} Start-Sleep -Seconds 30}Note: Now that you’ve created the script files, it’s time for you to proceed to the options given below.
Option 1 – Try creating a startup item
Note that this option only works on devices that have network access at login. So if it’s not there, the script will fail to reconnect the network drivers automatically. To create a startup item, here’s what you have to do:
Open the Startup folder located at %ProgramData%MicrosoftWindowsStart MenuProgramsStartUp.
From there, copy and paste the MapDrives.cmd.
After that, open the Scripts folder located at %SystemDrive%Scripts copy-paste MapDrives.ps1 and then copy and paste MapDrives.ps1 in there.
Note: After you complete the steps above, a log file named “StartupLog.txt” will be created in the %TEMP% folder. Now all that’s left for you to do is to log out of your computer and then log back in. This will ensure that the mapped drives are open.
Option 2 – Create a scheduled task
It is possible to create a scheduled task that runs as soon as you log in to your computer. To create a scheduled task, follow the steps below.
You have to copy the MapDrives.ps1 script file to the scripts folder of Windows located at %SystemDrive%Scripts.
After that, open the Task Scheduler and select Action > Create Task.
Next, type a name and description of the task in the General tab.
Then click on the Change User or Group button and select a local user group and click OK.
Now check the box labeled “Run with highest privileges” and switch to the Triggers tab.
From there, create a new trigger with the “At Logon” option in the Begin the task drop-down menu and then click OK.
After that, switch to the Actions tab and create a new action then choose to Start a program.
Next, type “Powershell.exe” in the Program/Script field, and in the Add arguments (optional) field, type the following:
And in the Start in the (optional) field, type “%SystemDrive%Scripts” as the location of the script file.
Now under the Conditions tab, select the “Start only if the following network connection is available” option and then select Any connection and click OK.
Restart your computer or log off from your account and then log back in so that the task will be executed.
Option 3 – Use the Group Policy settings
You need this option if the mapped network drives are defined via Group Policy settings. You have to update the action of the drive maps to Replace. As a result, it will delete the existing mapped drive and create the mapping on each logon again. However, any settings on the mapped drive that are changed from the Group Policy settings will be gone on each logon. So if the changes don’t work, you need to run the gpupdate command together with the /force parameter in order to refresh the Group Policy setting quickly.
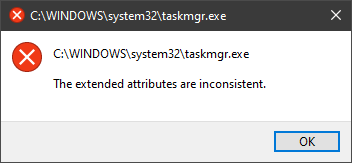
One of the most critical errors inside your Windows operating system is The Extended Attributes Are Inconsistent error. This error means that your operating system has been corrupted and it may produce many annoying issues like for example time lags, random crashes, and even freezing of the system when running multiple applications.
There are a lot of reasons for this error, from the registry to faulty application installations to sometimes even hardware issues like bad RAM memory or bad hard drive. Mostly issue is due to corrupted files inside Windows and most often people only think that resetting the PC or complete reinstallation is the only way to fix this problem.
Although reinstalling the system or resetting the PC will solve this error for sure there are other less time-consuming ways to fix this error.
In this guide, we will show you common ways in fixing Extended Attributes are inconsistent errors inside your Windows that are easy to do and less time-consuming than complete reinstallation of the system.
Fixing Extended Attributes Are Inconsistent error
Run SFC scan
Press ⊞ WINDOWS + X to open the hidden menu
Click on command prompt (admin)
In command prompt type in SFC /scannow and press ENTER
Wait for the operation to complete
Reboot your PC
Use System Image Repair Tool
Press ⊞ WINDOWS + X to open the hidden menu
Click on command prompt (admin)
In command prompt type in Dism /Online /Cleanup-Image /RestoreHealth and press ENTER
Wait for the operation to complete
Reboot your PC
Change all user accounts to the administrator
Press ⊞ WINDOWS + R to open the run dialog
Type in netplwiz and press ENTER
Select a first user account and click on Properties
Click on the Group Membership tab
Choose Others from the options
Select administrator (if all accounts are already administrators change all to users)
Repeat process for all other accounts
Click OK to save settings
Change Windows Sound scheme to default
Right-click on the sound icon in the taskbar
Click on Sound options
Go to the Sounds tab
In Sound Scheme click and choose Windows Default
Under Program Events choose Windows User Account Control
Click on the drop-down menu and choose None
Click on Apply
Click on OK
Downgrade the Sound driver
Press ⊞ WINDOWS + X to open the hidden menu
Click on Device Manager
Find your Audio driver and right-click on it
Click on uninstall and then on OK
Reboot your system
Do System Restore
If none of the provided solutions have worked, perform a system restore to the last point where everything was working fine.
Reset PC
If even system restore has not solved the issue or you do not have valid point in system restore time, perform Reset this PC and hopefully, the error will be finally fixed.
Conclusion
If all of the provided methods have not managed to repair this error that checks your hardware, your computer might have some faulty components if after complete PC reset error persists.
EasyEmailSuite is a browser extension made by MyWay that may come bundled with other free software that you download off of the Internet. When installed EasyEmailSuite will set the homepage and search engine for your web browser to http://search.myway.com.
EasyEmailSuite is an application that allows users to access their emails. Initially, this app may seem legitimate and useful, however, EasyEmailSuite is categorized as a browser hijacker.
This extension changes your home page and searches engine to MyWay. It monitors your search activity and collects data, that is later sold/forwarded to display additional unwanted ads in your browser. Several anti-virus scanners have classified EasyEmailSuite as a Browser Hijacker / PUP and are therefore not recommended to keep on your computer.
About Browser Hijackers
Browser hijacking is a common type of internet fraud where your web browser settings are altered to allow it to carry out things you don’t intend. They are designed to disrupt browser functions for several reasons. Usually, it will drive users to particular sites which are trying to increase their advertisement earnings. While it might seem harmless, these tools are made by malicious individuals who always attempt to take full advantage of you, so that they could earn money from your naivety and distraction. They not only screw up your internet browsers, but browser hijackers could also modify the system registry to make your computer vulnerable to other malicious programs.
Symptoms of browser hijacker infection
There are plenty of symptoms that indicate your internet browser has been highjacked:
1. the home page of your web browser is changed unexpectedly2. bookmark and the new tab are likewise changed3. the default web browser settings are modified and/or your default web engine is altered4. you see unsolicited new toolbars added5. you may notice never-ending pop-up adverts on your screen6. websites load very slowly and often incomplete7. you are blocked to access the websites of security solution providers.
Exactly how they get into your computer
Browser hijackers infect computer systems via malicious e-mail attachments, downloaded infected computer files, or by visiting infected sites. They can also come from any BHO, extension, add-on, toolbar, or plug-in with malicious objectives. Other times you might have mistakenly accepted a browser hijacker as part of a software program bundle (generally freeware or shareware). Some of the most popular hijackers are EasyEmailSuite, Babylon Toolbar, Conduit Search, Sweet Page, OneWebSearch, and CoolWebSearch.
Browser hijackers will interrupt the user’s browsing experience significantly, keep track of the websites frequented by users and steal private information, cause difficulty in connecting to the web, and then finally create stability issues, causing software programs and computers to freeze.
Browser hijacker removal methods
Some hijackers could be removed by uninstalling the freeware they were included with or by removing any add-ons you have recently added to your PC. However, many hijacking codes are not very easy to get rid of manually, since they go deeper into the operating system. You should think about undertaking manual fixes only if you happen to be a tech-savvy person, as risks are associated with tinkering with the system registry and HOSTS file.
Experts always recommend users remove any malware including browser hijacker with an automatic malware removal tool, which is easier, safer, and quicker than the manual removal procedure. Safebytes Anti-Malware discovers all kinds of hijackers – such as EasyEmailSuite – and eliminates every trace efficiently and quickly. Along with anti-malware, a PC optimizer tool can help you resolve Windows registry errors, eliminate unwanted toolbars, secure online privacy, and stabilize programs installed on the computer.
Help! Malware Blocking Antivirus Installation And Access To The Web
Malware could cause several different types of damage to PCs, networks, and data. Some malware sits in between your computer and the internet connection and blocks a few or all internet sites which you want to visit. It will also prevent you from adding anything to your PC, especially anti-virus software. If you are reading this article, odds are you’re stuck with a virus infection that is preventing you to download or install the Safebytes Anti-Malware program on your PC. There are some options you can try to get around with this obstacle.
Install the anti-malware in Safe Mode
If the virus is set to load automatically when Windows starts, getting into Safe Mode could block this attempt. Since only the minimal programs and services start-up in “Safe Mode”, there are hardly any reasons for issues to take place. To start your Windows XP, Vista, or 7 computers in Safe Mode with Networking, do as instructed below.
1) Tap the F8 key continuously as soon as your computer boots, but before the big Windows logo shows up. This would conjure up the “Advanced Boot Options” menu.
2) Select Safe Mode with Networking with arrow keys and press Enter.
3) When this mode loads, you will have the internet. Now, make use of your browser to download and install an anti-malware application.
4) Immediately after installation, do a full scan and let the software remove the threats it detects.
Utilize an alternate internet browser to download the anti-malware application
Some malware only targets certain web browsers. If this sounds like your case, utilize another web browser as it may circumvent the virus. The best solution to avoid this issue is to opt for an internet browser that is well known for its security measures. Firefox contains built-in Phishing and Malware Protection to keep you secure online.
Install antivirus on a flash drive
Here’s yet another solution which is using a portable USB anti-malware software package that can check your system for viruses without the need for installation. To run anti-virus using a USB flash drive, follow these simple steps:
1) Download the anti-malware on a virus-free PC.2) Put the USB drive into the uninfected computer.3) Double click on the downloaded file to open the installation wizard.4) Select flash drive as the place when the wizard asks you exactly where you wish to install the application. Follow the directions to finish the installation process.5) Transfer the thumb drive from the clean PC to the infected PC.6) Double-click the EXE file to open the Safebytes software right from the thumb drive.7) Click on “Scan Now” to run a complete scan on the infected computer for malware.
If no other method of downloading and installing antivirus software works, then you’ve got no other choice than to hit the last resort: a complete Windows reinstallation, the only solution proven to have a 100% rate of success at virus removal. If you’re not sure which method to employ, simply call our toll-free number 1-844-377-4107 to speak to our technical support team. Our experts can take you step-by-step through the virus removal process on the phone and also fix your personal computer remotely.
A Look at the Best AntiMalware Program
These days, an anti-malware program can protect your PC from various types of online threats. But exactly how to choose the best one amongst plenty of malware protection software that is available out there? You may be aware, there are many anti-malware companies and products for you to consider. Some are good ones, some are ok types, while some are merely bogus anti-malware programs that can harm your computer themselves! When searching for antivirus software, choose one which provides dependable, efficient, and complete protection against all known computer viruses and malware. When considering commercial anti-malware software options, the majority of people opt for well-known brands, like SafeBytes, and they are very happy with it.
SafeBytes anti-malware is a very effective and user-friendly protection tool that is made for end-users of all levels of computer literacy. Once you have installed this application, SafeByte's sophisticated protection system will ensure that no viruses or malicious software can seep through your computer.
SafeBytes anti-malware takes PC protection to a totally new level with its advanced features. The following are some typical features found in this program:
Most effective AntiMalware Protection: Safebytes is based on the very best virus engine within the industry. These engines can find and get rid of threats even during the early phases of a malware outbreak.
Real-time Threat Response: SafeBytes provides round-the-clock protection for your PC restricting malware attacks instantly. It’ll constantly monitor your laptop or computer for hacker activity and also gives end-users superior firewall protection.
High-Speed Malware Scanning Engine: SafeBytes Anti-Malware has a multi-thread scan algorithm that works up to 5x faster than any other protection software.
Web Filtering: SafeBytes provides an instant safety rating to the web pages you’re about to check out, automatically blocking dangerous sites and ensuring that you’re certain of your safety while browsing the net.
Light-weight: SafeBytes is a lightweight and simple to use antivirus and antimalware solution. Since it utilizes minimum computer resources, this tool leaves the computer’s power exactly where it belongs to: with you actually.
24/7 Live Expert Support: You can get high levels of support around the clock if you are using their paid version.
Technical Details and Manual Removal (Advanced Users)
If you wish to manually remove EasyEmailSuite without the use of an automated tool, it may be possible to do so by removing the program from the Windows Add/Remove Programs menu, or in cases of browser extensions, going to the browsers AddOn/Extension manager and removing it. You will likely also want to reset your browser.
To ensure the complete removal, manually check your hard drive and registry for all of the following and remove or reset the values accordingly. Please note that this is for advanced users only and may be difficult, with incorrect file removal causing additional PC errors. In addition, some malware is capable of replicating or preventing deletion. Doing this in Safe Mode is advised.
The following files, folders, and registry entries are created or modified by EasyEmailSuite
Files:
%UserProfile%Local SettingsApplication DataGoogleChromeUser DataDefaultLocal Extension Settingsifbgbfdfdgfngigejacbmmkeklfahmka
%LOCALAPPDATA%GoogleChromeUser DataDefaultExtensionsifbgbfdfdgfngigejacbmmkeklfahmka
%UserProfile%Local SettingsApplication DataGoogleChromeUser DataDefaultSync Extension Settingsifbgbfdfdgfngigejacbmmkeklfahmka
Search and Delete: chrome-extension_ifbgbfdfdgfngigejacbmmkeklfahmka_0.localstorage-journal
Search and Delete: chrome-extension_ifbgbfdfdgfngigejacbmmkeklfahmka_0.localstorage
Search and Delete: http_easyemailsuite.dl.tb.ask.com_0.localstorage-journal
Search and Delete: http_easyemailsuite.dl.tb.ask.com_0.localstorage
%UserProfile%Local SettingsApplication DataEasyEmailSuiteTooltab
%LOCALAPPDATA%EasyEmailSuiteTooltab
%LOCALAPPDATA%GoogleChromeUser DataDefaultLocal Extension Settingsifbgbfdfdgfngigejacbmmkeklfahmka
%UserProfile%Local SettingsApplication DataGoogleChromeUser DataDefaultExtensionsifbgbfdfdgfngigejacbmmkeklfahmka
Registry:
HKEY_LOCAL_MACHINESoftwareWow6432NodeEasyEmailSuite
HKEY_LOCAL_MACHINESoftwareEasyEmailSuite
HKEY_LOCAL_MACHINESoftwareMicrosoftInternet ExplorerLowRegistryDOMStorageeasyemailsuite.dl.tb.ask.com
HKEY_LOCAL_MACHINESoftwareMicrosoftInternet ExplorerLowRegistryDOMStorageeasyemailsuite.dl.myway.com
HKEY_LOCAL_MACHINESoftware[APPLICATION]MicrosoftWindowsCurrentVersionUninstall..Uninstaller
HKEY_LOCAL_MACHINEEasyEmailSuiteTooltab Uninstall Internet Explorer
As you know, the Taskbar is one of the integral parts of the Windows desktop and it has been there since the release of Windows 1.0 and up until now with Windows 10. Since then, Microsoft has been modifying the Taskbar with a new design which makes it a home for new features such as Windows Search, Task View, and many more. However, there are times when you may that the Taskbar has disappeared or has stopped responding. If you experience either one of these scenarios, read on as this post will walk you through what you can do to resolve the problem.
Here are some suggestions you can check out to resolve the issue with the Taskbar in Windows 10 but before you proceed, make sure that you create a System Restore point first. To do that, follow these steps:
In the Start search, type in “create a restore point” and click the entry “System Properties”.
Next, select the main system drive under Protection Settings and click on the Configure button.
After that, select the “Turn on system protection” option and then click on the Apply and OK buttons to save the changes made.
Once you’ve created a System Restore point, refer to the troubleshooting steps below to fix the Taskbar in Windows 10.
Option 1 – Try to restart the Explorer process
This may sound really basic but it actually is a proven method to fix the Taskbar issue. So if anything gets stuck on the system tray or the Taskbar, you can always fix it by restarting the explorer.exe. How? Refer to these steps:
First, right-click on the Taskbar and select the Task Manager.
After opening the Task Manager, go to the Processes tab and look for the process named “Windows Explorer”.
Then right-click on that process and select the option to Restart. Afterward, you should now be seeing the Taskbar as this will reload the whole Windows Shell.
Option 2 – Unhide the Taskbar using the Settings app
It is possible that the Taskbar could be hidden so you can try to unhide it using the Settings app.
Tap the Win + I keys to open Settings.
After that, go to Personalization > Taskbar.
From the main section, make sure that the “Automatically hide the task in desktop mode” is toggled to the off position. However, if it’s already off then proceed to the next options below.
Option 3 – Make sure that you are not in Tablet Mode
Since Windows 10 is designed to work on both desktop and mobile devices, it could be that your computer has slipped into Tablet Mode which explains why you’re not seeing the Taskbar. To check if your computer is really in Tablet Mode, follow these steps:
Go to the Start menu and select Settings.
Next, select the System setting and from the left pane select the Tablet Mode.
From there, make sure that the buttons next to the options given below are set to the off position:
Hide app icons on the taskbar in tablet mode
Automatically hide the taskbar in tablet mode
Option 4 – Try to check the Projection Settings
You might also want to check the Projection settings as it could be the reason why Taskbar has disappeared.
Tap the Win + P keys to open the Windows Projection settings.
Next, make sure that you select the “PC screen only” option and then check if your Taskbar has now appeared or not.
Error Code 30088-26 is shown when the user tries to install the MS Office suite to their PC. It is mostly due to several reasons including corrupted Office installation, the remnant of old office installation, or even Windows updates. We will cover all reasons along with provided solutions to each one.
Follow the guide below to address each scenario with the fix for it.
Corrupted Office installation
In order to fix this issue, you will need to repair the installation itself.
Press ⊞ WINDOWS + R to open the run dialog
Inside run dialog type in Control Panel
In the control panel double click on Programs and features
In the list of installed application find MS Office and click on it to select it
On top, just above the application list click on the change
Office dialog will be opened with multiple choices
Click and select Online repair and then click on Repair
Make sure that you have a stable internet connection and leave the process to be finished
Remnants of old office installation
Manually cleaning remnants of old office installation is not an easy task and it can be different from system to system depending on the previous Office version.
Luckily Microsoft has a dedicated office cleaning tool made for purpose of removing old tails and remnants of old office installations.
After the tool has been successfully downloaded, double-click on the .diagcab file to open it
Click on Advanced and make sure that the box associated with Apply repair automatically is checked.
Click the Next button to proceed
Wait until the initial detection phase is complete, then click on Installing at the first prompt
Select the program that you’re encountering issues with (most likely Microsoft Office) and click Next once again
At the next screen, click on Yes, try to uninstall
Wait until the operation is complete, then restart your computer and re-install the Microsoft Office suite
Windows Updates
After digging and trying out various solutions for this issue we came to the conclusion that this error can occur if Windows is not fully updated, and by fully updated we mean fully, not just critical updates, but all available ones. Check-in your setting to see if there are some uninstalled or pending updates waiting to be installed and if that is the case install them all.
After completely updating your Operating system error should vanish and you should be able to install Microsoft office without issues.
As you know, each one of the applications that you use in your Windows 10 computer has its own set of permissions by default. These applications either allows or denies the interactions between a few other applications, depending on their own needs. This is why you might suddenly encounter a message that says,
“This app wants to access your pictures”or“This app wants to access your account info”
both of which are followed by two buttons that will ask you to Allow or Deny the action. You can always click on any of the given options. This will determine the permission of the application.
Users in Windows 10 are given the option to either allow or deny applications in accessing their account information like name, picture and other account information. Thus, in this post, you will be guided on how you can change the Privacy settings of these apps to allow or deny them permission to access not just your account info but for all users, as well as specific apps in Windows 10.
The user account information is part of the Privacy data in Windows 10 that you can control easily using the Settings app. In fact, you can revoke or grant access permission for your account information, all the users and specific applications to do that, follow each one of the instructions provided below carefully.
Allow or deny apps permission to account info for yourself:
Step_1: The first thing you have to do is open Settings. From there, select Privacy.
Step_2: After that, scroll and look for Account info and select it.
Step_3: Now turn off the toggle button for the “Allow apps to access your account info” option if you want to deny apps permission to your account info. But if you want to allow them access, simply turn the toggle button on. Keep in mind that when you allow access or permission, you can select which apps can access your picture, name, and other account info by simply using the settings on the page you’re currently in.
Now if you want to allow or deny apps to access your account info for all the users, here’s what you have to do:
Step_1: First, open Settings and click on the icon for Privacy.
Step_2: Next, scroll down until you see the Account info located on the left side and then click on it.
Step_3: After that, click on the Change button under the “Allow access to account info on this device” section. If you want to deny account info access for all other users, then turn the toggle button off. Doing so will automatically disable not just the account info access for all users but also for all the apps as well.
On the other hand, if you want to allow or deny account info access to specific apps, you can do so by following these steps:
Step_1: As you did earlier, go to Settings and click on the Privacy icon.
Step_2: After that, scroll down and select Account info located on the left side.
Step_3: Now turn on or off the toggle button under the “Choose which apps can access your account info” section if you want to deny or allow specific apps permission to access Account Info. If you’ve turned on the toggle button under the “Allow apps to access your account info”, all the apps get access permissions by default.
Hello everyone and welcome to another quick tutorial for your Windows error, this time we will wrestle with error 0x8007000d.
Let's begin:
1. Browse to "C:\Windows\SoftwareDistribution\Download" and delete the contents of the folder.
2. Press ⊞ WINDOWS + X > Click Command Prompt (Admin) then type "wuauclt.exe /updatenow".
Hit Enter
3. Open Control Panel > Windows Update and Windows 10 should begin downloading.
Press ⊞ WINDOWS + X
Click Command Prompt (Admin)
Type in at the prompt OR Copy and Paste these one at a time : (Hit ENTER after each)
Stumbling upon downloader.dll not found error is not pleasant to experience, usually, it means that desired application can not be started. There could be several reasons why this error happens from user mistakes, corrupted files, bad installation, and even bad RAM memory. Whatever the reason might be solutions provided are the same for all and offer a fix to this issue.
it is advisable to follow provided solutions from start to finish not skipping any one of them since they are tailored to address the simplest solutions and issues and move toward more complicated ones.
Reinstall application
If you are receiving Downloader.dll not found when trying to run just a single certain application, reinstall the application, there is the possibility that the application has somehow corrupted downloader.dll during the installation process. Reinstalling might fix the problem.
Run SFC scan
SFC scan is the tool meant to scan all files and fix any corrupted ones. To run this tool, open the command prompt in administrator mode by right-clicking on the windows start button and then left-clicking on the command prompt (admin). When you are in command prompt type in SFC /scannow and let the whole process finish.
Update device driver
If previous steps have not provided results, go to device manager and visually check is there a device with an exclamation or other sign next to it, if there is, right-click on it and choose update driver.
When Microsoft held Windows 11 presentation it took special time to present the upcoming new Windows 11 store as kind of a big deal.
It was openly stated that with new Windows we will get a new store with a different attitude and new look.
New Microsoft store
Microsoft has stated that both customer and developer feedback over time has contributed to their redesign and rethinking of the store itself.
They want to be sure that policies for developers are more straightforward and clear so more developers will decide to bring their product to Windows. As for customers, they want more safety and more security so they feel protected when making a purchase.
The new store will come in Windows 11 but also in Windows 10 as well via update.
Stories and collections
Introducing the new store will be curated stories. Microsoft believes that stores should be focused on user experience so stories from customers themselves will play a big role here. They are rich editorial content to keep you informed about the best apps and inspire you to achieve more with your device.
This approach to information is aimed at bringing unknown applications to users via presenting them in a professional manner.
Android apps in the store
As stated in Windows 11 unveiling and presentation, Android apps will work inside Windows 11. Microsoft has teamed up with Amazon to bring you Android apps directly inside Windows via the new Microsoft store.
Pop up store from within a browser
When you are surfing on a certain webpage and want to save and install the application from there, a new pop-up store window will show allowing you to install the app directly.
Microsoft has not said will this feature work outside their Edge browser so we will have to wait and see about that.
Support for multiple types of applications
Since now developers were tied to certain formats if they wanted to publish their application in any kind of environment. Microsoft wants to bridge this.
Windows developers can publish any kind of app, regardless of app framework and packaging technology – such as Win32, .NET, UWP, Xamarin, Electron, React Native, Java, and even Progressive Web Apps.
For Progressive Web Apps Microsoft has made open-source tool PWABuilder 3.
Flexibility and choice of commerce platform
Starting July 28, app developers will also have an option to bring their own or a third-party commerce platform in their apps, and if they do so they don’t need to pay Microsoft any fee. They can keep 100% of their revenue.
It really sucks when you can’t fully enjoy the newest version of your favorite OS.
Windows 11 is still relatively fresh and consequently has some annoying little bugs that really ruin our experience. The good news is that you’re not alone and most of them are easy to fix.
Here are 5 commonly reported Windows 11 issues and what you can do to get rid of them.
1. Windows 11 audio problems
One of the absolute most irritating things in the world is struggling with the sound on your computer. Windows 11 users have reported facing the issue of low or no sound. If you’re currently experiencing the same frustration, you can be relieved. Chances are fixing it will only take a few minutes.
The first thing to check would be whether you accidentally muted your device by pressing the mute button on your keyboard. Yes, we know it sounds a lot like the old “have you tried turning it off and on again?” But it’s important to leave no stone unturned, and the most obvious things are usually the ones we easily overlook.
Moreover, if you have several audio output sources, check whether the right one is selected. You can do this via the Action Center or through Settings. If you want to use the same source every time, we also recommend you set it as the default one.
It’s also important to have a good, up-to-date audio driver. More often than not, this will be the true cause of your audio struggles. Make sure to update your driver, and if that doesn’t work out, you can always un- and reinstall it or install a different one.
Lastly, if all attempts remain unsuccessful, run the audio troubleshooter to figure out what’s actually going wrong.
2. Unable to find files
Such a powerful new operating system, yet it can’t seem to do the simplest thing imaginable? The File Explorer not responding on Windows 11 is one of the most frustrating and most common problems with Microsoft’s newest iteration of its awesome OS.
However, 9/10 times it can be fixed by simply restarting your PC. You could also try killing the Windows Explorer process in the Task Manager and then rerunning it.
If these don’t help, check whether there are any pending Windows 11 updates. A single missing update can compromise your PC’s functionality, so always make sure to install them all on time.
Should none of that work, then there are other ways to solve the File Explorer problem. However, then the issue is probably a bit deeper and it’s no longer in the ‘easy fix’ territory.
3. Start menu not working
Just like the File Explorer, the Start menu is a fundamental element of your OS. So, it’s only natural that its malfunction grinds your gears. It may be more customizable than on previous Windows versions, but it doesn’t always work smoothly.
If you’re facing the so-called Start menu critical error, there are a few things this could be caused by. Usually it means you turned off your system while an important update was still being installed, there is a corrupt file on your PC, or Windows forcefully stopped a program.
Whatever the reason, the solution should be pretty simple. Try the basic steps: restarting your File Explorer (like we explained above) and signing out and back into your account. If that doesn’t do anything, you may want to try uninstalling third-party start menu apps (if you have any), since they can interfere with your default programs’ functionality.
Now, those are the easy fixes. If you get nowhere with them, you might need to identify the root cause and search for more complex solutions than that.
4. Snipping tool not working
Our beloved screenshot tool was introduced with Windows 10 and Microsoft decided to keep it. However, you were probably just as disappointed as us when you tried to run it and failed.
Normally, this can be fixed by installing the latest Out-of-band (OOB) update, or even pending updates in general. Even if your system appears to be up-to-date, run the checker just in case.
Another cool thing Windows 11 lets you do is ‘Repair’ and ‘Reset’, which is the easiest way to troubleshoot your Snipping tool. If this fails, you can also try the good old un- and reinstall method. Simply uninstall the tool through the Control Panel and reinstall it from the Microsoft Store.
Furthermore, in the case of an upgrade from Windows 10 to 11, it may be that the old Snipping tool version is interfering with the launch of the new one. If you don’t care that much about the additional options available with the enhanced screenshot tool, you can use the old version instead.
Simply go to your C Drive, find the Windows.old folder, search for the tool and open it from there. Make sure to pin it to your taskbar as well, if you know you’re going to use it often.
5. Can’t install the latest update
The latest Windows 11 version, 22H2, has brought tons of enhancements to our dearest operating system. Unfortunately, a lot of users still haven’t had the opportunity to experience it. A mere update of your OS version should be the one thing that goes smoothly, but sometimes that’s not the case.
Failure to install 22H2 can be caused by a few things. Most commonly, the issue is caused by lack of storage space or corrupted files, but there could be other culprits.
There are a couple of things you could try. For example, it’s crucial that your drivers be up-to-date and some important services be enabled. These are: Windows Modules Installer, Background Intelligent Transfer Service, Cryptographic Service, Windows Update services.
To enable them, search ‘Services’, find the service you need and right-click on it. Open ‘Properties’ and select the startup type ‘Automatic’.
It may also be necessary to unplug all peripherals that aren’t crucial and disable third-party antivirus tools until after the update is finished.
Ultimately, you can run the Windows Update troubleshooter to detect and fix other possible issues.
Summary
Tiny bugs like these are nothing out of the ordinary. That said, we still all hate when they happen.
Hopefully some of our solutions have helped you to a smoother Windows 11 experience. But if you’re still struggling, feel free to reach out to us. We’d be happy to help!

 In this guide, we will show you common ways in fixing Extended Attributes are inconsistent errors inside your Windows that are easy to do and less time-consuming than complete reinstallation of the system.


 New Microsoft store


