Error Code 0x8024001b- What is it?
At its most basic level, Error Code 0x8024001b is an error that can cause problems with the installation and updates of software and operating system updates. The most common version of this error appears in Windows 10, but a similar error with a matching code number has been present in previous versions of the operating system, back through Windows 7.
Common symptoms include:
- Programs freezing or locking up during use
- The appearance of an error message regarding installation difficulties
- Computer shutting down or freezing during operation
- Difficulty in running multiple programs at the same time
Solution
 Error Causes
There are two main causes for Error Code 0x8024001b, both of which are fairly simple: Updates needed for the Windows Update tool itself and software that causes Windows Update to fail during installations through conflicts in system files. While these may seem like technical issues, these problems are actually easily resolved with a few simple steps. The average user can use the methods listed below to fix the problems on their own.
Further Information and Manual Repair
For users who want to address Error Code 0x8024001b for themselves, the steps below can be followed to address the two primary causes for the error. If you have difficulty in completing these steps or are not confident in your computing skills and ability to follow the listed steps, contact a Windows repair technician.
Here are the top methods to resolve Error Code 0x8024001b on your own:
Method One: Check for Updates to Windows Update
In some cases, the Windows Update tool may need an update for itself. When you attempt to run updates or install wizards for other software, it can cause conflicts with the Windows Update process, slowing down your computer or causing it to freeze.
If you are attempting to run multiple installations or updates at the same time, it may also cause Error Code 0x8024001b to arise on your computer.
To resolve this issue, close out all programs, with the exception of the Windows Update tool. Within the tool, select “Check for Updates” and install any updates that are needed. When finished, you should restart your computer to ensure that all updates have been fully applied before attempting any other installations or updates.
Method Two: Uninstall Conflicting Software
Another problem that can cause Error Code 0x8024001b is the presence of conflicting software. If Error Code 0x8024001b has only recently appeared on your computer, consider removing any software that has been added to your computer, running the Windows Update process, and restarting your computer before attempting to reinstall the problem software.
With any method that you use, it is important to remember to keep your Windows Updates current at all times. This is the best way to avoid the appearance of Error Code 0x8024001b and similar errors in the future, as stacked up updates are more likely to cause issues and conflicts with your other installed software and operating system.
While there are some tools out there that claim to be able to fix Error Code 0x8024001b for you, it is important to always thoroughly investigate the publisher and distributor of such software, as some of the tools available on the Internet will actually introduce malware and adware on your computer in the name of “protecting” your computer or resolving an error.
If you have tried to use both methods above and have not fully resolved Error Code 0x8024001b, get in touch with someone who is a qualified computer repair professional and is familiar with your particular version of the Windows operating system to assist you in finalizing your resolution.
Method Three: Use An Automated Tool
If you wish to always have at your disposal a utility tool to fix these Windows 10 and other related issues when they do arise, download and install a powerful automated tool.

 Valve has officially announced that Steam Deck will be compatible with Windows 11 despite TPM 2.0 Microsoft requirements.
From the beginning, Deck was announced like a mini handheld PC device. Powered with new Steam OS 3.0 based on Linux. However, besides out-of-the-box OS it was also stated that Deck will be a personal device meaning that other PC-based operating systems could be installed on it and even run your typical applications in it.
Since Microsoft announced Windows 11 hardware requirements, specifically the TPM 2.0 requirement many users voiced concern that Steam Deck will not be able to connect to Windows 11
TPM 2.0 is something that Microsoft requires for every internal and hardware component that is to connect on a Windows 11 device. This is to ensure that only trusted devices would be included in the array of a PC setup and avoid any problems like malicious hardware injecting software into a system.
This would also minimize the compromise Windows would have, as unverified or untrusted devices connect to a Windows PC.
However, Valve and AMD are ensuring us that Deck will not have any issue connecting to a PC running Windows 11 or even if you wish to transform Deck itself into a Device running Windows 11.
Valve has officially announced that Steam Deck will be compatible with Windows 11 despite TPM 2.0 Microsoft requirements.
From the beginning, Deck was announced like a mini handheld PC device. Powered with new Steam OS 3.0 based on Linux. However, besides out-of-the-box OS it was also stated that Deck will be a personal device meaning that other PC-based operating systems could be installed on it and even run your typical applications in it.
Since Microsoft announced Windows 11 hardware requirements, specifically the TPM 2.0 requirement many users voiced concern that Steam Deck will not be able to connect to Windows 11
TPM 2.0 is something that Microsoft requires for every internal and hardware component that is to connect on a Windows 11 device. This is to ensure that only trusted devices would be included in the array of a PC setup and avoid any problems like malicious hardware injecting software into a system.
This would also minimize the compromise Windows would have, as unverified or untrusted devices connect to a Windows PC.
However, Valve and AMD are ensuring us that Deck will not have any issue connecting to a PC running Windows 11 or even if you wish to transform Deck itself into a Device running Windows 11. 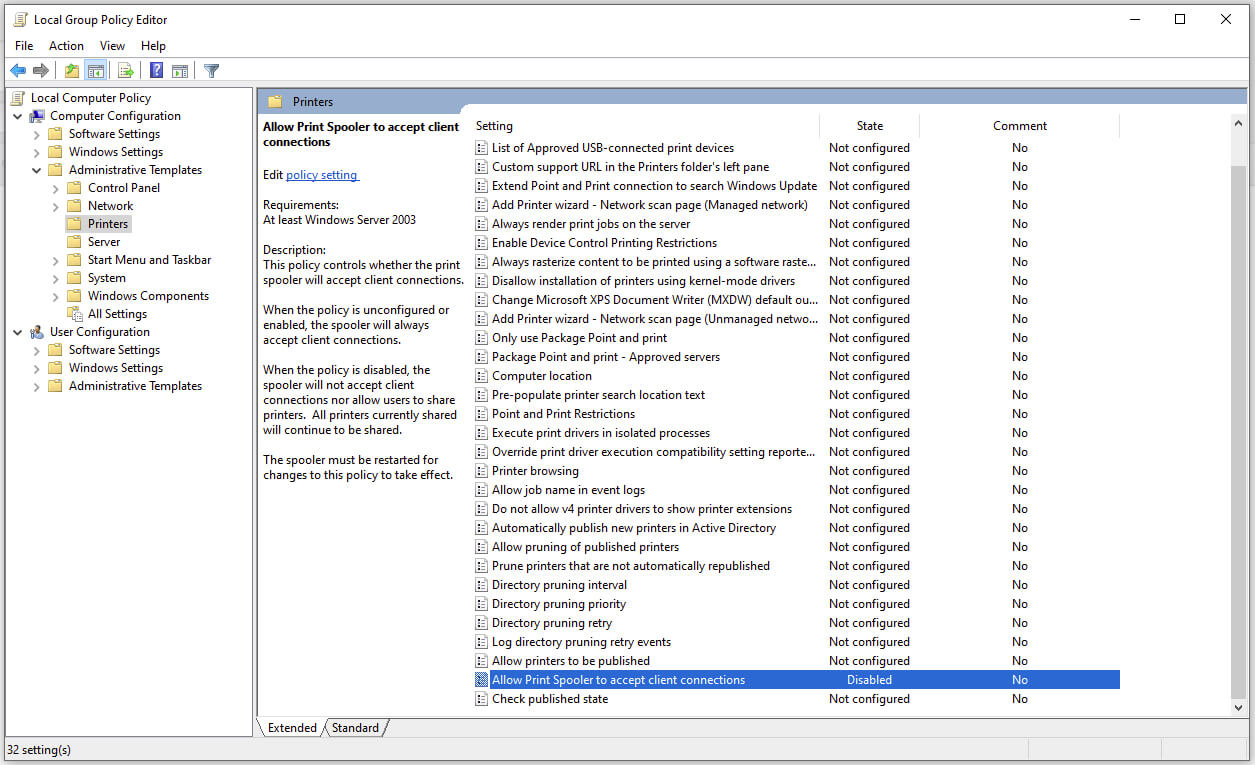 Microsoft is once again advising its customers to disable Windows print spooler after a new vulnerability that allows hackers to execute malicious code on machines has emerged. While a patch fixing the flaw will be released in due course, the most effective workaround currently on the table is to stop and disable the print spooler service entirely.
 When Task Manager opens, click on the startup tab on top.
 Once you click on startup you will get a list of applications that are set to be started when Windows is booted.
 You can now click on the application and then click on disable on the bottom button, the application status will update in task manager to disabled and it will not be booted anymore when Windows starts. In this same manner, you can enable back some applications if you changed your mind about them.
Please note that some applications are using some services and must have them running or they will not work properly. The best practice is to disable applications you are positive you will not use or use rarely so you do not want them to slow down Windows.
You can now click on the application and then click on disable on the bottom button, the application status will update in task manager to disabled and it will not be booted anymore when Windows starts. In this same manner, you can enable back some applications if you changed your mind about them.
Please note that some applications are using some services and must have them running or they will not work properly. The best practice is to disable applications you are positive you will not use or use rarely so you do not want them to slow down Windows.