Android apps inside Windows 11

Android apps inside Windows 11The euphoria around Windows 11 is not dying and reveal that Android apps will work natively inside Windows 11 has raised many emotions and questions.

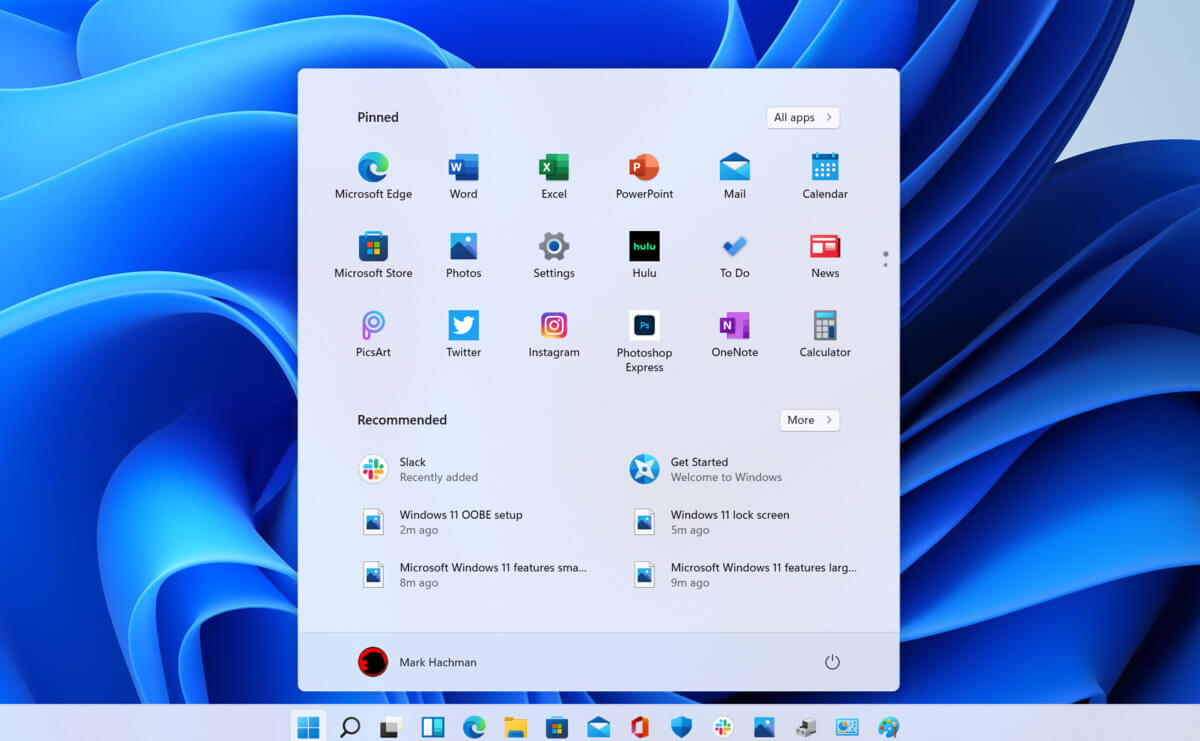
So, Microsoft has announced that Android apps will run natively inside Windows 11 OS and that they will reside alongside your other installed ones as icons, etc.

It is no secret that many users have been using emulation software to run Android apps inside Windows so far, so what is the difference?

It is still emulation

Whatever you would like to believe it is still emulation and Android apps are at the end of the day still Android apps running inside emulated environment.

This time we will not need third-party emulation software running inside Windows, we will have third-party emulation services running inside Windows.

Intel has teamed up with Microsoft in order to integrate Intel bridge algorithms in order to run Android apps, meaning that yea, pretty much we have emulation services running in order to run the application.

The problem with this kind of approach is that well emulation software is running and consuming system resources only when we start it, this kind of service is always running and always consuming resources and for someone who really does not care about Android apps at all, this is just a waste of resources.

Android store

The store is another issue here, instead of the Google play store we will have the Amazon app store integrated inside the new Microsoft store.

This means that any kind of for example game progress or login information from Google store cannot be transferred into Windows 11, add to that information that in the Amazon app store there are tons of missing applications like SLACK, TRELLO, BitWarden, etc and we might have a serious question here about the use of this feature.

Android apps that do not use Android services

If you even look past that it is still emulation and that it is available on the Amazon app store there is still concern about applications not using Google services for their running.

Many Android apps are relying on Google services like location or optimize their use of on-device resources, handle in-app purchases, etc. that cannot be found on this system.

Uber is a prime example that uses Google location service to determine your location and for its mapping data, with that application, is useless.

Other like Guardian will even pop up message that says Google play service is required in order to even work.

Android apps without Eero system

Amazon Eero system for enhanced internet access is not even yet available in its own app store which brings us to missing some key players like Bank of America, Chase mobile, Bueller, etc.

And across the board, the apps that are present in the Amazon Appstore are often as good as abandoned. Lots of titles are numerous versions behind their up-to-date Play Store counterparts, and plenty of programs you encounter in the Amazon environment clearly haven't been touched in years.

Conclusion

Many new Windows 11 features are quality features that I personally consider good but although this one seems innovative and good I simply cannot stand back it up.

Android apps were already inside Windows with emulation software which used google services and was working just fine, this was not needed in my opinion.

Do You Need Help with Your Device?

Our Team of Experts May Help
Troubleshoot.Tech Experts are There for You!
Replace damaged files
Restore performance
Free disk space
Remove Malware
Protects WEB browser
Remove Viruses
Stop PC freezing
GET HELP
Troubleshoot.Tech experts work with all versions of Microsoft Windows including Windows 11, with Android, Mac, and more.

Share this article:

You might also like

Checking the Bluetooth Battery level
In case you don’t know, Windows 10 now allows users to check the Bluetooth battery level of devices. More often than not, the accessories or peripherals users use for their Windows 10 devices are connected to it using Bluetooth technology. This high-speed low-powered wireless technology is designed to link mobile devices, computers, and other network devices over a short distance wirelessly. Monitoring the battery level of a device where Bluetooth is enabled isn’t an easy task as most of these devices do not support the Bluetooth battery monitor or the battery level display. And even when on devices that do, you still have to install additional software to find it. However, Windows 10 eliminates this requirement and all you have to do is add a Bluetooth device and connect that Bluetooth device. How? Follow the instructions provided below. Step 1: Adding a Bluetooth Device The easiest way to get your Bluetooth device battery to be displayed on your Windows 10 screen is to simply add a Bluetooth device. To do so, follow these sub-steps:
  • First, turn on the Bluetooth mode on your device.
  • Next, go to Windows Settings > Devices > Bluetooth & other devices.
  • From there, click on the “+” button next to the ‘Add Bluetooth or other devices” option and select the type of device you want to add.
Step 2: Connecting the Bluetooth Device Once you’ve added the device, it will be visible under the “Add a device” screen.
  • Now select the newly added Bluetooth device and click the “Done” button.
  • After that, it will now be connected. Go back to the “Bluetooth & other devices” window and scroll down to the section of “Mouse, Keyboard, and Pen”.
  • From there, move the cursor alongside the connected device to display its battery level.
Keep in mind that there are several ways in which you can display the battery information of the Bluetooth device. However, Windows 10 understands only one of them per se. So if your device is not a Bluetooth Low Energy device, Windows 10 won’t be able to show its battery information and won’t display its battery level.
Read More
Fix MUP_FILE_SYSTEM Blue Screen Error
If you encounter the MUP_FILE_SYSTEM Blue Screen error with a value of 0c00000103, then it indicates that the multiple UNC provider or MUP has got an invalid of unexpected data. This can lead to the fact that the MUP cannot channel a remote file system request to a network redirector, the UNC, or Universal Naming Convention provider. There are several ways you can fix the MUP_FILE_SYSTEM Blue Screen Error on your Windows 10 computer, you can try to check the hardware of your computer physically, update or rollback some device drivers, run the Driver Verifier Manager, remove any hardware you’ve installed recently or fix issues related to IRQ. Use the given options below as reference to fix the MUP_FILE_SYSTEM Blue Screen Error.

Option 1 – Try to physically check the hardware

The first thing you can do is to check the physical status of the hardware in your computer. You can clean the dust off the hardware components like the Network Card of the computer. You might want to use a small blower or you could also use a soft cloth and run the components gently. Make sure that you don’t damage any parts with moisture or cause harm to any circuits while you carry out this task.

Option 2 – Try to rollback, update several device drivers

You can try to roll back, update or disable certain device drivers on your computer to resolve the MUP_FILE_SYSTEM Blue Screen error.
  • First, boot your computer into Safe Mode.
  • After that, tap the Win + R keys to launch Run.
  • Type in devmgmt.msc into the box and tap Enter or click OK to open the Device Manager.
  • After that, a list of device drivers will be displayed. From there, look for the device drivers related to the Network Card, Chipset, Disk Drive, and the Graphics Drivers and any other driver related to MUP.sys and SwapBuffers.sys system files
  • After that, right-click on each entry of the device drivers and select the “Update Device” option from the menu.
  • Now follow the next on-screen instructions that appear and then restart your computer.
  • After restarting your computer, check if the Stop error is now fixed.

Option 3 – Configure the Driver Verifier Manager

The Driver Verifier Manager is another tool in Windows that could help you fix driver-related issues. And so if you want to fix the MUP_FILE_SYSTEM Blue Screen error you need to use the Driver Verifier Manager:
  • Type in the keyword “Verifier” in the Cortana search box to search for Verifier in Windows 10.
  • After that, select the option “Create custom settings”.
  • Make sure that you have checked everything except the options “DDI compliance checking” and “Randomized low resources simulation”.
  • Next, select the option “Select driver names from a list” option.
  • Afterward, you have to select all the drivers from any unofficial or third-party provider. To simply put it, you have to select all the drivers that are not supplied by Microsoft.
  • Then click on the Finish button.
  • Open Command Prompt as administrator and execute this command – verifier /querysettings
  • The command you just executed will display the Driver Verifier settings so if you see any of the flags enabled boot your Windows 10 PC into Safe Mode.
  • Open the Command Prompt as admin again and run this command – verifier /reset
  • The command will reset the Driver Verifier. Once the process is done, restart your PC and check.

Option 4 – Try to disconnect or disable newly installed hardware

In this option, you will have to disable or remove the hardware you’ve just installed recently since external devices could be the one that’s causing the Blue Screen of Death error to appear. To do that, just disconnect any external device that’s connected to your computer physically and then check if it fixes the MUP_FILE_SYSTEM Blue Screen error.

Option 5 – Try fixing IRQ-related issues

The Stop error might have something to do with an issue related to IRQ. You can verify it by switching your PCI Cards around. Aside from that, you can also check if the IRQ2 is assigned to a COM Port that is unavailable at that time.

Option 6 – Run the Blue Screen Troubleshooter

The Blue Screen troubleshooter is a built-in tool in Windows 10 that helps users in fixing BSOD errors like MUP_FILE_SYSTEM. It can be found in the Settings Troubleshooters page. To use it, refer to these steps:
  • Tap the Win + I keys to open the Settings panel.
  • Then go to Update & Security > Troubleshoot.
  • From there, look for the option called “Blue Screen” on your right-hand side and then click the “Run the troubleshooter” button to run the Blue Screen Troubleshooter and then follow the next on-screen options. Note that you might have to boot your PC into Safe Mode.

Option 7 – Perform a System Restore

Performing System Restore might help you in fixing the Blue Screen error. You can do this option either by booting into Safe Mode or in System Restore. If you are already in the Advanced Startup Options, just directly select System Restore and proceed with the next steps. And if you have just booted your PC into Safe Mode, refer to the steps below.
  • Tap the Win + R keys to open the Run dialog box.
  • After that, type in “sysdm.cpl” in the field and tap Enter.
  • Next, go to the System Protection tab then click the System Restore button. This will open a new window where you have to select your preferred System Restore point.
  • After that, follow the on-screen instructions to finish the process and then restart your computer and check if the problem is fixed or not.
Read More
Remove Polimva from your PC

Polimva is a Browser Extension for Google Chrome. This extension offers users the ability to search for any recipe on the web.

From the Author:

Polimva will help you discover new content! You will be exposed to cool and fun content every day! You can search and find new articles, videos, and reviews on daily basis.

-Amazing search experience. -Access to new interesting articles and videos every hour. -Polimva Changes the default search. -Updated content every day. -Follow any channel and topic that you like. -Choose the interface and the design of the results you get every time.
This extension changes your default search engine to Yahoo, and while active it changes the displayed ads on your browser, allowing it to make revenue on every ad you click. While this is not malicious, the extension redirects your search to its servers first before forwarding it to yahoo and displaying search results. The information that is sent back to the servers contains your browsing data & visited web pages. As a result, Polimva is considered a potentially unwanted browser hijacker and if flagged for optional removal.

About Browser Hijackers

Browser hijackers (also known as hijackware) are a kind of malware that modifies internet browser settings without the computer owner’s knowledge or approval. These kinds of hijacks appear to be rising at an astonishing rate worldwide, and they could be truly nefarious and often harmful too. They are designed to disrupt browser functions for many different reasons. It redirects you to the sponsored websites and injects adverts on the browser which helps its developer generate ad revenue. Even though it might seem naive, all browser hijackers are damaging and therefore always regarded as security threats. What’s more, hijackers could make the entire infected system vulnerable – other destructive malware and viruses will grab these opportunities to get into your computer system effortlessly.

Indications of browser hijack

Here are some signs that suggest you’ve been hijacked: 1. your browser’s home page is reset to some unfamiliar webpage 2. bookmark and the new tab are also modified 3. the default web browser configurations have been changed and/or your default web engine is altered 4. you see multiple toolbars on your web browser 5. your internet browser displays endless pop-up windows 6. your internet browser starts running slowly or displays frequent errors 7. you’re disallowed access to certain websites, for example, the website of an antimalware software manufacturer like SafeBytes.

Exactly how browser hijacker infects PCs

Browser hijackers can enter a PC in some way or other, including via downloads, file sharing, and email also. They can also come from any BHO, extension, add-on, toolbar, or plug-in with malicious purpose. Some internet browser hijackers spread in user’s PC by using a deceptive software distribution method called “bundling” (generally through freeware and shareware). Some of the popular hijackers are Polimva, Conduit Search, Babylon Toolbar, OneWebSearch, Sweet Page, and CoolWebSearch.

The best ways to remove a browser hijacker

Some browser hijacking could be simply corrected by finding and removing the corresponding malware software from your control panel. Unluckily, many of the software applications used to hijack an internet browser are deliberately built to be difficult to remove or detect. You should think of doing manual fixes only if you’re a tech-savvy person since there are possible risks associated with tinkering around with the computer registry and HOSTS file. You can opt for automatic browser hijacker removal methods by simply installing and running an efficient anti-malware program. If you need to get rid of persistent hijackers effectively, install the top-rated, award-winning anti-malware software Safebytes Anti-Malware.

Malware Blocking Internet And All Anti-Malware Software? Do This!

Malware could cause many different types of damage to computer systems, networks, and data. Some malware variants alter browser settings by adding a proxy server or modify the PC’s DNS settings. In such cases, you will be unable to visit certain or all of the websites, and thus unable to download or install the required security software to eliminate the malware. So what to do when malicious software prevents you from downloading or installing Safebytes Anti-Malware? There are a few steps you can take to circumvent this issue.

Use Safe Mode to fix the issue

Safe Mode is a special, simplified version of Microsoft Windows where just bare minimum services are loaded to counteract viruses and also other troublesome applications from loading. In case the malware is set to load immediately when the computer starts, shifting into this mode may well prevent it from doing so. In order to get into Safe Mode or Safe Mode with Networking, press F8 while the computer is starting up or run MSConfig and find the “Safe Boot” options in the “Boot” tab. Once you are in safe mode, you can attempt to install your anti-malware software application without the hindrance of the malicious software. Now, you could run the anti-virus scan to eliminate viruses and malware without any interference from another application.

Switch over to a different browser

Certain malware might target vulnerabilities of a specific web browser that block the downloading process. In case you suspect that your Internet Explorer has been hijacked by a trojan or otherwise compromised by cybercriminals, the ideal thing to do would be to switch to an alternate browser such as Mozilla Firefox, Google Chrome, or Apple Safari to download your chosen computer security software – Safebytes Anti-Malware.

Install security software on a thumb drive

To successfully eliminate the malware, you might want to approach the issue of running an anti-malware software program on the affected computer system from a different angle. Follow these steps to run the anti-malware on the infected computer. 1) Download the anti-malware on a virus-free PC. 2) Plug in the pen drive to a USB slot on the clean computer. 3) Run the setup program by double-clicking the executable file of the downloaded software, with a .exe file format. 4) Choose a USB flash drive as the location when the wizard asks you exactly where you want to install the program. Follow the instructions on the computer screen to finish off the installation process. 5) Now, plug the pen drive into the corrupted computer. 6) Double-click the EXE file to run the Safebytes software from the thumb drive. 7) Click on “Scan Now” to run a scan on the infected computer for viruses.

A Look at the Best Anti-Malware Program

Want to install the very best anti-malware software for your desktop? There are numerous applications on the market that comes in free and paid versions for Microsoft Windows computers. Some of them are good, some are ok types, and some will destroy your computer themselves! You must be very careful not to choose the wrong product, particularly if you purchase a paid program. On the list of recommended software by industry experts is SafeBytes Anti-Malware, well-known security software for Windows computers. SafeBytes anti-malware is really a powerful, highly effective protection application created to assist end-users of all levels of IT literacy in identifying and removing malicious threats out of their PC. With its outstanding protection system, this software will automatically detect and eliminate most of the security threats, including adware, viruses, browser hijackers, ransomware, trojans, worms, and PUPs. There are plenty of wonderful features you will get with this particular security product. Listed below are a few of the great ones: Robust, Anti-malware Protection: By using a critically acclaimed malware engine, SafeBytes gives multilayered protection that is made to catch and remove viruses and malware that are hidden deep inside your PC. Live Protection: SafeBytes gives you round-the-clock protection for your personal computer limiting malware intrusions instantly. This software will constantly monitor your computer for suspicious activity and updates itself continuously to keep current with the constantly changing threat scenarios. Safe Web Browsing: Through its unique safety rating, SafeBytes tells you whether a website is safe or not to visit it. This will assure that you’re always certain of your safety when browsing the internet. Lightweight Tool: SafeBytes is a lightweight and easy-of-use anti-virus and anti-malware solution. As it utilizes very little computer resources, this application leaves the computer power exactly where it belongs to: with you. 24/7 Support: Expert technicians are at your disposal 24/7! They will quickly fix any technical issues you may be experiencing with your security software. Put simply, SafeBytes has formulated a meaningful anti-malware solution that is aimed to protect your computer against various malware. Malware problems can become a thing of the past when you put this application to use. So if you’re searching for the very best malware removal application out there, and when you don’t mind shelling out a few bucks for it, opt for SafeBytes Anti-Malware.

Technical Details and Manual Removal (Advanced Users)

To get rid of Polimva manually, navigate to the Add or Remove programs list in the Control Panel and choose the program you want to get rid of. For browser plug-ins, go to your browser’s Addon/Extension manager and select the plug-in you intend to disable or remove. You might even want to reset your home page and search engine providers, and also delete browsing history, temporary files, and internet cookies. If you choose to manually delete the system files and Windows registry entries, use the following checklist to make sure you know exactly what files to remove before undertaking any actions. However, this can be a complicated task and only computer experts can accomplish it safely. Furthermore, certain malware keeps replicating which makes it tough to eliminate. You are advised to do this process in Windows Safe Mode.
Files: %UserProfile%\Local Settings\Application Data\Google\Chrome\User Data\Default\Extensions\epngjnkooalbmphkdlahcdhnfondeicc Registry: HKEY_CURRENT_USER\Software\Microsoft\Windows\CurrentVersion\Run HKEY_LOCAL_MACHINE\SOFTWARE\Microsoft\Windows\CurrentVersion\Run HKEY_LOCAL_MACHINE\SOFTWARE\Wow6432Node\Microsoft\Windows\CurrentVersion\Run
Read More
Fix Windows Update Error Code 0x80246017
Updating your Windows 10 computer isn’t always as easy as it should be since there are times when you might encounter some errors along the way. One of these errors is the error code 0x80246017 that comes with the error message “WU_E_DM_UNAUTHORIZED_LOCAL_USER”. According to Microsoft, the cause of this particular Windows Update error is that “The download failed because the local user was denied authorization to download the content”. So if you got this error when you tried updating your computer, read on as this post will provide you some suggestions on how you can fix it. Before you troubleshoot the problem using the options given below, make sure that you are logged in as administrator. If you are already logged in as an administrator, follow each one of the options carefully.

Option 1 – Try to check the status of some Windows Update Services

  • Tap the Win + R keys to open the Run dialog box.
  • Next, type “services.msc” in the field and hit Enter or click OK to open Services.
  • From the list of Services, look for the following services and make sure that their Startup type is as follows:
    • Windows Update – Manual (Triggered)
    • Background Intelligent Transfer Service – Manual
  • After that, check if the Service status of the listed services above is set to Running. If they’re not, click on the Start button to start these services and then check if you can now enable the Windows Update service or not.

Option 2 – Try to grant Full Control of the System Volume Information directory

  • First, tap the Win + X key combination and then select Command Prompt (Admin) from the given menu.
  • After opening Command Prompt with admin privileges, type the following command and tap Enter to execute it:
c md.exe /c takeown /f "C:System Volume Information*" /R /D Y && icacls "C:System Volume Information*" /grant:R SYSTEM:F /T /C /L
  • Once the command is executed, it will run a batch of tasks and will show each one of their statuses on the command line window and once they’re done, exit Command Prompt.
  • Now restart your computer and see if it fixed the problem or not.

Option 3 – Try to disable your antivirus program or Firewall

Disabling the antivirus program or Firewall or any other security software installed in your computer is always a good idea you can try when the Windows Update process does not go smoothly. So before you try updating your computer again, make sure to disable the antivirus or security program and once the Windows Update is done, don’t forget to enable the antivirus program back again.

Option 4 – Try running the DISM tool

You can try running the Deployment Imaging and Servicing Management or DISM tool to fix the Windows Update error. Using this built-in tool, you have various options such as the “/ScanHealth”, “/CheckHealth”, and “/RestoreHealth”.
  • Open the Command Prompt with admin privileges.
  • Then type in the following commands and make sure to hit Enter right after you type each one of them:
    • Dism /Online /Cleanup-Image /CheckHealth
    • Dism /Online /Cleanup-Image /ScanHealth
    • exe /Online /Cleanup-image /Restorehealth
  • After that, wait until the process is finished and do not close the window as the process will probably take a couple of minutes.
  • Once it’s done, restart your computer.

Option 5– Run the Windows Update Troubleshooter

If the DISM tool didn’t work in fixing the error, you could also try running the Windows Update Troubleshooter as it could also help in fixing any issues related to Windows Update including the Windows Update error code 0x80246017. To run it, go to Settings and then select Troubleshoot from the options. From there, click on Windows Update and then click the “Run the troubleshooter” button. After that, follow the next on-screen instructions and you should be good to go.

Option 6 – Run Microsoft’s online troubleshooter

Running Microsoft’s online troubleshooter might also help you fix the Windows Update error code 0x80246017. This online troubleshooter is known to help in fixing Windows Update errors, it scans your computer for issues that might be causing the problem and then fixes them automatically.
Read More
Fix Update and MS Store Error code 0x80070424
As you know, both the Windows Update and Windows Store are inter-dependable services in Windows 10 operating system. So when one of these services encounters an error like the “0x80070424, ERROR_SERVICE_DOES_NOT_EXIST”, the other service will most likely get this error as well. Note that this kind of error can occur to both the Windows Update Standalone Installer and to the Windows Update section in the Windows 10 Settings app. Some users also reported getting this error while trying to update Windows Defender as well. You can see the following error message in the Windows Update Standalone Installer:
“Installer encountered an error: 0x80070424, The specified service does not exist as an installed service.”
While you’ll see the following error message in the Windows Store:
“The were some problems installing updates, but we’ll try again later. If you keep seeing this and want to search the web or contact support for information, this may help: (0x80070424).”
To fix this error, you can try to re-register the Background Intelligent Transfer Service DLL file or run the Windows Update and Store apps troubleshooters. You can also reset the Windows Update-related folders or the Microsoft Store or fix the Windows Update files by using the DISM tool. On the other hand, you can also use the Registry Editor or check Windows Services. For more details regarding these potential fixes, refer to each one of the given options below.

Option 1 – Try to re-register the Background Intelligent Transfer Service DLL file

You may have to re-register the Background Intelligent Transfer Service DLL file using the regsvr32.exe before you can successfully install the program and fix ntdll.dll file crash error. The Regsvr32 tool is a command-line utility that can be used to register and un-register OLE controls as DLL and ActiveX (OCX) controls in the Windows operating system. Follow the steps below to use it.
  • Open Command Prompt as admin from the WinX menu.
  • Next, type the following commands in the elevated Command Prompt and hit Enter to execute the command. This will re-register the affected DLL file using the Windows operating system tool, regsvr32.exe.
    • regsvr32 Qmgr.dll /s
    • regsvr32 Qmgrprxy.dll /s
Note: Replace “[DLL file]” with the name of the DLL file that was pointed out in the error.
  • After you execute the given commands, you should see a message saying, “DllRegisterServer in vbscript.dll succeeded” if the Regsvr32 tool was able to run successfully.
  • Now restart your computer and check if the error is now fixed.

Option 2 – Try to run the Windows Store or the Windows Update Troubleshooters

The Windows 10 Store Apps Troubleshooter will help you in fixing the Error code 0x80070424. This is a great built-in tool from Microsoft that helps users fix any app installation issues. So this is worth a try to solve the problem. This built-in tool also helps you fix the Windows 10 Store if it isn’t working. To use the Windows Store Troubleshooter, follow the steps below.
  • Tap Win + I keys again to open the Windows Settings panel.
  • Go to Update & Security and then go to Troubleshoot.
  • On your right hand side, scroll down to find the Windows Store Apps and then click on Run the troubleshooter option and see if it fixes the problem.
Note: You can also try running the Windows Update troubleshooter to fix the error. You can run it under the Windows Update section of Update & Security.

Option 3 – Delete the files from Software Distribution Folder & Catroot2 folders

The downloaded Windows Updates are placed in a folder called “SoftwareDistribution”. The files downloaded in this folder are automatically deleted once the installation is completed. However, if the files are not clean up or if the installation is still pending, you can delete all the files in this folder after you pause the Windows Update service. For complete instructions, refer to these steps.
  • Open the WinX Menu.
  • From there, open Command Prompt as admin.
  • Then type in the following command – don’t forget to hit Enter right after typing each one of them.
net stop wuauserv net start cryptSvc net start bits net start msiserver
  • After entering these commands, it will stop the Windows Update Service, Background Intelligent Transfer Service (BITS), Cryptographic and the MSI Installer
  • Next, got to the C:WindowsSoftwareDistribution folder and get rid of all the folders and files there by tapping the Ctrl + A keys to select them all and then click on Delete. Note that if the files are in use, you won’t be able to delete them.
After resetting the SoftwareDistribution folder, you need to reset the Catroot2 folder to restart the services you just stopped. To do that, follow these steps:
  • Type each one of the following commands.
net start wuauserv net start cryptSvc net start bits net start msiserver
  • After that, exit Command Prompt and restart your computer and then try to run Windows Update once more.

Option 4 – Try to reset the Microsoft Store cache

Just like browsers, Microsoft Store also caches as you view apps and games so it is most likely that the cache is no longer valid and must be removed. To do so, follow the steps below.
  • Right click on the start button and click on Command Prompt (administrator).
  • Next, type in the command, “wsreset.exe” and tap Enter. Once you do, the command will clear the cache for the Windows Store app.
  • Now restart your PC and afterwards, try opening Microsoft Store again and then see if Error Code 0x80070424 is resolved or not.

Option 5 – Try to check the Windows Update or WU setting in the Registry

  • Tap the Win + R keys to open the Run utility and type “regedit” in the field and tap Enter to open the Registry Editor.
  • Next, go to this registry path: ComputerHKEY_LOCAL_MACHINESOFTWAREPoliciesMicrosoftWindowsWindowsUpdate
  • Here, look for the DWORD named “DisableWindowsUpdateAccess” and double click on it and then set its value data to “0”.
  • Exit the Registry Editor once you’re done and restart your computer.

Option 6 – Try to check the status of some Windows Update Services

  • Tap the Win + R keys to open the Run dialog box.
  • Next, type “services.msc” in the field and hit Enter or click OK to open Services.
  • From the list of Services, look for the following services and make sure that their Startup type is as follows:
    • Windows Update Service – Manual (Triggered)
    • Background Intelligent Transfer Service – Manual
    • Workstation Service – Automatic
  • After that, check if the Service status of the listed services above are set to Running. If they’re not, click on the Start button to start these services and then check if you can now enable the Windows Update service or not.

Option 7 – Run the DISM tool

You can also run the Deployment Imaging and Servicing Management or DISM tool to fix the error code 0x80070424. Using this built-in tool, you have various options such as the “/ScanHealth”, “/CheckHealth”, and “/RestoreHealth”.
  • Open the Command Prompt with admin privileges.
  • Then type in the following commands and make sure to hit Enter right after you type each one of them:
    • Dism /Online /Cleanup-Image /CheckHealth
    • Dism /Online /Cleanup-Image /ScanHealth
    • exe /Online /Cleanup-image /Restorehealth
  • Do not close the window if the process takes a while as it will probably take a few minutes to finish.
  • Once it’s done, reboot your computer and check if it has fixed the error.
Read More
Fix 0x80070037: The specified network ...
If you are trying to copy a file but suddenly encountered an error message saying, “An unexpected error is keeping you from copying the file”, then you’ve come to the right place as this post will help you resolve the problem. This error comes along with another message that states, “Error 0x80070037: The specified network resource or device is no longer available”. This kind of error occurs when the power supply to the external device is weak and causes the device to be disconnecting and reconnecting consistently. To fix this problem, you need to check out the potential fixes provided below.

Option 1 – Try to physically check the USB ports

You need to check the USB ports as there could be some ports that are loose or damaged physically which affects the overall performance of the port. You could also try to change the USB port since modern computers have a variety of USB ports. So if your USB drive supports USB 3.0 or 3.1, make sure that you plug it inside a USB 3.0 or 3.1 ports. If you’re not sure which port, just keep in mind that the USB 3 port is usually blue or you can also use your computer’s documentation or manual as a reference to locate it.

Option 2 – Check the connected cables physically

Aside from the USB ports, you also have to check the physical status of the connected cables because if there are damaged ones, just like with USB ports, it would also affect the overall connectivity of the device with the computer. So if you notice some irregularities in the connecting cable physically, you might have to buy another one and replace it and then see if it fixes the problem or not.

Option 3 – Update or reinstall the Universal Serial Bus Controller driver

Since it could be a driver issue, you can try to update or reinstall the Universal Serial Bus Controller drivers using the Device Manager. Refer to the following steps:
  • First, click the Start button and type “device manager”.
  • Then click on the “Device Manager” from the search results to open it.
  • From there, look for the “Universal Serial Bus controllers” option and then right-click on each one of the USB drivers and select the Update Driver from the menu.
Note: If it is a regular USB drive, then it will be listed as a USB Mass Storage Device but if you have a USB 3.0 device, then look for a USB 3.0 Extensible Host Controller.
  • Restart your PC and then click the “Search automatically for updated driver software” option.
Note: If updating the USB Controller drivers didn’t work, you can try to reinstall them instead.

Option 4 – Try connecting to a slower USB port

If connecting your device to USB 3.0 or 3.1 ports didn’t work, you might want to try connecting it to a slower USB port this time. There are times when the device is not capable of supporting the higher power supply from a USB 3.0 or 3.1 port which is why the weak circuits do not work properly. Thus, try connecting your device to a USB 2.0 port and check if your device is now working.

Option 5 – Try to turn off the Power Saving option

You could also try to turn off the Power Saving option to resolve the problem. All you have to do is switch to Power Management after you select the Properties of the USB device and from there, uncheck the “Allow the computer to turn off the device to save power” option. On the other hand, if you are using a laptop and did not use the USB device for a long time, then it could be powered off. This will ensure that the system does not turn off the USB device.

Option 6 – Try to connect your device to another computer

It is also possible that your computer does not support your device. To check that possibility, you can try connecting your device to a different computer and see if it is working without any issues. If it is, then you need to get another device that’s compatible with your computer.

Option 7 – Try to use a different device

You could also try using a different device and connect it to your computer. This will help you figure out if your device is damaged or not. So if the other device you connected is working just fine, then you might have to replace your device with a new one or consult an expert and have it repaired if possible.

Option 8 – Run the Hardware and Devices Troubleshooters

  • The first thing you need to do is click on Start and then on the gear-like icon to pull up the window for Settings.
  • After opening Settings, look for the Update and Security option and select it.
  • From there, go to the Troubleshoot option located on the left-hand side of the list.
  • Next, select Hardware and Devices from the list and open the Troubleshooter and run it. Once it is doing its job, wait for it to complete the process and then restart the system.
  • After the system restarts, check if the problem’s now fixed. If not, refer to the next option given below.
Read More
Step-by-Step Guide to Patching Error Code 24

Code 24 - What is it?

You may experience error code 24 when you try to use a device on your PC that is not properly installed or its driver is corrupted. Code 24 is a Device Manager error and it pops up on your computer screen in the following format:

“This device is not present, is not working properly, or does not have all its drivers installed. (Code 24)”

Solution

driverfix boxError Causes

Error code 24 may be triggered due to several reasons. However, the most common causes for this error code include:

  • Incorrect device installation
  • Hardware failure/ conflict
  • Corrupted or outdated driver
  • Device prepared for removal

It is recommended to resolve the error code to ensure your PC works at its optimal performance. Error code 24 can lower the device functionality and PC performance dramatically.

Further Information and Manual Repair

Since this error code can mean several different things, troubleshooting it can be quite tricky but to make it simple to resolve, we have listed down some easy methods to repair error code 24.

Try these methods to fix error 24 on your PC and ensure your system works at its optimal pace. Let’s get started….

Method 1 - Update the BIOS on Your Motherboard

Problems with BIOS, the controlling software in the PC motherboard, can sometimes trigger hardware conflicts resulting in Device Manager error code pop-ups.

In such a scenario, it is advisable to update BIOS. To update, go to your PC motherboard manufacturer’s website. Here you will be able to find instructions on updating BIOS.

Follow the instructions carefully to resolve error code 24 on your system. If the error code still persists, then try other methods discussed below.

Method 2 - Remove New Devices

If you experienced code 24 on your PC after installing new devices, then it is advisable to remove them to resolve the error code.

If the device is attached to your computer, then simply disconnect and remove it immediately. Once you disconnect it, reboot your system to activate changes.

Method 3 - Update Drivers

If device removal does not resolve the problem, then consider updating the device driver. Code 24 is also related to driver problems.

It can occur if a device driver is corrupted or outdated. In such an event, it is advisable to update the driver by installing the new and latest device driver version on your PC.

For doing this, simply download the latest device driver version from the manufacturer’s website and update it.

Method 4 - Install DriverFIX for Both Device Driver Update and Safe Device Removal

Finding problematic drivers and the latest device driver versions to update them, however, can be time-consuming and sometimes even frustrating. To avoid being in this situation, it is advisable to download DriverFIX.

DriverFIX is a cutting-edge, user-friendly and an innovative program exclusively designed to resolve device driver related issues and problems on computer systems

It is integrated with the newest technology and intelligent programming system that enables and empowers PC users like you to repair device driver error codes in seconds.

Once you install this software on your PC, simply run it. The software program instantly detects all problematic drivers and updates them with their latest versions available on the internet.

All this is done in mere seconds and it’s not time-consuming at all. Moreover, device driver updates are performed frequently to ensure that you don’t experience any driver problems again.

  • With this software on your PC, you don’t have to worry about updating drivers regularly.
  • In addition to this, as we discussed above, driver code 24 can also occur due to new plugged-in devices. If that’s the reason, then DriverFIX can help you resolve this problem too.
  • It can help you manage and unplug USB devices safely from your PC. After installing DriverFIX, unplugging USB devices is easy and you don’t have to worry about data corruption or drive damage.
  • DriverFIX manages USB devices smoothly by making the ejecting process easy and safely removes hardware from your PC, thereby resolving error code 24 in no time.
  • DriverFIX is easy to install and use and is compatible with all Windows versions.

Click here to download DriverFIX and repair Device Manager error code 24 right away.

Read More
Apple M2 Chip review

Direct replacement for Apple M1 Chip is near. There were some M1 Chips versions like M1 MAX and M1 ULTRA that were upgrades of the existing M1 chip, but the new and upcoming M2 is something different and it is aiming to replace M1 completely.

apple m2 chip

Made in a 5-nanometer design, with 20 billion transistors and 100GB/s of unified memory bandwidth is meant to increase performance over M1. It has the same M1 8 core design with 4 high-efficiency cores and 4 high-performance ones.

All CPU and GPU cores are faster than their M1 equivalents and Apple states that when running M1 and M2 at the same power level M2 will perform 25% faster. The first version of the chip will place focus on power efficiency so if you are more on side of being a power user wait for the MAX or ULTRA version of M2.

Tech details of M2

M2 system on a chip like its predecessor M1 combines both CPU and GPU on a single chip with shared memory in order to increase performance compared to systems that have separate CPU and GPU. M2 so far has been only announced for MacBook Air and the 13-inch MacBook Pro that suppose to hit the market somewhere around July this year. Of course, we expect that M2 is included in future iPad series or Mac Mini series as well.

  • CPU Cores: 8
  • GPU Cores: Up to 10
  • Unified Memory: Up to 24 GB
  • Neural Engine Cores: 16
  • Number of Transistors: 20 billion
  • Process: Second Generation 5nm
Read More
How to Fix Error Code 0xc004f034 in Windows 10

Error Code 0xc004f034 – What is it?

Error code 0xc004f034 occurs when Windows 10 users fail to activate their operating system. This activation error code affects not only Windows 10 but those using other versions of the Windows operating system including Windows 8.1. Users experiencing this problem will notice the following common symptoms which occur:

  • Inability to activate Windows 10 operating system
  • Message box with error code 0xc004f034

Solution

Restoro box imageError Causes

Error code 0xc004f034 usually results from issues related to activation servers. In such cases when servers are busy, users will not be able to complete the activation process which would result in access to their Windows 10 edition of choice. The error code may also result from issues related to your product key. For this reason, be sure to use the correct product key when you attempt to activate Windows 10.

Further Information and Manual Repair

The completion of manual repair methods can be an effective way to correct issues like error codes in Windows 10. To begin, however, ensure you follow the instructions as given as making even a slight mistake will result in unfavorable results. If, for whatever reason, you have trouble completing the steps suggested below, feel free to contact a Windows repair technician. This type of IT professional is usually equipped with knowledge and expertise to access your particular situation. Otherwise, see the manual repair methods listed below and complete at least one method to fix error code 0xc004f034.

Method One: Ensure You Enter a Valid Product Key

If there is a problem with your product key, you will need to ensure you fix it before you can resolve error code 0xc004f034. Follow the instructions below after ensuring you have a valid product key.

  • Step one: Click the Start button then select Settings
  • Step two: Select Update & security then Activation
  • Step three: Click the Change product key
  • Step four: Type in your valid product key with its 25 characters in the correct order

Your system will activate Windows 10 if the issue was related to the use of an invalid product key. However, attempt manual method two if error code 0xc004f034 reappears and you are unable to complete the activation process.

Method Two: Reattempt Windows 10 Activation Until Process Completes

In many cases, error code 0xc004f034 occurs simply due to a busy server. This was the case in 2015 in particular when Windows users first received access to editions of Windows 10 like Windows 10 Pro. To complete this process, you will need to follow the instructions below, repeating the last step until the activation occurs.

  • Step one: Click the Start button then select Settings
  • Step two: After selecting Settings, click Update & Security
  • Step three: Select Windows Update then the Check for updates tab
  • Step four: Click Activate Windows 10 update

If this method is successful, you will finally be able to update your system to the Windows 10 edition of your choice. This process may take just a few minutes – and several attempts – before you resolve the issue. Remember to be patient. However, contact a Windows repair technician to evaluate your system if the issue persists for more than a few days.

Method Three: Use an Automated Tool

If you wish to always have at your disposal a utility tool to fix these Windows 8 and other related issues when they do arise, download and install a powerful automated tool.
Read More
Perform Voice Activation Troubleshooting
One of the smoother things that Microsoft did with the Windows 10 operating system is to separate Cortana from Search. This means that Cortana is strictly now a voice assistant and many users have seen it coming since not everyone uses Cortana. In addition, it also paved the way for other virtual assistants like Alexa to get on board with Windows 10. And now in the newly released Windows 10 v1903, Windows has brought the Voice Activation under Privacy. In this post, you will be guided on how to perform the Voice Activation troubleshooting on your Windows 10 computer. To use Voice Activation in Windows 10, follow, in the Start Search, type “voice activation” and click on “Voice activation privacy settings” listed in the search results. And from there, you can choose to allow apps to use Microphone, like listen in the background as well as select which app can access it. Each time enabled voice assistants continue to listen via microphone for the voice keyword, the app will activate itself for the keyword and will react depending on what you ask it. So if you are using a voice assistant and it didn’t respond when you speak the keyword, just go to Settings > Privacy > Voice Activation and follow these steps:

Option 1: Check the App permission to use the voice activation feature.

You have to make sure that the toggle button for the Voice activation feature is turned on globally. It can be found under the “Allow apps to use voice activation” section. You also have to ensure that the microphone is available for apps that use this feature.

Option 2: Voice activation is not working under the lock screen.

If you tend to use the voice assistant even when your computer is locked, Microsoft has a specific setting that you have to turn on. You need to make sure that the toggle button for the “Allow apps to use voice activation when this device is locked” option is turned on. However, keep in mind that the voice assistants are not locked to only recognize your voice as they also answer to anyone who will use the voice keyword.

Option 3: Check the individual permissions of apps.

If the voice assistant is not working, you have to check each one of the apps’ permissions for voice keyword, and the option to work under locked condition works.

Option 4: Run the Microphone troubleshooter.

If you’ve verified that the settings are in place, then you have to run the Microphone troubleshooter by simply going to Settings > Privacy > Microphone. From there, make sure that the toggle button for the following options is turned on:
  • Allow apps to access your microphone
  • Enable microphone access for the voice assistant
And if it’s a desktop app, you have to enable the toggle on at the end.
Read More
1 2 3 171
Logo
Copyright © 2023, ErrorTools. All Rights Reserved
Trademark: Microsoft Windows logos are registered trademarks of Microsoft. Disclaimer: ErrorTools.com is not affiliated with Microsoft, nor claims direct affiliation.
The information on this page is provided for information purposes only.
DMCA.com Protection Status