Logo

An Easy Guide to Repairing Error Code 0x000000A5

0x000000A5 - What is this Error Code?

0x000000A5 is a stop error code also referred to as a blue screen of death error code. It is related to Advanced Configuration and Power Interface basic input/output system in Windows.

It often leads to a sudden system shut down or your system may restart unexpectedly. Blue error codes like 0x000000A5 are the most severe and dangerous types of errors Windows can encounter.

Ignoring 0x000000A5 error pop-ups and not repairing it timely can result in system crashes, valuable data loss and system failure.

Solution

Restoro box imageError Causes

The 0x000000A5 error code occurs particularly because of the ACPI BIOS error. This error message on your computer screen indicates that the Advanced Configuration and Power Interface (ACPI) BIOS of the computer is not compatible with your Windows system and is not fully compliant with the ACPI specifications.

BIOS is a set of software. Through this software, the operating system communicates with the computer’s hardware devices. The ACPI is a part of BIOS and the Windows operating system. It is the standard for the way BIOS works.

The presence of ACPI in the BIOS on a given Windows system determines whether the system can make full use of features such as Power Management or Plug and Play.

Here’s what happens: traditionally, ACPI BIOS implementation tries to manipulate hardware resources directly through BIOS code for hardware functionality nonetheless if the ACPI-based BIOS is not compliant with the ACPI standard on your system, it may not support workable communication between the operating system and the hardware.

This results in imbalance as the operations cannot be synchronized which results in system shut down, system instability, and machine failure. As a warning stop error 0x0000000A5 is displayed on the screen.

Further Information and Manual Repair

To fix the error message 0x0000005A on your PC you don’t need any professional assistance. Solving such blue screen errors in just a couple of clicks is not possible with Restoro

This is a multi-functional and feature-filled registry cleaner and system optimizer that helps PC users resolve practically every type of system instability issues and registry errors including BSoD errors like 0x000000A5.

It offers a comprehensive suite of utilities including registry cleaning, privacy issue detection and repair, system stability error identification, and Active X and Class issues detection.

This innovative and advanced PC fixer is designed to ensure and deliver optimum system performance. It scans and detects causes for 0x000000A5 error code and repairs them in seconds.

It has a neat and intuitive layout and easy navigation which makes this repair tool extremely user-friendly. Users of all levels are it novice or experienced can use it with ease and fix all types of PC-related errors like 0x000000A5 right away with no hassle. ACPI BIOS Error can be quickly resolved with this tool.

This error tool offers outstanding compatibility. It is practically compatible with all Windows versions.

Restoro download

To get started all you have to do is click here to install the Restoro on your computer. Once it is installed, run it to scan for 0x000000A5 error code. After scanning is complete, click the repair button to repair this issue immediately.

For user safety and data security, Restoro also creates backup files. This ensures that no valuable data is lost during system repair.

So, don’t delay in resolving error 0x000000A5 error code; install Restoro on your system today!

Do You Need Help with Your Device?

Our Team of Experts May Help
Troubleshoot.Tech Experts are There for You!
Replace damaged files
Restore performance
Free disk space
Remove Malware
Protects WEB browser
Remove Viruses
Stop PC freezing
GET HELP
Troubleshoot.Tech experts work with all versions of Microsoft Windows including Windows 11, with Android, Mac, and more.

Share this article:

You might also like

What to do if you can’t find Recycle Bin
The Recycle Bin is undeniably an important place to make files ready for deletion. To put it simply, it assumes some importance but there are times when it displays an unpredictable behavior. For instance, it just suddenly goes missing and even Cortana is unable to find it. A lot of users have experienced the missing Recycle Bin issue in their Windows 10 computers. If you are one of these users, you might have wondered where the Recycle Bin icon has gone and how you can get it back. Worry not, as this post will provide you a couple of options you can try to bring back Recycle Bin in your Windows 10 computer. Follow the given options below to get started.

Option 1 – Try to restore Recycle Bin

It could be that you have disabled the Recycle Bin by accident which is why Windows was not able to show it on your desktop. To restore Recycle Bin, follow these steps:
  • First, click on the Start button and select Settings.
  • Next, select the Personalization setting and then select Themes from the left pane.
  • After that, click on the “Desktop icon settings” link under the “Related Settings” heading. This will display a list of icons in the Desktop Icons window.
  • From there, make sure that you check the checkbox for “Recycle Bin” to make it appear on your Desktop screen once again.

Option 2 – Try to recreate the Recycle Bin

If the first option didn’t work, then it could be that Recycle Bin might have been deleted which is why you fail to restore it. And to resolve this problem, you need to recreate Recycle Bin. Refer to the following steps to do so:
  • You need to launch the Windows File Explorer first and go to the View tab.
  • From this tab, select Options and click on the drop-down arrow and then select the “Change folder and search option”.
  • Afterward, switch to the View tab when the Folder Options window appears on your screen and select the “Show hidden files, folders, and drives” option.
  • And then unmark the checkbox next to the “Hide protected operating system files (Recommended)” option and click on both the Apply and OK buttons, respectively.
  • Next, go back to the File Explorer and click on “This PC” located on the left bar and go to the C: drive.
  • From there, you will find a file named “$Recycle.Bin” located at the top.
  • Open this folder to access its contents and you should see the Recycle Bin icon located at the top.
  • After that, right-click on the Recycle Bin icon and click on the “Send To” option and then click on “Desktop (create shortcut)”.
  • It will then confirm and recreate the Recycle Bin icon on your Desktop screen.
Note: Even though this icon is quite similar to the original one, it actually differs from it. The difference is that you won’t see if fill up when you delete files and you can’t simply empty it by right-clicking on the shortcut. On the other hand, you can still drag items into it just like with the original one. So when you want to empty the content of the newly restored Recycle Bin, you just have to double-click on the shortcut and right-click on the recycle bin in the window that appears, and select the “Empty Recycle Bin” option. In addition, now that you’ve set up the Recycle Bin shortcut, you have to re-activate the “Hide protected operating system files” to keep the important files and folders in your computer hidden.

Option 3 – Try to repair the Recycle Bin

If both the first two options failed to restore the missing Recycle Bin, then you can try repairing it instead. There are times when the Recycle Bin is removed from the Desktop screen due to some corrupted Windows system files. To fix these corrupted system files, you can run the DISM tool. This tool is known to repair potentially corrupted files in your system as having them could also system issues like the missing Recycle Bin. To repair these corrupted system files, you can run the DISM commands:
  • Tap the Win + X keys and click on the “Command Prompt (Admin)” option.
  • After that, input each one of the commands listed below sequentially to execute them:
    • Dism /Online /Cleanup-Image /CheckHealth
    • Dism /Online /Cleanup-Image /ScanHealth
    • Dism /Online /Cleanup-Image /RestoreHealth
  • Once you’ve executed the commands given above, restart your computer and check if the problem is now fixed.

Option 4 – Make sure that you are not in Tablet Mode

Since Windows 10 is designed to work on both desktop and mobile devices, it could be that your computer has slipped into Tablet Mode which explains why you’re not seeing the Recycle Bin. To check if your computer is really in Tablet Mode, follow these steps:
  • Go to the Start menu and select Settings.
  • Next, select the System setting and from the left pane select the Tablet Mode.
  • From there, make sure that the buttons next to the options given below are set to the off position:
    • Hide app icons on the taskbar in tablet mode
    • Automatically hide the taskbar in tablet mode
Read More
How to Fix: Not a Valid Win32 Application Error

Not a Valid Win32 Application Error - What is it?

Not a Valid Win32 Application error code that indicates either the file or the program you are attempting to run missing or corrupt. And because of this error, Windows is unable to open your desired file or run the program successfully.

Error Causes

The ‘Not a Valid Win32 Application’ is triggered due to multiple reasons such as:
  • Unsuccessful program installation due to damaged disc/CD
  • Corrupted or incompatible file
  • The hard drive is loaded with bad and invalid entries
  • Malware invasion or viral infection
When you come across this error code on your PC, it is advisable to resolve it as it will cause you a great deal of inconvenience hampering program and file accessibility. Furthermore, if the error code occurs due to malware or viruses, then it can lead to severe data security threats and privacy issues.

Further Information and Manual Repair

To resolve the Not a Valid Win32 Application error on your PC, you don’t need to be a technical expert or hire a professional. Though this error might be crucial it is easy to fix. Here are some of the many methods that you can try to resolve this error code on your PC:
  • Check for File Compatibility
If you downloaded a file that is not compatible with your Windows version then you will come across this error. In this case, it is advisable to download the file version that is compatible and can run easily on the Windows version installed on your system. Nonetheless, if the file is compatible but still doesn’t run on your PC, then it’s possible that the file became corrupt during the download. Try downloading the file again.
  • Check if the CD is Clean
You may also come across the Not a valid Win32 application error code if the program installation from the CD is unsuccessful. This happens when the CD is dirty or it is scratched. The program does not copy properly onto the computer from the damaged CD. So, if the CD is scratched and dirty, buy a new CD and try installing the program again.
  • Verify the Program You Want to Run is Still on the Computer
If you are running the program from a shortcut, then verify that the program is still installed on your PC. This error may occur if the program is no longer installed on the computer. If you find the program is not installed on your system, then reinstall and try running the program again.
  • Wrong File Name Issue
Make sure the program or the file you are attempting to run on your system does not contain the same name as the long filename directory it is saved in. For example, running a file named ‘program’ in the ‘program files’ directory can cause errors in some Windows versions. If this is the issue, then try installing the program in a different directory.
  • Repair Hard Drive
If the hard drive is bad or corrupted, it can also generate the not a valid Win32 application. And because of this error files and programs fail to execute successfully as not all data can be read from the hard drive. To repair this issue first you need to run defrag and ScanDisk Microsoft built-in tools. These tools check for errors on the hard drive.
  • Run an Antivirus
If the error code occurs due to a viral infection or malware attack on your system, then you must download an antivirus, scan, and remove such malicious software. However, antivirus may slow down the speed of your PC. So, to resolve speed issues and boost the performance of your system, you may have to download a system optimizer.
Read More
4 Methods of Fixing Error Code 49

Error Code 49 – What is it?

Error Code 49 is a common device driver error that users encounter on any Windows 2000 and later operating system versions. The error occurs when the connected peripheral devices fail to function properly due to an overload of the system hive’s size. The error when prompted pops up on your screen with the following message:
"Windows cannot start new hardware devices because the system hive is too large (exceeds the Registry Size Limit). (Code 49)”
The error causes unattached devices to be displayed on the system hive list.

Solution

driverfix boxError Causes

Error Code 49 mainly results from problems in Windows registry system files; the system hive in the Windows registry exceeds its size limit. The system hive is part of the Windows registry and it is where files regarding devices are contained along with user preferences and applications. The devices will not work until the system hive size is brought back to normal levels.

Further Information and Manual Repair

There are several ways you can use to fix your error code. Here are the following.

Method 1 – Uninstall unused devices

One of the best ways to address the error code is to uninstall the unused devices which are listed on your computer’s system hive. To do this:
  • Log in using an Administrator account
  • Click the Start button and then click ‘Run’
  • In the box, enter the command:
  • "set devmgr_show_nonpresent_devices=1 cd%SystemRoot%System32 exit" and click enter
  • Open Device Manager, click ‘View’, and then choose ‘Show hidden devices’ to see unused devices.
  • When you can see the list, click on the device you want to uninstall by selecting the ‘Driver’ tab and then select ‘Uninstall’.
  • After uninstall is complete, restart your computer.

Method 2 – Use System Restore

If the error still persists, you can use system restore to eliminate the problem. Here is how you can do so:
  1. Log in using an Administrator account
  2. Click ‘Start’ button and select All Programs > Accessories > System Tools > System Restore
  3. Click ‘Restore my computer to an earlier time’ and click ‘Next’
  4. Select the last Windows restore point from the ‘On this list, click a restore point’ list, and click ‘Next’
  5. Click ‘Next’ on the confirmation window to proceed
  6. Restart your PC after restoration is complete
By restoring the system via a last saved system checkpoint, you can obtain undamaged Windows system files that can help avert the error code.

Method 3 – Manually uninstall and reinstall the device driver

If using system restore does not work in resolving the error code either, you may have to resort to manually uninstalling and then reinstalling the device driver causing the problem. This would be necessary since the remaining incomplete files due to a partial removal or installation of programs is what results in the error code. By uninstall and reinstalling the device driver program, it would lead to the completion of the files. You can do this by firstly logging in as Administrator and open Device Manager. Select the device that is causing the problem and double click it and make sure that the peripheral is connected properly to the PC. Upon opening, click on the ‘Driver’ tab and then select ‘Update Driver’. Make sure to refer to the system documentation that you received with your PC or computer to check for the motherboard details and driver specifics.

Method 4 – Use software to automatically download the driver

Manually uninstalling and reinstalling the driver will do the trick; however, it may be time-consuming, especially when you would have to resort to your hardware user manual. Therefore, using a program such as DriverFIX can save you a lot of time and frustration in having your device work properly on your computer. DriverFIX, with its user-friendly approach to help you fix your PC issues, comes with an integrated database that detects which drivers you need to reconfigure within just a few seconds and downloads it automatically. It further ensures that your drivers are installed in their entirety leaving no room for any incomplete files to remain that create Error Code 49. It also has the added advantage of being able to backup and restore your files should there be the slightest possibility of system file damage. DriverFIX is the answer to fixing your PC error codes accurately and quickly. Click here to download DriverFIX to fix Error Code 49 quickly and effectively!
Read More
How to Fix the Socket Error 10060

Socket Error 10060 - What is it?

Socket Error 10060 is a typical Outlook Express error. This error often occurs when the connection to the server fails. It specifically refers to a timeout while communicating with the email providers servers. The vast majority of all emails use SMTP for outgoing mail. Socket error 10060 in most instances is related to the SMTP settings for the user’s email. The error message is sometimes displayed in the following format:
Outlook Express Socket Error10060 - The connection to the server failed Account:’ your account’
Another thing you must know about this error is that it only stops the user from sending emails. This means that you can only receive emails, not send them.

Solution

Restoro box imageError Causes

The cause of this error code is hard to narrow down typically because there are many causes that can trigger the socket error code 10060. Some of the most common causes of this error code are:
  • Issues in email settings
  • Authentication settings
  • Firewall settings
  • Malware
Though this is not a critical error code it is advisable to fix it immediately without any delays. This error can hamper your communication via email and slow down your work productivity especially if you use Outlook for communication across the organization.

Further Information and Manual Repair

Here are some of the many methods to fix and resolve this error code. To help you resolve this issue, we have selected and listed down the best, quick, and easy do-it-yourself methods. Try them and repair Socket error code 10060 all by yourself without any professional assistance.

Method 1 - Check the Names of POP3 and SMTP Servers

To begin with, first check the names of the POP3 and SMTP servers to ensure that they are correct. Then check the outgoing SMTP port. Contact your email provider to determine the correct settings. Sometimes email providers change this value more than any other in their individual settings. Get it verified. Change the settings if needed.

Method 2 - Outgoing SMTP Server Requires Authentication

Sometimes the error code may occur due to authentication issues. If this is the reason then, don’t worry it is easy to fix. Simply go to the settings options and check the box ‘My server requires authentication’. Once you check the box, try sending the email again. This is most likely to resolve the socket error 10060 on your PC.

Method 3 - Disable Firewall

Your Firewall security may sometimes be the reason for socket error 10060 too. Therefore if after trying method 1 and 2, the error still persists, then it is advisable to disable firewall. Once you disable it, try sending an email using your Outlook account. If it works, the error is resolved.

Method 4 - Scan for Malware

There is a possibility that the Socket error 10060 is popping on your PC due to malware infection. If so, then it is advisable to download Restoro. This is a highly functional and a user-friendly PC fixer deployed with a powerful antivirus and several other scanners. Run it on your PC to scan for malware. It detects and removes all types of malware including Trojans, viruses, adware, spyware, and more in seconds. Click here to download Restoro to resolve socket error 10060 on your system today.
Read More
T-Mobile Hack, 40 Million and more Impacted
T-MobileHacker group recently came up with claims that they have stolen data from 100 million T-Mobile customers. T-Mobile has responded with confirmation it has been compromised and that over 40 million records were stolen, among them are not just present customers, but anyone who has applied for T-Mobile service as well as past accounts.

What has been stolen?

Report from T-Mobile states that stolen records included first and last name, date of birth, social security number, driver’s license & ID information. The company said that it has “no indication that the data contained in the stolen files included any customer financial information, credit card information, debit or other payment information.” Not really a reassuring statement meaning that they really do not know, but even if the statement is true, already stolen information is as much if even not more damaging and devastating as payment information.

What T-Mobile is planning to do now?

It is stated that the hole used for the hack has been addressed and closed so no more data can be stolen. Considering people that had their personal information compromised, T-Mobile said it is planning to reach out to them and offer them two years of free identity protection through McAfee’s ID Theft Protection Service. Additionally, T-Mobile recommends postpaid customers change their PIN by going online into their T-Mobile account or calling T-Mobile customer service by dialing 611 on their phone. The company also recommends a feature called Account Takeover Protection that prevents unauthorized individuals from stealing a phone number and porting it out of T-Mobile. Finally, the company will publish a website “for one-stop information and solutions to help customers take steps to further protect themselves.”
Read More
Remove Task View button from Windows 11
Task View
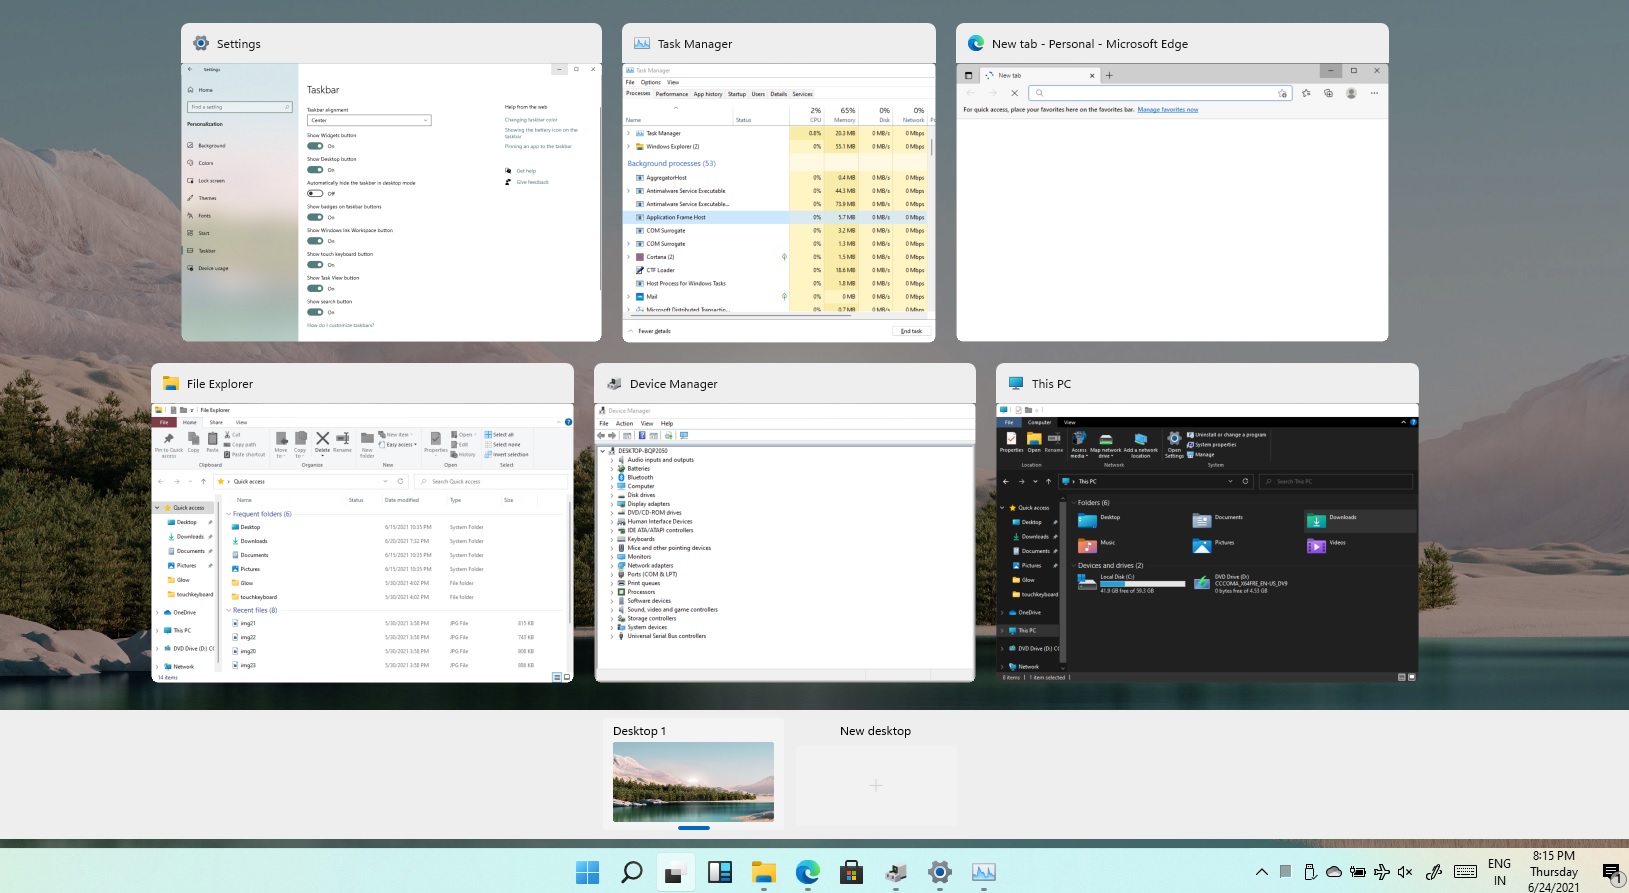
Task View feature inside Windows 11 is actually a great feature, letting you quickly view open windows and virtual desktops. How Task view itself could be reached with keyboard shortcut combination of ⊞ WINDOWS + TAB some users will prefer this way of using it and thus button on the taskbar is something you do not want or need. There is a very easy way to remove mentioned button and I will show you how to do it. Right-click the taskbar button itself and click on Hide From Taskbar. That’s it, you have done it. Now in order for you to bring it back if you change your mind, you will have to do some extra steps but it is nothing difficult. Right-click on the taskbar and click on Taskbar settings, you will be lead to Personalization > Taskbar. Inside locate Taskbar Items and switch Task View to ON, you will see the Task View button right away showing itself again.
Read More
Completely Remove MySearchDial Tutorial

MySearchDial is a browser hijacker that typically comes bundled with free software on the internet. This web platform designed for searching the internet and offers the installation of its software. This software injects itself into browsers and gains access to your settings, browsing data & user information. This data is distributed to the ad providers without limitation. While covered by their EULA, most users will be unaware of what they agree to with checkboxes selected by default. The software also adds a huge amount of registry keys and links throughout the operating system. Since the software injects itself into many personal files, removing the software results in a total reset of your browser settings. For these reasons MySearchDial is classified as potentially unwanted and is flagged for removal by a number of internet security utilities.

About Browser Hijackers

Browser hijacking is a common type of online fraud where your internet browser configuration settings are altered to allow it to carry out things you do not intend. Practically the majority of browser hijackers are created for marketing or advertising purposes. Usually, hijackers are designed for the benefit of online hackers usually through income generation that comes from forced ad clicks and website visits. Even though it may seem naive, these tools are designed by vicious individuals who always look to take full advantage of you, so that hackers can make money from your naive and distraction. Some browser hijackers are designed to make certain modifications beyond the browsers, like altering entries on the computer registry and letting other types of malware further damage your computer.

How you can know if your internet browser is hijacked

There are several symptoms that point to browser hijacking: 1. your browser’s home page has been reset to some unfamiliar website 2. your web browser is constantly being redirected to pornography websites 3. default online search engine is changed 4. discover new toolbars that you simply didn’t add 5. you observe lots of pop-ups on your computer screen 6. your internet browser has become unstable or starts running slowly 7. you’re blocked to access the websites of security solution providers.

So how exactly does a browser hijacker infect a PC

Browser hijackers can enter a computer in some way or other, including via file sharing, downloads, and e-mail also. They could also come from add-on applications, also called browser helper objects (BHO), web browser extensions, or toolbars. Other times you may have inadvertently accepted a browser hijacker as part of an application package (generally freeware or shareware). Examples of popular browser hijackers are Fireball, Ask Toolbar, GoSave, CoolWebSearch, Babylon Toolbar, and RocketTab. The existence of any browser hijacker malware on your system might significantly diminish the web browsing experience, track your internet activities that lead to severe privacy concerns, degrade overall system efficiency, and lead to software instability as well.

Getting rid of browser hijackers

Some hijackers could be removed by deleting the free software they were included with or by removing any add-ons you have recently added to your computer system. But, most hijackers are hard to remove manually. Regardless of how much you attempt to get rid of it, it can return over and over again. On top of that, manual removal needs you to execute many time-consuming and complicated actions which are very difficult to carry out for rookie computer users.

Can't Install Safebytes Anti-malware because of a Virus? Do This!

All malware is bad and the effects of the damage could differ based on the specific type of malicious software. Certain malware types alter web browser settings by adding a proxy server or change the PC’s DNS configurations. When this happens, you’ll be unable to visit certain or all sites, and therefore not able to download or install the required security software to remove the malware. If you’re reading this now, you may have probably recognized that virus infection is the reason for your blocked web traffic. So what do if you need to download and install an antivirus application like Safebytes? Although this kind of problem can be difficult to circumvent, there are a few actions you can take.

Install the anti-virus in Safe Mode

If the malware is set to run at Windows startup, then booting in Safe Mode should prevent it. Only minimal required programs and services are loaded when you start your computer or laptop in Safe Mode. To launch your Windows XP, Vista, or 7 PCs in Safe Mode with Networking, do as instructed below. 1) Press the F8 key repeatedly as soon as your computer boots, but before the big Windows logo or black screen with white texts shows up. This will bring up the Advanced Boot Options menu. 2) Use the arrow keys to choose Safe Mode with Networking and press ENTER. 3) Once you get into this mode, you should have access to the internet once again. Now, get the virus removal application you need by using the internet browser. To install the application, follow the guidelines in the installation wizard. 4) As soon as the application is installed, let the scan run to remove viruses and other malware automatically.

Utilize an alternate web browser to download an anti-malware program

Malicious program code might exploit vulnerabilities on a specific internet browser and block access to all anti-virus software websites. If you appear to have a virus attached to Internet Explorer, then switch over to an alternate browser with built-in security features, such as Chrome or Firefox, to download your favorite anti-malware program – Safebytes.

Run antivirus from a pen drive

Another approach is to download and transfer antivirus software from a clean computer to run a virus scan on the affected system. Abide by these steps to run the anti-virus on the affected computer system. 1) Make use of another virus-free computer to download Safebytes Anti-Malware. 2) Plug the Flash drive into the clean computer. 3) Run the setup program by double-clicking the executable file of the downloaded software, with a .exe file extension. 4) When asked, select the location of the USB drive as the place where you would like to store the software files. Follow the on-screen instructions to finish the installation. 5) Transfer the USB drive from the clean computer to the infected computer. 6) Double click the Safebytes Anti-malware icon on the thumb drive to run the application. 7) Click on the “Scan Now” button to start the virus scan.

SafeBytes Anti-Malware Features

In order to protect your computer or laptop from many different internet-based threats, it is very important to install an anti-malware application on your PC. However, with countless numbers anti-malware companies in the market, nowadays it is actually difficult to decide which one you should purchase for your PC. Some of them do a good job in getting rid of threats while some will damage your PC themselves. You have to choose a product that has got a good reputation and detects not just computer viruses but other sorts of malware too. When considering commercial antimalware software options, most people choose well-known brands, such as SafeBytes, and are very happy with it. SafeBytes antimalware is a highly effective and easy-to-use protection tool that is ideal for end-users of all levels of IT literacy. Using its outstanding protection system, this tool will instantly detect and remove most of the security threats, including viruses, adware, browser hijackers, PUPs, trojans, worms, and ransomware. SafeBytes carries a plethora of amazing features which can help you protect your laptop or computer from malware attack and damage. The following are some popular features found in this software program: Real-time Active Protection: SafeBytes gives complete and real-time security for your personal machine. They’re highly effective in screening and getting rid of various threats because they’re constantly revised with the latest updates and safety measures. Most Reliable AntiMalware Protection: Safebytes is made on the very best virus engine in the industry. These engines will identify and remove threats even during the early stages of a malware outbreak. Internet Security: SafeBytes gives an instant safety rating on the pages you’re going to visit, automatically blocking risky sites and making sure that you’re certain of your safety while browsing the net. Lightweight: SafeBytes provides total protection from internet threats at a fraction of the CPU load because of its advanced detection engine and algorithms. 24/7 Online Tech Support: Support service is readily available for 24 x 7 x 365 days through email and chats to answer your queries.

Technical Details and Manual Removal (Advanced Users)

If you wish to manually remove MySearchDial without the use of an automated tool, it may be possible to do so by removing the program from the Windows Add/Remove Programs menu, or in cases of browser extensions, going to the browsers AddOn/Extension manager and removing it. You will likely also want to reset your browser. To ensure the complete removal, manually check your hard drive and registry for all of the following and remove or reset the values accordingly. Please note that this is for advanced users only and may be difficult, with incorrect file removal causing additional PC errors. In addition, some malware is capable of replicating or preventing deletion. Doing this in Safe Mode is advised.

The following files, folders, and registry entries are created or modified by MySearchDial

Files: %PROGRAMFILES%Mysearchdialbhmysearchdial.dll. %PROGRAMFILES%MysearchdialescortShld.dll. %PROGRAMFILES%MysearchdialmysearchdialApp.dll. %PROGRAMFILES%MysearchdialmysearchdialEng.dll. %PROGRAMFILES%Mysearchdialmysearchdialsrv.exe. %PROGRAMFILES%MysearchdialmysearchdialTlbr.dll. %PROGRAMFILES%MysearchdialSqlite3.dll. %APPDATA%MozillaFirefoxProfilesENV(mysearchdial_path)[email protected]. %APPDATA%mysearchdialmysearchdial. %APPDATA%mysearchdial. %PROGRAMFILES%Mysearchdialbh. %PROGRAMFILES%Mysearchdial. Registry: Key HKEY_CLASSES_ROOT named esrv.mysearchdialESrvc.1 Key HKEY_CLASSES_ROOT named esrv.mysearchdialESrvc Key HKEY_CLASSES_ROOT named mysearchdial.mysearchdialappCore.1 Key HKEY_CLASSES_ROOT named mysearchdial.mysearchdialappCore Key HKEY_CLASSES_ROOT named mysearchdial.mysearchdialdskBnd.1 Key HKEY_CLASSES_ROOT named mysearchdial.mysearchdialdskBnd Key HKEY_CLASSES_ROOT named mysearchdial.mysearchdialHlpr.1 Key HKEY_CLASSES_ROOT named mysearchdial.mysearchdialHlpr Key 0400EBCA-042C-4000-AA89-9713FBEDB671 at HKEY_CLASSES_ROOTInterface. Key 0BD19251-4B4B-4B94-AB16-617106245BB7 at HKEY_CLASSES_ROOTInterface. Key 219046AE-358F-4CF1-B1FD-2B4DE83642A8 at HKEY_LOCAL_MACHINESOFTWAREMicrosoftInternet ExplorerLow RightsElevationPolicy. Key 3004627E-F8E9-4E8B-909D-316753CBA923 at HKEY_CLASSES_ROOTCLSID. Key 3281114F-BCAB-45E3-80D9-A6CD64D4E636 at HKEY_CLASSES_ROOTInterface. Key 44533FCB-F9FB-436A-8B6B-CF637B2D465A at HKEY_CLASSES_ROOTInterface. Key 44B29DDD-CF7A-454A-A275-A322A398D93F at HKEY_CLASSES_ROOTInterface. Key 4ED063C9-4A0B-4B44-A9DC-23AFF424A0D3 at HKEY_CLASSES_ROOTCLSID. Key 82E74373-58AB-47EB-B0F0-A1D82BB8EB5C at HKEY_CLASSES_ROOTCLSID. Key A4DE94DB-DF03-45A3-8A5D-D1B7464B242D at HKEY_CLASSES_ROOTInterface. Key AA0F50A8-2618-4AE4-A779-9F7378555A8F at HKEY_CLASSES_ROOTInterface. Key B2DB115C-8278-4947-9A07-57B53D1C4215 at HKEY_CLASSES_ROOTInterface. Key B97FC455-DB33-431D-84DB-6F1514110BD5 at HKEY_CLASSES_ROOTInterface. Key C67281E0-78F5-4E49-9FAE-4B1B2ADAF17B at HKEY_CLASSES_ROOTInterface. Key D40753C7-8A59-4C1F-BE88-C300F4624D5B at HKEY_CLASSES_ROOTCLSID. Key E72E9312-0367-4216-BFC7-21485FA8390B at HKEY_CLASSES_ROOTInterface. Key EF5625A3-37AB-4BDB-9875-2A3D91CD0DFD at HKEY_CLASSES_ROOTCLSID. Key EF5625A3-37AB-4BDB-9875-2A3D91CD0DFD at HKEY_LOCAL_MACHINESOFTWAREMicrosoftWindowsCurrentVersionExplorerBrowser Helper Objects. Key F6CCB6C9-127E-44AE-8552-B94356F39FFE at HKEY_CLASSES_ROOTInterface. Key FBC322D5-407E-4854-8C0B-555B951FD8E3 at HKEY_CLASSES_ROOTTypeLib. Key FFD25630-2734-4AE9-88E6-21BF6525F3FE at HKEY_CLASSES_ROOTInterface. Key mysearchdial at HKEY_CURRENT_USERSoftware. Key mysearchdial at HKEY_CURRENT_USERSoftwareInstallCore. Key mysearchdial at HKEY_LOCAL_MACHINESOFTWARE. Key mysearchdial at HKEY_LOCAL_MACHINESOFTWAREInstallCore. Value 3004627E-F8E9-4E8B-909D-316753CBA923 at HKEY_LOCAL_MACHINESOFTWAREMicrosoftInternet ExplorerToolbar.
Read More
UEFI Firmware settings goes missing
When it comes to booting an operating system on a computer, one of the most essential pieces of software you can use is the UEFI. In fact, a lot of users now prefer to use UEFI instead of BIOS. It also depends on whether the UEFI or the BIOS is supported on the motherboard. Recently, a number of users reported an issue with UEFI where they were unable to find it under the Advanced Options screen where it’s supposed to be located. The missing UEFI Firmware settings in the Advanced Options could be caused by several reasons. It is possible that the access to the UEFI menu is blocked or it could also be due to the Extra Fast Startup feature being enabled. It is also possible that the operating system is installed in Legacy mode. There are several options to try to fix this issue. You need to check if your computer supports UEFI or you could also try to disable Fast Startup or bypass the Extra Fast Startup feature. You can also use a boot to UEFI shortcut as well as check the CMOS battery.

Option 1 – Try checking if your computer supports UEFI

The first thing you have to do is to verify if your computer supports UEFI. If your computer does not support UEFI, then it’s no wonder why you don’t see the UEFI Firmware settings in the Advanced Options.

Option 2 – Try turning off Fast Startup

  • First, boot your computer in Safe Mode.
  • Once your computer is booted in Safe Mode, tap the Win + R keys to open the Run dialog box and type in “control” to open the Control Panel.
  • Next, click on the Hardware and Sound section and click on Power Options.
  • Afterward, select the “Choose what the power buttons do” option from the left side menu pane.
  • Now click on Change settings that are currently unavailable and uncheck the entry that says, “Turn on fast startup (Recommended)”.
  • Then click on Save Changes and restart your computer and see if it has fixed the problem or not.

Option 3 – Try bypassing the Extra Fast Startup feature

As mentioned, the missing UEFI Firmware settings could be due to the Extra Fast Startup feature. To fix it, you have to disable this feature. All you have to do is tap and hold the Shift key and click on the Shutdown button from the Start button. This will boot your PC with the UEFI booting from the beginning and then use the hotkey for your motherboard to boot into the UEFI setup.

Option 4 – Try using a boot to UEFI shortcut

  • Right-click on any empty space on your Desktop and select New > Shortcut.
  • This will open a new mini window. And here, you have to type this in the text field: shutdown /r /fw
  • After that, click on Next and name the desktop shortcut and then click on Finish.
  • Next, right-click on the newly created shortcut and select Properties.
  • Click on the Advanced button and select the “Run as administrator” option.
  • Now click OK to save the changes made. Each time you execute this shortcut, your computer will automatically be booted to the UEFI Firmware Settings.

Option 5 – Try to check the CMOS battery

Another thing you can do is check the CMOS battery physically on the motherboard and see if it has to be replaced since a damaged CMOS battery can also cause the issue with the missing UEFI Firmware settings.

Option 6 – Set your computer from Legacy to UEFI

If applicable, you can try to set your computer from Legacy to UEFI to resolve the problem.
  • In the Windows Search box, type “command prompt” and from the search results that appear, right-click on Command Prompt and select the “Run as administrator” option.
  • After that, execute this command: mbr2gpt.exe /convert /allowfullOS
  • Now, wait until the process is completed since you can track its process on your screen.
  • Once it’s done, go to Settings > Update & Security > Advanced Startup options and from there, click on Restart Now. This will restart your computer and give you advanced options.
  • Next, select Troubleshoot > Advanced Options where you will see further options including System Restore, Startup Repair, Go back to the previous version, Command Prompt, System Image Recovery, and UEFI Firmware Settings.
  • Now select the UEFI Firmware Settings. This will take you to the BIOS. Boot Mode is typically available under Boot > Boot Configuration. Once you’re there, set it to UEFI and then save the changes you’ve made. After that, your computer will restart.
Read More
How to do Disk cleanup in Windows 10
Disk cleanup is part of Windows 10 tools and it is essential in keeping your computer up and running in optimal settings and to free so much needed space as well as remove temporary files that can accumulate over time. Using disk cleanup from time to time is recommended and a very useful habit that will save you some headaches and optimize your computer running time, speed up boot sequence, etc. Think of it like cleaning up your desk, from time to time it can get too overwhelmed with junk and non-important things and if you are keeping it tidy all the time each time you need to find something it will be much faster and easier, same goes with computers, so if you do not have it, try to develop a habit that once per month you start disk clean up and remove trash from your hard drive. In order to do so, press ⊞ WINDOWS + E to bring File Explorer up Keyboard with windows and e markedOnce File Explorer is up and running right-click on the hard drive you wish to run disk cleanup on and click on properties. file explorer hd propertiesProperties Windows will open on the general tab, on that tab you have disk cleanup on the lower right part of properties, click on it. local disk properties cleanupWait for Windows to gather information about your hard drive and files on it. After it is finished you will be greeted with the next screen: disk cleanup section chooserHere you can thick and mark which items you would like to get rid of and which ones you would like to keep. Note that you can freely tick all of them and remove them since removing these files will not break WIndows in any way. make your choices and click on ok. You can also click on Clean up system files to run system files cleaner and get rid of junk there, you will not be able to choose any options there, Windows will alone clean up what is not needed. After disk cleanup is finished least thing you will have is more free disk space, but like mentioned, keeping your Windows and computer healthy goes a long way in its usability, speed, and performance.
Read More
How to remove SearchApp

SearchApp by Blpsearch is a Browser Hijacker that is presently targeting Google Chrome browsers. It is offered as a tool gives user enhanced online search experience. Search App also has other amazing tools that let you quickly search the web from a new tab window.

This extension changed your home page and new tab search to blpsearch. While installing you will see additional ads and sponsored links displaying throughout your browsing sessions. It collects user browsing information and uses it to better serve sponsored content.

About Browser Hijackers

Browser hijacking means a malicious code has control over and altered the settings of your web browser, without your approval. There are numerous reasons why you might experience an internet browser hijack; however commercial, marketing, and advertising are the key reasons for their creation. Generally, hijackers will force hits to websites of their preference either to increase web traffic generating higher ad earnings, or to obtain a commission for every user visiting there. Nonetheless, it is not that naive. Your internet safety is jeopardized and it is also very annoying. In a much worst case, your browser could be hi-jacked to download malicious software that will do a lot of damage to your computer or laptop.

Find out how to identify a browser hijack

Symptoms that your internet browser is hijacked include: your web browser’s homepage is suddenly different; bookmark and the new tab are also modified; the default browser configurations have been changed and/or your default web engine is altered; unsolicited new toolbars are added to your web browser; you observe numerous ads appear on your web browsers or display screen; your browser has instability issues or displays frequent errors; Inability to navigate to certain sites, especially anti-malware and other computer security software sites.

How it infects your personal computer

Browser hijackers can enter a PC by some means or other, for example via file sharing, downloads, and email too. Many internet browser hijackings come from add-on applications, i.e., toolbars, browser helper objects (BHO), or extensions added to web browsers to provide them extra capabilities. Some browser hijackers spread in user’s computers by using a deceptive software distribution strategy known as “bundling” (generally through shareware and freeware). Examples of popular browser hijackers are Fireball, GoSave, Ask Toolbar, CoolWebSearch, RocketTab, and Babylon Toolbar. Browser hijackers may record user keystrokes to gather potentially important information leading to privacy issues, cause instability on systems, drastically disrupt the user experience, and ultimately slow down the system to a stage where it becomes unusable.

How to repair a browser hijack

The one thing you could try to remove a browser hijacker is to discover the malicious software within the “Add or Remove Programs” list of the Windows Control Panel. It might or might not be there. When it is, uninstall it. Yet, some hijackers will be more difficult to locate or remove since they might get themselves associated with certain important computer files that enable it to operate as a necessary operating-system process. You should think about carrying out manual fixes only if you’re a tech-savvy individual because there are negative consequences associated with messing around with the system registry and HOSTS file. Installing and running antivirus software on the affected computer could automatically erase browser hijackers and other malicious programs. Safebytes Anti-Malware features a cutting-edge anti-malware engine to help you prevent browser hijacker infection in the first place, and clean up any existing issues. Together with the anti-malware tool, a PC optimizer, can help you in getting rid of all linked files and modifications in the computer registry automatically.

What To Do If You Cannot Install Any Anti-Malware?

Malware can cause plenty of damage to your personal computer. Some malware goes to great lengths to stop you from downloading or installing anything on your computer, particularly anti-virus software programs. If you are reading this now, you’ve perhaps realized that a malware infection is a reason behind your blocked net traffic. So how to proceed if you need to download and install an antivirus application such as Safebytes? There are a few steps you can take to circumvent this problem.

Install anti-virus in Safe Mode with Networking

In Safe Mode, you can actually change Windows settings, uninstall or install some program, and eradicate hard-to-delete malware. In the event the malware is obstructing the internet connection and affecting your computer, running it in Safe Mode allows you to download antivirus and run a scan whilst limiting potential damage. To boot into Safe Mode, hit the “F8” key on the keyboard right before the Windows boot screen shows up; Or right after normal Windows boot up, run MSConfig, check Safe Boot under Boot tab, and click Apply. Once you’re in Safe Mode, you can attempt to install your antivirus software program without the hindrance of the malware. Following installation, run the malware scanner to eliminate most standard infections.

Use an alternate browser to download security software

Some malware only targets particular web browsers. If this is your situation, use another web browser as it could circumvent the virus. In the event you suspect that your Internet Explorer happens to be hijacked by a virus or otherwise compromised by cybercriminals, the most effective thing to do is to switch to an alternate web browser such as Google Chrome, Mozilla Firefox, or Apple Safari to download your chosen security program – Safebytes Anti-Malware.

Install antivirus on a flash drive

Here’s yet another solution which is utilizing a portable USB anti-virus software that can scan your system for malware without needing installation. Do these simple steps to clear up your affected computer using a portable antivirus. 1) On a clean PC, download and install Safebytes Anti-Malware. 2) Connect the flash drive to a USB port on the clean computer. 3) Run the setup program by double-clicking the executable file of the downloaded application, which has a .exe file extension. 4) Select thumb drive as the place when the wizard asks you where you want to install the application. Follow the directions to finish the installation process. 5) Transfer the USB drive from the clean computer to the infected computer. 6) Run the Safebytes Anti-malware directly from the pen drive by double-clicking the icon. 7) Click “Scan Now” to run a scan on the affected computer for viruses.

Protect your Computer against Malware With SafeBytes Security Suite

If you’re looking to download the anti-malware program for your PC, there are various tools in the market to consider but you just cannot trust blindly anyone, irrespective of whether it is paid or free program. Some of them are excellent, some are ok types, and some will ruin your computer themselves! When searching for anti-malware software, pick one that offers reliable, efficient, and complete protection against all known computer viruses and malware. In terms of commercial tool options, most people go with well-known brands, like SafeBytes, and are quite happy with it. SafeBytes anti-malware is a powerful, highly effective protection tool created to help users of all levels of computer literacy in identifying and eliminating harmful threats out of their computer. Through its cutting-edge technology, this software protects your personal computer against infections brought on by different types of malware and other threats, including spyware, adware, computer viruses, worms, trojan horses, keyloggers, potentially unwanted programs (PUPs), and ransomware. SafeBytes anti-malware offers a myriad of enhanced features that sets it apart from all others. Listed below are some of the features you might like in SafeBytes. World-class AntiMalware Protection: Using its enhanced and sophisticated algorithm, this malware elimination tool can identify and eliminate the malware threats hiding in your PC effectively. Active Protection: SafeBytes gives round-the-clock protection for your computer restricting malware attacks in real-time. This software will always keep track of your PC for suspicious activity and updates itself regularly to keep abreast of the latest threats. Website Filtering: SafeBytes checks and gives a unique safety rating to every single website you visit and block access to web pages considered to be phishing sites, thus safeguarding you against identity theft, or known to contain malware. Light-weight: SafeBytes is a lightweight and user-friendly antivirus and anti-malware solution. As it utilizes minimal computer resources, this program leaves the computer’s power exactly where it belongs to: with you. Fantastic Tech Support: You can get high levels of support round the clock if you’re using their paid software. To sum it up all, SafeBytes Anti-Malware gives you outstanding protection combined with very low system resource usage with both great malware detection and prevention. Once you’ve installed SafeBytes Anti-Malware, you no longer need to worry about malware or any other security concerns. So when you need advanced forms of protection features and threat detections, purchasing SafeBytes Anti-Malware could be worth the dollars!

Technical Details and Manual Removal (Advanced Users)

If you don’t wish to use an automated tool and prefer to remove SearchApp manually, you could possibly do so by going to the Windows Add/Remove Programs menu in the control panel and deleting the offending program; in cases of browser extensions, you can uninstall it by going to the browser’s Add-on/Extension manager. You’ll probably also want to totally reset your internet browser to its default configuration settings. In order to ensure the complete removal, manually examine your hard drive and registry for all the following and eliminate or reset the values as needed. But bear in mind, this is often a difficult task and only computer professionals can perform it safely. In addition, some malware is capable of replicating or preventing deletion. It is advisable that you carry out the removal procedure in Safe Mode.
Files: %Documents and Settings%\All Users\Application Data\Blpsearch.com %program files %\internet explorer\Blpsearch.com\random.mof %program files (x86)%\common files\speechengines\ %programData%\suspicious folders\ %windows%\system32\driver\messy code.dll %AppData%\blpsearch.com\toolbar uninstallStatIE.dat %app data%\Blpsearch.comn Blpsearch.com Registry: HKEY_LOCAL_MACHINE\SOFTWARE\Microsoft\MATS\WindowsInstaller\EAF386F0-7205-40F2-8DA6-1BABEEFCBE8914.07.30.07.52.18 ProductName=Blpsearch.com HKEY_LOCAL_MACHINE\SOFTWARE\Wow6432Node\Microsoft\Tracing\Muvic_RASAPI32 HKEY_LOCAL_MACHINE\SOFTWARE\Wow6432Node\Microsoft\Tracing\Muvic_RASMANCS HKEY_LOCAL_MACHINE\SOFTWARE\Wow6432Node\Microsoft\Windows\CurrentVersion\Uninstall\EAF386F0-7205-40F2-8DA6-1BABEEFCBE89\DisplayName=Blpsearch.com HKEY_USERS\S-1-5-21-3825580999-3780825030-779906692-1001\Software\Microsoft\Windows\CurrentVersion\Uninstallf25211-852e-4d10-b6f5-50b1338a9271\DisplayName=Blpsearch.com
Read More
1 2 3 171
Logo
Copyright © 2023, ErrorTools. All Rights Reserved
Trademark: Microsoft Windows logos are registered trademarks of Microsoft. Disclaimer: ErrorTools.com is not affiliated with Microsoft, nor claims direct affiliation.
The information on this page is provided for information purposes only.
DMCA.com Protection Status