Windows photo viewer was a popular photo viewing application integrated into Windows 7, 8, and 8.1 but in Windows 10 it has been replaced with photos, Microsoft's new application aimed at photo viewing on your desktop. Now if any one of you wonders why should be bringing the old application back to Windows 10 since we have an alternative one, the answer would be resources and speed. The old photo viewer application is lightweight, fast, and reliable, opening the same photo in both photo viewer and in new photos shows us that Microsofts new viewer application takes even three times more RAM, and it's visibly slower in loading times for pictures.
Since I am a person who prefers speed and functionality over fancy looks I would be very glad to have the option to bring back a photo viewer. If you have by any chance Windows 10 as an upgrade, bringing back photo viewer is easy as 1,2,3. you just need to open settings and go to default apps, under photo viewer you should see your current default viewing application, probably photos, click on it to see options and choose photo viewer and exit the Settings menu, and you're done.
Sadly if Windows 10 has been installed clean on the system and not as upgrade things are a little bit more complicated but do not worry, stay with us, keep reading and you will get there.
Activating photo viewer
How technically photo viewer is still in the system but not used we will have to make it available again and this we will do by adding some lines in the Windows registry, that being said, open a notepad and paste the following code as it is in it.
Windows Registry Editor Version 5.00
[HKEY_CLASSES_ROOT\jpegfile\shell\open\DropTarget]
"Clsid"="{FFE2A43C-56B9-4bf5-9A79-CC6D4285608A}"
[HKEY_CLASSES_ROOT\pngfile\shell\open\DropTarget]
"Clsid"="{FFE2A43C-56B9-4bf5-9A79-CC6D4285608A}"
[HKEY_CLASSES_ROOT\Applications\photoviewer.dll\shell\open]
"MuiVerb"="@photoviewer.dll,-3043"
[HKEY_CLASSES_ROOT\Applications\photoviewer.dll\shell\open\command]
@=hex(2):25,00,53,00,79,00,73,00,74,00,65,00,6d,00,52,00,6f,00,6f,00,74,00,25,\
00,5c,00,53,00,79,00,73,00,74,00,65,00,6d,00,33,00,32,00,5c,00,72,00,75,00,\
6e,00,64,00,6c,00,6c,00,33,00,32,00,2e,00,65,00,78,00,65,00,20,00,22,00,25,\
00,50,00,72,00,6f,00,67,00,72,00,61,00,6d,00,46,00,69,00,6c,00,65,00,73,00,\
25,00,5c,00,57,00,69,00,6e,00,64,00,6f,00,77,00,73,00,20,00,50,00,68,00,6f,\
00,74,00,6f,00,20,00,56,00,69,00,65,00,77,00,65,00,72,00,5c,00,50,00,68,00,\
6f,00,74,00,6f,00,56,00,69,00,65,00,77,00,65,00,72,00,2e,00,64,00,6c,00,6c,\
00,22,00,2c,00,20,00,49,00,6d,00,61,00,67,00,65,00,56,00,69,00,65,00,77,00,\
5f,00,46,00,75,00,6c,00,6c,00,73,00,63,00,72,00,65,00,65,00,6e,00,20,00,25,\
00,31,00,00,00
[HKEY_CLASSES_ROOT\Applications\photoviewer.dll\shell\open\DropTarget]
"Clsid"="{FFE2A43C-56B9-4bf5-9A79-CC6D4285608A}"
[HKEY_CLASSES_ROOT\PhotoViewer.FileAssoc.Bitmap]
"ImageOptionFlags"=dword:00000001
"FriendlyTypeName"=hex(2):40,00,25,00,50,00,72,00,6f,00,67,00,72,00,61,00,6d,\
00,46,00,69,00,6c,00,65,00,73,00,25,00,5c,00,57,00,69,00,6e,00,64,00,6f,00,\
77,00,73,00,20,00,50,00,68,00,6f,00,74,00,6f,00,20,00,56,00,69,00,65,00,77,\
00,65,00,72,00,5c,00,50,00,68,00,6f,00,74,00,6f,00,56,00,69,00,65,00,77,00,\
65,00,72,00,2e,00,64,00,6c,00,6c,00,2c,00,2d,00,33,00,30,00,35,00,36,00,00,\
00
[HKEY_CLASSES_ROOT\PhotoViewer.FileAssoc.Bitmap\DefaultIcon]
@="%SystemRoot%\\System32\\imageres.dll,-70"
[HKEY_CLASSES_ROOT\PhotoViewer.FileAssoc.Bitmap\shell\open\command]
@=hex(2):25,00,53,00,79,00,73,00,74,00,65,00,6d,00,52,00,6f,00,6f,00,74,00,25,\
00,5c,00,53,00,79,00,73,00,74,00,65,00,6d,00,33,00,32,00,5c,00,72,00,75,00,\
6e,00,64,00,6c,00,6c,00,33,00,32,00,2e,00,65,00,78,00,65,00,20,00,22,00,25,\
00,50,00,72,00,6f,00,67,00,72,00,61,00,6d,00,46,00,69,00,6c,00,65,00,73,00,\
25,00,5c,00,57,00,69,00,6e,00,64,00,6f,00,77,00,73,00,20,00,50,00,68,00,6f,\
00,74,00,6f,00,20,00,56,00,69,00,65,00,77,00,65,00,72,00,5c,00,50,00,68,00,\
6f,00,74,00,6f,00,56,00,69,00,65,00,77,00,65,00,72,00,2e,00,64,00,6c,00,6c,\
00,22,00,2c,00,20,00,49,00,6d,00,61,00,67,00,65,00,56,00,69,00,65,00,77,00,\
5f,00,46,00,75,00,6c,00,6c,00,73,00,63,00,72,00,65,00,65,00,6e,00,20,00,25,\
00,31,00,00,00
[HKEY_CLASSES_ROOT\PhotoViewer.FileAssoc.Bitmap\shell\open\DropTarget]
"Clsid"="{FFE2A43C-56B9-4bf5-9A79-CC6D4285608A}"
[HKEY_CLASSES_ROOT\Applications\photoviewer.dll\shell\print]
"NeverDefault"=""
[HKEY_CLASSES_ROOT\Applications\photoviewer.dll\shell\print\command]
@=hex(2):25,00,53,00,79,00,73,00,74,00,65,00,6d,00,52,00,6f,00,6f,00,74,00,25,\
00,5c,00,53,00,79,00,73,00,74,00,65,00,6d,00,33,00,32,00,5c,00,72,00,75,00,\
6e,00,64,00,6c,00,6c,00,33,00,32,00,2e,00,65,00,78,00,65,00,20,00,22,00,25,\
00,50,00,72,00,6f,00,67,00,72,00,61,00,6d,00,46,00,69,00,6c,00,65,00,73,00,\
25,00,5c,00,57,00,69,00,6e,00,64,00,6f,00,77,00,73,00,20,00,50,00,68,00,6f,\
00,74,00,6f,00,20,00,56,00,69,00,65,00,77,00,65,00,72,00,5c,00,50,00,68,00,\
6f,00,74,00,6f,00,56,00,69,00,65,00,77,00,65,00,72,00,2e,00,64,00,6c,00,6c,\
00,22,00,2c,00,20,00,49,00,6d,00,61,00,67,00,65,00,56,00,69,00,65,00,77,00,\
5f,00,46,00,75,00,6c,00,6c,00,73,00,63,00,72,00,65,00,65,00,6e,00,20,00,25,\
00,31,00,00,00
[HKEY_CLASSES_ROOT\Applications\photoviewer.dll\shell\print\DropTarget]
"Clsid"="{60fd46de-f830-4894-a628-6fa81bc0190d}"
[HKEY_CLASSES_ROOT\PhotoViewer.FileAssoc.JFIF]
"EditFlags"=dword:00010000
"ImageOptionFlags"=dword:00000001
"FriendlyTypeName"=hex(2):40,00,25,00,50,00,72,00,6f,00,67,00,72,00,61,00,6d,\
00,46,00,69,00,6c,00,65,00,73,00,25,00,5c,00,57,00,69,00,6e,00,64,00,6f,00,\
77,00,73,00,20,00,50,00,68,00,6f,00,74,00,6f,00,20,00,56,00,69,00,65,00,77,\
00,65,00,72,00,5c,00,50,00,68,00,6f,00,74,00,6f,00,56,00,69,00,65,00,77,00,\
65,00,72,00,2e,00,64,00,6c,00,6c,00,2c,00,2d,00,33,00,30,00,35,00,35,00,00,\
00
[HKEY_CLASSES_ROOT\PhotoViewer.FileAssoc.JFIF\DefaultIcon]
@="%SystemRoot%\\System32\\imageres.dll,-72"
[HKEY_CLASSES_ROOT\PhotoViewer.FileAssoc.JFIF\shell\open]
"MuiVerb"=hex(2):40,00,25,00,50,00,72,00,6f,00,67,00,72,00,61,00,6d,00,46,00,\
69,00,6c,00,65,00,73,00,25,00,5c,00,57,00,69,00,6e,00,64,00,6f,00,77,00,73,\
00,20,00,50,00,68,00,6f,00,74,00,6f,00,20,00,56,00,69,00,65,00,77,00,65,00,\
72,00,5c,00,70,00,68,00,6f,00,74,00,6f,00,76,00,69,00,65,00,77,00,65,00,72,\
00,2e,00,64,00,6c,00,6c,00,2c,00,2d,00,33,00,30,00,34,00,33,00,00,00
[HKEY_CLASSES_ROOT\PhotoViewer.FileAssoc.JFIF\shell\open\command]
@=hex(2):25,00,53,00,79,00,73,00,74,00,65,00,6d,00,52,00,6f,00,6f,00,74,00,25,\
00,5c,00,53,00,79,00,73,00,74,00,65,00,6d,00,33,00,32,00,5c,00,72,00,75,00,\
6e,00,64,00,6c,00,6c,00,33,00,32,00,2e,00,65,00,78,00,65,00,20,00,22,00,25,\
00,50,00,72,00,6f,00,67,00,72,00,61,00,6d,00,46,00,69,00,6c,00,65,00,73,00,\
25,00,5c,00,57,00,69,00,6e,00,64,00,6f,00,77,00,73,00,20,00,50,00,68,00,6f,\
00,74,00,6f,00,20,00,56,00,69,00,65,00,77,00,65,00,72,00,5c,00,50,00,68,00,\
6f,00,74,00,6f,00,56,00,69,00,65,00,77,00,65,00,72,00,2e,00,64,00,6c,00,6c,\
00,22,00,2c,00,20,00,49,00,6d,00,61,00,67,00,65,00,56,00,69,00,65,00,77,00,\
5f,00,46,00,75,00,6c,00,6c,00,73,00,63,00,72,00,65,00,65,00,6e,00,20,00,25,\
00,31,00,00,00
[HKEY_CLASSES_ROOT\PhotoViewer.FileAssoc.JFIF\shell\open\DropTarget]
"Clsid"="{FFE2A43C-56B9-4bf5-9A79-CC6D4285608A}"
[HKEY_CLASSES_ROOT\PhotoViewer.FileAssoc.Jpeg]
"EditFlags"=dword:00010000
"ImageOptionFlags"=dword:00000001
"FriendlyTypeName"=hex(2):40,00,25,00,50,00,72,00,6f,00,67,00,72,00,61,00,6d,\
00,46,00,69,00,6c,00,65,00,73,00,25,00,5c,00,57,00,69,00,6e,00,64,00,6f,00,\
77,00,73,00,20,00,50,00,68,00,6f,00,74,00,6f,00,20,00,56,00,69,00,65,00,77,\
00,65,00,72,00,5c,00,50,00,68,00,6f,00,74,00,6f,00,56,00,69,00,65,00,77,00,\
65,00,72,00,2e,00,64,00,6c,00,6c,00,2c,00,2d,00,33,00,30,00,35,00,35,00,00,\
00
[HKEY_CLASSES_ROOT\PhotoViewer.FileAssoc.Jpeg\DefaultIcon]
@="%SystemRoot%\\System32\\imageres.dll,-72"
[HKEY_CLASSES_ROOT\PhotoViewer.FileAssoc.Jpeg\shell\open]
"MuiVerb"=hex(2):40,00,25,00,50,00,72,00,6f,00,67,00,72,00,61,00,6d,00,46,00,\
69,00,6c,00,65,00,73,00,25,00,5c,00,57,00,69,00,6e,00,64,00,6f,00,77,00,73,\
00,20,00,50,00,68,00,6f,00,74,00,6f,00,20,00,56,00,69,00,65,00,77,00,65,00,\
72,00,5c,00,70,00,68,00,6f,00,74,00,6f,00,76,00,69,00,65,00,77,00,65,00,72,\
00,2e,00,64,00,6c,00,6c,00,2c,00,2d,00,33,00,30,00,34,00,33,00,00,00
[HKEY_CLASSES_ROOT\PhotoViewer.FileAssoc.Jpeg\shell\open\command]
@=hex(2):25,00,53,00,79,00,73,00,74,00,65,00,6d,00,52,00,6f,00,6f,00,74,00,25,\
00,5c,00,53,00,79,00,73,00,74,00,65,00,6d,00,33,00,32,00,5c,00,72,00,75,00,\
6e,00,64,00,6c,00,6c,00,33,00,32,00,2e,00,65,00,78,00,65,00,20,00,22,00,25,\
00,50,00,72,00,6f,00,67,00,72,00,61,00,6d,00,46,00,69,00,6c,00,65,00,73,00,\
25,00,5c,00,57,00,69,00,6e,00,64,00,6f,00,77,00,73,00,20,00,50,00,68,00,6f,\
00,74,00,6f,00,20,00,56,00,69,00,65,00,77,00,65,00,72,00,5c,00,50,00,68,00,\
6f,00,74,00,6f,00,56,00,69,00,65,00,77,00,65,00,72,00,2e,00,64,00,6c,00,6c,\
00,22,00,2c,00,20,00,49,00,6d,00,61,00,67,00,65,00,56,00,69,00,65,00,77,00,\
5f,00,46,00,75,00,6c,00,6c,00,73,00,63,00,72,00,65,00,65,00,6e,00,20,00,25,\
00,31,00,00,00
[HKEY_CLASSES_ROOT\PhotoViewer.FileAssoc.Jpeg\shell\open\DropTarget]
"Clsid"="{FFE2A43C-56B9-4bf5-9A79-CC6D4285608A}"
[HKEY_CLASSES_ROOT\PhotoViewer.FileAssoc.Gif]
"ImageOptionFlags"=dword:00000001
"FriendlyTypeName"=hex(2):40,00,25,00,50,00,72,00,6f,00,67,00,72,00,61,00,6d,\
00,46,00,69,00,6c,00,65,00,73,00,25,00,5c,00,57,00,69,00,6e,00,64,00,6f,00,\
77,00,73,00,20,00,50,00,68,00,6f,00,74,00,6f,00,20,00,56,00,69,00,65,00,77,\
00,65,00,72,00,5c,00,50,00,68,00,6f,00,74,00,6f,00,56,00,69,00,65,00,77,00,\
65,00,72,00,2e,00,64,00,6c,00,6c,00,2c,00,2d,00,33,00,30,00,35,00,37,00,00,\
00
[HKEY_CLASSES_ROOT\PhotoViewer.FileAssoc.Gif\DefaultIcon]
@="%SystemRoot%\\System32\\imageres.dll,-83"
[HKEY_CLASSES_ROOT\PhotoViewer.FileAssoc.Gif\shell\open\command]
@=hex(2):25,00,53,00,79,00,73,00,74,00,65,00,6d,00,52,00,6f,00,6f,00,74,00,25,\
00,5c,00,53,00,79,00,73,00,74,00,65,00,6d,00,33,00,32,00,5c,00,72,00,75,00,\
6e,00,64,00,6c,00,6c,00,33,00,32,00,2e,00,65,00,78,00,65,00,20,00,22,00,25,\
00,50,00,72,00,6f,00,67,00,72,00,61,00,6d,00,46,00,69,00,6c,00,65,00,73,00,\
25,00,5c,00,57,00,69,00,6e,00,64,00,6f,00,77,00,73,00,20,00,50,00,68,00,6f,\
00,74,00,6f,00,20,00,56,00,69,00,65,00,77,00,65,00,72,00,5c,00,50,00,68,00,\
6f,00,74,00,6f,00,56,00,69,00,65,00,77,00,65,00,72,00,2e,00,64,00,6c,00,6c,\
00,22,00,2c,00,20,00,49,00,6d,00,61,00,67,00,65,00,56,00,69,00,65,00,77,00,\
5f,00,46,00,75,00,6c,00,6c,00,73,00,63,00,72,00,65,00,65,00,6e,00,20,00,25,\
00,31,00,00,00
[HKEY_CLASSES_ROOT\PhotoViewer.FileAssoc.Gif\shell\open\DropTarget]
"Clsid"="{FFE2A43C-56B9-4bf5-9A79-CC6D4285608A}"
[HKEY_CLASSES_ROOT\PhotoViewer.FileAssoc.Png]
"ImageOptionFlags"=dword:00000001
"FriendlyTypeName"=hex(2):40,00,25,00,50,00,72,00,6f,00,67,00,72,00,61,00,6d,\
00,46,00,69,00,6c,00,65,00,73,00,25,00,5c,00,57,00,69,00,6e,00,64,00,6f,00,\
77,00,73,00,20,00,50,00,68,00,6f,00,74,00,6f,00,20,00,56,00,69,00,65,00,77,\
00,65,00,72,00,5c,00,50,00,68,00,6f,00,74,00,6f,00,56,00,69,00,65,00,77,00,\
65,00,72,00,2e,00,64,00,6c,00,6c,00,2c,00,2d,00,33,00,30,00,35,00,37,00,00,\
00
[HKEY_CLASSES_ROOT\PhotoViewer.FileAssoc.Png\DefaultIcon]
@="%SystemRoot%\\System32\\imageres.dll,-71"
[HKEY_CLASSES_ROOT\PhotoViewer.FileAssoc.Png\shell\open\command]
@=hex(2):25,00,53,00,79,00,73,00,74,00,65,00,6d,00,52,00,6f,00,6f,00,74,00,25,\
00,5c,00,53,00,79,00,73,00,74,00,65,00,6d,00,33,00,32,00,5c,00,72,00,75,00,\
6e,00,64,00,6c,00,6c,00,33,00,32,00,2e,00,65,00,78,00,65,00,20,00,22,00,25,\
00,50,00,72,00,6f,00,67,00,72,00,61,00,6d,00,46,00,69,00,6c,00,65,00,73,00,\
25,00,5c,00,57,00,69,00,6e,00,64,00,6f,00,77,00,73,00,20,00,50,00,68,00,6f,\
00,74,00,6f,00,20,00,56,00,69,00,65,00,77,00,65,00,72,00,5c,00,50,00,68,00,\
6f,00,74,00,6f,00,56,00,69,00,65,00,77,00,65,00,72,00,2e,00,64,00,6c,00,6c,\
00,22,00,2c,00,20,00,49,00,6d,00,61,00,67,00,65,00,56,00,69,00,65,00,77,00,\
5f,00,46,00,75,00,6c,00,6c,00,73,00,63,00,72,00,65,00,65,00,6e,00,20,00,25,\
00,31,00,00,00
[HKEY_CLASSES_ROOT\PhotoViewer.FileAssoc.Png\shell\open\DropTarget]
"Clsid"="{FFE2A43C-56B9-4bf5-9A79-CC6D4285608A}"
[HKEY_CLASSES_ROOT\PhotoViewer.FileAssoc.Wdp]
"EditFlags"=dword:00010000
"ImageOptionFlags"=dword:00000001
[HKEY_CLASSES_ROOT\PhotoViewer.FileAssoc.Wdp\DefaultIcon]
@="%SystemRoot%\\System32\\wmphoto.dll,-400"
[HKEY_CLASSES_ROOT\PhotoViewer.FileAssoc.Wdp\shell\open]
"MuiVerb"=hex(2):40,00,25,00,50,00,72,00,6f,00,67,00,72,00,61,00,6d,00,46,00,\
69,00,6c,00,65,00,73,00,25,00,5c,00,57,00,69,00,6e,00,64,00,6f,00,77,00,73,\
00,20,00,50,00,68,00,6f,00,74,00,6f,00,20,00,56,00,69,00,65,00,77,00,65,00,\
72,00,5c,00,70,00,68,00,6f,00,74,00,6f,00,76,00,69,00,65,00,77,00,65,00,72,\
00,2e,00,64,00,6c,00,6c,00,2c,00,2d,00,33,00,30,00,34,00,33,00,00,00
[HKEY_CLASSES_ROOT\PhotoViewer.FileAssoc.Wdp\shell\open\command]
@=hex(2):25,00,53,00,79,00,73,00,74,00,65,00,6d,00,52,00,6f,00,6f,00,74,00,25,\
00,5c,00,53,00,79,00,73,00,74,00,65,00,6d,00,33,00,32,00,5c,00,72,00,75,00,\
6e,00,64,00,6c,00,6c,00,33,00,32,00,2e,00,65,00,78,00,65,00,20,00,22,00,25,\
00,50,00,72,00,6f,00,67,00,72,00,61,00,6d,00,46,00,69,00,6c,00,65,00,73,00,\
25,00,5c,00,57,00,69,00,6e,00,64,00,6f,00,77,00,73,00,20,00,50,00,68,00,6f,\
00,74,00,6f,00,20,00,56,00,69,00,65,00,77,00,65,00,72,00,5c,00,50,00,68,00,\
6f,00,74,00,6f,00,56,00,69,00,65,00,77,00,65,00,72,00,2e,00,64,00,6c,00,6c,\
00,22,00,2c,00,20,00,49,00,6d,00,61,00,67,00,65,00,56,00,69,00,65,00,77,00,\
5f,00,46,00,75,00,6c,00,6c,00,73,00,63,00,72,00,65,00,65,00,6e,00,20,00,25,\
00,31,00,00,00
[HKEY_CLASSES_ROOT\PhotoViewer.FileAssoc.Wdp\shell\open\DropTarget]
"Clsid"="{FFE2A43C-56B9-4bf5-9A79-CC6D4285608A}"
[HKEY_CLASSES_ROOT\SystemFileAssociations\image\shell\Image Preview\command]
@=hex(2):25,00,53,00,79,00,73,00,74,00,65,00,6d,00,52,00,6f,00,6f,00,74,00,25,\
00,5c,00,53,00,79,00,73,00,74,00,65,00,6d,00,33,00,32,00,5c,00,72,00,75,00,\
6e,00,64,00,6c,00,6c,00,33,00,32,00,2e,00,65,00,78,00,65,00,20,00,22,00,25,\
00,50,00,72,00,6f,00,67,00,72,00,61,00,6d,00,46,00,69,00,6c,00,65,00,73,00,\
25,00,5c,00,57,00,69,00,6e,00,64,00,6f,00,77,00,73,00,20,00,50,00,68,00,6f,\
00,74,00,6f,00,20,00,56,00,69,00,65,00,77,00,65,00,72,00,5c,00,50,00,68,00,\
6f,00,74,00,6f,00,56,00,69,00,65,00,77,00,65,00,72,00,2e,00,64,00,6c,00,6c,\
00,22,00,2c,00,20,00,49,00,6d,00,61,00,67,00,65,00,56,00,69,00,65,00,77,00,\
5f,00,46,00,75,00,6c,00,6c,00,73,00,63,00,72,00,65,00,65,00,6e,00,20,00,25,\
00,31,00,00,00
[HKEY_CLASSES_ROOT\SystemFileAssociations\image\shell\Image Preview\DropTarget]
"{FFE2A43C-56B9-4bf5-9A79-CC6D4285608A}"=""
[HKEY_LOCAL_MACHINE\SOFTWARE\Microsoft\Windows Photo Viewer\Capabilities]
"ApplicationDescription"="@%ProgramFiles%\\Windows Photo Viewer\\photoviewer.dll,-3069"
"ApplicationName"="@%ProgramFiles%\\Windows Photo Viewer\\photoviewer.dll,-3009"
[HKEY_LOCAL_MACHINE\SOFTWARE\Microsoft\Windows Photo Viewer\Capabilities\FileAssociations]
".cr2"="PhotoViewer.FileAssoc.Tiff"
".jpg"="PhotoViewer.FileAssoc.Jpeg"
".wdp"="PhotoViewer.FileAssoc.Wdp"
".jfif"="PhotoViewer.FileAssoc.JFIF"
".dib"="PhotoViewer.FileAssoc.Bitmap"
".png"="PhotoViewer.FileAssoc.Png"
".jxr"="PhotoViewer.FileAssoc.Wdp"
".bmp"="PhotoViewer.FileAssoc.Bitmap"
".jpe"="PhotoViewer.FileAssoc.Jpeg"
".jpeg"="PhotoViewer.FileAssoc.Jpeg"
".gif"="PhotoViewer.FileAssoc.Gif"
".tif"="PhotoViewer.FileAssoc.Tiff"
".tiff"="PhotoViewer.FileAssoc.Tiff"
Yup, that is a lot of keys and settings but you are almost done. Once you have pasted text into your new notepad document save it but as .REG, you can name it however you want but it has to be .REG extension.
Once the file is saved double click on it to merge it into the Windows registry. You might need to turn off UAC for this operation (check our tutorial on this topic) and accept warning messages but once it is done you should now have an old photo viewer as a choice for your default viewing application.
All you have to do now is to go to settings and go to default apps, under photo viewer you should see your current default viewing application, probably photos, click on it to see options and choose photo viewer and exit the Settings menu, and you're done.
Read More


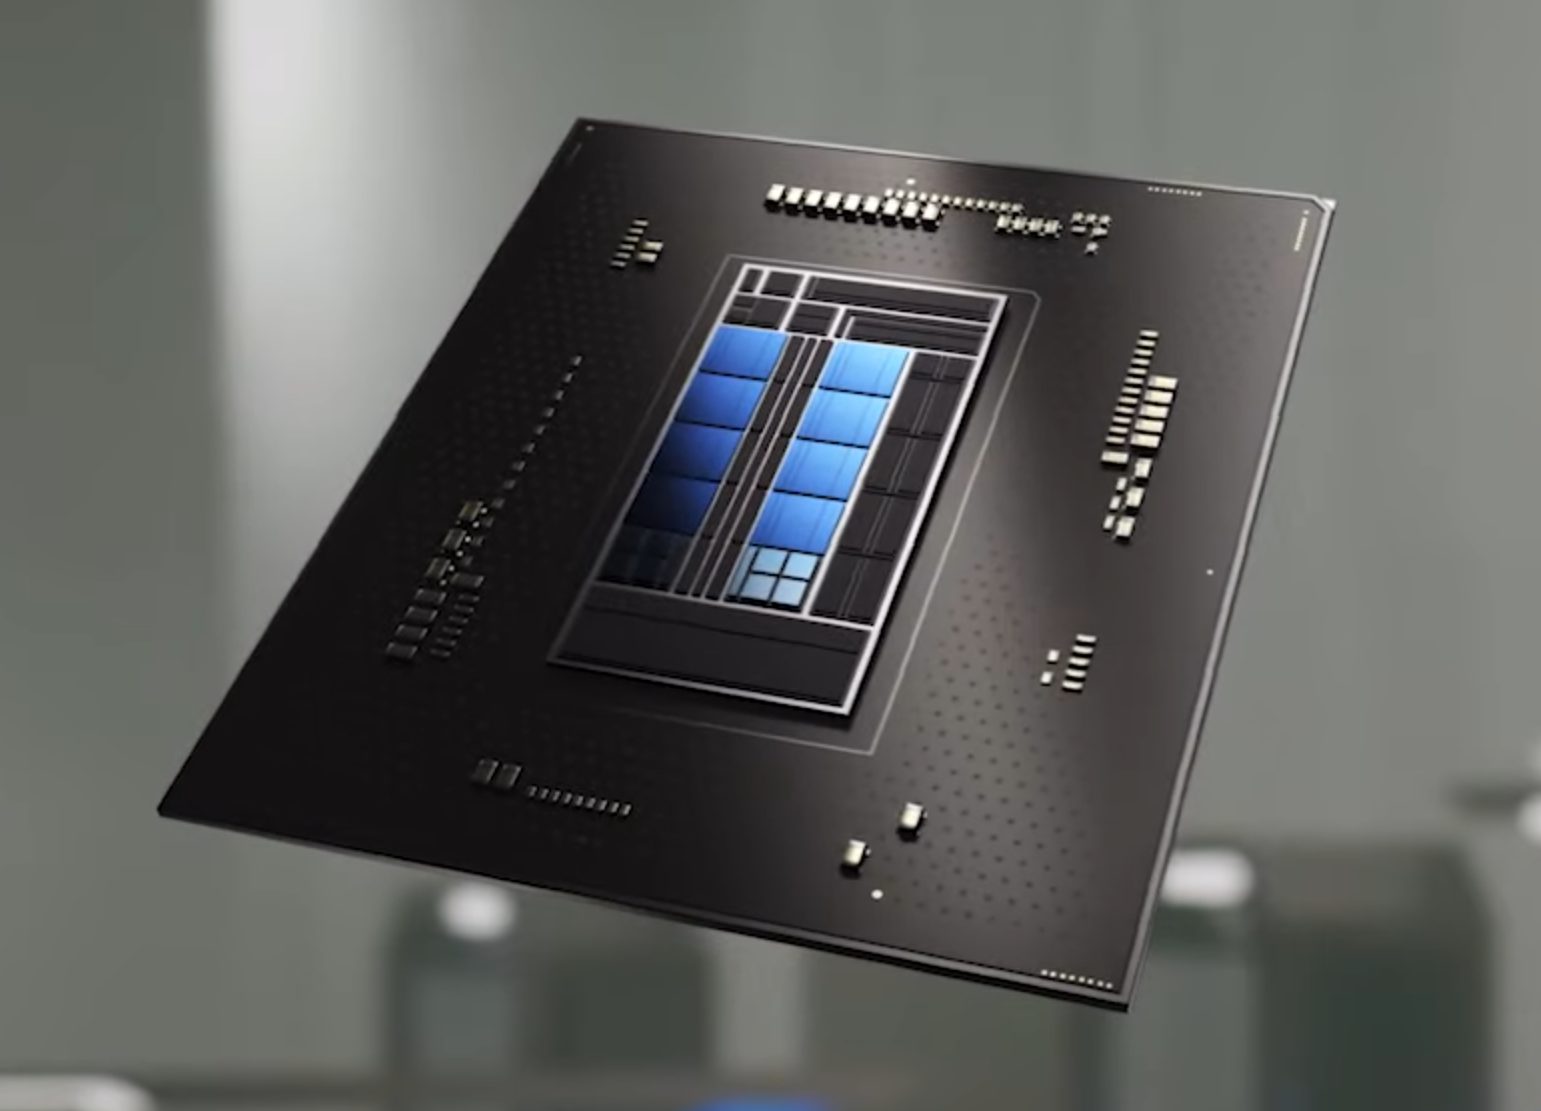 Now before you go on the bandwagon on bashing Intel itself take note that it is not Intel’s fault at all. The issue that arises is mostly due to DRM software and how it works. As you might know or not, Alder Lake has two sets of cores, standard performance cores, and power cores, and with Intel’s Thread Director on-chip right cores will be used for the right tasks, and here lies the issue.
DRM software might detect Thread Director as something suspicious and malicious, and then cut access to the game because of this. Intel, of course, has reached DRM manufacturers and places documentation about how software should be developed with this hybrid technology in mind.
Of course, newer games will be updated if needed and everything will work fine, also games on GOG will work fine because of GOG’s policy of no DRM store but some older ones might be left in limbo. They could work fine but DRM might be triggered and prevent them from loading, usually, game developer itself removes DRM protection after some time but that is not really always the case and there is a chance that some games might simply just not work on Alder Lake CPU only because of DRM protection.
Now before you go on the bandwagon on bashing Intel itself take note that it is not Intel’s fault at all. The issue that arises is mostly due to DRM software and how it works. As you might know or not, Alder Lake has two sets of cores, standard performance cores, and power cores, and with Intel’s Thread Director on-chip right cores will be used for the right tasks, and here lies the issue.
DRM software might detect Thread Director as something suspicious and malicious, and then cut access to the game because of this. Intel, of course, has reached DRM manufacturers and places documentation about how software should be developed with this hybrid technology in mind.
Of course, newer games will be updated if needed and everything will work fine, also games on GOG will work fine because of GOG’s policy of no DRM store but some older ones might be left in limbo. They could work fine but DRM might be triggered and prevent them from loading, usually, game developer itself removes DRM protection after some time but that is not really always the case and there is a chance that some games might simply just not work on Alder Lake CPU only because of DRM protection.
 A stop error or exception error commonly called the blue screen of death (BSoD) or blue screen, is an error screen displayed on Windows computers following a fatal system error. It indicates a system crash, in which the operating system has reached a condition where it can no longer operate safely. This is caused by many different problems, such as a general hardware failure or a crucial process terminating unexpectedly.
 On Windows 10 systems, a Black Screen of Death can be caused by an unfinished Windows Update.
 It is a diagnostic screen with a white type on a pink background. Pink Screen is mainly seen when the VMkernel of an ESX/ESXi host experiences a critical error, becomes inoperative, and terminates any virtual machines that are running. It is not fatal and generally considered more of a developer testing issue. When encountered, it can be fixed quickly by following the simple action of pressing and holding your computer’s power button to shut down the device.
 The Microsoft Windows 10 Operating System Brown Screen of Death is an on-screen fatal error notification with bug check codes which is seen when a computer crashes due to graphics hardware or software-related problems (failing graphics drivers).
 It affects the functioning of a browser, particularly Mozilla Firefox. The Yellow Screen of Death makes the appearance with a weird buzzing sound in the background when the XML parser refuses to process an XML document causing a parsing error and a weird buzzing sound. The issue persists unless the computer is manually rebooted.
 Commonly the Windows 10 red screen is caused due to the hardware error, particularly if you overclock your Windows PC/laptop. Despite this, sometimes the red screen of death is also caused by outdated or incompatible drivers or due to BIOS issues.
 The Orange Screen of Death on Windows occurs due to fatal hardware errors. Multiple reasons have been reported for the Orange Screen of Death. Some had this issue when watching a YouTube video, some were not able to boot into Windows. It can even occur when waking up from Sleep.
 The green screen of death only appears when you're running an Insider Preview version of Windows 10. It's the same as the blue screen of death, and it will show the same error messages. ... If you see a green screen of death (GSOD) on your PC, that's a sign you're using an Insider Preview build of Windows 10.
 The White Screen on Windows is also an error where the screen of the computer just turns white and freezes. There can be several things that can cause the white screen to appear on the Windows laptop monitor. But the main issue could be because of malfunctioning of the graphics hardware.