Code 32, a Device Manager error, pops up when a device driver and other required services related to the driver are disabled.
The error code 32 is usually displayed in the following format:
“A driver (service) for this device has been disabled. An alternate driver may be providing this functionality. Code 32”
When a driver experiences a problem, it is reported to the Device Manager. Though error Code 32 does not cause detrimental damage to your system, it can cause the loss of functionality of the hardware device whose driver is disabled.
Solution
Error Causes
Error 32 may be generated due to several reasons. However, the most common causes include:
The device driver is outdated
The device is not configured as the default
Some other device is providing default functionality
The device driver is disabled in the registry
Corruption of registry values in the CD ROM Drive Class registry key
Further Information and Manual Repair
If you come across error code 32 on your PC, then repair it immediately to ensure optimum PC performance. To resolve this error code, try the methods listed below. If you are not a computer programmer, don’t worry!
The listed solutions are easy to perform, require no technical background or expertise and more importantly, these solutions are very effective.
Simply follow the instructions to repair error code 32 on your system in just a few minutes.
Method 1 - Reboot Your PC
Sometimes Device Manager error codes may appear due to temporary issues, which may be resolved simply by rebooting your system. If you are lucky, this might actually work.
By restarting your PC, you might be able to get rid of error code 32. However, if the error still persists, then try other methods given below.
Method 2 - Uninstall and Reinstall the Driver
To resolve error code 32, uninstall and then reinstall the driver. To uninstall the driver, simply follow these steps:
Go to the start menu
Type Device Manager in the search bar and then press enter
Now in the Device Manager, find and then double-click the category of device that you wish to uninstall, for example, click on the Display Adapter to uninstall the graphics card.
Once you have located the device and the driver you wish to uninstall, simply right click on it and then click ‘uninstall’
Windows will prompt you to confirm device removal changes.
Click OK to confirm and proceed.
After that, simply restart your system to activate changes
To reinstall, go to the control panel and choose Add/Remove Hardware and add a new device. Follow all prompts to reinstall the device.
Method 3 - Delete Both the Upper Filters and Lower Filters Registry Values
As discussed above, sometimes error code 32 may be triggered due to corruption of registry values.
If this is the underlying cause, then delete both the upper filters and lower filters registry values from the registry. This will take about 5 to 7 minutes. Here’s what you have to do:
Go to the start menu
Type Regedit in the search box and then press enter
Now locate the HKEY_LOCAL_MACHINE folder under ‘My Computer’
Click the |> or (+) icon next to the folder name to expand
Here you will see a long list of subkeys
Locate the correct class GUID for the problematic device
Now click the registry subkey that corresponds to the device class GUID
Locate the Upper Filters and Lower Filter values and delete
Close the registry editor
Restart your PC to activate changes
This will hopefully resolve error code 32 on your system if the error was generated due to registry value corruption. However, if the error continues to appear, then resort to method 4.
Method 4 - Update the Problematic Driver
Locate the problematic drivers and update them with the latest versions. This procedure is effective but time-consuming if performed manually.
It takes several minutes to identify problematic drivers and find the latest and compatible versions for each driver on the manufacturers’ website. And besides, you will have to perform updates continuously to ensure the error doesn’t occur again.
Method 5 - Download DriverFIX to Update Drivers Automatically
To avoid the hassle, download DriverFIX.
This is a cutting-edge and user-friendly software program embedded with intelligent system programming and intuitive technology that identifies problematic drivers and updates them with the latest and compatible driver versions in seconds, automatically and on a regular basis.
By installing it on your PC, you can update all the drivers and repair code 32 in no time.
Click here to download DriverFIX to resolve Device Manager error code 32 today!
Can’t connect to this network Internet connectivity issues present a complex problem with simple solutions for PC and laptop users. First, it is usually recommended that users rule out problems with the internet connection, router, and Wi-Fi settings before proceeding to troubleshoot settings on your PC/laptop. Once the rest are ruled out, we can then proceed with the following troubleshooting steps and guidelines to fix your wifi connection issue:
The first step is to update your windows network adapter driver. Connectivity problems may arise if your network driver is not updated or if it is incompatible with the network adapter. To do so, you may resort to any third-party driver scanning and installing programs found online. This solution should have resorted if users don’t want the hassle of perusing through windows settings that users may not be familiar with.
However, this solution requires a pre-existing internet connection other than wifi, so it is recommended you have a backup internet connection via ethernet.
The second step is to uninstall the driver for your network adapter. This solution is to be reported if there is an issue with the driver as restarting the PC after the following steps let windows reinstall the driver again:
Open the quick access menu on your keyboard by pressing the Windows key and X key at the same time and select “Device Manager” from the menu list.
From the list of devices, select “Network Adapters”
Usually on the top of the list is the Wireless Network Adapter
Right-click the Wireless Network Adapter and select the option to “Uninstall device”
You will be given a confirmation in a new separate window to proceed. Click “Uninstall” to proceed.
After completing the previous steps, try rebooting your Windows PC and reconnecting to see if it works.
A third step is to disable the 802.1 1n modes of your network adapter by following the next steps:
First press the Windows logo key and the X key at the same time to bring up the quick-access menu. And like the previous step, select “Device Manager”
From the list of devices, select “Network Adapters”
Right-click the Wireless Network Adapter from the drop-down menu and select properties
Under properties, select the “Advanced” tab then select the 802.1 1n Mode. To the right drop-down menu change the option to “Disabled” and click “Ok”
After, try to re-establish the connection to see if the steps have worked.
In the event that any of the preceding did not fix your problem, it helps to take a second look at the router and network settings using the interface provided by your ISP. A simple reset to the back of your router often fixes the issue. Also, try to check if you have any other administrative capabilities over the network to determine whether your device, in particular, has been MAC filtered or if the frequency of your wireless adapter is not compatible with the broadcast frequency of your router.
Getting errors while trying to update your Windows 10 computer is not an uncommon occurrence. Although some of them are easy to fix, there are others that need a lot of time and research in order to resolve. One of these tough Windows Update errors is Error 0x80244007. This kind of Windows Update error halts the process of Windows Update and a simple system restart won’t help much to fix it.
When you encounter this Windows Update error, you will see a description that says, “SOAP client failed because there was a SOAP fault for reasons of WU_E_PT_SOAP_* error codes”. One of the main causes of such an error is that Windows was not able to renew the cookies for Windows Update. To fix this error, here are some suggestions that might be useful.
Option 1 – Clear up temporary or junk files
The error could be caused by some temporary or junk files in your computer and so you need to clear them up to fix the problem. You can achieve that using the Storage Sense feature.
Open Setting > System > Storage from the WinX Menu.
From there, you will see a list of all the local and connected storage devices along with the details on the free space. Make sure that Storage Sense is on.
Next, find a link that says “Free Up Space” and click it to open.
After that, a screen which is the built-in program in Windows 10 will appear and will scan your computer for the following junk files so you can free up disk space:
Windows Upgrade Log Files
The system created Windows Error Reporting Files
Thumbnails
Temporary Internet Files
Previous Windows Installation Files
Delivery Optimisation Files
DirectX Shader Cache
Choose the files you want to get rid of and then click on the remove files option. Note that you’ll have an idea of the total size as you select any of the junk files listed above.
Now go to the “Free Up Space Now” section and click the Clear Now button. This will get rid of all the temporary or junk files in your computer and should hopefully fix the Windows Update error 0x80244007.
Option 2 – Try running the Windows Update troubleshooter
Windows 10 have various troubleshooters that can help you resolve many system issues. So if you’re dealing with Windows Update errors like Error 0x80244007, you can run the Windows Update troubleshooter to resolve it.
To run it, go to Settings and then select Troubleshoot from the options. From there, click on Windows Update and then click the “Run the troubleshooter” button. After that, follow the next on-screen instructions and you should be good to go.
Option 3 – Try to reset the Windows Update components
If by any chance that the second option didn’t work, resetting the Windows Update components could also help you resolve the problem. How? Refer to the following steps:
Open Command Prompt with admin privileges.
After that, type each one of the following commands and hit Enter after you key in one after the other.
net stop wuauserv
net stop cryptsvc
net stop bits
net stop msiserver
Note: The commands you entered will stop the Windows Update components such as Windows Update service, Cryptographic services, BITS and MSI Installer.
After disabling WU components, you need to rename both the SoftwareDistribution and Catroot2 folders. To do that, type each one of the following commands below and don’t forget to hit Enter after you type one command after the other.
Next, restart the services you’ve stopped by entering another series of commands. Don’t forget to hit Enter after you key in one command after the other.
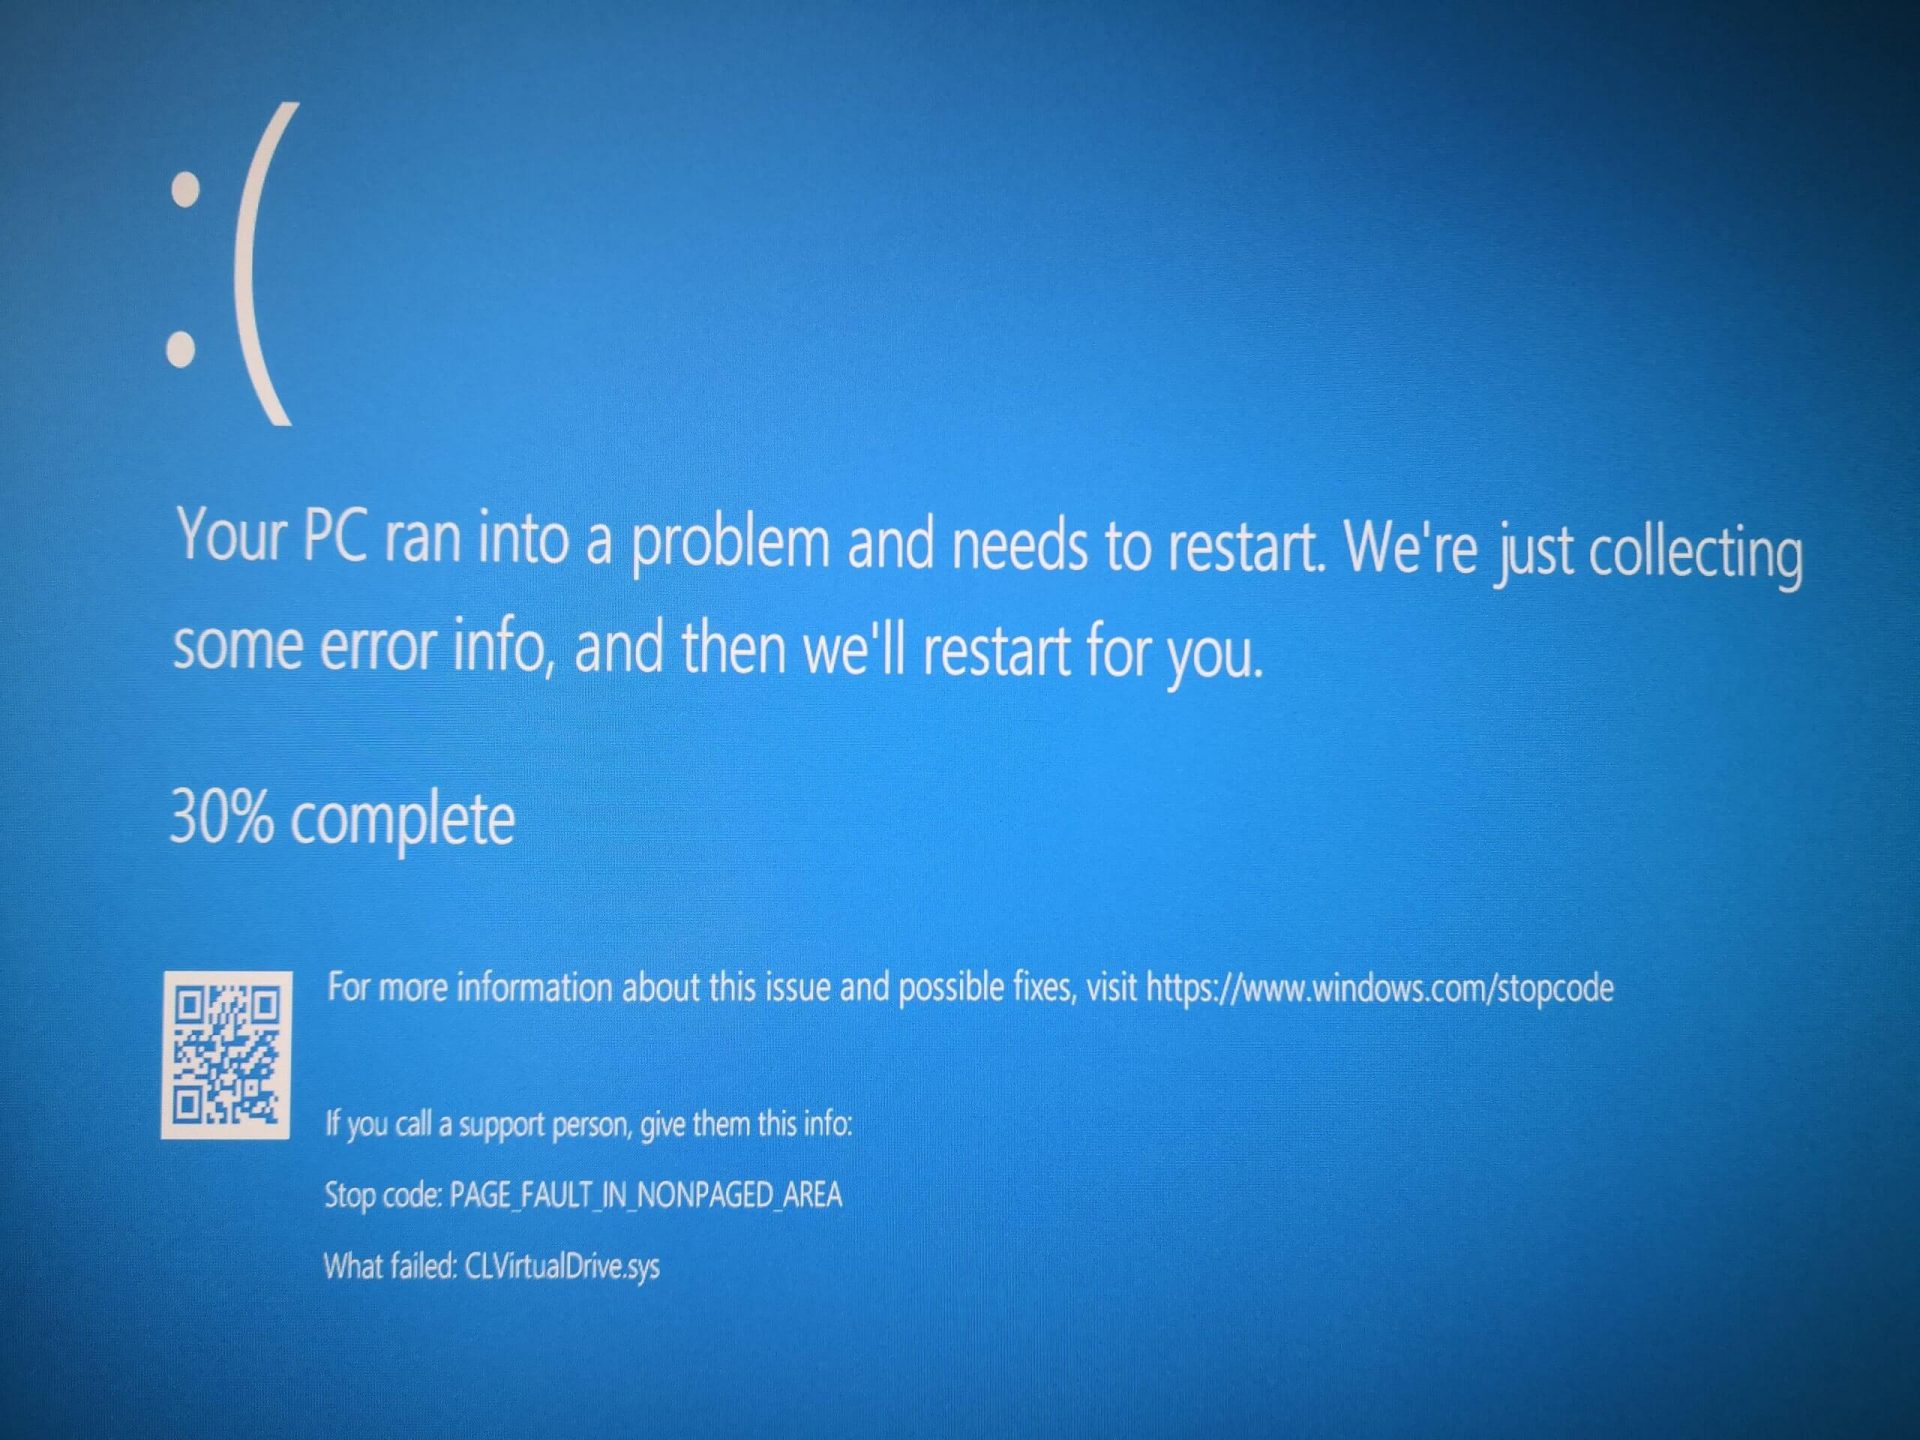
Page Fault in Non-Paged Area is a blue screen error usually happening with faulty drivers but it can come from different issues like faulty RAM.
In this short article, we will cover usual ways on how to approach and solve this error.
Solving Page fault in Non-Paged Area
Rollback using system restore
Simple and easy solution, roll back to the previous system restore point where Windows was stable and working.
Fix Page Fault in Non-Paged Area using device manager
Press ⊞ WINDOWS + X to open the hidden menu
Click on device manager
Find a device with a question mark and right-click on it
Click on the rollback driver button
Fix via command prompt
Press ⊞ WINDOWS + X to open the hidden menu
Click on command prompt (admin)
Inside command prompt type in SFC / scannow and press ENTER
Wait for the process to be finished and then reboot the PC
Fix via DISM tool
Press ⊞ WINDOWS + X to open the hidden menu
Click on command prompt (admin)
Inside command prompt type in DISM /Online /Cleanup-image /Restorehealth and press ENTER
Wait for the process to be finished and then reboot the PC
Page fault in Non-Paged Area via a dedicated tool
Sometimes manual and provided solutions just simply cannot cut it because the issue is triggered also with something else and not just a single issue.
Use DRIVERFIX to fix this specific issue with a single click.
Microsoft is trying to make Windows into a personalized OS, more and more features and parts can be customized to user liking. From larger things to smaller ones nowadays you can almost personalize every detail of Windows itself. In this article, we will tackle how to bring back the names of running applications on the taskbar.
Placing names beside icons on the taskbar is a pretty simple and straightforward task easily done.
First, right-click the Taskbar and select Taskbar settings.
In Taskbar settings, click the menu labeled Combine taskbar buttons.
Select Never.
That's it, now all of your running applications have a name beside them.
If you change your mind, you can always undo it by selecting Always hide labels in the Combine taskbar buttons menu.
As you know, Windows Update is the source for everything latest for Windows from Microsoft. Your computer receives essential updates frequently because of the Windows Update service and this Windows Update mechanism depends on various services such as Background Intelligent Transfer Service or BITS, Windows Server Update Service, Windows Update service, and many more. Although it may seem like a complex delivery system, it is a very efficient one. However, it is not without its issues as it still encounters errors every now and then. One of these errors is 80244019 which applies only to the Windows Server operating systems and to resolve it, you need to determine its cause.
The Windows Update Error 80244019 is most likely caused by faulty and corrupted DLL files or Registry Entries, connectivity issues, and outdated configuration of Windows Update service on the client end. Moreover, the error can also be caused by malware or if a file is not found on the server. This error can lead to a number of system issues like Startup and shutdown issues, software installation errors, external devices connection, system lags, unexpected application, and program issues, and many more. To resolve the problem, refer to the options given below.
Option 1 – Restart some Windows Update services
The first thing you have to do is to restart Windows Update-related services. Refer to the steps below to do so.
Open the WinX Menu.
From there, open Command Prompt as admin.
Then type in the following command – don’t forget to hit Enter right after typing each one of them.
net stop wuauservnet stop bits
After entering these commands, it will stop the Windows Update Service and the Background Intelligent Transfer Service.
Next, go to the C:/Windows/SoftwareDistribution folder and get rid of all the folders and files there by tapping the Ctrl + A keys to select them all and then click on Delete. Note that if the files are in use, you won’t be able to delete them.
Once all the contents in the Software Distribution folder are deleted, restart your PC and then go back to Command Prompt and input the following commands again.
net start wuauservnet start bits
Since the folder has already been flushed, it will be populated afresh the instant your restart your computer and open Windows Update.
Option 2 – Try turning on the Data Execution Prevention or DEP
The problem might be caused by disabled Data Execution Prevention which is why you have to make sure that it’s turned on.
Option 3 – Run the Windows Update Troubleshooter
You might also want to run the Windows Update Troubleshooter as it could also help in fixing Windows Update Error 80244019. To run it, go to Settings and then select Troubleshoot from the options. From there, click on Windows Update and then click the “Run the troubleshooter” button. After that, follow the next on-screen instructions and you should be good to go.
Option 4 – Try reconfiguring the Windows Update Settings
You can also try to reconfigure the settings in the Windows Update section to resolve the error.
Tap the Win + I keys to open the Windows Settings.
Next, click on Update & Security > Windows Updates > Update Settings and from there, click on the Advanced Options.
After that, uncheck the “Give me updates for other Microsoft Products when I update Windows” option.
Now restart your computer to successfully apply the changes made and then check if the Windows Update error is now fixed.
Option 5 – Try to manually install the Windows Updates
Windows Update Error 80244019 might be due to a Windows Update that has failed. So if it is not a feature update and only a cumulative update, you can download the Windows Update and install it manually. But first, you need to find out which update has failed, and to do so, refer to the following steps:
Go to Settings and from there go to Update and Security > View Update History.
Next, check which particular update has failed. Note that Updates that have failed to install will be displayed under the Status column which has a label of “Failed”.
After that, go to the Microsoft Download Center and look for that update using its KB number and once you find it, download and then install it manually.
Note: You can also use the Microsoft Update Catalog, a service from Microsoft that provides a list of software updates that can be distributed over a corporate network. With the help of this service, it can be easier for you to find Microsoft software updates, drivers as well as fixes.
Anxiety from all these digital threats lurking everywhere? An antivirus program can help put your mind at ease.
What can a virus do to your device?
A virus is malicious software that can affect pretty much any device and does so in a variety of ways. Be it your computer, your phone or your smart lightbulb - as long as there’s access to the internet, malware can get to it.
How exactly does this kind of attack manifest itself? Well, there’s a wide variety of effects ranging from mild to severe. Among other things, they depend on which type of malware attacks your device - a virus, spyware, ransomware, adware or something else.
These are some of the things you can expect to happen:
Slow performance
System crashes
Theft of data and sensitive information
Connectivity issues
Constant browser redirects
Strange messages sent to your contacts
Interference with files
It really can be the stuff of nightmares. So, if you want to sleep peacefully knowing that your devices are completely safe, you should definitely consider getting an antivirus.
P.S. don’t let its name fool you - an antivirus does indeed protect your devices against more than just viruses.
What is antivirus software exactly?
Antivirus software is designed to help you battle and ward off malware. Basically, it scans your device to detect any suspicious activity and offers tools to get rid of the culprit.
At first, antiviruses were developed to fight against viruses only, but nowadays they cover a lot more ground. Here are some of the biggest benefits of getting yourself a powerful defender.
Advantages of antivirus software
1. It fights those pesky ads
Look, constant ads that pop up everywhere aren’t the absolute worst thing that can happen on your computer. If anything, they are annoying, like when you’re trying to sleep but that one fly in your room just won’t stop buzzing.
Now, there’s a free, well-established solution for that - installing an ad blocker. And we’re about a hundred and ten percent sure you’ve already done that on each and every browser you use.
However, “if I can’t see it, it doesn’t exist” isn’t the most ideal approach for your online safety. Ad blockers can’t block everything and they won’t protect you from potential adware. An antivirus on the other hand offers that layer of protection against malware snuck into pop-ups and spammy websites.
2. It protects you from hackers
Hackers don’t target government institutions only. They’ll target regular people too if they have something to gain.
Credit: Clint Patteron (Unsplash)
There are different types of hacking, such as phishing e-mails, transmission of malicious programs, credential reuse, denial of service and more. In any case, they take control of your device and hijack your data.
The good thing is that, as threats evolve, antiviruses evolve too and there are tons of quality programs on the market that can keep you secure for an affordable price.
3. It keeps your files and data safe
When malware enters your device, it can target pretty much any file and get access to any and all data.
Installing an antivirus program will make sure that every single file, new or old, is monitored at all times, warning you against threats immediately. That way, you can make sure to react before your other files become infected and data is lost or stolen.
Another great thing for data protection is that the best antivirus software normally comes with a password manager, so no one can use malware to steal your passwords.
4. It blocks all kinds of malware
As we already stated, malicious attacks can be performed in many ways and malware comes in in different shapes an sizes, such as:
Trojan horse
Spyware
Ransomware
Adware
Rootkit
RAT (remote access Trojan)
Keyloggers
Worms
Botnets
Credit: Growtika (Unsplash)
Nowadays, antivirus software is designed to fight against all of these types. That’s why more often than not we hear the term 'antivirus' used interchangeably with 'anti-malware,' like in this article.
5. It keeps your children protected
You can’t keep your eyes on your kid every second of the day and you can’t protect them from everything. But at least you can limit their exposure to the threats they can encounter at every corner of the digital world.
An antivirus program will block harmful or suspicious websites and ads, which is great both for you and your children. To take it a step further, though, many such programs come with special parental controls and offer monitoring as well. It’s a great solution for keeping your kids safe online without sounding like the irritating, overbearing, controlling parent who “just doesn’t get it!”
How to pick one
There are definitely lots of different antivirus programs out there, both free and paid. We recommend you look for a paid option, since free ones are unfortunately a lot more susceptible to being compromised through malicious attacks.
Now, there are a few factors to consider when choosing the right software. If you use your PC for basic things then a basic antivirus will suffice. However, the more complex your use and the more sensitive the data you deal with, the stronger it needs to be.
It’s also crucial that you take into account the features it includes. As we already mentioned, some programs have additional security options. For example, depending on the package you select, Bitdefender provides:
Some are included in plans and some are separate products, so make sure to check out all the offers.
And don’t worry if you have multiple PCs or you’re looking for protection for your smartphone or tablet as well; Bitdefender has suitable solutions for your needs. Of course, you can also just pick their classic antivirus software if you’re not in need of advanced protection.
Another important point is how regularly the software is updated and enhanced. The more frequent the updates the better, as bugs can make the program more vulnerable. Other things we advise you consider are user-friendliness, impact on performance, reputation (user reviews especially) and, of course, price.
The bottom line
Fact is: anyone can be a malware victim. Don’t let it be you.
You can’t put a price on peace and security, so don’t be reluctant to pay for yours - especially since a lot of options out there are extremely affordable. Is $159.00 a year really too much to pay for cross-platform protection for up to 10 devices? We don’t think so.
Explore your options and protect your files and data before it’s too late.
The error 103 may occur either due to issues in your Google Chrome browser or system issues. If error 103 occurs when using Chrome, this means there is a conflict between Google Chrome and the antivirus program running on your PC.
It is displayed in either of the following formats:
‘Chrome error 103 connection aborted’, ‘Chrome error 103 err_connection_aborted’ or ‘Error 103 (net: ERR_CONNECTION_ABORTED): Unknown error.
However, if this is a system error code, it may be displayed in the following format ‘The semaphore cannot be set again’ or as ‘ERROR_TOO_MANY_SEM_REQUESTS’ or as the value 0x67.
Solution
Error Causes
The error 103 is triggered due to multiple reasons such as:
The conflict between Google Chrome and anti-viruses arises because when the web browser attempts to update, the anti-virus programs on your PC may view the update as a threat.
Due to this, the connection to the internet is terminated and the error 103 message is displayed on your computer screen. And besides, this keeps you from upgrading your Google Chrome browser too.
Other causes include:
Viral infection
Missing Windows component called ‘expand.exe’
Registry overlaps
Incompatible drivers
Further Information and Manual Repair
Here are some of the easy and efficient ways to resolve error 103. Choose a method according to the error 103 messages displayed on your screen.
Method 1: Check for the ‘Expand.exe’ Windows component
This method is workable if the error 103 is triggered due to browser issues. To get started, follow these steps.
First, go to the start menu, and in the search bar type ‘expand.exe’. If you are able to find it, move it to the following directory C:\Windows\system32. However, if you are unable to locate it, then copy the file from Windows installation CD. Once you copy the file to the directory, reinstall the updated version of Google Chrome.
Method 2: Change the Location of the Temporary File
If the error still persists, try method 2.
Go to the start menu and open the Run window. Now type C: and press OK. Then go to File, then New, and then Folder. Now create a temporary folder and name it ‘test’. After that go back to the start menu and open the Run window again. Now enter the following text in the text field:cmd.exe then press OK. In the command prompt type set TMP=C:\test.
After that try reinstalling Google Chrome by typing the following in the command prompt: start ChromeSetup.exe.
Method 3: Update Drivers
If the error message 103 is generated due to system issues, then try updating drivers. Sometimes the error may occur due to incompatible drivers.
Method 4: Perform an Entire PC Scan for Viruses
To resolve error 103, perform an entire PC Scan for viruses. Sometimes the error may occur due to viral infection. Removing viruses may fix the error.
Method 5: Clean and Restore the Registry
If the error is triggered due to registry issues, then it is advisable to download Restoro.
This is a multi-functional PC repair tool integrated with powerful utilities including an anti-virus, a registry cleaner, Active X controls, and class scanner, and a system optimizer. The registry cleaner feature wipes out all the unnecessary files including cookies, junk files, and bad registry keys that corrupt the registry. It cleans and restores the registry instantly.
The anti-feature removes all viruses and spyware while the system optimizer utility ensures your system works at its optimum speed.
It can be downloaded on all Windows versions. It is safe and efficient. This software is a one-stop solution for all PC-related errors.
Click here to download Restoro.
Microsoft just released Windows 11 Insider build 22000.71. Let’s dive in and see what it brings with you.
Changes and features
New entertainment widget. The entertainment widget allows you to see new and featured movie titles available in the Microsoft Store. Selecting a movie will direct you to the Microsoft Store to see more information about that title. Just open widgets and click or tap on the “Add widgets” button and choose the entertainment widget. For now, the entertainment widget is available for Insiders in the following countries: US, UK, CA, DE, FR, AU, JP.
The new context menus and other right-click menus have been updated to use acrylic material.
We are testing the usability of a SplitButton for making new folders and files in the File Explorer command bar.
The Taskbar previews (when you mouse-over open apps on the Taskbar) have been updated to reflect the new visual design of Windows 11.
Fixes
Taskbar:
We fixed an issue where if you drag app icons on the Taskbar to rearrange them, it was making the apps launch or minimize when you released the icon.
Using a long press with a touch on an app icon in the Taskbar to open the jump list should now work.
After right-clicking the Start icon in the Taskbar, clicking somewhere else should now dismiss the menu more reliably.
Shift + Right-click on an app icon in the Taskbar will now bring up the window menu like it used to and not the jump list.
We’ve addressed an issue that was making your mouse move slowly when hovering over the Taskbar previews.
We’ve included the fix for an issue when using multiple Desktops where an app icon in the taskbar might give the appearance of multiple windows being open when that wasn’t the case on that Desktop.
When using the Amharic IME you should no longer see an unexpected X next to the IME icon in the taskbar.
The issue where if you click on the input indicator on the Taskbar and it would unexpectedly highlight Quick Settings has been fixed.
When you hover over Task View, the preview flyout for your Desktops will no longer pop back up after using Esc to dismiss them.
We made a fix to address an issue where explorer.exe might crash after hovering over the Task View icon in the Taskbar.
We fixed an issue where the selected date in the calendar flyout was out of sync with the date in the Taskbar.
We made an update to address a scenario resulting in some Insiders not seeing the lunar calendar text in the calendar flyout when enabled in Settings.
This flight addressed an issue that could unexpectedly make the Taskbar background transparent.
Right-clicking the focus assist icon in the taskbar should now show a context menu.
The issue from the previous flight where icons in the taskbar corner were getting crushed against the top of the Taskbar has been addressed.
The tooltip for the location in use icon in the Taskbar should no longer appear blank sometimes.
Settings:
We fixed an issue making Settings crash on launch periodically.
Using the volume mixer sliders in Sound Settings should be more responsive now, as well as the page responsiveness as a whole.
We fixed an issue resulting in Disk and Volumes Settings’ change size option being clipped.
There was a non-functional verify link under Backup Settings – this has been fixed.
The Power and Battery Settings page should no longer be reporting that the battery saver is engaged if it’s not.
The Power and Battery Settings page should also now not crash when launched from Quick Settings.
We fixed a grammatical error in the Sign-in Settings text.
The “I forgot my PIN” link was unexpectedly missing in Sign-in Settings when a PIN was set up and has now been returned.
The issue where the Move option under Apps & Features in Settings wasn’t working reliably should be addressed in this build.
We’ve mitigated a problem where some of the colors in Settings weren’t updating after switching between dark and light mode, leaving the unreadable text.
We’ve done some work to help improve the performance of Settings when switching between light and dark mode.
We addressed an issue where some of the elements of the Themes page in Settings would end up crowded together when the window size was small.
We resolved an issue where the Pen menu toggle under Taskbar Settings was not in sync with the actual state of the feature.
Changes made to “Dismiss notification after this amount of time” in Accessibility Settings should now persist.
Some of the icons you could enable in Taskbar Settings were erroneously labeled Windows Explorer even though that’s not what they were – this should now be fixed.
The Connect text in Quick Settings has been updated to say Cast.
File Explorer:
Clicking the command bar button twice should now close any dropdown that appeared.
The new command bar should now appear when “Open folders in a separate process” is enabled under File Explorer Options > View.
This build addresses an issue where right-clicking a file and selecting Open With > Choose another app might launch the file in the default app rather than opening the Open With dialog.
Fixed an issue the desktop and File Explorer context menu would stop launching.
Search:
We fixed an issue where the option to verify your account in Search wasn’t working.
Hovering over the Search icon on a secondary monitor will now show the flyout on the correct monitor.
Search should now work if you open Start and start typing after having gone to the apps list and back.
Widgets:
When using the Outlook client with a Microsoft account, Calendar, and To-Do updates should sync faster down to the widgets.
We addressed an issue where if you added multiple widgets quickly from the widget's settings, it could result in some of the widgets not being visible on the board.
We fixed a bug where widgets could all become stuck in a loading state (blank squares in the window).
The traffic widget should now follow the Windows mode (light or dark).
The title of the sports widget should no longer mismatch with the content of the widget.
Other:
This build addresses an issue where ALT + Tab was getting stuck open sometimes after you released the keys and had to be manually dismissed.
We made a fix for an issue where Narrator's focus wasn’t ending up on the emoji panel after using the keyboard shortcut to open it.
Magnifier’s lens view has been updated so the lens now has rounded corners.
We found an issue that was noticeably impacting Start launch reliability for some Insiders, and have addressed it with this flight.
We’ve updated the “Most Used” text in the Start menu’s app list so it should no longer be getting clipped.
Using the semantic zoom in Start’s app list should no longer result in the list being pushed down and to the right off the edge of the window.
We fixed an issue where if you pressed ⊞ WIN + Z you would need to press Tab before you could use the arrow key to navigate through the snap layouts.
We addressed an issue where an acrylic area could get left on the screen after repeatedly snapping and unsnapping a window with touch.
We’ve done some work to mitigate an unexpected flash when moving a snapped window with touch.
We made a change to help window borders have a little more contrast when “Show accent color on title bars and windows borders” was turned off.
Known issues in Windows 11 repaired
Start:
In some cases, you might be unable to enter text when using Search from Start or the Taskbar. If you experience the issue, press ⊞ WIN + R on the keyboard to launch the Run dialog box, then close it.
Based on feedback, we are working on adding access keys to ⊞ WIN + X so that you can do things like “⊞ WIN + XM” to launch Device Manager. Insiders may see this functionality in this build, however, we are currently investigating an issue in which sometimes the option is unexpectedly unavailable.
Taskbar:
There is an issue in this build where Explorer.exe will crash when the date and time button on the Taskbar is clicked to access new notifications with Focus Assist turned off. The workaround for this is to enable Focus assist to priority or alarms mode. Note that when focus assist is turned on, notification popups won’t appear, but they will be in the notification center when opened.
The Taskbar will sometimes flicker when switching input methods.
Taskbar previews may draw partially offscreen.
Settings:
When launching the Settings app, a brief green flash may appear.
When using Quick Settings to modify Accessibility settings, the settings UI may not save the selected state.
The button to rename your PC doesn’t work in this build. If needed, this can be done using sysdm.cpl.
Settings will crash when clicking “Facial recognition (Windows Hello)” under Sign-in Settings if Windows Hello is already set up.
Reset this PC and Go back buttons in Settings > System > Recovery does not function. Reset and rollback can be accessed from the Windows Recovery Environment by selecting System > Recovery > Advanced startup, and pressing Restart now. Once in Windows Recovery, choose Troubleshoot.
Choose Reset this PC to perform a reset.
Choose Advanced options > Uninstall Updates > Uninstall latest feature update to perform a rollback.
File Explorer:
exe crashes in a loop for Insiders using the Turkish display language when the battery charge is at 100%.
When right-clicking the desktop or File Explorer, the resulting context menu and submenus may appear partially off-screen.
Clicking a desktop icon or context menu entry may result in the wrong item being selected.
Search:
After clicking the Search icon on the Taskbar, the Search panel may not open. If this occurs, restart the “Windows Explorer” process, and open the search panel again.
When you hover your mouse over the Search icon on the Taskbar, recent searches may not be displayed. To work around the issue, restart your PC.
The search panel might appear black and not display any content below the search box.
Widgets:
Widgets board may appear empty. To work around the issue, you can sign out and then sign back in again.
Launching links from the widgets board may not invoke apps to the foreground.
Widgets may be displayed in the wrong size on external monitors. If you encounter this, you can launch the widgets via touch or WIN + W shortcut on your actual PC display first and then launch on your secondary monitors.
Store:
The install button might not be functional yet in some limited scenarios.
Rating and reviews are not available for some apps.
Windows Security:
Device Security is unexpectedly saying “Standard hardware security not supported” for Insiders with supported hardware.
“Automatic sample submission” is unexpectedly turned off when you restart your PC.
Localization:
There is an issue where some Insiders may be missing some translations from their user experience for a small subset of languages running the latest Insider Preview builds. To confirm if you have been impacted, please visit this Answers forum post and follow the steps for remediation.
That's is so far, the latest update information on Windows 11 insider build. Stay tuned for more information when it comes as it comes.
When you try to open your Google Chrome browser and it starts to connect to the internet but suddenly, your Windows 10 computer crashes along with a Blue Screen error that says, “MEMORY_MANAGEMENT”, then read on as this post will guide you in fixing the problem.
This kind of BSOD error occurs when Google Chrome requests more memory or when it tries to access the network and demand is raised for more memory, the memory management program fails. To fix the problem, here are some possible solutions you might want to try. Follow them thoroughly.
Option 1 – Use the Driver Verifier Manager
The Driver Verifier Manager is another tool in Windows that could help you fix driver-related issues. And since the MEMORY_MANAGEMENT Blue Screen error concerns Google Chrome and an internet connection, the root cause of the problem might have something to do with the Network driver and to verify that, you can use the Driver Verifier Manager:
Type in the keyword “Verifier” in the Cortana search box to search for Verifier in Windows 10.
After that, select the option “Create custom settings”.
Make sure that you have checked everything except the options “DDI compliance checking” and “Randomized low resources simulation”.
Next, select the option “Select driver names from a list” option.
Afterward, you have to select all the drivers from any unofficial or third-party provider. To simply put it, you have to select all the drivers that are not supplied by Microsoft.
Then click on the Finish button.
Open Command Prompt as administrator and execute this command – verifier /querysettings
The command you just executed will display the Driver Verifier settings so if you see any of the flags enabled boot your Windows 10 PC into Safe Mode.
Open the Command Prompt as admin again and run this command – verifier /reset
The command will reset the Driver Verifier. Once the process is done, restart your PC and check.
Option 2 – Try updating the Network drivers
Tap the Win + R keys to launch the Run window and then type in the “devmgmt.msc” command and hit Enter to open the Device Manager window.
Under the Device Manager, you will see a list of drivers. From there, look for the Network Adapters and expand it.
Then right-click on each one of the Network drivers and update them all.
Restart your PC and see if it helped in fixing the MEMORY_MANAGEMENT BSOD error.
Option 3 – Try disabling Hardware Acceleration
You might want to disable Hardware Acceleration system-wide or for a particular program like Google Chrome and see if it resolves the MEMORY_MANAGEMENT error
Option 4 – Run the Memory Diagnostic Tool to check for Memory leaks
Tap the Win + R keys to open Run and type exe and hit Enter to open the Windows Memory Diagnostic Tool.
After that, it will give two options such as:
Restart now and check for problems (Recommended)
Check for problems the next time I start my computer
Once your computer has restarted, perform a basic scan or you could also go for the “Advanced” options such as “Test mix” or “Pass count”. Simply tap the F10 key to start the test.
Note: After you select the option, your PC will restart and check for memory-based issues. If it finds any issues, it will automatically fix them and if there’s no issue found, then it’s most likely not a memory-based issue so you should try the other options given below.
Option 5 – Perform a System Restore
Performing System Restore might help you in fixing the SYNTP.SYS Blue Screen error. You can do this option either by booting into Safe Mode or in System Restore. If you are already in the Advanced Startup Options, just directly select System Restore and proceed with the next steps. And if you have just booted your PC into Safe Mode, refer to the steps below.
Tap the Win + R keys to open the Run dialog box.
After that, type in “sysdm.cpl” in the field and tap Enter.
Next, go to the System Protection tab then click the System Restore button. This will open a new window where you have to select your preferred System Restore point.
After that, follow the on-screen instructions to finish the process and then restart your computer and check if the problem is fixed or not.
Option 6 – Run the Blue Screen Troubleshooter
The Blue Screen troubleshooter is a built-in tool in Windows 10 that helps users in fixing BSOD errors like MEMORY_MANAGEMENT. It can be found in the Settings Troubleshooters page. To use it, refer to these steps:
Tap the Win + I keys to open the Settings panel.
Then go to Update & Security > Troubleshoot.
From there, look for the option called “Blue Screen” on your right-hand side and then click the “Run the troubleshooter” button to run the Blue Screen Troubleshooter and then follow the next on-screen options. Note that you might have to boot your PC into Safe Mode.
0xc00d36cb error shows up when you are trying to play a video or movie using the default player in Windows. This error can occur due to a glitch in the media player or corrupted system files. in this guide, we will show you how to tackle this issue and fix it.
Run the video playback troubleshooter
Click on Start and select Settings.
Go to Update and Security.
Scroll down and open the Troubleshoot tab.
Scroll down and select the Video Playback option.
Click the Run the Troubleshooter button.
The troubleshooter will perform an initial scan and offer a few options.
Select Continue with this troubleshooter.
The troubleshooter will scan the system again for driver and codec issues.
Follow on-screen instructions and apply recommended fixes.
Reset the Movies and TV app
Click on Start and select Settings.
Go to Apps and open the Apps and features tab.
Scroll down to Movies and TV.
Select Movies and TV.
Click Advanced options.
Scroll down and click on the Reset button.
Create a new user account
Click on Start and select Settings.
Open Accounts.
Open the Family & other users tab.
Scroll down to Other users and click the Add someone else to this PC button.
In the Microsoft account window, type your email address.
If you don’t want to enter an email address and establish a local account, click on I don’t have this person’s sign-in information option instead.
Next, select Add a user without a Microsoft account (for a local account).
Else, enter your Microsoft account login details.
Enter a user name and password for your new account. Also, select a security question and add an answer to it.
Once the new profile is ready, log out of your current account.
Check for permission issues
Right-click on the problematic file and select Properties.
Open the Security tab.
Click the Advanced button.
In the Advanced Security Setting window, click the Change link.
In the Select User or Group window, enter Everyone in the text box.
Click the Check Names button.
Click OK and Apply to save the changes.
Close all the Properties windows.
Try playing the file or modifying the properties and check for any improvements.


 Rollback using system restore


 Changes and features