What is the Error 421?
Error 421 is a common SMTP (Simple Mail Transfer Protocol) Outlook error message. MS Outlook is one of the best and popular email applications widely used by PC Windows users for sending and receiving emails within and outside workplaces.
It is most commonly used in offices by professionals for faster communication.
This error may occur while sending and receiving emails on the server. The error 421 messages is displayed in either of the following formats:
“An unknown error has occurred: Server error 421”
"Could not send your message. Error 421"
421 4.2.1 : (DYN:T1) http://postmaster.info.aol.com/errors/421dynt1.html
421 4.3.1 Out of disk space for temp file
421 4.3.2 All server ports are busy
421 Downstream server error
421 Fork failed
421 Greylisting enabled, please try later
“An unknown error has occurred. Subject ‘Testing’, Account: ‘pop.charter.net’, Server: ‘mail.charter.net’, Protocol: SMTP, Server Response:
’421 Message rejected’, Port: 25, Secure(SSL): No, Server Error: 421, Error Number: 0x800CCC67”
Solution
 Error Causes
Some common causes for this critical Outlook error are:
- PST storage size exceeds 2GB file size
- Improper ISP settings
- Slow internet connection
- PST file corruption
- Trojan attack and viral infection
This is a critical Outlook error that should be resolved timely. If you delay, it may cause you a great deal of inconvenience.
The error code 421 hampers your ability to access your email account, send and receive emails, add new contacts, view emails, calendar entries, and journals. In other words, it just brings your email activities to a standstill locking you out of the account.
Further Information and Manual Repair
To resolve this error code on your system, you don’t always have to hire a professional or call the network personnel to do the job. It may be a critical error but the good news is that it is quite easy to fix. Even if you don’t have technical expertise, you can still repair it.
Here are some of the best methods to repair this issue on your system:
1. Change the Server Settings to its Maximum Limit
Try changing your server settings. Here set the inbound connections limit at the maximum limit.
- To do this, open the Microsoft Exchange Server Administrator utility. The access path of this utility will vary depending on the installation procedure used to set up Exchange Server.
- Once you open the MS Exchange Server Administrator utility, click the ‘Connections’ icon in the left side navigation pane. Now double click the internet mail service icon in the right side pane. As you click it, the Properties window will open.
- Now click the ‘Connections’ tab in the Properties window and then click the ‘Advanced’ button. This will open the configuration window.
- Here reset the number for ‘Maximum Number of Inbound Connections’ to a high number, its maximum limit. After changing the settings, close all open Exchange Server Administrator program windows to successfully complete the process.
After the process is complete, try accessing your Outlook email account again; if it works, then that’s great the error 421 is resolved. However, if it doesn’t, then the problem could be related to viral infection.
2. Download a PST Repair Tool
If the cause of the error is PST files corruption, then not only will you be locked out of your email account, you are also at risk of losing all the data stored in your email account.
However, the best way to resolve the error and ensure full data recovery is to download a reliable PST repair tool. By running a PST repair tool on your system, you can resolve the error 421 right away. It recovers your data, repairs corrupt and damaged PST files.
3. Scan Your PC with Restoro.
If viral infection and Trojans are causing the error 421 to pop up on your system, then it is recommended to download and scan your PC with Restoro.
This is an advanced, intuitive, and user-friendly PC fixer. It is not just an antivirus but also a system optimizer and a registry cleaner.
Unlike common antivirus software that only removes viruses and simultaneously slows down the system’s speed, Restoro removes all types of malicious software on your PC including malware, spyware, Trojans, and viruses, and also boosts the speed of your PC significantly.
It is safe, easy to operate, and a quick fixer. It is compatible with all Windows versions.
Click here to download Restoro and resolve error 421 today!

 The latest update from Panos Panay on Twitter is including New and redesigned Snipping tool inside Windows 11. From the shared video, we can see that it includes modern Windows 11 UI redesign and it looks and feels like a part of Windows 11.
More things that can be seen from the shared video is that it looks like the new snipping tool is a merged version of the old with snip & sketch.
It is good to see that it is still possible to capture screen with easier way natively inside Windows 11 but some more functionality would be more welcome I guess.
Users were asking for added functions for a long time like adding simple text for example but from shared video, no new features were presented so for some users 3rd party solutions will still be the way to go.
The new and redesigned Snipping tool will roll out with the next update and we will see then about all new features inside it firsthand. Until then, take care.
The latest update from Panos Panay on Twitter is including New and redesigned Snipping tool inside Windows 11. From the shared video, we can see that it includes modern Windows 11 UI redesign and it looks and feels like a part of Windows 11.
More things that can be seen from the shared video is that it looks like the new snipping tool is a merged version of the old with snip & sketch.
It is good to see that it is still possible to capture screen with easier way natively inside Windows 11 but some more functionality would be more welcome I guess.
Users were asking for added functions for a long time like adding simple text for example but from shared video, no new features were presented so for some users 3rd party solutions will still be the way to go.
The new and redesigned Snipping tool will roll out with the next update and we will see then about all new features inside it firsthand. Until then, take care. 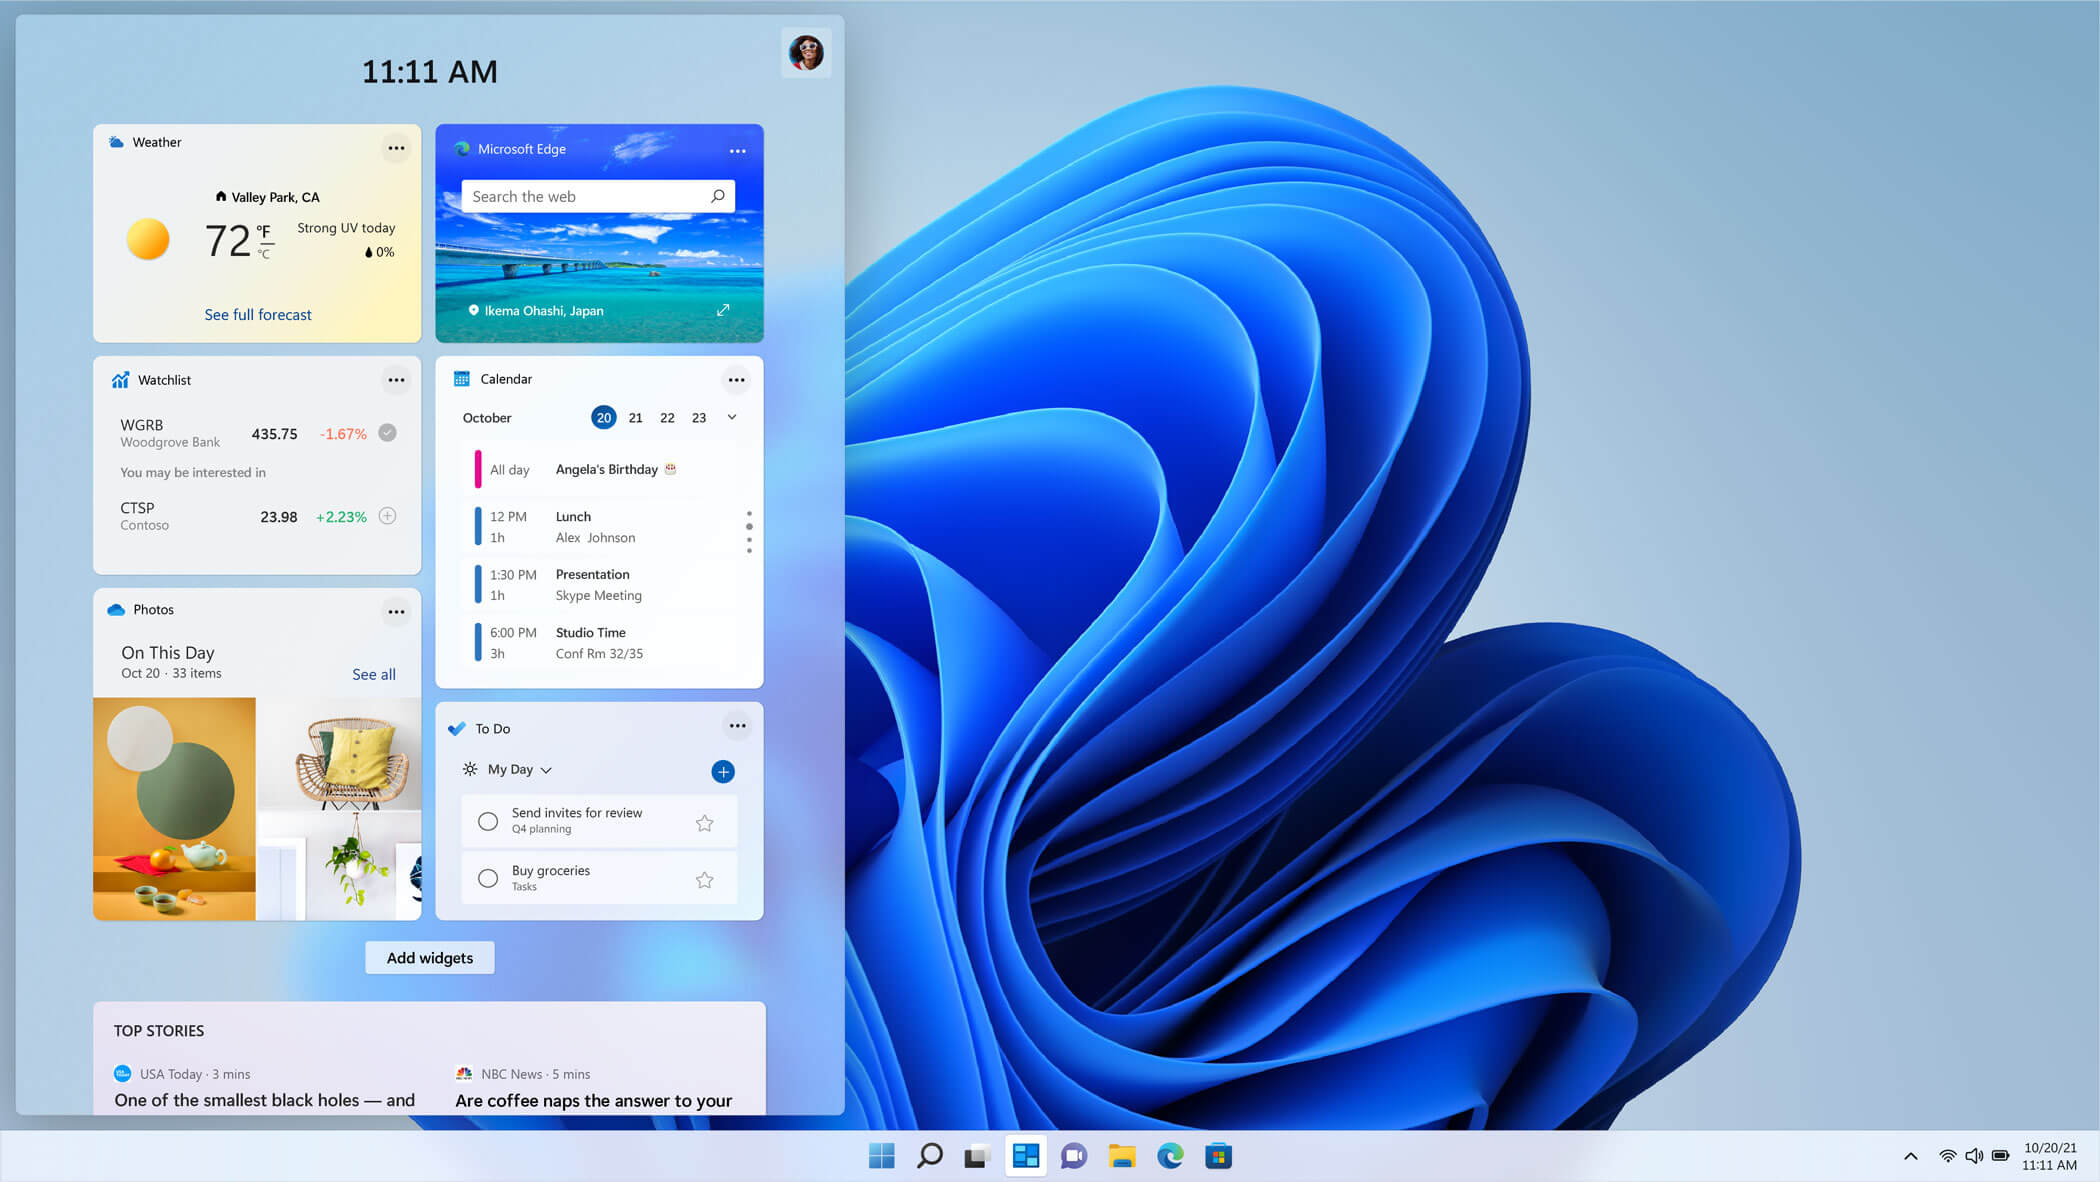 The new widget's menu inside Windows 11 is generally met with a positive attitude but there are still users which prefer not to have it. Luckily for them, Microsoft included a very easy way to turn the widgets menu on or off. Follow this easy guide to see how.
Right-click on the widget button in the taskbar and click on Hide from Taskbar and that’s it
Alternatively, you can also turn it off via the setting app.
Go to the settings app and navigate to Personalization > Taskbar > Taskbar Items and flipping the switch beside Widgets to Off.
Please note that both methods will only hide the button to toggle widgets menu, at the current state there is no really a way to actually turn it off, only hide it and make it not available to bring it up.
The new widget's menu inside Windows 11 is generally met with a positive attitude but there are still users which prefer not to have it. Luckily for them, Microsoft included a very easy way to turn the widgets menu on or off. Follow this easy guide to see how.
Right-click on the widget button in the taskbar and click on Hide from Taskbar and that’s it
Alternatively, you can also turn it off via the setting app.
Go to the settings app and navigate to Personalization > Taskbar > Taskbar Items and flipping the switch beside Widgets to Off.
Please note that both methods will only hide the button to toggle widgets menu, at the current state there is no really a way to actually turn it off, only hide it and make it not available to bring it up.