TranslationBuddy is a browser extension developed by MindSpark Inc. for Google Chrome. This extension allegedly offers users the ability to translate any text to any language.
From the Author: Now enjoy immediate access to the FREE web, email, and text translations, Multilanguage Virtual Keyboards, words of the day, and more!
This extension configures your New Tab page to TranslationBuddy™ to provide these features.
Get FREE translations instantly. An easy way to translate web pages, texts, and emails.
Unfortunately, this extension hijacks your browser's new tab page, and default search engine, changing it to MyWay. While installed, it monitors browser activity such as visited websites, clicked links, downloaded information, and sometimes even personal information that it later uses to display additional unwanted ads in your browser.
About Browser Hijackers
Browser hijacking is a type of unwanted program, usually a web browser add-on or extension, which then causes modifications in the web browser’s settings. Browser hijackers are capable of doing a number of things on your PC. Generally, browser hijacking is used for earning advertising revenue from forced advert clicks and site visits. Though it might appear harmless, these tools are made by vicious people who always try to take advantage of you, so that hackers can earn money from your naivety and distraction. Some browser hijackers are designed to make particular modifications beyond the browsers, like altering entries in the system registry and letting other malware further damage your machine.
Indications of browser hijack
There are several symptoms that point to a browser hijacking: you see unauthorized modifications to your Internet browser’s home page; bookmark and the new tab are likewise modified; The default search page of browser is modified; unwanted new toolbars are added to your web browser; unstoppable flurries of popup advertisements appear on your computer screen; your web browser gets sluggish, buggy, crashes very often; you’re blocked to access the websites of computer security solution providers.
Exactly how they invade computer systems
Browser hijackers can enter a PC by some means or other, for example via file sharing, downloads, and email also. They may also come from any BHO, browser extension, toolbar, add-on or plug-in with malicious intent. Some internet browser hijackers spread in user’s computers using a deceptive software distribution strategy called “bundling” (commonly through shareware and freeware).
Browser hijacking may lead to severe privacy problems and even identity theft, affect your web browsing experience by taking control over outbound traffic, substantially slows down your computer or laptop by deleting lots of resources, and cause system instability at the same time.
Removing browser hijackers
Some hijackers could be removed by deleting the free software they came with or by deleting any add-ons you’ve recently added to your computer system. Having said that, many hijackers are extremely tenacious and require specialized applications to remove them. Inexperienced PC users shouldn’t ever attempt the manual form of removal, as it demands thorough system knowledge to perform fixes on the system registry and HOSTS file.
You might opt for automatic browser hijacker removal methods by simply installing and running an efficient anti-malware program. One of the recommended tools for fixing browser hijacker infections is SafeBytes Anti-Malware. It will help you remove any pre-existing malicious software in your system and provides you real-time monitoring and protection from the latest internet threats. Together with the anti-malware tool, a system optimizer could help you in deleting all associated files and modifications in the registry automatically.
How To Get Remove Virus That Is Preventing Anti-Malware Downloads?
Malware can cause all kinds of damage when they invade your system, from stealing sensitive details to deleting data files on your PC. Certain malware variants modify browser settings by adding a proxy server or modify the computer’s DNS configurations. In these cases, you’ll be unable to visit certain or all websites, and thus unable to download or install the required security software to eliminate the malware. If you are reading this article now, you might have perhaps realized that virus infection is the reason behind your blocked net connectivity. So how to proceed if you want to download and install an antivirus program such as Safebytes? Refer to the instructions below to remove malware through alternative ways.
Install the antivirus in Safe Mode
In Safe Mode, you are able to modify Windows settings, uninstall or install some programs, and eliminate hard-to-delete viruses. In the event, the malicious software is set to load automatically when the PC starts, switching to this mode may prevent it from doing so. In order to get into Safe Mode or Safe Mode with Networking, press F8 while the system is booting up or run MSConfig and look for the “Safe Boot” options under the “Boot” tab. Once you’re in safe mode, you can try to install your anti-malware software application without the hindrance of the malware. After installation, run the malware scanner to eliminate most standard infections.
Switch to an alternate internet browser
Malicious code may exploit vulnerabilities on a particular internet browser and block access to all antivirus software sites. If you seem to have a virus attached to Internet Explorer, then switch over to an alternate browser with built-in safety features, such as Firefox or Chrome, to download your preferred anti-malware program – Safebytes.
Make a bootable USB anti-virus drive
Another approach is to download and transfer an anti-malware application from a clean PC to run a scan on the infected computer. Adopt these measures to run the antivirus on the affected computer system. 1) On a virus-free PC, download and install Safebytes Anti-Malware. 2) Plug the Flash drive into the clean computer. 3) Double-click the Setup icon of the antivirus software to run the Installation Wizard. 4) Select the USB flash drive as the location for saving the file. Follow the directions to complete the installation process. 5) Disconnect the pen drive. Now you can use this portable anti-malware on the infected computer system. 6) Double-click the EXE file to run the Safebytes tool from the pen drive. 7) Hit the “Scan” button to run a full system scan and remove malware automatically.
Let's Talk About SafeBytes Security Suite!
Today an anti-malware program can protect your computer from various kinds of internet threats. But wait, how to choose the right one amongst the many malware protection software that’s available out there? As you might be aware, there are numerous anti-malware companies and tools for you to consider. A few of them do a good job in getting rid of malware threats while some will damage your PC themselves. You need to be careful not to choose the wrong product, especially if you purchase a premium program. Among few good programs, SafeBytes Anti-Malware is the highly recommended software program for the security-conscious individual.
SafeBytes anti-malware is really a powerful, very effective protection application made to assist users of all levels of computer literacy in finding and removing malicious threats out of their PC. Using its cutting-edge technology, this application can assist you to eliminate several types of malware which include viruses, worms, PUPs, trojans, adware, ransomware, and browser hijackers.
SafeBytes anti-malware takes computer protection to a totally new level with its enhanced features. Below are some typical features found in this software:
Real-time Threat Response: SafeBytes provides complete and real-time security for your laptop or computer. This utility will constantly monitor your computer for any suspicious activity and updates itself continuously to keep abreast of the newest threats.
Anti-Malware Protection: This deep-cleaning anti-malware program goes much deeper than most antivirus tools to clean out your personal computer. Its critically acclaimed virus engine finds and disables hard to remove malware that hides deep inside your computer.
“Fast Scan” Features: SafeBytes Anti-Malware has a multi-thread scan algorithm that works up to 5 times faster than any other protection software.
Web Protection:Safebytes allots all websites a unique safety ranking that helps you to have an idea of whether the website you are about to visit is safe to browse or known to be a phishing site.
Light-weight: SafeBytes provides total protection from online threats at a fraction of the CPU load because of its enhanced detection engine and algorithms.
24/7 Online Support: You could get high levels of support around the clock if you’re using their paid software.
To sum it up, SafeBytes Anti-Malware offers great protection combined with very low system resource usage with both great malware prevention and detection. Now you may know that this tool does more than just scan and remove threats from your PC. So if you are looking for the best anti-malware subscription for your Windows-based PC, we suggest SafeBytes Anti-Malware software.
Technical Details and Manual Removal (Advanced Users)
If you wish to carry out the removal of TranslationBuddy manually rather than using an automated software tool, you may follow these steps: Proceed to the Windows Control Panel, click on the “Add/Remove Programs” and there, select the offending application to uninstall. In case of suspicious versions of web browser plugins, you can easily get rid of them via your web browser’s extension manager. Additionally, it is recommended to factory reset your browser to its default condition to fix corrupt settings.
To ensure the complete removal, manually examine your hard drive and registry for all of the following and eliminate or reset the values accordingly. But bear in mind, this is often a challenging task and only computer professionals could carry it out safely. Furthermore, certain malware is capable of replicating or preventing deletion. It is recommended that you carry out the removal process in Windows Safe Mode.
0x Referenced Memory at 0x is an error code that occurs when the random memory addresses conflict.
This error causes running programs or browsers to crash. Referenced memory at error code is considered as a service violation error. It is displayed as the following:
“The instruction at 0xf77041d24 referenced memory at 0×00000000. The memory could not be read.”
Solution
Error Causes
The ‘referenced memory at’ errors is either triggered by:
Hardware failure
Problems with the RAM and the registry
Hardware failure may result if the driver is not installed properly. The problems in the RAM indicate registry issues that occur due to data overload in the hard disk and poor PC maintenance.
The registry saves all the information and activities you perform on your system on the hard disk.
This includes the junk files, temporary files, invalid registry entries, and files of both installed and uninstalled programs. These files accumulate and take over a lot of RAM space.
Also, the referenced memory at error can be considered to be a form of memory leak where unknown third-party software can take up the memory space that has been reserved for a particular program.
For example, if you have toolbars and add-ons installed in your browser, it can also lead to invalid registry storage in the registry.
If you don’t clean the registry, these unnecessary files can overload your data and lead to hard disk/RAM damage and corruption triggering obscure error messages like referenced memory at error.
Further Information and Manual Repair
Referenced memory is a critical error; if not resolved it can lead to serious PC damages like a system failure. To avoid this, it is advisable to fix it right away.
Here are a couple of ways to repair this issue on your system:
Cause: Hardware Failure
Solution: If the referenced memory at error is generated due to hardware failure then to resolve this error you must reinstall the driver that has caused the error to appear.
Let’s say if the error pops up because of the printer driver, reinstall it. For re-installation of the driver, simply go to the control panel and click on the Device Manager option.
Once you click it you will see a detailed page with a list of devices.
Now click on the printer (the problematic driver in this situation) to reinstall the driver software. Double click on it to open the properties dialog box and then click the driver tab and update the driver. Once you have updated the driver, try using the printer. Check if it works.
If it works and the referenced memory at the error code does not appear on the screen, this means the problem was with the hardware. However, if the error still pops up then this means the problem is deeper. It’s related to the registry.
Cause: Problems with the RAM and the registry
Solution: If the problem is with the RAM and the registry, then it is advisable to download Restoro.
Restoro is a new, next-generation, and highly functional registry cleaner.
It detects and removes all the registry issues, unnecessary and obsolete files saved in the hard disk taking up a lot of RAM space. It clears the RAM and cleans up the disk.
Furthermore, it repairs the damaged files, fragmented disk, and the corrupt registry in seconds enabling you to resume the program that you were running before the error occurred.
Restoro has a user-friendly interface and easy navigation.
To run and operate this system you don’t need any kind of technical expertise. In just a few clicks you can resolve the critical referenced memory at error on your PC.
It is compatible with all Windows versions
Click here to download and install Restoro on your PC and fix the referenced memory error code now.
A lot of users prefer to use Microsoft OneDrive when it comes down to cloud storage as it does not only come with the seal of approval from Microsoft but it’s also primarily good and better compared to other cloud storage services. However, that doesn’t mean that OneDrive isn’t without any issues. For one, you might encounter an issue where the OneDrive thumbnails do not show in File Explorer in Windows 10. If you are currently experiencing this problem, read on as this post will help you fix it.
As you know, you can add OneDrive to your Windows 10 computer and have all the files locally synchronize to the cloud and so on. This means that whatever is available in the cloud will be seen on your computer. It is smooth and definitely saves you a lot of time which is why a lot of users prefer to use it. So if you suddenly not see any thumbnails in OneDrive, then that would be a problem.
You are actually not the only one having this problem as there are other users who reported getting the same issue recently about the picture thumbnails that no longer show up in the OneDrive folders in the File Explorer. At the time of writing, it isn’t clear yet what the cause of the issue really is. Even so, there are still potential fixes you can check out to resolve it, and the sooner you do it, the better as this can be a major problem. To get started, refer to the instructions given below.
Option 1 – Try to disable Files on Demand
The first thing you can do to fix the problem is to disable the Files on Demand. This is what you have to do to get things under control.
First, right-click on the OneDrive icon located in the taskbar and go-to of OneDrive.
After that, click on More and Settings. This will open a new window where you have to click on the Settings tab and uncheck the “Files on Demand” service.
Once done, restart your computer and check if you can now see the thumbnails in the OneDrive folder. However, if it didn’t work, then proceed to the next given option below.
Option 2 – Try to change the icon view
The next thing you can do to fix the problem is to change the icon view. It is possible that the problem might have something to do with the size of the icons than anything else. So you have to change the icon view and to do that, follow these steps:
First, open Control Panel in Windows 10.
Next, in the search box, type “folder” and then click on the File Explorer Options.
From there, click on the View tab and uncheck the “Always show icons” option, and make sure that showing thumbnails is active.
Now go back to Control Panel and type “system” in the search box. This will open a new window where you have to select the “View advanced system settings” option.
Then under the Performance section, click on Settings and click on the option that allows you to show the thumbnails instead of icons.
Microsoft store is ready and prepared for Windows 11 official release on October 5th and it is coming with some surprises.
It has officially confirmed that many open source and free applications will be in it like Opera, VLC, discord, Libre office, etc. It seems that Microsoft wants to place its store as one place to go for all of your software needs.
Another great surprise is the coming of Epic games store implementation. It was officially confirmed but not explained in detail, will we have Epic store opened in Windows store or we will only get installer as a package we will see but this is some great news.
As for how it states now, it seems that the Windows store aims to eliminate searching the web for applications and bring them all into one environment with reviews and ratings so you know which one to install and use. It also features a great search engine to find proper applications for your needs.
The new store will come to Windows 10 as well but after all Windows 11 has been mostly released and adopted. So expect it via update in two or three months' time.
It would be great if some larger companies decide to join MS stores like Autodesk, Adobe, the Foundry, etc so you can install everything you need from it but one can only hope.
We Couldn't Install Windows Technical Preview 0x80070070 - 0x20005 -- What is it?
Some Windows users have been experiencing errors in an attempt to upgrade to Windows 10 OS. This includes the “We Couldn’t Install Windows Technical Preview 0x80070070 – 0x20005” error code. If you’re one of the many users who’ve encountered this error, you might want to check the available space on your device. Error code 0x80070070 – 0x20005 occurs when you do not have the required space to be able to install the upgrade.
Solution
Error Causes
Just like the other alternatives of error code 0x80070070 – 0x20005 such as 0x80070070 – 0x50011, 0x80070070 – 0x50012, and 0x80070070 – 0x60000, We Couldn't Install Windows Technical Preview 0x80070070 - 0x20005 is most likely caused by the following:
Insufficient disk space in your computer
Incomplete installation or improper deletion of applications
In order to upgrade to Windows 10, you need to have at least 40 to 50 GB of free space in your device. Thus, you need to free up some space in order to successfully upgrade your system to Windows 10. See below for the manual methods you can employ to solve your problem.
NOTE: It would be best to seek help from an experienced technician if you are not confident enough to perform the manual methods yourself or you can alternatively make use of an automated tool.
Method One: Clean Up Your Device
Click Start then browse Afterwards, click on This PC.
Right-click on Local Disk (C:) then choose
Under the General tab, click on Disk Cleanup.
Once the Disk Cleanup window appears, check all items you want to clear down, making sure that the recycle bin is empty and clear any temp files, as well as error logs. Click OK once you’re done.
Repeating the same process above, clear down your system files as well to ensure that the old OS files from your previous system are taken down by clicking on Clean up system files in the Disk Cleanup window.
Method Two: Uninstall Unused Applications
Sometimes, there are unused applications just lying around your device. This may take up your needed space from your device for a system upgrade. Uninstalling these applications can make space that will eventually elude error code 0x80070070 – 0x20005 along with its alternatives – code 0x80070070 – 0x50011, code 0x80070070 – 0x50012, and code 0x80070070 – 0x60000.
Open the Control Panel then select Programs and Features.
Check on unused applications on your device
Right-click on the unused application then select
Method Three: Remove or Archive Files
If there are tons of images, media, videos, or documents that you rarely use but will still be needing in the future, you can move these files to another drive where Windows 10 will not be installed on.
If there are no secondary drives in your device, consider using a USB Drive or external hard disk. Another option you can do is making use of cloud storage programs like One Drive or Google Drive. In this way, you’ll still have access to these files even if it’s not in a physical location while making larger space in your device.
Method Four: Scan Your Device For Viruses
Most Windows users download applications or software regularly. These applications or software might come from unsafe sites where you might have accidentally downloaded a virus or malware along with the legit application or software you intended to download.
With that said, it is highly recommended to download and install in your device a reliable and powerful antivirus. Using an antivirus, you can now perform an overall scan of your device’s system. Once you’re able to detect and remove any suspected virus or malware, you’ll now be able to get rid of the error code 0x80070070 – 0x20005. After solving the issue, you can now resume upgrading to Windows 10.
Method Five: Download An Automated Tool
Can’t seem to put up with the long and technical manual repair process? You can still fix this error by downloading and installing a powerful automated toolthat will surely get the job done in a jiffy!
Ehshell.exe is a type of .exe (executable file). This file functions as an essential component of the Microsoft Media Center. By default, it is located in a subfolder of C:\Windows.
Ehshell.exe application error is an error code that pops up when tasks in the Media Center freezes. The Ehshell.exe application error is usually displayed on the screen in the following format:
“ehshell.exe – Common Language Runtime Debugging ServicesApplication has generated an exception that could not be handled.Process id=0xa18 (2584), Thread id=0xa24 (2596).”
Solution
Error Causes
Ehshell.exe application error is triggered when PC users perform repetitive tasks in Media Center on a Windows XP Media Center Edition.
The computer stops to respond and the error message is displayed.
This error occurs if users perform one or more of the following repetitive tasks in the Media Center:
Repeated resize, restore and minimize the Media Center Window
Schedule TV shows to record
Repeatedly change the channel while Media Center is in a window
Ehshell.exe file corruption due to malware infection or registry issues
Though this is not a fatal error, to avoid any kind of inconvenience, it is advisable to fix the error right away.
Further Information and Manual Repair
To fix the ehshell.exe application error on your system, you don’t have to hire a professional and spend hundreds of dollars on repair. Here are some of the best and most effective do-it-yourself methods that you can try to resolve this issue on your PC immediately.
Method 1 - Install the Latest Service Pack for Microsoft Windows
To repair the issue, install the latest Windows service pack. A service pack is basically a Windows update, often combines previously released updates that help make Windows more reliable.
These are offered free of charge on Microsoft’s official website. To get started, simply log on to Microsoft’s official website and download the latest service pack compatible with your Windows version.
The installation process may take 30 minutes to install. And you will be prompted to restart your PC about halfway through the installation process.
Once the Windows Service Pack is installed, the ehshell.exe application error will be fixed. If the error still persists, then try method 2.
Method 2 - Scan for Malware
Ehshell.exe application error may also appear on your PC due to malware infection. Malware programs like viruses, Trojans, and worms deliberately give their malicious processes similar .exe file names, so it is hard to identify the malware.
In such an event, it is advisable to download a powerful antivirus and scan your entire PC. Run it to remove all the hidden malware programs on your system. Once malware is removed, the ehshell.exe application error will be resolved.
Method 3 - Clean Registry
Sometimes .exe files can also get corrupt when the registry gets overloaded with unnecessary and obsolete files. If this is the underlying reason for the error code occurrence then it is advisable to download Restoro.
This is a multi-functional and user-friendly PC Fixer deployed with a registry cleaner. It removed all the unnecessary files, cleans and repairs the registry in seconds thereby fixing all registry-related errors.
Click here to download Total System Care and resolve the Ehshell.exe application error on your PC.
Still sitting on the fence about upgrading to Windows 11 because you don’t know what to expect? Interestingly, the new edition somehow manages to be both a total revamp and still very similar to its predecessor in many ways. It’s really something to experience for yourself.
We do want to give you a sneak peek, though. So here’s an overview of the biggest changes Windows 11 brings to the table.
What’s different in Windows 11?
1. Visual changes
The first thing anyone will notice after switching to Windows 11 is the striking visual difference. The entire interface is smoother, cleaner and more minimalistic than on Windows 10, even resembling the macOS in some instances. Perhaps the most obvious change in appearance is the Start menu and Taskbar location, which is now at the bottom center. It’s actually very neat, but if you’re someone who loves familiarity, don’t worry, you can move it back to the left.
Centralized Taskbar and Start menu
Moreover, you’ll notice that the Taskbar includes a Microsoft Teams icon by default (which you can, of course, remove) and that Live Tiles are gone. The News and Interests section has also been removed - or, shall we say, replaced. As opposed to Windows 10, news, weather forecasts and other information are now displayed as widgets.
To add to the cleanliness of the UI, Microsoft also enhanced the ‘Snap Layouts’ feature to help you better organize your windows and maximize screen real estate. It’s similar to app grouping on your smartphone. In Windows 10 this feature is slightly restricted, as it requires some manual resizing and dragging. In Windows 11, you can just hover over the minimize/maximize option on a window, select a layout and throw the windows in there.
Snap Layouts
2. New accessibility features
Microsoft has certainly paid attention to accessibility with Windows 10, but Windows 11 takes this to a whole new level.
One of the ways Windows 11 has taken things up a notch is by adding the long-awaited ‘Live Captions’ feature and advanced Narrator options.
Live Captions apply both to media played on your PC as well as your own speech when you’re using the microphone. Keep in mind that, as with almost all kinds of subtitles, you have to be prepared for a potential delay. However, it’s barely noticeable and doesn’t take away from the usefulness of this awesome new feature whatsoever.
As for the Narrator, there are three new voice packs to choose from. Microsoft has tried to put emphasis on a more natural voice than we are used to. So, now you can choose between Aria, Jenny and Guy, who will read pretty much anything off your screen out loud. Aside from this, Microsoft has also expanded the list of braille displays supported by the Narrator feature. For users with anxiety or trouble concentrating, a welcomed addition is the Focus app, which is no longer part of the Clock app. It’s now separate and called ‘Focus Sessions’, automatically triggering the Do Not Disturb mode when activated. It blocks all pop-ups and flashes and lets you work in peace until you’re ready to switch it off.
3. Android apps
Android users may rejoice! Windows 11 supports the use of your favorite applications now.
Microsoft has done this by integrating the Amazon Appstore to the Windows 11 Microsoft Store. From there, you can download your favorite Android apps and use them on your PC in a smartphone-like window.
Unfortunately not too many apps are supported at this time, but Microsoft is working on making the emulation possible for many more. Also, the option is only available in specific regions at this moment - check out if you’re one of the lucky ones.
4. Improved gaming performance
Avid gamers will be happy to hear that Microsoft has put some effort into streamlining Windows 11 for their gaming needs.
To give gamers a supreme visual experience, Windows 11 offers the ‘Auto HDR’ feature. As long as your monitor is HDR-compatible, this feature will automatically adjust the colors, brightness and contrast of games without any input from you.
Another update is DirectStorage, which we were introduced to in Windows 10 already. In Windows 11, it’s been improved to tweak loading times and overall gaming performance efficiency even better. The predisposition for it to work optimally is that your device has an NVMe SSD.
The Xbox Game Bar also helps gamers towards a smoother experience. It allows in-game screenshots, viewing processes that are running (similar to the Task Manager), monitoring the CPU and GPU performance and frame rate, integrating the Xbox App and more. There’s also a number of widgets you can now use with the Game Bar, for example the Spotify widget.
Xbox Game Bar
Another cool addition is the Xbox Game Pass, which unlocks hundreds of games to play on your Xbox App, with new additions coming in every month.
5. Smart App Control
Aside from a sleek new look and better accessibility for all users, Windows 11 also comes with a security power-up. Bear in mind that this feature is only available on clean Windows 11 installs.
Smart App Control (SAC) is an AI-powered new feature designed to protect your PC from potential threats. It blocks untrustworthy apps and adware and helps detect potentially unwanted apps, maintaining your PC’s performance and keeping your system safe.
It comes with an ‘Evaluation’ mode, which you should definitely select when running SAC for the first time. That way, the app monitors your usage and assesses whether you’re a candidate for SAC. Some users need it to be on all the time, for others it might be too distracting. Evaluation mode will turn SAC on or off based on your usage.
Don’t disable SAC again unless you’re absolutely sure you don’t need it, since reenabling it will require a fresh install. We recommend you don’t turn it off, as it is a neat feature protecting your data and files from malware at all times.
Summary
Have we piqued your interest in trying Microsoft’s latest OS? It’s a pretty exciting new iteration, but we’ll let you find out for yourself. We hope you like it!
Windows comes with a built-in backup solution. However, if it failed because of an internal error, you will encounter an error message saying, “The backup application could not start due to an internal error, Server execution failed (0x80080005)”. When you get this kind of error, it means that it did not start and the process failed with a Server execution error. If you got this kind of error worries not for this post will guide you in fixing the problem in your Windows 10 computer.
The Windows Backup service is an excellent feature in Windows that only works on the NTFS file system and if you want to use this make sure that you have formatted your files system to NTFS. It is performed by the Volume Shadow Copy, all you have to do is right-click on any folder and if you see the “Previous versions” option, this means that a backup process runs from time to time and can bring back old files when needed.
To resolve the “The backup application could not start due to an internal error”, here are two suggestions you can check out.
Option 1 – Check if the Volume Shadow Copy service is running and restart it
The first thing you need to do is check if the Volume Shadow Copy service. To do that, refer to the following steps:
Click on Start and type “cmd” and right-click on Command Prompt from the search results.
Then select the “Run as administrator” option to open Command Prompt with admin privileges.
After that, type “net stop sdrsvc” and hit Enter to execute the command in stopping the Volume Shadow Copy service.
Next, type the “net start sdrsvc” command and hit Enter to start the service again.
Note: You can also restart the service using the Windows Services Manager.
In the Cortana search box, type “services” and click on the Services icon to open the Services Manager. Alternatively, you can also tap the Win + R keys to launch the Run prompt and then type “services.msc” in the field and hit Enter to open the Services Manager.
From there, look for the Volume Shadow Service (sdrsv) from the list of services. Its Startup type should be set to Manual by default.
Restart the service and if you don’t encounter any error while you turn it on, re-run the backup service and see if the backup process runs successfully.
Option 2 – Try to run the Volume Shadow Copy Service in a Clean Boot State
If the first option didn’t work and the service still keeps on failing even though the service is running, you can try putting your computer in a Clean Boot State and then try to run Windows Backup again.
Log onto your PC as an administrator.
Type in MSConfig in the Start Search to open the System Configuration utility.
From there, go to the General tab and click “Selective startup”.
Clear the “Load Startup items” check box and make sure that the “Load System Services” and “Use Original boot configuration” options are checked.
Next, click the Services tab and select the “Hide All Microsoft Services” check box.
Click Disable all.
Click on Apply/OK and restart your PC. (This will put your PC into a Clean Boot State. And configure Windows to use the usual startup, just simply undo the changes.)
Now try to run the Volume Shadow Copy service again and see if the process goes smoothly.
Note: You might also want to delete all the files in the backup solution if you want to start fresh with the backup solution. Just go to C:/System/Volume/Information/Windows Backup and take ownership of the folder. After that, make sure to stop the Volume Shadow Copy service and then delete all the files inside it.
Error code 0x80070490 occurs in versions of Windows including Windows 8 or 8.1 and Windows 7 or Windows Vista. This error often arises when users attempt to install updates via Windows Update or Microsoft Update.
The main reason for the error relates to the Component-Based Servicing (CBS) manifest which has become damaged. When the error occurs, the Windows device is unable to successfully install updates.
Solution
Error Causes
Error code 0x80070490 might appear for various reasons but is most prominent in the following cases:
Attempts to install Windows 8 or 8.1
A corrupted Component-Based Servicing (CBS)
Further Information and Manual Repair
The solutions for error code 0x80070490 vary so users may need to attempt each solution to find the best results.
Repair Corrupted Windows Files with System File Checker
The System File Checker (SFC.exe) is a Windows-based utility that enables users to check and repair corrupted or damaged system files. It can also restore missing systems files which can be the cause of errors such as error code 0x80070490.
To repair files, begin scan by swiping the right edge of the screen then opening the search box. Type Command Prompt, right-click this option, then select Run as Administrator. Once the scan begins, wait for the process to be completed then restart your device. Check if the error is resolved by reattempting updates. If error code 0x80070490 in Windows 8 or 8.1 persists on your device, proceed to the solution below.
Perform Clean Boot
A clean boot is one of the best ways to reduce conflict among files – an issue that may arise whenever users update, install or run programs on their Windows device.
To run a clean boot, your device reboots using limited drives and programs. The process allows you to identify which conflict among programs is causing errors on your Windows device.
You can access the clean boot tool by entering msconfig in the search box. Select Services, then System Configuration. Check the Hide all Microsoft services checkbox then select Disable all. Next, go to the Startup tab, click and open Task Manager. After selecting the Startup tab, make sure you right-click each startup program. Click Disable from the context menu then close Task Manager when done. Select OK on the System Configuration menu then restart your machine to clean boot Windows 8 or 8.1.
If the clean boot successfully identifies and resolves issues with corrupted files, you will be able to access updates using Windows Update or Microsoft Update. Error code 0x80070490 will no longer occur. But if that proves unsuccessful, other options are available below including running Windows Update Troubleshooter.
Run Windows Update Troubleshooter
This method can provide a simple solution for users as it verifies whether your Internet connection, network adapter and Windows Update services are functioning properly. However, if you are uncertain as to whether you will be able to troubleshoot, seek assistance from a qualified Microsoft technician.
To run Windows Update Troubleshooter, simply download from Microsoft’s website. Be sure you are downloading the tool recommended for your operating system, in this case Windows 8 or 8.1. After you download Windows Update Troubleshooter, run it to enable the tool to check for and resolve update issues on your device.
Use DSIM or System Update Readiness Tool
The System Readiness Tool or DSIM is another method you can use to correct issues related to error code 0x80070490. This tool checks problems on your system that might prevent your computer from performing Windows updates including issues related to damaged system files.
Once you download and install this tool, it will be able to run automatically. The process may be technical, however, requiring specialized knowledge to successfully download and run the tool. Consider getting assistance from an IT professional in this case. Also, check Microsoft's online resources to download the tool.
Use an Automated Tool
Having an automated tool at hand will enable users to always be prepared. Download a powerful automated utility tool to provide solutions whenever error codes or other problems affect your Windows 8 device.
We have all experienced Windows errors over time and that can range from simple ones that will do very little to no harm and can be even system breaking making us lose our work or completely making the PC unusable. No one likes them but they happen, and usually, they happen once we least expect them.
No matter how frequent and unpleasant they might be there are ways to keep them at the minimum and even avoid them.
We will discuss steps that you can take in order to do this, simple tips and guides on how to keep your computer in top form and eliminate not just Windows, but any kind of errors altogether.
Keep your hardware clean
Believe it or not, some serious Windows errors like the dreaded blue screen of death can come from hardware issues not from the software at all. It is very important to keep your computer clean and with enough air flow so it can function properly.
Keeping applications on the drive might seem harmless but sadly that is not the case. Some applications have a certain impact on the system itself after all most of them are tweaking registry entries in Windows and sometimes having too many applications means an increased possibility of conflict over certain resources even when they are not running.
Some applications like adobe creative suite, for example, will have certain services always running in the background, and more of these kinds of applications you have, more services, more places for unexpected errors when they collide. Some of them will also install certain dependencies that could be problematic.
The general idea is: if you are not using it, uninstall it and you will be safer and more resilient to errors inside OS.
Do not use pirated or cracked software
Besides moral and law implications that using pirated or cracked software might bring you there are also certain other things that might be problematic. Certain "free" software might come packet with some problematic malware, for example, it is not uncommon for attackers to use some popular software to pack their malicious application with it.
Other things might be wrong and incomplete tweaking with application in order to bypass security and thus bringing some instability due to scripts needed to run in order to achieve this goal.
Keep your drivers updated
Errors can also come from old drivers or bad drivers, device manufacturers are not all-knowing and perfect, and sometimes drivers can wreak havoc on the system. Having updated drivers can minimize any kind of unexpected behaviors inside the operating system making it more stable and reliable.
You can check your driver version in the control panel inside the Windows OS and then compare it to the ones found on the manufacturer's site, if there are newer available it is recommended to download and install them,
Keep software updated
Applications can have bugs, and bugs can lead to certain errors both in the system and when using the app as well. It is in your best interest to get the latest patch or newer version of the software in order to avoid these unpleasant experiences.
Also, certain codecs and extensions that are installed directly in Windows can also have some unpredictable behavior, updating is the best solution to keep them in line.
Keep Windows updated
Same as with drivers and applications, Windows itself is not immune from bugs and some unpredictable issues. Luckily Microsoft is always working on fixes and features of Windows but in order to actually have benefited from that work, you will need to keep Windows updated. Sometimes a bad update can introduce some errors but you can always roll back to the previous and wait for them to fix everything and then download them all.
Check the health of your hardware regularly
Hardware components have their life cycle, more quality ones tend to last longer but eventually, they will reach the end of their lifecycle. There are a lot of testers for various components in your computer that can check different things and provide you with information about the state of your components.
If you are on Windows 11, Microsoft has included a basic health app inside OS, just type PC health check in search and start the app. For some more detailed information and advanced checks, you will have to use a custom application. There are plenty of them specialized for single components like RAM, SSD, etc. A simple google search with providing you with top results and most of them are free for personal use.
Remember, a faulty component or component that is reaching its life cycle can produce many errors inside the operating system.
You might have experienced a situation where your Windows computer was interrupted due to some battery issues or power failure. It could be that the upgrade process was interrupted because you’ve signed out of your computer or you restarted it by accident. In this case, you will most likely get a Windows Update or Upgrade error 0x80200056. If you are getting this error, read on as this post will guide you in fixing it.
This kind of error pops up when the upgrade process was interrupted and could be caused by anything but the baseline here is that your computer was restarted accidentally or someone could have signed out your PC. To resolve the problem, here are some fixes you ought to try:
Option 1 – Try updating or upgrading your computer again
This is the basic thing to do since the process was suddenly interrupted. Just log in to your account and restart the Windows Update or Upgrade process but make sure that your internet connection is stable and that you don’t touch anything so as not to interrupt the upgrade/update process again.
Option 2 – Check if your PC is plugged in or if the battery is full
It is always best to update your computer always when you’re really sure that the power won’t fail. If you’re using a desktop computer, make sure that everything is plugged in. And if you’re using a laptop when this error occurred, make sure that its battery is at 100% but it’s better if you just plug it into power just in case as there are times when the Windows update or upgrade gets stuck for too long like for hours so it will really help if your device is connected to power.
Option 3 – Try running the Windows Update Troubleshooter
Running the built-in Windows Update troubleshooter could also help you resolve the Windows Update errors as well as the error 0x80200056. To run it, go to Settings and then select Troubleshoot from the options. From there, click on Windows Update and then click the “Run the troubleshooter” button.
Option 4 – Delete the contents in the SoftwareDistribution folder
The Software Distribution folder in the Windows operating system is a folder that can be found in the Windows directory and is used to store files temporarily which might be required to install the Windows Update on your PC. Thus, it is required by the Windows Update and maintained by WUAgent. A lot of users tried deleting the files in this folder to fix the problem and so far it has worked. Like them, you can try clearing the Windows Update cache by simply deleting the contents of the folder named “SoftwareDistribution” since Windows apparently can’t clear and re-download the update contents once they are corrupted. Thus, deleting the contents of this folder will make Windows download the contents again which will fix the problem. To do that, follow the steps below.
Open the WinX Menu.
From there, open Command Prompt as admin.
Then type in the following command – don’t forget to hit Enter right after typing each one of them.
net stop wuauservnet stop bits
After entering these commands, it will stop the Windows Update Service and the Background Intelligent Transfer Service.
Next, got to the C:\Windows\Software\Distribution folder and get rid of all the folders and files thereby tapping the Ctrl + A keys to select them all and then click on Delete. Note that if the files are in use, you won’t be able to delete them.
Once all the contents in the Software Distribution folder are deleted, restart your PC and then go back to Command Prompt and input the following commands again.
net start wuauservnet start bits
Since the folder has already been flushed, it will be populated afresh the instant your restart your computer and open Windows Update.
Option 5 – Try running the System File Checker scan
System File Checker or SFC is a built-in command utility that helps in restoring corrupted files as well as missing files. It replaces bad and corrupted system files to good system files that might be causing the error 0x80200056. To run the SFC command, follow the steps given below.
Tap Win + R to launch Run.
Type in cmd in the field and tap Enter.
After opening Command Prompt, type in sfc /scannow
The command will start a system scan which will take a few whiles before it finishes. Once it’s done, you could get the following results:
Windows Resource Protection did not find any integrity violations.
Windows Resource Protection found corrupt files and successfully repaired them.
Windows Resource Protection found corrupt files but was unable to fix some of them.
Option 6 – Run the Chkdsk utility to repair hard disk errors
You can also run the Chkdsk utility to resolve the Windows Update error 0x80200056. If your hard drive has issues with integrity, the update will really fail as the system will think that it’s not healthy and that’s where the Chkdsk utility comes in. The Chkdsk utility repairs hard drive errors that might be causing the problem.
Open Command Prompt with admin privileges.
After opening Command Prompt, execute the commands listed below, and don’t forget to hit Enter right after you type in each one of them and if you have installed Windows to some different directory, you must replace “C” with the name of the drive you’ve installed Windows with.
chkdsk C: /r /x
chkdsk C: /f
Option 7 – Run the DISM tool to repair the Windows Update client
The Windows update/upgrade error 0x80200056 might be caused by some issues in the Windows Update client so you need to run the DISM tool to repair it. Note that you have to use another computer or another Windows from a shared network to fix it.

 Error Causes
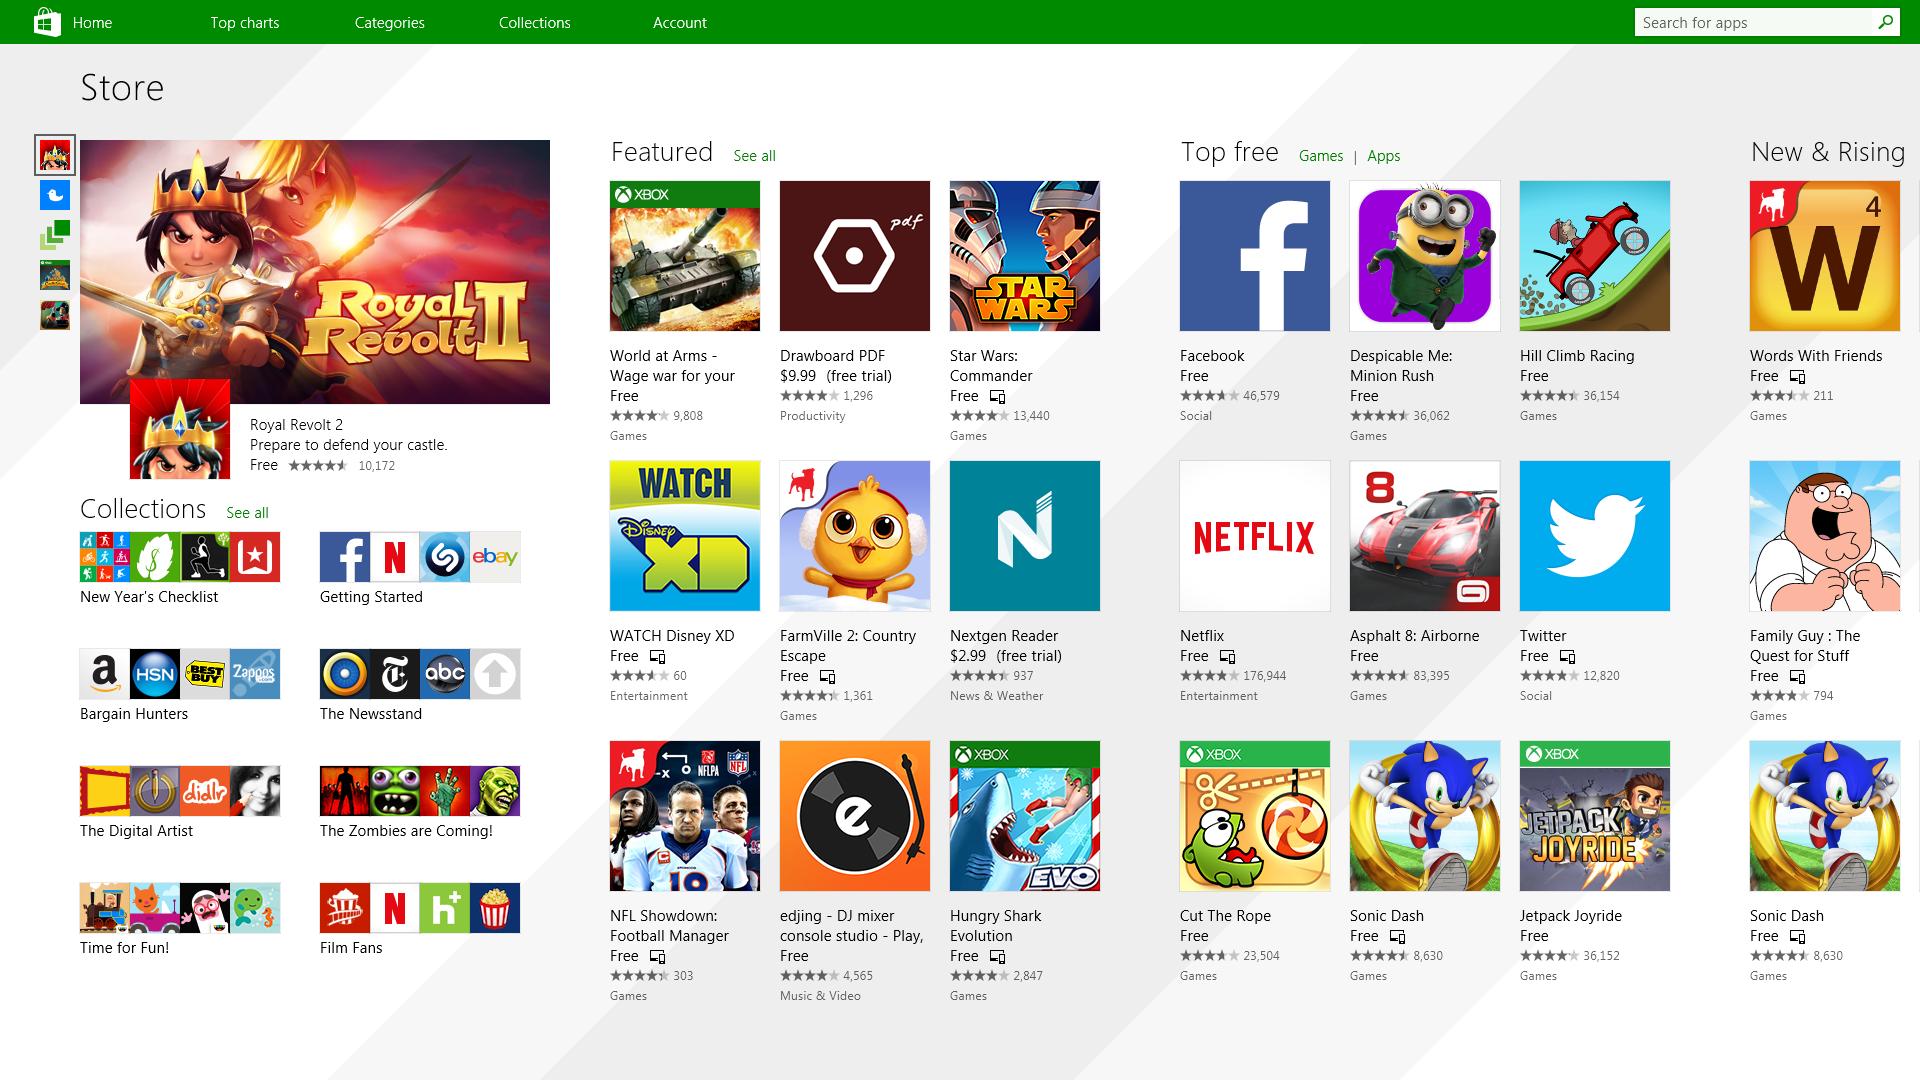 It has officially confirmed that many open source and free applications will be in it like Opera, VLC, discord, Libre office, etc. It seems that Microsoft wants to place its store as one place to go for all of your software needs.
Another great surprise is the coming of Epic games store implementation. It was officially confirmed but not explained in detail, will we have Epic store opened in Windows store or we will only get installer as a package we will see but this is some great news.
As for how it states now, it seems that the Windows store aims to eliminate searching the web for applications and bring them all into one environment with reviews and ratings so you know which one to install and use. It also features a great search engine to find proper applications for your needs.
The new store will come to Windows 10 as well but after all Windows 11 has been mostly released and adopted. So expect it via update in two or three months' time.
It would be great if some larger companies decide to join MS stores like Autodesk, Adobe, the Foundry, etc so you can install everything you need from it but one can only hope.
It has officially confirmed that many open source and free applications will be in it like Opera, VLC, discord, Libre office, etc. It seems that Microsoft wants to place its store as one place to go for all of your software needs.
Another great surprise is the coming of Epic games store implementation. It was officially confirmed but not explained in detail, will we have Epic store opened in Windows store or we will only get installer as a package we will see but this is some great news.
As for how it states now, it seems that the Windows store aims to eliminate searching the web for applications and bring them all into one environment with reviews and ratings so you know which one to install and use. It also features a great search engine to find proper applications for your needs.
The new store will come to Windows 10 as well but after all Windows 11 has been mostly released and adopted. So expect it via update in two or three months' time.
It would be great if some larger companies decide to join MS stores like Autodesk, Adobe, the Foundry, etc so you can install everything you need from it but one can only hope. 


