There is a built-in tool in Windows 10 the Disk Cleanup Utility which can help you restore hard disk space by removing temporary files, Thumbnails, old Windows files, Windows Upgrade logs, Delivery optimization files, and many more. However, from time to time, this built-in tool also experiences some issues. One of these issues is when it gets stuck on Windows Update Cleanup. Read on to find out what you can do in such a case.
When the Disk Cleanup Utility is stuck on the Windows Update Cleanup, the process could be slow and take a long time to complete when purging the files. If this happens, click on Cancel to close the dialog box. After that, try running the Disk Cleanup Tool again as administrator and check if the files that you want to clean is still there or not. If it isn’t there, then this means that the cleanup has been done, otherwise, you need to refer to the options given below.
Option 1 – Try to manually delete the contents in the SoftwareDistribution folder
Open the WinX Menu.
From there, open Command Prompt as admin.
Then type in the following command – don’t forget to hit Enter right after typing each one of them.
net stop wuauserv
net start cryptSvc
net start bits
net start msiserver
After entering these commands, it will stop the Windows Update Service, Background Intelligent Transfer Service (BITS), Cryptographic, and the MSI Installer
Next, go to the C:/Windows/SoftwareDistribution folder and get rid of all the folders and files thereby tapping the Ctrl + A keys to select them all and then click on Delete. Note that if the files are in use, you won’t be able to delete them.
After resetting the SoftwareDistribution folder, you need to reset the Catroot2 folder to restart the services you just stopped. To do that, follow these steps:
Type each one of the following commands.
net start wuauserv
net start cryptSvc
net start bits
net start msiserver
After that, exit Command Prompt and restart your computer and then try to run Windows Update once more.
Option 2 – Try to manually delete the contents of the Windows.old folder
The Windows.old folder is the one that holds the older version of Windows when you upgrade. It comes really useful when you want to revert to the previous version of Windows 10. Thus, you can delete the Windows.old files in case the cleanup tool is stuck.
Option 3 – Try running Disk Cleanup in a Clean Boot State or Safe Mode
Another thing you can try is to restart your computer in a Clean Boot State or Safe Mode. Chances are, there are some programs that are preventing the Disk Cleanup Utility tool to run properly. After you restart your computer in a Clean Boot State or Safe Mode, try to run the Disk Cleanup tool again and then see if it now works or not.
Option 4 – Run the Windows Update Troubleshooter
You might also want to run the Windows Update Troubleshooter as it could also help in fixing this issue. To run it, go to Settings and then select Troubleshoot from the options. From there, click on Windows Update and then click the “Run the troubleshooter” button. After that, follow the next on-screen instructions and you should be good to go.
Option 5 – Run the DISM tool to fix the corruption in the Component Store
You can try running the Deployment Imaging and Servicing Management or DISM tool to fix the Wdf01000.sys Blue Screen error. Using this built-in tool, you have various options such as the “/ScanHealth”, “/CheckHealth”, and “/RestoreHealth”.
Open the Command Prompt with admin privileges.
Then type in the following commands and make sure to hit Enter right after you type each one of them:
Dism /Online /Cleanup-Image /CheckHealth
Dism /Online /Cleanup-Image /ScanHealth
exe /Online /Cleanup-image /Restorehealth
Do not close the window if the process takes a while as it will probably take a few minutes to finish.
Can you use an MS-Outlook e-mail account to send and get workplace e-mails on a daily basis? Are you using the exact same Outlook e-mail account for a long time? Are you getting PST Mailbox Errors?
Then you have developed awareness and knowledge about Outlook PST Errors. Ms-outlook essentially stores the email items in a PST record. This includes all attachments, contacts, calendar items, your e-mails and records.
You might encounter various kinds of Outlook Inbox error messages exhibited on the display in extended formats eg. 0x80040600 0x8004060c or 0x80040116.
All all these are Outlook mailbox malfunctions that stop the Outlook program from executing jobs correctly and thus restricting your capacity to gain access to your e-mail account, see attachments, contacts, and calendar items that are significant.
Error Causes
There's not a single particular trigger for Outlook email malfunctions. A few causes can trigger these, but, the most frequent are virus contamination, 2 GB limit is exceeded by PST file and broken.
There are no specific signals which will help help you identify but some pointers to look at include the following:-
You cannot access certain parts of your Outlook interface
Obscure error messages start popping on your screen
You can’t add new contacts or change entry data in your calendar
Further Information and Manual Repair
When you experience these signs related to PST Inbox errors, it is advisable to repair the problem immediately to ensure it does not cause inconvenience for you and hampers your communication via Outlook emails. Remember this error not only inconveniences you but also hinders proper communication between various business partners.
Determining the ultimate reason for distinct Outlook email malfunctions could be tricky, time-consuming, and might need specialized knowledge to nail it down with regards to fixing the Outlook mailbox malfunctions.
In case you are not a specialist, working out and fixing this problem is an uphill process. To simplify this process, obtain and install an Outlook PST Repair Tool!
This is an intelligent solution to fix all kinds of Outlook errors. You do not have to go deeper into the technical details of the problem.
The Outlook PST Repair tool does it for you. An inbox repair tool identifies and also repairs all sorts of MS Outlook errors in seconds. It is easy to use, highly functional, safe and efficient.
By installing an Outlook repair tool, Outlook errors can be easily removed from your computer and keep the errors from happening again. It also fixes damaged PST files and damaged e-mails can help regain data.
Whatever you should do is to begin:
If you are trying to install Office but got an error saying, “Something went wrong, Sorry we ran into a problem” with error codes 12002-4, 12007-4, or 12152-4 instead, this indicates that you have a problem with your internet connection. Aside from internet connection issues, the problem could also be due to some programs that block the installation files to be downloaded so when they time out, you get these error codes.
There are several options you can try to fix the 12002-4, 12007-4, or 12152-4 error codes. You can try to install Office offline or turn off the proxy server or VPN (if you’re using one). You can also try to temporarily disable your antivirus program or Firewall. Refer to the given potential fixes below to troubleshoot and fix the problem.
Option 1 – Try to install Office offline
The first thing you can do if you encounter the error codes 12002-4, 12007-4, or 12152-4 when installing Office is to download an offline copy of Office especially when you’re certain that your internet connection is slow. Once you’ve downloaded it, install it again. The offline installer will download both the 32 and 64-bit versions of Office. Keep in mind that you must download the correct version.
Option 2 – Disable the Proxy server
The first thing you can do is to try disabling the Proxy server as it might be the reason why you’re getting error 0x80244022 for Windows Updates. To disable the proxy server, refer to the steps below.
Tap the Win + R keys to open the Run dialog box.
Then type “inetcpl.cpl” in the field and hit Enter to pull up the Internet Properties.
After that, go to the Connections tab and select the LAN settings.
From there. Uncheck the “Use a Proxy Server” option for your LAN and then make sure that the “Automatically detect settings” option is checked.
Now click the OK and the Apply buttons.
Restart your PC.
Note: If you are using a third-party proxy service, you have to disable it. In addition, if you are also using a VPN, you can try to disable it as well.
Option 3 – Temporarily disable the Antivirus and Firewall
As mentioned earlier, the downloading of the installation files could be blocked by either the antivirus program or Firewall or it could be both especially when the link seems suspicious. To fix this problem, you have to disable both the antivirus like Windows Defender and the Firewall or any third-party software you might be used temporarily and then download the installation files again. Once the download is completed, make sure to turn on the antivirus program and the Firewall again. On the other hand, you can also try downloading in a different location which also means that you have to try a different network. It could be that the load on the current system is too high which is why it’s not able to offer enough bandwidth to download the installation files of Microsoft Office.
In case you don’t know, Windows 10 comes with a native ability to project to another screen, be it wireless or wired. All it takes to do that is by tapping the Win + P key combination to display options to manage the extended display. However, there are times when you might encounter errors when you do that like the “Your PC can’t project to another screen” error. This kind of error stops you from projecting your computer to the other screen. Here’s the full content of the error message:
“Your PC can’t project to another screen, Try reinstalling the driver or using a different video card.”
This error could be due to loosely connected hardware or the display adapter. It is also possible that a recent Windows Update has messed up its settings. To resolve this issue, you can try several suggestions that will be given in this post. You can try to check the hardware cable connections or run the Hardware and Devices troubleshooter. You could also update or reinstall the display adapters or replace the graphics card.
Option 1 – Try checking the hardware connections
The first thing you have to do before you further troubleshoot the problem is to check the hardware connections of your computer and see if there are damaged ones, just like with the ports as it would also affect the overall connectivity of the device with the computer. You also have to make sure that no pin is missing from the ports. So if you notice some irregularities in the connecting cable physically, you might have to buy another one and replace it and then see if it fixes the problem or not.
Option 2 – Run the Hardware and Devices Troubleshooters
The first thing you need to do is click on Start and then on the gear-like icon to pull up the window for Settings.
After opening Settings, look for the Update and Security option and select it.
From there, go to the Troubleshoot option located on the left-hand side of the list.
Next, select Hardware and Devices from the list and open the Troubleshooter and run it. Once it is doing its job, wait for it to complete the process and then restart the system.
After the system restarts, check if the problem’s now fixed. If not, refer to the next option given below.
Option 3 – Try to update or reinstall the display adapters
You might also want to update the drivers for Display adapters and Monitors or you might also have to update or reinstall your NVIDIA driver if you’re using one. To update or reinstall the display adapters, follow these steps:
Tap the Win + R keys to open the Run dialog box and then type in MSC and tap Enter or click OK to open the Device Manager.
Expand the section for Display Adapters.
And then select the Display Driver and right-click on it.
From the drop-down menu, select the Update Driver option and follow the on-screen instructions to install the latest version of the Display Driver.
Restart your PC after the installation.
If you find that updating the drivers does not help, you can try to reinstall them. How? Simply follow the steps below.
Tap the Win + X keys and select the Device Manager.
After that, look for the affected driver in the Device Manager window. And if you see a yellow exclamation mark beside it, right-click on it and select the option “Rollback” to roll back the driver.
And if the Rollback option is not available, just select Uninstall and then restart your PC.
Finally, open the Devices Manager once again and select the option “Scan for hardware changes” to install the driver.
Option 4 – Consider replacing the graphics card
You might also want to consider replacing the graphics card of your computer to resolve the problem if the options provided above didn’t work.
A command is not recognized Error, what it is? If you are constantly using programs like CMD or DISM directly from the Run prompt, you might have wondered how they launched instantly and how is it that the Windows operating system is able to find them right away. For instance, when you create a shortcut of a program, the shortcut knows where exactly the program is located and launches it quickly.
The Windows operating system keeps a list of paths where the most common system programs are located so when you use the Run prompt, it opens easily. The list kept by Windows is called the Windows Environment Variables. If something goes wrong with this list, the programs won’t work. So in this guide, you will be guided on how you can troubleshoot the problem where any command you use is not recognized as an internal or external command, operable program, or batch file.
Before you start troubleshooting the problem, you need to make sure that the program you are trying to run really exists. In fact, this can also happen to the Run program which is pulled up using the Win + R shortcut. To check, go to C:\Windows\System32 and there, check if the program exists or not or you can also try searching for the EXE in the System 32 folder. After making sure that the program exists, refer to the instructions given below.
Modify the Windows Environment Variables:
Step 1: Tap the Win + X keys and then select System. After that, it will open the section where you can see all the properties on your computer.
Step 2: Next, select the Advanced system setting located on the left pane and click on the Environment Variables.
Step 3: After that, locate Path under the System Variables and select EDIT.
Step 4: Before you edit, you need to copy the entire string and paste it into the Notepad app so that in case something went wrong, you can paste it back.
Step 5: Next, look for the directory path, “C:\Windows\System32”. If you can’t find it, try adding a semi-colon at the end.
Step 6: Afterwards, click OK to save the changes made and then exit.
Step 7: Now restart your computer as all the paths are picked up when your computer restarts.
Note: Now all you have to do is to try executing the programs once again – the ones where you got the error, “ is not recognized as an internal or external command, operable program or batch file” every time you open them and then see if you can now open these programs or not.
Windows 10 setup is a bit complicated which is why it’s uncommon to encounter errors along the way. One of these errors you can encounter when running Windows Setup is the error code 0x80070006. If you are trying to fix this error, you’ve come to the right place as this post will guide you on how to do so.
When you get the error code 0x80070006, you will see the following error message:
“Windows cannot install required files. Network problems may be preventing Windows from accessing the file. Make sure the computer is connected to the network and restart the installation. Error code: 0x80070006.”
As stated in the error message, this kind of error in Windows Setup is due to an unstable or unreliable network connection. Such problems can also be triggered by network hardware which includes the network adapters and the network routers. To fix this error, you need to check your internet connection and router or run the built-in network troubleshooter. You could also try using a different USB port or recreate a bootable USB drive as well as get a new Windows image file.
Option 1 – Try checking your internet connection and router
As mentioned, this Windows 10 setup error could be due to an unstable internet connection. To fix it, the first thing you have to do is to check the status of your internet connection and see if it is stable and has enough speed to run the setup. If it’s slow, then it’s no wonder that the setup process failed. To fix that, you can try to reboot your router from its admin panel or you can just turn it off manually and then turn it back on after a couple of seconds. In addition, you also have to check if it’s plugged in properly.
Option 2 – Try to run the Network Adapter troubleshooter
The next thing you can do is to run the Network Adapter troubleshooter. This built-in troubleshooter can help resolve any network issues. It can reset the adapters, remove cached settings, and many more. To run it, follow these steps:
Go to Settings > Update & security and from there select Troubleshoot.
Next, scroll down and select the “Network Adapter” option from the right pane.
Then click on the Run Troubleshooter” button.
After that, your computer will check for any possible errors and will pinpoint the root cause of the problem if possible.
Option 3 – Try to use a different USB port
You might want to check the integrity of the USB port where connected the device if you are using a bootable USB storage device to run the setup for Windows 10. All you have to do is switch the USB port or try to use another bootable USB device and see if it fixes the problem.
Option 4 – Try recreating the Windows 10 installation USB
Recreating the Windows 10 installation USB might help in fixing the problem. You can use a USB drive to do so but make sure that it has a great read-write speed. Follow the steps below to recreate Windows 10 installation USB”
Click this link and then click the Download Tool Now button.
Next, click the “Use the tool to create installation media (USB flash drive, DVD, or ISO file)…” option and follow the next given instructions on the screen.
Now select the ISO file option in step 5.
After that, you should now have an ISO file.
Next, go to the location where you’ve downloaded the ISO file.
Then right-click on the Windows 10 ISO file and select the Open with option and then select File Explorer.
Now click on “setup.exe” and follow the next instructions that appear on the screen. When asked, you have to select either Nothing (clean install) or Keep personal files only option. Take note that you must not select the “Keep personal files, apps, and Windows settings since it doesn’t really work.
Option 5 – Try getting a new Windows image file
If none of the four given options above worked, you might want to get a newer installation image using the Windows Media Creation tool. After that, create the bootable USB drive and once completed and then try to run the Windows 10 setup again.
22H2 update for Windows 11 will arrive later this year and although Microsoft is not releasing anything big there will be some interesting improvements and fixes. We take a look at some that caught our attention.
Phishing protection
One of the most interesting upcoming features is enhanced phishing protection. Microsoft Defender SmartScreen will be upgraded to alert users when they try to store passwords in plain text files and also if they accidentally type in a Microsoft account password on phishing sites.
"These enhancements will make Windows the world's first operating system with phishing safeguards built directly into the platform and shipped out of the box to help users stay productive and secure without having to learn to be their own IT department,"
Microsoft
File Explorer gets tabs, a modern sidebar, and contextual suggestions
Finally, Windows File explorer is getting tabs that will allow much easier management of folders and files inside it.
It is confirmed that Microsoft is also working on a new 'HOME' sidebar that should be modern in design and in features including OneDrive so you can find everything in one place.
Pinning of favorite files was also mentioned so you can easily pin favorites for quick access.
Full-screen widgets
Windows 11 has brought back widgets in a new way and from all the feedback users are loving them. Currently, you have a widget sidebar on the left part of the screen where you have your chosen store widgets but from the Microsoft teaser, we will have soon the option to have them in full screen.
If you are using a widget for reading news, blogs, etc. this feature will be very good since you will be able to use your whole screen for information and not just a part of it.
Suggested actions
Another new feature is 'suggested actions' which is going to be particularly useful in apps like Microsoft Teams. With this new feature, you can highlight a date in a Teams message and Windows will suggest actions.
For example, if you highlight a date, you'll see a recommendation to create an event in Microsoft Calendar for that day.
Encountering errors is never a pleasant experience and fixing errors can sometimes take a large amount of time. Also depending on your expertise and knowledge about computers and the operating systems themselves could be determining factor would you try to wrestle with error.
We will explore and analyze the advantages of both methods so you can choose and know when to apply one and when to reach for the other.
Advantages of manual method
Full control is the main advantage of manually solving errors, when you go deep dive into manually fixing problematic issues you are one that has control. Complete freedom is also another, sometimes fixing things can be done in several different ways and when you are the man behind the wheel, you are the one that can choose how to approach and what solution to apply in order to solve the issue.
Disadvantages of using manual method
The main disadvantage that some users might encounter is that they will need to know ins and outs of computer and operating systems' workings. Of course, the more complicated errors, the more knowledge it will require in order to apply the proper fix. There is also a risk to break something else if the person that is doing the fixing is not fully competent so this is also something to think about.
Another thing that goes against manual fixing is the time it will require in order to actually fix it, some more complex stuff will probably depend on searching for some external resources like searching for compatible drivers for example, or navigating complex registry keys inside Windows.
Advantages of automatic solutions
If you are a user that has no knowledge about how the operating system works, if you do not know what is a registry or how to properly navigate through the Windows folder then the automated solution is for you. The main advantage of automated systems is that you can easily fix errors without any kind of technical knowledge and usually with just one click of a button.
Saving time is also one of the advantages of fully automated solutions because they will work much faster than manually locating the problem and then fixing it. Also, most of these systems will have in place active monitoring that will check always if your system is in top form and alert you when something is not right.
Disadvantages of one-click solutions
Automated solutions are great, they can solve various issues and errors without any knowledge from the user, but they are not perfect. Like security suites sometimes an automated system can misinterpret something as an error when in fact it is not and fixing it could mean some apps not working anymore, luckily you can choose would you like to apply the suggested solution. So if you are using one do not just click fix without looking at what it is trying to fix and maintain.
Another problem with this is the price it is carrying, manually solving your computer error will cost you your time and knowledge but good automated software will come with a price tag. Some people might not be too happy to pay for this kind of application but at the end of the day, it will still be cheaper than a professional technician. The last thing that you should be aware of is that in order for the app to do its work properly it will need to be active all the time, now for modern computers, this is not the issue but for some older ones with a small amount of memory might lead to some slowing them down. This is a price to be paid in order to have your system always errors free.
Should you use an automated solution at all?
This depends on your knowledge and time available, professional IT technicians will not need this type of solution nor will power users but for most common people this will offer computers free of errors for an affordable price.
Both the Windows 10 and Windows Server operating systems have a number of common system files that vary from the ones that support the installation, boot process, and other operations or tasks in the system. However, if any of these files get corrupted, it might cause some errors during the setup of the Windows 10 operating system. One of these errors is the “Windows cannot find the Microsoft Software License Terms” error.
“Windows cannot find the Microsoft Software License Terms. Make sure the installation sources are valid and restart the installation.”
The only option given when you encounter this error is to click on the OK button and nothing else and then the setup gets interrupted and won’t push through. To fix this error and proceed with the installation, you can try to get a new installation image or switch ports, or fix the CFG file. For more details, follow each one of the potential fixes provided below.
Option 1 – Try to get a new installation image
It is possible that there might be some issues with the installation image. It could be corrupted or was modified illegally. Or it could be that the bootable storage device created might have damaged sectors or installation. To resolve this problem, you need to download a fresh copy of the Windows 10 installation image using the Windows Media Creation tool or simply use the ISO image separately and then build a bootable USB.
Option 2 – Try to switch Ports
The error might be caused by the connection to the USB port. It could be that the port is unstable due to a number of factors that resulted in the interruption of the installation process. To fix this problem, you can try switching the USB port or if you are using an optical drive, you can get an external USB optical drive or connect it to another port internally and see if it fixes the problem.
Option 3 – Try to fix the CFG file
If none of the first two options worked, then you might want to fix the CFG file. This file is a configuration file format used for storing settings. All you have to do is download the CFG file. Once you’ve downloaded this file, copy this file to the root of your bootable drive and then check if it fixes the error. If not, then try to copy the same file inside the “/sources/” folder inside the root of the drive. This should fix the error.
Access denied error code 16 is tied to websites, it is an error which you will encounter when trying to visit some specific website or if you are unlucky on all of the websites. Lucky for us this error is fixable and in order for us to do this, follow this guide for possible solutions.
Check Date and Time, Incorrect date and time can often interfere with services in your Windows, browsers are not different and this can cause some websites not to be shown. Check your date and time and set it correctly if needed.
Try to access the website from another device. If you manage to open a website on another PC or some other device then keep reading in order to find the solution, if you can not, then the problem is on the website itself.
Turn off Firewall or antivirus. New antivirus and firewall applications can sometimes mark certain websites as malicious and will cut contact with them rendering them unable to be accessed or opened. Try turning the firewall and antivirus temporarily off and then try to access the website.
Try opening web site in another browser. To eliminate browser-specific issues and their configuration, try opening the website in another browser.
Disable PROXI server. Some applications, especially malicious ones can change your proxi setting in LAN. go to your LAN settings and turn off proxi if it is enabled.
Reset your Browser. If this issue is caused by bad data in your browser or by its settings and preferences, resetting the complete browser will solve the issue.
Use VPN. Sometimes the reason for you was not able to access some website might be because the site is not available for your region, to bypass this issue use VPN and reroute your location.
The third time is charm saying goes but not when we are talking about Microsoft. Print spooler is again in focus, in a bad way.
This is the third print spooler vulnerability to emerge in just five weeks. While a critical flaw was originally identified and patched in June, a similar flaw came to light shortly after and was subsequently patched (with mixed success).
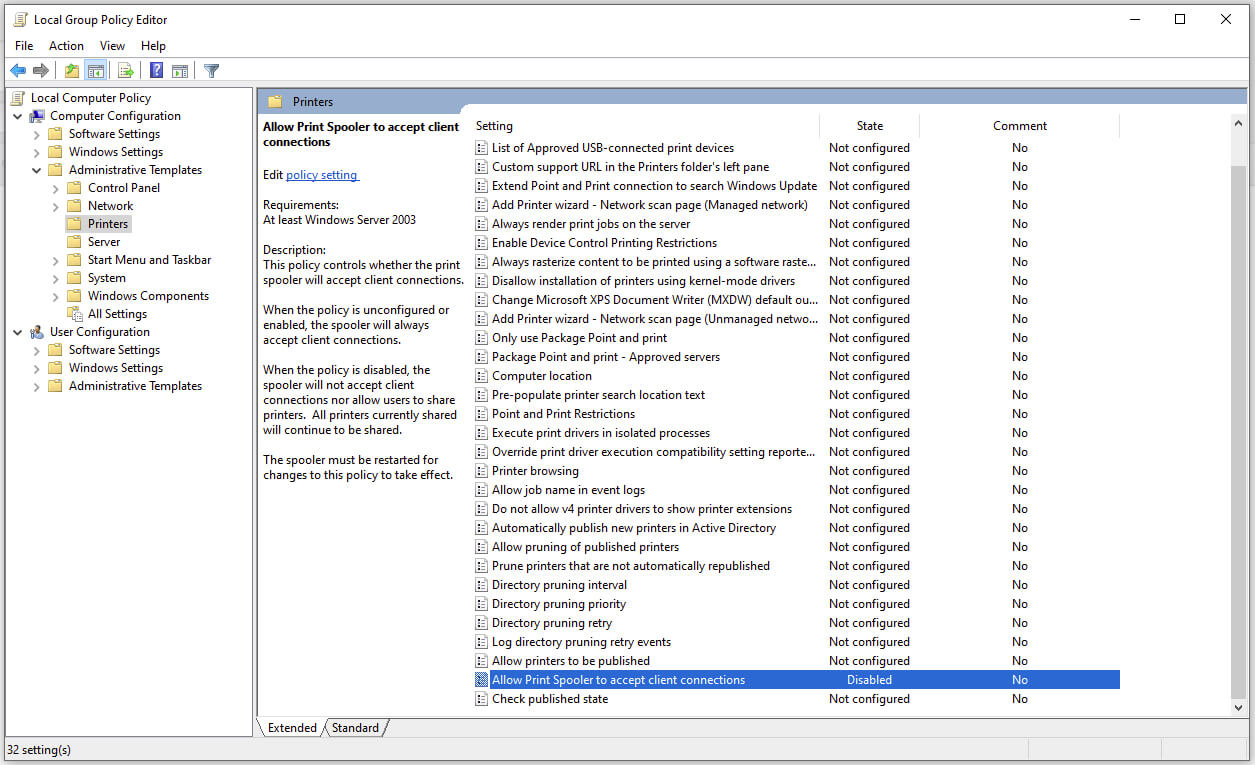
Microsoft is once again advising its customers to disable Windows print spooler after a new vulnerability that allows hackers to execute malicious code on machines has emerged. While a patch fixing the flaw will be released in due course, the most effective workaround currently on the table is to stop and disable the print spooler service entirely.
"An elevation of privilege vulnerability exists when the Windows Print Spooler service improperly performs privileged file operations. An attacker who successfully exploited this vulnerability could run arbitrary code with SYSTEM privileges. An attacker could then install programs; view, change, or delete data; or create new accounts with full user rights."
Stop this service right away or you are risking a potential attack.
Press ⊞ WINDOWS + X to open the hidden menu
Click on Power Shell (admin)
In Power Shell type in the following command to check if spool service is running: Get-Service -Name Spooler followed by ENTER
If spooler service is running type in the next command to stop it: Stop-Service -Name Spooler –Force and press ENTER
Then follow with this command to disable it at startup: Set-Service -Name Spooler -StartupType Disabled followed with ENTER
That’s it, we hope a patch will come soon for all the people that are using network printing and indeed need this service running in order to do work.


 Microsoft is once again advising its customers to disable Windows print spooler after a new vulnerability that allows hackers to execute malicious code on machines has emerged. While a patch fixing the flaw will be released in due course, the most effective workaround currently on the table is to stop and disable the print spooler service entirely.