QR code or if you want to be more technical Quick Response code is a two-dimensional code made of square dots creating a pattern that can be scanned via QR scanner and then interpreted. Usually, they are present on product packaging, on business cards, websites, etc.
When you decode a QR code you can get a link to a website or link to a file or whatever, you can get text, image, email, contact information, etc.
QR Code Desktop Reader & Generator sample code
How to decode a QR Code? You can scan it with your mobile devices like iPhone, iPad, Android or Blackberry equipped with additional software for scanning QR Codes. You might want to check out tools like Barcode Scanner or Red Laser. If you don’t have a mobile device or you need to scan a barcode on your PC, simply use CodeTwo QR Code Desktop Reader & Generator.
How this program works
QR Code reading
CodeTwo QR Code Desktop Reader & Generator is a free tool that will let you quickly scan any QR Code from your screen – be it a part of the website, email, banner, or document. Simply run the program and hit From the screen on the top menu.
Your standard mouse cursor will change into a cross to help you make a selection on your screen. Simply select an area with a QR Code and the program will automatically scan it. You can scan QR codes from websites, documents, movie files – you name it.
You can also select an image file that contains a QR Code and the program will locate it automatically and decode it. To do that, simply click From file on the top menu of the program and select the desired image from your hard drive.
If you have a file copied to your clipboard, or if you make a screenshot of a QR Code, QR Code Desktop Reader & Generator will let you decode those QR codes in one click. Just click From clipboard and the program will automatically locate and decode the QR code for you.
That is not all, you can also use your camera to scan QR codes. If you have more than one camera, the program will let you choose which one to use. To use this option, simply click From webcam, and you will be able to scan QR codes with your recording device.
QR Code generation
CodeTwo QR Code Desktop Reader & Generator also acts as a QR code generator. Creating QR codes is as easy as reading them. Here is how to generate a QR code:
In the top menu, click Generate mode on and enter the text you want to translate into QR Code
Choose if you want to copy it to the clipboard or save it in a file. The QR Code will be scaled automatically, but you can resize it in the Size settings tab.
The resulting QR code can be used however you like. To name just a few options, you can:
Upload it to your blog/website which is especially useful for mobile users.
Print it on a poster, providing easily accessible links with more information on your event.
Send it in newsletters, or include it in your email signature.
QR Codes in email signatures
Inserting QR codes in email signatures lets mobile users quickly grab your contact details, or provides them with links so that they can get more information on your company or topic you were discussing. You can also provide your recipients with a link to QR Code Desktop Reader & Generator. This will help them easily decode QR codes when they open your email on a PC.
QR code
If you want to include a QR code automatically in email signatures throughout a whole organization, try CodeTwo central email signature management solution. It is a very useful tool, which enables you to unify email signatures on Exchange Server and Office 365 (Microsoft 365).
In case you don’t know, the .Net Framework is a programming infrastructure introduced by Microsoft. You will need it to run on lots of services and applications. Note that most of the applications that require the .Net Framework are packed with their installation files which is why it will be installed automatically on your computer when you install an application. However, there are instances when you’ll get an error message saying, “The .NET Framework 4.7 is not supported on this operating system” while trying to install the .NET Framework as a standalone service.
The very reason why this error message appears is stated in the error message itself. Although the .Net Framework is supported on Windows 10, it is not actually compatible with some other Windows 10 versions. So it is most likely that you are seeing this error message because the .Net Framework in your computer is not compatible with the Windows 10 version you are running. Since that’s the case, you need to update Windows 10 to fix the problem.
Updating your Windows 10 computer is the only solution you can try to fix this problem. Thus, it is advised that you check for Windows Updates even if you are now using the latest version of Windows 10. And since the issue is caused by an incompatible operating system version, once you install the exact version of Windows 10 required by the .Net Framework, the problem will be fixed. Simply follow the steps given below to do so.
Step 1: Tap the Win + R keys to open the Run dialog box.
Step 2: After that, type in “winver” in the field and tap Enter.
Step 3: Next, your Windows 10 version should be given in the new window that appears. Take note that the number after the Version which is in the second line is your version number of Windows 10. And that the number must be 1507 or 1709. The first two digits in these numbers are the year while the second two represent the month when the update was released. So if you are running a 1709 version, this means that the Windows 10 version you are using was released in September 2017.
Step 4: The next thing you have to do is to make sure that you have the Windows 10 version that’s compatible with the .Net Framework. To verify, you need to click here and click on the System Requirements.
After opening the link, take a look at the Supported Operating System section where it says, “Windows 10 Anniversary Update” and “Windows 10 Creators Update”. Since there are users who are not familiar with the version numbers related to both the Anniversary and Creators updates, refer to the list given below.
November Update (1511)
Anniversary Update (14393)
Creators Update (1703)
Fall Creators Update (1709)
Spring Creators Update (1803)
As you can see, the Creators Update has version 1703 while the Anniversary Update has version number 14393 so if you are using a version lower than the 14393 version then it’s no wonder you aren’t able to install the .Net Framework 4.7 on your Windows 10 PC. Now all that’s left to do is to update your Windows 10 version and make sure that you will be updating it to the latest version available and then try installing the .Net Framework again.
The Internet has become an essential human right as stated in many countries around the world. Among many benefits that the internet offers are various sites selling Stock photographs for all of your needs. No matter are you working in the design industry or just want to make something for yourself there is a high chance that you will eventually need some photos for your work.
In this article we are going to go through the best Stock Photo sites BUT, we will focus on ones that give you royalty-free Photos, so no paying stuff here, just the best of the free world.
Adobe Stock free collection
https://tracker.tradedoubler.com
In the last year of 2020, Adobe has made more than 70000 photos, videos, illustrations, and templates completely free. You are free to use provided material for personal, commercial, and creative work. Since this is adobe’s collection, well part of it, all of the given material is of high quality. You can also upload pictures to do a visual search to find similar ones.
Unsplash
https://unsplash.com/
Unsplash is a place where you will go if you want to find free-quality pictures. Since a lot of photographers are donating their selected work there you will find always consistently high-quality work there. Unsplash also has applications for Android and iOS so you can go through their stock on your mobile device as well. Photos are organized into categories that make searching much easier.
Pixabay
https://pixabay.com/
Pixabay is maybe well known due to its huge collection of both images and illustrations. There are tons and tons of stuff in there all royalty-free for use. The bad side is due to its strongest one, since there are so many images on its site, quality is not always top-notch like on Unsplash for comparison but you might find stuff here that you will not be able to do it anywhere else.
Pexels
https://www.pexels.com/
This is a great choice for web or app developers since you can find various UI ideas and designs on it. Many UI ideas ready for implementation will be found here and a decent amount of photos as well. The overall site is great for that purpose but please do read the license on each image since some of them are limited in use and cannot be used in commercial projects.
Pikwizard Stock
https://www.pikwizard.com/
Stock photography from Pikwizard is a place where you will go if you need high-quality pictures of people. There are a lot of images of people in natural poses doing things, nothing cheesy or unnatural, just pure and great-looking ones. Among other things is also a vast selection of cityscapes. Sadly as in the case of Pexels, not all pictures have the the same license so make sure to check terms of use before using one.
Gratisography Stock photos
http://gratisography.com/
Last on our list is a Stock site with a strange name and if you visit it you will see that it is not just the name that is strange. Gratisography is a stock site that aims to provide you with high-quality photographs but in different take from another site. These images are more artistic and surreal than other competitor sites. Images are uploaded almost on daily basis but since thematic is somewhat niche collection itself is relatively small.
Conclusion
That’s it, we hope that we have helped you in any way to find some material for your next project and I hope to see you soon back on errortools.com.
Take care and all the best.
Cortana is your personal digital assistant fully integrated into Windows 10 designed to help you make your life easier. The more you use it, the more Cortana can learn about you, and the experience becomes more personalized and accurate. It can perform a variety of tasks, and it's full of handy tricks, but perhaps one of the best features is the advanced speech recognition that enables Cortana to understand the context of a natural voice conversation.
On Windows 10, and across platforms with the Cortana app on iPhone and Android, the assistant can understand virtually any voice command and perform tasks. For example, by just speaking you can find facts, create reminders and manage your calendar, launch applications, change settings, and a lot more.
Now, if you're looking for an official list of all the voice commands Cortana supports, you'll never find it because it doesn't exist. Cortana can understand natural language and context, there's no particular set of commands to make things happen. In a sort of way, you are speaking to Cortana as you would to any other person.
Invoking Cortana
Before using voice commands, it's important to know the ways in which you can invoke Cortana using natural language:
You can click the microphone icon in the taskbar next to the Start menu.
You can use the Shift + ⊞ Windows + C keyboard shortcut to open Cortana in listening mode.
You can use the Hey Cortana feature, which lets you invoke the assistant by simply saying Hey Cortana followed by the command. For example, Hey Cortana: How's the weather?.
On Windows 10 Mobile devices, you can press and hold the search button to open Cortana in listening mode.
Comprehensive list of Cortana voice commands
The following list of commands are examples you can use to learn how to control Cortana with voice commands. Keep in mind that there isn't a specific way to speak the commands. For example, Hey Cortana: Let me listen to some tunes is the same as asking for a more systematic command like Hey Cortana: Play music.
Cortana basic voice commands:
Getting the time for any location:
"What time is it?"
"What time is in New York?" or "What time is in Greece?"
Getting weather information for any location:
"What's the weather like?"
"What's the weather in Madrid?" or "What's the weather in Slovakia?"
"When does the sun set?"
"Is it hot in Hawaii?"
"How's the weather looking for tomorrow/next week?"
Opening (Store and desktop) apps and websites:
"Open Photoshop" or "Go to Firefox"
"Open errortools.com."
Getting news information:
"Show me top headlines."
"Show me the latest news."
"Show me weather news."
"Show me Blizzard stock."
"Show me bitcoin exchange rate."
"What was the score of the last Brazil football game."
Creating a note:
"Create a note."
"Create Shopping note."
"Create Shopping note: Buy a basket of eggs"
"Take a note."
"Draft a note."
"Write a note."
Translating to a different language:
"Translate."
"Translate Hello to German"
"Translate Where is the nearest park? to Spain"
Doing math:
"What's 34% or $764.89?"
"What's 43 times 59?"
"What the square root of 26509?"
"What's 29 times 6 divided by 12?"
"Convert 6.9 cups to fluid ounces."
"How many miles are in 89 Kilometers?"
Defining a word:
"Define Space."
Tracking packages:
"Where is my package?"
"Show me my packages."
Cortana search voice commands:
Finding documents, photos, videos:
"Find photos from August 1998."
"Find cat videos."
"Find document called Collection of poems."
Searching the web:
"Search the web for Heroes of Might and magic."
Finding facts:
"How tall is Mount Everest?"
"Who is Steve Jobs?"
"When Arnold Schwarzenegger was born?"
"Who is Mercedes CEO?"
"When does spring begin?"
"What's the capital of Zimbabwe?"
"When is Thanksgiving?"
It's important to note that Cortana is capable of conversational understanding, which means that you can also ask follow-up questions without having to be very specific.
For example, if you ask Cortana: "Who is the president of the United States", you can then ask a follow-up question, such as "Who is his wife?" or "When was he born?" and the assistant should be able to answer those questions accurately.
Discovering food places nearby:
"Find food places near me."
"Find restaurants near me."
"Find bars near me."
"What's a good restaurant near me?"
"What's interesting nearby?"
"Show me Chinese restaurants near me."
"Show me Italians restaurants in Los Angeles."
Cortana health and fitness voice commands:
"How was my sleep last night?"
"What was my step count yesterday?"
"How many calories did I burn today?"
These commands require a tracking device, such as the Microsoft Band 2 to enable your fitness and health activities, and you need to connect Cortana with the Microsoft Health (Microsoft Band) service.
Cortana settings voice commands:
Opening the Settings app:
"Open Settings."
"Open Action Center."
Controlling settings:
"Turn on/off Bluetooth"
"Turn on/off Wi-Fi"
"Turn on/off Airplane Mode"
Cortana reminders voice commands:
Creating reminders:
"Remind me to wash the car."
Creating location-based reminders:
"Remind me to buy CDs next time I go to Walmart."
Creating person-based reminders:
"Remind me to ask for vacation time next time I talk to Goran."
Creating time-based reminders:
"Remind me to watch the basketball game at 6 PM."
"Remind me to buy the food for the d&d session on Sunday at 3 PM."
Viewing reminders:
"Show me my reminders."
Cortana calendar voice commands:
Viewing calendar events:
"How's my schedule looking today?"
"Show me my appointments for next week."
"When is my dentist appointment?"
Adding new calendar events:
"Add dental appointment for Monday at 2 PM."
Moving calendar events:
"Move dental appointment to Friday at 5 PM."
Cortana alarms voice commands:
Creating alarms:
"Set an alarm for next Monday at 5:30 AM."
"Set an alarm for Saturdays at 9 AM."
Viewing alarms:
"Show my alarms"
Removing alarms:
"Cancel alarm for Saturdays at 9 AM."
Cortana timer voice commands:
Creating a timer:
"Set a timer for 5 minutes."
You can only start a one-timer at one point in time. If there is a timer already running, Cortana will ask you to restart it at a new time.
Viewing timer:
"Show timer."
"How much time is left on the timer?"
Canceling timer:
"Stop timer."
Cortana location voice commands:
Knowing your exact location:
"Tell me where am I?"
Cortana messaging voice commands:
Sending text messages:
"Send a text to Milan: I'll be late for lunch today."
Sending quick emails:
"Send email to Milena: See you later tonight."
"Send email to John and Claudia: How is the project coming along?"
Cortana location voice commands:
Getting directions:
"What's the traffic like on the way home?"
"How do I get home."
"How long would it take to drive to Madison Square Garden?"
"Get me directions to Port Authority."
"How do I get from my location to Long Beach, New York?"
"How far away is the moon?"
"Show me walking directions to the nearest gas station."
"Show me public transit to 11 Times Sq, New York, NY 10036."
"Show me the map of San Francisco."
Tracking flights:
"Track flight 1056."
"Is my flight delayed?"
"Is my flight on time?"
Cortana entertainment voice commands:
Controlling music:
"Play Metallica."
"Put some Symphonic music."
"Shuffle music."
"Play and Justice for all by Metallica."
"Stop music"
"Pause music"
"Pause song."
"Play next"
"Next track"
"Skip track."
Identifying what's playing:
"What is this song?"
"What's playing?"
Movies & TV:
"What's Blade Runner run time?"
"Who was the director of Gladiator?"
"What movies are playing near me?"
"What are the showtimes for Star Trek lower decks?"
Cortana technical support voice commands:
"How do I install a printer?"
"How do I project my screen?"
"How do I change my background?"
"How do I update Windows?"
"How do I make a backup?"
"How do I change default apps?"
"How do I change Privacy?"
"How do I connect a wireless device?"
Sometimes asking a "How to do I" question will result in a web search response.
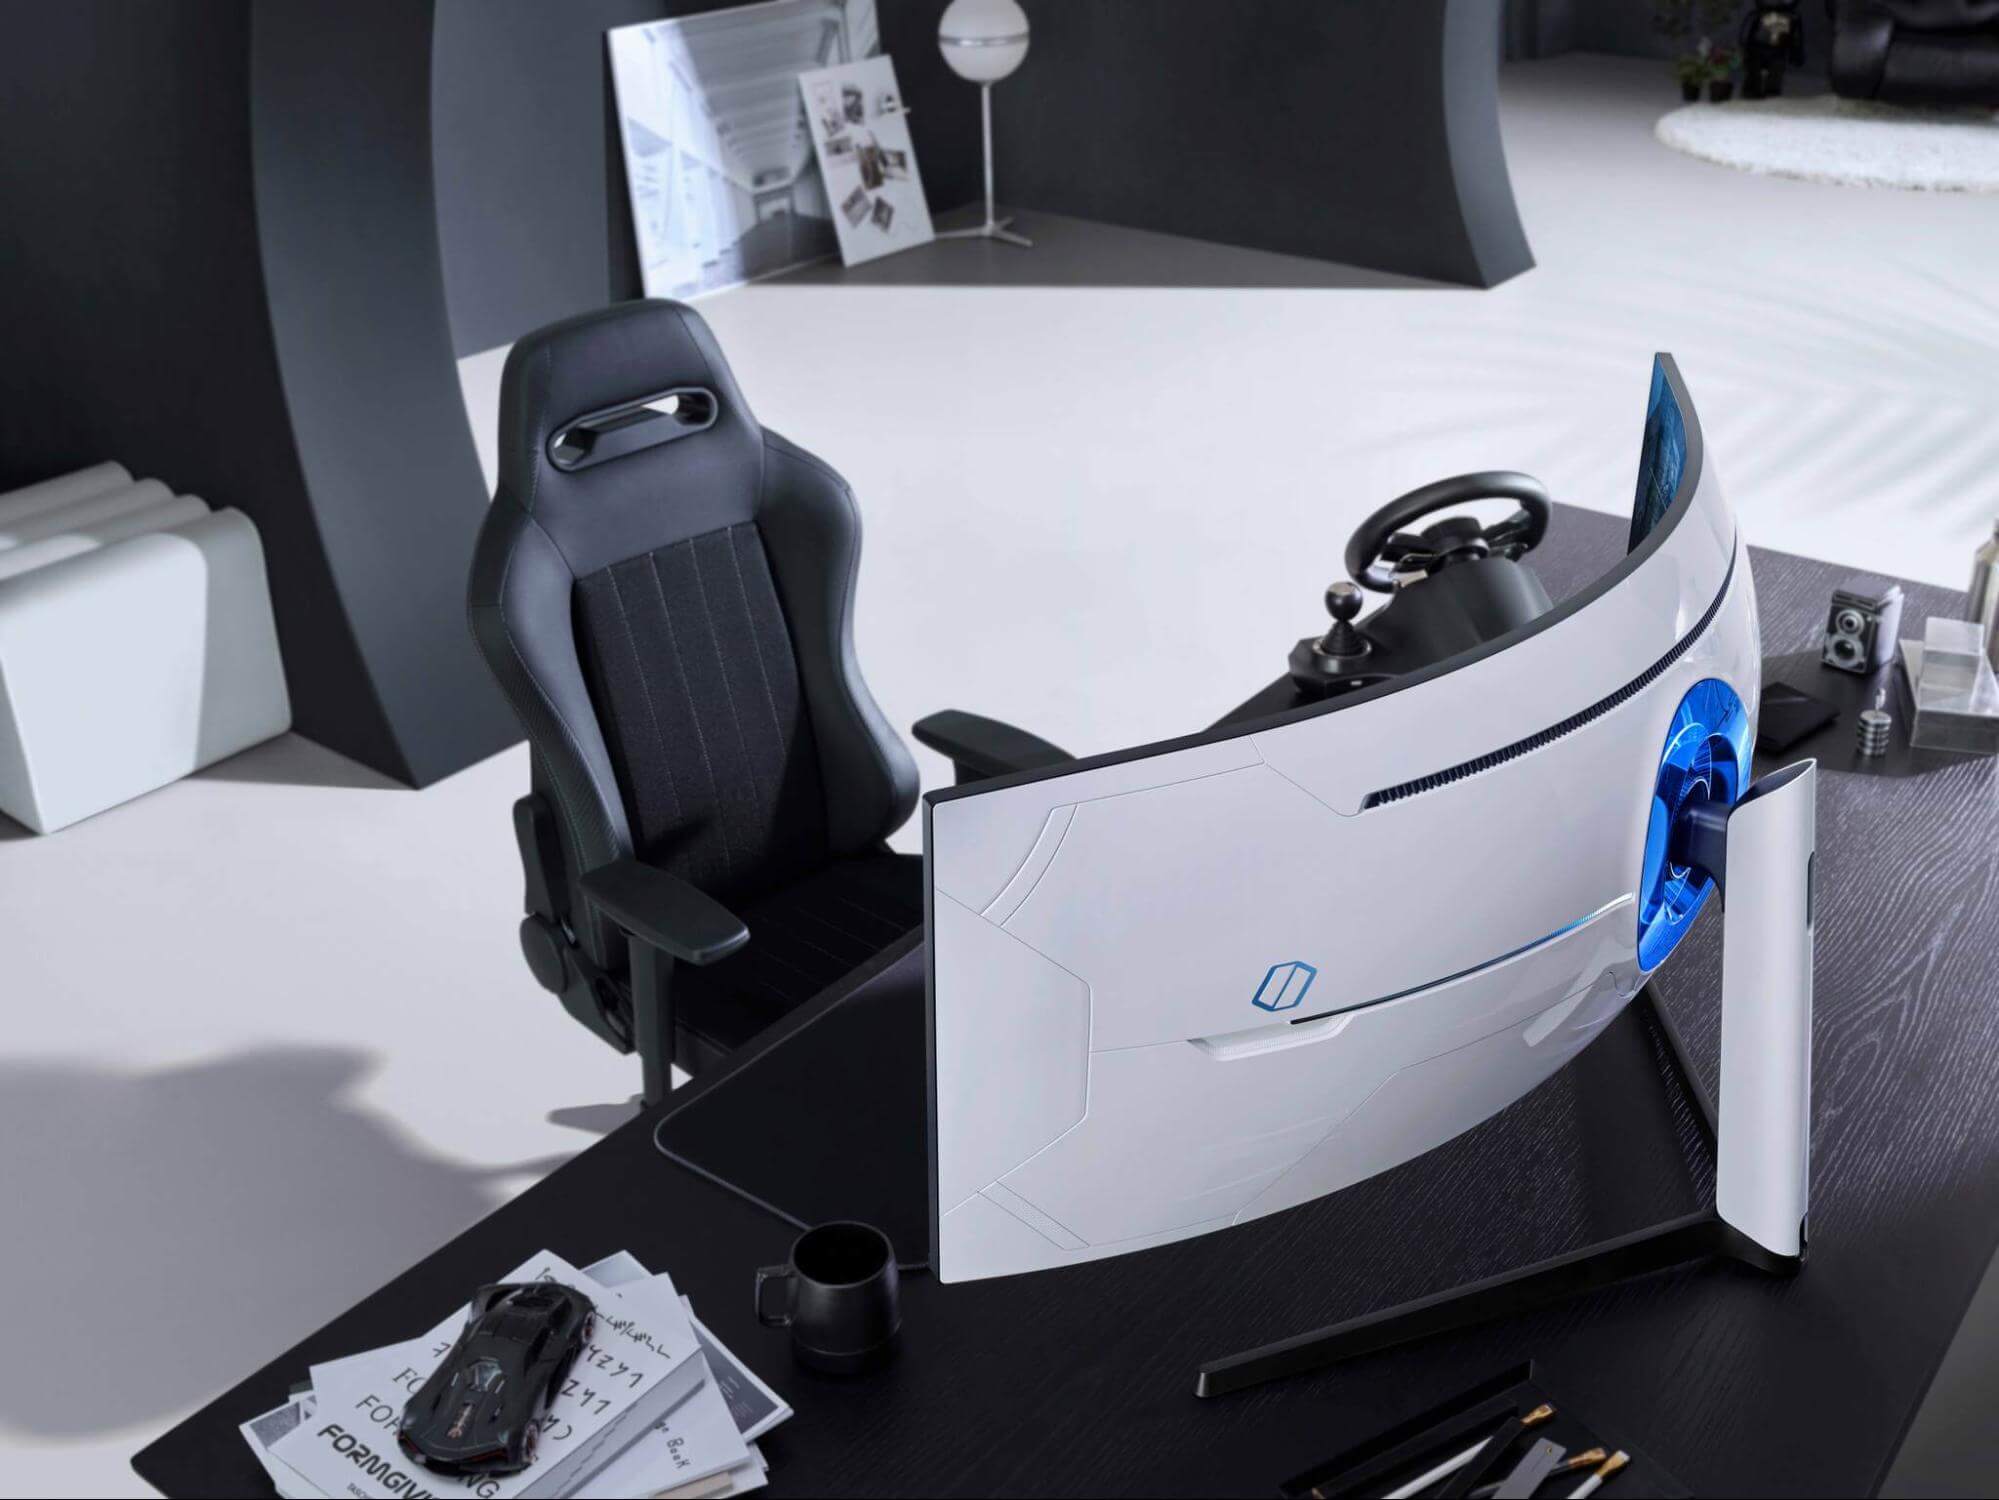
Odyssey Neo G9 is a successor to Odyssey G9 curved gaming monitor and it is aimed again at the gaming community with its specifications but of course, it can be used for work as well.
Gapping at a stunning $2500 USD price it is not really a cheap piece of hardware so it is normal to see what do you get for this kind of price and do features justify it, so let’s dive in.
Size and resolution
The first thing that you can notice about the screen is that it is big and curved, 49 inches big which is pretty big, and with it, I believe you can forget about using 2 or 3 screens because this single one will cover everything you need really.
Going as far as 5120 X 1440 resolution is the strange definition, basically, this is 5K which is kind of nice but I do not see the advantage. Sure it is larger than 4K, but for the price of $2500 I expected an 8K monstrosity so if the resolution is not the main price justification then what is? Let’s move on and find out.
Odyssey tech specs
The monitor comes with HDR and 240Hz refresh rate which is very nice and coupled with 1ms pixel response time, adaptive sync, and Variable Refresh Rate you get pretty good other tech specs.
All of this is very nice but the monitor's strongest selling point is Mini Led tech. Mini Led is a next-gen tech currently found only in high-end TVs. With this technology, monitors can produce truer blacks sort of speak thanks to a greater number of dimming zones.
Odyssey Neo G9 is rated at 2000 nits in the brightness values and local dimming zones go to stunning 2048. It comes also with Quantum HDR that supports 10+, Freesync, and G-Sync capability. In connection, the department monitor comes with a single display 1.4 port and two HDMI 2.1 ports. It also includes a headphone jack along with two USB 3.0 ports.
Conclusion
While the resolution of the monitor is nothing impressive for the given price, its size and the rest of the tech specs surely are. Now I will not lie, the price is still a little too high but if you could afford it easily I think you should.
Could not connect to the System Event explanation: Although logging into a Windows 10 computer may seem like a simple process, it’s actually not since the Windows operating system has built a mechanism in a way that any third party or malware intervention would not compromise access to the system. This mechanism is supported by numerous services, functions, and DLL files. And Microsoft has been taking this security to a whole new level with the introduction of Windows Hello.
Recently, a number of users reported getting the “Windows could not connect to the System Event Notification Service service. Please consult your system administrator” error when logging into their computers. While some users also reported that although they can log in, they encounter the same error message from the Notification area. There are several options you can check out to resolve the error. You have to check the status of several Windows Services and make sure that they are running. You also have to reset Winsock as well as run the System File Checker scan.
Option 1 – Check for certain Windows Services
First, you need to tap the Win + R keys on your keyboard to open the Run dialog box.
Next, type “services.msc” in the field and click OK or tap Enter to open the Windows Services Manager.
After that, you will see a list of services and from there, look for the following Windows Services:
DHCP Client
System Event Notification Service
Windows Font Cache Service
Now make sure that the Startup Type of each service is started and running.
Option 2 – Try resetting the Winsock drivers
In the Start Search, type “command prompt” and right-click on Command Prompt from the search results, and then select the “Run as administrator” option.
After opening Command Prompt, execute this command: netsh winsock reset
Note: If you are using IPv4, execute the “netsh int ipv4 reset” instead. On the other hand, if you are using IPv6, execute the “netsh int ipv6 reset”
Now exit Command Prompt and see if the error is now fixed.
Option 3 – Try running System File Checker or SFC scan
You could also run System File Checker or SFC scan to fix the BSOD error. It is a built-in command utility that helps in restoring corrupted files as well as missing files. It replaces bad and corrupted system files with good system files. To run the SFC command, follow the steps given below.
Tap Win + R to launch Run.
Type in cmd in the field and tap Enter.
After opening Command Prompt, type in sfc /scannow
The command will start a system scan which will take a few whiles before it finishes. Once it’s done, you could get the following results:
Windows Resource Protection did not find any integrity violations.
Windows Resource Protection found corrupt files and successfully repaired them.
Windows Resource Protection found corrupt files but was unable to fix some of them.
Dune, arguably one of the best science fiction novels ever written was brought to a big screen first time by David Linch. Sadly movie itself went through development hell and a lot of troubles and the end result was somewhat strange. The audience was divided on it, some hated it, some loved it but for sure it left a mark in cinema history. Years have passed and just when people forgot about ever receiving another try on a book adaptation Denis Villeneuve has brought his vision of Frank Herbert's novel into its full glory on a big screen.
The interesting thing about this new Dune movie was that from the start Denis envisioned it as a two-movie part openly saying that book itself is too complex to be done in a single movie. But, the issue arises when information about Dune part two was hanging on a thread on how well Dune part one will be received and performed in the box office. This naturally brought all kinds of speculation and worry among fans of the franchise, especially because the movie itself was really good and well made.
Well for all of you fans and people who wanted to see a continuation of the story can rest at peace now since the Legendary picture has officially announced and green-lighted Dune part two. The budget was given and we can expect part two at the beginning of 2023.
In case you don’t know, Microsoft hooks up every machine that is running Windows 10 with an Advertising ID which helps them in providing Windows 10 users with relevant ads. These ads are delivered to users in the Action Center, Start Menu as well as the ads inside the UWP Applications.
What makes these advertisements relevant is that they keep track of your browsing trends, likes and dislikes, with the help of the Advertising ID. However, if you are not fond of advertisements and you do not want this feature of Microsoft to track your usage, worry not for you actually have the option to disable targeted ads on your Windows 10 computer by turning off the Advertising ID. And you can do that during Windows 10 Setup or using the Group Policy Editor. For more details, refer to the instructions provided below for each one of the methods.
Option 1 – Turn off Advertising ID during Windows 10 setup
If you are about to install Windows 10, then during the installation process, your computer boots into the Install and Configure Windows 10 screen with Cortana that assist you during the setup. Once you reach the last page which is “Choose privacy settings for your device”, you will see the Advertising ID of your computer. Under the Advertising ID, you have to disable or toggle off the “Apps can use advertising ID to provide more personalized advertising in accordance with the privacy policy of the app provider” option. After you disable it, click on the Accept button to proceed with the installation. After that, the copy of your Windows 10 you are using will have the Advertising ID disabled by default.
Option 2 – Turn off Advertising ID via Group Policy Editor
First, tap the Win + R keys to launch the Run utility.
Then, type “gpedit.msc” in the field and click OK or tap Enter to open the Group Policy Editor.
Next, navigate to this group policy setting: Computer Configuration > Administrative Templates > System > User Profiles
Now double click on the “Turn off the advertising ID” option and set the radio button to Enabled. Once you do, you will see the following description on your screen:
“This policy setting turns off the advertising ID, preventing apps from using the ID for experiences across apps. If you enable this policy setting, the advertising ID is turned off. Apps can’t use the ID for experiences across apps. If you disable or do not configure this policy setting, users can control whether apps can use the advertising ID for experiences across apps.”
Note that setting the radio button to Enabled or Not Configured will turn off the data collection of the Advertising ID.
Finally, exit the Group Policy Editor and then restart your computer to apply the changes made successfully.
Error 126 is a very commonly occurring error that is often the result of damaged system files of Windows. They usually occur during the installation of some Windows program or application. When Error 126 is generated, it terminates the installation process almost instantly.
It is important to take corrective measures immediately to ensure that no such problems are encountered again in the future.
Solution
Error Causes
There are a variety of conditions that may trigger Error 126. These conditions are listed below as follows.
Corrupt or incorrect registry entries in the system files
When any of the above-listed conditions occur, the corrupt system files will go to the improper links or missing information.
Eventually, the problems with the files will keep the applications or programs from responding in the usual manner. Whatever are the reasons for error generation, it is of utmost importance that the error is removed to ensure smooth functioning of the system.
Further Information and Manual Repair
There are many different ways this error can be rectified. However, the two most effective solutions are listed below as follows.
This solution is for the advanced user. Turn on the system and log on to it as the Administrator. Now click on the Start button. Now click on All programs -> Accessories -> System Tools. Here you will come across the option for System Restore. Click on it. A new window will appear. Select 'restore my computer to an earlier time' point. Now clock on Next. A list of restore points will now appear in front of you. Choose the latest restore point you come across from this list and click on ‘Next’. In the next window that opens, click on ‘Next’ again. This is the confirmation window. Once the restoration finishes, restart your computer.
This solution is for novice users. Download an Error 126 repair utility program. Install it on your system. Now use it to scan your system for errors. Find out if there is an option to fix/repair error. When you come across it, click on it as soon as the scan is complete. Restart your computer. Your system is now free of Error 126.
Have you been feeling anxious in the digital space? Feeling like you have a million eyes on you each time you visit a website? It can definitely make you uneasy. Luckily there’s an easy fix, and it’s called a VPN.
In this article we’ll take you through the basics of what a VPN does and some of the biggest benefits you can reap from buying one.
VPN: definition and how it works
VPN stands for Virtual Private Network, so its name already says a lot about what it does.
A VPN is specialized software that keeps your browsing private and secure. Essentially it hides your identity, preventing possible cyberattacks and data theft. This is especially important in cases of public network use, where you’re highly exposed to potential threats.
To be more specific, this software encrypts your Internet Protocol (IP) address by filtering it through a server hosted by the VPN provider first. That way, it prevents your Internet service provider, third parties and lurking online thieves from tracking the actual you.
Credit: FLY:D on Unsplash
Some providers, such as Surfshark VPN with its IP Rotator feature, even make it a habit to frequently change your IP address to further protect your identity. With most VPN providers, you can also appear to be in a completely different country, adding to your disguise.
There are tons of advantages you can look forward to if you decide to use a VPN. Take a look at some of the crucial ones.
Benefits of using a VPN
When choosing a VPN, you can find both free and paid options. We recommend you go with the paid ones, since they have stronger security, encryption and data protection, as well as more advanced features. Free VPNs come with limitations and risk of malicious attacks on the software itself.
You can choose to buy a singular VPN service or opt for antivirus software that has a VPN built in, for example Bitdefender’s Ultimate Security plan. That depends on what you use your computer for and how much.
When you pick one, here’s what it can do for you.
1. Access region-specific content
When we said you could change your location, we meant it. Say you’re using a streaming service and a show you desperately want to watch isn’t available in your country. You can use your VPN to make it look like you’re browsing from a country where it’s unlocked.
This option is also convenient for gamers who want to access maps, skins and other in-game items unavailable in their location.
In addition, you can use this powerful feature when you’re traveling to a region where some of your favorite content may not be accessible.
Do keep in mind that you need to read the Terms and Conditions (yeah, we know - who does that?) of your games and services before doing this, since you could end up getting a penalty. It’s also important to remember that there are entire countries that have strict regulations or even bans on VPNs, for example Belarus, Russia and China. So make sure to be very cautious with your VPN use, friends.
2. Browse like no one’s watching
VPNs shield your browsing habits from prying eyes on the web. Those can be malicious hackers or just third-party cookies tracking your every move to later bombard you with targeted ads. For example, Surfshark VPN features a Cookie blocker that blocks all cookie-related pop-ups and lets you browse in peace (and secret). It works even when the VPN is turned off, which is also pretty neat.
In addition, their CleanWeb 2.0 technology makes sure ads and especially malware don’t stand a chance at all, since they’re blocked before they can even load.
The inability of sites to track your browsing means they can’t collect and analyze any of your data. So, your personal information - or your company’s information in case that’s what you’re using your computer for - is entirely hidden and secure.
3. Save money
It’s well-known that the prices of certain items and services vary based on your location, browsing time, age and many other factors. This most commonly goes for airline tickets and hotel stays.
You can use your VPN to avoid high prices and surcharges. Clear all cookies, turn on your VPN and visit an online shopping site to check out their prices. Then compare your findings with the offers you see when your VPN is off, when you spend a long time on the site or have an active account with the company.
Sometimes this can really help you find the best deals and avoid breaking the bank. But again, check the Terms and Conditions before you purchase something using a VPN.
4. Secure your smart home
The more smart devices you have connected to your network, the more exposed you are to potential cyberattacks. Phones and computers are generally designed to be decently secure even without a VPN or antivirus, but smart home devices leave a lot to be desired in that regard.
Protecting your home network with a VPN software means all devices connected to it are secure, be it an air purifier or Alexa.
Credit: Bence Boros on Unsplash
5. Prevent connection slowdown
Your ISP can intentionally slow down your internet speed based on how much data you’ve consumed (data throttling) or your activities online (bandwidth throttling).
But with a VPN, what kind of data you send and receive and how much is entirely hidden. Therefore, if your ISP can’t see you, they can’t control you and they can’t throttle down your speed.
The bottom line
You can never be too safe online. So definitely think about getting yourself a solid VPN to pump up your privacy and security as much as you can. And if you have any questions or need help choosing the perfect software for you, feel free to reach out to us.
Many are upgrading their OS to Windows 10, however, it’s not always smooth sailing because users have been reportedly experiencing different bugs including Black Screen after a successful update.
One common issue in installing Windows 10 is the appearance of a black screen after installation. This usually occurs when the user restarts the computer. Initially, there will be a black screen only appearing on the monitor. There are also cases where a mouse cursor is present, while some cases have no cursor at all.
Not only that, it seemed that you’ve lost all your desktop icons when experiencing this bug.
Solution
Error Causes
Just like the other bugs experienced by Windows 10 users, booting to a black screen has reasons. Before you even try to look for the solution, you first have to determine the cause of the error, in this case, the error would be black screen when booting.
Error on external devices such as printer or mouse.
Having outdated display/video drivers that normally result in black screen when OS is updated.
If error messages are left unsolved, you may encounter other Windows 10 related issues such as error code 0xc0000142.
Further Information and Manual Repair
Before you even think of upgrading your OS to Windows 10, you need to know that there are specific system requirements and specifications to be able to successfully update your operating system.
A Microsoft DirectX 9 graphics device or later with WDDM 1.0 driver graphics card
800 x 600 display
A Microsoft account and Internet access.
There are more system requirements in order to use other certain Windows 10 features, but we’ll focus on solving your black screen problem in this article.
IMPORTANT NOTE: While it’s possible that you’ll be able to find the solution for your black screen during Windows 10 update, contacting the service of a professional technician or using an automated tool is advisable if you’re not confident in performing the methods to be discussed.
Method 1: Windows 10 DVD Boot
Hit Repair your computer at the Install Now screen.
Press Advanced Options
When you’re in the Advanced Options find Troubleshoot and click it.
Proceed to pressing Startup Repair
Simply follow the instructions of the screen and check if that helps solve the black screen problem.
Method 2: Safe Mode from Windows 10 DVD Boot
Go to Install Now screen
Hit Repair your computer button
Go to Advanced Options
Click Safe Mode option
There’s a chance that you’ll get an error prompt saying, “installation cannot be completed in safe mode.” If this happens, simply press Shift + F10. This command will redirect you to the Command Prompt. You just open Device Manager by keying in devmgmt.msc then disable the display adapters, now check if you’ll be able to successfully boot in normal mode.
This process will normally allow you to complete the Windows 10 installation, if that’s the case you can just update the display adapter drivers from the manufacturer’s website. Restart your computer and see if this solves the problem.
Method 3: Driver Roll Back
Hit Windows Key + X then press the Device Manager
Expand the Display Adapters option
Right-click the listed Display Adapter and press on properties
Find the Driver Tab and click on it, then press Roll Back Driver
Do take note, however, that the Roll Back Driver option is not available if there was no previous version installed.
Method 4: Check External Devices
Since one common cause of black screen during a Windows 10 update is the external devices you use in your computer, you might want to consider these steps as well.
Simply unplug all of the external devices you currently use
Restart your computer
If in case this solved your black screen problem, carefully plug back the devices one at a time to determine which of the device is the culprit.
Update the drivers for the outdated hardware using a reliable third party tool.
Method 5: Fast Startup Disabled
Some Windows 10 users had success in solving their black screen problem by disabling the fast startup.
Go to the Control Panel, find Power Options and press “Choose what the power button does,” which is located in the left pane of the panel.
Hit the “Change settings that are currently unavailable.”
Make sure to unmark the checkbox button saying, “Turn on fast startup.”

 In this article we are going to go through the best Stock Photo sites BUT, we will focus on ones that give you royalty-free Photos, so no paying stuff here, just the best of the free world.
 Odyssey Neo G9 is a successor to Odyssey G9 curved gaming monitor and it is aimed again at the gaming community with its specifications but of course, it can be used for work as well.
Gapping at a stunning $2500 USD price it is not really a cheap piece of hardware so it is normal to see what do you get for this kind of price and do features justify it, so let’s dive in.
Odyssey Neo G9 is a successor to Odyssey G9 curved gaming monitor and it is aimed again at the gaming community with its specifications but of course, it can be used for work as well.
Gapping at a stunning $2500 USD price it is not really a cheap piece of hardware so it is normal to see what do you get for this kind of price and do features justify it, so let’s dive in.

 If you are about to install Windows 10, then during the installation process, your computer boots into the Install and Configure Windows 10 screen with Cortana that assist you during the setup. Once you reach the last page which is “Choose privacy settings for your device”, you will see the Advertising ID of your computer. Under the Advertising ID, you have to disable or toggle off the “Apps can use advertising ID to provide more personalized advertising in accordance with the privacy policy of the app provider” option. After you disable it, click on the Accept button to proceed with the installation. After that, the copy of your Windows 10 you are using will have the Advertising ID disabled by default.


