Sharing is caring, an old saying says. I completely agree and that is reason enough for this article filled with sharing goodness. Holidays are coming and I hope that the holiday spirit is strong with you, that you will spend them in peace and with loved ones. All that being said wouldn’t it be great if you can spend some joy with close ones and share some of your games on their account so they can enjoy them as well?
 Well, you can and it is not complicated as well. Follow this easy guide to see how can you get someone’s account up and running with some of your games.
The family Sharing feature inside Steam will let you share your games to another account so owners of that account can play games that you have purchased without the need to buy themselves. You can allow up to 5 accounts and 10 devices to play your library games, and owners of these accounts will have their own achievements.
Be aware that enabling this option will place your entire library on the share, you will not be able to choose which games you would like to share and therefore any kind of parental controls are not applying here. Also know that once the game is running on one device, others will have to wait for one playing to finish before they can get a spin on it.
Only the owner of the game can play whenever he wants as a priority but others will have to wait for the game to be not run by someone else.
In order to share your game library have a person, you wish to share games with at his device on ready to go and enable steam guard on your account.
To enable steam guard login into your account and on the top left corner click on Steam and then on Settings. Inside settings click on the Manage Steam Guard Account Security button. Choose the way of authentication either by mail or steam guard mobile app. Check Get Steam guard codes by email radio button and re-login into account.
Now that Steam Guard is enabled on the primary account let’s share some games!!!
Inside client again, in the top left click on Steam and again on settings. In the left panel choose and click on Family. Inside Family section check box beside Authorize Library Sharing on This Computer. Log out of your account and login into the client user account credentials you wish to share your library with (this is your friend or cousin account, they need to log in to Steam client on your computer but with their credentials). After they have successfully logged in, log them out and re-log with your account again.
Now go again into Steam > Family and now you should see an account in the box at the bottom with the user name or your friend or relative. Confirm that this is an account that you wish to share the library with by clicking on the checkbox next to the name. Now let users login into the desired device with their credentials and they will have access to your entire library. Happy gaming!

“Waol.exe has encountered a problem and needs to close. We are sorry for the inconvenience.’
 Error Causes
"Cannot find the file sqlite3.dll (or one of its components)"
Followed by:
"Error starting program.. A required .DLL file sqlite3.dll was not found."
Error CausesError code 0xc004fc03 occurs when Windows users fail to activate their Windows operating system due to a networking problem. The error code’s common symptoms include the following:
Error CausesError code 0xc004fc03 in Windows 10 usually occurs due to issues related to a Windows user’s network. Your computer may be having problems connecting to the Internet or your firewall may be blocking or interrupting your device’s ability to activate Windows 10. In some cases, users may simply need to wait a day or two to reattempt to activate their system using a valid product key, as there may be an issue with the Windows activation servers. Failure to promptly fix this error code might result in other Windows 10 error messages, such as error code 0xc004f034.
To rectify the error code, Windows 10 users will need to perform manual repair procedures that fix the underlying problems causing error code 0xc004fc03. These procedures may include reconnecting to one’s network, checking your firewall settings, or activating your Windows operating system via phone. The manual repair methods are simple and do not require technical knowledge of the Windows operating system. If your attempts at manually repairing this error code fail, however, you may need to try a few other procedures.
To check your Internet connection, you’ll need to access the Network & Internet tab in Windows 10. Follow the instructions below to access this tab and fix Internet connectivity issues if they are preventing you from activating Windows on your machine.
If your status shows that you are not connected to a network, you will need to fix your connection. Simply use the Network Troubleshooter to troubleshoot your connection. You will be able to activate your copy of Windows once your connectivity issues are resolved.
If, however, the problem persists and error code 0xc004fc03 occurs during the activation process, this simply means that the existence of the error code is not due to connectivity or networking problems. In such a case, move to the next manual repair method listed below and follow the exact instructions given.
Windows Firewall protects your PC from hackers, worms, and other malicious programs. However, in some cases, it may result in error codes like error code 0xc004fc03. If your firewall is interfering with the Windows 10 activation, you’ll be able to rectify the problem by simply adjusting your settings. Follow the steps below to check – and adjust if necessary – your Windows Firewall settings.
In some cases, Windows users may not be able to adjust settings within the Windows Firewall tab, as your firewall settings may be controlled by a third party antivirus software. If this is the case, open the antivirus software and turn off the firewall if the software does not prevent you from making such changes to its settings.
Note, however, that you will need to readjust the settings as soon as you activate your version of Windows 10. This is due to the fact that turning off your firewall settings permanently may lead to exposure to worms and other malicious programs.
Activation of Windows via phone is another option for individuals experiencing error code 0xc004fc03. The activate by phone option in the Update & Security tab will be available once you fail to activate Windows 10. To complete this manual repair method, follow the steps below.
This is one of the most effective ways to fix error code 0xc004fc03. If the issue persists, however, you can proceed to the last resort.
If you wish to always have at your disposal a utility tool to fix these Windows 8 and other related issues when they do arise, download and install a powerful automated tool.
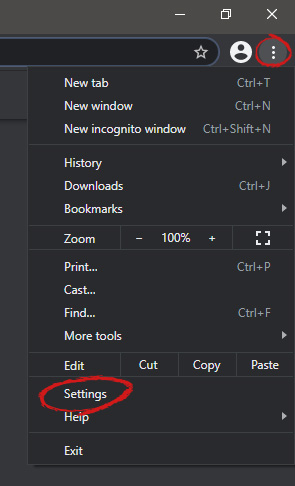 When you are in settings, on the left side move toward the bottom until you run into a tab that says On Startup and click on it. On right, a new section will open, click on Open a specific page or set of pages.
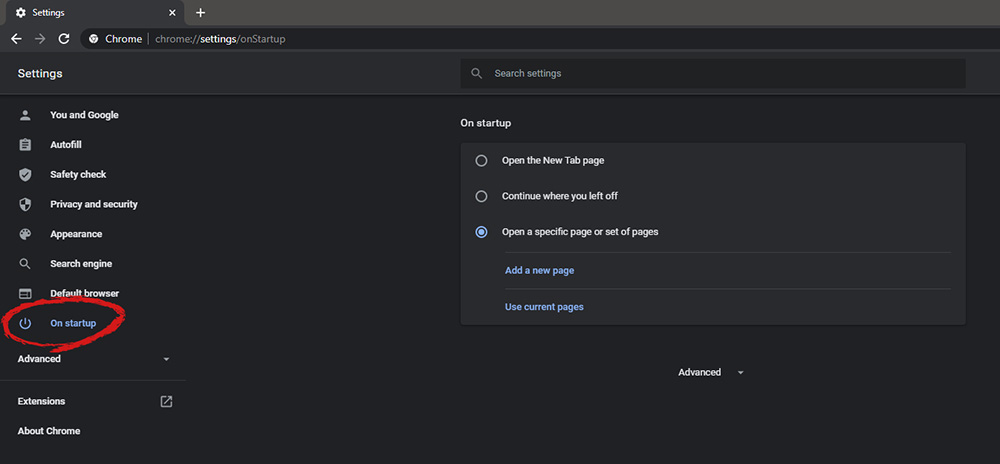 You will be presented with the option to add a new page by typing its URL or getting it from bookmarks or using a specific opened one. You can repeat this process until you have added all pages that you wish to be automatically opened once Chrome is opened for the first time.
In the Windows ecosystem, MS Surface laptops are among the best laptops on the market, they are regarded as equivalent to Apple MAC laptops but for Windows. Microsoft Fall 2022 Event will be held on October 12th at 10 AM. The event itself will be held right before it kicks off its annual, developer-focused Ignite event in Seattle from that same day through October 14.

This event is the first in-person event that Microsoft has held since the beginning of the pandemic. We expect the launch of the Surface Pro 9 and the Surface Laptop 5, and maybe Surface Studio 3 as well. There are also some rumors about products themselves like choices between an ARM or x86 CPU but nothing is confirmed so far, we can just wait and see.