LINUX has become more than just a dedicated server Operating system, more and more it is gaining ground in home computers as well and as services like Steam and Gog are offering their titles for LINUX it is gaining more and more ground daily.
Why LINUX?
So, what makes LINUX so good? First of all security, no other Operating system has that high level of security like LINUX and that is the reason why it is widely used as a server. Other advantages are it is less resource hungry and its architecture is made in such a way that it does not has applications remains and traces which remain in the system, once an application is deleted from OS, it is deleted and every trace is removed from OS. Apple OS is based on LINUX kernel but made specifically for their hardware.
LINUX popularity
So naturally, the question pops up why LINUX is not more popular? One of the reasons is its difficulty, to work in LINUX you need to have some level of computer knowledge, Windows is more user-friendly and a lot of people prefer the ease of use to features. This is somewhat been fixed sort of speak in last years since we have LINUX distributions which aim to be more simple and user friendly but it is far from easy of use of one Windows.
Another big reason was software support. Altho some powerhouse software has its LINUX versions and works just fine, even better than on Windows, your typical user applications lack and games were almost non-existent making LINU users rely on Windows emulation software for simple applications, and often it did not work properly. This has also changed for the better in later years but as with the previous point, it is still far from being Windows wide.
What is LINUX distro?
Linux comes in different versions called distributions. What this means is that the basic core of the Operating system is the same though all LINUX versions and all LINUX drivers and software will work on anyone, they will visually and feature-wise be different. Also, they will be more complex for use or they will have different hardware requirements.
Choosing the right LINUX distribution is no easy task and we are here to help you by offering you certain points and guides in hopes to direct you on the right path.
What Do You Need the Distro for?
This might be perhaps the most crucial question when trying to decide which LINUX distribution you want to install.
Depending on your preferences and goal like work, games, security, media you will need to consider the best distributions in the field of your preference. A very good place to get this kind of information is on DistroWatch. When on-site, navigate to the Distribution category search filter and choose the option best suited to your needs.
What Kind of Software Will You Be Using?
Like the previous question, this one is also your personal preference but it will make difference if you are planning to use a different type of software. If your plans are gaming for example you will want the latest and greatest LINUX kernel version for maximum hardware compatibility. If you are a regular desktop user you will aim for a distro that is updated constantly so you are working with the latest versions of Chrome or Firefox. In some cases, depending on your software you might want to run older but faster distribution.
What Kind of Hardware Will You Be Using?
If your computer is up to date you can run any distribution that you like but if it is an older rig your options might be a little limited. Now depending on the technical characteristics of your computer and its age it may come down to just a few available distributions which are specially tailored to run on old hardware. These kinds of distributions are lightweight and do not take much space but sadly can not offer you the latest and greatest in software but for usual everyday tasks like web browsing, word processing, email viewing, etc they work perfectly fine. You can have a great office machine with proper lightweight distribution offering you all that you need to be able to work.
How Much do you know about computers?
As stated before, LINUX is not as user-friendly as WIndows and your overall technical knowledge can play a big role in deciding which LINUX you want to adapt. If you are more of a casual user then avoid technical distributions which will require to manually tweak tons of stuff, go for more automated ones. If you are a power user however and enjoy wrestling with each detail then perhaps some distro with more command-oriented nature.
What Kind of Community Are You Looking For?
Now you might ask what does community has to do with the operating systems but the same as Windows, LINUX also can have some issues, and sometimes installing drivers will require certain steps to be taken. How it is much easier to find a solution when having a great community surrounding the project I suggest not dismissing this part when choosing your distro. Every community is helpful, but they’re all helpful in different ways.
If you would like to read more helpful articles and tips about various software and hardware visit errortools.com daily.

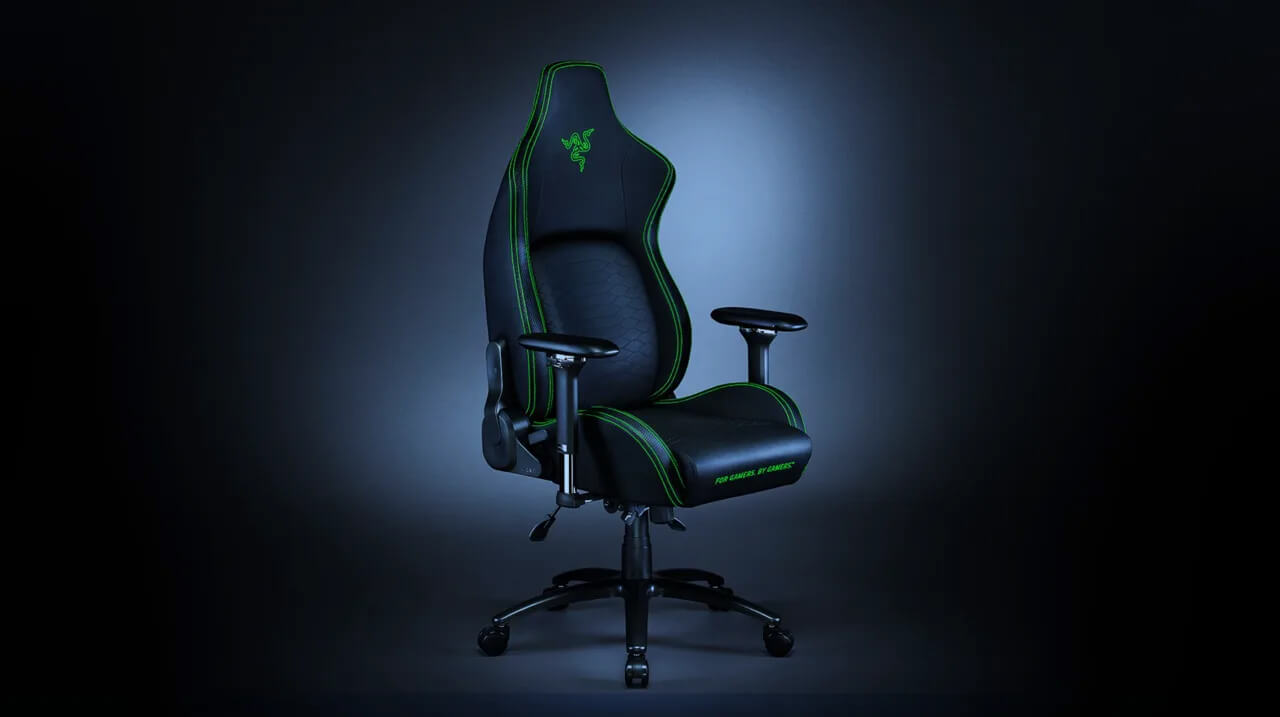 It seems that last few days we were riding some Razer bandwagon but rest assured that we are not sponsored by them in any way, truth is that simply they come up with some interesting accessories which I believe are worth covering.
Gaming Chair itself comes in two colors, fully black and green black combination and it is not really an entry-level chair if we are talking about price. The chair itself is around 600USD depending on the distributor and considering that price range it is placed in more top cream of gaming chairs but it is worth every dime.
It seems that last few days we were riding some Razer bandwagon but rest assured that we are not sponsored by them in any way, truth is that simply they come up with some interesting accessories which I believe are worth covering.
Gaming Chair itself comes in two colors, fully black and green black combination and it is not really an entry-level chair if we are talking about price. The chair itself is around 600USD depending on the distributor and considering that price range it is placed in more top cream of gaming chairs but it is worth every dime.

 Razer is a well-known brand among PC gamers and users, it started as a peripheral manufacturer focused on keyboards and mouse but after years passed Razer expanded its inventory offerings. It soon started offering headphones and lately has branched into wider product lines like gaming chairs and protection masks.
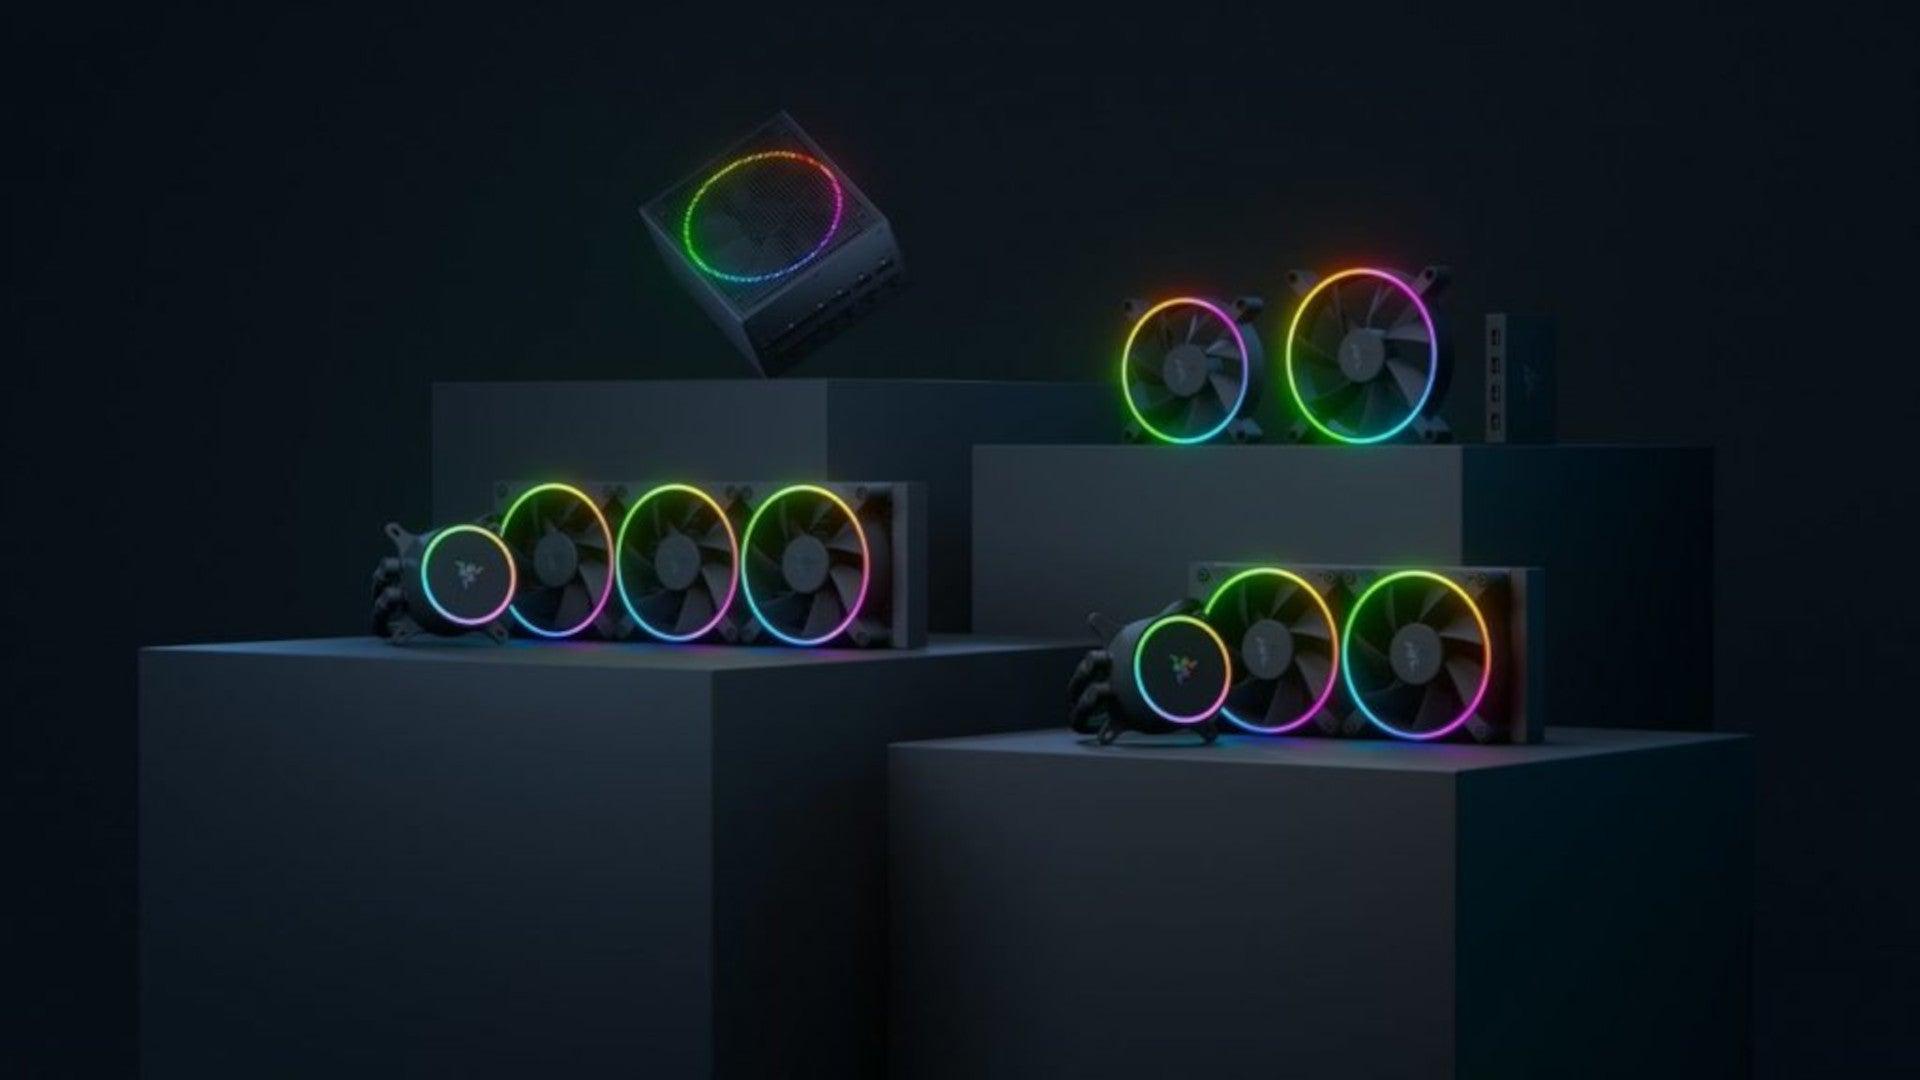
It is not a big surprise that Razer is expanding into other branches of the PC industry. This time, however, it has revealed not one but three new hardware for your PC. Case fans, all in one liquid cooler and power supply.
There are not many details about the products themselves but one thing is one hundred percent confirmed, they come with Razer Chroma, all of them, even the fans.
Razer is a well-known brand among PC gamers and users, it started as a peripheral manufacturer focused on keyboards and mouse but after years passed Razer expanded its inventory offerings. It soon started offering headphones and lately has branched into wider product lines like gaming chairs and protection masks.
It is not a big surprise that Razer is expanding into other branches of the PC industry. This time, however, it has revealed not one but three new hardware for your PC. Case fans, all in one liquid cooler and power supply.
There are not many details about the products themselves but one thing is one hundred percent confirmed, they come with Razer Chroma, all of them, even the fans.
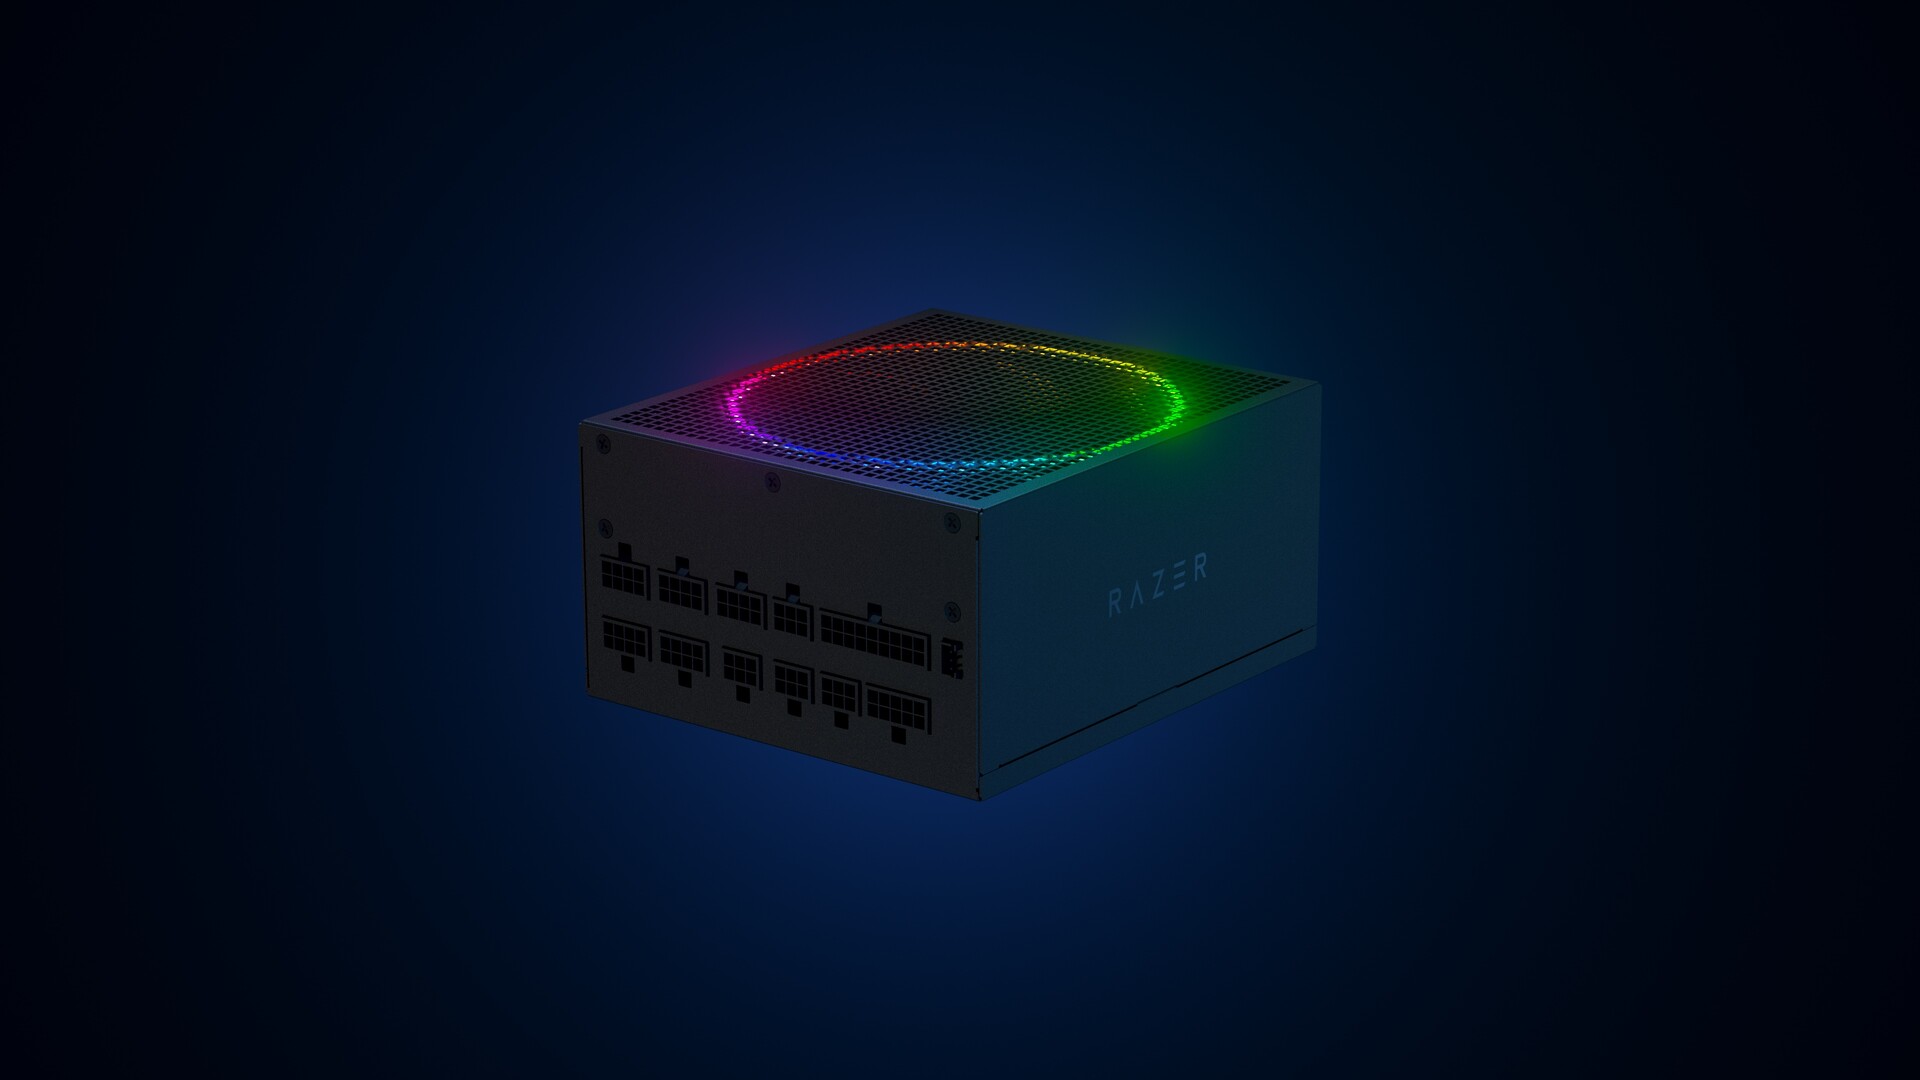 Most interesting for me personally is Razers Katana, the power supply unit. It is a modular power supply ranging from 750W to 1200W with the additional option of Titanium rated one with an impressive 1600W of power. Power supply will start shipping in early 2022 and at the time of writing this article no price range has been released.
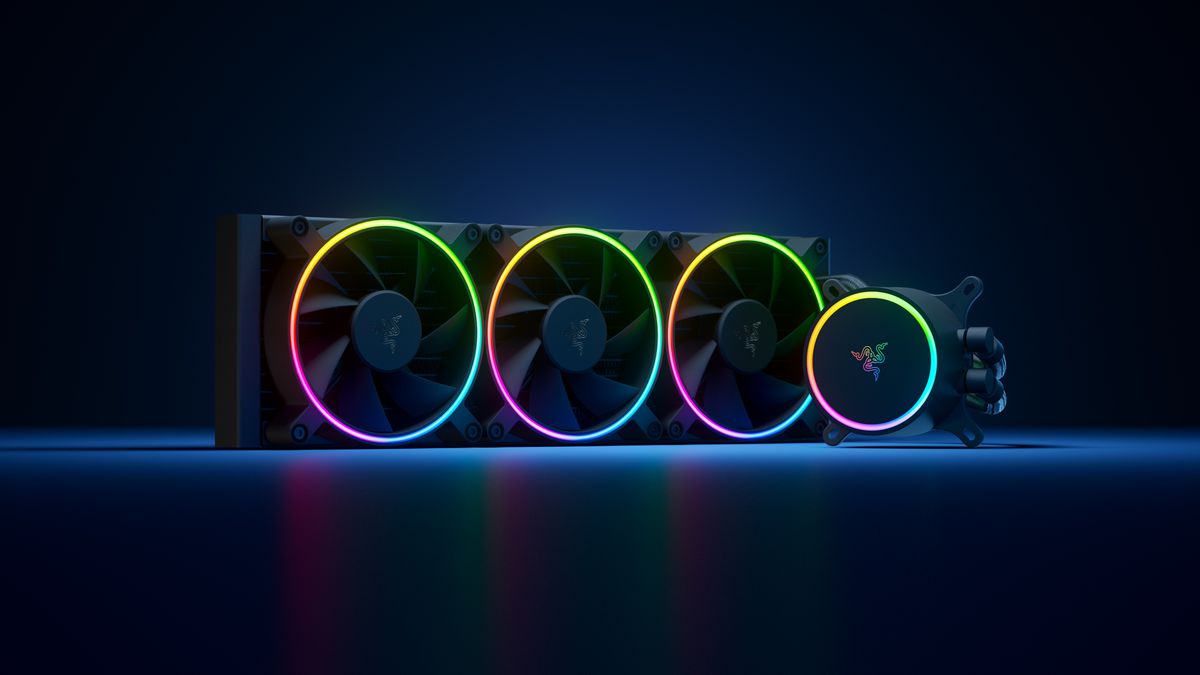 Hanbo liquid cooler will feature an optimized intake design so it can ensure greater heat transfer and fluid dynamic for improved reliability and silent operation. Radiator comes in 240mm size with two fans and a larger one of 360mm with three fans. The pump will be able to rotate in any direction of full 360 degrees so it can fit in any case. Hanbo will be released in November this year but no pricing has been released so far.
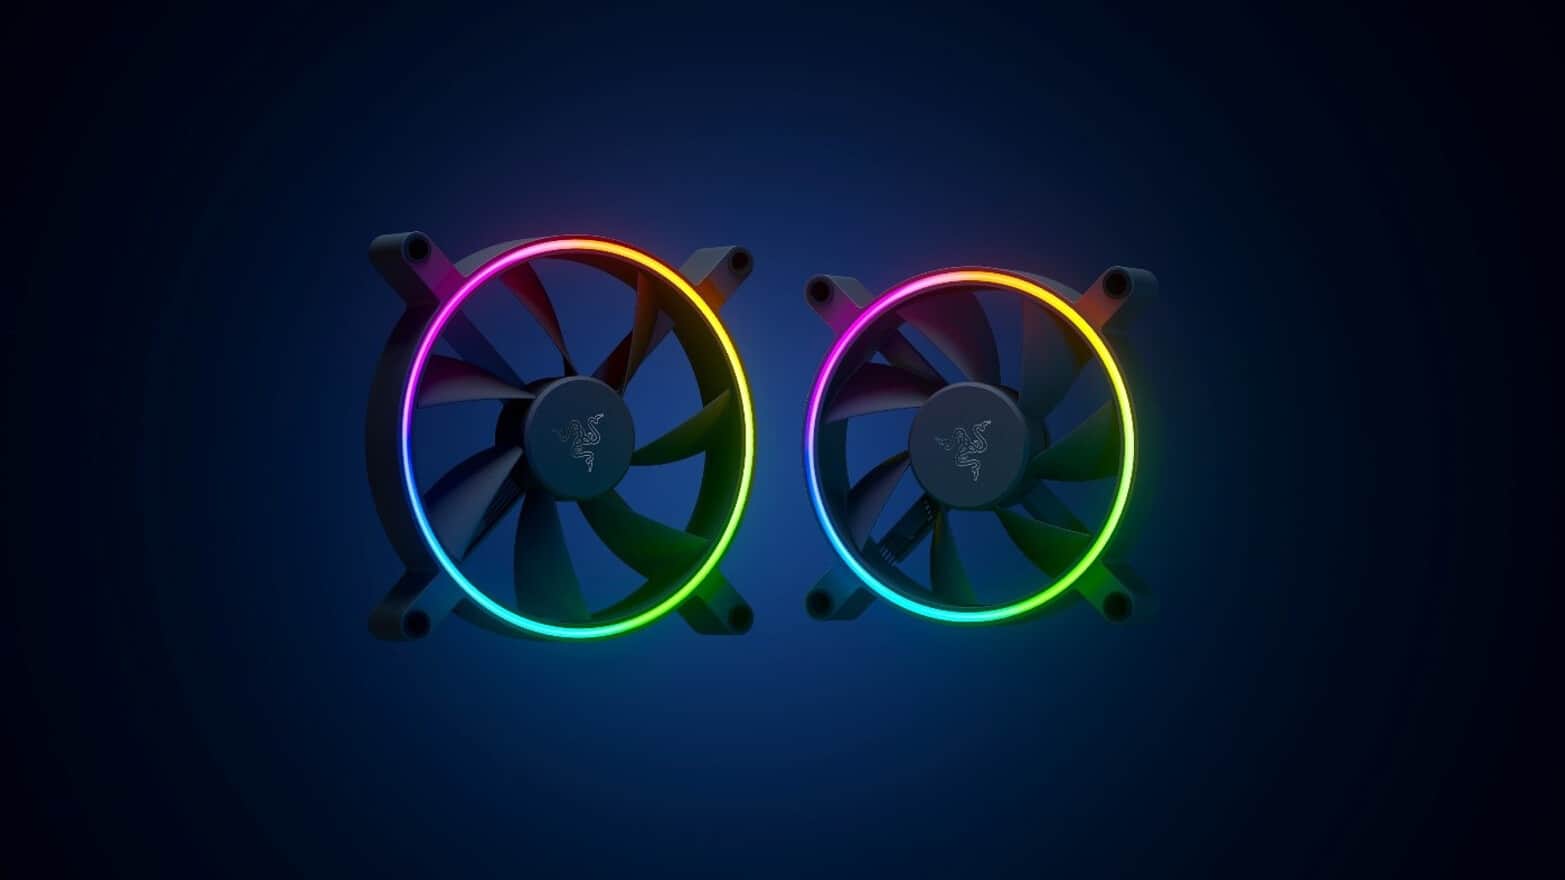 Kunai fans will boast high static pressure performance with lowered noise. They will go as far as 2200rpm for the 120mm version where the 140mm version will go up to 1600rpm. They will come with addressable LEDs and up to eight fans will be able to be connected to Razer’s PWM fan controller that will come with a magnet at the back for easy attachment to any steel part of PC casing.
PWM will use Razer’s Synapse software to customize pulse width modulation in order to improve airflow and noise. PWM will be priced at $49.99 in the Razer Store and it is available for preorder. Fans are priced at $44.99 for one 120mm or $129.99 for a three-pack of 120mm. One 140mm will go for $49.99 and a three-pack will be $129.99.
Kunai fans will boast high static pressure performance with lowered noise. They will go as far as 2200rpm for the 120mm version where the 140mm version will go up to 1600rpm. They will come with addressable LEDs and up to eight fans will be able to be connected to Razer’s PWM fan controller that will come with a magnet at the back for easy attachment to any steel part of PC casing.
PWM will use Razer’s Synapse software to customize pulse width modulation in order to improve airflow and noise. PWM will be priced at $49.99 in the Razer Store and it is available for preorder. Fans are priced at $44.99 for one 120mm or $129.99 for a three-pack of 120mm. One 140mm will go for $49.99 and a three-pack will be $129.99.