
DigiSmirkz is a Browser Extension by Mindspark Inc. This extension offers users the ability to enrich their emails or chats with tons of new emojis. When installed it will replace your default new tab page with a variety of search.myway.com, hosted at hp.myway.com. This search engine uses information about you, collected by the extension to display unwanted targeted ads by Mindspark Partners and Ad Networks.
While surfing the internet with this extension installed and enabled, you will see additional pop-up ads, inserted ads into search results and sponsored content on web pages.
Several anti-virus applications have marked this extension as a Browser Hijacker and is therefore recommended to be removed from the Computer.
About Browser Hijackers
Browser hijackers (sometimes referred to as hijackware) are a kind of malicious software that modifies web browser settings without the computer owner’s knowledge or consent. These hijacks appear to be rising at an alarming rate worldwide, and it could be really nefarious and often harmful too. Browser hijacker malware is created for a variety of reasons. Typically, hijackers will force hits to sites of their choice either to get more traffic generating higher ad earnings or to obtain a commission for every user visiting there. Although it may seem harmless, these tools were created by vicious people who always look to take advantage of you, so that they can easily make money from your naive and distraction. They not only ruin your internet browsers, but browser hijackers can even modify the computer registry, making your PC vulnerable to other types of attacks.Major signs that an internet browser has been hijacked
There are many symptoms that indicate your browser is highjacked: 1. your homepage is reset to some unfamiliar webpage 2. your internet browser is constantly being redirected to porn websites 3. the default web engine and/or the default browser settings are modified 4. unsolicited new toolbars are added to your web browser 5. your internet browser will display constant pop-up windows 6. your web browser starts running slowly or presents frequent errors 7. you can’t navigate to particular webpages, like security software-related websites.How they get into your PC
Browser hijackers can enter a PC by some means or other, for example via file sharing, downloads, and e-mail too. They may also come from any BHO, extension, add-on, toolbar or plug-in with malicious purpose. A browser hijacker could also be installed as a part of freeware, shareware, demoware and fake programs. Some of the most popular hijackers are DigiSmirkz, Conduit Search, Babylon Toolbar, Sweet Page, OneWebSearch, and CoolWebSearch. Browser hijackers can interrupt the user’s web surfing experience severely, track the websites frequented by users and steal private information, cause difficulty in connecting to the web, and eventually create stability issues, causing applications and system to crash.How you can fix a browser hijack
Certain hijackers could be removed simply by uninstalling the related freeware or add-ons through the Add or Remove Programs in the Windows control panel. But, many browser hijackers are hard to get rid of manually. Irrespective of how much you attempt to get rid of it, it may keep returning over and over again. You should think of undertaking manual repairs only if you are a tech-savvy person, as there are possible risks associated with tinkering around with the computer registry and HOSTS file. Industry experts always suggest users remove any malicious software including browser hijacker by using an automatic malware removal tool, which is better, safer, and faster than the manual removal method. To remove any type of browser hijacker from your system, you can download this particular top-notch malware removal software – SafeBytes Anti-Malware.Virus Blocking Internet And All Antivirus Software? Do This!
Practically all malware is bad and the degree of the damage will vary greatly with regards to the type of infection. Certain malware types alter internet browser settings by adding a proxy server or change the PC’s DNS configurations. When this happens, you will be unable to visit some or all sites, and thus not able to download or install the necessary security software to clear out the computer virus. If you are reading this article, chances are you’re stuck with a malware infection which is preventing you to download and/or install Safebytes Anti-Malware program on your system. Follow the instructions below to get rid of malware by alternate ways.Make use of Safe Mode to resolve the issue
If any malware is set to load immediately when Windows starts, stepping into safe mode may block this attempt. Since only the bare minimum programs and services start-up in Safe Mode, there are rarely any reasons for issues to happen. Below are the steps you should follow to take out viruses in Safemode. 1) Tap the F8 key repeatedly as soon as your system boots, however, before the big Windows logo or black screen with white texts appears. This should bring up the Advanced Boot Options menu. 2) Use the arrow keys to choose Safe Mode with Networking and press ENTER. 3) When you are into this mode, you will have an internet connection once again. Now, get the malware removal software you want by utilizing the browser. To install the software, follow the guidelines in the installation wizard. 4) Once the software is installed, let the scan run to eliminate viruses and other malware automatically.Switch to an alternative browser
Malicious program code might exploit vulnerabilities in a specific internet browser and block access to all anti-virus software sites. The most effective solution to avoid this problem is to choose a web browser that is renowned for their security measures. Firefox has built-in Malware and Phishing Protection to keep you safe online.Run anti-virus from a pen drive
Another solution is to create a portable anti-malware program on your USB stick. Adopt these measures to run the anti-malware on the affected computer. 1) Use another virus-free PC to download Safebytes Anti-Malware. 2) Mount the USB drive on the same system. 3) Run the setup program by double-clicking the executable file of the downloaded software, which has an .exe file format. 4) Select USB flash drive as the location when the wizard asks you where you want to install the application. Follow the on-screen instructions to complete the installation process. 5) Transfer the USB drive from the clean PC to the infected computer. 6) Run the Safebytes Anti-malware directly from the USB drive by double-clicking the icon. 7) Click the “Scan” button to run a full system scan and remove viruses automatically.Protect Your Computer Against Malware and Viruses With SafeBytes Anti-Malware
If you are looking to purchase anti-malware for your computer system, there are lots of brands and packages for you to consider. Some of them are great while some are scamware applications that pretend as legitimate anti-malware software waiting around to wreak havoc on the computer. You need to select a company that creates industry-best anti-malware and it has got a reputation as reliable. On the list of highly recommended software programs is SafeBytes Anti-Malware. SafeBytes has a good track record of excellent service, and clients are very happy with it. SafeBytes anti-malware is a trustworthy software that not only secures your computer system completely but is also very user-friendly for people of all ability levels. Through its cutting-edge technology, this software protects your PC against infections brought on by various kinds of malware and similar internet threats, including spyware, adware, trojans, worms, computer viruses, keyloggers, potentially unwanted program (PUPs), and ransomware.There are many wonderful features you will get with this particular security product. These are some of the highlighted features included in the product.
World-class AntiMalware Protection: This deep-cleaning antimalware application goes much deeper than most antivirus tools to clean out your personal computer. Its critically acclaimed virus engine detects and disables hard to remove malware that conceals deep inside your personal computer. Live Protection: SafeBytes provides real-time active checking and protection against all of known viruses and malware. This utility will always monitor your PC for any suspicious activity and updates itself regularly to keep current with the latest threats. Web Protection: Safebytes allots all sites a unique safety rating that helps you to have an idea of whether the webpage you are going to visit is safe to view or known to be a phishing site. Faster Scanning: SafeBytes’s very fast malware scanning engine reduces scan times and extends battery life. Simultaneously, it will effectively detect and remove infected files or any online threat. Low CPU and RAM Usage: SafeBytes gives you total protection from internet threats at a fraction of the CPU load because of its advanced detection engine and algorithms. Fantastic Tech Support Team: You can obtain absolutely free 24/7 technical assistance from their computer experts on any product queries or PC security issues. SafeBytes will keep your computer safe from latest malware threats automatically with hardly any input needed from you again. You now may realize that this particular tool does more than just scan and eliminate threats from your PC. You will get the very best all-around protection for the money you spend on SafeBytes Anti-Malware subscription, there is no doubt about it.Technical Details and Manual Removal (Advanced Users)
If you want to do the removal of DigiSmirkz manually rather than employing an automated software tool, you can follow these simple steps: Go to the Windows Control Panel, click on the “Add or Remove Programs” and there, select the offending program to remove. In case of suspicious versions of web browser extensions, you can actually remove it through your browser’s extension manager. You may also want to reset your home page and search engine providers, and also clear your web browser cache and cookies. In order to ensure complete removal, manually examine your hard drive and registry for all of the following and remove or reset the values accordingly. Please note that only advanced computer users should try to manually edit the registry because removing any single critical system file leads to a serious problem or perhaps a computer crash. Moreover, certain malware keeps replicating which makes it tough to remove. Doing this malware-removal process in Safe Mode is suggested.
Files:
%UserProfile%\Local Settings\Application Data\Google\Chrome\User Data\Default\Extensions\fhibenoomgnppdhbjaephephkddnokof
%LOCALAPPDATA%\DigiSmirkzTooltab
Registry:
HKEY_CURRENT_USER\SOFTWARE\DigiSmirkz
HKEY_CURRENT_USER\SOFTWARE\Wow6432Node\DigiSmirkz
HKEY_CURRENT_USER\SOFTWARE\Microsoft\Internet Explorer\LowRegistry\DOMStorage\digismirkz.dl.myway.com
HKEY_LOCAL_MACHINE\Software\Microsoft\Internet Explorer\DOMStorage\digismirkz.dl.myway.com
HKEY_LOCAL_MACHINE\Software\[APPLICATION]\Microsoft\Windows\CurrentVersion\Uninstall..Uninstaller
DigiSmirkzTooltab Uninstall Internet Explorer

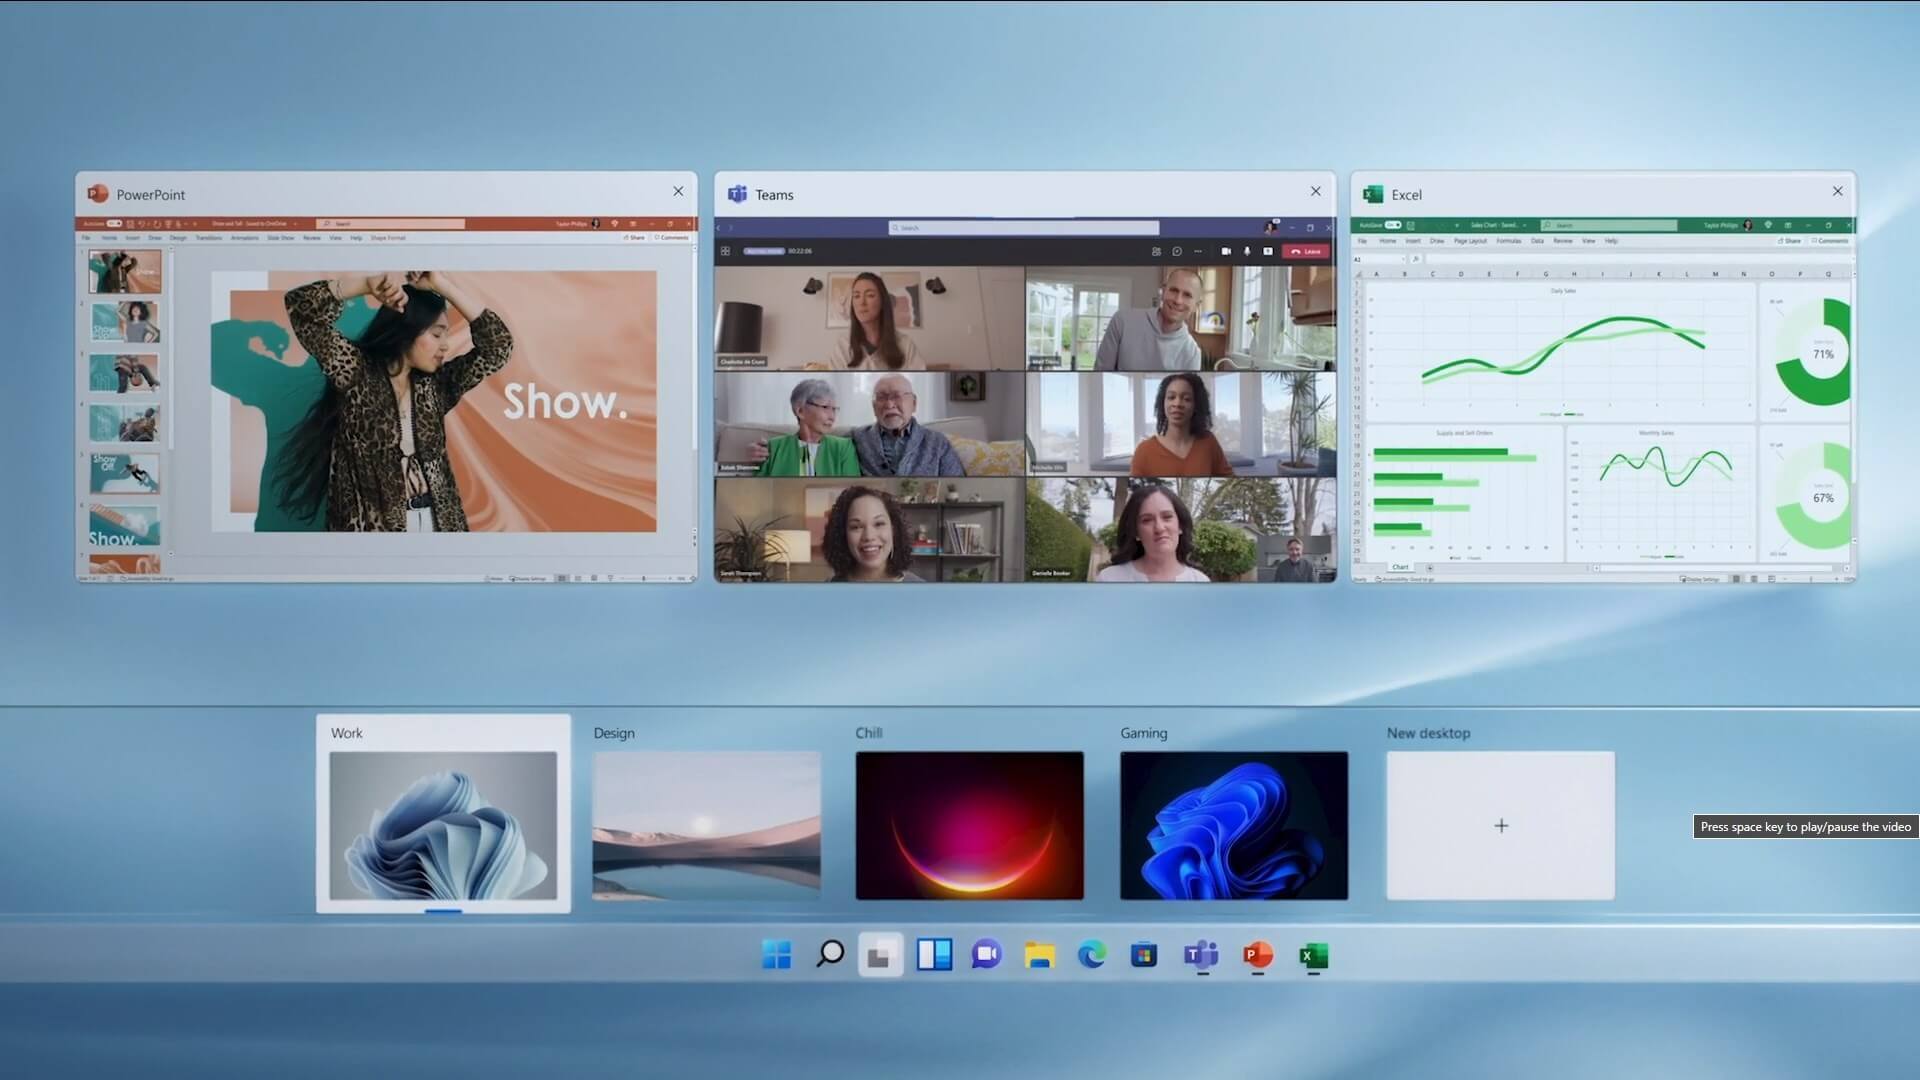 The feature that was originally planned for now scrapped Windows 10X is included in Windows 11. You will be able to customize your Virtual desktop with different wallpapers for each screen.
In order to fully customize your virtual desktops with different wallpapers follow this easy step-by-step guide.
The feature that was originally planned for now scrapped Windows 10X is included in Windows 11. You will be able to customize your Virtual desktop with different wallpapers for each screen.
In order to fully customize your virtual desktops with different wallpapers follow this easy step-by-step guide.
 How to switch
 Conclusion