The holiday season is almost upon us and buying gifts for loved ones can sometimes present some headaches, especially if that loved one is a Gamer or PC enthusiast. We have all been there and how almost every household today has a console or PC struggles are infecting more and more people. But do not despair, we have made a nice list of potential gifts for you.
The list contains some nice essential and good things but we gave our best not to break the bank so you will not find any large screens or 300$ keyboards here. Of course, you can always get expensive gifts and if you have money for it do it, it is just we want to have affordable stuff here.
A Steam gift card
For gamers, a good game is a great gift but most of the time when we are buying a game we can miss what the person wants. That is why a Steam gift card is a great gift for gamers. He can use it and buy whatever he or she wants for its value.
Xbox Game pass
This is another for those Gamers type. Xbox game pass is a great gift even if you do not own Xbox since all games will work on PC as well. Xbox Game Pass Ultimate includes the PC version, which will unlock somewhere between 300 and 350 games automatically. It’s a subscription service, so your PC gamer will have to keep up with it. The monthly price is worth it, though.
Pack of cable ties
Almost every PC user has tons of cables lying around, and most of the time they are not really tidy. Cable ties come to the rescue!!! Let us be honest, no one likes cables that are scattered all over the place, even the computer users so if they do not have this essential piece of equipment, we are sure they will like it.
Compressed air duster
Dust is enemy no.1 for computer users, it gets into the keyboard, into small spaces, etc. It is very difficult to get it out so an air duster for compressed air is a great cleaning gift for any kind of computer enthusiast. You can get it with a can of compressed air as well so everything is ready for cleaning.
New Headset
A headset is always a great gift. Over time earbuds can deteriorate and get damaged simply just by using them and when enough time passes even cables can start losing contact and overall sound quality may drop. Usually, computer users change headsets like keyboards so if your loved one has some old headsets showing their age, a new one is a perfect present.
New SSD drive
More hard disk space is always a welcome sight for any PC user and new SSD drives fueled with new technology are faster than ones of the same size in past years making them a perfect gift.
Large mouse pad
A good mouse pad can mean a lot to a gamer. Over time mouse pad deteriorates simply with its use so a new and fancy large pad is a great gift for any user. If you want a great gift, make it with RGB light.
As you know, the Office Language Packs need to be installed right after installing Office. It also has to be on the correct version of Office so if any of these conditions are not met, you will most likely get error codes 30053-4 or 30053-39 when you install a language pack in Microsoft Office. If you are currently facing this error, read on as this post will help you fix the problem. Here’s the full context of the error message:
“Something went wrong, Sorry, installation cannot continue because no compatible office products are detected.”
When you have to work on two different languages, that’s where the language packs come in handy. You might have to work on one language but when it comes to proofreading or help, you need another language. Note that some language accessory packs offer partial localization which is why some parts of the Office might show the default language.
If you are using Office 365 or Office 2019, 2016, 2013, or 2010, you need to go to the language accessory pack page from office.com and select your language. Once you see the download link, click on it to start downloading the pack. It includes the display in the chosen language, proofing tools for the selected language, as well as the Help in the selected language. Once the installation is complete, follow each one of the given options below to configure the language accessory pack properly.
Option 1 – Select Editing and Proofing language
You need to open any Office program and navigate to File > Options > Language.
From there, you need to make sure that the language you want to use is in the list under the Choose Editing Languages section.
After that, you can add or remove the language that Office uses for editing and proofing tools.
Option 2 – Configure the Display and Help languages
In this option, you can change the default display and help languages for all the Office applications so whatever you choose will be used for all the buttons, menus, and support of all the programs. After you select the language, restart all the Office applications to apply the changes made successfully.
On the other hand, if you are using Office volume license versions, note that only an administrator account can install this if you are using the Volume License version of Microsoft Office 2016. You have to download the ISO image of the language packs, language interface packs, and the proofing tools from the VLSC or Volume Licensing Service Center. This process can be quite complicated so you might have to go to the docs.microsoft.com page to be guided accordingly. After you installed everything correctly, the error code 30053-4 or 30053-39 should now be fixed.
If you are not able to access the Windows 10 Advanced troubleshooting options within Windows then you’ve come to the right place as this post will guide you on how you can repair or boot the Windows 10 installation without losing data using the bootable installation USB or DVD media. To repair or boot Windows 10 using the installation media, you have to download the Windows ISO, create a bootable USB or DVD drive, boot from the media and select “Repair your computer” and then select Startup Repair under Advanced troubleshooting. To get started, follow the given steps below carefully.
Step 1: Frist, download the Windows ISO.
Although this is not necessarily needed, it’s still better if you download the Windows ISO first so make sure that you download the same ISO version as installed on your computer.
Step 2: Next, create a bootable USB or DVD drive.
Insert your USB drive into your PC.
Tap the Win + R keys to open the Run dialog box and type in “cmd” and tap Enter to open the Command Prompt. Alternatively, you can also search for “cmd” in the Cortana search box to open Command Prompt.
Once you’ve opened CMD, type in this command to open the DISPART utility – diskpart
After that, you should see a new black and white window that would say, “DISKPART>”.
Next, type in “list disk” in the command line and tap Enter to see the list of all the Storage devices as well as your hard disk connected to your PC. Here, you have to identify your disk’s number.
Type in this command where “X” is the disk number you have identified and then tap Enter – disk X
Type in this command and hit Enter to clear the table records and all the visible data on the drive – clean
Now you have to recreate a new primary partition of the drive so you’ll have to type in this command and tap Enter right after – create part pri
A new primary partition has been created so you have to select it by typing this command and tapping Enter – select part 1
Now you have to format it to make it visible to normal users by typing – format fs=ntfs quick
Note: If your platform supports the Unified Extensible Firmware Interface or UEFI, replace the “NTFS” with “FAT32” in the command on Step 10.
After that, type in this command and tap Enter after – active
Finally, type this command and hit Enter to exit the utility – exit
After you prepare the image for the operating system, save it to the root of your USB Storage device.
Step 3: After creating a bootable drive, boot from the media and select the “Repair your computer” option.
Once you boot from the USB drive, it will start the Windows 10 installation right away. So you must not keep on clicking Next as you will end up installing Windows. You need to look for the “Repair your computer” link on the first installation screen and click on it and then boot your computer into Advanced Recovery.
Step 4: Select Startup Repair under the Advanced options screen
Once you’re at the Advanced Recovery screen, select Advanced Options and select Troubleshoot.
After that, look for the Startup Repair and click on it and then follow the next on-screen instructions. This solution will help you fix issues that do not allow you to boot into your computer.
On the next screen, you will see the admin account with its name. Click on it and verify using the account password associated with the email.
After verification, it will start to diagnose your computer and automatically resolve any detected issues related to boot.
After the issue is fixed, your computer should reboot normally and you should now be able to use it. Note that your personal files are still intact since the process didn’t delete or wipe them out.
Windows 10 has displayed one of the most efficient and user-friendly interfaces. However there have been many issues on the backend of this commonly praised operating system: For example, Windows Update is still a wonky and error-laded system application. One example of this error is Windows Update Error 0x80073712 which stands in the way of users just wanting to keep their PCs updated hassle-free.
The error code 0x80073712 signifies that a file needed by Windows Update to function is either damaged, missing, or corrupted. However, this does not mean that your Windows version will forever stay as-is with no mode to update it. Windows Update Error 0x80073712 is perfectly fixable with the set of provided steps below and some of Windows’ built-in troubleshooting steps:
Solution 1: Open Windows Update Troubleshooter
Open the Windows Update Troubleshooter by pressing the Window Key and “S” keys simultaneously.
Enter the word “Troubleshoot” in the search box and select the Troubleshoot result
On the new window, select “Windows Update” to troubleshoot.
Run the troubleshooter, then open Windows Update and try to install the update again.
Solution 2: Run the DISM tool
Open the command prompt by pressing Windows Key and “S” key simultaneously
Enter “cmd” in the search box. Right Click command prompt among the results and select “Run as administrator”
In the Command Prompt window type the following and press the Enter key after every command
To close the Administrator: Command prompt window, type Exit, and then press Enter.
Run Windows Update again.
Solution 3: Rename the Software Distribution folder
Open the command prompt as previously mentioned
Input the following command pressing Enter after every linenet stop wuauservnet stop cryptSvcnet stop bitsnet stop msiserverrename c:windowsSoftwareDistribution softwaredistribution.oldnet start wuauservnet start cryptSvcnet start bitsnet start msiserverexit
Restart the PC and run the updater if it works again.
Solution 4: Restart Windows Update Services
Press the Windows logo key and R together to open Run -> Input services.msc -> and press Enter
Search for the Windows Update service -> Check its status
If it is not indicated, right-click on the service and select Start to force start your Windows Update
If you see an error, locate the Startup Type option and set it to Automatic
Now you should reboot your computer and see if your Windows Update is OK
Solution 5: Fix Registry Issues
If after all the aforementioned solutions, you still experience problems with Windows Update, the problem may lie in the registry that is either damaged or corrupted. You may choose to do manual editing of your Windows registry by opening your Windows registry editor. But doing so is risky as one wrong letter may do incalculable damage to your system. To do so safely for more inexperienced users., we recommend using a third-party registry cleaner/tools, many of which can be found online.
Have you been feeling anxious in the digital space? Feeling like you have a million eyes on you each time you visit a website? It can definitely make you uneasy. Luckily there’s an easy fix, and it’s called a VPN.
In this article we’ll take you through the basics of what a VPN does and some of the biggest benefits you can reap from buying one.
VPN: definition and how it works
VPN stands for Virtual Private Network, so its name already says a lot about what it does.
A VPN is specialized software that keeps your browsing private and secure. Essentially it hides your identity, preventing possible cyberattacks and data theft. This is especially important in cases of public network use, where you’re highly exposed to potential threats.
To be more specific, this software encrypts your Internet Protocol (IP) address by filtering it through a server hosted by the VPN provider first. That way, it prevents your Internet service provider, third parties and lurking online thieves from tracking the actual you.
Credit: FLY:D on Unsplash
Some providers, such as Surfshark VPN with its IP Rotator feature, even make it a habit to frequently change your IP address to further protect your identity. With most VPN providers, you can also appear to be in a completely different country, adding to your disguise.
There are tons of advantages you can look forward to if you decide to use a VPN. Take a look at some of the crucial ones.
Benefits of using a VPN
When choosing a VPN, you can find both free and paid options. We recommend you go with the paid ones, since they have stronger security, encryption and data protection, as well as more advanced features. Free VPNs come with limitations and risk of malicious attacks on the software itself.
You can choose to buy a singular VPN service or opt for antivirus software that has a VPN built in, for example Bitdefender’s Ultimate Security plan. That depends on what you use your computer for and how much.
When you pick one, here’s what it can do for you.
1. Access region-specific content
When we said you could change your location, we meant it. Say you’re using a streaming service and a show you desperately want to watch isn’t available in your country. You can use your VPN to make it look like you’re browsing from a country where it’s unlocked.
This option is also convenient for gamers who want to access maps, skins and other in-game items unavailable in their location.
In addition, you can use this powerful feature when you’re traveling to a region where some of your favorite content may not be accessible.
Do keep in mind that you need to read the Terms and Conditions (yeah, we know - who does that?) of your games and services before doing this, since you could end up getting a penalty. It’s also important to remember that there are entire countries that have strict regulations or even bans on VPNs, for example Belarus, Russia and China. So make sure to be very cautious with your VPN use, friends.
2. Browse like no one’s watching
VPNs shield your browsing habits from prying eyes on the web. Those can be malicious hackers or just third-party cookies tracking your every move to later bombard you with targeted ads. For example, Surfshark VPN features a Cookie blocker that blocks all cookie-related pop-ups and lets you browse in peace (and secret). It works even when the VPN is turned off, which is also pretty neat.
In addition, their CleanWeb 2.0 technology makes sure ads and especially malware don’t stand a chance at all, since they’re blocked before they can even load.
The inability of sites to track your browsing means they can’t collect and analyze any of your data. So, your personal information - or your company’s information in case that’s what you’re using your computer for - is entirely hidden and secure.
3. Save money
It’s well-known that the prices of certain items and services vary based on your location, browsing time, age and many other factors. This most commonly goes for airline tickets and hotel stays.
You can use your VPN to avoid high prices and surcharges. Clear all cookies, turn on your VPN and visit an online shopping site to check out their prices. Then compare your findings with the offers you see when your VPN is off, when you spend a long time on the site or have an active account with the company.
Sometimes this can really help you find the best deals and avoid breaking the bank. But again, check the Terms and Conditions before you purchase something using a VPN.
4. Secure your smart home
The more smart devices you have connected to your network, the more exposed you are to potential cyberattacks. Phones and computers are generally designed to be decently secure even without a VPN or antivirus, but smart home devices leave a lot to be desired in that regard.
Protecting your home network with a VPN software means all devices connected to it are secure, be it an air purifier or Alexa.
Credit: Bence Boros on Unsplash
5. Prevent connection slowdown
Your ISP can intentionally slow down your internet speed based on how much data you’ve consumed (data throttling) or your activities online (bandwidth throttling).
But with a VPN, what kind of data you send and receive and how much is entirely hidden. Therefore, if your ISP can’t see you, they can’t control you and they can’t throttle down your speed.
The bottom line
You can never be too safe online. So definitely think about getting yourself a solid VPN to pump up your privacy and security as much as you can. And if you have any questions or need help choosing the perfect software for you, feel free to reach out to us.
Realtek sound device not playing sound is a common Windows issue. It happens occasionally and luckily it can be solved with a little effort and in a short time period. Today in this article we will explore the most common reasons and solutions for driver malfunction for Realtek inside Windows 10. If you have this particular problem, go from step 1 to the last step since all steps are meant to go from simplest to the most complex.
All of that being said let us fix your Realtek driver issue.
Check Speakers or/and Headphones first
The first thing would in any troubleshooting be to check are your speakers turned on or are your headphones connected and the volume or switch on them is set properly. Nothing more embarrassing than spending an hour or so troubleshooting only to find out that issue was in a malfunction of speakers or them not being turned on.
Check the Volume control in Windows
Same as the previous step where you have checked hardware, now it is time to check to see if the volume control is set properly and not by any chance muted or volume is brought all the way down.
Check if the Device Manager is reporting an error and update the driver
If both hardware is functioning properly and volume control in Windows is set correctly then the issue might be in Windows not detecting device or driver malfunction. In any case, the Device Manager will be the one who will report this problem. In order to check to see if the driver is properly working press ⊞ WINDOWS + X to open the hidden start menu.
Once it opens, click on Device Manager to open it,
If you have a driver device error inside Windows, you should see it immediately when entering the Device Manager, it will have a yellow exclamation mark beside it. Right-click on it and choose update driver.
Reinstall driver
If driver update failed or you already have the latest drivers, reinstalling them could fix the issue since drivers might have corrupted during installation of some update or application. Follow steps from point 3 to get to the driver in Device Manager, then right-click on it but instead of update choose to uninstall. Reboot Windows once the driver is uninstalled and Windows will install a new one.
Check Windows update
Check to see if the latest Windows update is installed, update your Windows if needed
Fix driver issue with DRIVERFIX
If everything else fails, get DRIVERFIX, a premium solution for your PC issues, and fix driver errors.
One of the useful things you can use on your laptop is touchpads. They help users in achieving tasks through the gestures and multi-finger tap or touch support it brings in the scope for various shortcuts. However, not all times touchpad brings productivity as it can also encounter some issue every now and then. One of these issues has been reported on a couple of Lenovo laptops that use touchpad drivers from the Alps Pointing Device. According to the reports, an error saying, “Set user settings to driver failed” when they use the touchpad.
This type of error on the touchpad usually occurs when a computer boots up and it could be caused by a faulty update on the Alps pointing device driver which is being installed in the background. To fix this error on the touchpad, you could try to disable the Alps pointing device entry from the MSConfig or you could try to get the latest version of the driver or uninstall the driver altogether. Before you proceed with the troubleshooting tips given below, make sure that you create a System Restore point first. Once you have that covered, proceed to the following options.
Option 1 – Try disabling the entry of the Alps pointing device from MSConfig
This first given option was able to fix the problem for many users so to get started, follow these steps:
In the Start Search box, type “MSConfig” and select System Configuration from the search results.
Next, go to the Services tab and look for the Alps pointing device entry from the list that appears, and uncheck it.
Then click the Apply and OK buttons to save the changes made.
Now restart your computer and see if the error in the touchpad is now fixed.
Option 2 – Try to download and install the latest version of the driver
The next option you can check out to fix the error is to download and install the latest version of the driver from the official website of Lenovo support. Note that an updated version of the touchpad driver will most likely get rid of the error. However, you have to make sure that the version you’re going to get is compatible with your existing Windows version.
Option 3 – Try to uninstall the Alps Pointing device driver
If the first two given options didn’t work, you can try uninstalling the Alps Pointing-device driver instead. You can do this under the Mice and other pointing devices section. After you uninstall the driver, restart your computer and delete the driver’s leftover folder inside this location in File Explorer (C:/Program Files). Once you’re done, restart your computer and check if the error is now gone. Keep in mind that after you’ve uninstalled the driver, any extra configuration features that Lenovo drivers offered before the uninstallation will no longer be available.
Bluetooth perhaps is slowly becoming an outdated feature but sometimes you can really used it and need it.
By default, in Windows 11 Bluetooth is turned OFF so if you need it, you will need to turn it ON first. Luckily turning it ON is easy and we will guide you through the process
Turning Bluetooth using the Quick Settings menu
The easiest and fastest way to turn the Bluetooth ON is using the quick setting menu:
Click on indicator icons located left of date and time in Taskbar
Click on the Bluetooth icon (if the icon is not displayed, click on the pencil icon, then click on Add and add Bluetooth icon from the list)
Right-click on the Bluetooth icon and select go to Settings
Go to Adding a Bluetooth Device to Windows 11 section
Switch it ON via Windows Settings
Open Windows settings by using ⊞ WINDOWS + I combination
Click on Bluetooth & Devices
Inside settings turn Switch to ON beside Bluetooth
Click + Add Device large button on top
Click Bluetooth
Select device in the list of found devices (make sure device is turned ON, it has Bluetooth sharing ON, and that it is in pairing mode)
If the device needs the password, type it in
When the message Your device is ready to go is showed on the screen click on the Done
Advice on Bluetooth devices
Note that the Bluetooth devices you connect to Windows 11 stay linked to your PC unless you pair them with a different PC, smartphone, or tablet later.
After a time, most Bluetooth devices power down automatically to save battery life. To continue where you left off, either power the Bluetooth device up (if it has a power button) or press a button on a keyboard or mouse, and it should automatically turn on and reconnect with your PC.
If you’re having trouble connecting your Bluetooth device, make sure that Windows 11 is fully updated and that you’ve installed any drivers that came with your device.
Make sure that the device is fully charged or that it has a fresh set of batteries.
while Windows is searching. You’ll need to remove the device from Windows 11 first and then attempt to pair it with your PC again.
Removing devices
If you need to remove (un-pair) a Bluetooth device, just open Windows Settings and navigate to Bluetooth & Devices. Locate the name of the device that you want to remove, click the three dots button in the corner of its square and select Remove Device.
Error 0xc0000142 can occur in any of the Windows versions and usually occurs when an application fails to properly initialize.
This error can be critical for a computer as it signifies that the system is unstable. Error 0xc0000142 can cause slow performance in a PC, system freeze, startup and shutdown issues, blue screen and errors in installation.
Solution
Error Causes
Windows/Application Error 0xc0000142 can occur because of a number of reasons.
When a computer is an overload with data, or when system files get broken or missing, this error can occur and will result in startup and shutdown issues as well as the blue screen. Another reason, and one which is quite common, is improper computer maintenance.
This will cause a PC to perform slow, system freezes, and installation errors. This error displays ‘failed to initialize’ on either a Windows error box or the blue screen of death.
Further Information and Manual Repair
Error 0xc0000142 can occur at any time, but there are many ways to resolve it. For instance:
1) Clean the Registry
A corrupted registry is one of the major reasons why this error occurs. The registry is used by Windows to store information and settings on the computer, which is why it has a large database.
This database contains emails, wallpapers, saved passwords and much more in ‘file path references’. These allow Windows to run the common files in your system. A registry cleaner can fix any errors in the registry database.
2) Malware Scan
Viruses can cause certain applications to not function properly. Hence, download a strong antivirus and run a deep scan on your system and remove any potential infections and spyware.
3) Reinstall Applications
Non-critical applications in a computer are those that are installed by the user. If error 0xc0000142 displays in any of your installed programs, then you should reinstall these programs. Often applications have damaged or corrupted files which can slow them down. To resolve this, follow these steps:
From Start, click on Control Panel
Go to Add/Remove Programs and uninstall the programs
Restart your PC and reinstall the program
The third step is not recommended in case the error is caused by cmd.exe
4) Repair Windows
If the error is still on display despite following the previous steps, then you can repair Windows. This process allows Windows to retain all your data and information by simply replacing the program files and settings with fresh ones. This can stop error 0xc0000142 by allowing the programs access to use necessary files smoothly and effectively.
If you cannot resolve the error in any of these steps, then there is another way to do so if you have a computer that runs the Microsoft Internet Security and Acceleration (ISA) Server 2000. Follow these steps in order to resolve it:
Make sure that in Program Files and Microsoft ISA Server, a Clients folder exists. The ISA Server service will run on this folder
Confirm that Administrators and SYSTEM have Full Control assigned in the Program Files/Microsoft ISA Server/Clients folder
Confirm that Msplat.txt file is in the Clients folder. You can copy this file from other ISA Server computers if it is missing
If the Clients folder is damaged or is missing, or if you can’t copy the Msplat.tct file from another ISA Server computer, then reinstall the ISA Server 2000
So you have just got home from that new computer store with your fancy and all-new mouse, screen, keyboard, etc. You plugged in your new component, Windows detected it, installed drivers for it and it is working like a charm. A few months later down the road and the computer starts little by little to slow down.
Plug and play is a great concept, and automatic detection is even greater but how time passes old unused stuff piles in your hard drive and in Windows itself thus slowing down your computer and taxing it more and more as new components and software are added. Old drivers from old components sadly are not removed from Windows itself and over some larger period of time they can pile up and slow down your daily operations on the computer or even cause some problems in it.
This guide will teach you how to manually remove old unused device drivers from your Windows so it is fresh and like new again.
Making old devices visible
In order for us to remove old drivers, the first thing we must do is make them visible in our device manager, old drivers are hidden and will not show up, we must make this happen. We do this by pressing WINDOWS + X keys on your keyboard to bring up a hidden menu in Windows.
Once the menu appears, click on Command Prompt (admin)Once the command prompt with administrator privileges comes on-screen type in it following string:
SET DEVMGR_SHOW_NONPRESENT_DEVICES=1
This command will force Windows to show all devices in the device manager including old ones that are not used anymore, but since their drivers are still installed, devices will show up.
When you type command press ENTER.
Once again press WINDOWS + X to show the hidden menu but this time choose the device manager
The device manager will open, go to view > snow hidden devices in order to show unused devices.
Removing old device
Open any category and if there is a device that was once used and still has its drivers in the system it will be shown as faded out.
Right-click on the device and click on uninstall device to remove it completely from your system.
Please always be careful when removing devices so you do not remove the device which is being used by mistake and always double-check that you are removing something that you used to have on your system. This method will show all hidden devices even ones that are hidden but crucial to the system working properly.
Internal Error 2771 is an internal error code associated with Kaspersky Internet Security and Antivirus software. This error pops up when Kaspersky Internet Security software fails to install on your PC successfully.
Installation of the software is interrupted and therefore it ends prematurely. This happens mostly when you try to install a new build on an existing installation.
Internal Error 2771 is displayed in one of the following formats:
This error may result on your computer screen due to several reasons. Some of the most common underlying causes include:
A leftover Registry Key
Bad entries from previous Security Package
INFCACHE.1 file corrupted
Conflicts with other security software installed on your system
Further Information and Manual Repair
To successfully overcome this problem and ensure the successful installation of Kaspersky Internet Security software on your system, try the methods given below.
Method 1- Remove the Leftover Registry Key
Sometimes Internal error code 2771 may appear during installation due to the leftover registry key from the previous Kaspersky software removal.
A registry key is often created when uninstalling the previous Kaspersky version from the PC. This key is left behind even after you reboot your system.
This key is called AVP**_post_ uninstall, you need to delete it to ensure the new version of the Kaspersky program is installed successfully on your PC. For this, simply go to the start menu and type Regedit in the search bar.
Now navigate to HKEY_LOCAL_MACHINESOFTWAREMicrosoftWindowsCurrentVersionRun and then look here for the registry key called AVP**_post_ uninstall. In order to delete this file, right-click it and then select delete.
Once uninstalled, reboot your PC and then try installing the Kaspersky Internet Security program again.
Hopefully, this will resolve the issue. If the software installs smoothly, then the error is fixed, in case it still persists, then try other methods illustrated below.
Method 2 - Remove the INFCAHCE.1 Corrupt File
Another reason for the error pop-up may be INFCAHCHE.1 corruption.
This file is basically used to store driver information and inf file locations. However, if it contains corrupted information, then you must remove it.
To do this, go to the start menu and type cmd into the search bar. This will open a command prompt. Here type del C:\Windows\infinfcache.1. Now reboot your PC and try installing Kaspersky software on again.
Method 3 - Fix Software Conflict
Security software conflict can also result in internal error 2771 code display. And when this happens, the installation of Kaspersky prematurely ends.
Security software conflict may occur if you have Comodo Firewall installed on your PC. A firewall is known to cause issues with Kaspersky software programs.
The best way to resolve this issue is to uninstall all security software programs on your PC. Once all security software is removed, then install Kaspersky on your system. If the installation is successfully completed, then reinstall the other software again.
Method 4 - Download Restoro
Error 2771 can also result on your computer screen if traces of the previously installed Kaspersky software still remain in the registry despite the program removal. In such an event it is advisable to download Restoro.
This is a cutting-edge and user-friendly PC Repair Tool deployed with an intuitive interface and a powerful registry cleaner. The registry cleaner scans your entire PC in seconds and detects all registry-related problems.
It removes all the bad entries, invalid registry keys, traces of previously uninstalled programs, junk files, and cookies that are known for registry corruption. It takes just a few clicks to perform this process.
Once all traces are removed, you can install the new version of the Kaspersky Internet Security program on your PC without interruption.
Click here to download Restoro and be on your way to resolve Internal Error 2771 on your computer!
 The list contains some nice essential and good things but we gave our best not to break the bank so you will not find any large screens or 300$ keyboards here. Of course, you can always get expensive gifts and if you have money for it do it, it is just we want to have affordable stuff here.


 Once it opens, click on Device Manager to open it,
 If you have a driver device error inside Windows, you should see it immediately when entering the Device Manager, it will have a yellow exclamation mark beside it. Right-click on it and choose update driver.
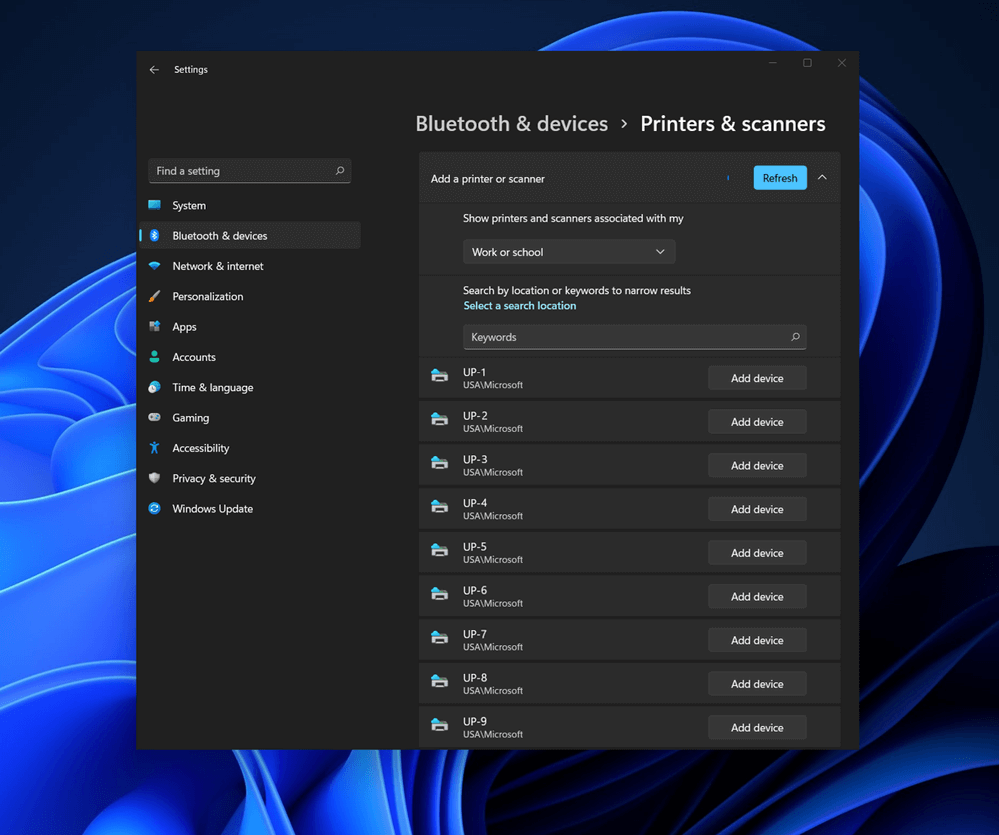 Bluetooth perhaps is slowly becoming an outdated feature but sometimes you can really used it and need it.
By default, in Windows 11 Bluetooth is turned OFF so if you need it, you will need to turn it ON first. Luckily turning it ON is easy and we will guide you through the process
Bluetooth perhaps is slowly becoming an outdated feature but sometimes you can really used it and need it.
By default, in Windows 11 Bluetooth is turned OFF so if you need it, you will need to turn it ON first. Luckily turning it ON is easy and we will guide you through the process

 Once the command prompt with administrator privileges comes on-screen type in it following string:
 This command will force Windows to show all devices in the device manager including old ones that are not used anymore, but since their drivers are still installed, devices will show up.
When you type command press ENTER.
Once again press WINDOWS + X to show the hidden menu but this time choose the device manager
This command will force Windows to show all devices in the device manager including old ones that are not used anymore, but since their drivers are still installed, devices will show up.
When you type command press ENTER.
Once again press WINDOWS + X to show the hidden menu but this time choose the device manager
 The device manager will open, go to view > snow hidden devices in order to show unused devices.

 Right-click on the device and click on uninstall device to remove it completely from your system.
 Please always be careful when removing devices so you do not remove the device which is being used by mistake and always double-check that you are removing something that you used to have on your system. This method will show all hidden devices even ones that are hidden but crucial to the system working properly.