If you got an error message saying, “Windows Update failed to install error 0x80240034” when trying to update your Windows 10 then it’s probably due to some update services that are failing at some point. In addition, you might also see Error constant WU_E_DOWNLOAD_FAILED with the description that “Update has failed to download”.
The Windows Update failed to install error 0x80240034 might be caused by some connection problem or there might be a duplicate update or that installation is not allowed and so on. And so to fix the problem, we’ve prepared some options that could help. Make sure to follow them accordingly but before you proceed, you need to verify if you have a stable internet connection.
Option 1 – Restart your computer and try installing the Updates again
Restarting your computer can also help in fixing the Windows Update failed to install error 0x80240034. There are cases where the issue resolves on its own as it could just be some simple network or PC error.
Option 2 – Try to disable your antivirus program
The Windows Update failed to install error 0x80240034 might be caused by the antivirus program installed in your computer which is why disabling the antivirus program or any security software installed in your computer is always a good idea you can try when the Windows Update process does not go smoothly. So before you try updating your computer again, make sure to disable the antivirus or security program and once the Windows Update is done, don’t forget to enable the antivirus program back again.
Option 3 – Clean up temporary and junk files
Open Setting > System > Storage from the WinX Menu.
From there, you will see a list of all the local and connected storage devices along with the details on the free space.
Now make sure that the Storage Sense feature is turned On then go find a link that says “Free Up Space” and click it to open.
After that, a screen which is the built-in program in Windows 10 will appear and will scan your computer for the following junk files so you can free up disk space:
Windows Upgrade Log Files
The system created Windows Error Reporting Files
Thumbnails
Temporary Internet Files
Previous Windows Installation Files
Delivery Optimisation Files
DirectX Shader Cache
Note: Once you’re done freeing up space on your drive, try to run the setup file again.
Option 4 – Run the Windows Update Troubleshooter
Running the built-in Windows Update troubleshooter is one of the things you can first check out as it is known to automatically resolve any Windows Update errors like error 0x80240034. To run it, go to Settings and then select Troubleshoot from the options. From there, click on Windows Update and then click the “Run the troubleshooter” button. After that, follow the next on-screen instructions and you should be good to go.
Option 5 – Delete Files from Software Distribution Folder & Catroot2 folders
The downloaded Windows Updates are placed in a folder called “SoftwareDistribution”. The files downloaded in this folder are automatically deleted once the installation is completed. However, if the files are not clean up or if the installation is still pending, you can delete all the files in this folder after you pause the Windows Update service. For complete instructions, refer to the steps below.
Open the WinX Menu.
From there, open Command Prompt as admin.
Then type in the following command – don’t forget to hit Enter right after typing each one of them.
net stop wuauserv
net start cryptSvc
net start bits
net start msiserver
After entering these commands, it will stop the Windows Update Service, Background Intelligent Transfer Service (BITS), Cryptographic, and the MSI Installer
Next, go to the C:/Windows/SoftwareDistribution folder and get rid of all the folders and files thereby tapping the Ctrl + A keys to select them all and then click on Delete. Note that if the files are in use, you won’t be able to delete them.
After resetting the SoftwareDistribution folder, you need to reset the Catroot2 folder to restart the services you just stopped. To do that, follow these steps:
Type each one of the following commands.
net start wuauserv
net start cryptSvc
net start bits
net start msiserver
After that, exit Command Prompt and restart your computer, and then try to run Windows Update once more.
Option 6 – Run the DISM tool
If the first five options didn’t work, then running the Deployment Imaging and Servicing Management tool might help as it can repair the Windows System Image as well as the Windows Component Store in Windows 10.
After you access the Advanced Startup options, select Command Prompt by using the arrow keys on your keyboard.
Next, type in this command: DISM /Online /Cleanup-Image /RestoreHealth
Do not close the window if the process takes a while as it will probably take a few minutes to finish.
Option 7 – Run System File Checker
Running the SFC scan or System File Checker might also help in fixing error 0x80240034.
Tap Win + R to launch Run.
Type in cmd in the field and tap Enter.
After opening Command Prompt, type in sfc /scannow and hit Enter.
Restart your PC.
Option 8 – Try to use the Media Creation tool
The Media Creation tool in Windows allows you to use the ISO installation file to make a bootable device that you can use to install Windows on your PC. Note that this is kind of different from the usual installation process as it could erase your computer’s current settings and data on the primary drive. Thus, before you proceed, you need to backup all your data into some removable drive and then use the Media Creation Tool to make a bootable drive.
After making the bootable drive, you need to plug it into your computer and then reboot.
Next, tap the F10 or Esc key to open the boot options.
Now set the boot priority of the removable drive the highest. Once the setup comes forth, follow the next onscreen instructions and install Windows without any problems.
Do you come across this error message “Receiving’ reported error (0x800ccc92): “Your e-mail server rejected your login”? Verify your user name and password in your account properties. The server responded: - ERR invalid user names and password” when you try to send or open emails using your Outlook account?
If yes, then this article is a must-read for you as we explain why this error occurs and how you can resolve it.
To begin with, 0x800ccc92 is a common Microsoft Outlook error.
This error restricts your ability to send and receive emails on your Outlook email address. In other words, it locks you out and hampers your ability to use your account successfully causing a great deal of inconvenience especially if you use your Outlook account for communication in and across your office.
Solution
Error Causes
The 0x800ccc92 error message may occur due to numerous reasons so narrowing it down to one particular reason for occurrence is not easy. However, here we have listed down some of the most common causes of this error code:
Incorrect Outlook configuration settings
Invalid password or username
PST file crosses its fixed file size limit
Failure of POP3 and Protocol STMP in database server connection
Improper synchronization between Outlook and the server
Virus Infection
Invalid registry entries
Further Information and Manual Repair?
To fix the error code 0x800ccc92 on your system, here are some quick, effective, and easy DIY solutions that you can try:
Solution 1:
Sometimes the error code may occur due to an invalid password and usernames entry. Therefore, first, cross-check user ID and password. If you’ve entered the wrong password, try inserting the correct password to access your account.
Solution 2:
If the error still persists, then try installing the latest available Server Service Pack for Exchange. This solution works best if compatibility is the issue and the underlying reason for the error is improper synchronization between Outlook and the server.
Solution 3:
The presence of malware and viruses can also lead to such errors. Therefore, it is advisable to scan your entire PC for malware and viruses using a powerful antivirus.
Solution 4:
If the issue occurs due to bad and invalid registry entries, then it is important that you remove them right away. Due to such entries, you may experience the 0x800ccc92 error on your PC. To remove them, you need to download a registry cleaner.
Downloading two programs an antivirus and a registry cleaner separately may slow down the speed of your PC. Therefore, to ensure this does not happen it is recommended you install Restoro
Restoro is an advanced and multi-functional PC Fixer. This software is deployed with an intuitive algorithm and multiple powerful PC repair utilities including a registry cleaner, anti-virus, and a system optimizer. It is a one-stop solution for all PC-related issues.
Using this tool, you can scan your entire PC and remove all types of malicious software including malware, viruses, spyware, and Trojans corrupting your PC in seconds. Simultaneously, it also removes all bad registry keys and entries and files the damaged system file, thereby restoring the registry back to normal.
The system optimizer utility ensures your PC speed is not compromised due to the repair process.
This software is safe, bug-free, efficient, and user-friendly. It is compatible with all Windows versions.
Click here to download Restoro on your PC to instantly remove viruses and invalid registry entries to resolve the 0x800ccc92 error message on your system now!
Can you use an MS-Outlook e-mail account to send and get workplace e-mails on a daily basis? Are you using the exact same Outlook e-mail account for a long time? Are you getting PST Mailbox Errors?
Then you have developed awareness and knowledge about Outlook PST Errors. Ms-outlook essentially stores the email items in a PST record. This includes all attachments, contacts, calendar items, your e-mails and records.
You might encounter various kinds of Outlook Inbox error messages exhibited on the display in extended formats eg. 0x80040600 0x8004060c or 0x80040116.
All all these are Outlook mailbox malfunctions that stop the Outlook program from executing jobs correctly and thus restricting your capacity to gain access to your e-mail account, see attachments, contacts, and calendar items that are significant.
Error Causes
There's not a single particular trigger for Outlook email malfunctions. A few causes can trigger these, but, the most frequent are virus contamination, 2 GB limit is exceeded by PST file and broken.
There are no specific signals which will help help you identify but some pointers to look at include the following:-
You cannot access certain parts of your Outlook interface
Obscure error messages start popping on your screen
You can’t add new contacts or change entry data in your calendar
Further Information and Manual Repair
When you experience these signs related to PST Inbox errors, it is advisable to repair the problem immediately to ensure it does not cause inconvenience for you and hampers your communication via Outlook emails. Remember this error not only inconveniences you but also hinders proper communication between various business partners.
Determining the ultimate reason for distinct Outlook email malfunctions could be tricky, time-consuming, and might need specialized knowledge to nail it down with regards to fixing the Outlook mailbox malfunctions.
In case you are not a specialist, working out and fixing this problem is an uphill process. To simplify this process, obtain and install an Outlook PST Repair Tool!
This is an intelligent solution to fix all kinds of Outlook errors. You do not have to go deeper into the technical details of the problem.
The Outlook PST Repair tool does it for you. An inbox repair tool identifies and also repairs all sorts of MS Outlook errors in seconds. It is easy to use, highly functional, safe and efficient.
By installing an Outlook repair tool, Outlook errors can be easily removed from your computer and keep the errors from happening again. It also fixes damaged PST files and damaged e-mails can help regain data.
Whatever you should do is to begin:
Code 17 is a typical Spotify error code. Spotify is a music streaming service. Through this software, PC users can browse songs and search by artist, album, and playlist.
Simply put, it is an audio player available for BlackBerry, iOS, and Microsoft Windows desktop.
You may experience error code 17 if the process fails when downloading Spotify from the internet. The error message is displayed in any one of the following formats:
Error 17: Spotify has encountered a problem and needs to close. We are sorry for the inconvenience. Spotify could not be started (Error code 17)
Some of the symptoms of this error code are program crash, slow Windows performance, and periodic system freeze.
Solution
Error Causes
Error 17 may be triggered by several reasons such as:
Viral infection
Incomplete installation of Spotify software
Corrupt download
Registry corruption
Windows Installer service terminated
To use the audio player Spotify successfully on your PC, it is advisable to fix error 17 right away on your system. Delay may cause inconvenience and limit your access to your desired program.
Further Information and Manual Repair
To repair this error code on your PC, you don’t have to hire a professional or be a technical whiz yourself. The good news is that this error is quite easy to fix.
You don’t need to be technically sound to resolve it. Here are some proven methods for you to fix error code 17 on your system.
So let’s get started:
Method 1 - Make sure that the Windows Installer is running
Sometimes Spotify error 17 may occur if the Windows Installer service is terminated. Therefore before you download, make sure the Windows Installer is running. This is a good way to ensure the error code 17 messages don’t pop up on your PC again.
For this here’s what you need to do, first quit all programs. Now go to the start menu and in the search box type RUN, and press enter. In the Open Box, type msiexec /unregister and then press OK to confirm.
After that, perform the same steps again, and now in the Open Box type msiexec /regserver and press OK to save.
Reboot your PC and try downloading Spotify again. If the program successfully downloads on your system, then this means error 17 is resolved. However, if the error code still persists, then try other methods given below.
Method 2 - Use System Restore to Undo Recent Changes
Another reason for the cause of error 17 is the improper or incomplete installation of Spotify. Improper installations can configure settings and also leave bad entries in the registries.
To resolve, use System Restore utility built-in Windows. By using this system tool, you can undo recent changes and resume your computer to its previous condition as it was before the proper installation was attempted.
To do this, go to the start menu, then in the search box type System Restore and press enter. Go to System Restore and choose a restore point. Once you’ve selected the point, reboot your PC to activate changes.
Method 3 - Remove Viruses
Viruses can enter and damage your PC if you download software programs from unknown websites. These not only damage your PC but also hinder your ability to install desired programs successfully in this case audio player Spotify.
In such an event, simply use an antivirus to remove all viruses infecting your system. After they are removed, make sure you download and install Spotify software from a trusted website.
Method 4 - Repair the Registry
Another cause of error 17 is registry corruption. This occurs due to bad entries, invalid and junk files saved in the registry. To fix the corrupt registry simply download Restoro.
This is a user-friendly PC Fixer embedded with a powerful registry cleaner. This software is compatible with all Windows versions. The registry cleaner detects all registry issues, removes all file corrupting the registry, and cleans it immediately in just a few clicks.
Click here to download Restoro on your PC and resolve Error 17.
When you connect your TV via HDMI cable Windows will recognize it as another monitor and will control the display settings for your HDMI connection. In most cases using it as the extended desktop will work fine, issues will arise when you play video on it. Video playing applications can override Windows settings which can lead to strange results on the screen. Here in this guide, we will tackle with reasons and solutions to this particular issue. Solutions provided are not meant to be followed in the way they are presented but as a silent rule, they go from most common one to most rare so it is advisable to try them in the order presented.
FIXING RESOLUTION ISSUES
The first thing when experiencing resolution issues on your TV connected to a PC is to check TV settings. There is very likely a chance that you will need to manually adjust picture settings on the TV itself using TV controls.
On older models of TV, there is an overscan option which can lead to different resolutions and screen sizes. Overscan is a technology that was used in order to help content creators to deliver consistent pictures on different screen sizes and aspect ratios but how technology has advanced and everything including aspect ratio was standardized overscan itself has become a relic of the past. If you are unable to access or see edges of your desktop on the TV screen it is very likely that overscan is the issue. In order to fix this be sure to select HDTV's aspect ratio to fit the screen setting in the picture setting.
Sadly finding this option on your TV will be different from manufacturer to manufacturer and even from model to model of the same manufacturer so we can not cover all models but in most cases option is located under picture settings or advanced options. Sometimes you will face even different overscan settings instead of classic ft to screen options, in this case, experiment with the setting until you find one which will work. If you have it, find settings in the user manual of your TV.
Luckily you have managed to find the proper option on your TV set and have chosen the right aspect ratio for display. If everything works ok there is no need for the next step but if you experience a different resolution than desired on your TV follow this next guide on how to change the resolution of the TV on your PC.
Press the ⊞ Windows and type Change Display Settings. Click on the top result.
Once the Display Settings App opens, you’ll see two screens (or more if you’ve got multiple HDMI outputs connected). Make sure you select the right display for the HDMI TV before making any changes. You can do this by clicking on Identify.
You’ll see the number from the screenshot above displayed on the monitors for a brief period. Depending on which screen is set to your primary display, make sure you change the settings for the HDMI monitor.
Select the HDMI monitor from the available displays.
Scroll down until you see the current resolution settings for your HDMI monitor.
You can change the resolution settings and test different values that match your HDMI TV’s configuration.
Once you change the setting, Windows will apply the new resolution for a limited time and revert if you don’t accept the new setting.
Once you’ve found the best resolution for your TV, select Keep Changes to keep the new resolution.
You are all set now, make sure that you have the latest drivers on your system and enjoy using your TV as a second monitor.
If we are to believe news from Intel, new series of processors based on Alder Lake architecture are about to be released somewhere in October. Alder Lake is the 12th Generation Core of Intel processors and it is meant to have all advantages of the current CPU structure.
I9 is aimed to pack a punch against its competitors with technology including eight high-performance Golden Cove cores (P-cores) with Hyper-Threading and eight energy-efficient Goldmont (E-cores) equipped with a 30MB L3 cache and operating at high clock speeds.
During the benchmark test, the new CPU outperformed all of Intel’s previous Rocket Lake structure processors which is logically expected but the big surprise came from results that indicate better performance than Apple’s new M1 processor even in single-threaded performance which is supposed to be best in that field.
Another surprise was really beating AMD Ryzen 9 in each field. If we take into account that i9 has 16 cores in total and can process 24 threads against Ryzen 9 with 16 Cores and 32 threads this is an impressive feature.
Now truth to be told Alder lake has massive L3 cache and microarchitectural advantages and consumes much more power but the results of performance are high. Also, note that this early CPU is not really a mass production one and maybe some things will still change but early results are very satisfactory.
We will see what will price tag be since in this age of shortage and competition that will also play a big role in its overall success. Speaking of competition I eagerly await AMD’s response to this, in any way it seems that the CPU market is for some turbulence which is always a good thing for the final customer and I welcome it.
If you own an iPhone, iPad, or iPod you might be aware of the phenomenon of connecting and disconnecting your device. In one moment device is connected and then it somehow loses connection and you have to plug in back again to be recognized.
In this troubleshooting guide, we will address ways to eliminate this issue and to connect and have your devices working properly. We will go from the most common ones to the most uncommon so it is advisable to try solutions in order to how they are presented.
Check cable
The most common issue with this kind of behavior comes from a broken cable if you have the opportunity try another working cable to see if the device will behave differently. If everything is working fine with another cable, the issue is in the previous cable.
Check USB ports and Cable Jack
Usually, it is a cable issue, but it can also be a USB jack on cable or even a USB port on a PC, try putting the jack into another port to see if this will solve the issue.
Check device settings
From updates on your device comes a change of setting about privacy which can reflect on connection with the computer. In order to eliminate this, you will need to reset your device.
Go to device settings and go to general
Scroll down until you find the reset section and go into it
In the reset, section click on reset location and privacy
You will have to authenticate using your pin/passcode in order to complete the reset function
Enter your passcode (or use any other authentication method you have chosen) and you can now reset the Location and Privacy settings.
Click on reset
Connect the device to PC and choose trust this device
Update iTunes
Outdated iTunes can also be a problem with this particular issue. Go to the apple website and download the latest version of iTunes or updating it via apple updater.
There are times when you try to open a file, an executable file for instance, but were unable to do so since you encounter an error in an Open File – Security Warning dialog box that says, “This publisher has been blocked from running software on your machine, You must unblock this publisher to run this software”. This kind of error is most likely thrown by your operating system because it considers the file to be unsafe and could potentially harm your computer. However, if you’re certain that the file is harmless, read on as this post will walk you through fixing the error so you can open the file without getting an error.
There are various options you can check out to fix the error. You may run the program using Command Prompt or unblock it using File Properties. You could also try turning off SmartScreen or use the unblock file command in Windows PowerShell.
Option 1 – Try running the program via Command Prompt
Tap the Win + R keys to open the Run dialog box and type “cmd” in the field and hit Enter to open Command Prompt.
Next, tap the Shift key and right-click on the program or the executable file, and then select the “Copy as path” option.
After that, paste this path in the Command Prompt window and tap Enter to open the program.
Option 2 – Try to unblock the file using File Properties
Right-click on the file you were trying to open and select Properties.
Next, click the Unblock button and then click on the Apply and OK buttons.
You should now be able to open or access the file without getting the error.
Option 3 – Turn off SmartScreen
The next thing you can do is to turn off SmartScreen temporarily. All you have to do is open the Windows Defender Security Center and from there, go to the App & browser control section. After that, click on the radio button for Off under Check apps and files. Once you’re done, try opening the file again. Don’t forget to enable the SmartScreen back on.
Option 4 – Try to use the Unblock-File command in PowerShell
You might also want to utilize the Unblock-File command in Windows PowerShell as it will unblock the file so you can open it. To execute this command, follow these steps:
Tap the Win + X keys and then click on Windows PowerShell.
After opening PowerShell, type or copy and paste this command and tap Enter to execute it: Get-ChildItem -Path 'C:Users<username>Downloads' | Unblock-File
The command you entered will unblock all the files in the Downloads folder, assuming that’s where the file you were trying to open is stored. If it’s not, then replace the path with the path where the file is located. Take note to also replace “<username>” with your Username.
Now check if the file has been unblocked by accessing or opening it.
Error 0x800CCC90 is a typical Outlook error. This error indicates that Outlook has failed to connect to the mail server that handles and manages the incoming and outgoing emails. The error message is displayed in the following format:
“There was a problem logging onto your mail server. Your User Name was rejected.”
This error limits your ability to send and receive emails on Outlook. If you largely communicate at the workplace using your Outlook account, this error may slow down your work productivity and performance dramatically. Therefore it is advisable to fix it immediately.
Solution
Error Causes
The error 0x800CCC90 is triggered several reasons including but not limited to:
Authentication issues
Failure of POP 3 Server
PST File Corruption
Registry issues- Invalid Entries
Viral infection
Further Information and Manual Repair
To resolve error 0x800CCC90, try the methods given below:
Method 1 - Adjust the Authentication Settings
To resolve the error 0x800CCC90, adjust the authentication settings. Here’s what you need to do:
First, go to the ‘Tools’ tab and select the ‘Accounts’ option.
Once you select the account option, an internet accounts box will appear on the computer screen.
Simply double click on the account property box after that go to the server tab and click on it.
Check the box that says ‘My Server Requires Authentication’.
Click on apply to accept changes tab to save changes and close the window.
To activate changes made, restart Outlook and then try sending emails again.
Method 2 - Download a PST Repair Tool
If the error is triggered by PST file corruption, then the best way to resolve it is to download the PST repair tool. Download the PST repair tool from a trusted website. Run it on your system to fix PST file issues and resolve error 0x800CCC90.
Method 3 - Scan for Viruses
Another way to resolve this error is to scan for viruses. Viruses usually enter computer systems through phishing emails or while downloading attachments.
You may not know this but viruses may be affecting your PC. Due to viruses, errors like error 0x800CCC90 can also be triggered. Therefore install an antivirus to scan and remove errors on your PC.
Method 4 - Clean the Registry and Remove Invalid Entries
Due to poor PC maintenance, misconfigured and invalid registry entries may be stored in the registry. Such entries may lead to Outlook errors too. Thus to resolve you must clean the registry and remove these entries right away. Download a registry cleaner to fix the error.
Whether the error is triggered by viral infection or registry issues, it is recommended you download only Restoro. This is the one-stop solution to resolve all PC related errors. This software is deployed with 6 scanners including a registry cleaner, an antivirus, and a system optimizer.
It is user-friendly and has simple navigation. It is compatible with all Windows versions. In just a few clicks this software resolves practically all types of PC-related errors including error 0x800CCC90.
Click here to download Restoro today!
Microsoft store is ready and prepared for Windows 11 official release on October 5th and it is coming with some surprises.
It has officially confirmed that many open source and free applications will be in it like Opera, VLC, discord, Libre office, etc. It seems that Microsoft wants to place its store as one place to go for all of your software needs.
Another great surprise is the coming of Epic games store implementation. It was officially confirmed but not explained in detail, will we have Epic store opened in Windows store or we will only get installer as a package we will see but this is some great news.
As for how it states now, it seems that the Windows store aims to eliminate searching the web for applications and bring them all into one environment with reviews and ratings so you know which one to install and use. It also features a great search engine to find proper applications for your needs.
The new store will come to Windows 10 as well but after all Windows 11 has been mostly released and adopted. So expect it via update in two or three months' time.
It would be great if some larger companies decide to join MS stores like Autodesk, Adobe, the Foundry, etc so you can install everything you need from it but one can only hope.
Still sitting on the fence about upgrading to Windows 11 because you don’t know what to expect? Interestingly, the new edition somehow manages to be both a total revamp and still very similar to its predecessor in many ways. It’s really something to experience for yourself.
We do want to give you a sneak peek, though. So here’s an overview of the biggest changes Windows 11 brings to the table.
What’s different in Windows 11?
1. Visual changes
The first thing anyone will notice after switching to Windows 11 is the striking visual difference. The entire interface is smoother, cleaner and more minimalistic than on Windows 10, even resembling the macOS in some instances. Perhaps the most obvious change in appearance is the Start menu and Taskbar location, which is now at the bottom center. It’s actually very neat, but if you’re someone who loves familiarity, don’t worry, you can move it back to the left.
Centralized Taskbar and Start menu
Moreover, you’ll notice that the Taskbar includes a Microsoft Teams icon by default (which you can, of course, remove) and that Live Tiles are gone. The News and Interests section has also been removed - or, shall we say, replaced. As opposed to Windows 10, news, weather forecasts and other information are now displayed as widgets.
To add to the cleanliness of the UI, Microsoft also enhanced the ‘Snap Layouts’ feature to help you better organize your windows and maximize screen real estate. It’s similar to app grouping on your smartphone. In Windows 10 this feature is slightly restricted, as it requires some manual resizing and dragging. In Windows 11, you can just hover over the minimize/maximize option on a window, select a layout and throw the windows in there.
Snap Layouts
2. New accessibility features
Microsoft has certainly paid attention to accessibility with Windows 10, but Windows 11 takes this to a whole new level.
One of the ways Windows 11 has taken things up a notch is by adding the long-awaited ‘Live Captions’ feature and advanced Narrator options.
Live Captions apply both to media played on your PC as well as your own speech when you’re using the microphone. Keep in mind that, as with almost all kinds of subtitles, you have to be prepared for a potential delay. However, it’s barely noticeable and doesn’t take away from the usefulness of this awesome new feature whatsoever.
As for the Narrator, there are three new voice packs to choose from. Microsoft has tried to put emphasis on a more natural voice than we are used to. So, now you can choose between Aria, Jenny and Guy, who will read pretty much anything off your screen out loud. Aside from this, Microsoft has also expanded the list of braille displays supported by the Narrator feature. For users with anxiety or trouble concentrating, a welcomed addition is the Focus app, which is no longer part of the Clock app. It’s now separate and called ‘Focus Sessions’, automatically triggering the Do Not Disturb mode when activated. It blocks all pop-ups and flashes and lets you work in peace until you’re ready to switch it off.
3. Android apps
Android users may rejoice! Windows 11 supports the use of your favorite applications now.
Microsoft has done this by integrating the Amazon Appstore to the Windows 11 Microsoft Store. From there, you can download your favorite Android apps and use them on your PC in a smartphone-like window.
Unfortunately not too many apps are supported at this time, but Microsoft is working on making the emulation possible for many more. Also, the option is only available in specific regions at this moment - check out if you’re one of the lucky ones.
4. Improved gaming performance
Avid gamers will be happy to hear that Microsoft has put some effort into streamlining Windows 11 for their gaming needs.
To give gamers a supreme visual experience, Windows 11 offers the ‘Auto HDR’ feature. As long as your monitor is HDR-compatible, this feature will automatically adjust the colors, brightness and contrast of games without any input from you.
Another update is DirectStorage, which we were introduced to in Windows 10 already. In Windows 11, it’s been improved to tweak loading times and overall gaming performance efficiency even better. The predisposition for it to work optimally is that your device has an NVMe SSD.
The Xbox Game Bar also helps gamers towards a smoother experience. It allows in-game screenshots, viewing processes that are running (similar to the Task Manager), monitoring the CPU and GPU performance and frame rate, integrating the Xbox App and more. There’s also a number of widgets you can now use with the Game Bar, for example the Spotify widget.
Xbox Game Bar
Another cool addition is the Xbox Game Pass, which unlocks hundreds of games to play on your Xbox App, with new additions coming in every month.
5. Smart App Control
Aside from a sleek new look and better accessibility for all users, Windows 11 also comes with a security power-up. Bear in mind that this feature is only available on clean Windows 11 installs.
Smart App Control (SAC) is an AI-powered new feature designed to protect your PC from potential threats. It blocks untrustworthy apps and adware and helps detect potentially unwanted apps, maintaining your PC’s performance and keeping your system safe.
It comes with an ‘Evaluation’ mode, which you should definitely select when running SAC for the first time. That way, the app monitors your usage and assesses whether you’re a candidate for SAC. Some users need it to be on all the time, for others it might be too distracting. Evaluation mode will turn SAC on or off based on your usage.
Don’t disable SAC again unless you’re absolutely sure you don’t need it, since reenabling it will require a fresh install. We recommend you don’t turn it off, as it is a neat feature protecting your data and files from malware at all times.
Summary
Have we piqued your interest in trying Microsoft’s latest OS? It’s a pretty exciting new iteration, but we’ll let you find out for yourself. We hope you like it!

 Error Causes
 If we are to believe news from Intel, new series of processors based on Alder Lake architecture are about to be released somewhere in October. Alder Lake is the 12th Generation Core of Intel processors and it is meant to have all advantages of the current CPU structure.
I9 is aimed to pack a punch against its competitors with technology including eight high-performance Golden Cove cores (P-cores) with Hyper-Threading and eight energy-efficient Goldmont (E-cores) equipped with a 30MB L3 cache and operating at high clock speeds.
During the benchmark test, the new CPU outperformed all of Intel’s previous Rocket Lake structure processors which is logically expected but the big surprise came from results that indicate better performance than Apple’s new M1 processor even in single-threaded performance which is supposed to be best in that field.
Another surprise was really beating AMD Ryzen 9 in each field. If we take into account that i9 has 16 cores in total and can process 24 threads against Ryzen 9 with 16 Cores and 32 threads this is an impressive feature.
Now truth to be told Alder lake has massive L3 cache and microarchitectural advantages and consumes much more power but the results of performance are high. Also, note that this early CPU is not really a mass production one and maybe some things will still change but early results are very satisfactory.
We will see what will price tag be since in this age of shortage and competition that will also play a big role in its overall success. Speaking of competition I eagerly await AMD’s response to this, in any way it seems that the CPU market is for some turbulence which is always a good thing for the final customer and I welcome it.
If we are to believe news from Intel, new series of processors based on Alder Lake architecture are about to be released somewhere in October. Alder Lake is the 12th Generation Core of Intel processors and it is meant to have all advantages of the current CPU structure.
I9 is aimed to pack a punch against its competitors with technology including eight high-performance Golden Cove cores (P-cores) with Hyper-Threading and eight energy-efficient Goldmont (E-cores) equipped with a 30MB L3 cache and operating at high clock speeds.
During the benchmark test, the new CPU outperformed all of Intel’s previous Rocket Lake structure processors which is logically expected but the big surprise came from results that indicate better performance than Apple’s new M1 processor even in single-threaded performance which is supposed to be best in that field.
Another surprise was really beating AMD Ryzen 9 in each field. If we take into account that i9 has 16 cores in total and can process 24 threads against Ryzen 9 with 16 Cores and 32 threads this is an impressive feature.
Now truth to be told Alder lake has massive L3 cache and microarchitectural advantages and consumes much more power but the results of performance are high. Also, note that this early CPU is not really a mass production one and maybe some things will still change but early results are very satisfactory.
We will see what will price tag be since in this age of shortage and competition that will also play a big role in its overall success. Speaking of competition I eagerly await AMD’s response to this, in any way it seems that the CPU market is for some turbulence which is always a good thing for the final customer and I welcome it. 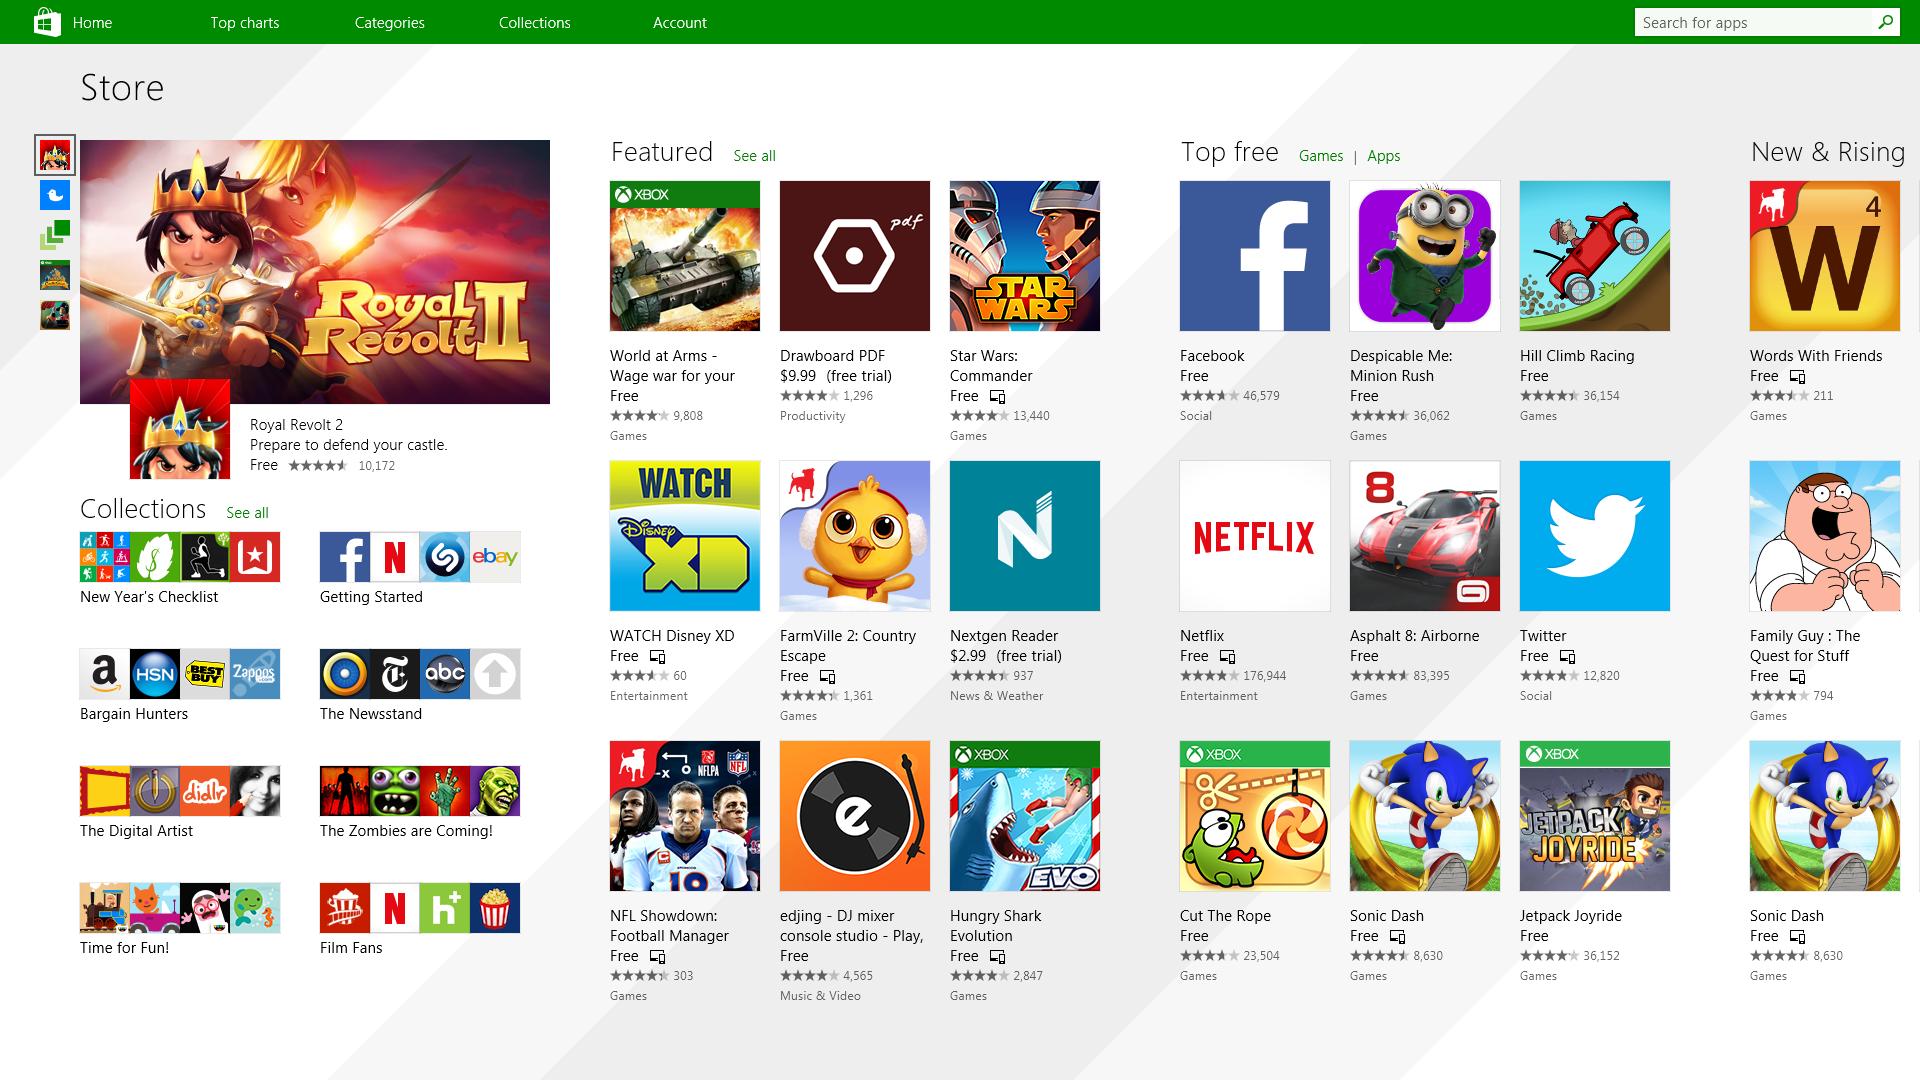 It has officially confirmed that many open source and free applications will be in it like Opera, VLC, discord, Libre office, etc. It seems that Microsoft wants to place its store as one place to go for all of your software needs.
Another great surprise is the coming of Epic games store implementation. It was officially confirmed but not explained in detail, will we have Epic store opened in Windows store or we will only get installer as a package we will see but this is some great news.
As for how it states now, it seems that the Windows store aims to eliminate searching the web for applications and bring them all into one environment with reviews and ratings so you know which one to install and use. It also features a great search engine to find proper applications for your needs.
The new store will come to Windows 10 as well but after all Windows 11 has been mostly released and adopted. So expect it via update in two or three months' time.
It would be great if some larger companies decide to join MS stores like Autodesk, Adobe, the Foundry, etc so you can install everything you need from it but one can only hope.
It has officially confirmed that many open source and free applications will be in it like Opera, VLC, discord, Libre office, etc. It seems that Microsoft wants to place its store as one place to go for all of your software needs.
Another great surprise is the coming of Epic games store implementation. It was officially confirmed but not explained in detail, will we have Epic store opened in Windows store or we will only get installer as a package we will see but this is some great news.
As for how it states now, it seems that the Windows store aims to eliminate searching the web for applications and bring them all into one environment with reviews and ratings so you know which one to install and use. It also features a great search engine to find proper applications for your needs.
The new store will come to Windows 10 as well but after all Windows 11 has been mostly released and adopted. So expect it via update in two or three months' time.
It would be great if some larger companies decide to join MS stores like Autodesk, Adobe, the Foundry, etc so you can install everything you need from it but one can only hope. 


