NDIS or Network Driver Interface Specification is a programming interface for the network interface cards that aids in the proper functioning of a system driver in a computer network. The NDIS helps the computer system in order to communicate with other connected devices and hardware components on a computer network. In relation, the ndis.sys file is a critical system file developed by Microsoft for the Windows operating system. As you know, sys files or system files are important parts of the Windows operating system as well as a repository of system driver settings used by Windows to communicate with the connected hardware and devices.
The ndis.sys files are stored mostly in a driver folder at C:/Windows/System32/drivers and as mentioned, these files are essential for the system to function properly. Although the presence of ndis.sys system file is not yet known to affect the normal functioning of the Windows OS, some of the Windows 10 users reported that they encountered ndis.sys blue screen errors on their PCs. Blue Screen of Death errors or Stop errors usually occurs when you open a program or a function. Moreover, it could also occur when the driver gets loaded during the system startup or during system shutdown.
It isn’t yet clear what really causes the ndis.sys blue screen error. However, like other Stop errors, it may occur due to corrupted files, misconfigured device drivers, bad drivers, corrupted Windows Registry, missing or damaged system files, and malicious programs. Aside from the aforementioned reasons, the ndis.sys blue screen error might also occur if your hard disk is damaged and if the RAM is corrupted. In such cases, a lot of users usually disable the ndis.sys file. However, it won’t really resolve the issue since the file is required for the normal functioning of the operating system and even when you disable the file, it’s pretty useless as the file will start all over again. In addition, you might want to disable security programs or firewalls and antivirus programs in the meantime to check if these programs are the ones that are causing the error. And if you’ve determined that none of the security programs or firewalls and antivirus programs are to blame, refer to the options below that might help you resolve the DRIVER_IRQL_NOT_LESS_OR_EQUAL or ndis.sys Blue Screen of Death error.
Option 1 – Try to update or reinstall the PC device driver
The Ndis.sys Blue screen error can occur when the device driver in your computer is outdated or corrupted. Thus, you either have to update or reinstall it to fix the issue.
Tap the Win + R keys to launch Run.
Type in devmgmt.msc into the box and tap Enter or click OK to open the Device Manager.
After that, a list of device drivers will be displayed. If you see a red or yellow sign that shows up against the driver, right-click on the driver’s name and select “Update Driver Software” or “Uninstall”. And if you find any “Unknown device”, you need to update it as well.
Select the “Search automatically for updated driver software” option and then follow the instructions to complete the process.
Restart your PC.
Option 2 – Rollback your Network drivers
If you have updated the driver software as of late and you suddenly got this BSOD error, you might have to roll back the device driver – in other words, switch back to the previous working version. To do that, follow these steps:
Tap the Win + R keys to launch the Run window and then type in the “devmgmt.msc” command and hit Enter to open the Device Manager window.
Under the Device Manager, you will see a list of drivers. From there, look for the Network Adapters and expand it.
Next, select the driver entries that are labeled appropriately other than anything in the context of the WAN Miniport.
Then select each one of them and double-click to open a new mini window.
After that, make sure that you’re on the Driver tab and if you are not, just navigate to it then click the Roll Back Driver button to switch back to the previous version of your Network adapters.
Now restart your computer to successfully apply the changes made.
Option 3 – Try running the System File Checker
The SFC or System File Checker scan could detect and automatically repair damaged system files that could be causing the ndis.sys Blue Screen of Death error. SFC is a built-in command utility that helps in restoring corrupted files as well as missing files. It replaces bad and corrupted system files with good system files. To run the SFC command, follow the steps given below.
Tap Win + R to launch Run.
Type in cmd in the field and tap Enter.
After opening Command Prompt, type in sfc /scannow and hit Enter.
The command will start a system scan which will take a few whiles before it finishes. Once it’s done, you could get the following results:
Windows Resource Protection did not find any integrity violations.
Windows Resource Protection found corrupt files and successfully repaired them.
Windows Resource Protection found corrupt files but was unable to fix some of them.
Option 4 – Try running the CHKDSK utility
Running the CHKDSK utility might also help you resolve the Netwtw04.sys failed BSOD error. If your hard drive has issues with integrity, the update will really fail as the system will think that it’s not healthy and that’s where the CHKDSK utility comes in. The CHKDSK utility repairs hard drive errors that might be causing the problem.
Open Command Prompt with admin privileges.
After opening Command Prompt, execute the following command and hit Enter:
chkdsk /f /r
Wait for the process to be completed and then restart your computer.
Option 5 – Run the DISM Tool
The DISM tool is another command-line tool in the Windows operating system that could help users fix various corrupted system files. To use it, follow these steps:
Open the Command Prompt as admin.
Then type in this command: DISM /Online /Cleanup-Image /RestoreHealth
The DISM command you entered will repair the corrupted system image. Do not close the window if the process takes a while as it will probably take a few minutes to finish.
Restart your PC.
Option 6 – Perform a System Restore
Performing a System Restore on your computer can also help you fix the ndis.sys Blue Screen of Death error. You can do this option either by booting into Safe Mode or in System Restore. If you are already in the Advanced Startup Options, just directly select System Restore and proceed with the next steps. And if you have just booted your PC into Safe Mode, refer to the steps below.
Tap the Win + R keys to open the Run dialog box.
After that, type in “sysdm.cpl” in the field and tap Enter.
Next, go to the System Protection tab then click the System Restore button. This will open a new window where you have to select your preferred System Restore point.
After that, follow the on-screen instructions to finish the process and then restart your computer and check if the problem is fixed or not.
Isn’t it annoying when you get an error message pop up stating ‘Cannot find propsys.dll” or “propsys.dll not found” when you start your computer or open a particular program?
The propsys.dll file is crucial to the Windows operating system. This file is located in one of the following locations: "C:\Windows", C:\Program Files, C:\WINDOWS\system32, or C:\Program Files\Common Files". And the propsys.dll error indicates that the propsys digital library file is damaged and corrupt.
The propsys.dll error may lead to a very unstable operating system.
It may also hamper your ability to access many programs on your computer, lead to program and system crash and slow down the system’s performance. Therefore, to avoid these system threats, it is advisable to fix the error immediately.
Solution
Error Causes
The common causes of propsys.dll file error are:
Registry problem
The propsys.dll file is damaged due to a virus or spyware
Improper software removal
Hardware Failure
The propsys.dll error message is displayed in either of the following forms:
Propsys.dll not found
Cannot find [Path]propsys.dll
This application failed to start because propsys.dll was not found. Reinstalling the application may fix this problem
The propsys.dll file is missing
Further Information and Manual Repair
There are many ways to fix the propsys.dll error. However, for optimum results from the fix, you must first identify the cause of the error and then choose the solution accordingly.
Recommended Solution for Registry Issue
If you use your system daily the resulting wasted/invalid/junk entries may dilate the registries.
This can result in registry malfunctioning which may result in a propsys.dll error on your screen. When this happens, it is advisable to use a registry cleaner to fix the problem.
Registry cleaner helps clean up the junk entries and repairing the corrupted registries.
For this, you will first have to download a registry cleaner repair tool. Download and install the software on your computer. After downloading it, click the start scan button to run. This helps scan and diagnose system errors on your computer in seconds.
Once the scanning is complete, click on the fix button to repair the registry problem.
Recommended Solution for File Damage and Corruption
Use the ‘System Restore’ option to restore corrupt and damaged files. The ‘System Restore’ function will help you get a fresh copy back and simultaneously help fix the error. Here’s how to use and access the ‘System Restore’ function on your computer:
Simply go to the start menu and in the search box type restore. Once you type, it will show you the system restore option. Now select ‘choose a different restore point’. After this, you will be presented with a list of restore points.
Choose a point that you believe happened before the propsys.dll error. Confirm your selection and restart.
Another alternative solution for file damage is to run a virus scan of your entire system; the damage could be related to a virus or malware infection.
Recommended Solution for Hardware Failure
If a propsys.dll error occurs due to hardware failure, then it is advisable to update the drivers for hardware devices that you think are related to propsys.dll. For example, if you receive the propsys.dll error when you play a 3D video game, then try updating the driver for your video card.
If you’re suddenly unable to launch or open Google Chrome or unable to load web pages, then it’s most likely that the files in Chrome have been corrupted or some plugin is taking up a lot of resources which is why you encounter an error message saying, “Google Chrome has stopped working”. And when you try to check the Task Manager, you’ll see that Chrome is really taking up lots of resources, however, when you check the Taskbar, strangely, you will see nothing. If you are currently facing this issue in Chrome on your Windows 10 PC, follow the given options below.
Option 1 – Kill Google Chrome’s process in the Task Manager
If you aren’t able to open Chrome, then maybe its process is running in the background and you don’t see the browser windows. If that’s the case, you may have to force quit the browser and then try to open it again.
First, right-click on the Taskbar then select the Task Manager. And if the Task Manager is not responding, you can just use the Alt + Ctrl + Del keys and then select the Task Manager.
After opening the Task Manager, under Processes, look for Google Chrome’s process which would most likely be named “chrome.exe”.
Right-click on Google Chrome’s process and then select the End task option.
Now try to open Google Chrome again.
Option 2 – Try checking if your antivirus program is blocking Google Chrome
There are instances when due to false-positive, a security or antivirus program might block Chrome which is why it failed to open properly. Thus, you can just disable the security program temporarily and then check if you can now open Chrome or not.
Option 3 – Delete the User Profile in Chrome
You can also try deleting the User Profile folder in Chrome. To do so, follow these steps:
Tap the Win + R keys to open the Run dialog box.
Then copy and paste “%USERPROFILE%AppDataLocalGoogleChromeUser Data” and hit Enter.
From there, look for a folder named “Default folder” and then copy the folder to another drive as a backup.
After creating a copy of the folder, delete the Default folder.
Next, open Google Chrome again and go to Settings > Advanced > Reset.
Option 4 – Disable the Extensions in Chrome
There are instances when issues on a browser are triggered or caused by some problematic extension. To find out which one of your extensions is causing the problem, disable them all first and then enable them back one by one.
Click on the three-dotted icon for the menu located at the top-right corner of your screen.
Then click on the More tools option and go to Extensions.
From there, you will see a list of all the installed extensions in Chrome.
Disable all these extensions and restart the browser.
Now enable them back one by one to figure out which one of them is the culprit. You could also remove extensions that you no longer use.
Option 5 – Run the Chrome Cleanup tool
You might also want to try running the Malware Scanner & Cleanup tool in Chrome. This is a built-in tool that can help you get rid of any unwanted pop-ups, banners, ads, unusual startup pages, toolbars, and malware. Thus, it can help you to resolve the issue in Chrome.
Option 6 – Try to reinstall Chrome
If running the Malware Scanner & Cleanup tool in Chrome didn’t work out for you, you can try reinstalling it. To do so, follow these steps:
Open the Settings app and go to System > Apps & features.
From there, look for Chrome and uninstall it from your PC.
Then go to the official website of Google Chrome and download its latest version and install it.
The “Unknown Hard” error that keeps on appearing in Windows 10 can put users in an unpleasant situation. This kind of error leads to the freezing of the taskbar, blackening of the screen, and sudden disappearance of the icons on the Desktop. And each time you try to open Windows, the system will only give you an error message saying that it’s a critical error and some applications like Start and Cortana won’t work.
Upon analysis, it seems that the “sihost.exe” is not responding and that it is the one that’s causing the c000021a Unknown Hard error to pop up. Sihost.exe files represent the Shell Infrastructure Host which is an essential component in the Windows operating system. The Windows Shell Infrastructure Host is primarily responsible for handling some graphical elements of the operating system interface such as the Start menu and the taskbar transparency. And so if the Shell Infrastructure or Sihost.exe has stopped, has been removed, or corrupted, you will most likely have issues with the overall functionality of the Windows operating system and you’ll get the Unknown Hard error
In addition, the ctfmom.exe Unknown Hard error may also occur due to incompatible drivers installed on your PC. Ctfmom is a process that identifies inputs such as handwriting, languages, and many more. It’s the one that controls the functions of background behavior. To resolve this issue, you need to first try to identify which application is the one that’s running the sihost.exe file. And if needed, you need to either update or reinstall or completely uninstall the problematic application.
Option 1 – Try to run the System File Checker
The SFC Scan or System File Checker, us a built-in utility in Microsoft Windows that can be found in the C:\Windows\System32 folder. This tool allows users to scan and restore any corrupted system files in Windows that might be causing the Unknown Hard error to appear. Before you use this tool, make sure to find out whether the sihost.exe on your computer is a Trojan that you have to remove or if it’s a file that belongs to a trusted Windows application. Once you have that sorted out, follow the steps below.
Tap Win + R to launch Run.
Type in cmd in the field and tap Enter.
After opening Command Prompt, type in sfc /scannow
The command will start a system scan which will take a few whiles before it finishes. Once it’s done, you could get the following results:
Windows Resource Protection did not find any integrity violations.
Windows Resource Protection found corrupt files and successfully repaired them.
Windows Resource Protection found corrupt files but was unable to fix some of them.
Option 2 – Try to use System Restore
You can also try using System Restore. This is one of the ways you can use it to back up your PC. Since restore points are created automatically each week by System Restore, you can use System Restore to restore your computer back to an earlier good point in time.
Option 3 – Try to troubleshoot the error in a Clean Boot State
Putting your PC in a Clean Boot state can help you diagnose and troubleshoot the issues in your system. During this state, you can start the system with a minimum number of drivers and startup programs that will surely help you in isolating the root cause of the Unknown Hard Error.
Log onto your PC as an administrator.
Type in MSConfig in the Start Search to open the System Configuration utility.
From there, go to the General tab and click “Selective startup”.
Clear the “Load Startup items” checkbox and make sure that the “Load System Services” and “Use Original boot configuration” options are checked.
Next, click the Services tab and select the “Hide All Microsoft Services” checkbox.
Click Disable all.
Click on Apply/OK and restart your PC. (This will put your PC into a Clean Boot State. And configure Windows to use the usual startup, just simply undo the changes.)
After putting your PC in a Clean Boot State, try creating a system restore point and see if the problem still occurs. Clean Boot troubleshooting is designed to help you isolate the problem. For you to execute a clean boot troubleshooting, you must do a couple of actions (the steps are given above) and then restart your PC after every action. You might have to disable one third-party app after the other to really isolate the issue. And once you’ve narrowed down the problem, you can either disable the third-party app that’s causing the problem or remove it. Note that you must switch your PC back into the Normal Startup mode after you’re done troubleshooting the problem. Here’s how you can do it:
From the “Start” menu, go to System Configuration.
After that, switch to the General tab and click the option for “Normal Startup”.
Next, go to the Services tab and clear the checkbox for “Hide all Microsoft services”.
Then find and click “Enable all” and if prompted, you have to confirm.
Afterward, go to the Task Manager and enable all the Startup programs and confirm the action.
The WidgiToolbar is an unscrupulous application designed to advertise other applications as a part of a bundle, steal financial information and penetrate the security of a computer system, making it open to other threats. In most cases, WidgiToolbar claims to center its installs on toolbars but that’s not always the case.
Technical details about WidgiToolbar Malware include:
Digital Publisher: GreenTree Applications srl
Product Version: YTD Video Downloader 4.8.9.7
Original File Name: YTDStub.exe
Entry Point: 0x0000323C
Assessment of WidgiToolbar
Created by GreenTree Applications/ Spigot Inc., the WidgiToolbar is a list of nested toolbars. This application was in fact a bundle, installing several other applications upon installation. For this installation, WidgiToolbar installed only the YouTube Downloader toolbar and several other applications. Thereafter, the application appeared pretty harmless but is intended on distributing advertisements over the user’s computer, often without the user’s discretion. It’s all in the ads.
Additionally, based on evaluations made by Security Analysts, the WidgiToolbar application is used for extracting personal and financial information from a user’s computer system. Financial information encapsulates banking and credit card details. Your passwords and other highly confidential information might be detected by the WidgiToolbar application if care is not taken.
Overall, the WidgiToolbar installs and collects information from your computer system without your knowledge and permission. Furthermore, WidgiToolbar leaves a computer system vulnerable and susceptible to other threats and malware. The application is known for opening a portal or door into your computer system. This implies that other software can be installed on your computer via this avenue, once again without your knowledge.
Responsible for wreaking havoc on your computer, it’s then pertinent that you remove it altogether. Manually removing the WidgiToolbar is not an option. Why? A manual removal procedure will not be able to remove the software in its entirety. An automated tool is the best option.
Like all other programs offered as a bundle, several other programs were installed. These include:
MS Build
Reference Assemblies
PRO PC Cleaner
Soon after the installation of WidgiToolbar was completed, there were a total of four (4) new applications installed on the computer. These were all found in the computer's Local Drive.
After WidgiToolbar was installed, the application attempted to change the default search provider to search.yahoo.com. This was a clear indication that this was a promotion to get more Internet users to use the Yahoo search engine.
Why Use Spyhunter to Remove WidgiToolbar?
As a result of its nature, the WidgiToolbar is difficult to remove. You might be able to remove other programs that were manually installed within the bundle, but to remove WidgiToolbar completely; an automated tool is a necessity. This is to ensure that specific registry keys installed by WidgiToolbar are found and removed.
To completely remove WidgiToolbar from your computer, click here to download and install Spyhunter.
After a scan was done with Spyhunter, there were 330 threats detected. Spyhunter was able to remove all 330 threats with ease and success.
As of late, a number of users reported experiencing a problem where their Windows 10 computers get stuck on Airplane mode for some unknown reason. According to the affected users, they were unable to turn off the Airplane mode which means that their computers are also not able to connect to the internet. One of the possible reasons why this kind of issue occurs is that there could be a bug with the airplane mode or it could also be the doing of faulty network drivers or physical switch that’s turned on, and so on. If you are one of the few users who experience the same issue, then read on as this post will guide you on what to do if your Windows 10 computer gets stuck on Airplane mode.
There are a couple of suggestions you can check out to resolve the problem. You can try to check the status of the Radio Management service, flush the DNS cache or you could turn off the airplane mode via system settings. You could also update the network drivers or turn off the physical switch for airplane mode or make some adjustments in the Windows Registry. For more details, refer to each one of the suggestions provided below.
Option 1 – Try to check the Radio Management Service status
First, tap the Win + R keys to open the Run dialog box and type “services.msc” in the field, and hit Enter to open the Windows Services Manager.
Next, look for the Radio Management service and select Properties.
From there, change its Startup type to Disabled and click on the Apply and OK buttons to save the changes made.
Once done, restart your computer and check if you can now turn off the airplane mode.
Option 2 – Flush the DNS cache
You could also try to flush the DNS cache to fix the “ERR_ICAN_NAME_COLLISION” error. All you have to do is open Command Prompt as an administrator and then execute each one of the following commands sequentially to flush the DNS cache:
ipconfig/release
ipconfig/renew
ipconfig/flushdns
Option 3 – Try turning off the airplane mode via System settings
If flushing the DNS cache did not help in fixing the problem, then you might want to turn off airplane mode via system settings.
In the Windows Search bar, type “airplane mode”.
From the search results that appear, click on Airplane mode.
After that, a window will appear where you have to turn off the toggle button for Airplane mode.
Option 4 – Try to update, rollback or reinstall the Network adapter drivers
The next thing you can do to resolve the problem is to update the Network Adapter drivers by following these steps:
Tap the Win + R keys to launch the Run window and then type in the “devmgmt.msc” command and hit Enter to open the Device Manager window.
Under the Device Manager, you will see a list of drivers. From there, look for the Network Adapters and expand them.
Look for the Broadcom Network Adapter and right-click on it, as well as other network adapters that have an exclamation icon, and update them all.
Restart your PC and see if it helped in fixing the problem.
Note: If updating the network drivers didn’t help in fixing the problem, you can also try to roll back the very same drivers from their previous versions and restart your Windows 10 PC. After that, the system itself will reinstall the drivers you just uninstalled. Alternatively, you can also download and install the drivers from the manufacturer’s website directly.
To reinstall the network adapter drivers, refer to these steps:
Open the Devices Manager from the Win X Menu.
Then locate the device drivers and right-click on them to open the Properties.
After that, switch to the Driver tab and click on the Uninstall Device button.
Follow the screen option to completely uninstall it.
Finally, restart your computer. It will just reinstall the device drivers automatically.
Option 5 – Try to turn off the physical switch for Airplane mode
If your computer has a physical switch to turn on or off the airplane mode, then you might want to check that switch if you have one. Chances are, it could be the reason why you’re unable to turn off Airplane mode on your computer.
Option 6 – Try to make some adjustments in the Registry
Tap the Win + R keys to launch the Run utility.
Then type “Regedit” in the field and hit Enter to open the Registry Editor.
Next, navigate to this registry path: HKEY_LOCAL_MACHINESystemCurrentControlSetControlClass
From there, edit the registry value of “RadioEnable” to “1”.
Exit the Registry Editor once done, and restart your computer.
In case you don’t know, the Title bar comes with the Maximize, Minimize, as well as the Close button. However, there are instances when you might notice that the Title bar, Maximize, Minimize and Close buttons are missing in the File Explorer. This kind of problem might be due to some glitch in the computer, or it could also be caused by some built-in tool or an installed program in your computer. Moreover, there are also other factors that you have to consider such as corruption in the system files as well as errors in the user profile which is generated on a domain network, and so on.
There are several suggestions you can check out to fix the problem. You can try to boot your computer in a Clean Boot State to see if a third-party program is the root cause of the problem. You can also try to run built-in tools like System File Checker and the DISM tool. You could also get the video buffer emptied, reset or reinstall the program, or recreate the User Profile.
Option 1 – Put your computer in a Clean Boot State
As pointed out, it is possible that some third-party program or service is the one that’s behind the problem. To isolate this possibility and to identify the culprit, you have to put your computer into a Clean Boot State. To do so, follow the steps below.
Log onto your PC as administrator.
Type in MSConfig in the Start Search to open the System Configuration utility.
From there, go to the General tab and click “Selective startup”.
Clear the “Load Startup items” check box and make sure that the “Load System Services” and “Use Original boot configuration” options are checked.
Next, click the Services tab and select the “Hide All Microsoft Services” check box.
Click Disable all.
Click on Apply/OK and restart your PC. (This will put your PC into a Clean Boot State. And configure Windows to use the usual startup, just simply undo the changes.)
You need to disable one third-party app after the other to really isolate the issue. And once you’ve narrowed down the problem, you can either disable the third-party app that’s causing the problem or remove it.
Option 2 – Run System File Checker scan
You might also try running the System File Checker or SFC scan to fix the issue. System File Checker is a command utility built into your computer that helps restore corrupted files and missing files. Refer to the following steps to run it:
Hit the Win + R keys to launch Run.
Type in cmd in the field and tap Enter.
After opening Command Prompt, type in sfc /scannow
The command will start a system scan which will take a few whiles before it finishes. Once it’s done, you could get the following results:
Windows Resource Protection did not find any integrity violations.
Windows Resource Protection found corrupt files and successfully repaired them.
Windows Resource Protection found corrupt files but was unable to fix some of them.
Restart your computer and see if the System32 folder still pops up at startup or not.
Option 3 – Try running the DISM tool
You can try running the Deployment Imaging and Servicing Management or DISM tool to fix the Windows Upgrade problem. Using this built-in tool, you have various options such as the “/ScanHealth”, “/CheckHealth”, and “/RestoreHealth”.
Open the Command Prompt with admin privileges.
Then type in the following commands and make sure to hit Enter right after you type each one of them:
Dism /Online /Cleanup-Image /CheckHealth
Dism /Online /Cleanup-Image /ScanHealth
exe /Online /Cleanup-image /Restorehealth
Do not close the window if the process takes a while as it will probably take a few minutes to finish.
Option 4 – Try to empty the Vide buffer
These kinds of problems could also be due to bad data in the Video Buffer. Thus, you can try to empty the Video buffer to resolve the problem. All you have to do is tap the Shift + Ctrl + Win key + B keys on your keyboard. After that, leave your computer idle for about 10 seconds until you notice it blink once. Now you try using your computer as usual and see if the glitch is now fixed or not.
Option 5 – Try to reset or reinstall the program
Another thing you can do to fix the issue is to reset or reinstall the program where you encounter the problem. Chances are, you are running the application in the Full-screen mode but you can exit it by simply tapping the Esc or F11 key. However, if nothing changed, then consider resetting or reinstalling the program. Just go to the Windows 10 Settings app and navigate to Apps > Apps & Features. From there, look for the entry of the application you’re having problems with and select it and then click on the Advanced options. After that, click on the Reset button under the Reset section.
Option 6 – Try recreating the User Profile
You might also want to try recreating the User Profile on your computer since some errors in the creation of a User Profile can result in problems like this one. Thus, you have to try deleting the User Profile and then recreate it.
We are all waiting for the release of Intel’s Alder Lake series of processors and real-world results on its performance. Sadly lately it came to our attention that some games might have issues with the processor.
Now before you go on the bandwagon on bashing Intel itself take note that it is not Intel’s fault at all. The issue that arises is mostly due to DRM software and how it works. As you might know or not, Alder Lake has two sets of cores, standard performance cores, and power cores, and with Intel’s Thread Director on-chip right cores will be used for the right tasks, and here lies the issue.
DRM software might detect Thread Director as something suspicious and malicious, and then cut access to the game because of this. Intel, of course, has reached DRM manufacturers and places documentation about how software should be developed with this hybrid technology in mind.
Of course, newer games will be updated if needed and everything will work fine, also games on GOG will work fine because of GOG’s policy of no DRM store but some older ones might be left in limbo. They could work fine but DRM might be triggered and prevent them from loading, usually, game developer itself removes DRM protection after some time but that is not really always the case and there is a chance that some games might simply just not work on Alder Lake CPU only because of DRM protection.
Conclusion
I will admit that I have not been a great fan of DRM in general, I understand that game developer want to protect themselves from piracy but how it looks they were not really successful with it. Even today single-player games get pirated on the day they are released and legally bought ones always make trouble for people that actually paid for them.
I remember times when DRM was awful and you could install a game a limited number of times, luckily this was removed but it seems that many old habits still remain sadly and DRM is present even today in various forms. GOG is proof that people will buy DRM-free games and that they will support this kind of model. Maybe it is time to forget about fighting against piracy, you will not make it go away and people who do not want to buy games will not buy them, on other hand many users that do buy games, if they cannot use them they will rest to pirated version since that one will work.
It is sad to see that pirated software can work better than a legal one and offer a more pleasant experience.
If your Windows computer is not booting up and displays Secure Boot Violation – The system found unauthorized changes on the firmware, operating system, or UEFI drivers error message on the screen, then you can follow this tutorial to troubleshoot the problem.
When you encounter this kind of problem on your computer, you will get the following error message on your screen:
“Secure Boot ViolationThe system found unauthorized changes on the firmware, operating system, or UEFI drivers.Press [OK] to run the next boot device or enter directly to BIOS Setup if there are no other boot devices installed.Go to BIOS Setup > Advanced > Boot and change the current boot device into other secured boot devices.”
This kind of error message pops up due to the Secure Boot that protects your computer from running any non-OEM signed boot software during startup. In other words, the Secure Boot firmware is the one that scans for non-signed boot software each time your computer boots up and if it detects anything strange, it will block the boot and will display the error message. To fix this error, there are two things you can try. You can try to disable the Secure Boot or try using a System Restore Point. For more detailed instructions, refer to each one of the options provided below.
Option 1 – Disable the Secure Boot in the BIOS
Disabling the Secure Boot in the BIOS settings is definitely recommended to resolve the issue. To disable Secure Boot, here’s what you have to do:
First, boot your computer into Windows 10.
Next, go to Settings > Windows Update. From there, check if there is anything that you have to download and install if you see any available updates. Usually, OEMs send and update the list of trusted hardware, drivers, and operating systems for your computer.
After that, go to the BIOS of your computer.
Then go to Settings > Update & Security > Advanced Startup options. If you click on Restart Now, it will restart your computer and give you all the advanced options.
Next, select Troubleshoot > Advanced Options. As you can see, this screen offers you further options including System restore, Startup repair, Go back to the previous version, Command Prompt, System Image Recovery, and UEFI Firmware Settings.
Select the UEFI Firmware Settings which will take you to the BIOS.
From there, go to the Security > Boot > Authentication tab where you should see Secure Boot. Note that every OEM has its own way of implementing the options so it varies.
Next, set Secure Boot to Disabled and set Legacy Support to On or Enabled.
Save the changes made and exit. Afterward, your computer will reboot.
Option 2 – Try running System Restore in Advanced Startup Options
Since you probably can’t boot into your Windows 10 computer, you can try to run System Restore again in the Advanced Startup Options.
Boot your computer into the Advanced Startup Options screen.
From there, you will see some options to troubleshoot when you can’t log in to Windows in the usual way.
Now select Troubleshoot > Advanced Options > Command Prompt.
After that, type “rstrui” and hit Enter to execute the command which will start the System Restore process.
Option 3 – Make a proper bootable USB Drive/Stick
To make a proper bootable USB drive, you need to use the Windows Media Creation tool. The Media Creation tool in Windows allows you to use the ISO installation file to make a bootable device that you can use to install Windows on your PC. Note that this is kind of different from the usual installation process as it could erase your computer’s current settings and data on the primary drive. Thus, before you proceed, you need to backup all your data into some removable drive and then use the Media Creation Tool to make a bootable drive.
After making the bootable drive, you need to plug it into your computer and then reboot.
Next, tap the F10 or Esc key to open the boot options.
Now set the boot priority of the removable drive the highest. Once the setup comes forth, follow the next onscreen instructions and install Windows without any problems.
As we near the end of 2022 we look at the current best antivirus software for popular platforms, why they are the best, and why you should get them.
Avira, a great free Antivirus
Avira has been around a long time with its free antivirus version of the larger protection suite. It had its ups and downs but the latest versions are really great. With high-speed scans and low system impact, Avira antivirus is really one of the best free antivirus software currently on the market.
The software itself has also received UI & UX updates making it straightforward and easy to use. The virus scanning engine is the same as in paid version that ranks among the top engines in the world for this type of work. The package also gives you some great browser protection and a good firewall as well, there is really no excuse to skip on this if you want a free solution.
The only thing that we would say is not so great in Avira is reporting some false positives, sometimes even for MS updates, it is rare but it can happen.
Malwarebytes, a powerful Windows antivirus
Malwarebytes Premium is easy to use, simple antivirus solution that shies away from complicated UI, and simply put, it just works. Its scanning engine is well-known and places among the top and best in the world often finding some malware that other can miss.
Another great thing is its integration with Windows itself, it is one of the rare applications that can and will work incredibly well beside your typical Windows protection tools so you can have both of them running at the same time.
Installation and running are really simple and every typical PC user will find it as easy as walking in the park. On the other hand, sadly system impact is a little high and it will have issues running on lower-end systems due to its memory requirements.
Intego MAC Internet Security X9, the best Mac antivirus
Gone are the days when MAC had no virus issues, since MAC rose in popularity among the users, also rose the number of viruses and malware. The system itself has some great protection built it inside but for more security and better control of it, you will need a third-party dedicated solution.
Intego was made by Mac antivirus experts who have been building this kind of software last 25 years. The interface is easy to use and premade presets are really helpful, but the security suite can also be customized to fit your needs and desires.
Since this is only available as a security suite, you are getting a firewall and some other security tools along with your antivirus that will run as a part of it.
The bad side is that scans can sometimes run slow, most of the time they are OK in terms of speed but occasionally they can switch to slower speeds and impact scanning time to some annoying times. Also, there is no webcam protection nor VPN service included where others on this list have them.
Bitdefender mobile security: best Android protection
While protection is not only needed for your gaming or workstation, software suites that are dealing with mobile and tablet security exist. The best of them is the Bitdefender antivirus mobile suite. Low on system resources and low on performance impact with the really great virus detection rate Bitdefender is at the top of suites for your phone.
Consistent high virus detection packed with low battery impact is great but the suite comes with tons of other tools as well like browser security tools, email protection, and real-time link and notification protection.
The application will always scan each file and newly installed application in the background and alert and cut off any found threat. App itself is easy to install and use and most of the time it will do everything in the background for you but offer you customization if you need it.
The package also includes VPN and application lock that will let you protect the critical applications from being accessed as well as an online account scanner. Anti-theft and anti-loss tools, which allow you to find, remotely lock or wipe a stolen or lost device, add yet another layer of protection.
One thing that is missing from this great package is fraudulent call protection. Newer Android phones have this feature inside but it would be nice if Bitdefender had it as well.
Bitdefender, the best antivirus software
Now that we have covered specific cases of each platform, there is one player that has all of them covered and with a quality product, that player is BitDefender and it is great. Personally, this is my protection suite of choice and as I type this it is running in the background.
Bitdefender has it all, low system impact, as a matter of fact, it is one, if not, the lowest performance impact engine on the market currently and that is packed with a great and highly consistent virus & malware detection suite. Along with real-time malware protection, browser security, and anti-spam tools, you also get anti-phishing defenses, ransomware protection, and a strong firewall.
Bitdefender scores are very high in both the zero-day threat and real-world protection tests at AV-Test, an established organization that tests antivirus software. Despite being tested against tens of thousands of well-known and widespread malware threats, the software consistently achieves a 100% blocking rate.
The suite also comes with a restricted free VPN and with parental controls as well. Webcam and microphone protection are also included in the suite and on top of all, it has great pricing plans and constant discounts.
BitDefender is really a great package and it might sound too good, but after years and years of personally using it I have not had single malware or virus issue, the only thing that I would put as a negative is that system is severely slowed down when system scans are performed so be sure to run or schedule them when you are not using your computer. This, of course, can put some people off and I will admit it is a serious drawback but for me, the security of my workstation is more important than leaving the computer for 20 or so minutes in order to perform a full scan of the system.
Buying a product and then finding out that is not working is one of the most annoying and disappointing things that a consumer can experience. It is no secret that Adobe software and services online can malfunction or detect somewhat false information and behave accordingly placing buyers in an awkward position.
Adobe no matter how huge and great can also still sometimes has software that can misbehave in this way and sometimes downloading their suite and buying it after can not be 100% registered and even after the money is transferred and purchase has been completed you can still have a trial status for your adobe cloud applications.
In this guide, we will address this issue and see how we can fix it so you can get back to your creative work in no time.
Follow this guide as it is presented step by step.
Wait an hour
No, seriously, wait an hour. Sometimes transaction and registration of transaction along with activation can take up to one hour of time. If you just made a purchase and you are still under trial in the launcher, give it a little time to detect the purchase and adjust accordingly.
Check to see if your subscription is active
Sign in to https://account.adobe.com/plans. If you have more than one account, make sure you sign in with the proper one.
Under My plans, select Manage plan.
In the Plan Information section, check to make sure that your subscription is active. If it’s expired, it's likely why you’re seeing messaging that indicates you are in trial mode or that your trial has expired.
If your subscription is showing as active, then an out-of-date payment method may be the issue.
To see if your payment information is current, in the Plan information section, select Manage payment.
If your payment method isn’t current, update your credit card information in the pop-up window and select Save.
Your new payment method will take effect in the next billing cycle.
Sing out and then sign back in
Open the Creative Cloud desktop app. (Select the icon in your Windows taskbar or the macOS menu bar.)
Select the Account icon in the upper right, and then select Sign out.
In the confirmation dialog box, select Sign Out. The Creative Cloud apps and services associated with your account are deactivated on the computer.
Sign in again to your Adobe account.
Launch any Creative Cloud app included in your membership, such as Photoshop or Illustrator. If prompted, sign-in on the next screen.
Update creative cloud applications
Open the Creative Cloud desktop app. (Select the icon in your Windows taskbar or the macOS menu bar.)
Depending on your version of the Creative Cloud desktop app, do one of the following:
On the Help menu, select Check for updates.
or
Select the three vertical dots icon in the upper-right corner of the app.
Choose Check for App Updates from the menu.
If you aren’t using the latest version of your Creative Cloud app, an update prompt appears next to it on the apps list. Select Update.
Remove entries in the HOSTS file
If the previous solutions do not work, your computer could have trouble connecting to Adobe's activation servers. This could be because of an incorrectly configured Operating System hosts file (Operating system hosts files map host names to IP addresses).
To solve this issue, try removing Adobe-related entries from the hosts file. You can remove the Adobe-related entries from the hosts file in two ways:
Automatically repair the hosts file using the Limited Access Repair tool: Repair the hosts file using the Limited Access Repair tool. With this method, you do not have to manually edit the hosts file -- the tool automatically repairs the file.
Reset the hosts file manually: If the issue is not fixed even after you run the Limited Access Repair tool, reset the hosts file manually:
To reset the hosts file on Windows, do the following:
Navigate to C:\WINDOWS\System32\drivers\etc.
Open the hosts file with a text editor such as Notepad.
Check for any Adobe-related entries in the hosts file.
If there are Adobe-related entries in the hosts file, move the file to the desktop, for example by dragging.
Delete the Adobe-related entries from the hosts file. Make sure that you do not delete any other entries.
Save the hosts file that you edited in the previous step. The updated hosts file should not have any Adobe-related entries.
Move the file from desktop to the original location: C:\WINDOWS\System32\drivers\etc. When moving the file, select the Replace option.
To reset the hosts file on macOS, do the following:
To find the hosts file, open Finder and then choose to Go > Go to Folder. In the box, type the following location and then press Return:/private/etc/hosts
If you are unable to locate the file, it means that the hosts file is hidden. Type the following command in terminal to unhide the file, and then repeat Step 1. chflags nohidden /etc/hosts
Open the hosts file using a text editor such as Text Edit.
Check for any Adobe-related entries in the hosts file.
If there are Adobe-related entries in the hosts file, move the file to the desktop, for example by dragging.
Delete the Adobe-related entries from the hosts file. Make sure that you do not delete any other entries.
Save the hosts file that you edited in the previous step.
Move the file from the desktop to the original location: /private/etc/hosts. When moving the file, select the Replace option.

 Error Causes
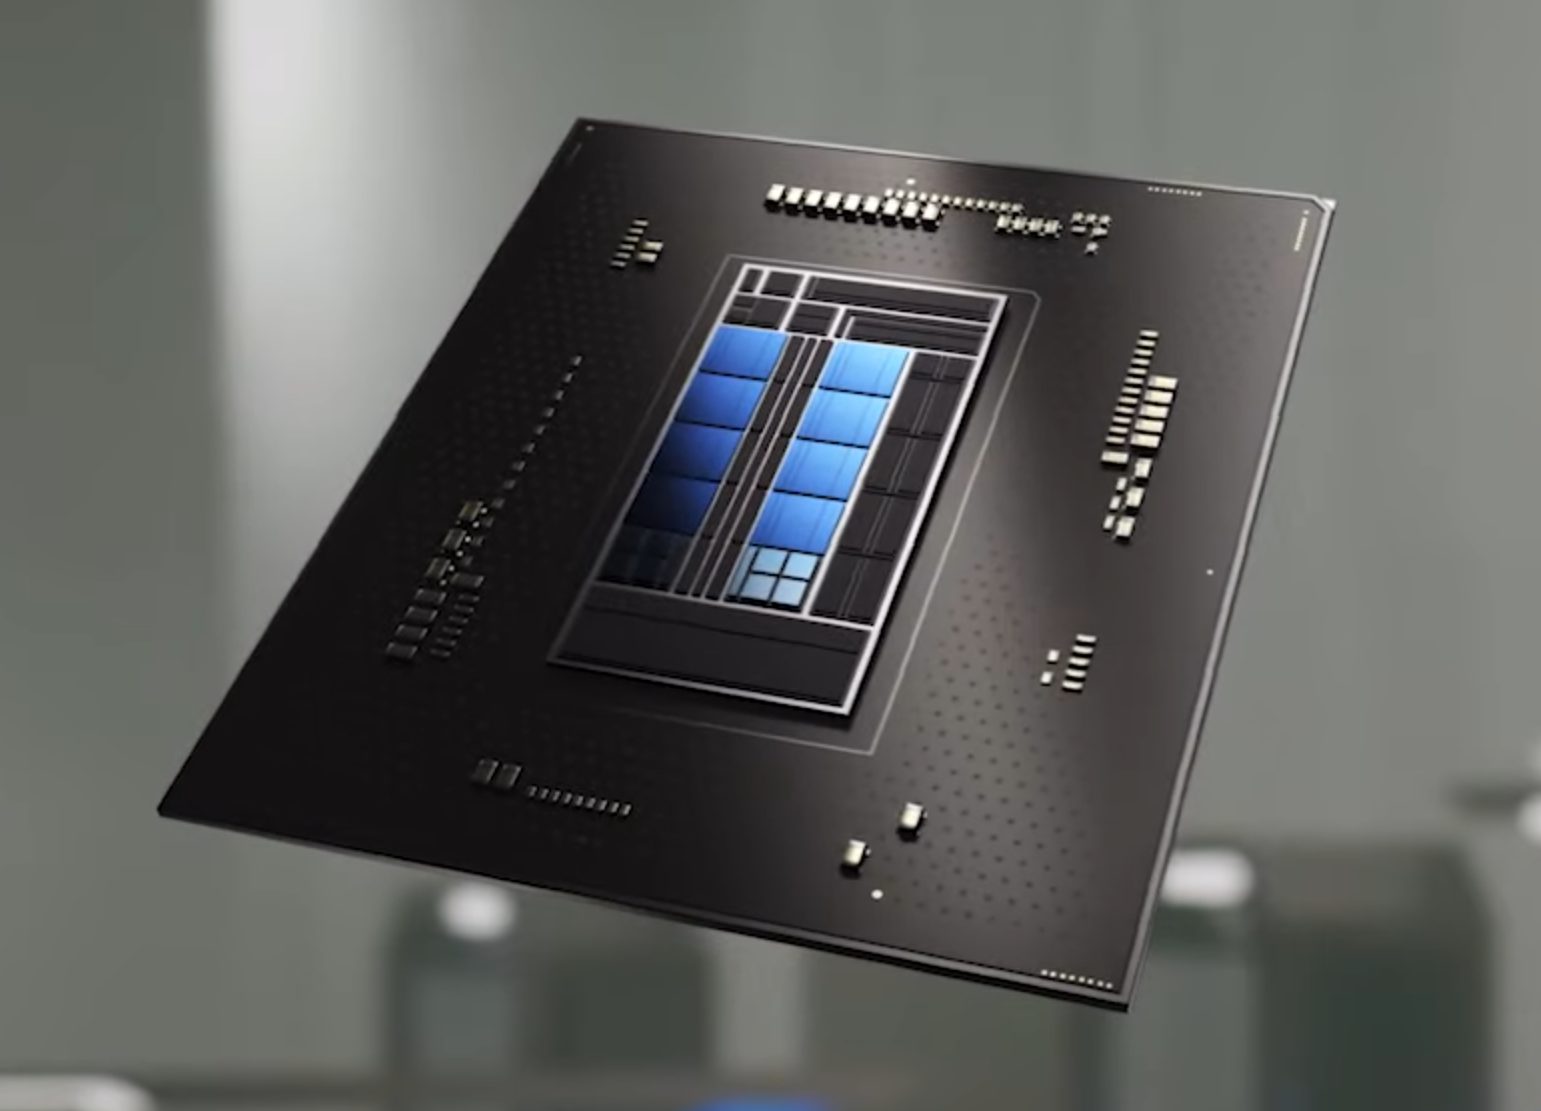 Now before you go on the bandwagon on bashing Intel itself take note that it is not Intel’s fault at all. The issue that arises is mostly due to DRM software and how it works. As you might know or not, Alder Lake has two sets of cores, standard performance cores, and power cores, and with Intel’s Thread Director on-chip right cores will be used for the right tasks, and here lies the issue.
DRM software might detect Thread Director as something suspicious and malicious, and then cut access to the game because of this. Intel, of course, has reached DRM manufacturers and places documentation about how software should be developed with this hybrid technology in mind.
Of course, newer games will be updated if needed and everything will work fine, also games on GOG will work fine because of GOG’s policy of no DRM store but some older ones might be left in limbo. They could work fine but DRM might be triggered and prevent them from loading, usually, game developer itself removes DRM protection after some time but that is not really always the case and there is a chance that some games might simply just not work on Alder Lake CPU only because of DRM protection.
Now before you go on the bandwagon on bashing Intel itself take note that it is not Intel’s fault at all. The issue that arises is mostly due to DRM software and how it works. As you might know or not, Alder Lake has two sets of cores, standard performance cores, and power cores, and with Intel’s Thread Director on-chip right cores will be used for the right tasks, and here lies the issue.
DRM software might detect Thread Director as something suspicious and malicious, and then cut access to the game because of this. Intel, of course, has reached DRM manufacturers and places documentation about how software should be developed with this hybrid technology in mind.
Of course, newer games will be updated if needed and everything will work fine, also games on GOG will work fine because of GOG’s policy of no DRM store but some older ones might be left in limbo. They could work fine but DRM might be triggered and prevent them from loading, usually, game developer itself removes DRM protection after some time but that is not really always the case and there is a chance that some games might simply just not work on Alder Lake CPU only because of DRM protection.


