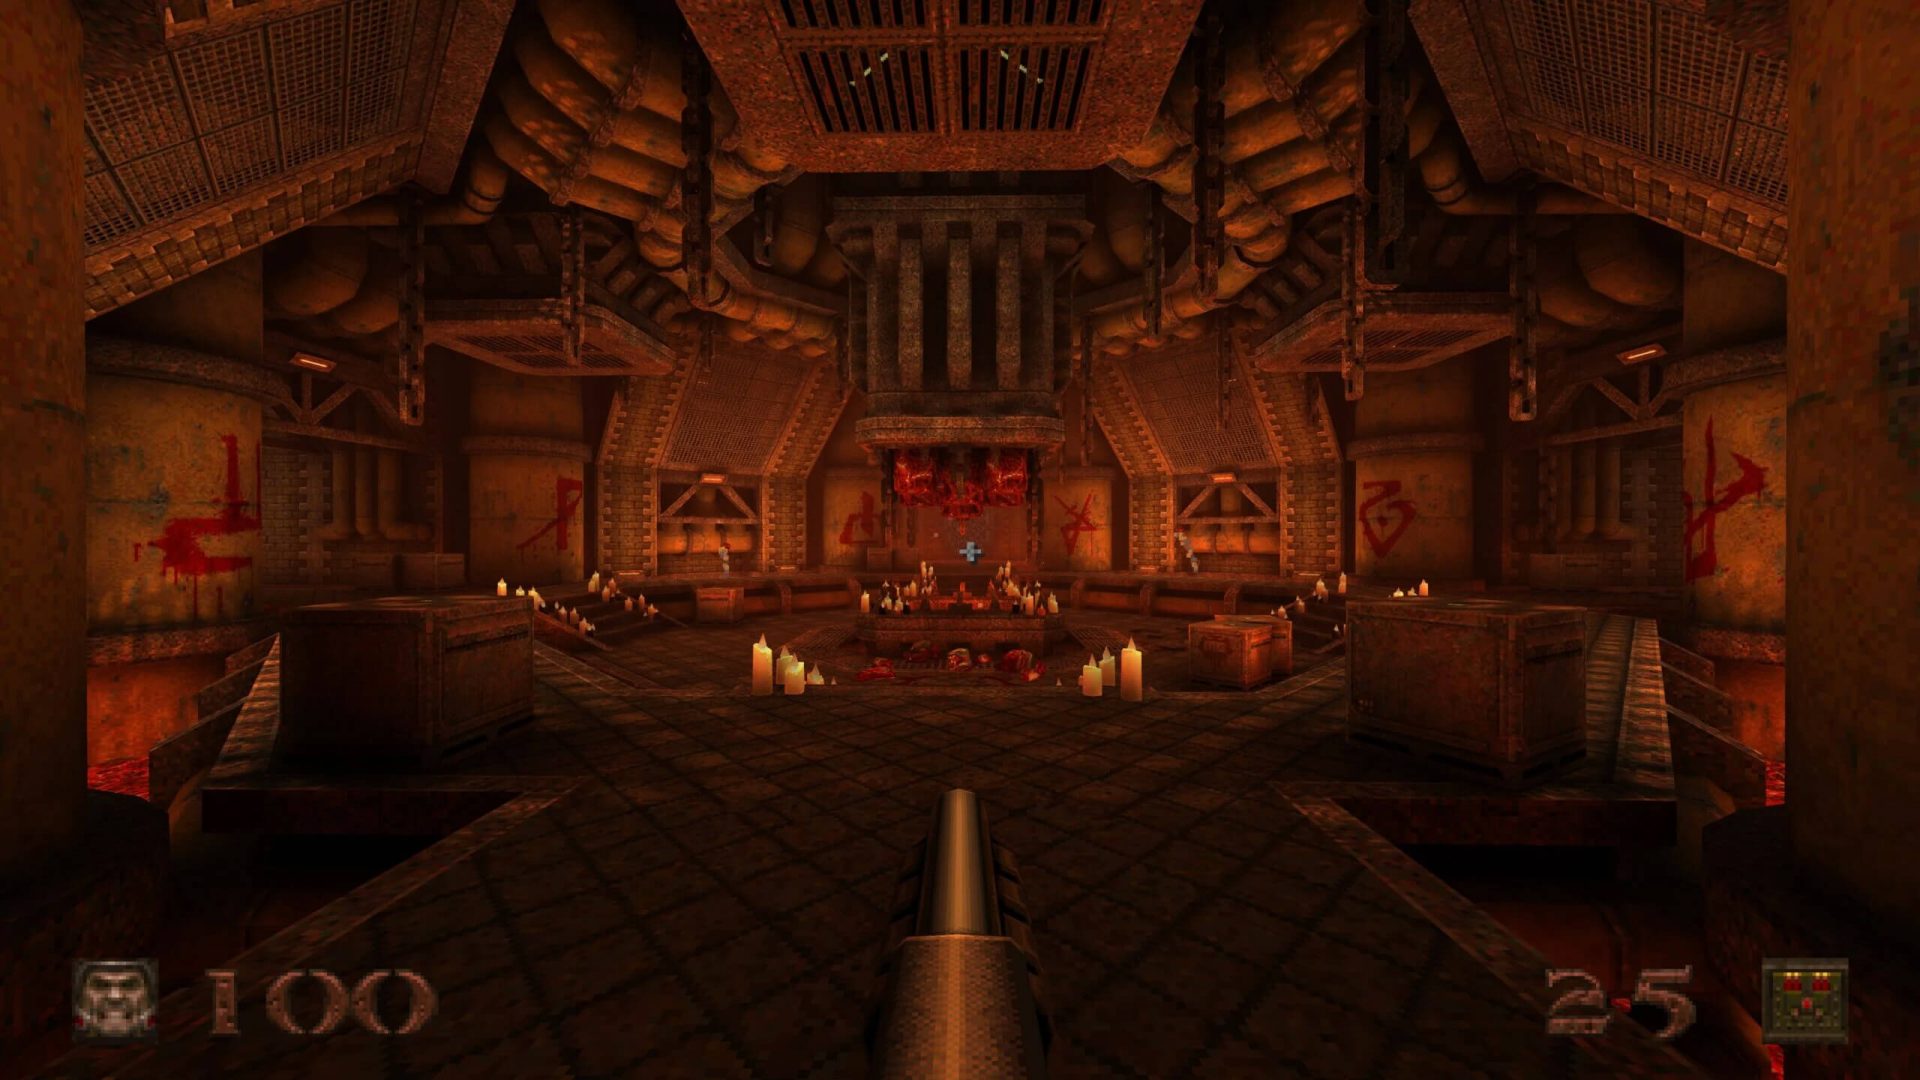
Logo

Guide to Quickly Fixing the Thorconnwndclass

Thorconnwndclass error is an Outlook error that has recently reared its head.

Known to create several problems in the proper functioning of the Outlook application, this error is essentially a constituent of the Norton Antivirus Crash Guard Symantec component. That’s why those using the Norton Antivirus program are most likely to encounter this error.

Solution

Restoro box imageError Causes

When the Thorconnwndclass error occurs, the Outlook closes unexpectedly, users encounter problems while sending or receiving emails and, performance of Outlook is degraded and this happens because issues arise while accessing the PST file. Because of this damaged PST file, stored data is unavailable for access.

Other factors that trigger the Thorconnwndclass error are listed below.

  • Corrupt or damaged Outlook Add-ins
  • Corrupt or damaged Outlook bar
  • Unfinished Outlook installation
  • Faulty settings
  • Thorconnwndclass Norton is being used with Outlook

Regardless of the underlying factors that lead up to the occurrence of this error, it's of paramount importance that workarounds are implemented to ensure desired performance of Outlook in the long run.

Further Information and Manual Repair

While there are several ways to rectify this error, some of the most common ones are listed below as follows.

  • The most effective solution is the PST file repair tools available online. These tools use a complex algorithm and thoroughly scan the PST file and repair it as needed. This resolves the Thorconnwndclass error that one encounters in Outlook. Usually such software have an easy to use interface and can easily be used, without the need for the user to have a strong technical background. Another advantage of using these software available online is that they not only repair the file, but they often play a pivotal role in retrieving inaccessible or lost data.

Some other tips for manually resolving this problem are listed below as follows.

  • First and foremost, disable your Norton Antivirus program if it’s installed on your system. Now, open the Outlook application in Safe Mode. Since this problem may also be triggered by damaged or corrupt Outlook add-ins, it is strongly advised that you disable or uninstall them. Now, you will come across some .dat files. Rename them by changing the existing .dat files to new .dat.
  • Another useful approach is to employ the Inbox Repair tool offered by Outlook.
  • Finally, one can also use the scanpst.exe file to fix any problem or error that resides within the  Outlook application.

Do You Need Help with Your Device?

Our Team of Experts May Help
Troubleshoot.Tech Experts are There for You!
Replace damaged files
Restore performance
Free disk space
Remove Malware
Protects WEB browser
Remove Viruses
Stop PC freezing
GET HELP
Troubleshoot.Tech experts work with all versions of Microsoft Windows including Windows 11, with Android, Mac, and more.

Share this article:

You might also like

An Easy Guide to Resolving Internal Error 2324

Internal Error 2324 - What is it?

Internal Error 2324 occurs when you try to upgrade Firefox on your Windows 7 PC. The program fails to install and run successfully. The following error message is displayed:
‘The installer encountered an unexpected error installing this package. This may indicate a problem with this package. The error code is 2324.’

Solution

Restoro box imageError Causes

This error may occur due to different reasons. These include:
  • Viral infection
  • Bad registry entries (cookies or traces of old version of Firefox program)
  • Other programs running on your PC during Firefox program installation
  • Installation was not performed from the Administrator account
To use the Firefox web browser successfully on your PC, you first need to resolve error 2324 on your system.

Further Information and Manual Repair

To repair error 2324, try the following methods:

Method 1 - Perform a Clean Reinstall.

This means to remove the Firefox program completely from your PC and then reinstall it. To do this, remove the Firefox installation folder saved in one of the locations by default: C:\Program Files\Mozilla Firefox C:\Program Files (x86)\Mozilla Firefox Now download the latest Firefox version on your PC and save the setup file on your computer. After that double click, the downloaded installation file and follow the steps illustrated in the wizard to install Firefox on your PC.

Method 2

Sometimes Firefox installation may fail because of the interference from other programs running on your PC. Therefore, it is advisable to close all programs running in the background when upgrading the Firefox program. You can also disable programs like Logitech QuickCam and Spybot Tea Timer.  These are some of the many programs that are notorious for interfering with Firefox updates.

Method 3 - Scan for viruses to resolve.

Viruses are malicious programs that often enter computers through files downloads from unreliable websites and phishing emails. These programs then hide in your PC and infect it. You may often experience problems during program installation if your PC is infected by viruses. To fix the issue and ensure smooth Firefox program installation on your system, simply run an antivirus. Antivirus scans and detects all viruses in a few minutes. Upon detection, remove them right away to ensure your PC is free from such malicious programs. Now try updating Firefox on your system again. If it is updated smoothly, then the error is resolved.

Method 4

The registry of your system stores all the activities performed on your PC. You may have uninstalled the old Firefox version from the Control Panel but the traces of the uninstalled program may still remain in the registry as bad entries. These bad entries may be causing error 2324 to pop up on your PC. To resolve, you need to remove these entries from the registry. For quick removal, download Restoro. It is a user-friendly PC Fixer with a registry cleaner that scans and removes all obsolete files stored in the registry such as incorrect registry keys, bad entries, cookies, and junk files. Click here to download Restoro.
Read More
Methods To Repair "Error in Loading DLL" on Windows PC's

Error in Loading DLL - What is it?

This is a Dynamic Link Library (DLL) error. It results when a program calls upon a DLL file to perform a certain task and the file fails to load as it is damaged. In a nutshell, DLL is a collection of small programs. DLL is called upon by the executable program (EXE) that is running. The DLL file allows the executable program to run on the system. For example this error may occur when you try to run wizards in Microsoft Office Access such as the Import Wizard, the Report Wizard or the Control Wizard. This error is usually displayed as:
“Error in loading dll” “Object library not registered”

Solution

Restoro box imageError Causes

The error in loading DLL occurs due to numerous reasons. Some of the most common causes include:
  • The DLL or the referenced DLL is not in a directory specified in the path.
  • DLL File is damaged due to hard disk errors and registry corruption
  • Registry key may not exist
  • Malware errors add malicious codes to the application
  • Spyware and adware infections
When you come across error in loading DLL, it is advisable to fix it right away as this error can pose serious threats and lead to your PC malfunctioning. It can corrupt programs and put you at risk of data security and privacy threats.

Further Information and Manual Repair

To resolve this error in loading DLL files, you don’t always have to hire a technician even if you don’t have technical knowledge. This error is quite easy to repair. Here are two ways to resolve error in loading DLL without any professional assistance:

Solution 1: Reinstall the Program

Reinstalling the program can help you resolve this issue. However, when doing this you will first have to uninstall the program and also remove the DLL files from the registry to ensure the update is carried successfully. In addition to this, you will also have to uninstall some programs that share DLL files with the program that you are removing from your system to reinstall it again. Windows will prompt the DLL shared message if it is being shared by other software on your system. Though this is a method used to resolve errors in loading DLL this can be slightly tricky and confusing for many.

Solution 2: Repair the Registry and Remove Malware

This is the best, easiest and most efficient way to repair error in loading DLL files. Did you know 94% of the PC-related errors are triggered by registry corruption and malware infection? To repair the registry and remove malware from your system, you don’t have to download a separate registry cleaner and an anti-virus. Simply download Restoro. Restoro is a cutting-edge and multi-functional repair tool integrated with powerful utilities like a registry cleaner, system optimizer, and an anti-virus. By running Restoro on your computer you can resolve all the underlying causes for error in loading DLL files in seconds. Whether the error results from registry corruption or viral infection, Restoro is the only tool you need to run to repair. It is a safe, efficient and a super functional tool. It has a neat layout, easy navigation, and a user-friendly interface embedded with advanced technology and automated algorithms that scan your entire PC and repair all kinds of PC issues right away.  It can be easily operated by even novice users.

Restoro features

The registry cleaner feature repairs DLL errors and corrupt registry. It removes all the unnecessary and obsolete files that have overloaded and damaged the hard disk. It scans and wipes out such files clearing up the disk space. It fixes mis-configured registry keys and settings thus resolving errors in loading DLL files. If your system is infected by malware it may create Dll.exe malicious files on your system. If these are viruses, they can damage your system. Malicious software like Trojan and spyware are detected and removed with the help of the privacy error detector module integrated into Restoro. Other features that are worth mentioning are its backup feature and outstanding Windows compatibility. With Restoro users can create backup files for data recovery in the event of data loss during repair. Also, it is compatible with all Windows versions. To resolve error in loading DLL files on your system you just have to perform 3 simple steps:
  1. Click here to download Restoro.
  2. Run it on your system to scan for errors in loading DLL files
  3. Click repair to fix the issues.
Read More
Can’t type in Win apps, Search, Cortana, etc.
If you are typing inside the Search bar, Cortana, Taskbar, Windows 10 apps, etc., and then everything seems invisible then read on as this post will guide you in fixing this issue. At first, you might think that something is wrong with your keyboard but it really has nothing to do with it. The problem actually lies with the apps from Microsoft Store. Thus, if you can’t type anything in any of the apps from Microsoft Store in Windows 10, refer to the options given below to fix them.

Option 1 – Ensure that ctfmon.exe is running

Ctfmon.exe is a Microsoft process in Windows 10 that controls the Alternative User Input as well as the Office Language bar. In other words, it enables end-users to control the computer using on-screen keyboard inputs, speech, and even pen for various languages. It would be better if you launch the program once by going to the C:/Windows/system32 folder. Doing so will ensure that whatever API is needed for the keyboard typing to work properly again. You also have to make sure that its startup status is not disabled. In addition, you can also try the following steps, alternatively.
  • Open the Task Scheduler.
  • Then go to Microsoft > Windows > TextServicesFramework.
  • And on the MsCtfMonitor, right-click and enable the task.
  • Now restart your computer.
This will ensure that all the text boxes will start to work again. And if the task MsCtfMonitor is missing from the list of tasks, you can import it with the XML file from basics.net. Then download and create a task to run it each time you log in to your PC.

Option 2 – Use the Windows Store Apps Troubleshooter

You might also try running the Windows Store Apps Troubleshooter as it can help in resolving issues with the Windows Store apps. This built-in tool can resolve most of the app-related problems. To use it, go to Settings > Update & Security > Troubleshooting > Windows Store Apps and from there, click the start the troubleshooter button. The Windows Store Apps Troubleshooter will scan the computer for any issues with the Windows store apps and will automatically fix them if it finds any.

Option 3 – Re-register all the Windows 10 UWP apps using PowerShell

  • First, make sure to close all the running applications on your computer.
  • Next, in the Start search, type in PowerShell and right click on the result, and select the “Run as administrator” option.
  • After that, type the following commands to re-register the Windows 10 apps. Make sure to hit Enter on each line:
    • reg delete "HKCUSoftwareMicrosoftWindows NTCurrentVersionTileDataModelMigrationTileStore" /va /f
    • get-appxpackage -packageType bundle |% {add-appxpackage -register -disabledevelopmentmode ($_.installlocation + "appxmetadataappxbundlemanifest.xml")}
    • $bundlefamilies = (get-appxpackage -packagetype Bundle).packagefamilyname
    • get-appxpackage -packagetype main |? {-not ($bundlefamilies -contains $_.packagefamilyname)} |% {add-appxpackage -register -disabledevelopmentmode ($_.installlocation + "appxmanifest.xml")}

Option 4 – Try to run the DISM tool

You can also run the DISM Tool as it helps in repairing the Windows System Image as well as the Windows Component Store in Windows 10. Using this built-in tool, you have various options such as the “/ScanHealth”, “/CheckHealth”, and “/RestoreHealth” which could help in fixing the problem.
  • Open the Command Prompt with admin privileges.
  • Then type in the following commands and make sure to hit Enter right after you type each one of them:
    • Dism /Online /Cleanup-Image /CheckHealth
    • Dism /Online /Cleanup-Image /ScanHealth
    • exe /Online /Cleanup-image /Restorehealth
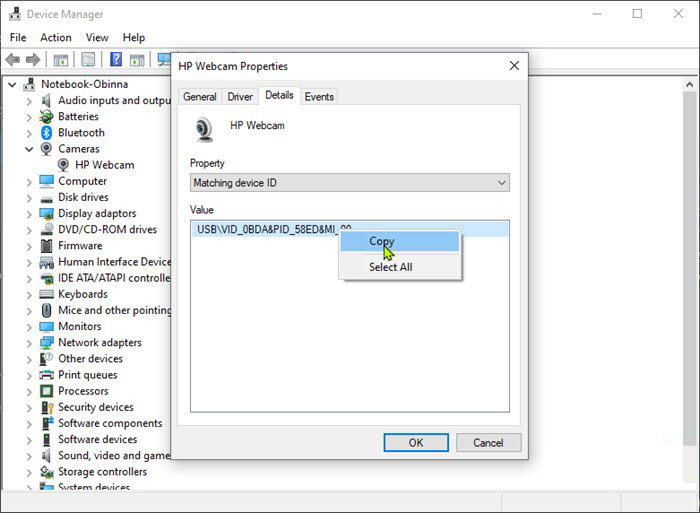
  • Do not close the window if the process takes a while as it will probably take a few minutes to finish.

Option 5 – Run the System File Checker Scan

System File Checker or SFC is a built-in command utility that helps in restoring corrupted files as well as missing files. It replaces bad and corrupted system files to good system files. To run the SFC command, follow the steps given below.
  • Tap Win + R to launch Run.
  • Type in cmd in the field and tap Enter.
  • After opening Command Prompt, type in sfc /scannow
The command will start a system scan which will take a few whiles before it finishes. Once it’s done, you could get the following results:
  1. Windows Resource Protection did not find any integrity violations.
  2. Windows Resource Protection found corrupt files and successfully repaired them.
  3. Windows Resource Protection found corrupt files but was unable to fix some of them.
  • Restart your PC.
Read More
How to Fix Error Code 0x8007007B on Your PC

Error Code 0x8007007B (Code 0x8007007B) – What is it?

Error code 0x8007007B (Code 0x8007007B) is an error that occurs when you attempt to activate Windows 10, as well as Windows Server 2008, Windows Vista, Windows 7, Windows 8, or Windows Server 2012.

Common symptoms include:

  • You will see an error message like this: “Error 0x8007007B 'The filename, directory name, or volume label syntax is incorrect”.
  • If you are using volume-licensed media to install: Windows 7, Windows 8, Windows Vista Business, Windows Vista Enterprise, Windows Server 2008 R2, Windows Server 2008, Windows Server 2012, Windows 10.
  • Your computer is not connecting the activation wizard to a Key Management Service (KMS) host computer.

Solution

Restoro box imageFurther Information and Manual Repair

Error Code 0x8007007B usually occurs when a product key has been activated too many times. Blocking activation aids in avoiding abuse of the key. If abuse of the key is not the case, it is possible to get the key reset, or you may receive a new key altogether. When you are not sure that you can complete these methods yourself, as they do contain advanced steps, it would be wise to consult a computer repair technician to avoid making the problem any worse.

Generally, the solution can be simple; it is just dependent on how comfortable you are with getting technical in your computer. Volume licensed media means that the media has a preset number of times that it is allowed to be activated. This helps to avoid misuse of the product. Some people install the Windows 10 program multiple times on their computer if they are software developers or do certain types of software testing. It is important to know the cause in order to effectively find the solution.

Method One:

  1. From the desktop screen, press the Windows key and S, type “Command Prompt”. Then, right-click on Command Prompt in the results. Select Run as Administrator.  Click Yes when asked about requesting permission.
  2. In the Command Prompt box, enter the command: slmgr.vbs -ipk xxxxx-xxxxx-xxxxx-xxxxx-xxxxx
  3. The x's represent the product key. Replace these with your unique product key.
  4. Type in the following command into the “Command Prompt” window: slmgr.vbs -ato
  5. Click Enter
  6. Restart your computer and try to activate windows again. It should not show the error code anymore.

Method Two:

  1. While on the desktop, press the Windows key and R.
  2. A window saying Run should open.
  3. Type in the following command: Slui 3
  4. Press ENTER and a window should appear.
  5. This window asks for you to enter the operating system activation product key.
  6. Enter this key in the space provided.
  7. After entering this, click Activate.
  8. Restart your computer now.
  9. Check for activation. The Error code should be gone now.

Method Three:

  1. Open the Command Prompt with access as administrator just as in Method One, and enter the following command: sfc /scannow
  2. The command will complete the tasks. This will take some time so just let the computer do its thing and work. Let the sfc finish the scan.
  3. When the scan is complete, restart the computer.
  4. Check for the activation. The error code should be gone at this point.
  5. If it is gone, revisit Method One or move on the Method Four.

Method Four:

Call the Microsoft Support Team and explain the problem in as much detail as you can give. Give the team the error code 0x8007007B and ask to have a different product key. When they give you the new product key, repeat Method 2. The Microsoft Support Team will either change your product key, or they will reset your current product key so that it can be used for activation again.

Read More
How to turn off Live Photo on iPhone

Apple introduced the Live Photo feature way with iPhone 6S in their iOS9. Live Photo idea was that each time you take a photo, your phone will capture a few seconds of video along with sound and all of that is sent when you share your photo. This of course can sometimes be really bad when some not wanted audio gets recorded in the background.

live photo

Since the feature was introduced it has been set as the default option when taking pictures so each time you snap one you just capture a small amount of video and audio along. Good thing is that this feature can be turned off and the even better news is that you can edit your old photos to remove back video and audio.

How to share only photo

You can keep your Live Photos but share only a single still typical photo if you wish. Go to the photos app on your phone and select the photo you wish to share. Press the Share button on the bottom left part of the screen and once the Share menu appears tap on the Live button in the upper left corner of the selected photo. The button should turn grey and become slashed and now you can share only still photo. This is only temporary for this one specific share so next time you want to do this you will have to go through the process again.

How to disable Live Photo

If you are not happy with the previous solution and really do not want to turn off the Live feature each time you want to share a photo or you just simply do not want the feature at all there is way to turn if off for good. Take note that you can temporarily not use this feature just by opening the camera, switching to photo mode, and then tapping on the Live photo button on the toolbar that looks like three circles one inside another. This will temporarily turn the Live Photo feature for this session but next time when you open the camera by default it will be turned on again. This is a good approach if you want the feature but sometimes you just want not to use it.

In order to turn it off completely go to the settings of your phone and go to Camera and then preserve settings. inside the preserve setting turn the switch Live Photo to ON position, now go-to camera and again click on the live photo button to turn it off but this time setting will be saved and next time you open the camera it will not be ON.

Editing old Live Photos

As stated before you can edit your old pictures in order to make them stills. You can edit them to remove audio only but keep the video part, or you can completely remove everything and convert them into typical still images.

In order to only remove audio from your Live Photos go to pictures and select one that you wish to change, click on edit, and inside edit tap on the Live Photo icon (three circles). Next tap on the audio icon located in the top left corner of your screen and it will change into the mute icon. Click on done and you are finished.

To completely remove the Live photo go to Photos, select picture, click on edit and select the live photo button again. This time tap and hold the Live button next to the sound until it turns gray with a strike through it. Click on done and you are finished.

Read More
InternetSpeedTracker Removal Guide

InternetSpeedTracker is a browser extension developed by MindSpark Inc. This browser add-on offer uses tips on how to boost their “bad” internet connection speed. It displays false internet speed in order to get you to open the sponsored links listed in the toolbar.

This extension also hijacks your browser home page and replaces your default search engine with MyWay. While browsing the internet you will see additional unwanted sponsored ads and links throughout your search results, and sometimes even pop-up ads might appear. While active this extension gathers personal information, website visits, links, and clicks and uses this data to serve ads.

InternetSpeedTracker has been flagged as a Browser Hijacker by several anti-virus scanners, and due to its data mining behavior, it is not recommended to keep it on your computer, especially because it gives false data about your internet speed.

About Browser Hijackers

Browser hijack is a very common type of online fraud where your internet browser settings are modified to allow it to carry out things you don’t intend. They’re created to disrupt browser functions for several purposes. It redirects you to the sponsored sites and inserts ads on the web browser which helps its developer generate earnings. Nevertheless, it’s not that naive. Your web safety is jeopardized and it is also extremely irritating. They don’t just ruin your web browsers, but browser hijackers could also modify the computer registry, making your PC vulnerable to other attacks.

How one can know if your web browser is hijacked

Signs that an internet browser is a hi-jacked include: the browser’s home-page is modified; you find yourself regularly directed to a different site than the one you meant; the default search engine is changed; unwanted new toolbars are added to your web browser; never-ending pop-up ads show up and/or your browser pop-up blocker is disabled; your web browser starts running sluggishly or displays frequent glitches; You simply can’t access specific sites, particularly anti-virus sites.

How they infect PCs

A browser hijacker can be installed on your computer when you check out an infected website, click an e-mail attachment, or download something from a file-sharing website. They are usually included with toolbars, BHO, add-ons, plugins, or browser extensions. A browser hijacker could also be installed as a part of freeware, shareware, demoware, and fake programs. A good example of a notorious browser hijacker is the most recent Chinese malware known as “Fireball”, which has attacked 250 million computer systems worldwide. It acts as a hijacker but can be turned into a fully functioning malware downloader afterward. Browser hijackers could affect the user’s browsing experience greatly, keep track of the websites visited by users and steal private information, cause difficulty in connecting to the internet, and ultimately create stability issues, making software programs and systems freeze.

How to repair a browser hijack

Some hijackers could be removed by uninstalling the freeware they came with or by eliminating any extension you have recently added to your system. But, many hijackers are hard to get rid of manually. No matter how much you attempt to eliminate it, it can keep coming back over and over again. And there’s no denying the fact that the manual fixes and removal methods can be quite a complicated job for a rookie PC user. Furthermore, there are several risks connected with fiddling around with the system registry files.

What you can do if Virus Stops You From Downloading Anything?

Malware could cause all kinds of damage after they invade your system, ranging from stealing your private information to deleting data files on your computer system. Certain malware variants modify web browser settings by adding a proxy server or modify the computer’s DNS configuration settings. In such cases, you’ll be unable to visit some or all of the websites, and thus not able to download or install the necessary security software to remove the infection. If you’re reading this article, chances are you’re stuck with a virus infection that is preventing you to download or install the Safebytes Anti-Malware program on your PC. There are some fixes you can try to get around with this issue.

Install antivirus in Safe Mode with Networking

If the malware is set to load at Windows startup, then booting in Safe Mode should prevent it. Since only the minimal programs and services start-up in safe mode, there are rarely any reasons for issues to take place. Listed below are the steps you should follow to start your computer into the Safe Mode of your Windows XP, Vista, or 7 computers (visit Microsoft site for instructions on Windows 8 and 10 PCs). 1) At power on/start-up, tap the F8 key in one-second intervals. This will bring up the Advanced Boot Options menu. 2) Select Safe Mode with Networking with arrow keys and hit Enter. 3) As soon as this mode loads, you will have an internet connection. Now, utilize your web browser normally and navigate to https://safebytes.com/products/anti-malware/ to download and install Safebytes Anti-Malware. 4) Right after the software program is installed, let the diagnostic scan run to remove trojans and other malware automatically.

Switch to an alternate web browser

Web-based viruses can be environment-specific, aiming for a particular internet browser or attacking specific versions of the browser. The best solution to avoid this issue is to opt for a browser that is known for its security features. Firefox comprises built-in Phishing and Malware Protection to keep you safe online.

Run anti-virus from a pen drive

Another technique is to download and transfer an anti-malware application from a clean PC to run a scan on the affected computer. Follow these steps to use a flash drive to clean your infected system. 1) Download Safebytes Anti-Malware or Microsoft Windows Defender Offline onto a clean PC. 2) Insert the pen drive on the same system. 3) Double-click the Setup icon of the anti-malware software package to run the Installation Wizard. 4) Pick a USB flash drive as the place when the wizard asks you exactly where you would like to install the application. Follow the instructions on the computer screen to complete the installation process. 5) Now, transfer the pen drive to the infected computer. 6) Run the Safebytes Anti-malware directly from the thumb drive by double-clicking the icon. 7) Click the “Scan” button to run a full system scan and remove malware automatically.

Let's Talk About SafeBytes Anti-Malware!

Want to install the best anti-malware application for your laptop or computer? There are many applications available in the market which comes in free and paid versions for Windows computers. Some of them are great and some are scamware applications that pretend as legitimate anti-malware programs waiting to wreak havoc on your PC. When looking for an antimalware program, pick one which gives reliable, efficient, and total protection against all known viruses and malware. One of the recommended tools by industry leaders is SafeBytes Anti-Malware, the most dependable program for Windows computers. SafeBytes anti-malware is a reliable tool that not only secures your system permanently but is also quite user-friendly for people of all ability levels. This application could easily identify, remove, and protect your personal computer from the most advanced malware attacks such as spyware, adware, trojan horses, ransomware, worms, PUPs, and other possibly damaging software applications. SafeBytes has excellent features when compared to other anti-malware programs. Below are a few of the great ones: World-class AntiMalware Protection: Built upon a greatly acclaimed anti-virus engine, this malware removal application can identify and remove numerous obstinate malware threats such as browser hijackers, PUPs, and ransomware that other common antivirus applications will miss. Live Protection: SafeBytes gives real-time active supervision and protection from all known viruses and malware. They’re very effective in screening and eliminating different threats because they are regularly improved with new updates and alerts. Web Security: SafeBytes provides an instant safety rating on the web pages you are going to visit, automatically blocking risky sites and making sure that you are certain of your safety while browsing the internet. Very Low CPU and Memory Usage: SafeBytes provides complete protection from online threats at a fraction of the CPU load due to its enhanced detection engine and algorithms. Premium Support: SafeBytes provides 24/7 technical support, automatic maintenance, and updates for the best user experience.

Technical Details and Manual Removal (Advanced Users)

If you wish to manually remove InternetSpeedTracker without the use of an automated tool, it may be possible to do so by removing the program from the Windows Add/Remove Programs menu, or in cases of browser extensions, going to the browsers AddOn/Extension manager and removing it. You will likely also want to reset your browser. To ensure the complete removal, manually check your hard drive and registry for all of the following and remove or reset the values accordingly. Please note that this is for advanced users only and may be difficult, with incorrect file removal causing additional PC errors. In addition, some malware is capable of replicating or preventing deletion. Doing this in Safe Mode is advised.

The following files, folders, and registry entries are created or modified by InternetSpeedTracker

Files: C:DOCUME1USER1LOCALS1Tempnsk1.tmp C:b418207fbd4b466002312b66521c390947518e9a0d787e4e059af0505f607f3e C:DOCUME1USER1LOCALS1Tempnsk2.tmp C:DOCUME1USER1LOCALS1Tempnsk2.tmpnsDialogs.dll C:DOCUME1USER1LOCALS1Tempnsk2.tmpSystem.dll C:DOCUME1USER1LOCALS1Tempnsk2.tmpnsDialogs.dll C:DOCUME1USER1LOCALS1Tempnsk2.tmpSystem.dll C:Program FilesInternetSpeedTracker_9tEIInstallr.binNP9tEISb.dl_ C:PROGRA1INTERN2Installr.binNP9tEISb.dl_ C:Program FilesInternetSpeedTracker_9tEIInstallr.binNP9tEISb.dll C:Program FilesInternetSpeedTracker_9tEIInstallr.bintEIPlug.dl_ C:PROGRA1INTERN2Installr.bintEIPlug.dl_ C:Program FilesInternetSpeedTracker_9tEIInstallr.bintEIPlug.dll C:Program FilesInternetSpeedTracker_9tEIInstallr.bintEZSETP.dl_ C:PROGRA1INTERN2Installr.bintEZSETP.dl_ C:Program FilesInternetSpeedTracker_9tEIInstallr.bintEZSETP.dll C:WINDOWSsystem32rundll32.exe C:Program FilesInternetSpeedTracker_9tEIInstallr.binNP9tEISb.dl_ C:Program FilesInternetSpeedTracker_9tEIInstallr.binNP9tEISb.dll C:Program FilesInternetSpeedTracker_9tEIInstallr.bintEIPlug.dl_ C:Program FilesInternetSpeedTracker_9tEIInstallr.bintEIPlug.dll C:Program FilesInternetSpeedTracker_9tEIInstallr.bintEZSETP.dl_ C:Program FilesInternetSpeedTracker_9tEIInstallr.bintEZSETP.dll Registry: HKLMSOFTWAREClassesInternetSpeedTracker_9t.HTMLMenu HKLMSOFTWAREClassesInternetSpeedTracker_9t.HTMLPanel HKLMSOFTWAREClassesInternetSpeedTracker_9t.SettingsPlugin HKLMSOFTWAREClassesInternetSpeedTracker_9t.ToolbarProtector HKLMSOFTWAREWow6432NodeMicrosoftWindowsCurrentVersionexplorerBrowser Helper Objects9e28b297-11d4-4293-aa6f-558658ee66ae HKLMSOFTWAREWow6432NodeMicrosoftWindowsCurrentVersionexplorerBrowser Helper Objectscc28794a-99d4-4b1b-bccf-b065ce5f9feb HKLMSOFTWAREWow6432NodeInternetSpeedTracker_9t HKLMSYSTEMControlSet001servicesInternetSpeedTracker_9tService HKLMSYSTEMCurrentControlSetservicesInternetSpeedTracker_9tService HKUS-1-5-21-1633355155-4214755471-2067616181-1000SoftwareAppDataLowSoftwareInternetSpeedTracker_9t HKLMSOFTWAREWow6432NodeMicrosoftWindowsCurrentVersionRunInternet Speed Tracker EPM Support
Read More
Find out bottlenecks in your PC easily
Building a custom PC is a great feeling but it can sometimes not be ideal and we are not talking about breaking or losing parts. What we mean is that choosing the right components can be sometimes a difficult task. Of course, picking a PC case can have its issues, choosing the right power supply can be tricky but pairing all components together, especially CPU and GPU can be tricky. bottlenecksBuilders with no depth knowledge and experience can sometimes choose improper CPU or GPU, picking one of them to be much more powerful than another thus not using it to its full potential because another component cannot handle stuff at the same speed. In order to not be trumped by this kind of stuff, there is a website that is completely free and you do not even need to be registered in order to use it. Bottlenet calculator link here What is even better, once you input your components you will get advice on what to change in order to tweak the system a little more to avoid bottlenecks even more. It is a very useful tool and we are advising you to use it in order to save money but not throwing it on some component that will be half used.
Read More
Enable or Disable Status Bar in File Explorer
As you know, the Windows File Explorer is quite a responsive program and contains tons of features. It allows you to do various customizations by changing Settings or changing the value of a Registry key or Group Policy modification. Either way, you will be guided on how you can enable or disable the Status Bar in File Explorer on your Windows 10 computer. The Status Bar is located at the bottom of the File Explorer and shows you how many items are inside the folder and how many items you’ve selected. In addition, it also shows you information about each item and can display items using large thumbnails with just a single click. In order to enable or disable the Status Bar in File Explorer, you can use the two given options below as reference. You can either use the Folder Options or the Registry Editor.

Option 1 – Enable or Disable Status Bar via Folder Options

  • Tap the Win + E keys on your keyboard to open File Explorer.
  • Then tap the Alt + F keys and click on Options.
  • From there, make sure that you are in the View tab and look for the “Show Status Bar” option in the list that gets populated.
  • After that, check if the Show Status Bar option is enabled or disabled. It is supposed to be enabled by default so if it is enabled and you want to disable it, just simply uncheck its checkbox otherwise, leave it as it is.
  • Now click on Apply and then OK to save the changes made

Option 2 – Enable or Disable Status Bar via Registry Editor

  • Tap the Win + R keys to open the Run dialog box.
  • Then type “Regedit” in the field and hit Enter to pull up Registry Editor.
  • Next, navigate to this registry key: HKEY_CURRENT_USERSoftwareMicrosoftWindowsCurrentVersionExplorerAdvanced
  • Afterward right-click on Advanced and select New > DWORD (32-bit) Value and then input “ShowStatusBar as the name of the newly created DWORD.
  • Now double click on the new DWORD and change its value to “0” if you want to disable Status Bar and “1” if you want to enable it.
  • Then exit the Registry Editor and restart your computer to apply the changes made.
Read More
How to Fix Windows 10 Error Code 0x80070570

Error Code 0x80070570 - What is it?

Error Code 0x80070570 is a common Windows 10 error code that generally is seen by users who are attempting to install a new version of the operating system. While it is most often associated with Windows 10, variations on this same error code have been present in previous versions of the operating system, going all the way back to Windows 7.

Common symptoms include:

  • Inability to run through the installation process to completion when attempting to install a new version of the operating system
  • Error message regarding corrupt or missing files
While it is frustrating to encounter an error like Error Code 0x80070570 as you try to install a new operating system version on your device, there are several methods that can be used to try to resolve the issue. If you do not feel like you have the skill or knowledge necessary to successfully apply the steps below, be sure to get in touch with a trusted computer repair technician that is competent in the repair of Windows 10 errors.

Solution

Restoro box imageError Causes

In some cases, Error Code 0x80070570 arises erroneously when the system isn’t able to find a particular file that it needs. Other times, it happens when there is a conflict with the antivirus software that you are running and the installation software. Finally, there may be a faulty source of RAM in your computer that needs to be removed before the installation can be completed.

Regardless of what you believe to be the cause behind the error code, there are at least two different methods that you can use to try to resolve Error Code 0x80070570 on your device. The first is fairly simple and easy to follow, while the second requires a little bit more knowledge of your hardware in order to complete it successfully.

Further Information and Manual Repair

There are two common ways that users can attempt to get around Error Code 0x80070570 on their devices. Each requires a little more skill and technical knowledge than the last. If you don’t feel like you have the skill, time, or ability to invest in the methods below, be sure to get in touch with a Windows repair technician who can help you to complete the necessary steps in the right ways.

Here are the best ways to attempt to resolve Error Code 0x80070570 on your Windows device:

Method One:  Reattempt Installation

In some cases, when Error Code 0x80070570 appears on your computer, you can simply click on the OK button and then go back to the screen immediately proceeding where your installation has left off, choosing to restart the process of installation. For some users, repeating this method at least four times has allowed them to bypass the error without undertaking more serious and time-consuming methods to resolve the issue at hand.

Method Two:  Check Your Various Sources of RAM

If you have more than one source of RAM in your computer, first remove one of the sources, then re-attempt installation. If you are still encountering Error Code 0x80070570 after removing one of the sources, continue to remove each until you are down to a single source, then trade that last source for one of the ones that have been pulled.

If you have a bad source of RAM, this can help you to figure out which input is causing the error to appear and to address the problem appropriately. Once you have determined which specific source is causing the problem, you can reboot your computer and attempt to run the installation process one more time.

If your RAM sources are not specifically causing the issue, you may still need to run diagnostics tests on your hardware to identify the source of the problem at hand.

Method Three: Use An Automated Tool

If you wish to always have at your disposal a utility tool to fix these Windows 10 and other related issues when they do arise, download and install a powerful automated tool.

Read More
The PrintNightmare vulnerability finally fixed
PrintNightmare vulnerability has been a struggling issue for Microsoft in the past weeks, each time it seems to be addressed and fixed something new popped up and it still had issues. Microsoft finally addressed the issue but with a price. The default behavior of Point and Print is changed. From this fix onward, the Point and Print driver installation and update behavior will require administrator privileges, which should prevent the exploit to the Windows Print Spooler that could be used by malicious individuals to gain administrative privileges in Windows. The drawback of this fix from Microsoft is that non-elevated users may have difficulty adding or updating printers. Microsoft feels that the security risks caused by PrintNightmare are worth the tradeoff, though. If you really want to let non-elevated users add printers, you can follow the instructions in this Microsoft Support article to disable this mitigation with a registry key. However, doing so will expose you to this known vulnerability and isn’t recommend.
Read More
1 2 3 171
Logo
Copyright © 2023, ErrorTools. All Rights Reserved
Trademark: Microsoft Windows logos are registered trademarks of Microsoft. Disclaimer: ErrorTools.com is not affiliated with Microsoft, nor claims direct affiliation.
The information on this page is provided for information purposes only.
DMCA.com Protection Status