Error Code 1627 is a type of HP printer installation error. It usually occurs when you try to install an HP printer on your PC. The error code 1627 pop-up hampers your ability to install an HP printer successfully.
This error code is usually displayed in the following format:
Installation Error: Call to Driver Package Install returned error 1627 for package C:ProgramFilersHPHP deskjet 2510 seriesDriver storePipelinehpvplog.inf
Solution
Error Causes
Like every device installed on your PC, printers also need software called drivers to function on Windows Operating System.
Although Windows supports several computer devices since many drivers are already installed in Windows but there are some devices that do need additional software to get started and operate smoothly on Windows such as Hewlett-Packard HP printers.
Installing a Hewlett-Packard printer driver is slightly more time-consuming and complex than any other driver. Causes for HP printer installation usually include:
Driver issues
Bad Registry Keys
Though this is not a fatal error, it is still advisable to fix it right away to avoid inconvenience.
Further Information and Manual Repair
To resolve this error on your PC, you don’t necessarily have to hire a professional and spend hundreds of dollars in repair. The good news is that HP Installation error code 1627 is quite easy to fix. Here are some of the best and proven DIY methods to resolve error code 1627:
Method 1 - Uninstall and then Reinstall HP Printer Driver
HP printer installation errors can occur due to driver issues. If the driver is not installed properly or is outdated, you will never be able to install an HP printer on your PC successfully.
Therefore to solve this issue, first, make sure the driver used for printer installation is up to date. If it is outdated, then update it. On the other hand, if the printer driver is up to date but not installed properly then reinstall it. In both situations, first, you must uninstall the driver.
Uninstalling the previous installation will help you clean the system. Once the system is clean you can reinstall the HP drivers again.
To uninstall, go to the start menu and then the control panel. Now go to the Add/Remove program option and uninstall the driver. To activate changes, reboot your PC. Now install the updated version again.
Method 2 - Clean the Registry
If the printer software installation fails while updating, then this means the removal of the failed software was not successful. It may not show up in the Control Panel program list.
This means the entries of the failed software are still present in the registry of your PC. In this scenario, you need to clean the registry and remove the bad entries from there to successfully install the HP printer driver on your system.
Though this can be done manually this can be both time-consuming and slightly challenging if you are not technically sound. Therefore, to remove bad entries from the registry in seconds in just a few clicks download Restoro.
This is a user-friendly PC Repair Tool deployed with a powerful registry cleaner. The registry cleaner scans your entire PC, detects and removes all bad entries and files corrupting the registry right away.
Once the registry is cleaned, you can try installing the printer driver again. This is most likely to resolve the issue.
As was pointed out, you might need to reinstall the printer driver again. Using DriverFIX, you'll be able to automatically update your computer system and install the drivers your computer needs to operate smoothly.
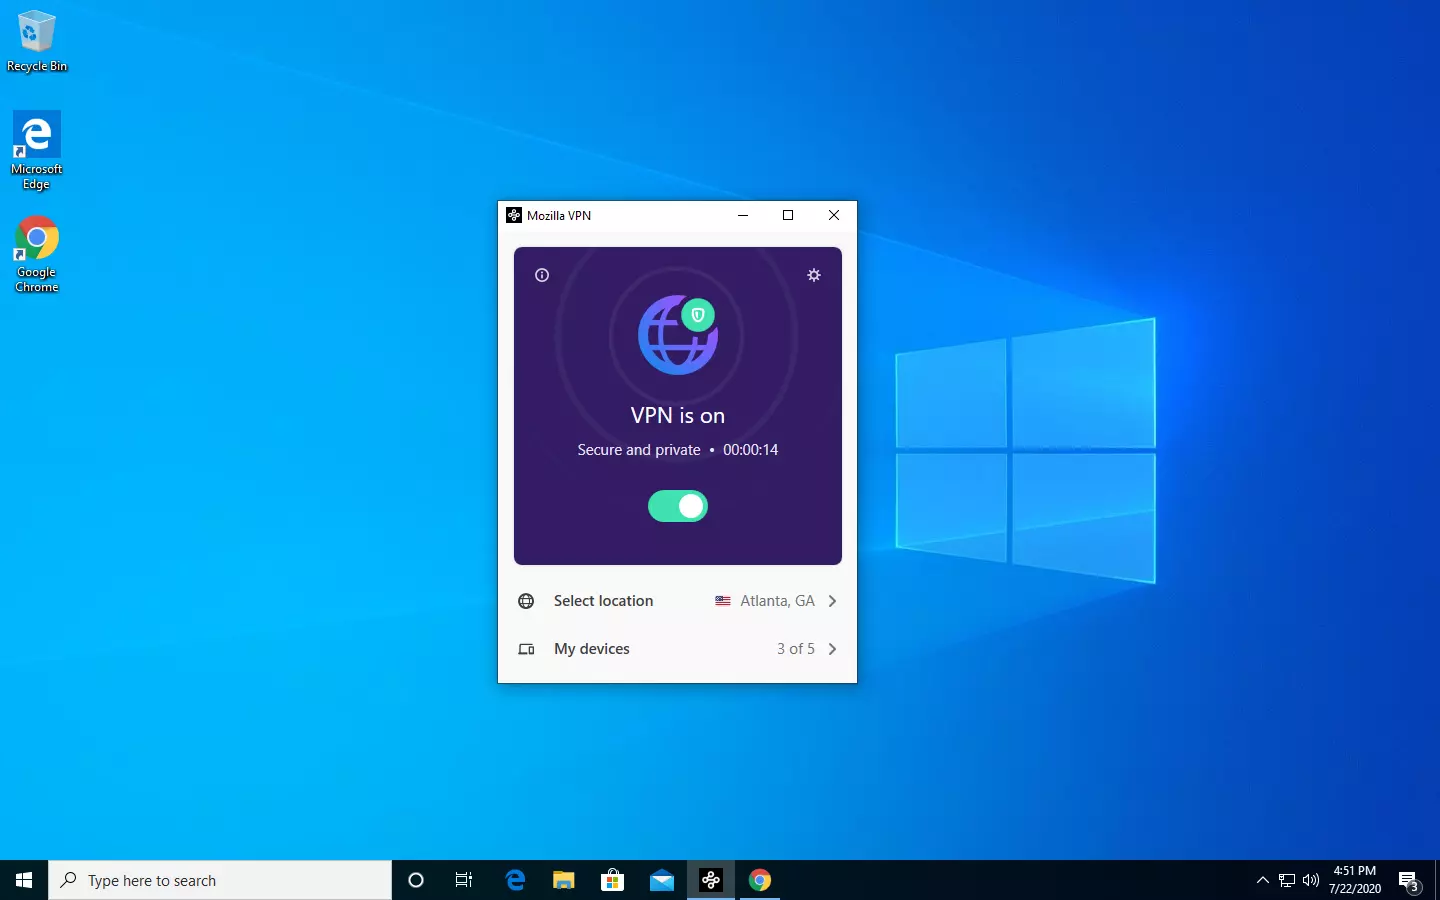
The new thing from Mozilla is not a browser, it is a VPN!
Besides Firefox, Mozilla offers now Firefox Relay, an app helping you to mask your email and phone number, and a new Mozilla VPN.
Mozilla has recently announced a new subscription model that will let you use all products together for $6.99 per month. Although this is a little more expensive than the competition that goes around for $5 per month note that with this subscription you are having access to all services, not just VPN.
VPN will not only hide your IP address but will also make sure websites cannot access your real location and it encrypts all of your network activity. Relay will give you protection against spam, serving as a shield for your email and limiting spammers from access to your real email address and phone number. With Mozilla subscription will let you use both services.
When error code 0xc00007b occurs in Windows 8, users are unable to run gaming or multimedia programs on their devices. The message box will occur stating that error code 0xc00007b is present. This issue is usually related to software conflict associated with the use of a gaming program that has errors. It may also result when users use applications that are not compatible with the version of Windows they have installed on their machine.
Solution
Error Causes
Error codes on Windows devices can result from many reasons, including lack of proper PC maintenance, the presence of malware, and issues related to servers. In the case of error code 0xc00007b, it manifests itself on various versions of the Windows operating system when users attempting to run applications incompatible with their system or use the incorrect bit location. To correct these issues that may be causing error code 0xc00007b, users will need to use manual repair methods listed in this article. Failure to rectify this error code could result in others such as error code 0xc0000142.
Further Information and Manual Repair
The manual repair procedures listed in this article do not require extensive technical knowledge. Thus, even average Windows users will be able to apply these solutions in order to fix error code 0xc00007b in Windows 8. However, in case of difficulty applying the solutions listed below, contact a Windows repair technician.
Method One: Install Windows Updates
One of the first manual repair methods you can attempt is to use Windows Update. This will enable users to access the latest updates for the version of Windows they have on their system. To update your system, follow the instructions below.
Step one: Open Start Menu, then select Settings
Step two: Select Update & security
Step three: Select Windows Update
Step four: Install updates if any are available
After you’ve completed the installation of the latest updates, reboot your machine then attempt to run the gaming application you were unable to open due to error code 0xc00007b. You should be able to run the application if Windows Update fixed the issue. However, if the error code reoccurs, proceed to the next manual repair method by installing Microsoft DirectX.
Method Two: Install Microsoft DirectX
Another important manual repair method relates to the use of DirectX, a free tool available to Windows users regardless of the version of the Windows operating system present on their PC. Visit Microsoft’s official website and search for DirectX End-User Runtime Web Installer. Ensure you access the latest version of the program, then click download.
The app enables Windows users to access high-speed gaming by providing a powerful platform for games and multimedia applications. Access to the latest version of DirectX can help users fix the issues causing error code 0xc00007b in Windows 8.
When the installation process is complete, reboot your PC, then proceed by checking if you are able to run your gaming applications. If you are still unable to run the applications the issue will need to be resolved via another manual repair method.
Method Three: Install Latest Version of .NET Framework
Access the latest version of Microsoft’s .NET Framework to complete the final manual repair method. Be sure to follow the steps listed below to download the latest version of the .NET framework. This is crucial as only the latest version of the framework is equipped with the necessary capabilities required to successfully address the issues causing error code 0xc00007b on your device.
Step one: Open your favorite web browser
Step two: Enter www.microsoft.com/net
Step three: Click Downloads
Step four: Select the latest version of the .NET Framework by clicking the framework at the top of the list. (Currently, the latest version is .NET Framework 4.6.2.)
Step five: Select preferred language, then download
Step six: Run software.
Restart your computer after you’ve downloaded the latest version of the .NET framework. Open the gaming application you were previously unable to run due to error code 0xc00007b.
You’ll be able to access all your gaming or multimedia programs if the issue was resolved via this manual repair method. Otherwise, you may need to reinstall the programs you are unable to run as there may be an issue with the program itself resulting in software conflict or the inability to run other gaming programs.
Method Four: Download an Automated Tool
If you wish to always have at your disposal a utility tool to fix these Windows 8 and other related issues when they do arise, download and install a powerful automated tool.
Instagram posting has been reserved for mobile phones for a very long time but in October 2021 that privilege has come to an end. Instagram added the long-awaited ability to post to Instagram from the website. You get nearly all of the same filters and editing tools that you can find in the iPhone and Android app, too.
In order to post via computer on your Instagram account all you need is a browser. The first step, of course, is to go to instagram.com and login into your account, if you do not have an account, you can make one for free. Next, click on the + icon in the upper right corner.
Create a new post screen will open, in this screen click on the Select from computer blue button on the bottom. The file manager will open, choose your desired photo and confirm. After that, you will be presented will an adjustment screen for a photo, here you can crop the photo, zoom in, adjust the aspect ratio, or if you wish add more photos to create a slide show.
Once you are done will all of these adjustments, click on Next in the upper right. From there you will be taken into a filter screen where you can apply one of many filters or if you want, you can adjust brightness, contrast, saturation, temperature, etc. just like in the application on your phone. Once you have the desired result, again click on Next in the upper right part of the screen.
Lastly, you will be given an option to write a caption for the photo if you wish and add a location. Once this step is finished you can post the feed by clicking on share in the upper right part.
That is all to it, just like in a mobile application you can now use your computer for Instagram posting.
Can’t connect to this network Internet connectivity issues present a complex problem with simple solutions for PC and laptop users. First, it is usually recommended that users rule out problems with the internet connection, router, and Wi-Fi settings before proceeding to troubleshoot settings on your PC/laptop. Once the rest are ruled out, we can then proceed with the following troubleshooting steps and guidelines to fix your wifi connection issue:
The first step is to update your windows network adapter driver. Connectivity problems may arise if your network driver is not updated or if it is incompatible with the network adapter. To do so, you may resort to any third-party driver scanning and installing programs found online. This solution should have resorted if users don’t want the hassle of perusing through windows settings that users may not be familiar with.
However, this solution requires a pre-existing internet connection other than wifi, so it is recommended you have a backup internet connection via ethernet.
The second step is to uninstall the driver for your network adapter. This solution is to be reported if there is an issue with the driver as restarting the PC after the following steps let windows reinstall the driver again:
Open the quick access menu on your keyboard by pressing the Windows key and X key at the same time and select “Device Manager” from the menu list.
From the list of devices, select “Network Adapters”
Usually on the top of the list is the Wireless Network Adapter
Right-click the Wireless Network Adapter and select the option to “Uninstall device”
You will be given a confirmation in a new separate window to proceed. Click “Uninstall” to proceed.
After completing the previous steps, try rebooting your Windows PC and reconnecting to see if it works.
A third step is to disable the 802.1 1n modes of your network adapter by following the next steps:
First press the Windows logo key and the X key at the same time to bring up the quick-access menu. And like the previous step, select “Device Manager”
From the list of devices, select “Network Adapters”
Right-click the Wireless Network Adapter from the drop-down menu and select properties
Under properties, select the “Advanced” tab then select the 802.1 1n Mode. To the right drop-down menu change the option to “Disabled” and click “Ok”
After, try to re-establish the connection to see if the steps have worked.
In the event that any of the preceding did not fix your problem, it helps to take a second look at the router and network settings using the interface provided by your ISP. A simple reset to the back of your router often fixes the issue. Also, try to check if you have any other administrative capabilities over the network to determine whether your device, in particular, has been MAC filtered or if the frequency of your wireless adapter is not compatible with the broadcast frequency of your router.
We have all experienced Windows errors over time and that can range from simple ones that will do very little to no harm and can be even system breaking making us lose our work or completely making the PC unusable. No one likes them but they happen, and usually, they happen once we least expect them.
No matter how frequent and unpleasant they might be there are ways to keep them at the minimum and even avoid them.
We will discuss steps that you can take in order to do this, simple tips and guides on how to keep your computer in top form and eliminate not just Windows, but any kind of errors altogether.
Keep your hardware clean
Believe it or not, some serious Windows errors like the dreaded blue screen of death can come from hardware issues not from the software at all. It is very important to keep your computer clean and with enough air flow so it can function properly.
Keeping applications on the drive might seem harmless but sadly that is not the case. Some applications have a certain impact on the system itself after all most of them are tweaking registry entries in Windows and sometimes having too many applications means an increased possibility of conflict over certain resources even when they are not running.
Some applications like adobe creative suite, for example, will have certain services always running in the background, and more of these kinds of applications you have, more services, more places for unexpected errors when they collide. Some of them will also install certain dependencies that could be problematic.
The general idea is: if you are not using it, uninstall it and you will be safer and more resilient to errors inside OS.
Do not use pirated or cracked software
Besides moral and law implications that using pirated or cracked software might bring you there are also certain other things that might be problematic. Certain "free" software might come packet with some problematic malware, for example, it is not uncommon for attackers to use some popular software to pack their malicious application with it.
Other things might be wrong and incomplete tweaking with application in order to bypass security and thus bringing some instability due to scripts needed to run in order to achieve this goal.
Keep your drivers updated
Errors can also come from old drivers or bad drivers, device manufacturers are not all-knowing and perfect, and sometimes drivers can wreak havoc on the system. Having updated drivers can minimize any kind of unexpected behaviors inside the operating system making it more stable and reliable.
You can check your driver version in the control panel inside the Windows OS and then compare it to the ones found on the manufacturer's site, if there are newer available it is recommended to download and install them,
Keep software updated
Applications can have bugs, and bugs can lead to certain errors both in the system and when using the app as well. It is in your best interest to get the latest patch or newer version of the software in order to avoid these unpleasant experiences.
Also, certain codecs and extensions that are installed directly in Windows can also have some unpredictable behavior, updating is the best solution to keep them in line.
Keep Windows updated
Same as with drivers and applications, Windows itself is not immune from bugs and some unpredictable issues. Luckily Microsoft is always working on fixes and features of Windows but in order to actually have benefited from that work, you will need to keep Windows updated. Sometimes a bad update can introduce some errors but you can always roll back to the previous and wait for them to fix everything and then download them all.
Check the health of your hardware regularly
Hardware components have their life cycle, more quality ones tend to last longer but eventually, they will reach the end of their lifecycle. There are a lot of testers for various components in your computer that can check different things and provide you with information about the state of your components.
If you are on Windows 11, Microsoft has included a basic health app inside OS, just type PC health check in search and start the app. For some more detailed information and advanced checks, you will have to use a custom application. There are plenty of them specialized for single components like RAM, SSD, etc. A simple google search with providing you with top results and most of them are free for personal use.
Remember, a faulty component or component that is reaching its life cycle can produce many errors inside the operating system.
Getting a few errors here and there when updating your Windows 10 computer is not uncommon. Some of these errors won’t allow the Windows Update service to initiate while the other ones will halt the process while it’s running. So in this post, we’ll show you what you can do to fix the Windows Update error 0x80070020.
The Windows Update error 0x80070020 is most likely caused by some programs installed in the system which interferes with the Windows Update process. It might be an antivirus program, an incompatible program, a potentially unwanted program, or worse, malware. In addition, corrupted or missing files might also be the culprit. Whichever the cause may be, here are some suggestions you need to check out to resolve the problem.
Option 1 – Try to reset the Windows Update components manually
To manually reset the Windows Update components, first, you need to stop the Background Intelligent Transfer Service, Windows Update, and the Cryptographic Services. To do so, run the following command in Command Prompt and make sure to press Enter after you enter each one of them:
net stop bits
net stop wuauserv
net stop cryptsvc
Next, delete the “qmgr*.dat” file in order to reset the Windows Update components. To do delete this file, run the following command in Command Prompt:
Del “%ALLUSERSPROFILE%Application DataMicrosoftNetworkDownloaderqmgr*.dat
Now you have to rename both the SoftwareDistribution and Catroot2 folders by entering the following command in Command Prompt:
RE-register BITS and other Windows Update related files by typing each one of the following commands:
regsvr32.exe atl.dll
regsvr32.exe urlmon.dll
regsvr32.exe mshtml.dll
regsvr32.exe shdocvw.dll
regsvr32.exe browseui.dll
regsvr32.exe jscript.dll
regsvr32.exe vbscript.dll
regsvr32.exe scrrun.dll
regsvr32.exe msxml.dll
regsvr32.exe msxml3.dll
regsvr32.exe msxml6.dll
regsvr32.exe actxprxy.dll
regsvr32.exe softpub.dll
regsvr32.exe wintrust.dll
regsvr32.exe dssenh.dll
regsvr32.exe rsaenh.dll
regsvr32.exe gpkcsp.dll
regsvr32.exe sccbase.dll
regsvr32.exe slbcsp.dll
regsvr32.exe cryptdlg.dll
regsvr32.exe oleaut32.dll
regsvr32.exe ole32.dll
regsvr32.exe shell32.dll
regsvr32.exe initpki.dll
regsvr32.exe wuapi.dll
regsvr32.exe wuaueng.dll
regsvr32.exe wuaueng1.dll
regsvr32.exe wucltui.dll
regsvr32.exe wups.dll
regsvr32.exe wups2.dll
regsvr32.exe wuweb.dll
regsvr32.exe qmgr.dll
regsvr32.exe qmgrprxy.dll
regsvr32.exe wucltux.dll
regsvr32.exe muweb.dll
regsvr32.exe wuwebv.dll
Now type each one of those commands below.
net start bits
net start wuauserv
net start cryptsvc
Option 2 – Install the updates in a Clean Boot State
You might want to try putting your computer in a Clean Boot state and then install Windows Updates again without any trouble. During this state, you can start the system with a minimum number of drivers and startup programs that will surely help you in isolating the root cause of the issue.
Log onto your PC as an administrator.
Type in msconfig in the Start Search to open the System Configuration utility.
From there, go to the General tab and click “Selective startup”.
Clear the “Load Startup items” check box and make sure that the “Load System Services” and “Use Original boot configuration” options are checked.
Next, click the Services tab and select the “Hide All Microsoft Services” check box.
Click Disable all.
Click on Apply/OK and restart your PC. (This will put your PC into a Clean Boot State. And configure Windows to use the usual startup, just simply undo the changes.)
After that, try to install the Windows Updates or upgrade again.
Option 3 – Clear the contents of both the SoftwareDistribution and Catroot2 folders
Open the WinX Menu.
From there, open Command Prompt as admin.
Then type in the following command – don’t forget to hit Enter right after typing each one of them.
net stop wuauservnet stop bits
After entering these commands, it will stop the Windows Update Service and the Background Intelligent Transfer Service.
Next, go to the C:/Windows/SoftwareDistribution folder and get rid of all the folders and files thereby tapping the Ctrl + A keys to select them all and then click on Delete. Note that if the files are in use, you won’t be able to delete them.
Once all the contents in the Software Distribution folder are deleted, restart your PC and then go back to Command Prompt and input the following commands again.
net start wuauservnet start bits
Since the folder has already been flushed, it will be populated afresh the instant your restart your computer and open Windows Update.
Option 4 – Try to run the Windows Update Troubleshooter
Running the built-in Windows Update troubleshooter could also help you resolve the Windows Update error 0x80070020. To run it, go to Settings and then select Troubleshoot from the options. From there, click on Windows Update and then click the “Run the troubleshooter” button. After that, follow the next on-screen instructions and you should be good to go.
Option 5 – Try restarting the Windows Update Services
Open the Services Manager.
From there, make sure that you set the following services and Startup types:
The Error Code 0x80070057 is rather typical with Win7.
Customers of Win7 maintain reporting that each moment they strive to install this Operating system, it shows this problem error.
Often, the total information that comes with this specific error is:
"Error Code 0x80070057: The parameter is wrong"
When this problem happens, you will end up struggling to move private documents from one person to another.
Solution
Error Causes
You could get the error message when you attempt installing Win7,
"An Internal Error has occurred. Incorrect parameters".
If this happens to you, realize that you are dealing with malfunction code 0x80070057. This error occurs mostly when you are trying to build a full backup of your Windows 7 OS.
The primary source of Error 0x80070057 is huge registry values.
Extensive registry values usually occur when you are trying to back up your Windows 7 OS. This means that you need to immediately create a bigger virtual memory space to avert the occurrence of the error.
Error Code 0x80070057 can be a result of incompatibility between the motherboard and some drivers.
Check whether the computer's motherboard and the installed drivers are compatible. If you can't do this effectively on your own, it might be a good idea to enlist the services of a qualified technician.
The Problem Signal 0x80070057 has a close Connection with RAID Installations
RAID installations have a tendency of sparking off the Error Code 0x80070057. If you experience this error while using RAID, first turn off the RAID setup and check whether that resolves the problem.
Further Information and Manual Repair
Error Code 0x80070057 is repairable. Thus, there's absolutely no cause for alarm when you see it with respect to your own Windows 7 Operating System. So what can you do to resolve it?
a) Increase Virtual Memory: This is perhaps the most common solution to Error Code 0x80070057. In most cases, simply raising the virtual memory especially on Windows 7 Operating-System completely eliminates the error. Moreover, you don't have to be technically advanced to effect the change. Simply follow these steps:-
Click the Start Button and visit Control Panel
Click System Security, and proceed to System.
Click the Advanced System Settings, subsequently proceed to the Advanced Level Tab.
Click Change, which can be under the Virtual Memory
Change the virtual memory value. For instance, you can customize entirely from 2000MB to 6000MB.
Click Set, then Ok. You are done
As with each additional change you make with respect to your Computer, you will have to conclude by re-booting it. This way you make certain that they'll stay as you've established them and apply the necessary modifications.
If the error still persists after attempting the preceding fix, download a registry-cleaning software. The software will clean up your disk and free up memory thus increasing the available virtual memory for your computer. This should solve your persistent Error Code 0x80070057.
Blue screen locale id 1033 error as the name suggests, is a type of BSoD error. This error may occur during Windows startup, program load, or while the program is running. The error indicates poor PC maintenance and occurs without any warning.
The error message is prompted in the following format:
Problem signature: Problem Event Name: BlueScreen OS Version: 6.0.6002.2.2.0.16.7 Locale ID: 1033
When the error occurs, the computer screen turns blue and the user is unable to view or access the program. It is advisable to fix the error right away, virtually because BSoD is a critical PC error, it can pose serious threats to your system.
Error Causes
The two most common causes of the occurrence of the Blue Screen Locale ID1033 error code are:
Registry issues
Viral infection
Further Information and Manual Repair
You don’t need to hire a technician or be a computer whiz to resolve Blue Screen Locale ID1033 error code. Here are some methods that you can try to resolve this error on your PC. These methods are easy to perform and result-driven.
Method 1: Perform a PC Scan by Downloading an Anti-Virus
Since this error is indicative of a viral infection, it is suggested you perform a PC scan by installing an antivirus on your system. Make sure you download an antivirus that is powerful and has the ability to scan all kinds of viruses.
Method 2: Clean and Repair the Registry
Another alternative method is to clean and repair the registry.
The Registry is a component of the PC that stores all information and activities performed on the PC. This includes both important and unnecessary files like junk files, cookies, internet history, temporary files, invalid entries, bad registry keys, and more.
These files not only accumulate in the registry but also damage and corrupt it thereby generating error codes like the Blue Screen Locale ID1033 error code.
The quickest and easiest way to log into your computer is when you use the PIN feature in Windows 10. Even though it is a bit slower compared to biometric logins such as Fingerprint and Iris scanning that comes under Windows Hello, the PIN feature is definitely less complicated. However, just like any other module of the software, it is also prone to some errors. In this post, you will be guided in fixing several PIN errors such as 0xd00000e5, 0x8007139f, and 0x8009003. These errors could be caused at different points in time like when you change or create a PIN or when you log into your computer.
To fix the 0xd00000e5, 0x8007139f and 0x8009003 PIN errors, there are various solutions you can try. You may empty the contents of the NGC folder or remove and change the PIN or the password. You could also use the Group Policy Editor or reset the ACLs in the NGC folder as well as run built-in tools like System File Checker and the DISM tool.
Option 1 – Take ownership of the NGC folder and delete its contents
Boot your computer first into Safe Mode.
Next, you need to take ownership of the Ngc folder first and you can do that using Command Prompt.
Type “command prompt” in the Windows Search bar and then right-click on the relevant search result and select “Run as administrator”.
After that, if a User Account Control or UAC prompt appears, just click on Yes to proceed.
Next, type and enter this command: TAKEOWN /F C:WindowsServiceProfilesLocalServiceAppDataLocalMicrosoftNgc
Note that the <path> is the location of the folder or file in File Explorer.
Now type and enter this second command: ICACLS C:WindowsServiceProfilesLocalServiceAppDataLocalMicrosoftNgc /grant administrators:F
Finally, once the command has been executed, restart your computer.
Once your computer has restarted, delete all the contents in the Ngc folder and check if the error is now fixed.
Option 2 – Try to remove and change the PIN or password
The 0xd00000e5, 0x8007139f, and 0x8009003 PIN errors could be caused by some conflicting issues with the PIN or password you have set for the User Account of your computer. Thus, you have to remove or change the PIN or password to fix these PIN errors.
Remove the PIN by going to Settings > Accounts > Sign-in options.
From there, go to the PIN section and click on the Remove button.
You will be asked to verify your account to proceed in removing the PIN, enter your credentials.
Restart your computer and then set up a new PIN.
Once you’re done, restart your computer and check if the error is gone now.
Option 3 – Try to use the Group Policy Editor
Tap the Win + R keys to open the Run utility and type “gpedit.msc” in the field and tap Enter to open the Group Policy Editor.
Next, navigate to this policy setting: Computer Configuration > Administrative Templates > System > Logon
After that, double click on the “Turn on convenience PIN Sign-in” option located on the right-side panel.
Then set its radio button to Enabled. You will see the following description when you do so:
“This policy setting allows you to control whether a domain user can sign in using a convenience PIN. If you enable this policy setting, a domain user can set up and sign in with a convenience PIN. If you disable or don’t configure this policy setting, a domain user can’t set up and use a convenience PIN. Note: The user’s domain password will be cached in the system vault when using this feature. To configure Windows Hello for Business, use the Administrative Template policies under Windows Hello for Business.”
After setting the radio button to Enabled, it will turn on the Logins in your computer using the PIN.
Close the Group Policy Editor and restart your computer for the changes to take effect.
Option 4 – Try to reset the ACLs in the Ngc folder
Type “command prompt” in the Windows Search bar and then right-click on the relevant search result and select “Run as administrator”.
After opening Command Prompt with admin privileges, execute this command: C:/Windows/Service/Profiles/Local/Service/AppData/Local/MicrosoftNgc /T /Q /C /RESET
The command you entered will start checking for errors and fix them automatically.
Option 5 – Run the System File Checker scan and the DISM tool
System File Checker:
Tap Win + R to launch Run.
Type in cmd in the field and tap Enter.
After opening Command Prompt, type in sfc /scannow
The command will start a system scan which will take a few whiles before it finishes. Once it’s done, you could get the following results:
Windows Resource Protection did not find any integrity violations.
Windows Resource Protection found corrupt files and successfully repaired them.
Windows Resource Protection found corrupt files but was unable to fix some of them.
Now restart your computer.
DISM tool:
Open Command Prompt.
Then type in the following commands and make sure to hit Enter right after you type each one of them:
Dism /Online /Cleanup-Image /CheckHealth
Dism /Online /Cleanup-Image /ScanHealth
Dism /Online /Cleanup-image /Restorehealth
After that, wait until the process is finished and do not close the window as the process will probably take a couple of minutes.
Error code 0xc004f034 occurs when Windows users are unable to activate their operating system. It affects Windows 8 and Windows 10 users and features common symptoms which include the following:
Inability to activate Windows
Message box with error code 0xc004f034
Solution
Error Causes
Error code 0xc004f034 often occurs due to an issue with the Windows product key. This may occur when users enter an invalid product key or use one that is appropriate for use on a different version of Windows. To correct the issue, users will need to use the correct product key for their system or contact an IT professional if their device is connected to a Key Management Service (KMS). Windows users affected by this error code may also need to check their system for viruses or missing system files since these issues can result in error codes on Windows devices.
Further Information and Manual Repair
Manual repair methods enable users to fix problems related to error codes. Though some manual repair methods require the use of Command Prompt and utility tools like the System File Checker, even non-technical Windows users can find success simply by following the instructions provided below.
However, note that some issues can be complex, thus requiring the use of an automated tool or help from a Windows repair technician. Consider these options if the manual repair methods below do not resolve error code 0xc004f034 on your Windows 8 device.
Method One: Enter Valid Windows Product Key
Microsoft currently offers several ways for customers to activate their Windows operating system, the most common of which is the product key. This 25-character code verifies that users have access to an authorized version of Windows.
You may get a valid product key from an authorized dealer, a new PC with Windows, or access a digital copy from a Windows website when you purchase your Windows operating system online. Once you have a valid product key, use it to activate Windows and resolve error code 0xc004f034 in Windows 8. Follow the steps below to access the Product Activation Wizard.
Step one: Click or tab Start button then select Settings
Step two: Tap or click PC Settings, then select Activate Windows
Step three: Type invalid product key
Once a valid product key is used, the Product Activation Wizard should complete the activation process. If you are unable to complete the process, however, and error code 0xc004f034 remains unresolved, click the link or instructions the Product Activation Wizard provides regarding activation via phone or customer support.
Method Two: Run System File Checker
Another option available to Windows 8 users is System File Checker (SFC). This tool enables Windows users to scan and repair corrupted or missing system files. Follow the steps below to access SFC.
Step one: Go to Start and type Command Prompt or CMD.
Step two: Run as Administrator
Step three: Type sfc /scannow ensuring a space is between “sfc” and “/scannow”.
System File Checker will repair any corruptions found on system files within your machine once you successfully follow the instructions provided. The tool will also replace missing files which will lead to better performance on your PC.
When the process is complete, restart your device then check if you are able to activate Windows. If error code 0xc004f034 is still present, you will need to find another solution via repair method three.
Method Three: Scan for Viruses and other Malware
Viruses and other forms of malware are one of the main issues resulting in poor PC performance and Windows error codes. To fix this issue on your PC, scan your machine for signs of these malicious programs. If you do not have anti-malware software and would like to download one from the Internet, ensure the software you choose is effective before attempting to download it.
Once you have powerful antimalware software on your PC, begin a scan for viruses, Trojan horses, and other forms of malware. If the Windows error code occurred due to issues related to malicious programs, you will be able to resolve the issue. If, however, this manual repair method proves ineffective in resolving error code 0xc004f034, download a powerful automated tool or contact a Windows repair technician to assist you.
Method Four: Use an Automated Tool
If you wish to always have at your disposal a utility tool to fix these Windows 8 and other related issues when they do arise, download and install a powerful automated tool.