Check if your data has been stolen for free

Website breaches and stealing user data is nothing new in the world of the internet. Although a very unpleasant experience it still happens even on some high-quality websites. In this article, we will not focus on how can you not be the target of this kind of attack, because you really cannot. Weel you can kind of if you decide not to have your data on websites at all, but let's just say that is not something you are willing to do.

stolenSo, in this case, you have some social, forum, or gaming accounts but you heard that service has been breached and that your email or password might be stolen. Well in this case all you need to do is of course to login into the service and change your password. But, what happens if you are not aware at all that service has been compromised?

Mozilla foundation has asked themselves this same question it seems and they have decided to help us out. They have placed a free online service where you can just by typing in your email address find out if your email or data has been compromised in any way.

Go to https://monitor.firefox.com/ and check it out, if you find out that there is some website that you did not know was breached, change your password right away, and if you have used the same password for anything else (I hope not), change them as well.

Do You Need Help with Your Device?

Our Team of Experts May Help
Troubleshoot.Tech Experts are There for You!
Replace damaged files
Restore performance
Free disk space
Remove Malware
Protects WEB browser
Remove Viruses
Stop PC freezing
GET HELP
Troubleshoot.Tech experts work with all versions of Microsoft Windows including Windows 11, with Android, Mac, and more.

Share this article:

You might also like

Nostalgic gaming with Retroid pocket 2
We have talked about gaming on old computers and have covered new and upcoming Steam deck handheld console. Today we are combining old gaming with a handheld console and our target of talk is Retroid pocket 2. This product is packed with really high-quality plastic and with some great features in it. retroid pocket 2So let's dive into this cool handheld in more detail and find out why we like it so much.

Good manufacturing quality

Plastic and overall manufacturing quality are really, really good. The battery is great, packing 4000mAh that can hold over 3 hours of nonstop gaming, and all buttons and joysticks are great. The screen is a 640 x 480 60Hz 3.5″ IPS screen (4:3 aspect ratio) that performs really great for its purpose, retro gaming. There is a Digital D-Pad and dual analog joysticks. The right joystick is the lower profile to avoid being accidentally moved when pressing the four gaming buttons. There are three buttons at the bottom which are Home, Start, and Select. On either side are good-quality stereo speakers. On the bottom of the device are a Micro SD Card slot and a 3.5mm headphone port. On the top of the device are Left and Right shoulder and trigger buttons. There are the power button and volume adjustments. There are a USB Type-C OTG port and a Micro HDMI output for connection to a TV.

Good technical statistics

Good, not great but then again since this is retro handheld you cannot really expect some crazy stuff like alder lake inside. So the console is punching ARM Cortex A7 CPU with 2 cores and a clock of 1.5GHz paired with ARM Mali 400-MP2 500MHz GPU. The console has 1GB LPDDR3 RAM memory and 8GB eMMC Storage where 5GB is freely available, the rest is taken for OS. As mentioned before the display is 640x480 resolution with a size of 3.5″. The battery is Lithium-Ion with a power of 4000mAh and on the handheld, there is a USB Type-C connector, 3.5mm headphone jack, and Micro-HDMI. It also has Wifi/Bluetooth 4.0

Retroid Pocket 2 OS and support

Pocket 2 comes with Android 6 but you can update its firmware to the 8.1 version on the official site that I would highly recommend. New versions of the handheld will come with 8.1 on it from the box. Having Android as OS opens many possibilities like you can download Android apps such as Steam Link, allowing you to play actual PC games on your Retroid Pocket 2. Not just that, if it does get a newer version of Android it could even have the ability to use xCloud, Xbox’s cloud gaming service. Of course, hardware will not be able to handle modern games but the option is still there and for some old PC titles available on steam like Commander Keen, for example, this is a great option. The console can emulate basically everything up to Dreamcast, including N64, PSP, and Playstation 1. It can emulate Nintendo DS also, but it can only do so with one screen. The only problem with this console is you will need to install and update Apps. You’ll need to learn about RetroArch, an app that lets you download emulators or cores to play games.

Retroid price

The last thing on the list is the price of the console itself. Going just under the 100$ mark this really makes it an affordable option for plenty of people that would like to experience retro handheld gaming or for ones like me, nostalgic gamers wanting to relive some era of playing games on the road.

Conclusion

Among Chinese handheld devices for retro gaming, Retroid Pocket 2 is really on top of what the market can offer. If you are looking for a great handheld retro console and are not afraid of little dive-ins into the OS and various configurations, Pocket 2 will reward you with plenty and wide emulation support.
Read More
How To Fix Error 504

Error 504 - What is it?

Error 504 is a type of runtime error that occurs on Windows PC. A runtime error is a bug that causes software or hardware problems thereby preventing programs from working on your PC correctly. This error may occur during the execution of the program.  It also slows down your PC performance.

Solution

Restoro box imageError Causes

Error 504 can be triggered by many causes such as:
  • Incompatibility between 2 software programs
  • Malicious software
  • Missing DLL files
  • Registry issues

Further Information and Manual Repair

Whenever you experience the error 504 on your system, it is advisable to resolve it immediately, typically because runtime errors like error 504 can lead to system failure and valuable data loss which is more than often hard to recover. To resolve this error code, you don’t necessarily have to hire a professional for the job. In fact, here are some solutions that you can try to fix by yourself, even if you are not a computer programmer.

1. Get the latest updates for Windows and for the program showing the error

This is a quick way to resolve runtime error 504 on Windows PC. To update the latest updates for Windows and for the program causing the error, open Windows Update by going to the start menu. In the search box type ‘update’ and then in the list of results click Windows Update.  In the left pane click on check for updates, wait while Windows looks for the latest updates. It will show you a list of updates available select the important updates that you want to install. Then click ok and then click install updates. After the updates are successfully complete, restart your PC and try running the application. If the error still persists, then try the solution given below.

2. Scan For Malicious Software

Sometimes the runtime error 504 may occur due to viral infection and malware. So, to resolve it download an antivirus. However, the antivirus can also slow down your PC performance.

3. Scan for Registry Issues

Another way to resolve it is to scan for registry issues. The registry and DLL files get damaged when it overloads with too much data. This particularly includes irrelevant and obsolete files. Registry issues trigger runtime errors like 504. The best way to resolve it is to download Restoro. This is an advanced and multi-functional PC Fixer embedded with multiple utilities like a registry cleaner, an antivirus, and a system optimizer. The registry cleaning utility resolves registry issues by removing the unnecessary files completely and repairing the damaged dll files. The antivirus module scans and removes all kinds of malicious software on your PC like viruses and Trojans, thereby resolving the runtime error 504 in seconds. As for speed, Restoro also functions as a system optimizer which boosts the performance of your system significantly. Restoro is safe and bug-free software. It has simple navigation and a user-friendly interface which makes it very easy to operate and workaround. It is compatible with all Windows versions. Click here to download Restoro and resolve error 504 today!
Read More
DNS_PROBE_FINISHED_BAD_CONFIG error in Chrome
If you always use Google Chrome when browsing the internet, then you might have come across an error saying, “This webpage is not available, DNS PROBE FINISHED BAD CONFIG”. If you do, then this problem certainly has something to do with the DNS since any error code which has “DNS” in it points out a network issue in the computer. Getting the DNS_PROBE_FINISHED_BAD_CONFIG error indicates that your computer is not able to connect the website because the Domain Name Server or DNS wasn’t able to resolve the website name into IP address or it is not available at all. So in this guide, we’ll help you sort out this issue in Chrome on your Windows 10 PC.

Option 1 – Check the Network Cables and restart your router then reconnect

The most obvious thing you can do first is to try checking if the network cables connected to your computer or router are properly connected or not. If it turns out that some network cables are not connected properly, then it’s probably why you’re getting the DNS_PROBE_FINISHED_BAD_CONFIG error in Chrome. And if your computer is connected via Wi-Fi, you need to make sure to restart your router once. In addition, you can also forget the Wi-Fi your computer is currently connected to and then try reconnecting again to see if it would work.

Option 2 – Flush the DNS and reset TCP/IP

Flushing the DNS and reset TCP/IP could also help in fixing the DNS_PROBE_FINISHED_BAD_CONFIG error in Chrome. To do so, refer to these steps:
  • Click the Start button and type in “command prompt” in the field.
  • From the search results that appear, right-click on Command Prompt and select the “Run as administrator” option.
  • After opening Command Prompt, you have to type each one of the commands listed below. Just make sure that after you type each command, you hit Enter
    • ipconfig /release
    • ipconfig /all
    • ipconfig /flushdns
    • ipconfig /renew
    • netsh int ip set dns
    • netsh winsock reset
After you key in the commands listed above, the DNS cache will be flushed and the Winsock, as well as the TCP/IP, will reset.

Option 3 – Try to remove the Proxy

You can also try to remove the Proxy as it might also help you in fixing the DNS_PROBE_FINISHED_BAD_CONFIG error. Here’s how you can do it:
  • Tap the Win + R keys to open the Run dialog box.
  • Then type “inetcpl.cpl” in the field and hit Enter to pull up the Internet Properties.
  • After that, go to the Connections tab and select the LAN settings.
  • From there. Uncheck the “Use a Proxy Server” option for your LAN and then make sure that the “Automatically detect settings” option is checked.
  • Now click the OK and the Apply buttons.
  • Restart your PC.
Note: If you are using a third-party proxy service, you have to disable it.

Option 4 – Change the DNS

Try to use the Google Public DNS If the first option didn’t work, you can try to use the Public DNS by Google and see if it can help fix the DNS error. You have to modify the DNS settings in your system explicitly and use the DNS IP addresses.
  • The first thing you have to do is right-click on the network icon in the Taskbar and select Network and Sharing Center.
  • Next, click on the “Change Adapter Settings” option.
  • After that, search for the network connection that you are using to connect to the internet. Note that the option might be “Wireless Connection” or “Local Area Connection”.
  • Right-click on your network connection and click on Properties.
  • Then select the new window to choose the “Internet Protocol 4 (TCP/IPv4)” option.
  • After that, click on the Properties button and click the checkbox in the new window for the option “Use the following DNS server addresses”.
  • Type in “8.8.8” and “8.8.4.4” and click OK and exit.

Option 5 – Clear Chrome’s browsing data

If your browsing data in Chrome hasn’t been cleared for some time now then that might be the reason why you’re suddenly getting the DNS_PROBE_FINISHED_BAD_CONFIG error when you browse the web. To fix this error, you need to clear your web browsing data. Refer to the following steps to do so.
  • Tap the Ctrl + Shift + Delete buttons to go to the Clear browsing data section in Chrome.
  • Next, set the time range to “All time” and tick all the boxes and then click on the Clear data button.
  • After that, restart the Chrome browser and try to open the website you were trying to open earlier.

Option 6 – Try running the Chrome Cleanup tool

In case you don’t know, there is actually a built-in malware scanner and cleanup tool in Chrome that helps you get rid of any unwanted ads, pop-ups, and even malware, as well as unusual startup pages, toolbars, and other things that could affect the performance of the browser.
Read More
Enable Windows Sandbox on Windows
One of the most common ways cybercriminals use to inject suspicious code into devices is by tricking users into installing a malicious program on a targeted device. Oblivious users are vulnerable to such tricks, which is why Microsoft has been working hard in the background to address this issue. Recently, Microsoft announced the availability of a sandboxed version of Windows 10 that runs inside Windows 10 in order to isolate suspected software to run inside it and protect the system from potential threats. This Windows Sandbox feature is a new feature that keeps your computer secure. It is a virtual disposable environment that you can enable. So if suspect any software of being malicious, you can run this software in an environment and ensure that it won’t interfere with any normal processes and would not jeopardize files on your computer. To simply put it, “Windows Sandbox is a new lightweight desktop environment tailored for safely running applications in isolation”. So if the Sandbox is closed, all the residual files, software, and other data are deleted permanently. To enable Windows Sandbox, refer to the instructions provided below. Step 1: You have to make sure that you are running either Windows 10 Enterprise Editions or Windows 10 Pro and that your computer is running build 18305 or newer. Step 2: After that, you have to enable Virtualization to let another instance of Windows 10 running in Sandbox mode. Step 3: Next, search for Windows Features on and off in the search box and then select the appropriate entry. Step 4: From the list, go to the mini window and check the Windows Sandbox and then click on OK. Step 5: Afterwards, in the Cortana Search box, search for “Windows Sandbox” and select the related entry to run it in an elevated window. Step 6: Then from your main computer (host), copy the executable file and paste it inside the Windows Sandbox environment. Step 7: Now run the executable file in the Sandbox environment and use it as you normally do. Step 8: Once you’re done, close the Windows Sandbox application and as mentioned, every data regarding the executable file and the temporary environment will be deleted. Step 9: And for the sake of safety, ensure that there are no modifications made to the host because of the executions in the Sandbox environment. You have the option to contact Microsoft for feedback related to Windows Sandbox. You can use the traditional Feedback Hub if you have any suggestions or any issues. Just fill in the appropriate details and select Windows Sandbox for the feature category under the Security and Privacy section. And if you have any issues related to the execution of and within Windows Sandbox, simply choose “Recreate my problem” then select Start capture to reproduce the issue, and once you’re done, select Stop capture.
Read More
T-Mobile Hack, 40 Million and more Impacted
T-MobileHacker group recently came up with claims that they have stolen data from 100 million T-Mobile customers. T-Mobile has responded with confirmation it has been compromised and that over 40 million records were stolen, among them are not just present customers, but anyone who has applied for T-Mobile service as well as past accounts.

What has been stolen?

Report from T-Mobile states that stolen records included first and last name, date of birth, social security number, driver’s license & ID information. The company said that it has “no indication that the data contained in the stolen files included any customer financial information, credit card information, debit or other payment information.” Not really a reassuring statement meaning that they really do not know, but even if the statement is true, already stolen information is as much if even not more damaging and devastating as payment information.

What T-Mobile is planning to do now?

It is stated that the hole used for the hack has been addressed and closed so no more data can be stolen. Considering people that had their personal information compromised, T-Mobile said it is planning to reach out to them and offer them two years of free identity protection through McAfee’s ID Theft Protection Service. Additionally, T-Mobile recommends postpaid customers change their PIN by going online into their T-Mobile account or calling T-Mobile customer service by dialing 611 on their phone. The company also recommends a feature called Account Takeover Protection that prevents unauthorized individuals from stealing a phone number and porting it out of T-Mobile. Finally, the company will publish a website “for one-stop information and solutions to help customers take steps to further protect themselves.”
Read More
Delete files and folders using Command Prompt
There are times when you might find it difficult to delete folders or files in File Explorer and it could be due to many reasons. One of these reasons can be attributed to the failure that can lock down the folders or files which prevents you from deleting them. In this kind of situation, you can utilize the Command Prompt to delete the folders, sub-folders, and files on your computer, and in this post, you will be guided on how exactly you can do that. Before you proceed, keep in mind that when you use the Command Prompt incorrectly, it might affect your computer and render it inoperable, thus, you must be extra careful when executing the steps given below and it would also be better if you create a System Restore Point. After that, refer to the following instructions. Step 1: First, in the Start Search, type “command prompt” in the field and from the search results, right-click on Command Prompt and then select the “Run as administrator” option to open Command Prompt with admin privileges. Step 2: After opening Command Prompt as admin, navigate to the folder where the file you want to delete is located. Note that you have to execute the “cd” or the change directory command. Step 3: Next, execute the following command in Command Prompt:
DEL /F /A <file path with extension>
Note: In the given command, “/F” is the force delete command, while “/A” is the command that selects the files with the ready for archiving attribute. Step 4: After that, go to the location where you can find the folder you want to delete by using the “cd” command again. And then execute the following command right after:
RD /S <folder path>
Note: In the given command, “RD” is the command that removes the folder from the directory, while “/S” removes all of its sub-folders and files. On the other hand, if you also use the “/Q” parameter, you won’t see the “Y/N” confirmation but if you didn’t use it, then simply tap the Y button to proceed.
Read More
Fix Unknown USB Device error message
USB devices are one of the commonly used devices every day – from plugging mobile devices for charging using pen drives, you are making use of USB drives. However, there are times when you might encounter an error message saying, “Unknown USB Device” as you plug your USB device on your Windows 10 computer. So if you encounter this kind of error message followed by either of the following explanations, read on as this post will give you a couple of suggestions you can check out to resolve the issue.
  • Device Descriptor Request Failed
  • Port reset failed
  • The device failed enumeration
  • Set address failed
  • Error code 43
You can fix this error using several ways. You can try changing the Power Options, update or roll back the USB drivers, turn off Fast Startup, or run the USB troubleshooter. Follow the options given below for more details.

Option 1 – Try to change the Power Options

  • Tap the Win + R keys to open the Run utility.
  • Then type “powercfg.cpl” and tap Enter to open the Power Options window.
  • Next, go to your selected power plan and click the “Change plan settings” option to open a new page.
  • From there, click on the “Change advanced power settings” option. This will open a new window where you can see various power consumption options.
  • Now look for the USB Settings option and expand it.
  • Then set the USB selective suspend setting to “Disabled” for both scenarios: On Battery and Plugged in.
  • After that, click on OK and restart your computer to apply the changes made.

Option 2 – Update or reinstall the Universal Serial Bus Controller driver

Since it could be a driver issue, you can try to update or reinstall the Universal Serial Bus Controller drivers using the Device Manager. Refer to the following steps:
  • First, click the Start button and type “device manager”.
  • Then click on the “Device Manager” from the search results to open it.
  • From there, look for the “Universal Serial Bus controllers” option and then right-click on each one of the USB drivers and select the Update Driver from the menu.
Note: If it is a regular USB drive, then it will be listed as a USB Mass Storage Device but if you have a USB 3.0 device, then look for a USB 3.0 Extensible Host Controller.
  • Restart your PC and then click the “Search automatically for updated driver software” option.
Note: If updating the USB Controller drivers didn’t work, you can try to reinstall them instead.

Option 3 – Try turning off Fast Startup

  • Tap the Win + R keys to open the Run dialog box and type in “control” to open the Control Panel.
  • Next, click on the Hardware and Sound section and click on Power Options.
  • Afterwards, select the “Choose what the power buttons do” option from the left side menu pane.
  • Now click on Change settings that are currently unavailable and uncheck the entry that says, “Turn on fast startup (Recommended).
  • Then click on Save Changes and restart your computer and see if it has fixed the problem or not.

Option 4 – Run the Hardware and Devices Troubleshooters

  • The first thing you need to do is click on Start and then on the gear-like icon to pull up the window for Settings.
  • After opening Settings, look for the Update and Security option and select it.
  • From there, go to the Troubleshoot option located on the left-hand side of the list.
  • Next, select Hardware and Devices from the list and open the Troubleshooter and run it. Once it is doing its job, wait for it to complete the process and then restart the system.
  • After the system restarts, check if the problem’s now fixed. If not, refer to the next option given below.
Read More
Razer Iskur gaming chair for healthy gaming
Razer Iskur
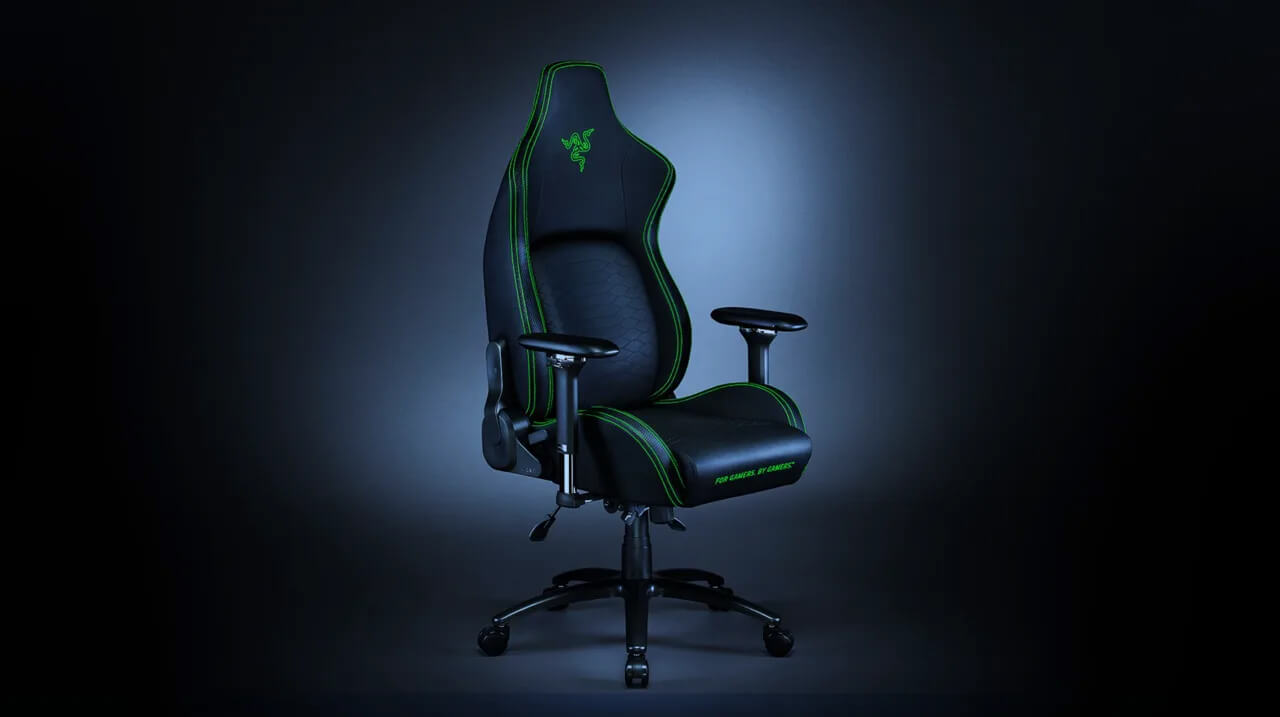
It seems that last few days we were riding some Razer bandwagon but rest assured that we are not sponsored by them in any way, truth is that simply they come up with some interesting accessories which I believe are worth covering. Gaming Chair itself comes in two colors, fully black and green black combination and it is not really an entry-level chair if we are talking about price. The chair itself is around 600USD depending on the distributor and considering that price range it is placed in more top cream of gaming chairs but it is worth every dime.

Iskur Specifications

Iskur is made of a steel frame with a reinforced plywood lumbar support frame for added weight tolerance. Frame and lumbar support are surrounded with memory foam and all of that is wrapped in cotton and polyester layer which is again wrapped in multi-layer synthetic leather making the chair very durable for long hours of daily use. The chair also comes with a memory foam head cushion which is detachable and removable if you do not wish to use it. On the Razer website among specifications, it stands that the chair is best suited for persons from 5’6” – 6’2” (170 – 190cm) height and up to 299lbs (136kg).

Features

The chair has, of course, height adjustment as any gaming chair and surprisingly it has great control for the armrest. The armrest can be adjusted in 4 different ways: up & down, left & right, forward & backward, and inward & outward. The backrest can be also tilted up to 26 degrees angle. All of these features are great and good but there is one more feature that really makes this chair stand out from rest and it is Lumbar support. Iskur has an adjustable lumbar support system on the lower part of the backrest. With your lumbar support secured, you can then make the necessary tweaks to optimize the rest of your posture using the Razer Iskur’s adjustable height, backrest, and armrests.

Conclusion

Razer Iskur is neither cheapest nor perhaps the best gaming chair you can buy, but it is a really good one. It is well manufactured and made to feel and look like a premium product that actually it is.
Read More
A Guide to Resolving Error Code 32

Error Code 32 - What is it?

Code 32, a Device Manager error, pops up when a device driver and other required services related to the driver are disabled.

The error code 32 is usually displayed in the following format:

“A driver (service) for this device has been disabled. An alternate driver may be providing this functionality. Code 32”

When a driver experiences a problem, it is reported to the Device Manager. Though error Code 32 does not cause detrimental damage to your system, it can cause the loss of functionality of the hardware device whose driver is disabled.

Solution

driverfix boxError Causes

Error 32 may be generated due to several reasons. However, the most common causes include:
  • The device driver is outdated
  • The device is not configured as the default
  • Some other device is providing default functionality
  • The device driver is disabled in the registry
  • Corruption of registry values in the CD ROM Drive Class registry key

Further Information and Manual Repair

If you come across error code 32 on your PC, then repair it immediately to ensure optimum PC performance. To resolve this error code, try the methods listed below. If you are not a computer programmer, don’t worry!

The listed solutions are easy to perform, require no technical background or expertise and more importantly, these solutions are very effective.

Simply follow the instructions to repair error code 32 on your system in just a few minutes.

Method 1 - Reboot Your PC

Sometimes Device Manager error codes may appear due to temporary issues, which may be resolved simply by rebooting your system. If you are lucky, this might actually work.

By restarting your PC, you might be able to get rid of error code 32. However, if the error still persists, then try other methods given below.

Method 2 - Uninstall and Reinstall the Driver

To resolve error code 32, uninstall and then reinstall the driver. To uninstall the driver, simply follow these steps:

  1. Go to the start menu
  2. Type Device Manager in the search bar and then press enter
  3. Now in the Device Manager, find and then double-click the category of device that you wish to uninstall, for example, click on the Display Adapter to uninstall the graphics card.
  4. Once you have located the device and the driver you wish to uninstall, simply right click on it and then click ‘uninstall’
  5. Windows will prompt you to confirm device removal changes.
  6. Click OK to confirm and proceed.
  7. After that, simply restart your system to activate changes
  8. To reinstall, go to the control panel and choose Add/Remove Hardware and add a new device.  Follow all prompts to reinstall the device.

Method 3 - Delete Both the Upper Filters and Lower Filters Registry Values

As discussed above, sometimes error code 32 may be triggered due to corruption of registry values.

If this is the underlying cause, then delete both the upper filters and lower filters registry values from the registry. This will take about 5 to 7 minutes. Here’s what you have to do:

  1. Go to the start menu
  2. Type Regedit in the search box and then press enter
  3. Now locate the HKEY_LOCAL_MACHINE folder under  ‘My Computer’
  4. Click the |> or (+) icon next to the folder name to expand
  5. Here you will see a long list of subkeys
  6. Locate the correct class GUID for the problematic device
  7. Now click the registry subkey that corresponds to the device class GUID
  8. Locate the Upper Filters and Lower Filter values and delete
  9. Close the registry editor
  10. Restart your PC to activate changes

This will hopefully resolve error code 32 on your system if the error was generated due to registry value corruption. However, if the error continues to appear, then resort to method 4.

Method 4 - Update the Problematic Driver

Locate the problematic drivers and update them with the latest versions. This procedure is effective but time-consuming if performed manually.

It takes several minutes to identify problematic drivers and find the latest and compatible versions for each driver on the manufacturers’ website. And besides, you will have to perform updates continuously to ensure the error doesn’t occur again.

Method 5 - Download DriverFIX to Update Drivers Automatically

To avoid the hassle, download DriverFIX.

This is a cutting-edge and user-friendly software program embedded with intelligent system programming and intuitive technology that identifies problematic drivers and updates them with the latest and compatible driver versions in seconds, automatically and on a regular basis.

By installing it on your PC, you can update all the drivers and repair code 32 in no time.

Click here to download DriverFIX to resolve Device Manager error code 32 today!

Read More
Why ActiveX Control May Damage Your Personal Computer
ActiveX Controls are plugins you may constantly come across when working with Internet Explorer. An illustration of these kinds of control is the MICROSOFT IE Flash Player. They frequently result into significant problems for the Computer, yet they're vital for IE to operate correctly. You shouldn't ever overlook that after you install Active Controls in your Personal Computer, you effectively provide them with access to other areas of your PC. The ActiveX Controls not only tracks your search routines, but in addition puts malicious software, which might possibly be hazardous to your Computer.

Solution

Restoro box imageError Causes

ActiveX Controls make your Internet Explorer work as required and are usually great and beneficial to your own Computer. Yet, they can function as a source of problems because of the following factors.
  • You should stop installing  ActiveX Controls from Un Trustworthy Resources
In the event they are installed by you from un trustworthy resources new threats are likely introduced by ActiveX Controls to your PC. One of the more regular types of ActiveX Controls worth necessary for installation is Flash Player. Yet, never be in a hurry to install these Controls from resources that you don't trust.
  • Limit The Number of ActiveX Controls You Install on your PC
Prevent installing java/oracle ActiveX controls, because of its weak security measures which could make your Personal Computer and any additional information there in, open to attacks. Limit to the variety of ActiveX Controls that you install on your PC as these could increase the vulnerability canvas on your computer.

Further Information and Manual Repair

You can manually fix any malfunction that springs up from ActiveX Controls. Yet, more than mending the harm, produce the setting that ensures you never have troubles from them to start with. Just how do you do that?

a) Stop installing or downloading ActiveX Controls from Un Trustworthy Sources

This has been mentioned above, but it's worth repeating because it's the most common reason behind ActiveX Controls malfunctions. You might anticipate that for this kind of obvious reason for ActiveX Controls malfunctions, PC consumers would be extra cautious, however that is never true.

b) Limit ActiveX Controls Softwares

You can restrict ActiveX controls from running automatically on your PC. To limit them, head to Tools in Internet Explorer, and choose Internet Options. Proceed to the Security tab, and select Customs level Browse completely down before you get to the area designated "ActiveX". Subsequently, mark "Prompt" under every choice that you encounter. But don't mark the choice indicated "Run ActiveX Controls and Plug-Ins", together with, "Script ActiveX Controls Marked Safe for Scripting". By performing the measures emphasized above, you happen to be in substance stating that, you will not permit any installation of ActiveX Controls, without express authorization by you. In this manner, you have better control over different forms of ActiveX Controls you permit to be installed, therefore reducing potential threats to your PC.
Read More
1 2 3 171
Logo
Copyright © 2023, ErrorTools. All Rights Reserved
Trademark: Microsoft Windows logos are registered trademarks of Microsoft. Disclaimer: ErrorTools.com is not affiliated with Microsoft, nor claims direct affiliation.
The information on this page is provided for information purposes only.
DMCA.com Protection Status