To understand Logon.scr application error, it is first important to understand the function of logon.scr. Logon.scr is an important file that is located in the Windows\System32 folder. It guarantees Windows systems stability.
Logon.scr application error occurs when logon.scr file gets corrupt. It is a common system error that can happen in most Windows platforms. It usually pops up during system start-ups and when trying to launch certain programs.
Some of the common systems of this error code include: system halt, freeze, no application icons are visible on the desktop, random blue screen of death and system performance decreases dramatically.
Solution
Error Causes
Two of the most common causes of logon.scr application error is:
Corrupted and damaged logon.scr file
Viral infection
It is advisable to fix this error code immediately because it leads to serious damages. It is fatal and can result in a system crash; therefore resolve it right away.
Further Information and Manual Repair
To resolve this issue on your computer you don’t have to spend hundreds of dollars to hire a professional for the job. The good news is that it can be repaired easily and does not require any technical expertise.
Here are some of the most effective and easy DIY methods to resolve the error on your screens.
Method 1 - Replace the Damaged and the Corrupted Logon.scr File
Whether the file gets corrupted or is accidentally deleted, the best way to fix the issue is to download the Logon.scr file again from a reliable website and install in the following location C:\Windows\System32.
Alternatively you can also get the file copy form another proper functioning computer by using flash drive if you don’t have an internet connection to download the logon.scr file online.
Method 2 - Restore Points by Applying System Restore of Windows
Another way to resolve this is to restore points to bring back your system to the previous state before the error occurred. To do this, simply click the start button and type ‘System Restore’.
Now click System Restore in the result and click next. Select the restore point in the list and click the next button to proceed. To activate changes reboot your PC.
Method 3 - Scan and Remove Viruses
If Logon.scr application error still persists, then it could be due to viruses. To resolve, install a powerful anti-virus. Scan your entire PC and remove viruses.
Method 4 - Repair the Registry
Corrupt and damaged Logon.scr file also triggers issues with the registry. DLL files and other important files like Logon.scr application files may get damage due to too many bad and invalid registry entries.
Registry stores all the activities performed on the PC including unnecessary files like junk files and cookies. If these are not removed timely, these files accumulate and corrupt important files. Therefore, to fix the error it is advisable to clean and repair the registry.
The best way to go about is to download Restoro. This is a user-friendly and multi-functional PC Fixer deployed with a registry cleaner. It scans for all registry errors and removes all the invalid entries. It cleans the registry and repairs the damaged files thereby resolving the issue in seconds.
Click here to download Restoro and resolve the Logon.scr application error now!
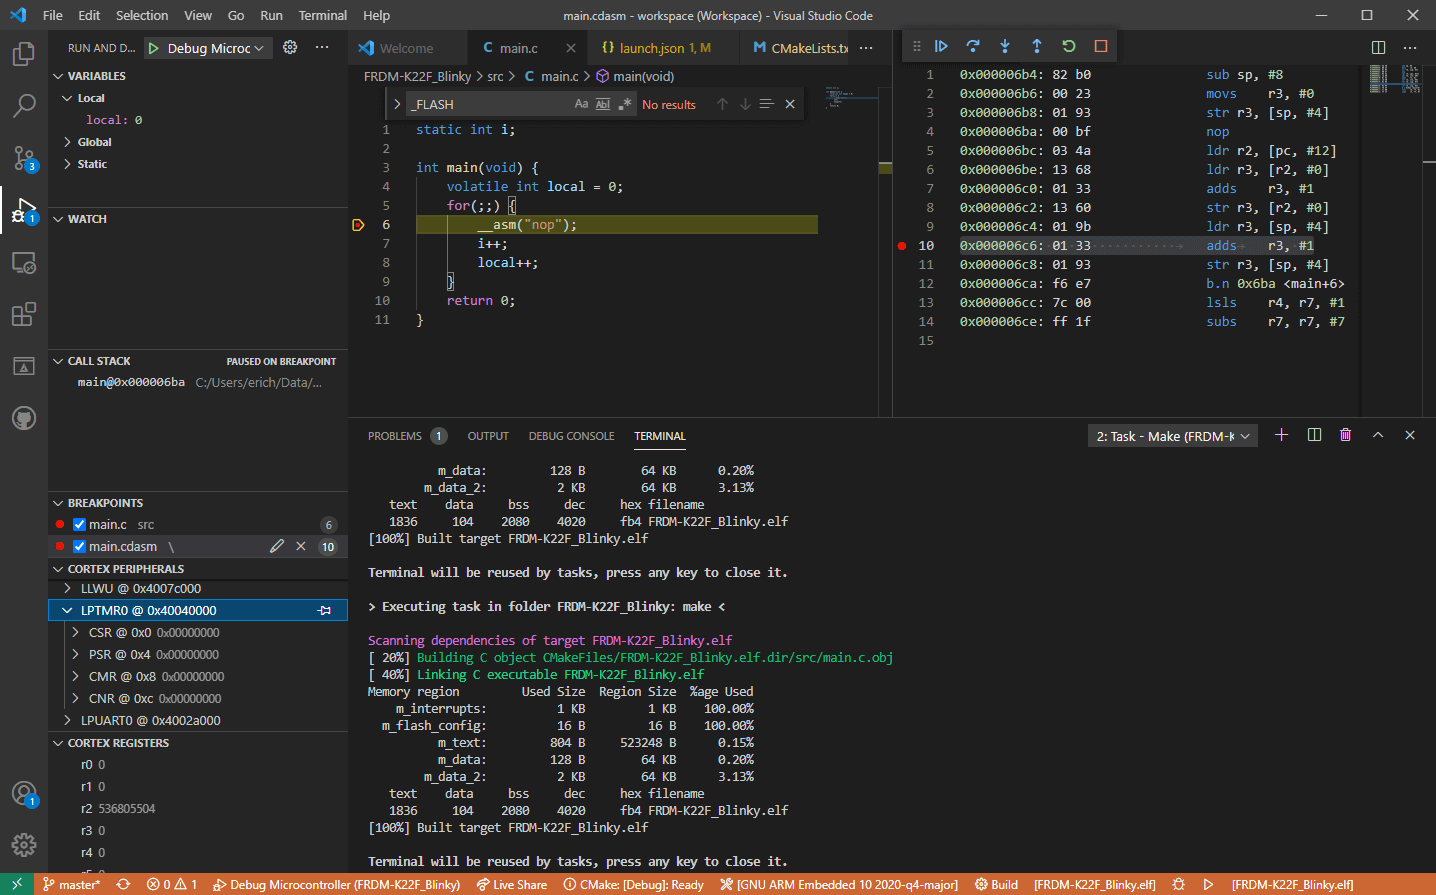
Visual studio code is a code editor available for Windows, Linux, and macOS. It is a completely free tool offering you to code in any language without the need to switch to another editor.
Visual Studio Code is part of Microsoft Visual Studio which is a complete integrated development environment (IDE). Take notice that Visual studio itself has more advanced tools for developing and testing, it has 24/7 support, training, and Azure for WEB apps.
Visual Studio Code is an editor lacking in some advanced features Visual Studio offers.
Visual Studio code Price and royalty
As mentioned Visual Studio code is completely free licensed under the MIT license agreement giving you the tool free to use and sell your product.
How it supports Linux, Windows, and macOS, all you need it to go to its official page https://code.visualstudio.com/, download it and start using it.
How this is free project backside is that there is no official support, you will have to rely on various articles and community in order to get needed information or problem solution.
Features
Syntax highlighting has become standard and norm for any editor but besides this function VS code offers us also IntelliSense option which goes a step further with code completion, code hinting, and parameter info.
This means that VS code is aware of many things going on inside your code and will offer you as you type a menu with options for autocomplete along with variables referenced, function names, etc.
VS code offers extensions inside its extensions marketplace where you can add extensions in order to implement new languages, add debuggers, change the layout, etc. This is one of the great features it allows you to easily switch from one project to another, one language to another not leaving your code editor.
Working with version control systems like Git is easy with VS Code. You’ll be able to stage files and make commits, then push and pull changes to your remote code repository of choice, right from the editor.
Conclusion about Visual Studio code
Visual Studio Code is one of if not the most flexible and extensible code editors currently on the market that I have ever tried and used. IT has become my code editor of choice simply for reasons that there is really not much it cannot do and it is constantly updated and taken care of.
You can really tune it to look and feels how you want with extensions and you really cannot beat the free price tag.
I would highly recommend this editor for daily use especially since its biggest competitors like Atom and sublime text have not seen many updates lately.
Error 0x80010108 is a Windows Live Photo Gallery error. This error prevents the Windows PC user from viewing photos. The error code is often displayed in the following format:
‘An error is preventing the photo or video from being displayed’ Error code 0x80010108
Solution
Error Causes
The error 0x80010108 occurs due to multiple reasons including:
To view the photos on your Windows PC, it is advisable to fix the problem right away.
Furthermore, you should also not delay in fixing this problem especially if the underlying causes are related to the registry or viral infection. These can pose serious system and security threats including system failure, crash and data breaches.
Further Information and Manual Repair
To resolve this error on your system, you don’t always have to hire a technical expert or be a technical whiz yourself. Here are some easy and effective methods to resolve error 0x80010108 on your PC immediately:
Method #1
To repair Windows Live Essential Software Settings, go to the start menu and then click the control panel.
Now in the control panel go the option Programs. In the programs click the tab programs and features and then select Windows Live Essentials and click repair tab. Once the settings are repaired, restart your PC to activate changes.
Method #2
Go to the start menu and type regedit.exe and then press enter. Type the following key: HKEY_CLASSES_ROOT WindowsLive.PhotoGallery.bmp.15.4 shell open DropTarget then right-click DropTarget and then Rename. Prefix a hyphen so that it becomes “-DropTarget”.
Now type the following for each GIF/ICO/JPG/PNG/TIF file types:
HKEY_CLASSES_ROOTWindowsLive.PhotoGallery.gif.15.4 shellopen DropTarget
HKEY_CLASSES_ROOT WindowsLive.PhotoGallery.ico.15.4 shell open DropTarget
HKEY_CLASSES_ROOT WindowsLive.PhotoGallery.jpg.15.4 shell open DropTarget
HKEY_CLASSES_ROOT WindowsLive.PhotoGallery.png.15.4 shell open DropTarget
HKEY_CLASSES_ROOT WindowsLive.PhotoGallery.tif.15.4 shell open DropTarget
Method #3
Download Restoro on your PC to scan for both registry issues and malware. Restoro is a multi-functional PC Fixer embedded with utilities like a powerful registry cleaner, an antivirus, and a system optimizer to name a few.
The registry cleaner scans and detects all registry-related issues. It removes all unnecessary files damaging the registry and corrupting the registry settings. Simultaneously, the antivirus removes all kinds of malicious software affecting your PC including spyware, viruses, and Trojans.
The system optimizer feature ensures that your PC works at the optimal level and does not slow down during and after the cleaning process.
Restoro is efficient and safe.
It has a user-friendly interface and simple navigations which makes it quite easy to operate. It can be downloaded on all Windows versions including.
Click here to download Restoro to resolve error 0x80010108.
When you are copying some files from your computer to your hard disk and vice versa or when you have several disks connected to your Windows 10 computer and you suddenly receive an error message saying, “The request failed due to fatal device hardware error”, then this means that there is some issue with the hardware of your computer. This issue might be caused by various reasons but whatever they may be, this post will guide you on how you can fix the “The request failed due to fatal device hardware error”. To fix the error, here are some suggestions that could help.
Option 1 – Check for any hard disk errors
On your desktop, right-click on the “This PC” or computer icon and then select Manage to open the Disk Management. Here you get to check your drive’s health.
Next, click on Disk Management on the left side panel.
From there, check the state of your drives. If it shows that all your partitions are healthy then it means all is good and that the problem may have something to do with some physical issues with your hard drive.
Option 2 – Run the CHKDSK utility
When it comes to some issues concerning the hard drive or removable devices, there is a utility in Windows that might help which is called “chkdsk”. This error check utility can help with several issues in the system including “The request failed due to fatal device hardware error”.
Tap the Win + S keys to open the Search box.
Then type “command prompt” in the field and from the search results that appear, right-click on Command Prompt and select “Run as administrator”.
After opening an elevated command prompt, copy and paste the following command and hit Enter:
Note: In the command given above, “[/F]” will try to fix the system errors while “[/R]” will be the one to fix the bad sectors.
Now if you are prompted to run CHKDSK after your reboot your PC, just tap Y and reboot your PC.
If CHKDSK is not able to find any errors, tap the Win + E keys and navigate the access window. From there, right-click on the concerned drive and click on Properties.
After opening Properties, click on the tab Tools and then click on the “Check” button under the Error-checking section.
Wait until the process is completed and then restart your computer
Option 3 – Verify the hard drive using SMART attributes
In case you don’t know, Windows has a built-in feature of SMART analysis which analyzes the hard drive/SSD and checks all the parameters by performing some minor operations. To use it, follow these steps:
Tap the Win + S keys and type “command prompt” in the field then right-click on the related search result and select the “Run as administrator” option.
After opening Command Prompt as admin, type the “wmic disk drive get status” command and hit Enter.
You should get a result after that, and if you see that it’s “normal”, proceed to the next option below.
Option 4 – Format your hard disk
You can try formatting your drive since this problem also occurs on removable hard drives. In addition, if your drive is not properly initialized, this error will really pop up. Thus, you need to make sure that the hard drive is initialized and that the correct partition style is selected.
To get started formatting your drive, tap the Win + E keys and then go to the access page of the drive.
Next, right-click on the drive and select Format.
After that, uncheck the “Quick Format” option and then format your drive properly.
Now once the formatting process is finished, unplug the drive and plug it back in afterward.
Check if the error is already fixed. If the drive is not initialized, tap the Win + R keys and hit Enter.
After opening the Run dialog box, type “diskmgmt.msc” and hit Enter to open Disk Management.
From there, right-click on the drive volume and select Initialize Disk.
Next, select the correct partition type and proceed.
When you get the “HTTP Error 304 Not modified” error in Google Chrome, Mozilla Firefox, or Microsoft Edge, there can be lots of reasons why you’re getting this error. The HTTP Error code 304 means redirection, technically. It could be that the DNS has some issues or the cache is already reusing the existing information to look for a website or it could also be that your browser might be infected.
In this post, we will show you what you can do to fix the “HTTP Error 304 Not modified” error when you are not able to open a website on your browser. Here are the exact details of the error message:
“This status code is returned if the client has already downloaded resources since the last visit and is displayed to notify the client browser that the requested resources is already stored in the browser cache which hasn’t been modified.”
Follow each one of the given fixes below to resolve the issue.
Option 1 – Clear the browsing data on your browsers
The first thing you can try is clearing the browsing data on your browsers.
Microsoft Edge:
Open Microsoft Edge.
Then click on the three horizontal dots to open the menu.
From there, click on Settings. And under Settings, click the “Choose what to clear” button under the Clear browsing data section.
Next, check all the checkboxes and then click the Clear button to clear the browsing data in the Edge browser.
Restart Edge.
Google Chrome:
Open Chrome and then click on the three vertical dots located at the top of the window.
Then click on Settings.
After that, click on Advanced. And from the Privacy and Security section, click on the “Clear browsing data” option.
Now click on the CLEAR DATA button.
Restart Chrome.
Mozilla Firefox:
Open Firefox and then click on the three horizontal lines to open the menu.
From there, click on Options.
Next, select Privacy & Security.
After that, click on the Clear Now button under the Cached Web Content section and then click the Clear All Data button under the Site Data section.
Restart Firefox.
Option 2 – Flush DNS and reset the TCP/IP
There are some websites that don’t resolve since the DNS in your computer still remembers that old IP address. And so you need to flush the DNS as well as reset the TCP/IP on your computer.
Click the Start button and type in “command prompt” in the field.
From the search results that appear, right-click on Command Prompt and select the “Run as administrator” option.
After opening Command Prompt, you have to type each one of the commands listed below. Just make sure that after you type each command, you hit Enter
ipconfig /release
ipconfig /all
ipconfig /flushdns
ipconfig /renew
netsh int ip set dns
After you key in the commands listed above, the DNS cache will be flushed and the TCP/IP will reset.
Option 3 – Try using the Google Public DNS
Changing your DNS to Google Public DNS might also help you in fixing the “HTTP Error 304 Not modified” error. To do so, follow the steps below.
The first thing you have to do is right-click on the network icon in the Taskbar and select Network and Sharing Center.
Next, click on the “Change Adapter Settings” option.
After that, search for the network connection that you are using to connect to the internet. Note that the option might be “Wireless Connection” or “Local Area Connection”.
Right-click on your network connection and click on Properties.
Then select the new window to choose the “Internet Protocol 4 (TCP/IPv4)” option.
After that, click on the Properties button and click the checkbox in the new window for the option “Use the following DNS server addresses”.
Type in “8.8.8.8” and “8.8.4.4” and click OK and exit.
Option 4 – Run Cleanup Tool and disable Extensions
You might also want to run the Cleanup Tool in Chrome if you are using this browser as well as disable all the extensions as some of them, if not all, might be the reason why you’re getting the “HTTP Error 304 Not modified” error.
If you are trying to log into your user account on your Windows 10 computer but encountered an error message instead that says, “Your account has been disabled, Please see your system administrator”, read on as this post will guide you on how you can fix this problem.
In this kind of scenario, you won’t be able to access your data unless you have access to the administrator account. This problem could be caused by several problems. It is possible that malware has infected your computer and has changed some settings in your computer, especially if your system has been under a malware attack not too long ago. The malware could’ve changed the “Account is disabled” option.
The only thing you can do to resolve this kind of problem is to log into your computer using another administrator account and then change the setting. However, if you don’t have a second administrator account, you can just enable the built-in hidden administrator account on your computer. You shouldn’t have any problem enabling the hidden administrator account as it is quite easy when you can log into your account. And in this post, you will be guided on how you can enable the hidden administrator account using the Registry Editor to fix the “Your account has been disabled, Please see your system administrator” error.
To get started, follow the instructions given below.
First, you need to start your computer and ensure that you are on the error screen. From there, you will see the Power options located on the right-hand side.
Click on the Power options and tap and hold the Shift key and then select Restart.
After that, the Advanced Boot Options will appear and from there select Troubleshoot > Command Prompt.
Next, you have to select your user account and enter the user account’s password to open Command Prompt.
After opening Command Prompt, open your screen and type “Regedit” and then tap Enter on your keyboard.
Now select the HKEY_LOCAL_MACHINE in the Registry Editor and go to File > Load Hive.
Afterward, you have to open the Windows installation drive and go to the location – WindowsSystem32Config
From there, you should find a file named “SAM” – select this file and click the Open button.
Next, you have to enter a key name. You can just input whatever you prefer.
Once done, navigate to this path: HKEY_LOCAL_MACHINEkey_nameSAMDomainsAccountUsers
From this path, you will see a key named “000001F4” – select this key and double click on the “F” entry that you can find on the right-hand side of the screen.
After that, look for the value data line labeled “0038” which should show 11 in the first column. You have to replace it with 10.
Once done, click on the OK button and close the Registry Editor and the Command Prompt to restart your computer.
Now once your computer has restarted, sign in to the Administrator account and open the Computer Management window. You can just search for it using the search bar in the Taskbar.
After you open Computer Management, go to Local Users and Groups > Users – where you can find all the user accounts. Look for your deleted user account and right-click on it and select Properties and then unmark the checkbox that says “Account is disabled”. This should fix the problem.
There are various complex tasks that take place under the hood while you upgrade or clean install the Windows operating system on a computer. Because of its complexity, there are times when you might encounter some errors when you upgrade or clean install Windows 10. One of the errors you could encounter is the error that states, “Windows could not prepare the computer to boot into the next phase of installation. To install Windows, restart the installation”.
This error does not only occur in Windows 10 as it could also occur on the other versions of Windows. There are a lot of possible causes for this error. It could be due to incompatible BIOS, corrupted system files, improper installation media or it could also be due to excessive hardware plugged into your computer and so on. Whatever the cause is, here are some potential fixes you need to check out to fix the problem.
Option 1 – Try to disconnect or disable newly installed hardware
In this option, you will have to disable or remove the hardware you’ve just installed recently since external devices could be the one that’s causing the Blue Screen of Death error to appear. To do that, just disconnect any external device that’s connected to your computer physically and then check if it fixes the error.
Option 2 – Try to update the BIOS
As you know, the BIOS is a sensitive part of a computer. Even though it is a software component, the functioning of the hardware depends on it largely. Thus, you must be careful when modifying something in the BIOS. So if you don’t know much about it, it’s best if you skip on this option and try the other ones instead. However, if you are well-versed in navigating the BIOS, then follow the steps below.
Tap the Win + R keys to open the Run dialog box.
Next, type “msinfo32” in the field and press Enter to open System Information.
From there, you should find a search field on the bottom where you have to search for the BIOS version and then press Enter.
After that, you should see the developer and version of the BIOS installed on your PC.
Go to your manufacturer’s website and then download the latest version of BIOS on your computer.
If you are using a laptop, make sure that you keep it plugged in until you have updated the BIOS.
Now double click on the downloaded file and install the new BIOS version in your computer.
Now restart your computer to apply the changes made.
Option 3 – Try to reconfigure all the created partitions
You could also try to reconfigure the partitions by deleting and recreating all the available partitions on your computer and then see if it fixes the problem.
Option 4 – Make a proper bootable USB Drive/Stick
To make a proper bootable USB drive, you need to use the Windows Media Creation tool. The Media Creation tool in Windows allows you to use the ISO installation file to make a bootable device that you can use to install Windows on your PC. Note that this is kind of different from the usual installation process as it could erase your computer’s current settings and data on the primary drive. Thus, before you proceed, you need to backup all your data into some removable drive and then use the Media Creation Tool to make a bootable drive.
After making the bootable drive, you need to plug it into your computer and then reboot.
Next, tap the F10 or Esc key to open the boot options.
Now set the boot priority of the removable drive the highest. Once the setup comes forth, follow the next onscreen instructions and install Windows without any problems.
Every now and then, the Windows Installer can also encounter some problems or glitches. One of these problems is where the Windows Update Standalone Installer, Windows Defender as well as Windows Firewall throws an error message that says, “The specified service does not exist as an installed service, 0x80070424”. This type of error can actually affect various applications on your computer so you have to fix it as soon as you can.
Although there is no clear reason for what really causes this error, there are various suggestions you can try to fix it.
Option 1 – Try to run the Windows Update troubleshooter
Windows 10 have various troubleshooters that can help you resolve many system issues. So if you’re dealing with errors “The specified service does not exist as an installed service, 0x80070424”, you can run the Windows Update troubleshooter to resolve it.
To run it, go to Settings and then select Troubleshoot from the options. From there, click on Windows Update and then click the “Run the troubleshooter” button. After that, follow the next on-screen instructions and you should be good to go.
Option 2 – Try to reconfigure the Windows Time Service
In the Start Search, type “command prompt” and right-click on Command Prompt from the search results.
Then click on the “Run as administrator” option to open Command Prompt with admin privileges.
Now execute each one of the given commands sequentially and hit Enter right after you type each one of them.
net stop W32time
exe /unregister
exe /register
net start W32time
After executing the given commands above, wait until it says, “W32Time successfully registered”.
Option 3 – Try to restart related Windows services
First, type “command prompt” in the Start Search and right-click on Command Prompt from the search results.
Then click on the “Run as administrator” option to open Command Prompt with admin privileges.
Now execute each one of the given commands sequentially and hit Enter right after you type each one of them.
SC config wuauserv start= auto
SC config bits start= auto
SC config cryptsvc start= auto
SC config trustedinstaller start= auto
Note: The commands you’ve just executed will make sure that the required Windows services are available.
Option 4 – Try to download and install the Windows Update Agent
You might also want to download and install the latest Windows Update Agent as it could also help you resolve the “The specified service does not exist as an installed service, 0x80070424” error.
Option 5 – Try to reset the Windows Update components
If by any chance that the second option didn’t work, resetting the Windows Update components could also help you resolve the problem. How? Refer to the following steps:
Open Command Prompt with admin privileges.
After that, type each one of the following commands and hit Enter after you key in one after the other.
net stop wuauserv
net stop cryptsvc
net stop bits
net stop msiserver
Note: The commands you entered will stop the Windows Update components such as Windows Update service, Cryptographic services, BITS, and MSI Installer.
After disabling WU components, you need to rename both the SoftwareDistribution and Catroot2 folders. To do that, type each one of the following commands below, and don’t forget to hit Enter after you type one command after the other.
Next, restart the services you’ve stopped by entering another series of commands. Don’t forget to hit Enter after you key in one command after the other.
net start wuauserv
net start cryptsvc
net start bits
net start msiserver
Close Command Prompt and reboot your PC and then check for updates on your computer and see if the error is resolved.
Option 6 – Try running the Windows Firewall troubleshooter
You could also try to run the Windows Firewall troubleshooter as it might also help you fix the problem. This could help in repairing and fixing Windows Firewall issues automatically. Check if it’s available for your Windows.
Finally upgraded to Microsoft’s newest OS, but the performance is a bit sluggish? Here are a few useful tips you may not have thought about that could significantly transform your experience!
How to speed up Windows 11?
1. Disable startup programs
There are many programs that launch right on startup that really aren’t essential. This, in turn, causes your PC to launch and run more slowly.
To check which programs are enabled on startup, go into the Task Manager and select the Startup tab. Find every program that doesn’t need to launch immediately, right-click on it and press ‘Disable’.
This will not shut down the program in that instant. It’ll just prevent it from running automatically as you turn on your PC. You can always launch it manually when you need it.
2. Expand your memory and storage
If you want your PC to run super smoothly, you need to have enough memory to support that. This is especially significant for those of you who love to multitask. Upgrading your RAM gives your PC more space to store the temporary data it needs to complete processing tasks. In other words, processing takes a lot less time.
Your long-term storage is equally important. Hopefully at this point you’re already using SSD over HDD, since this type of storage offers a faster boot time.
Credit: Marc Pezin on Unsplash
In any case, we recommend expanding your storage capacity. The more files and data you store, the more there is to load, significantly influencing your PC’s speed. Larger storage capacity means new data and essential updates can be stored comfortably, preventing any strain on your PC’s performance.
3. Clean up disk space
If you aren’t willing to upgrade your storage just yet, the least you can do is clean up your storage right now.
Aside from manually deleting stuff you no longer need, you can also get rid of temporary files that clutter up your storage and eat up performance for no reason. To get to them, click Windows + X and select ‘Run’ (or just type it in the search bar).
A small window will pop up, where you need to type %temp%. This will take you to a whole folder full of all the temporary files you can remove without thinking twice.
For those who upgraded from Windows 10, there’s a neat trick to get rid of potential leftover files you don’t need on your brand new iteration. Only do this if you’re 100% sticking with Windows 11, though. Go to System > Storage > Temporary files. Make sure to only leave ‘Previous Windows Installation’ and ‘Windows Update Clean-up’ checked and click on ‘Remove files’.
Lastly, make use of Windows 11’s fantastic Storage Sense feature. Turning it on will enable your PC to constantly watch out for junk or unused files to optimize your PC’s performance to the maximum.
4. Install pending updates
This one should go without saying, but pending updates can be detrimental to your Windows 11 performance. The longer you leave them untouched, the more bugs the outdated programs and patches can cause. So, make sure to regularly check for updates and install them as soon as they’re available.
5. Disable visual effects
As cool as visual effects, animations, shadows and transparency are, they can also put quite a toll on your computer’s speed. On a newer setup this generally shouldn’t be a problem, but if you do notice a drop in performance, definitely consider turning off some of these settings.
To do this you can go to the Control Panel, System Properties and click the ‘Advanced’ tab. In the Performance section, choose Settings. If you’d like a quicker way to get to the dialog (Performance Options) with Visual Effects, you can also type sysdm.cpl in the search bar.
Once there, you can either have your PC choose what’s best, choose the best appearance or the best performance. The other option is to manually toggle the effects off and on. The biggest obstacles to speed are taskbar animations, window shadows, control/element animations and animations upon minimizing/maximizing.
Credit: Windows on Unsplash
In the same vein, you should go to Settings > Personalization > Colors and disable Transparency, to prevent your computer from doing overtime just to hit the aesthetic appeal.
6. Get rid of bloatware
Bloatware is one of the biggest culprits of slow computer speed.
Pre-installed software that’s pretty much useless but takes up valuable system resources has been around since day one. No matter which device or platform you’re talking about. Luckily, a lot of it is removable, making it easy to lighten the load on your device.
To boost your Windows 11 computer, go to Settings > Apps > Installed apps.You’ll probably see a bunch of apps you don’t want or need. Click on the three dots next to each one you want to remove and press ‘Uninstall’.
Aside from helping optimize performance, removing bloatware has another great benefit. Unfortunately, often this pre-installed software is quite vulnerable, exposing you to great risk of cyberattacks. So, removing it definitely improves your device’s security and gives you at least some peace of mind.
Summary
These are a few of our fastest tips for boosting performance. There are other, more complex and time-consuming ways, of course. If you’ve tried these quick ones and still need advice on how to improve your PC’s speed, feel free to reach out!
The Error Code 0x80070057 is rather typical with Win7.
Customers of Win7 maintain reporting that each moment they strive to install this Operating system, it shows this problem error.
Often, the total information that comes with this specific error is:
"Error Code 0x80070057: The parameter is wrong"
When this problem happens, you will end up struggling to move private documents from one person to another.
Solution
Error Causes
You could get the error message when you attempt installing Win7,
"An Internal Error has occurred. Incorrect parameters".
If this happens to you, realize that you are dealing with malfunction code 0x80070057. This error occurs mostly when you are trying to build a full backup of your Windows 7 OS.
The primary source of Error 0x80070057 is huge registry values.
Extensive registry values usually occur when you are trying to back up your Windows 7 OS. This means that you need to immediately create a bigger virtual memory space to avert the occurrence of the error.
Error Code 0x80070057 can be a result of incompatibility between the motherboard and some drivers.
Check whether the computer's motherboard and the installed drivers are compatible. If you can't do this effectively on your own, it might be a good idea to enlist the services of a qualified technician.
The Problem Signal 0x80070057 has a close Connection with RAID Installations
RAID installations have a tendency of sparking off the Error Code 0x80070057. If you experience this error while using RAID, first turn off the RAID setup and check whether that resolves the problem.
Further Information and Manual Repair
Error Code 0x80070057 is repairable. Thus, there's absolutely no cause for alarm when you see it with respect to your own Windows 7 Operating System. So what can you do to resolve it?
a) Increase Virtual Memory: This is perhaps the most common solution to Error Code 0x80070057. In most cases, simply raising the virtual memory especially on Windows 7 Operating-System completely eliminates the error. Moreover, you don't have to be technically advanced to effect the change. Simply follow these steps:-
Click the Start Button and visit Control Panel
Click System Security, and proceed to System.
Click the Advanced System Settings, subsequently proceed to the Advanced Level Tab.
Click Change, which can be under the Virtual Memory
Change the virtual memory value. For instance, you can customize entirely from 2000MB to 6000MB.
Click Set, then Ok. You are done
As with each additional change you make with respect to your Computer, you will have to conclude by re-booting it. This way you make certain that they'll stay as you've established them and apply the necessary modifications.
If the error still persists after attempting the preceding fix, download a registry-cleaning software. The software will clean up your disk and free up memory thus increasing the available virtual memory for your computer. This should solve your persistent Error Code 0x80070057.
There are several kinds of errors you could encounter when you are running Windows 10 on a virtual machine. The Windows OS knows the difference between booting up in a standalone computer or in a virtual machine. This is why some specific drivers and system capabilities are used while emulating the Windows OS on software and during this phase, there are times when the System Preparation may throw up an error that says, “A fatal error occurred while trying to sysprep the machine”.
This kind of error arises due to a race condition wherein the Sysprep command tries to stop the Microsoft Distributed Transaction Coordinator or MSDTC service and the VMware tool tries to start the MSDTC service. You may also see the following messages logged in the Setuperr.log file:
[0x0f0082] SYSPRP LaunchDll:Failure occurred while executing ‘C:Windowssystem32msdtcprx.dll,SysPrepDtcCleanup’, returned error code -2146434815[gle=0x000000b7]
To fix the 0x0f0082, 0x0f0070, 0x0f00a8 Sysprep errors, you can check out two potential fixes. First, you have to check the status of the MSDTC service and the second one is to check the settings in the Windows Registry. Note that these fixes are proven to be effective on many users and apply to several versions of Windows, including Windows 10.
Option 1 – Check the status of the MSDTC service via Command Prompt
As mentioned, the error could be caused by the malfunctioning of the MSDTC service or it. Thus, you have to uninstall and reinstall the MSDTC service to resolve the problem and you can do that using Command Prompt. Follow the steps below.
In the Start Search, type “command prompt” and from the results, right-click on Command Prompt and then select the “Run as administrator” option to open it with admin privileges.
If a User Account Control or UAC prompt appears, just click on Yes to proceed.
Once you’ve opened Command Prompt, execute this command: msdtc –uninstall
The command you just entered will uninstall the MSDTC service. After that, you need to execute this second command to reinstall the service: msdtc –install
Now exit Command Prompt and check if the error is now fixed.
Option 2 – Check the Registry settings
Tap the Win + R keys to open the Run dialog box and type “Regedit” in the field and click OK or hit Enter to open the Registry Editor.
After opening the Registry Editor, navigate to this registry path: HKEY_LOCAL_MACHINESOFTWAREMicrosoftWindows NTCurrentVersionSoftwareProtectionPlatform
From there, look for a DWORD value that’s named “SkipRearm” and double click on it.
Then change its value data to “1”.
Restart your computer to apply successfully apply the changes made and check if it was able to fix the error.


 Visual studio code is a code editor available for Windows, Linux, and macOS. It is a completely free tool offering you to code in any language without the need to switch to another editor.
Visual Studio Code is part of Microsoft Visual Studio which is a complete integrated development environment (IDE). Take notice that Visual studio itself has more advanced tools for developing and testing, it has 24/7 support, training, and Azure for WEB apps.
Visual Studio Code is an editor lacking in some advanced features Visual Studio offers.
Visual studio code is a code editor available for Windows, Linux, and macOS. It is a completely free tool offering you to code in any language without the need to switch to another editor.
Visual Studio Code is part of Microsoft Visual Studio which is a complete integrated development environment (IDE). Take notice that Visual studio itself has more advanced tools for developing and testing, it has 24/7 support, training, and Azure for WEB apps.
Visual Studio Code is an editor lacking in some advanced features Visual Studio offers.

