How to Fix Error Code 0x800ccc0f

Error code 0x800ccc0f - What is it?

Error code 0x800ccc0f is an error that occurs when users attempt to send/receive emails in Outlook or Outlook Express. Though information regarding the error is limited and sometimes difficult to decipher to those unfamiliar with error code issues, the following are possible symptoms users can expect when this error occurs:

  • Unexpected termination of the connection
  • Inability to access email messages sent to one’s account
  • Inability to send email messages

Solution
Restoro box imageError Causes

Errors in Outlook or Outlook Express may occur due to a multiplicity of reasons. It may be due to a problem with your network connection or the server. You may also encounter this problem after an extended period of inactivity.

Since the error could be due to one of many issues, several solutions are recommended. However, note that these suggestions require you to make changes that come with various risks. Be sure to implement these instructions correctly to avoid causing more problems to occur.

If you are not confident that you will be able to successfully implement the solutions below, get help from a certified Windows technician or IT professional.

Further Information and Manual Repair

As with other error codes, manual procedures are available which users can take to correct the problem. To implement manual repair, follow the methods suggested below:

Method one: Troubleshoot your Internet Connection

Since error code 0x800ccc0f may manifest itself due to an issue with your network, you can seek to rectify the problem by first checking your connection. To do this, open an Internet browser. Type a valid web address in the address bar and click Enter.

If you are unable to access the website, you may then seek to fix the Internet connectivity issue by using Microsoft Automated Troubleshooting Services. These free tools are available for download on Microsoft’s website.

Not only can these tools fix your Windows Firewall – if this is the cause of your connectivity issues. These automated troubleshooting tools can also resolve other issues related to your Internet browser or network.

However, if after downloading and running these tools error code 0x800ccc0f still persists in Outlook or Outlook Express, implement the solution below.

Method two: Verify your Network Connection

Verifying your network connection is another way you can resolve your Outlook issues, i.e. once the issue is in fact a network-based problem.

To verify your network connection, make sure your computer’s network devices are turned on and fully functioning. Also ensure that the cables that connect your computer to a network are secure. You may also contact your Internet Service Provider (ISP) to verify your connection.

If there is no issue with your network and error code 0x800ccc0f persists, you will need to implement method three.

Method three: Check your Firewall or Router Settings

Problems with sending or receiving email messages based on the 0x800ccc0f error code could also be due to configuration issues for individuals who connect using a router. If this is a misconfiguration issue, you may be able to resolve the problem by bypassing the router and connecting through your modem.

Before doing this, however, be sure to check if your firewall is turned on as connecting directly can leave your machine vulnerable. Prevent attacks by checking your Windows Firewall setting. After making adjustments where necessary to ensure the firewall is turned on, test your connectivity to ensure you can access a connection. Also, check Outlook to see whether the error message has been resolved. If the error persists, consider the next solution.

Method four: Disable Third-party Security Apps

Third-party apps like anti-virus software can sometimes cause interference, leading to errors. For this reason, check if the antivirus on your device is the source of the issue. Start by disabling the antivirus software. You may also turn off the software’s email scanning feature to verify whether or not that is the cause of the error.

Note that disabling your antivirus is only a temporary solution as it is not recommended that you use your computer without such protection in place. Consider replacing your antivirus or uninstalling and reinstalling for a permanent fix if indeed your issue with error code 0x800ccc0f was caused by interference from third-party apps.

Method five: Automated Tool

Also, consider downloading a powerful automated tool to protect your machine from possible errors in the future.


Do You Need Help with Your Device?

Our Team of Experts May Help
Troubleshoot.Tech Experts are There for You!
Replace damaged files
Restore performance
Free disk space
Remove Malware
Protects WEB browser
Remove Viruses
Stop PC freezing
GET HELP
Troubleshoot.Tech experts work with all versions of Microsoft Windows including Windows 11, with Android, Mac, and more.

Share this article:

You might also like

Fix WIFI not asking for password
Windows has tendencies to remember WIFI passwords so it can reconnect automatically to them. But from time to time we change passwords and Windows does not let us change it since he has network remembered. In this case, we will not be able to connect to the internet. In this helpful guide, we will let you know which steps you will need to take in order to solve this issue and to be able to connect to the internet again.
  1. Restart Modem

    First thing first, restart your modem. Windows might see it as a new network and offer you to type in the password for it.
  2. Update driver

    Sometimes the issue could be due to driver problems, open device manager and update WIFI driver or reinstall it.
  3. Reset WIFI password

    Press ⊞ Windows + R type “Control” > hit Enter. Now click Network and Internet > Network and Sharing Center > Change adapter settings. Right-click on the connected Wifi and select Status. Click Wireless Properties, change the password from the Network security key section, and then click OK to reset your WiFi password.
  4. Forget the network

    Click on Start > Settings > Network & Internet > Wi-Fi. Click the Manage known networks link Select the network you are looking for Select Forget.
  5. Delete your WIFI profile

    Press ⊞ Windows + X to open the secret menu and click on Command prompt (admin) In command prompt windows type: netsh wlan show profile netsh wlan delete profile name=<profile name> Reboot
Read More
15 Deep WEB sites you need to visit
Deep WEBA not long time ago we had an article about the deep WEB and dark WEB here on errortools.com explaining its origins and its purpose. The article can be found here if you are interested: https://errortools.com/windows/what-is-deep-and-dark-web/ Now at this point in time, we want to present you with 15 great Deep WEB sites that could offer you some information not found anywhere else, that could offer you some privacy, or simply to have some fun and safely explore how it is like to be part of deep WEB. Take notice that for successful visiting of given sites you will need to have installed TOR browser. More about Tor browser itself can be found here: https://errortools.com/blog/software-review-series-tor-browser/ and its official website for download here: https://www.torproject.org/download/ Make sure that you copy the onion link and paste it into your TOR browser in order to access the site. That being said, let’s begin.
Mail2Tor

http://mail2tor2zyjdctd.onion/ If you want secure and private ways of sending your emails then look no further. Mail2Tor uses a webmail client and encrypts each email received or sent, combine that for not storing IP addresses and you have a private and safe environment for your emails.

The Hidden Wiki

http://zqktlwiuavvvqqt4ybvgvi7tyo4hjl5xgfuvpdf6otjiycgwqbym2qad.onion/wiki/index.php/Main_Page The Hidden Wiki is the go-to site if you want to explore more of deep WEB since it is the site of collected .onion sites. Think of it as a registry of onion sites that want to be accessed publicly but offer anonymity.

TorLinks

http://torlinksd6pdnihy.onion/ TorLinks is another site focusing on .onion site listings. Site themselves are divided into categories and are easy to find. Take note that .onion sites come and go so make sure to visit frequently both The Hidden Wiki and TorLinks in order to be updated.

Torch Search Engine

ttp://xmh57jrzrnw6insl.onion/ Torch is the oldest and most well-known search engine for dark web links, with its database of over a million .onion websites there is a chance that you will find what you are looking for on it.

DuckDuckGo

http://3g2upl4pq6kufc4m.onion/ Integrated into TOR itself as a default search engine DucDuckGo has proven itself to be a great competitor and challenger to Google. But unlike Google, DuckDuckGo will not track you nor store your search activities making it a great general private search engine.

Facebook

https://www.facebookwkhpilnemxj7asaniu7vnjjbiltxjqhye3mhbshg7kx5tfyd.onion/ Yup, Facebook has its own .onion version of its popular platform. Now since Facebook itself is a social media platform anonymity is out of the question but with .onion routing, you can have and maintain a Facebook account from locations where you normally could not like in some countries where Facebook.com is banned.

Galaxy3

http://galaxy3bhpzxecbywoa2j4tg43muepnhfalars4cce3fcx46qlc6t3id.onion/ Galaxy3 is also a social platform, the site is mostly populated with code experts and other individuals posting all kinds of stuff.

The Dark Lair

http://vrimutd6so6a565x.onion/index.php/Board Dark Lair was the first image exchange website that evolved into a social network. One difference from the other two mentioned is that you can engage in the website without registration as an anonymous user.

Pro Publica

https://www.propub3r6espa33w.onion/ The aim of the five-time Pulitzer Prize winner ProPublica is “To expose abuses of power and betrayals of the public trust by government, business, and other institutions, using the moral force of investigative journalism to spur reform through the sustained spotlighting of wrongdoing.” It’s the first major online publication to have a .onion address. The non-profit newsroom is funded by organizations such as the Sandler Foundation and has made countless contributions to the fight for free speech and privacy.

Soylent News

http://7rmath4ro2of2a42.onion/ Soylent news is an onion site that well brings news. The difference from other sites of the same content is that Soylent news is community moderated without any big names involved so it is authentic in its content.

CIA

ttp://ciadotgov4sjwlzihbbgxnqg3xiyrg7so2r2o3lt5wz5ypk4sxyjstad.onion/ Tor’s history is an unlikely tale. It was created by the U.S Navy with the purpose of helping informants in foreign nations to communicate safely over the Internet. The Central Intelligence Agency (CIA), in that spirit, released a .onion site so that people from across the globe can browse their resources securely and anonymously.

Secure drop

https://secrdrop5wyphb5x.onion/ Secure drop is a platform for changing leaked information and for journalists to communicate with their leads in private. It is used by Washington Post, Pro Publica, and The Guardian.

Hidden Answers

http://answerszuvs3gg2l64e6hmnryudl5zgrmwm3vh65hzszdghblddvfiqd.onion/ Hidden Answers is Reddit or Quora of the dark web but as in the spirit of the dark web, all discussed topics and stories are in total anonymity.

SCI-HUB

http://scihub22266oqcxt.onion/ With over 50 million research papers in the domain of science shared freely, Sci-Hub eliminates all barriers of free knowledge and offers a unique approach to education and scientific information.

Smartmixer.IO

http://smrtmxdxognxhv64.onion/ Smartmixer is a bitcoin mixer. The service scrambles your bitcoin with other users making your purchases completely anonymous. And that's it. 15 dark WEB onion sites you need to visit. I hope that you enjoyed the list and found something useful in it. Also, note that onion links can change overnight so if any of provided links do not work just go to DuckDuckGo and search for the site with the onion at the end.
Read More
How to Fix Fmod.dll Error Code

Error Fmod.dll - What is it?

This is a type of DLL error code. DLL is the abbreviation of Dynamic Link Library. DLL files contain small programs which are similar to executable files. One DLL file may be used to load and run several programs. Fmod.dll is created by Electronic Arts Inc. and associated with Crysis. This file is developed for the Windows OS. This error code occurs when you are unable to access, run and load programs supported by Crysis on your PC. Fmod.dll error code message is displayed in different formats such as:
  • "Fmod_event.dll not found."
  • "The file fmod_event.dll is missing."
  • "This application failed to start because fmod_event.dll was not found. Re-installing the application may fix this problem."
  • "Cannot start Crysis. A required component is missing: fmod_event.dll. Please install Crysis again."
  • "Fmod_event.dll Access Violation."
  • "Cannot register fmod_event.dll."
  • "Cannot find C:\Windows\System32\fmod_event.dll."
Error Fmod.dll may pop up when you start-up or shut down the PC or even during the installation of a program.

Solution

Restoro box imageError Causes

Narrowing down to one cause for Fmod.dll error code is impossible virtually because this error may result due to different reasons on your system. Some of the common causes associated with this error code are:
  • Viral Infection
  • Hardware failure
  • Missing, Corrupt, or Deleted Fmod.dll file
  • Improper program installation
  • Registry issues
No matter what the underlying cause of the reason may be, it is recommended to resolve the issue immediately to avoid serious PC threats.

Further Information and Manual Repair

To resolve this error on your system, try the methods discussed below:

Method 1 - Check the Recycle Bin

As mentioned above, Fmod.dll is a DLL file that is used to run and load a variety of programs on your system. There is a possibility that you uninstalled a program that was supported by the Fmod.dll file and accidentally deleted it. In such a scenario, the easiest way to resolve the Fmod.dll error code is to re-install the deleted file from the recycle bin. For this, go to the recycle bin and search for the file. If you find it reinstall if you can’t then simply download the Fmod.dll file from a reliable website.

Method 2 - Scan for Malware

Malware usually enters through phishing emails and downloads. These malicious programs then hide in your system disguising as either DLL or EXE files. The occurrence of fmod.dll file error may be due to malicious programs hiding in your system. Therefore scan your entire PC with a powerful anti-virus. An antivirus detects and removes all malicious software programs such as viruses, malware, Trojans, spyware, and adware. Try this, to resolve error code Fmod.dll and see the results.

Method 3 - Fix Hardware Problems

Fmod.dll file error may also pop on your screen due to hardware failure. If this is the reason, then we advise you to use the Device Manager an in-built tool in Windows 7 and 8 to fix hardware failures. For this go to the start menu then control panel. Now click on the ‘hardware and sound link’ and then click on the Device Manager. If you find any devices in red exclamation point, then this means this device is problematic. Uninstall the driver for that hardware device and then update the driver. Install the latest version to resolve. Remember, hardware problems are mostly related to outdated drivers.

Method 4 - Restore Points

Use System Restore, an in-built utility also known as the recovery tool, to restore points and ensure your PC is back to its previous working condition before the error code occurred. Simply put, it helps undo recent changes. You can find the System Restore tool in the System Tools folder.

Method 5 - Clean and Repair the Registry

The registry is that part of your PC that stores all the information, activities performed, and files including the junk files, invalid keys, bad entries, and cookies. When these files accumulate on your PC, they take up all the registry space and corrupt the important system and DLL files also stored in the registry, thereby generating such errors. Now you can clean the registry manually. But this process can be time-consuming and slightly technical, hence we advise you to download Restoro. This is a PC Fixer integrated with a registry cleaner. It is easy to use deployed with an intuitive interface. The registry cleaner scans the entire PC and removes all registry errors. It wipes out all the obsolete files and repairs the damaged DLL and system files. Click here to download Restoro.
Read More
Microsoft removed password as a requirement
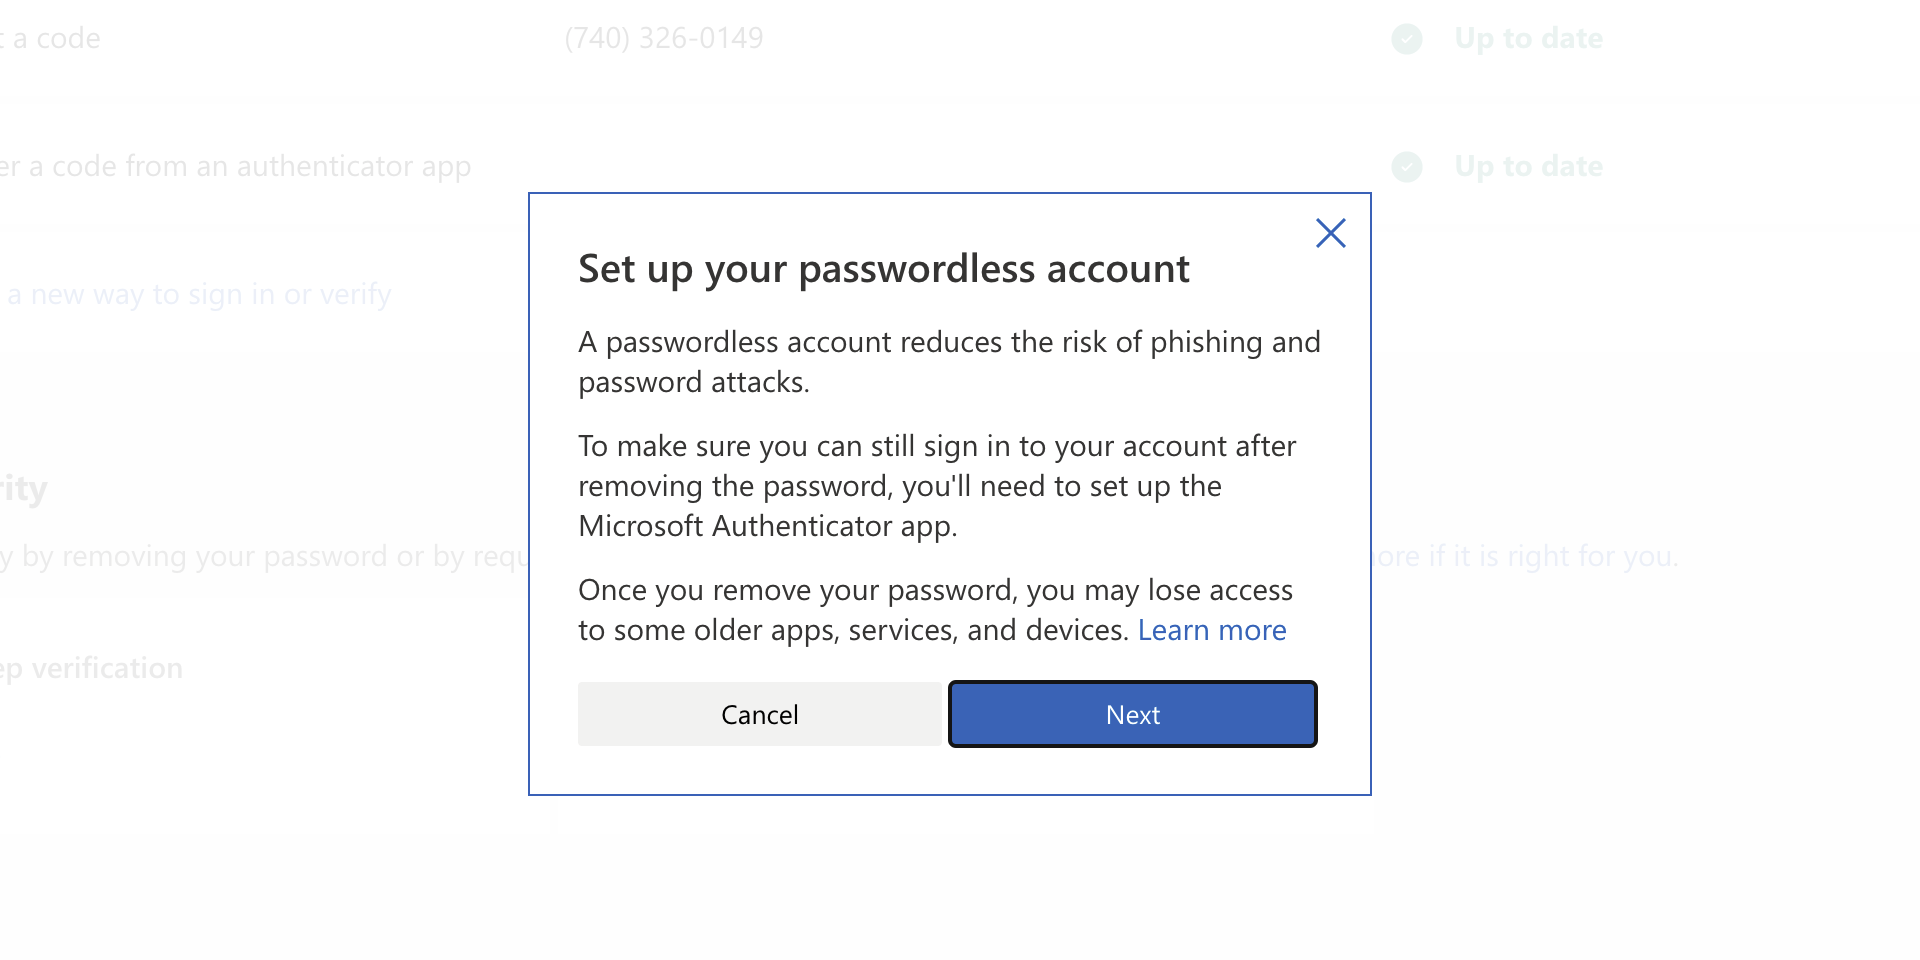
ms password goneAs of the time of writing this article you no longer need or are required to have a password if you plan to log in to your Microsoft account. Microsoft explored various options for account security and came to the conclusion that passwords are obsolete. Microsoft is letting you access your account through the Microsoft Authenticator app, Windows Hello, a security key, SMS verification, or email verification code. All of these methods are way better in terms of security than passwords.
How to turn these features on?

To get rid of your Microsoft password, the process is simple. You simply need to go to your Microsoft account, click “advanced security options,” then “enable passwordless accounts” under the Additional security section.
Read More
How to Fix Socket Error 10013

Socket Error 10013 - What is it?

Socket error 10013 is an error code that often pops on the screen when you try to access the server. This error code restricts your permission to access. It shows that your permission request was denied. The error message is displayed in the following format:
“Socket.error: [Errno 10013] an attempt was made to access a socket in a way forbidden by its access permissions”

Solution

Restoro box imageError Causes

Narrowing down a particular reason for the cause of socket error 10013 is difficult, typically because this error code can be generated due to several reasons. Here are some of the common reasons for its occurrence on your PC:
  • High-security set up- Firewall or an antivirus program
  • Too many functions tied to the same driver confuses the socket
  • Outdated drivers
  • Malware
The good news is that the socket error 10013 is not fatal. However, it is advisable to fix and resolve the issue to avoid inconvenience.

Further Information and Manual Repair

Here are some of the best, quickest and easiest methods to work around the problem and resolve socket error 10013 without any hassle or delay.

Method 1 - Turn off Firewall

Believe it or not, a high level of internet security measures like Firewalls and anti-virus programs are a common cause of socket error 10013. Firewalls are made to protect a computer from harmful connections but sometimes it may also restrict server connections, considering them as a threat to your system security. Due to this, permission access is adamantly denied. To resolve this issue on your PC, the best way to go about is to turn off your Firewall or any other anti-virus programs installed on your system. Once you turn off these programs, try accessing the server again. The majority of the time the issue is resolved by carrying this step. Nonetheless, if the error still persists, try the methods given below.

Method 2 - Check the Permissions section of the Firewall Program

Another way to resolve this is to check the permission section of the Firewall program and check for the server. If the server is not listed, contact the Internet Service Provider (ISP) and ask for help in adding the server to the list.

Method 3 - Update Drivers

The outdated driver may sometimes be the reason for the socket error 10013.  The socket may no longer use the drivers installed on your PC which is why permission to access the server is not granted. When this is the reason, try updating the drivers to resolve. For new drivers, visit the software manufacturers’ website, download, and install.

Method 4 - Scan for Viruses and Malware

Another alternative is to scan for viruses and malware. Sometimes the cause for the error is a viral infection. Therefore, remove them to resolve. The best way is to download Restoro. This is a user-friendly and next-generation PC Fixer embedded with 6 scanners including a powerful anti-virus. It scans your entire PC and removes all types of viruses including malware, adware, spyware, and Trojans in seconds. Click here to download Restoro.
Read More
Fix Windows Update Error 0x8007001f – 0x20006
As you know, Microsoft’s Windows Media Creation Tool is a useful tool that helps you download and install the latest version of the Windows 10 operating system. However, there are times when it could encounter some problems during the update process. One of these programs is the following error message:
“0x8007001F-0x20006, The installation failed in the SAFE_OS phase with an error during REPLICATE_OC operation.”
The error pointed out the “Safe OS phase”. It is the phase that’s initiated to install all the required Windows Updates. Thus, the possible cause for this error could have something to do with an interrupted download, internet connection, and many more. Although this error could be caused by a lot of factors, fixing it shouldn’t be that hard. You can try to reset the Windows Update Components or delete the Windows Update cache. You could also disable both the Firewall and your antivirus program temporarily or run the Windows Update in a Clean Boot state, as well as run the Windows Update troubleshooter. To get started troubleshooting the error, follow each one of the suggestions provided below.

Option 1 – Try to reset the Windows Update components

Resetting the Windows Update components could help you resolve the Windows Update error 0x8007001f – 0x20006. How? Refer to the following steps:
  • Open Command Prompt with admin privileges.
  • After that, type each one of the following commands and hit Enter after you key in one after the other.
    • net stop wuauserv
    • net stop cryptsvc
    • net stop bits
    • net stop msiserver
Note: The commands you entered will stop the Windows Update components such as Windows Update service, Cryptographic services, BITS, and MSI Installer.
  • After disabling WU components, you need to rename both the SoftwareDistribution and Catroot2 folders. To do that, type each one of the following commands below, and don’t forget to hit Enter after you type one command after the other.
    • ren C:WindowsSoftwareDistribution SoftwareDistribution.old
    • ren C:WindowsSystem32catroot2 Catroot2.old
  • Now, restart the services you’ve stopped by entering another series of commands. Don’t forget to hit Enter after you key in one command after the other.
    • net start wuauserv
    • net start cryptsvc
    • net start bits
    • net start msiserver
  • Exit Command Prompt and then restart your computer.

Option 2 – Try to delete the Windows Update Cache

You might also want to delete the Windows Update cache since there are times when existing corrupt or incomplete Windows Update files can cause some problems in downloading and installing Windows Updates. To achieve this, simply delete the “$Windows.~BT” & “$Windows.~WS” folders in your computer. Once you’re done, try to run Windows Update again and see if the error is now fixed.

Option 3 – Try to temporarily disable anti-virus and Windows Defender Firewall

As mentioned, the error could be due to the antivirus program or the Windows Defender Firewall installed on your computer. Thus, disabling them or any security software installed in your computer is always a good idea you can try when you’re not able to access the shared drive on your computer. There are times when you encounter problems like error 0x8007001f – 0x20006 due to interference of antivirus or security programs. Thus, you have to disable both your antivirus program and Windows Defender Firewall for the meantime and check if it fixes the error or not

Option 4 – Run the Windows Update in a Clean Boot State

It is possible that some third-party application is the one that’s causing the problem so it’s best if you put your computer in a Clean Boot state. During this state, you can start the system with a minimum number of drivers and startup programs that will surely help you in isolating the root cause of the issue.
  • Log onto your PC as an administrator.
  • Type in MSConfig in the Start Search to open the System Configuration utility.
  • From there, go to the General tab and click “Selective startup”.
  • Clear the “Load Startup items” check box and make sure that the “Load System Services” and “Use Original boot configuration” options are checked.
  • Next, click the Services tab and select the “Hide All Microsoft Services” check box.
  • Click Disable all.
  • Click on Apply/OK and restart your PC. (This will put your PC into a Clean Boot State. And configure Windows to use the usual startup, just simply undo the changes.)
  • After that, try to run Windows Update again.
Note: If you are able to install the app without any trouble at all then it means that the error is caused by some third-party application on your computer. You need to look for the culprit and uninstall it once you found it.

Option 5 – Run the Windows Update Troubleshooter

You might also want to run the Windows Update Troubleshooter as it could also help in fixing error 0x8007001f – 0x20006. To run it, go to Settings and then select Troubleshoot from the options. From there, click on Windows Update and then click the “Run the troubleshooter” button. After that, follow the next on-screen instructions and you should be good to go.
Read More
How to Fix Media disconnected error message on Windows 10
A computer with no internet connection is like a mobile phone that can’t call nor text though you can still use it for other things. So if you are having problems with your computer’s internet connection, worry not as there are some basic things you can try before you go over the actual troubleshooting. Just make sure that you really have working internet. To verify it, try connecting your other devices. Aside from that, you must also make sure that your computer is connected properly over cable or connected to the router over the Wi-Fi. Once you have all these things covered, now’s the time to start troubleshooting the problem with the help of the instructions prepared below. To be more specific, this guide will walk you through what you can do when you encounter a particular internet connection problem where you get the Media State Media disconnected error message on your Windows 10 computer.

Before you troubleshoot the problem, you need to first check the internet connection status on your computer. To do that, follow these steps:

  • Type in “cmd” in the Cortana search box.
  • From the search results, right-click on Command Prompt and select “Run as administrator” from the context menu.
  • After opening Command Prompt with administrator privileges, type in the ipconfig /all command and hit Enter.
  • After you enter the command, you will see a list of all the connected media like the Ethernet, Wi-Fi along with its status, and more. From there, you need to check everything closely. I notice a message that says, “Media State . . . . . Media disconnected”, then your internet connection is indeed having issues.
Refer to the options below to fix the Media State Media disconnected error message on your Windows 10 PC.

Option 1 – Try resetting WINSOCK and IP Stack

  • Type in “cmd” in the Cortana search box.
  • From the search results, right-click on Command Prompt and select “Run as administrator” from the context menu.
  • After opening Command Prompt, type in each one of the commands listed below
    • netsh winsock reset catalog – This command will reset the WINSOCK entries.
    • netsh int ipv4 reset reset.log – This command will reset the IPv4 TCP/IP stack.
    • netsh int ipv6 reset reset.log – This command will reset the IPv6 TCP/IP stack
  • Once you’ve executed the commands listed above, restart your PC to successfully apply the changes made.

Option 2 – Check if your Network Adapter is disabled

If you’ve disabled the network adapters on your computer, then it’s most likely the reason why you’re getting the Media State Media disconnected error message. Thus, you need to enable it back.
  • Open Settings and go to Network and Internet > Select Ethernet > Change adapter options.
  • From there, right-click on the adapter and enable it.

Option 3 – Check the Wi-Fi Properties

Though this case is not common, Wi-Fi sharing has actually caused issues for some users. That’s why you need to check the Wi-Fi properties. Go to Network Connections and right-click on Wi-Fi and select Properties. From Properties, go to the Sharing tab and select the first option and click OK.

Option 4 – Try updating the Network driver

  • Tap the Win + R keys to open the Run dialog box and then type in devmgmt.msc and tap Enter or click OK to open the Device Manager.
  • Expand the section for the outdated device drivers.
  • And then select the Network driver or any other outdated driver(s) and right-click on it/them.
  • From the drop-down menu, select the Update Driver option and follow the on-screen instructions to install the latest version of the driver.
  • Then also click on the option, “Search automatically for updated driver software.
  • Restart your PC after the installation.
Note: If updating the Network driver didn’t work, you can go to the website of your PC manufacturer and look for the support section where you can download the drivers for your computer. You just need to take note of your PC’s correct model and model number so you can find the appropriate driver.
Read More
Domain Users Sign in using Biometrics
The use of Biometrics is supported by Windows 10. Aside from that, it also supports PIN, password, picture password on all computers and if your computer has the proper hardware, Windows 10 also supports facial scanning, iris scanning, and even fingerprint scanning. You can see all these exciting features inside Settings > Accounts > Sign In Options. On the other hand, you can’t really expect to make use of all the above-mentioned features since it depends if the hardware is available to support them. One of the most interesting features is the use of Biometrics which is really useful in workplaces and so this post will show you how you can enable or disable the Domain Users Sign In on Windows 10 using Biometrics via Registry Editor or Group Policy Editor. But before you go on, you need to create a System Restore Point first since the modifications you’re about to do might affect the functioning of your computer. So in case something went wrong, you can always undo the changes you’ve made.

Option 1 – via Registry Editor

  • Tap the Win + R keys to open the Run dialog box.
  • Next, type “Regedit” in the field and hit Enter to open the Registry Editor.
  • After that, navigate to the following registry path:
HKEY_LOCAL_MACHINESOFTWAREPoliciesMicrosoftBiometricsCredential Provider
  • From there, right-click on the right-side panel and click on New > DWORD (32-bit) Value.
  • And then set the name of the newly created DWORD as “Domain Accounts”.
  • Afterward, click on “Domain Accounts” and set its value to “1”. This will allow the domain users to sign in to Windows 10 using Biometrics. While the value of 0 will disable the domain users sign in to Windows 10 using Biometrics.
  • Exit the Registry Editor and restart your computer for the changes to take effect.

Option 2 – via Group Policy Editor

  • Tap the Win + R keys to open the Run dialog box.
  • Next, type “gpedit.msc” in the field and hit Enter to open the Group Policy Editor.
  • After that, navigate to the following setting:
Computer Configuration > Administrative Templates > Windows Components > Biometrics
  • Then double click on the following entries located on the right-side panel and set the radio button to Enabled on all of them.
    • Allow the use of Biometrics.
    • Allow users to log on using Biometrics.
    • Allow domain users to log on using biometrics.
  • Now exit the Group Policy Editor and restart your computer to apply the changes made properly.
Read More
Fix Intel Wireless AC 9560 errorcode 10 in W11
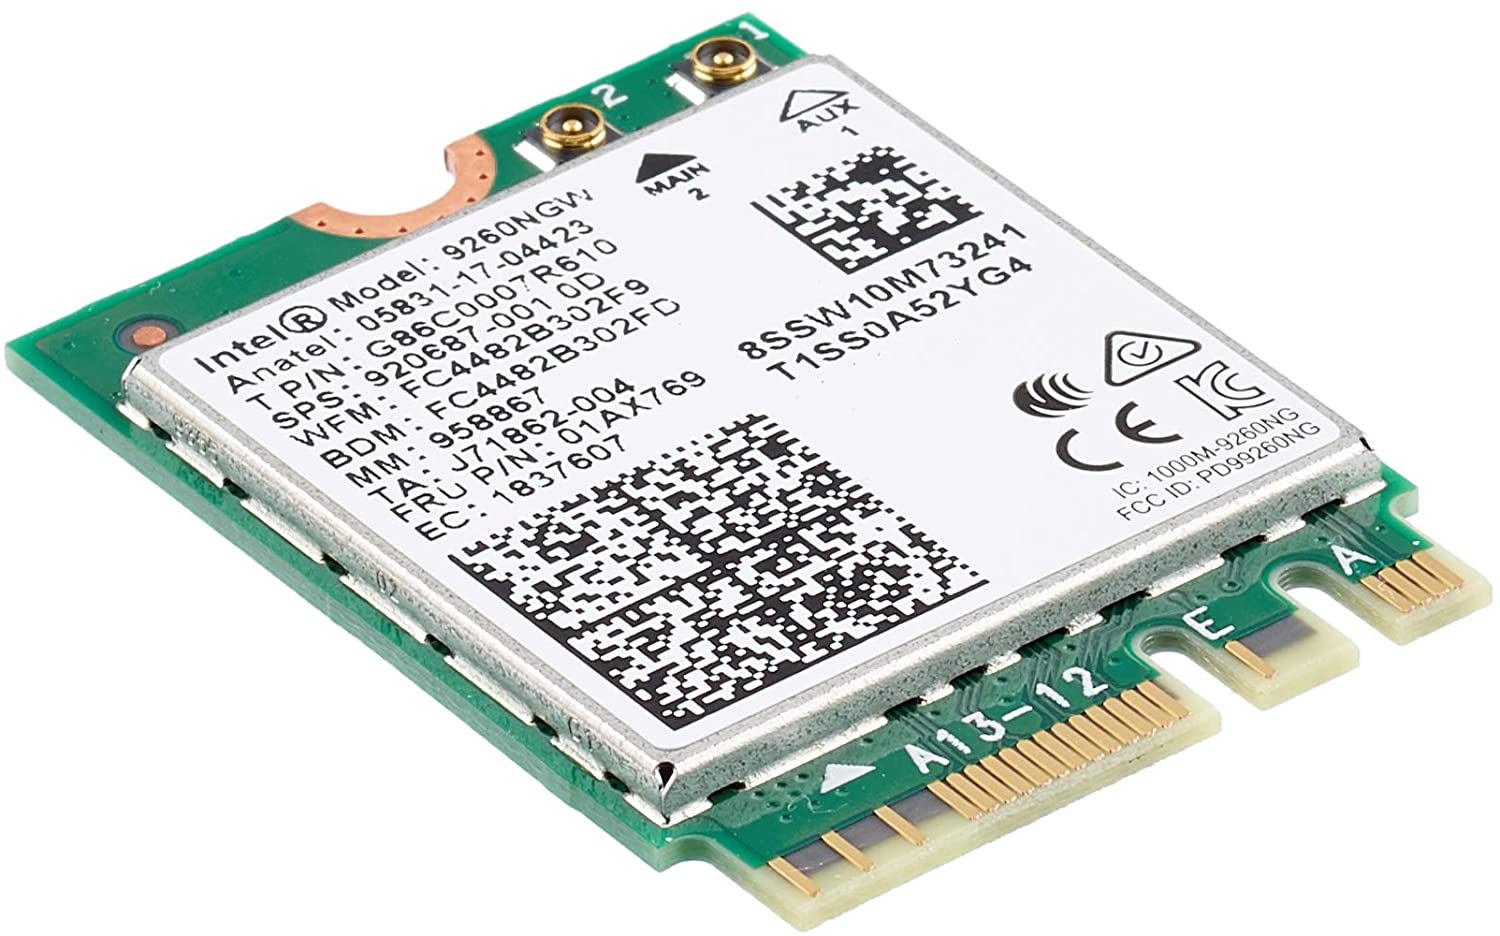
Error code 10, device manager code occurs when Bluetooth or Wi-Fi cannot be enabled. Inside device manager beside device would be yellow exclamation sign and if you go into device properties status would be: This device cannot start. Intel Wireless AC 9560Following are proven solutions that will resolve the issue and provide you with a working device.

Reboot PC, check for switch

This simple solution can usually work in most cases, first thing is to check if by any chance hardware switch for Wi-Fi or Bluetooth is OFF (laptops have a small switch that can turn the device On or OFF), then if you do not have a switch or you made sure it is ON, reboot your system.

Run Network Adapter Troubleshooter

If previous simple step solutions have not proven to be effective run Network Adapter Troubleshooter
  1. Press WINDOWS + I to open settings
  2. Go to System > Troubleshoot > Other troubleshooters
  3. Inside Find Network Adapter
  4. Click on Run to start the troubleshooters

Disable and then re-enable Adapter

If the previous solution has not fixed the issue try disabling the adapter and then re-enabling it back.

Update network adapter

Go to the intel website and download the latest driver package. After the download is finished install the latest driver.

Turn ON the WLAN AutoConfig service

  1. Press Windows key + R to invoke the Run dialog.
  2. In the Run dialog box, type services.MSC and hit Enter to open Services.
  3. In the Services window, scroll and locate the WLAN AutoConfig service.
  4. Double-click on the entry to edit its properties.
  5. In the properties window, click the drop-down on the Startup type and select Automatic.
  6. Next, make sure the Service status is started and running.
  7. Click Apply > OK to save changes.
  8. Exit Services console.
  9. Restart PC.
Read More
How to Set up POP3 Email in Outlook
No one knows everything about a program off hand. You need to use the program for a long time before you can even possibly know all that it is able to do and all you are able to achieve with it. However, this doesn’t mean that you don’t need help from time to time. This is also the case when Outlook errors pop up. Sometimes there are things you must or probably should do with your program that you do not understand and definitely don’t know how to do. Set up POP3 with your email account in Outlook is one of these things you will probably need help to achieve.

Steps to Set up POP3

First, you may need to know what POP3 is. POP3 is the way emails are sent from one email address to another. It may be more or less instant nowadays, but the process is still long and hard-winded. Similar to how your letters get from your mailbox to the recipients' mailbox, your emails get from you to the next person. Letters are picked up in your mailbox and sent to your post office where they send it to the recipient’s post office who sends it to the recipient’s mailbox. Similarly, your email is sent to your outbox, which sends it to your email service provider, that sends it to the recipient’s email service provider who sends it to their inbox. This is one of the reasons that sending an email to someone who uses the same email service provider as you is about a millisecond faster. This process of sending emails is called POP3 and you need to set it up if you use Outlook on Microsoft. This, on Outlook, also determines which email account you send your emails from. You see, on Outlook and many other email service providers, you can have many different email addresses, no even necessarily with the email service provider’s prefix on the end. Now, if you want to see this for yourself, go on to your settings on Outlook and look for manage email accounts. If you have more than one email account, you will see them listed. Somewhere on the sidebar, you will see POP3 as well. If you want to add more email accounts to this, such as a business email or a personal email, then just click ‘Add new account’ instead of 'Manage email accounts'. When you click on an email account you have linked already, you will see on this side the details for your POP3 (incoming emails) and your SMTP (outgoing emails). This can be changed, but since everyone’s number of accounts and type of accounts is different, there is no set way to change this. However, you can give Microsoft a call and they will walk you through the necessary steps in order to change this.

Conclusion

So, POP3 can be incredibly easy to understand or incredibly hard; it depends on how good you are with electronics and the advice you are given. But don’t try to change things by yourself; get a professional from Microsoft to help you with POP3 on your Microsoft Outlook account.
Read More
1 2 3 171
Logo
Copyright © 2023, ErrorTools. All Rights Reserved
Trademark: Microsoft Windows logos are registered trademarks of Microsoft. Disclaimer: ErrorTools.com is not affiliated with Microsoft, nor claims direct affiliation.
The information on this page is provided for information purposes only.
DMCA.com Protection Status