- Tap the Win + R keys to open the Run dialog box and then type “cleanmgr” in the field and hit Enter to open the Disk Cleanup window.
- After that, select the drive you want to clean.
- Now click OK to clean the disk and restart your computer.
A number of users reported lately that their Windows 10 PCs automatically boots into the BIOS whenever they start their computers. And when they tried to exit the BIOS and restart their computers, it still boots into the BIOS. If you are one of the users who experience the same problem, worry not for this post will walk you through what you can do to resolve the problem.
Each time a Windows 10 computer boots, it goes through a lot of processes and one of them is where it checks the computer for any hardware issue such as hard drives, peripherals, as well as external devices. So if it finds some issue, the computer will halt the boot process and will boot into the BIOS. To fix this, there are several suggestions you can try. You have to check if you’ve pressed any key, especially the F2 or F12, or Del keys. You also have to check the peripherals and external devices in your computer or update the BIOS or reset it. For more information, make sure to follow each one of the options laid out below.
The first thing you can do is to check for any pressed key. This might not make any sense but a pressed key can actually cause this problem. So you have to check if you have the F2 or F12 or Del buttons pressed since these are hardware keys that are usually set by the OEM to boot into the BIOS.
You might also want to try checking if there are other devices that are connected to your PC. This is because the configuration of the BIOS or UEFI might be configured in a way that any external device connected to the computer has a higher boot priority compared to the hard disk. And if it’s really the case, the externally attached disk might be the drive your computer is trying to boot into and not the hard disk. In such cases, Pen Drives, USB storage devices, CDs, DVDs, and so on, are included in this category of physical device connections.
If the Boot Manager wasn’t able to locate a proper boot device, then it could be the reason why your computer boots into the BIOS when you turn it on. Thus, you have to check if there is an available proper boot device. You can usually find it under the Boot priority section. However, if you’re unable to locate your hard drive or SSD under the Boot device, then you have to change the hard drive but you have to check first if it is properly plugged in and that it works on other computers. If it works on other PCs, then the problem lies in the motherboard of your computer, and in that case, you have to consult its manufacturer.
Updating the BIOS can help you fix the issue but as you know, BIOS is a sensitive part of a computer. Even though it is a software component, the functioning of the hardware depends on it largely. Thus, you must be careful when modifying something in the BIOS. So if you don’t know much about it, it’s best if you skip on this option and try the other ones instead. However, if you are well-versed in navigating the BIOS, then follow the steps below.
Note: If updating the BIOS didn’t help, you might want to consider resetting it instead.
You might also want to reset the BIOS configuration which will lead to arranging the boot configuration since it is intended by the manufacturer. Note that this will get rid of any blockage in the boot process. All you have to do is take out the CMOS battery for a couple of seconds and then put it back again. After that restart, your computer and will be booted directly into Windows. Resetting the BIOS would also get rid of any password set for BIOS and you need to change your CMOS battery in case it didn’t work.

ComputerHKEY_LOCAL_MACHINESOFTWAREMicrosoftWindowsCurrentVersionAuthenticationLogonUITestHooksStep 4: From there, look for a DWORD named “ConsoleMode”. If you don’t see this DWORD, you can just create a new DWORD and name it as “ConsoleMode” and make sure that its base is set to Hexadecimal. Step 5: After that, double click on ConsoleMode and change its value to “0” to disable it and “1” to enable it. Step 6: Now restart your computer to apply the changes made. Like pointed out, you can only use your keyboard when you’re in the Console Mode login window or screen. You can just use the ESC button to go back to the menu while you can utilize the arrow keys so you can go through the options that are mostly vertically arranged and the Enter key to select an option. In the Console Mode, sign-in using the Passwords and PINs worked efficiently.
 Razer is a well-known brand among PC gamers and users, it started as a peripheral manufacturer focused on keyboards and mouse but after years passed Razer expanded its inventory offerings. It soon started offering headphones and lately has branched into wider product lines like gaming chairs and protection masks.
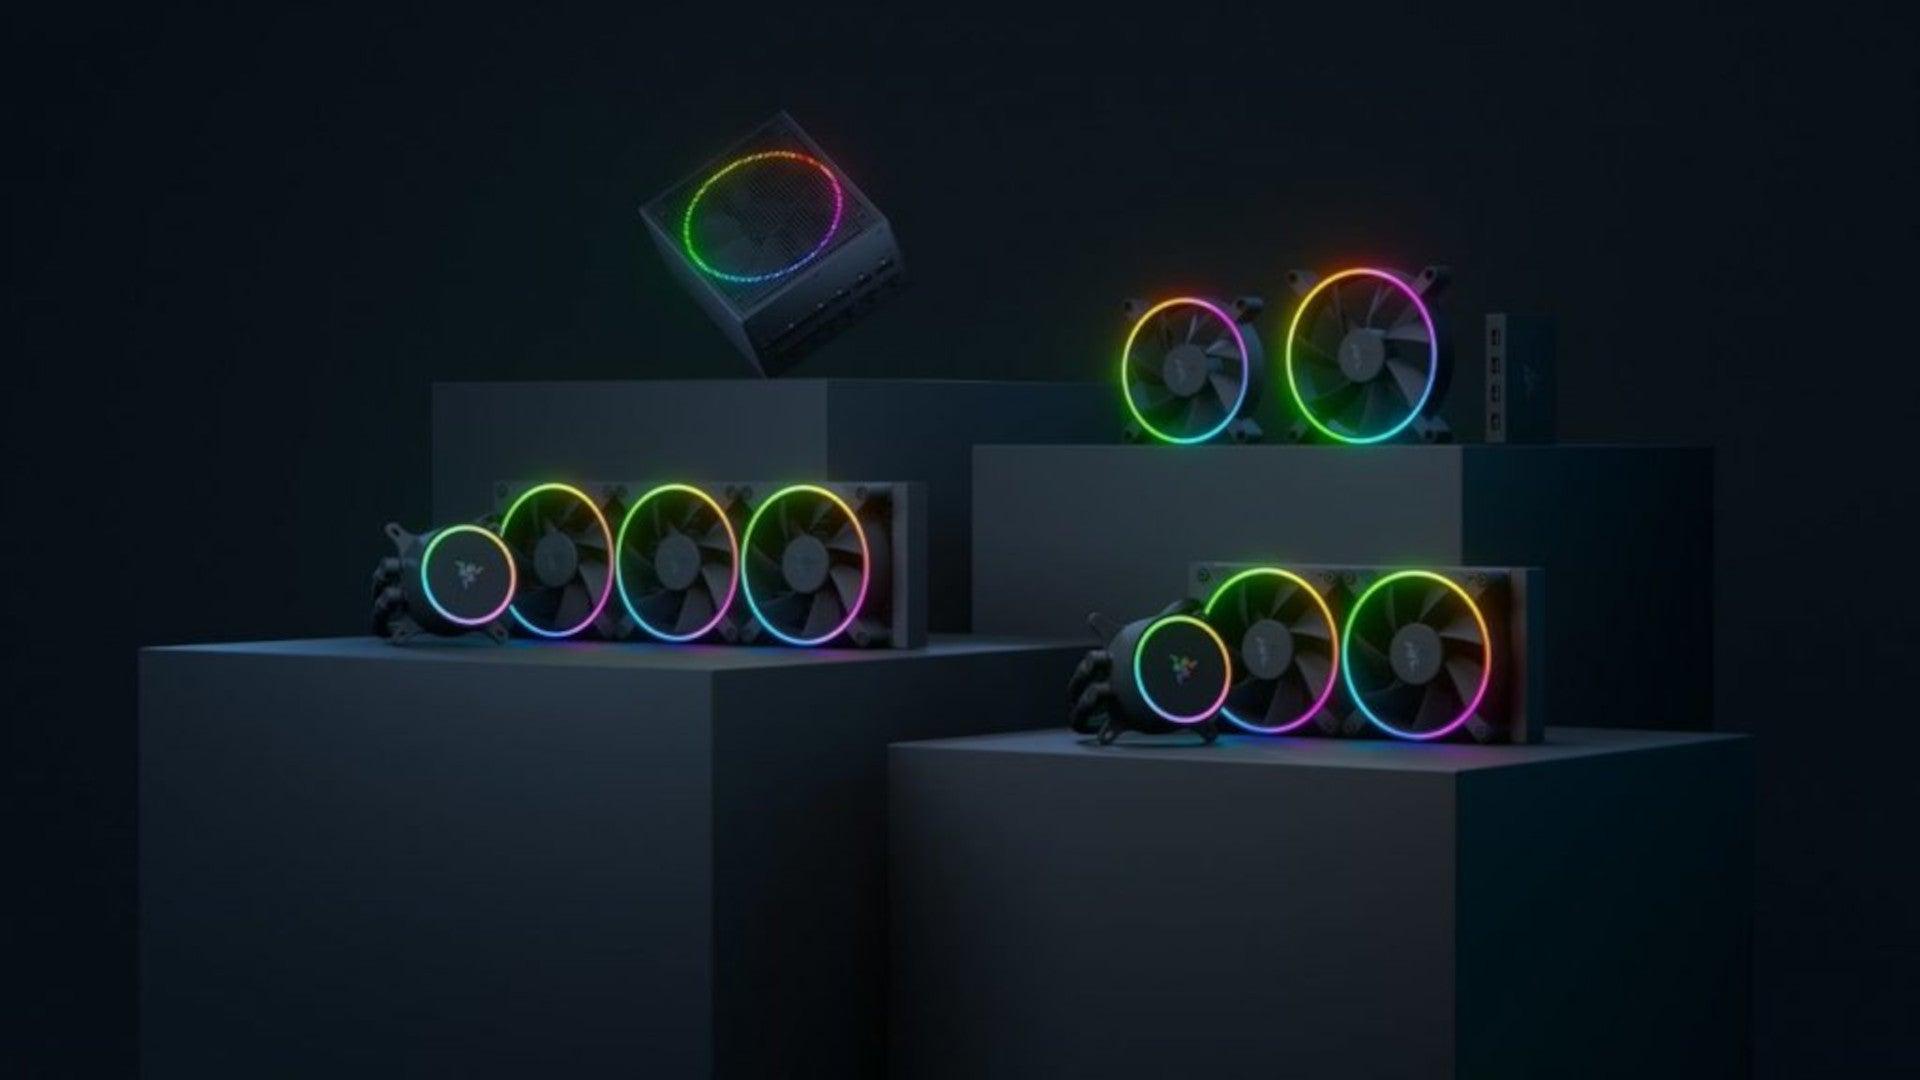
It is not a big surprise that Razer is expanding into other branches of the PC industry. This time, however, it has revealed not one but three new hardware for your PC. Case fans, all in one liquid cooler and power supply.
There are not many details about the products themselves but one thing is one hundred percent confirmed, they come with Razer Chroma, all of them, even the fans.
Razer is a well-known brand among PC gamers and users, it started as a peripheral manufacturer focused on keyboards and mouse but after years passed Razer expanded its inventory offerings. It soon started offering headphones and lately has branched into wider product lines like gaming chairs and protection masks.
It is not a big surprise that Razer is expanding into other branches of the PC industry. This time, however, it has revealed not one but three new hardware for your PC. Case fans, all in one liquid cooler and power supply.
There are not many details about the products themselves but one thing is one hundred percent confirmed, they come with Razer Chroma, all of them, even the fans.
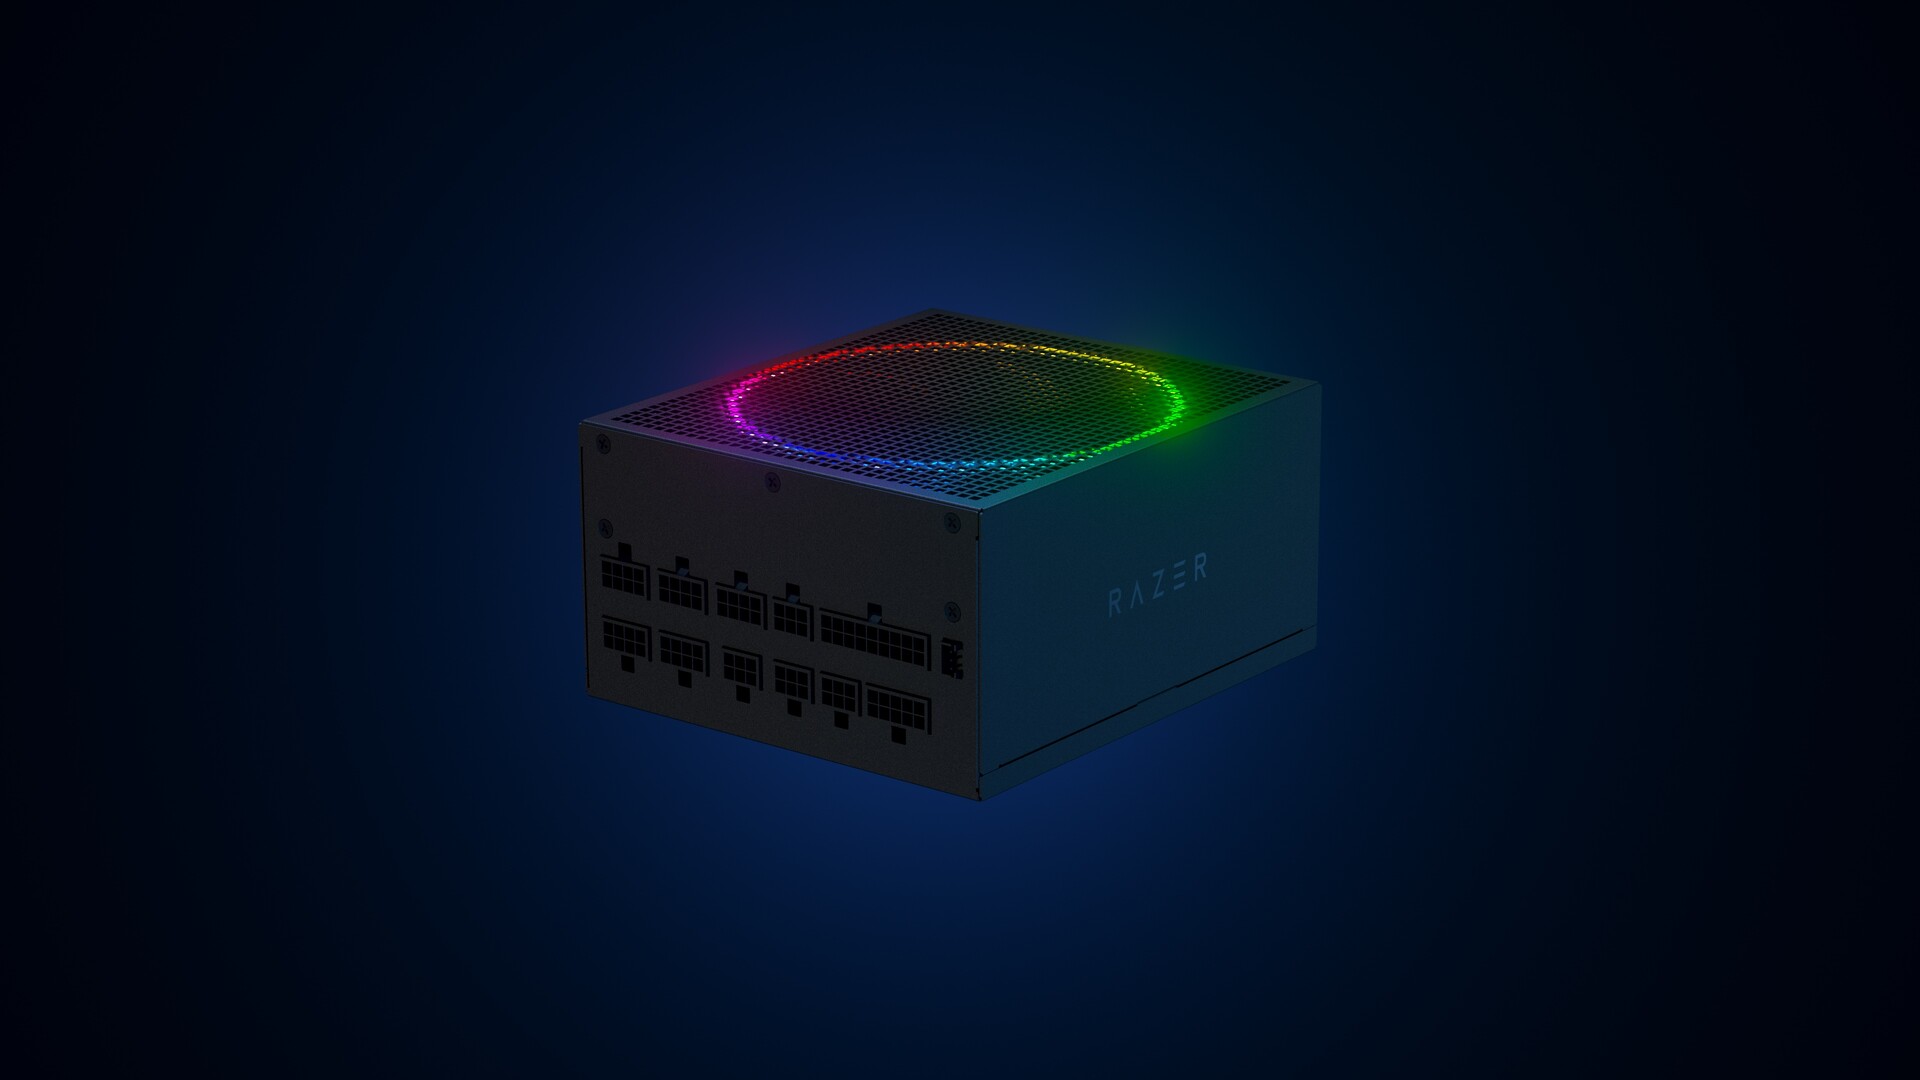 Most interesting for me personally is Razers Katana, the power supply unit. It is a modular power supply ranging from 750W to 1200W with the additional option of Titanium rated one with an impressive 1600W of power. Power supply will start shipping in early 2022 and at the time of writing this article no price range has been released.
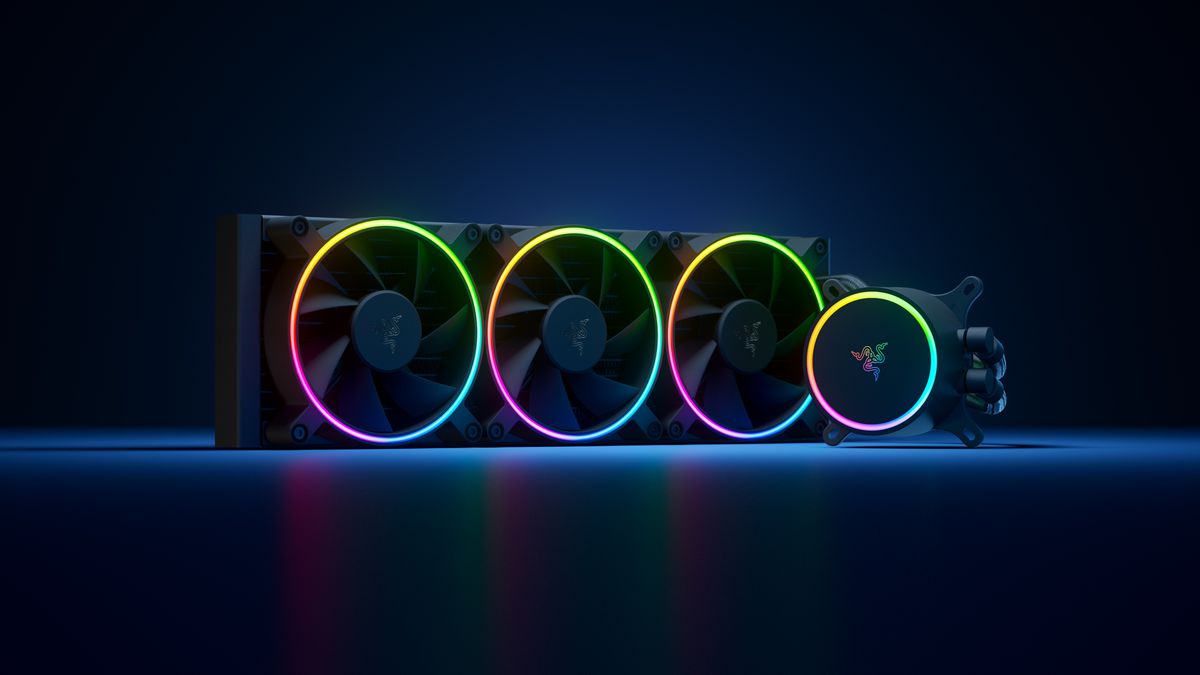 Hanbo liquid cooler will feature an optimized intake design so it can ensure greater heat transfer and fluid dynamic for improved reliability and silent operation. Radiator comes in 240mm size with two fans and a larger one of 360mm with three fans. The pump will be able to rotate in any direction of full 360 degrees so it can fit in any case. Hanbo will be released in November this year but no pricing has been released so far.
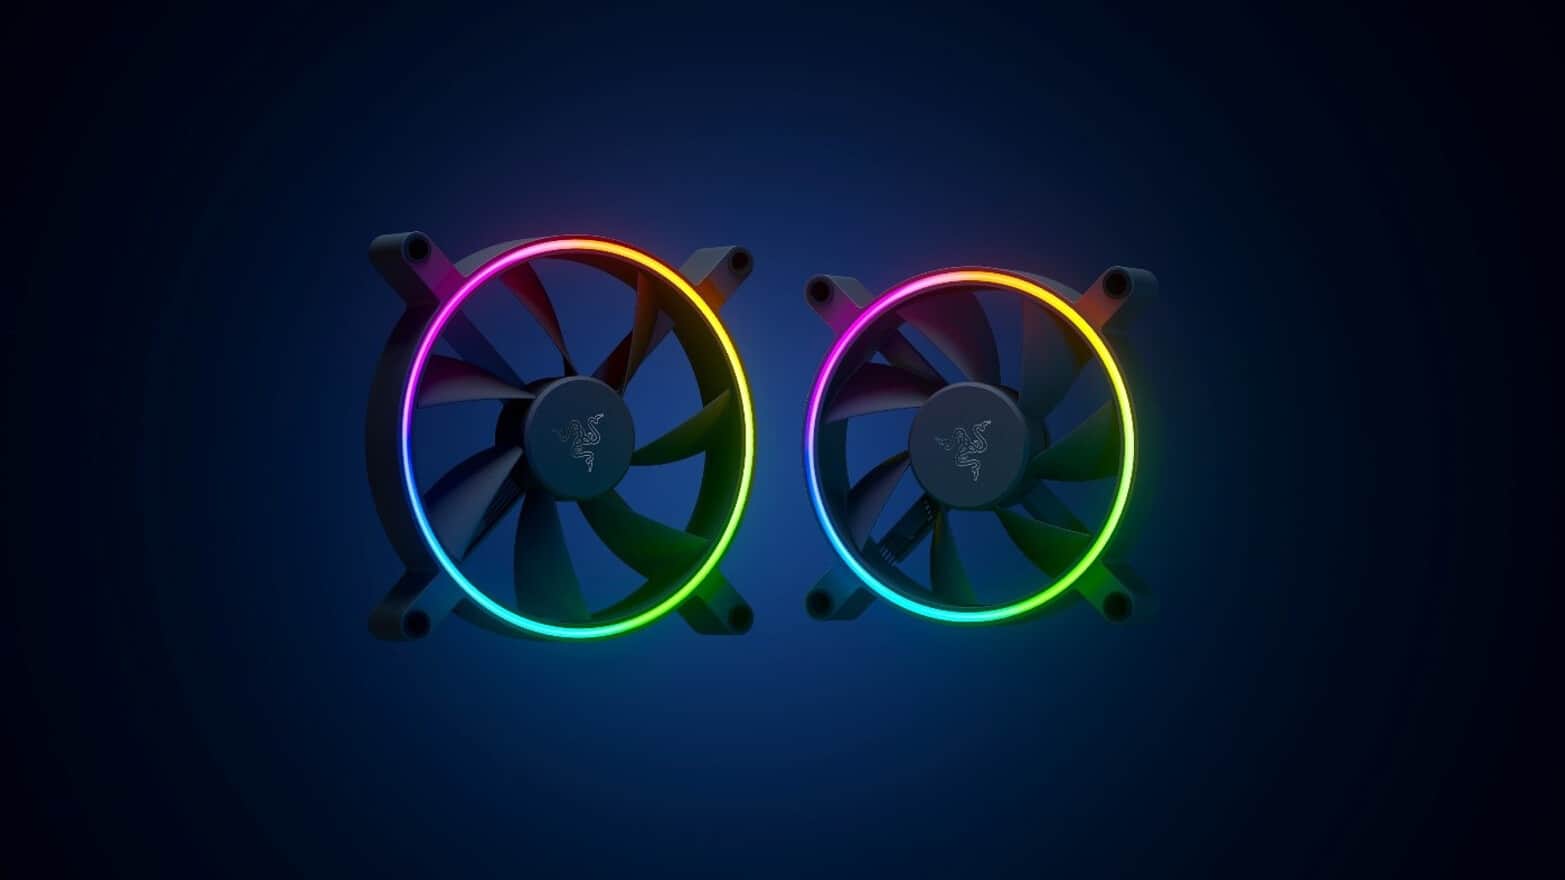 Kunai fans will boast high static pressure performance with lowered noise. They will go as far as 2200rpm for the 120mm version where the 140mm version will go up to 1600rpm. They will come with addressable LEDs and up to eight fans will be able to be connected to Razer’s PWM fan controller that will come with a magnet at the back for easy attachment to any steel part of PC casing.
PWM will use Razer’s Synapse software to customize pulse width modulation in order to improve airflow and noise. PWM will be priced at $49.99 in the Razer Store and it is available for preorder. Fans are priced at $44.99 for one 120mm or $129.99 for a three-pack of 120mm. One 140mm will go for $49.99 and a three-pack will be $129.99.
Kunai fans will boast high static pressure performance with lowered noise. They will go as far as 2200rpm for the 120mm version where the 140mm version will go up to 1600rpm. They will come with addressable LEDs and up to eight fans will be able to be connected to Razer’s PWM fan controller that will come with a magnet at the back for easy attachment to any steel part of PC casing.
PWM will use Razer’s Synapse software to customize pulse width modulation in order to improve airflow and noise. PWM will be priced at $49.99 in the Razer Store and it is available for preorder. Fans are priced at $44.99 for one 120mm or $129.99 for a three-pack of 120mm. One 140mm will go for $49.99 and a three-pack will be $129.99. HKEY_CURRENT_USERSoftwareMicrosoftWindowsCurrentVersionExplorerAdvancedStep 4: From there, right-click on the right side of the panel and select New > DWORD (32-bit) and then name it “LastActiveClick”. Step 5: After that, double click on the newly created DWORd to modify its value. Put “1” as its value data. Step 6: Then click OK and close the Registry Editor. Step 7: Now restart your computer to successfully apply the changes made. Note: In case you want to revert back to the default configuration, all you have to do is set the value data of LastActiveClick to “0” or simply delete that DWORD and restart your computer to successfully apply the changes made.
Error 0xe06d7363 is displayed when a process or an operation is not launched, or completed by an application.
This error can prevent the user from performing some operations. It might close the application unconditionally. Sometimes a ‘GetLastError()’, a ‘GetExceptionCode()’, or a ‘GetExceptionInformation()’ is displayed with this error.
Error 0xe06d7363 can occur for a number of reasons. Damaged, corrupted, or missing files in the registry database are the main reasons why the error might occur. Another reason is when the system files are not configured correctly, thus they corrupt system files in applications. They can also affect the hardware devices.
All code-generated exceptions in the Microsoft Visual C + + compiler will contain this error. As this error is compiler-generated, the code will not be listed in Win32 API header files. This code is a cryptic device, with ‘e’ for exception while the final 3 bytes represent ‘msc’ ASCII values.
To resolve this error, you will have to debug an application. While using Microsoft Visual Studio, you can stop the program when the error 0xe06d7363 occurs. To start debugging, follow these steps:
Another fix for this issue is reverting back to an earlier copy or the last update of the same Windows. Error 0xe06d7363 can occur is when you try running a client application using Microsoft.SqlServer.Types.dll component on your computer that has Microsoft SQL Server 2008 Server Pack 2 installed. With the error, the following text can be seen:
“unable to load DLL ‘SqlServerSpatial.dll’ Exception from HRESULT 0xe06d7363".
A Cumulative Update 7 was initially released for SQL Server 2008 Service Pack 2 in order to fix this issue. Since the builds are cumulative, every new fix released contains hotfixes and all security fixes which were also included in the previous SQL Server 2008 fix release. This error can be found in all Microsoft products that are listed in the Applies to Category.
Microsoft SQL Server 2008 hotfixes are created to resolve errors like 0xe06d7363 on specific SQL Server service packs. This error is by design and has commonly occurred in the previous versions of Windows before Windows 7.
Congratulations, you have just fixed Error 0xe06d7363 in Windows 10 all by yourself. If you would like to read more helpful articles and tips about various software and hardware visit errortools.com daily. Now that’s how you fix Error 0xe06d7363 in Windows 10 on a computer. On the other hand, if your computer is going through some system-related issues that have to get fixed, there is a one-click solution known as Restoro you could check out to resolve them. This program is a useful tool that could repair corrupted registries and optimize your PC’s overall performance. Aside from that, it also cleans out your computer for any junk or corrupted files that help you eliminate any unwanted files from your system. This is basically a solution that’s within your grasp with just a click. It’s easy to use as it is user-friendly. For a complete set of instructions in downloading and using it, refer to the steps below Perform a full system scan using Restoro. To do so, follow the instructions below.
