Rundll Error, DLL is also known as Dynamic Link Library is a Window library that basically consists of instructions and codes used and shared by multiple programs installed on your system. It helps programs load and run smoothly.
Rundll error is generated when the system fails to access DLL files thereby hampering your ability to successfully run your desired program.
 Error Causes
The rundll error code is triggered due to multiple reasons such as:
It is advisable to fix the run.dll error immediately without any delay because this error exposes your PC to serious threats such as system crash, freeze, failure, data loss, and even privacy threats like cybercrime, data breaches, and identity thefts.
To resolve the rundll error on your system, here are some solutions that you can try:
Sometimes rebooting your system can also resolve the issue. However, if it doesn’t then you need to try some other solution to fix it.
To fix rundll error, the first thing that you need to do is to identify the program generating this error and check it for validity. For this, simply analyze the rundll error dialog box. Let’s say you get the following run.dll error on your system Error loading
C:\WINDOWS\system32\usvdgpo.dll.
This error message indicates that the program ‘usvdgpo’ is causing the run.dll error on the system.
Once the program is identified, the next step is to stop it manually. For this, you go to the start menu and click run, now type ‘services.msc’ in the dialog box, and press ‘Enter’.
After that right-click the related process to your rundll error and then click the ‘Stop’ button to stop the program. Now close the window.
Though this action will stop the process it will not remove the reference to the bogus items. To remove that you will have to remove the program from the Windows Registry. This can be done by typing ‘Regedit’ in the Run dialog box.
This will open the registry editor. From the keys listed in the left panel, navigate to the following key: HKEY_LOCAL_MACHINE/Software/Microsoft/Windows/CurrentVersion/Run.
Now right-click on this key and click delete and then simply close the windows registry and reboot your system.
After this, you will then have to uninstall the program to completely eradicate the rundll error. To do this, go to the control panel, Add/remove programs, and right-click to uninstall the program causing the run.dll error on your system. Click yes to confirm your decision.
Once the program is uninstalled, reinstall the program using the program CD to get yourself an error-free program.
This procedure is tricky, time-consuming, and maybe slightly challenging for you especially if you are not a computer programmer.
If the cause of the run.dll error is a malware attack then you need to download an antivirus and run it on your system. However, this may impact the speed of your PC.
Antivirus is notorious for slowing down PC speed.
If you are not a computer programmer, then running Restoro is possibly the easiest way for you to resolve rundll errors on your system in seconds. Restoro is an innovative, cutting edge, and multi-functional feature-filled PC repair tool that can be used to repair all kinds of system-related errors including rundll errors.
The registry cleaner utility cleans up the RAM by removing unnecessary and obsolete files like junk files, invalid registry entries, and files from the uninstalled programs. It resolves disk fragmentation issues, repairs dll files, and the registry.
In just a few clicks you can easily repair the registry and remove malware thereby resolving rundll errors on your system. Operating Total System Care is quite simple. It has a user-friendly interface and easy navigation.
It is safe, efficient, bug-free, and compatible with all Windows versions
Click here to download Restoro and resolve ‘rundll errors’ and access/run programs on your system smoothly.

 GPU shortage and its cause
DISM.exe /Online /Cleanup-image /Restorehealth
sfc /scannow
findstr /c:"[SR]" %windir%LogsCBSCBS.log >"%userprofile%Desktopsfclogs.txt"The command you entered will open up the logs on your Desktop where you can look for files that are causing the error on your computer manually.
chkdsk /f /r
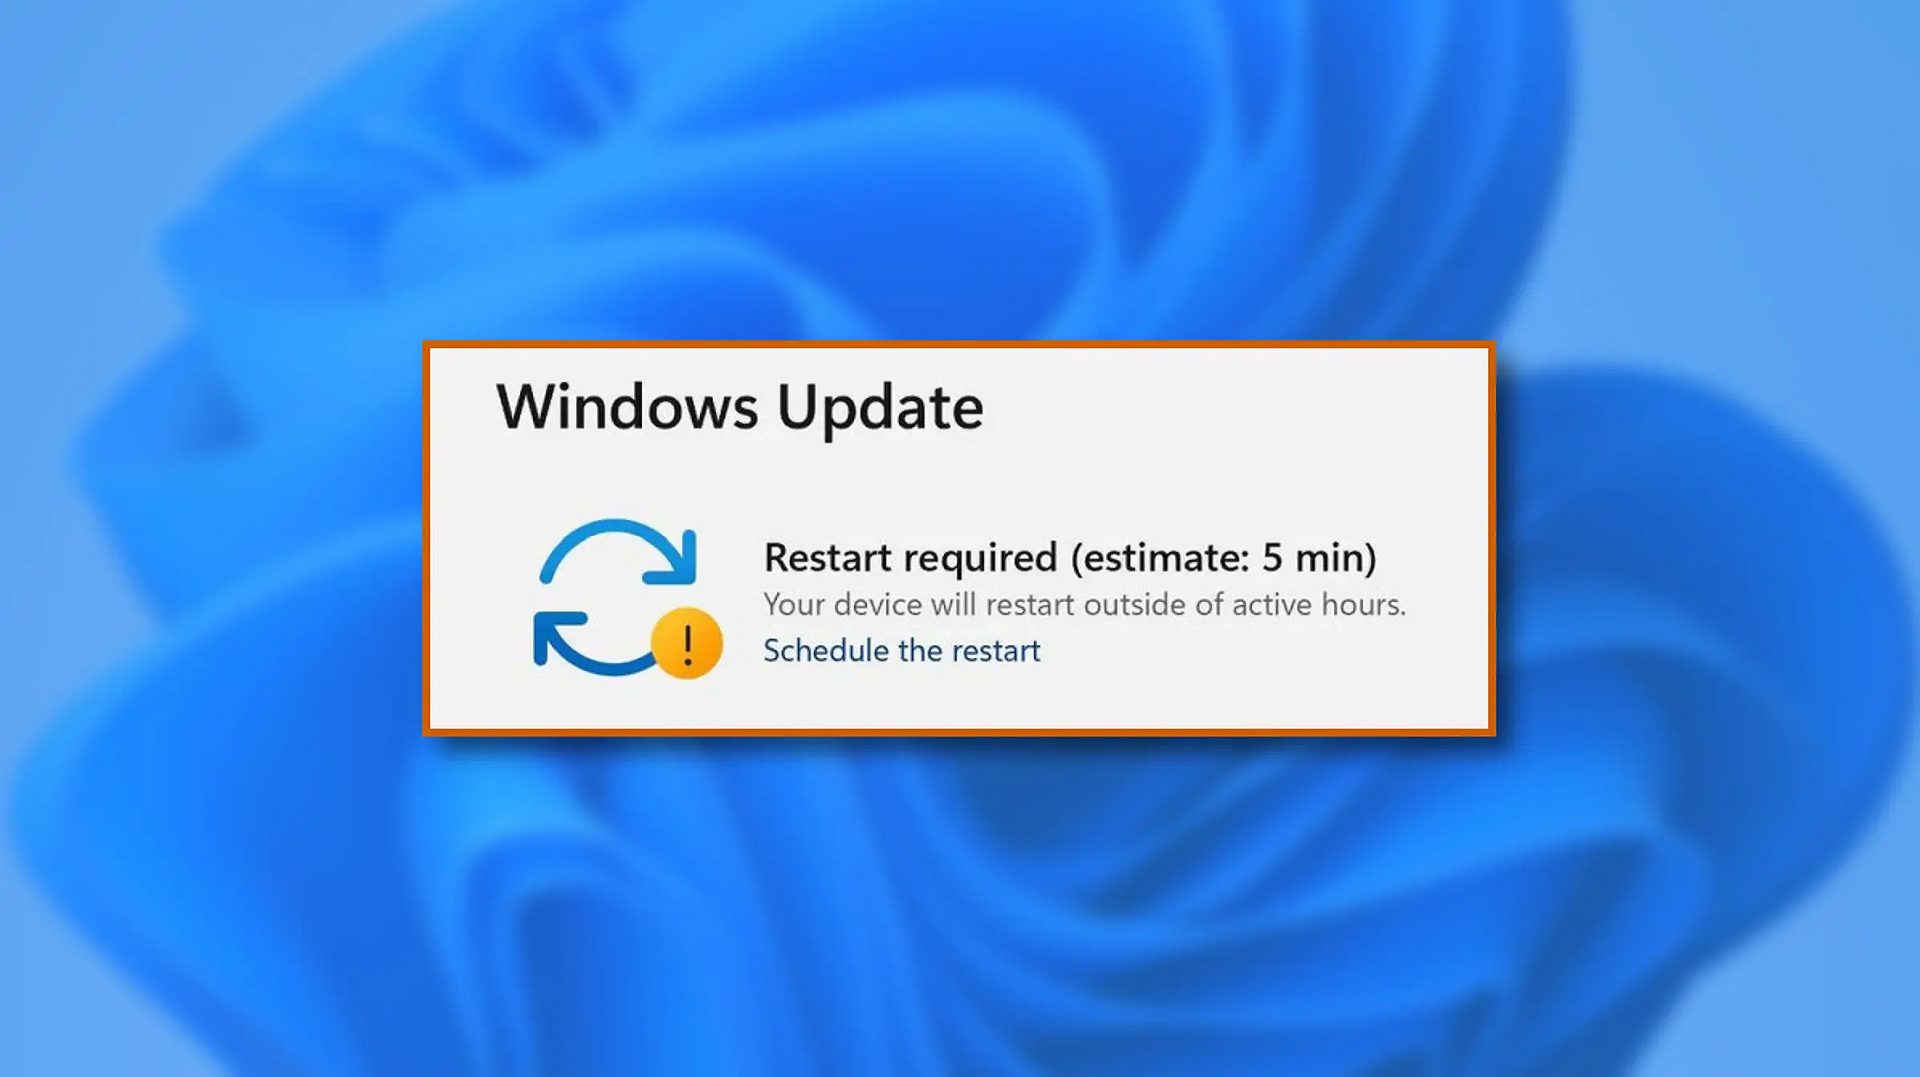 When Windows 11 update is available but you do not wish to restart right away because you are in the middle of using a computer, you can schedule a restart for up to 7 days. It is very easy and we will show you how to do it.
ExpressFiles is a program developed by Express Solutions. A number of Anti-Virus programs have flagged this program as a Potentially Unwanted Application. In many instances, it is bundled with additional programs on installation.
The program claims it offers users easy to search for various currently popular search terms. During our testing, the software never displays any search results, no matter the search words. Upon installation and setup, it defines an auto-start registry entry which makes this program run on each Windows boot for all user logins. A scheduled task is added to Windows Task Scheduler in order to launch the program at various scheduled times. The program defines an exception rule in Windows Firewall, allowing it to connect to the internet without limitations and auto-update itself.

dism /online /enable-feature /featurename:MediaPlayback
 Windows 11 is coming soon, from its typical view and color scheme, Windows 11 will natively support dark mode.
The dark mode is very popular in many applications today, some large companies like Adobe, Autodesk, and many more have already adopted a dark color scheme for their software so it is logical for others to follow and Microsoft is aboard for it.
The dark mode itself has its benefits, for people who work on computer for longer period of time dark mode inside applications will throw less white and blue light on their eyes making workhours easier and pleasant on them.
As a person who does indeed spend a lot of time in front of the screen, I would advise you to switch to dark mode regardless of the time that you spend with a computer, your eyes will be grateful.
Windows 11 is coming soon, from its typical view and color scheme, Windows 11 will natively support dark mode.
The dark mode is very popular in many applications today, some large companies like Adobe, Autodesk, and many more have already adopted a dark color scheme for their software so it is logical for others to follow and Microsoft is aboard for it.
The dark mode itself has its benefits, for people who work on computer for longer period of time dark mode inside applications will throw less white and blue light on their eyes making workhours easier and pleasant on them.
As a person who does indeed spend a lot of time in front of the screen, I would advise you to switch to dark mode regardless of the time that you spend with a computer, your eyes will be grateful.
CalendarSpark is a browser extension developed by MindSpark. This extension allows an easy way to print or view calendar templates and make schedulers for a day/week/month/year. This browser extension hijacks your browser home page and search engine, changing them to MyWay.com. While the extension is installed it monitors your browsing activity and collets visited websites, clicked links, and sometimes even personal information, which it later uses to display targeted unwanted ads through your browsing sessions.
While browsing the internet with this extension installed you will see additional sponsored links, ads, and sometimes even pop-up ads on websites that are not supposed to have any of these. Several anti-virus scanners have detected this extension as a Browser Hijacker, and due to its data collecting behavior, it is not recommended to keep it on your computer.