Windows photo viewer was a popular photo viewing application integrated into Windows 7, 8, and 8.1 but in Windows 10 it has been replaced with photos, Microsoft's new application aimed at photo viewing on your desktop. Now if any one of you wonders why should be bringing the old application back to Windows 10 since we have an alternative one, the answer would be resources and speed. The old photo viewer application is lightweight, fast, and reliable, opening the same photo in both photo viewer and in new photos shows us that Microsofts new viewer application takes even three times more RAM, and it's visibly slower in loading times for pictures.
Since I am a person who prefers speed and functionality over fancy looks I would be very glad to have the option to bring back a photo viewer. If you have by any chance Windows 10 as an upgrade, bringing back photo viewer is easy as 1,2,3. you just need to open settings and go to default apps, under photo viewer you should see your current default viewing application, probably photos, click on it to see options and choose photo viewer and exit the Settings menu, and you're done.
Sadly if Windows 10 has been installed clean on the system and not as upgrade things are a little bit more complicated but do not worry, stay with us, keep reading and you will get there.
How technically photo viewer is still in the system but not used we will have to make it available again and this we will do by adding some lines in the Windows registry, that being said, open a notepad and paste the following code as it is in it.
Windows Registry Editor Version 5.00
[HKEY_CLASSES_ROOT\jpegfile\shell\open\DropTarget]
"Clsid"="{FFE2A43C-56B9-4bf5-9A79-CC6D4285608A}"
[HKEY_CLASSES_ROOT\pngfile\shell\open\DropTarget]
"Clsid"="{FFE2A43C-56B9-4bf5-9A79-CC6D4285608A}"
[HKEY_CLASSES_ROOT\Applications\photoviewer.dll\shell\open]
"MuiVerb"="@photoviewer.dll,-3043"
[HKEY_CLASSES_ROOT\Applications\photoviewer.dll\shell\open\command]
@=hex(2):25,00,53,00,79,00,73,00,74,00,65,00,6d,00,52,00,6f,00,6f,00,74,00,25,\
00,5c,00,53,00,79,00,73,00,74,00,65,00,6d,00,33,00,32,00,5c,00,72,00,75,00,\
6e,00,64,00,6c,00,6c,00,33,00,32,00,2e,00,65,00,78,00,65,00,20,00,22,00,25,\
00,50,00,72,00,6f,00,67,00,72,00,61,00,6d,00,46,00,69,00,6c,00,65,00,73,00,\
25,00,5c,00,57,00,69,00,6e,00,64,00,6f,00,77,00,73,00,20,00,50,00,68,00,6f,\
00,74,00,6f,00,20,00,56,00,69,00,65,00,77,00,65,00,72,00,5c,00,50,00,68,00,\
6f,00,74,00,6f,00,56,00,69,00,65,00,77,00,65,00,72,00,2e,00,64,00,6c,00,6c,\
00,22,00,2c,00,20,00,49,00,6d,00,61,00,67,00,65,00,56,00,69,00,65,00,77,00,\
5f,00,46,00,75,00,6c,00,6c,00,73,00,63,00,72,00,65,00,65,00,6e,00,20,00,25,\
00,31,00,00,00
[HKEY_CLASSES_ROOT\Applications\photoviewer.dll\shell\open\DropTarget]
"Clsid"="{FFE2A43C-56B9-4bf5-9A79-CC6D4285608A}"
[HKEY_CLASSES_ROOT\PhotoViewer.FileAssoc.Bitmap]
"ImageOptionFlags"=dword:00000001
"FriendlyTypeName"=hex(2):40,00,25,00,50,00,72,00,6f,00,67,00,72,00,61,00,6d,\
00,46,00,69,00,6c,00,65,00,73,00,25,00,5c,00,57,00,69,00,6e,00,64,00,6f,00,\
77,00,73,00,20,00,50,00,68,00,6f,00,74,00,6f,00,20,00,56,00,69,00,65,00,77,\
00,65,00,72,00,5c,00,50,00,68,00,6f,00,74,00,6f,00,56,00,69,00,65,00,77,00,\
65,00,72,00,2e,00,64,00,6c,00,6c,00,2c,00,2d,00,33,00,30,00,35,00,36,00,00,\
00
[HKEY_CLASSES_ROOT\PhotoViewer.FileAssoc.Bitmap\DefaultIcon]
@="%SystemRoot%\\System32\\imageres.dll,-70"
[HKEY_CLASSES_ROOT\PhotoViewer.FileAssoc.Bitmap\shell\open\command]
@=hex(2):25,00,53,00,79,00,73,00,74,00,65,00,6d,00,52,00,6f,00,6f,00,74,00,25,\
00,5c,00,53,00,79,00,73,00,74,00,65,00,6d,00,33,00,32,00,5c,00,72,00,75,00,\
6e,00,64,00,6c,00,6c,00,33,00,32,00,2e,00,65,00,78,00,65,00,20,00,22,00,25,\
00,50,00,72,00,6f,00,67,00,72,00,61,00,6d,00,46,00,69,00,6c,00,65,00,73,00,\
25,00,5c,00,57,00,69,00,6e,00,64,00,6f,00,77,00,73,00,20,00,50,00,68,00,6f,\
00,74,00,6f,00,20,00,56,00,69,00,65,00,77,00,65,00,72,00,5c,00,50,00,68,00,\
6f,00,74,00,6f,00,56,00,69,00,65,00,77,00,65,00,72,00,2e,00,64,00,6c,00,6c,\
00,22,00,2c,00,20,00,49,00,6d,00,61,00,67,00,65,00,56,00,69,00,65,00,77,00,\
5f,00,46,00,75,00,6c,00,6c,00,73,00,63,00,72,00,65,00,65,00,6e,00,20,00,25,\
00,31,00,00,00
[HKEY_CLASSES_ROOT\PhotoViewer.FileAssoc.Bitmap\shell\open\DropTarget]
"Clsid"="{FFE2A43C-56B9-4bf5-9A79-CC6D4285608A}"
[HKEY_CLASSES_ROOT\Applications\photoviewer.dll\shell\print]
"NeverDefault"=""
[HKEY_CLASSES_ROOT\Applications\photoviewer.dll\shell\print\command]
@=hex(2):25,00,53,00,79,00,73,00,74,00,65,00,6d,00,52,00,6f,00,6f,00,74,00,25,\
00,5c,00,53,00,79,00,73,00,74,00,65,00,6d,00,33,00,32,00,5c,00,72,00,75,00,\
6e,00,64,00,6c,00,6c,00,33,00,32,00,2e,00,65,00,78,00,65,00,20,00,22,00,25,\
00,50,00,72,00,6f,00,67,00,72,00,61,00,6d,00,46,00,69,00,6c,00,65,00,73,00,\
25,00,5c,00,57,00,69,00,6e,00,64,00,6f,00,77,00,73,00,20,00,50,00,68,00,6f,\
00,74,00,6f,00,20,00,56,00,69,00,65,00,77,00,65,00,72,00,5c,00,50,00,68,00,\
6f,00,74,00,6f,00,56,00,69,00,65,00,77,00,65,00,72,00,2e,00,64,00,6c,00,6c,\
00,22,00,2c,00,20,00,49,00,6d,00,61,00,67,00,65,00,56,00,69,00,65,00,77,00,\
5f,00,46,00,75,00,6c,00,6c,00,73,00,63,00,72,00,65,00,65,00,6e,00,20,00,25,\
00,31,00,00,00
[HKEY_CLASSES_ROOT\Applications\photoviewer.dll\shell\print\DropTarget]
"Clsid"="{60fd46de-f830-4894-a628-6fa81bc0190d}"
[HKEY_CLASSES_ROOT\PhotoViewer.FileAssoc.JFIF]
"EditFlags"=dword:00010000
"ImageOptionFlags"=dword:00000001
"FriendlyTypeName"=hex(2):40,00,25,00,50,00,72,00,6f,00,67,00,72,00,61,00,6d,\
00,46,00,69,00,6c,00,65,00,73,00,25,00,5c,00,57,00,69,00,6e,00,64,00,6f,00,\
77,00,73,00,20,00,50,00,68,00,6f,00,74,00,6f,00,20,00,56,00,69,00,65,00,77,\
00,65,00,72,00,5c,00,50,00,68,00,6f,00,74,00,6f,00,56,00,69,00,65,00,77,00,\
65,00,72,00,2e,00,64,00,6c,00,6c,00,2c,00,2d,00,33,00,30,00,35,00,35,00,00,\
00
[HKEY_CLASSES_ROOT\PhotoViewer.FileAssoc.JFIF\DefaultIcon]
@="%SystemRoot%\\System32\\imageres.dll,-72"
[HKEY_CLASSES_ROOT\PhotoViewer.FileAssoc.JFIF\shell\open]
"MuiVerb"=hex(2):40,00,25,00,50,00,72,00,6f,00,67,00,72,00,61,00,6d,00,46,00,\
69,00,6c,00,65,00,73,00,25,00,5c,00,57,00,69,00,6e,00,64,00,6f,00,77,00,73,\
00,20,00,50,00,68,00,6f,00,74,00,6f,00,20,00,56,00,69,00,65,00,77,00,65,00,\
72,00,5c,00,70,00,68,00,6f,00,74,00,6f,00,76,00,69,00,65,00,77,00,65,00,72,\
00,2e,00,64,00,6c,00,6c,00,2c,00,2d,00,33,00,30,00,34,00,33,00,00,00
[HKEY_CLASSES_ROOT\PhotoViewer.FileAssoc.JFIF\shell\open\command]
@=hex(2):25,00,53,00,79,00,73,00,74,00,65,00,6d,00,52,00,6f,00,6f,00,74,00,25,\
00,5c,00,53,00,79,00,73,00,74,00,65,00,6d,00,33,00,32,00,5c,00,72,00,75,00,\
6e,00,64,00,6c,00,6c,00,33,00,32,00,2e,00,65,00,78,00,65,00,20,00,22,00,25,\
00,50,00,72,00,6f,00,67,00,72,00,61,00,6d,00,46,00,69,00,6c,00,65,00,73,00,\
25,00,5c,00,57,00,69,00,6e,00,64,00,6f,00,77,00,73,00,20,00,50,00,68,00,6f,\
00,74,00,6f,00,20,00,56,00,69,00,65,00,77,00,65,00,72,00,5c,00,50,00,68,00,\
6f,00,74,00,6f,00,56,00,69,00,65,00,77,00,65,00,72,00,2e,00,64,00,6c,00,6c,\
00,22,00,2c,00,20,00,49,00,6d,00,61,00,67,00,65,00,56,00,69,00,65,00,77,00,\
5f,00,46,00,75,00,6c,00,6c,00,73,00,63,00,72,00,65,00,65,00,6e,00,20,00,25,\
00,31,00,00,00
[HKEY_CLASSES_ROOT\PhotoViewer.FileAssoc.JFIF\shell\open\DropTarget]
"Clsid"="{FFE2A43C-56B9-4bf5-9A79-CC6D4285608A}"
[HKEY_CLASSES_ROOT\PhotoViewer.FileAssoc.Jpeg]
"EditFlags"=dword:00010000
"ImageOptionFlags"=dword:00000001
"FriendlyTypeName"=hex(2):40,00,25,00,50,00,72,00,6f,00,67,00,72,00,61,00,6d,\
00,46,00,69,00,6c,00,65,00,73,00,25,00,5c,00,57,00,69,00,6e,00,64,00,6f,00,\
77,00,73,00,20,00,50,00,68,00,6f,00,74,00,6f,00,20,00,56,00,69,00,65,00,77,\
00,65,00,72,00,5c,00,50,00,68,00,6f,00,74,00,6f,00,56,00,69,00,65,00,77,00,\
65,00,72,00,2e,00,64,00,6c,00,6c,00,2c,00,2d,00,33,00,30,00,35,00,35,00,00,\
00
[HKEY_CLASSES_ROOT\PhotoViewer.FileAssoc.Jpeg\DefaultIcon]
@="%SystemRoot%\\System32\\imageres.dll,-72"
[HKEY_CLASSES_ROOT\PhotoViewer.FileAssoc.Jpeg\shell\open]
"MuiVerb"=hex(2):40,00,25,00,50,00,72,00,6f,00,67,00,72,00,61,00,6d,00,46,00,\
69,00,6c,00,65,00,73,00,25,00,5c,00,57,00,69,00,6e,00,64,00,6f,00,77,00,73,\
00,20,00,50,00,68,00,6f,00,74,00,6f,00,20,00,56,00,69,00,65,00,77,00,65,00,\
72,00,5c,00,70,00,68,00,6f,00,74,00,6f,00,76,00,69,00,65,00,77,00,65,00,72,\
00,2e,00,64,00,6c,00,6c,00,2c,00,2d,00,33,00,30,00,34,00,33,00,00,00
[HKEY_CLASSES_ROOT\PhotoViewer.FileAssoc.Jpeg\shell\open\command]
@=hex(2):25,00,53,00,79,00,73,00,74,00,65,00,6d,00,52,00,6f,00,6f,00,74,00,25,\
00,5c,00,53,00,79,00,73,00,74,00,65,00,6d,00,33,00,32,00,5c,00,72,00,75,00,\
6e,00,64,00,6c,00,6c,00,33,00,32,00,2e,00,65,00,78,00,65,00,20,00,22,00,25,\
00,50,00,72,00,6f,00,67,00,72,00,61,00,6d,00,46,00,69,00,6c,00,65,00,73,00,\
25,00,5c,00,57,00,69,00,6e,00,64,00,6f,00,77,00,73,00,20,00,50,00,68,00,6f,\
00,74,00,6f,00,20,00,56,00,69,00,65,00,77,00,65,00,72,00,5c,00,50,00,68,00,\
6f,00,74,00,6f,00,56,00,69,00,65,00,77,00,65,00,72,00,2e,00,64,00,6c,00,6c,\
00,22,00,2c,00,20,00,49,00,6d,00,61,00,67,00,65,00,56,00,69,00,65,00,77,00,\
5f,00,46,00,75,00,6c,00,6c,00,73,00,63,00,72,00,65,00,65,00,6e,00,20,00,25,\
00,31,00,00,00
[HKEY_CLASSES_ROOT\PhotoViewer.FileAssoc.Jpeg\shell\open\DropTarget]
"Clsid"="{FFE2A43C-56B9-4bf5-9A79-CC6D4285608A}"
[HKEY_CLASSES_ROOT\PhotoViewer.FileAssoc.Gif]
"ImageOptionFlags"=dword:00000001
"FriendlyTypeName"=hex(2):40,00,25,00,50,00,72,00,6f,00,67,00,72,00,61,00,6d,\
00,46,00,69,00,6c,00,65,00,73,00,25,00,5c,00,57,00,69,00,6e,00,64,00,6f,00,\
77,00,73,00,20,00,50,00,68,00,6f,00,74,00,6f,00,20,00,56,00,69,00,65,00,77,\
00,65,00,72,00,5c,00,50,00,68,00,6f,00,74,00,6f,00,56,00,69,00,65,00,77,00,\
65,00,72,00,2e,00,64,00,6c,00,6c,00,2c,00,2d,00,33,00,30,00,35,00,37,00,00,\
00
[HKEY_CLASSES_ROOT\PhotoViewer.FileAssoc.Gif\DefaultIcon]
@="%SystemRoot%\\System32\\imageres.dll,-83"
[HKEY_CLASSES_ROOT\PhotoViewer.FileAssoc.Gif\shell\open\command]
@=hex(2):25,00,53,00,79,00,73,00,74,00,65,00,6d,00,52,00,6f,00,6f,00,74,00,25,\
00,5c,00,53,00,79,00,73,00,74,00,65,00,6d,00,33,00,32,00,5c,00,72,00,75,00,\
6e,00,64,00,6c,00,6c,00,33,00,32,00,2e,00,65,00,78,00,65,00,20,00,22,00,25,\
00,50,00,72,00,6f,00,67,00,72,00,61,00,6d,00,46,00,69,00,6c,00,65,00,73,00,\
25,00,5c,00,57,00,69,00,6e,00,64,00,6f,00,77,00,73,00,20,00,50,00,68,00,6f,\
00,74,00,6f,00,20,00,56,00,69,00,65,00,77,00,65,00,72,00,5c,00,50,00,68,00,\
6f,00,74,00,6f,00,56,00,69,00,65,00,77,00,65,00,72,00,2e,00,64,00,6c,00,6c,\
00,22,00,2c,00,20,00,49,00,6d,00,61,00,67,00,65,00,56,00,69,00,65,00,77,00,\
5f,00,46,00,75,00,6c,00,6c,00,73,00,63,00,72,00,65,00,65,00,6e,00,20,00,25,\
00,31,00,00,00
[HKEY_CLASSES_ROOT\PhotoViewer.FileAssoc.Gif\shell\open\DropTarget]
"Clsid"="{FFE2A43C-56B9-4bf5-9A79-CC6D4285608A}"
[HKEY_CLASSES_ROOT\PhotoViewer.FileAssoc.Png]
"ImageOptionFlags"=dword:00000001
"FriendlyTypeName"=hex(2):40,00,25,00,50,00,72,00,6f,00,67,00,72,00,61,00,6d,\
00,46,00,69,00,6c,00,65,00,73,00,25,00,5c,00,57,00,69,00,6e,00,64,00,6f,00,\
77,00,73,00,20,00,50,00,68,00,6f,00,74,00,6f,00,20,00,56,00,69,00,65,00,77,\
00,65,00,72,00,5c,00,50,00,68,00,6f,00,74,00,6f,00,56,00,69,00,65,00,77,00,\
65,00,72,00,2e,00,64,00,6c,00,6c,00,2c,00,2d,00,33,00,30,00,35,00,37,00,00,\
00
[HKEY_CLASSES_ROOT\PhotoViewer.FileAssoc.Png\DefaultIcon]
@="%SystemRoot%\\System32\\imageres.dll,-71"
[HKEY_CLASSES_ROOT\PhotoViewer.FileAssoc.Png\shell\open\command]
@=hex(2):25,00,53,00,79,00,73,00,74,00,65,00,6d,00,52,00,6f,00,6f,00,74,00,25,\
00,5c,00,53,00,79,00,73,00,74,00,65,00,6d,00,33,00,32,00,5c,00,72,00,75,00,\
6e,00,64,00,6c,00,6c,00,33,00,32,00,2e,00,65,00,78,00,65,00,20,00,22,00,25,\
00,50,00,72,00,6f,00,67,00,72,00,61,00,6d,00,46,00,69,00,6c,00,65,00,73,00,\
25,00,5c,00,57,00,69,00,6e,00,64,00,6f,00,77,00,73,00,20,00,50,00,68,00,6f,\
00,74,00,6f,00,20,00,56,00,69,00,65,00,77,00,65,00,72,00,5c,00,50,00,68,00,\
6f,00,74,00,6f,00,56,00,69,00,65,00,77,00,65,00,72,00,2e,00,64,00,6c,00,6c,\
00,22,00,2c,00,20,00,49,00,6d,00,61,00,67,00,65,00,56,00,69,00,65,00,77,00,\
5f,00,46,00,75,00,6c,00,6c,00,73,00,63,00,72,00,65,00,65,00,6e,00,20,00,25,\
00,31,00,00,00
[HKEY_CLASSES_ROOT\PhotoViewer.FileAssoc.Png\shell\open\DropTarget]
"Clsid"="{FFE2A43C-56B9-4bf5-9A79-CC6D4285608A}"
[HKEY_CLASSES_ROOT\PhotoViewer.FileAssoc.Wdp]
"EditFlags"=dword:00010000
"ImageOptionFlags"=dword:00000001
[HKEY_CLASSES_ROOT\PhotoViewer.FileAssoc.Wdp\DefaultIcon]
@="%SystemRoot%\\System32\\wmphoto.dll,-400"
[HKEY_CLASSES_ROOT\PhotoViewer.FileAssoc.Wdp\shell\open]
"MuiVerb"=hex(2):40,00,25,00,50,00,72,00,6f,00,67,00,72,00,61,00,6d,00,46,00,\
69,00,6c,00,65,00,73,00,25,00,5c,00,57,00,69,00,6e,00,64,00,6f,00,77,00,73,\
00,20,00,50,00,68,00,6f,00,74,00,6f,00,20,00,56,00,69,00,65,00,77,00,65,00,\
72,00,5c,00,70,00,68,00,6f,00,74,00,6f,00,76,00,69,00,65,00,77,00,65,00,72,\
00,2e,00,64,00,6c,00,6c,00,2c,00,2d,00,33,00,30,00,34,00,33,00,00,00
[HKEY_CLASSES_ROOT\PhotoViewer.FileAssoc.Wdp\shell\open\command]
@=hex(2):25,00,53,00,79,00,73,00,74,00,65,00,6d,00,52,00,6f,00,6f,00,74,00,25,\
00,5c,00,53,00,79,00,73,00,74,00,65,00,6d,00,33,00,32,00,5c,00,72,00,75,00,\
6e,00,64,00,6c,00,6c,00,33,00,32,00,2e,00,65,00,78,00,65,00,20,00,22,00,25,\
00,50,00,72,00,6f,00,67,00,72,00,61,00,6d,00,46,00,69,00,6c,00,65,00,73,00,\
25,00,5c,00,57,00,69,00,6e,00,64,00,6f,00,77,00,73,00,20,00,50,00,68,00,6f,\
00,74,00,6f,00,20,00,56,00,69,00,65,00,77,00,65,00,72,00,5c,00,50,00,68,00,\
6f,00,74,00,6f,00,56,00,69,00,65,00,77,00,65,00,72,00,2e,00,64,00,6c,00,6c,\
00,22,00,2c,00,20,00,49,00,6d,00,61,00,67,00,65,00,56,00,69,00,65,00,77,00,\
5f,00,46,00,75,00,6c,00,6c,00,73,00,63,00,72,00,65,00,65,00,6e,00,20,00,25,\
00,31,00,00,00
[HKEY_CLASSES_ROOT\PhotoViewer.FileAssoc.Wdp\shell\open\DropTarget]
"Clsid"="{FFE2A43C-56B9-4bf5-9A79-CC6D4285608A}"
[HKEY_CLASSES_ROOT\SystemFileAssociations\image\shell\Image Preview\command]
@=hex(2):25,00,53,00,79,00,73,00,74,00,65,00,6d,00,52,00,6f,00,6f,00,74,00,25,\
00,5c,00,53,00,79,00,73,00,74,00,65,00,6d,00,33,00,32,00,5c,00,72,00,75,00,\
6e,00,64,00,6c,00,6c,00,33,00,32,00,2e,00,65,00,78,00,65,00,20,00,22,00,25,\
00,50,00,72,00,6f,00,67,00,72,00,61,00,6d,00,46,00,69,00,6c,00,65,00,73,00,\
25,00,5c,00,57,00,69,00,6e,00,64,00,6f,00,77,00,73,00,20,00,50,00,68,00,6f,\
00,74,00,6f,00,20,00,56,00,69,00,65,00,77,00,65,00,72,00,5c,00,50,00,68,00,\
6f,00,74,00,6f,00,56,00,69,00,65,00,77,00,65,00,72,00,2e,00,64,00,6c,00,6c,\
00,22,00,2c,00,20,00,49,00,6d,00,61,00,67,00,65,00,56,00,69,00,65,00,77,00,\
5f,00,46,00,75,00,6c,00,6c,00,73,00,63,00,72,00,65,00,65,00,6e,00,20,00,25,\
00,31,00,00,00
[HKEY_CLASSES_ROOT\SystemFileAssociations\image\shell\Image Preview\DropTarget]
"{FFE2A43C-56B9-4bf5-9A79-CC6D4285608A}"=""
[HKEY_LOCAL_MACHINE\SOFTWARE\Microsoft\Windows Photo Viewer\Capabilities]
"ApplicationDescription"="@%ProgramFiles%\\Windows Photo Viewer\\photoviewer.dll,-3069"
"ApplicationName"="@%ProgramFiles%\\Windows Photo Viewer\\photoviewer.dll,-3009"
[HKEY_LOCAL_MACHINE\SOFTWARE\Microsoft\Windows Photo Viewer\Capabilities\FileAssociations]
".cr2"="PhotoViewer.FileAssoc.Tiff"
".jpg"="PhotoViewer.FileAssoc.Jpeg"
".wdp"="PhotoViewer.FileAssoc.Wdp"
".jfif"="PhotoViewer.FileAssoc.JFIF"
".dib"="PhotoViewer.FileAssoc.Bitmap"
".png"="PhotoViewer.FileAssoc.Png"
".jxr"="PhotoViewer.FileAssoc.Wdp"
".bmp"="PhotoViewer.FileAssoc.Bitmap"
".jpe"="PhotoViewer.FileAssoc.Jpeg"
".jpeg"="PhotoViewer.FileAssoc.Jpeg"
".gif"="PhotoViewer.FileAssoc.Gif"
".tif"="PhotoViewer.FileAssoc.Tiff"
".tiff"="PhotoViewer.FileAssoc.Tiff"
Yup, that is a lot of keys and settings but you are almost done. Once you have pasted text into your new notepad document save it but as .REG, you can name it however you want but it has to be .REG extension.
Once the file is saved double click on it to merge it into the Windows registry. You might need to turn off UAC for this operation (check our tutorial on this topic) and accept warning messages but once it is done you should now have an old photo viewer as a choice for your default viewing application.
All you have to do now is to go to settings and go to default apps, under photo viewer you should see your current default viewing application, probably photos, click on it to see options and choose photo viewer and exit the Settings menu, and you're done.

 10 worst computer viruses in history
chkdsk /f /r
 Error Causes
Problem signature: Problem Event Name: BlueScreen OS Version: 6.0.6002.2.2.0.16.7 Locale ID: 1033When the error occurs, the computer screen turns blue and the user is unable to view or access the program. It is advisable to fix the error right away, virtually because BSoD is a critical PC error, it can pose serious threats to your system.
You don’t need to hire a technician or be a computer whiz to resolve Blue Screen Locale ID1033 error code. Here are some methods that you can try to resolve this error on your PC. These methods are easy to perform and result-driven.
When Windows evolved into Windows 10, the program known as Windows Security Essentials is no longer. It is now the program known as Windows Defender. When a computer is upgraded from a previous version of Windows up to Windows 10, the Windows Defender takes over and will replace the Security Essentials. In a small percentage of Windows 10 upgrades, something will go wrong and the new program will fail to replace Security Essentials. The result will be that the operating system has both of the programs installed. In this case, Windows Defender will not offer any protection and Security Essentials will not be able to defend either. This error code will also present itself when the Windows Mail App in Windows 10 fail to retrieve and sync email from the user's account.
Common symptoms include:
Error CausesError code 0x80070426 will present itself when a PC user has upgraded their OS from a previous version of Windows to the new Windows 10 version. When this happens, a small portion of users will experience the disconnect between older versions of specific programs, namely the virus protection. When the previous version of the program under a different name is not completely removed and the new virus protection program is installed, the programs will cancel each other out and collectively offer no protection.
This error code may also be found when Windows 10 tries to sync the user's email with the Windows Mail App.
Hold down the Windows Key and press R. Type in taskmgr into the run dialogue. You should locate the Windows Defender Service (this may show up as Windefend). Right-click on it and then choose Stop.
This will stop the program, but the program will start back up automatically when the computer restarts. While this program is stopped, uninstall Essentials.
To do this: go to Control Panel, Programs, and Features, Uninstall a Program. Alternately, you may hold down the Windows Key and press R, type in appwiz.cpl, click OK, and then locate Microsoft Essentials. Uninstall it, and then restart your computer.
After this is done, go to Settings, Update, and Security. Choose Windows Defender and ensure that Real-time protection is on. Refer back to the Task Manager, Services. Make sure that Defender service is on and running.
When error code 0x80070426 presents itself in the form of an error with the Mail app, it may be necessary to run an SFC scan.
Right-click on the Start menu or Windows icon, and select Command prompt. The command prompt may be navigated by using shortcut keys Win and X and then select it.
Run the command prompt and then type in sfc /scannow and then press enter. The SFC scan will be run, and be careful not to abort the process before it has finished. This will scan for any files that are lost or corrupt on the PC.
If the scan has found any corrupt files, type in this code and then hit Enter: findstr /c:”[SR]” %windir%LogsCBSCBS.log >”%userprofile%Desktopsfcdetails.txt.
To skip the repair of corrupt or missing files, type in: Dism /Online /Cleanup-Image /RestoreHealth. The details of the scan can be found on the sfcdetails.txt file that will be on the desktop.
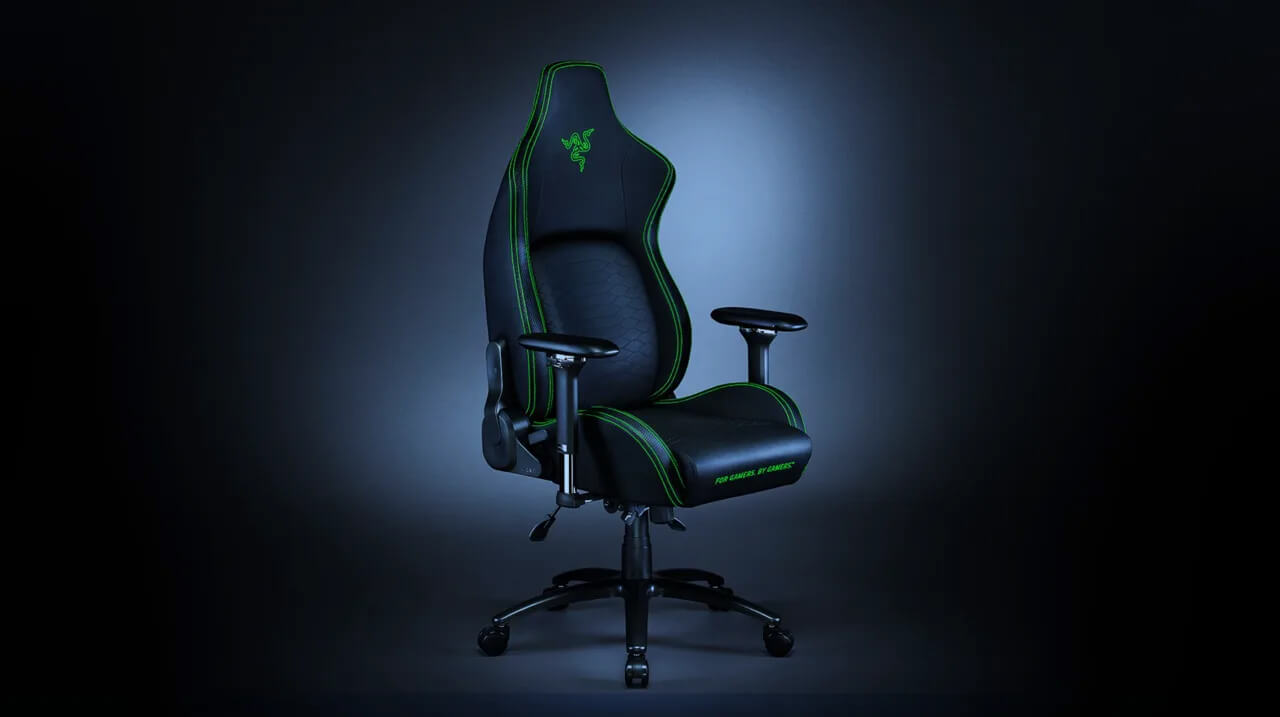 It seems that last few days we were riding some Razer bandwagon but rest assured that we are not sponsored by them in any way, truth is that simply they come up with some interesting accessories which I believe are worth covering.
Gaming Chair itself comes in two colors, fully black and green black combination and it is not really an entry-level chair if we are talking about price. The chair itself is around 600USD depending on the distributor and considering that price range it is placed in more top cream of gaming chairs but it is worth every dime.
It seems that last few days we were riding some Razer bandwagon but rest assured that we are not sponsored by them in any way, truth is that simply they come up with some interesting accessories which I believe are worth covering.
Gaming Chair itself comes in two colors, fully black and green black combination and it is not really an entry-level chair if we are talking about price. The chair itself is around 600USD depending on the distributor and considering that price range it is placed in more top cream of gaming chairs but it is worth every dime.