Logo

A Quick Guide to Resolving Missing Dciman32.dll Error

Missing Dciman32.dll Error – What is it?

Dciman32.dll is a type of dynamic link library. Just like any other dll file, it includes instructions and is called to load and run different programs.

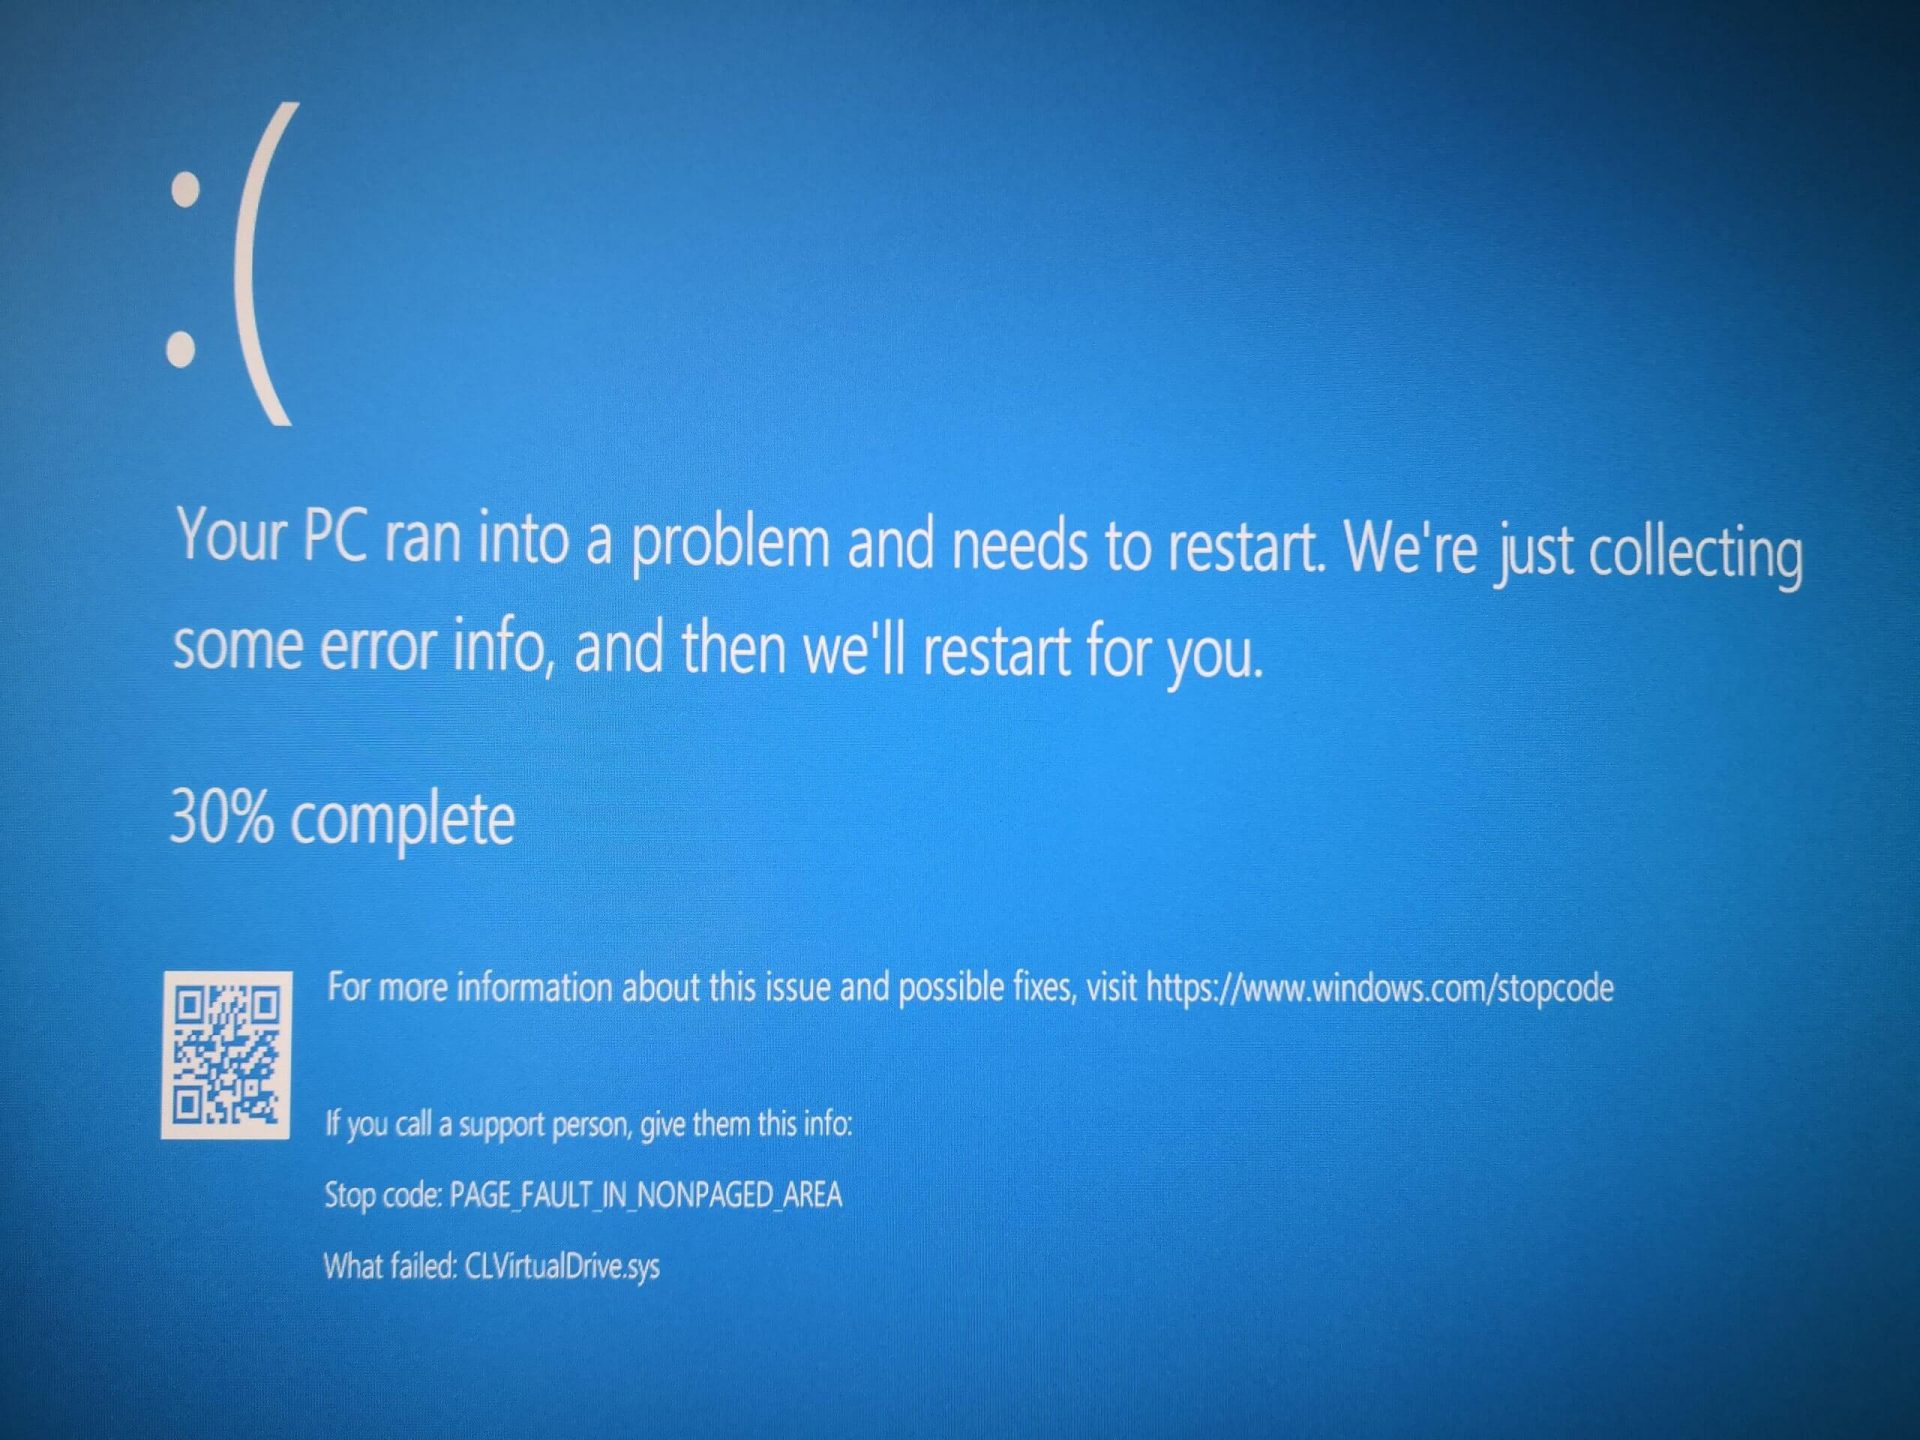
The Missing Dciman32 dll error code occurs when the program dependent on this dll file type is unable to load the file. This error can occur while using or installing certain programs on your system.

  • "Dciman32.dll Not Found"
  • "Cannot find [PATH]dciman32.dll"
  • "This application failed to start because dciman32.dll was not found. Re-installing the application may fix this problem."
  • "The file dciman32.dll is missing."
  • "Cannot start [APPLICATION]. A required component is missing: dciman32.dll. Please install [APPLICATION] again."

Solution

Restoro box imageError Causes

The Dciman32.dll error causes include:

  • Dciman32.dll file corruption or removal
  • Poor program installation that uses Dciman32.dll file
  • Registry issues
  • Hardware failure
  • Malware infection

Further Information and Manual Repair

Here are some of the easiest and effective ways to fix the Dciman32 dll error on your PC:

Method 1 - Restore Dciman32 dll file Back on your PC

Remember DLL files are shared files. You might have deleted this file while uninstalling some other program on your PC.

Therefore to restore Dciman32.dll file, first check your recycle bin. If you locate it, then that’s great however if you don’t, then another way to restore the Dciman32.dll file is to download it from the internet.

Method 2 - Update Drivers for Hardware Devices

To update the driver first download the latest drivers from the hardware manufacturer’s website.

Now go to the start menu, then the control panel and then click the device manager. Once you open the device manager, locate the hardware device you want to update the driver for. For example, if you experience a Dciman32 dll error when you play a 3D video game, then this indicates that you need to update the drivers for your video card.

Navigate through different categories of hardware devices by clicking the icon to find the hardware you want to update. After finding the hardware you’re updating the driver for, right-click on the hardware’s name and then choose properties and then the driver tab. Click update driver button. This method will take approximately 10 to 12 minutes.

To activate the changes you will have to restart your PC.

Method 3 - Reinstall the Program that Uses Dciman32.dll File

Another way to resolve the Dciman32.dll error code on your system is to reinstall the program showing the error message. Poor program installation can also be the reason for the error occurrence.

To reinstall the program, first, you will have to uninstall the program showing the error message, and then restart your PC to activate changes.

Once your computer restarts, reinstall the deleted program. Make sure that the disc or the CD you are reinstalling the program from is bug-free and not scratched.

Method 4 - Scan your PC for Registry Issues and Viruses

If the dll error still persists, then this means either the error is triggered by viruses or registry issues. To resolve these issues you will have to install and run programs on your PC antivirus and a registry cleaner.

However, you should note that installing too many programs can slow down your system’s performance.

Restoro

The best way to scan for viruses and registry issues without compromising your PC performance is to download Restoro.

This is a multi-functional PC Fixer embedded with 4 powerful and unique PC repair utilities including an antivirus that scans all kinds of viruses, Trojans, and malware. It also features a registry cleaner that removes all unwanted files saved in the registry, cleans the registry, repairs the damaged dll and system files including the Dciman32.dll file, and restores them back to normal.

Furthermore, to ensure your system performance at its optimum level, it is also embedded with a system optimizer. And forth utility it features is Active X controls and class scanner.

This is a safe and a user-friendly program compatible with all Windows versions. Click here to download Restoro now.

Do You Need Help with Your Device?

Our Team of Experts May Help
Troubleshoot.Tech Experts are There for You!
Replace damaged files
Restore performance
Free disk space
Remove Malware
Protects WEB browser
Remove Viruses
Stop PC freezing
GET HELP
Troubleshoot.Tech experts work with all versions of Microsoft Windows including Windows 11, with Android, Mac, and more.

Share this article:

You might also like

Stopping automatic redirects in Browsers
As you know, the internet has changed the world immensely. Nowadays, JavaScript is pushing the modern web ahead. One of the things that make these experiences with the internet seamless and with less clutter is redirection. It is often used on web pages and there are times when a user is prompted about them and most of the time, we barely notice them. However, there are also instances when things can go wrong with redirects as they could become a loop that could mess things up. And since the browser takes a lot of system resources, redirection can result in a poor user experience. That’s why in this post, you will be guided on how you can stop these automatic redirects on browsers such as Microsoft Edge, Google Chrome, and Mozilla Firefox, on your Windows 10 computer. To get started, refer to each one of the options provided below to stop automatic redirects in Microsoft Edge, Google Chrome, and Mozilla Firefox.

Option 1 – Configure the browsers to stop pop-ups and deceptive contents

There are a lot of browsers with built-in settings that allow users to stop pop-ups and deceptive content. To configure these settings, refer to these steps:
  • Microsoft Edge:

    • Click on the three horizontal dots icon or the menu button.
    • Next, click on Settings and select Privacy & Security from the left side navigation.
    • After that, scroll down on the right-side panel and look for Block pop-ups and Windows Defender SmartScreen and then turn their toggle buttons to On.
  • Google Chrome:

    • Open Google Chrome and click on the three vertical dots icon for the menu located in the top right corner of the browser.
    • Next, click on Settings and scroll down until you see the Advanced option. Click on it to open the Advanced Settings.
    • Now scroll down until you reach the Privacy and Security section and look for the Safe browsing option and turn its toggle button to On.
  • Mozilla Firefox

    • Open Mozilla and click on the three horizontal lines icon for the menu button located in the top right corner of the browser and click on Options.
    • Next, go to the Settings section and click the Privacy & Security tab and scroll down and then click on Permissions.
    • From there, make sure that the Block pop-up windows checkbox is checked.
    • Finally, scroll down until you reach the Security section and make sure that the checkbox for the Block dangerous and deceptive content is checked.

Option 2 – Try to reset Winsock, TCP/IP & Flush DNS

To stop redirects, you can also reset Winsock and the TCP/IP as well as flush the DNS cache. To do so, follow these steps:
  • Right-click on the Start button and click on Command Prompt (administrator) so you can pull up an elevated Command Prompt.
  • After that, execute each one of the commands listed below. And after you typed in one after the other, you have to hit Enter.
  1. netsh winsock reset – type in this command to reset Winsock
  2. netsh int ip reset resettcpip.txt – type in this command to reset TCP/IP
  3. ipconfig /flushdns – type in this command to flush the DNS cache
  • Next, restart your PC and check if the problem’s fixed.

Option 3 – Edit your Hosts File

  • Tap the Win + R keys to open then type in %WinDir% and then click OK.
  • Go to System32/drivers/etc.
  • Open the host file using Notepad.
  • Delete all the suspicious entries.
  • After that, save the changes you’ve made and close the file.
Read More
How to Fix 0xc000001d Error

What Is 0xc000001d Error?

The 0xc000001d error is a common yet critical error that can occur when Windows is damaged or fails to work as a result of either missing system files or corrupt system components. This error can be extremely dangerous to Windows as it can inflict major damage to data and component files.

Error Causes

A 0xc000001d error code can occur because of a number of reasons, of which corrupt registry files are the most common, and about 94% of the time, this results in the error. However, virus infection or an adware or spyware invasion can also result in this error. Outdated drivers and missing DLL files can also be critical and will lead to this error causing major damage to computer files. Contrary to popular belief, incomplete installation and unfinished uninstalls can also because of this error. Other causes include improper shutting down of computers and improper hardware or software deletion.

Solution

Restoro box imageFurther Information and Manual Repair

Because of this 0xc000001d error code, Windows can fail in starting some processes and the system’s performance can significantly slow down. In some cases, Windows has problems starting up and the system can freeze. Lastly, this error code can even result in the Blue screen of death error message, just like other critical Windows errors. If any of the above problems and symptoms occur in your PC, then you should immediately seek to resolve this problem. In order to resolve this 0xc000001d error code or repair the corrupted and damaged Windows files, you will need a 0xc000001d repair tool. There is more than one method of treating this kind of error code, and here is how you can manually do it:
  • Start the computer and log in as administrator
  • Go to the start button and select All Programs. Go to Accessories, System Tools, and then System Restore
  • Click on System Restore and in a new window, select the ‘Restore my computer to an earlier time’ option and click Next
  • On the new confirmation window that appears, click Next
  • Restart your computer after the restoration has been completed
Another way to manually repair this 0xc000001d error code is to:
  • Manually edit the Windows registry
  • Update all the drivers for the device
Read More
Creating custom Keyboard shortcuts in Windows
Keyboard shortcuts are undeniably one of the most utilized ways and are helpful in maximizing productivity through the various applications at top speed in Windows 10. It offers the option to create custom keyboard shortcuts that allow users to launch apps, and even websites, instantly. There are already tons of keyboard shortcuts that are built-in in Windows 10 but in case you don’t know, you can actually create new ones. Doing so is not a difficult task and in this post, you will be guided on how you can exactly create custom keyboard shortcuts in your Windows 10 computer. Most users would create desktop shortcuts or pin the apps in the taskbar to speed up the process of working on their computers. It is an easy task to do since you can easily do it by dragging an app from the Start Menu to the desktop or by simply right-clicking on the executable app and selecting the “Create Shortcut” option. However, doing so would take physical effort and there are times when you have to minimize all the apps to get to the desktop so you can click the shortcut and this is where the Custom Keyboard Shortcuts come in handy. You can create Custom Keyboard Shortcuts in Windows 10 for various programs – from the traditional desktop apps to the new universal apps – you can fling in a shortcut so that you can instantly open them faster compared to when doing it manually and besides this also wouldn’t affect any of the ongoing system activity. To get started, you need to follow the steps provided below carefully.

To add Custom Keyboard hotkeys to a program and website desktop shortcuts, here’s what you have to do:

Step 1: First, you have to right-click on the app or website and select Properties. Step 2: After that, go to the Shortcut tab and from there, you will see the “Shortcut key” textbox which allows you to enter a new or custom keyboard shortcut for the app or website. Step 3: In the textbox field, input your preferred letters to set up the new hotkey. Keep in mind that this custom shortcut has to be combined with the Ctrl + Alt keys which means that if you want to select “N”, you have to tap the Ctrl + Alt + N keys. Step 4: Once done, click on the Apply and OK buttons to save the changes made and then close the window. Step 5: After that, tap the newly created keyboard shortcut, Ctrl + Alt + N keys again to open the app or website you’ve set up earlier.

To add Custom Keyboard hotkeys to a desktop app or an independent program that can be installed using direct download, here’s what you have to do:

Step 1: First, open the Start Menu and look for the icon/tile of the required app in the menu. However, if you are not able to find the desired app, then just click on the All Apps option to navigate through all the apps that are installed on your PC. Step 2: Once you find the app, just right-click on it and select More and then click on the “Open file location” option. Step 3: This will open a new window with the shortcut icon. Right-click on the app’s shortcut icon and select Properties. Step 4: This will open the Properties window where you can add the shortcut combination. Keep in mind that just like the previous method, the custom shortcut has to be combined with the Ctrl + Alt keys. For instance, if you select E, then you also have to set a keyboard shortcut that includes Ctrl + Alt, so it will be, Ctrl + Alt + E. Step 5: Once you’re done, click on the Apply and OK buttons to save the changes made. You should now be able to use the custom shortcut key you’ve set.
Read More
How to Remove iWinGames - PUP Removal Tutorial

iWin is a self-published games platform that offers users to download and play free games. It is classified as potentially unwanted, primarily because it often comes bundled with the iWin Toolbar, which is an adware supported browser extension by Conduit. The iWin Toolbar is heavily flagged as malware or unwanted by numerous Antiviruses. iWin Games is not malicious in itself, though due to its bundling and common inclusion of the toolbar, many users wish to remove it.

About Browser Hijackers

Browser hijack is a very common type of online fraud where your web browser configurations are altered to allow it to do things you never intend. Basically, most browser hijackers are made for marketing or advertising purposes. It redirects you to the sponsored sites and injects advertisements on the browser that helps its creator generate income. Most people assume that these kinds of websites are legitimate and harmless but that is incorrect. Nearly every browser hijacker poses an actual threat to your online safety and it is necessary to categorize them under privacy risks. When the program attacks your computer or laptop, it starts to mess things up a whole lot that slows your computer down to a crawl. In the worst-case scenario, you may be pushed to deal with serious malware threats as well.

How one can know whether the web browser is hijacked?

There are plenty of signs that indicate your internet browser has been highjacked: the browser’s homepage is changed; you find new unwanted bookmarks or favorites added, usually directed to ad-filled or pornography sites; The default search page of web browser is altered; you’ll see many toolbars on the web browser; your internet browser displays constant pop-up ads; your web browser starts running slowly or presents frequent glitches; You can’t access certain sites, particularly anti-virus websites.

How they invade computers

Browser hijackers infect PCs in numerous ways, including via a drive-by download, a file-share, or an infected e-mail. Many browser hijackings originate from add-on programs, i.e., browser helper objects (BHO), toolbars, or plug-ins added to web browsers to provide them extra capabilities. Also, some shareware and freeware can put the hijacker in your computer through the “bundling” technique. A good example of some popular browser hijackers includes Anyprotect, Conduit, Babylon, SweetPage, DefaultTab, Delta Search, and RocketTab, but the names are constantly changing. Browser hijackers could record user keystrokes to collect potentially important information that leads to privacy concerns, cause instability on systems, severely disrupt the user experience, and ultimately slow down the computer to a point where it becomes unusable.

How to repair a browser hijack

Some hijackers can be easily removed by uninstalling the free software they were included with or by deleting any extension you have recently added to your computer system. However, most browser hijackers are hard to get rid of manually. Irrespective of how much you try to eliminate it, it may return over and over. And there’s no denying the very fact that manual repairs and removal can be quite a difficult job for a beginner computer user. Furthermore, there are many risks associated with tinkering around with the pc registry files.

What To Do If You Cannot Install Any Antivirus?

Malware could cause many different types of damage to computer systems, networks, and data. Some malware variants modify internet browser settings by including a proxy server or modify the computer’s DNS settings. In these cases, you’ll be unable to visit some or all of the sites, and thus not able to download or install the required security software to remove the computer virus. If you’re reading this article right now, you may have perhaps recognized that virus infection is the cause of your blocked net connectivity. So what to do when you want to install an anti-virus application like Safebytes? Refer to the instructions below to remove malware through alternative ways.

Make use of Safe Mode to fix the issue

In the event the malware is set to load at Windows startup, then booting in safe mode should avoid it. Only minimal required applications and services are loaded whenever you boot your laptop or computer in Safe Mode. Here are the steps you should follow to boot into the Safe Mode of your Windows XP, Vista, or 7 computers (visit Microsoft website for instructions on Windows 8 and 10 computers). 1) Press the F8 key continuously as soon as your system boots, but before the large windows logo comes up. This will bring up the Advanced Boot Options menu. 2) Use the arrow keys to choose Safe Mode with Networking and press ENTER. 3) Once you get into this mode, you will have an internet connection once again. Now, use your browser to download and install an anti-malware application. 4) Right after the software program is installed, let the scan run to remove viruses and other threats automatically.

Obtain the antivirus software using an alternate internet browser

Certain malware might target vulnerabilities of a specific web browser that obstruct the downloading process. The ideal way to overcome this issue is to go with an internet browser that is well known for its security measures. Firefox has built-in Malware and Phishing Protection to help keep you safe online.

Create a bootable USB antivirus drive

Another way is to download and transfer an antivirus application from a clean PC to run a scan on the infected computer. To run anti-malware from a USB pen drive, follow these simple measures: 1) Use another virus-free computer system to download Safebytes Anti-Malware. 2) Insert the pen drive onto the same computer. 3) Double-click the Setup icon of the anti-malware software package to run the Installation Wizard. 4) When asked, select the location of the pen drive as the place where you would like to store the software files. Follow the activation instructions. 5) Now, transfer the pen drive to the infected PC. 6) Run the Safebytes Anti-malware directly from the pen drive by double-clicking the icon. 7) Click on “Scan Now” to run a scan on the infected computer for malware.

Protect Your Computer & Privacy With SafeBytes Anti-Malware

To help protect your PC from many different internet-based threats, it is important to install an anti-malware program on your laptop. But with countless numbers of anti-malware companies in the market, nowadays it is hard to decide which one you should buy for your computer. A few of them are good, some are decent, while some will harm your PC themselves! You need to purchase a product that has gained a strong reputation and detects not just viruses but other kinds of malware as well. When considering commercial anti-malware tool options, most people opt for well-known brands, such as SafeBytes, and they are quite happy with it. SafeBytes anti-malware is a trustworthy tool that not only secures your PC permanently but is also extremely user-friendly for people of all ability levels. Through its cutting-edge technology, this software protects your personal computer against infections caused by various kinds of malware and similar threats, including adware, spyware, trojans, worms, computer viruses, keyloggers, potentially unwanted programs (PUPs), and ransomware. SafeBytes has a plethora of great features that can help you protect your PC from malware attacks and damage. Listed below are some of the best ones: Robust, Anti-malware Protection: Built upon a highly acclaimed antivirus engine, this malware removal application is able to identify and get rid of various stubborn malware threats like browser hijackers, potentially unwanted programs, and ransomware that other typical antivirus programs will miss. Live Protection: Malware programs attempting to get into the system are discovered and stopped as and when detected by the SafeBytes active protection shields. This tool will always monitor your PC for any suspicious activity and updates itself regularly to keep abreast of the constantly changing threat scenarios. Web Protection: Safebytes assigns all websites a unique safety rating that helps you to get an idea of whether the webpage you’re just about to visit is safe to browse or known to be a phishing site. High-Speed Malware Scanning Engine: SafeBytes’s virus scan engine is among the fastest and most efficient in the industry. Its targeted scanning considerably increases the catch rate for viruses which is embedded in various computer files. Lowest CPU and RAM Usage: SafeBytes is a lightweight and user-friendly anti-virus and antimalware solution. Since it uses very low computer resources, this program leaves the computer’s power exactly where it belongs to: with you actually. 24/7 Live Expert Support: For any technical concerns or product support, you may get 24/7 expert assistance through chat and email.

Technical Details and Manual Removal (Advanced Users)

If you wish to manually get rid of iWin Games without the use of an automated tool, it might be possible to do so by removing the program from the Windows Add/Remove Programs menu, or in cases of browser extensions, going to the browsers AddOn/Extension manager and uninstalling it. You may even want to reset your home page and search providers, and also delete browsing history, temporary files, and cookies. Lastly, examine your hard drive for all of the following and clean your computer registry manually to get rid of leftover application entries after uninstalls. Please be aware that this is for advanced users only and could be difficult, with wrong file removal causing additional PC errors. Moreover, certain malware is capable of replicating or preventing removal. You’re suggested to do this process in Safe Mode.
Files: C:DOCUME1USER1LOCALS1Tempnsu1.tmp C:e8bfb44ebc51cebadf4410cb35e993837a67e31b69a243ebac9de76160c97ac6 C:DOCUME1USER1LOCALS1Tempnsu2.tmp C:DOCUME1USER1LOCALS1Tempnsu2.tmpSystem.dll C:DOCUME1USER1LOCALS1Tempnsu2.tmpftdownload.dat C:e8bfb44ebc51cebadf4410cb35e993837a67e31b69a243ebac9de76160c97ac6 C:DOCUME1USER1LOCALS1Tempnsu2.tmpSystem.dll C:DOCUME1USER1LOCALS1Tempnsu2.tmpftdownload.dat C:DOCUME1USER1LOCALS1Tempnsu2.tmp C:DOCUME1USER1LOCALS1Tempnsu1.tmp C:DOCUME1USER1LOCALS1Tempnsu2.tmp C:DOCUME1USER1LOCALS1Tempnsu2.tmpftdownload.dat C:DOCUME1USER1LOCALS1Tempnsu2.tmpSystem.dll Directory %COMMONAPPDATAiWin Games. Directory %LOCALSETTINGSTempiWinGames. Directory %PROGRAMFILESiWin Games. Directory %PROGRAMSiWin Games. Registry: Key HKEY_CLASSES_ROOT named iWinGamesInstaller.CoInServ.1 Key HKEY_CLASSES_ROOT named iWinGamesInstaller.CoInServ Key 495874FE-4A82-4AD1-9476-0B957E0B95EB at HKEY_CLASSES_ROOTTypeLib. Key 4B55700F-DB51-4891-8B28-6136A48A0105 at HKEY_CLASSES_ROOTAppID. Key 4B55700F-DB51-4891-8B28-6136A48A0105 at HKEY_CLASSES_ROOTCLSID. Key CA5E2E62-8612-4942-84A0-A94090D166AA at HKEY_CLASSES_ROOTInterface. Key E3ED53C5-7AD5-4DF5-9734-AFB6E7E5D9DB at HKEY_CLASSES_ROOTInterface. Key 4301AEBD288588A40833184CFEC0AF92 at HKEY_CLASSES_ROOTInstallerFeatures. Key 4301AEBD288588A40833184CFEC0AF92 at HKEY_CLASSES_ROOTInstallerProducts. Key 80F08842F9EA1BE4BA4922DA74CDB698 at HKEY_CLASSES_ROOTInstallerUpgradeCodes. Key ForseRemove at HKEY_CLASSES_ROOTAppID. Key iWinArcade at HKEY_CURRENT_USERSoftware. Key iWinArcade at HKEY_LOCAL_MACHINESOFTWARE. Key iWinGamesInstaller.EXE at HKEY_CLASSES_ROOTAppID. Key iWinGamesInstaller at HKEY_LOCAL_MACHINESYSTEMControlSet001Services. Key iWinGamesInstaller at HKEY_LOCAL_MACHINESYSTEMControlSet002Services. Key iWinGamesInstaller at HKEY_LOCAL_MACHINESYSTEMControlSet003Services. Value %PROGRAMFILESiWin GamesiWinGames.exe at HKEY_LOCAL_MACHINESYSTEMControlSet001ServicesSharedAccessParametersFirewallPolicyStandardProfileAuthorizedApplicationsList. Value %PROGRAMFILESiWin GamesWebUpdater.exe at HKEY_LOCAL_MACHINESYSTEMControlSet001ServicesSharedAccessParametersFirewallPolicyStandardProfileAuthorizedApplicationsList.
Read More
6 colors of Western Digital
I must admit that I am a big Western Digital fan, I have been using their hard drives really long time and I must admit that I am very happy with their products. Sometimes they could be a little more expensive than other drives on market but security and performance are on their side. If you ever wanted to purchase Western Digital or WD hard drives or you are considering getting one, no doubt that you have come across their color cryptic line of products. 1TB Hard drive can come in 6 different colors in your search products query and if you are not familiar with the WD color coding of hard drives you might be a little lost as to which one is right for you and what are the differences. This article is made to explain exactly that, what are WD colors representing so you can choose the right one for your needs. Western Digital has decided to use color codes in order to mark their series of disks which means that each color represents different hard drive series and it is made and aimed for different use, we are going to explore in detail each series below:

WD BLUE

Blue series is all around typical hard drive made and meant for daily use in desktop computers for all kinds of tasks. You can use it in casual gaming or for storage, its purpose is tailored for all-around casual daily users.

WD RED

WD Red HDD is designed for NAS and RAID systems. Its purpose is to be turned 24/7 who ever need access to it. Get this series if you need to have constant access to files or if you need a reliable RAID hard drive.

WD GREEN

Green series of the hard drive is manufactured for low power consumption and for storage, they are meant to be used for storage and not accessed regularly.

WD PURPLE

Purple line of hard drive products is designed solely for video surveillance systems. Instead of having a preference on reading data like WD RED, the PURPLE series is given preference on writing, constant writing to be more precise.

WD BLACK

The black series is made for an external storage medium with high performance. Due to the high performance, WD Black hard drives are much popular among photo editors and high-end gamers.

WD GOLD

WD Gold HDD provides a long-term cold storage medium. Therefore, this series of Western Digital hard drives are suitable for data centers. These hard drives can handle many sophisticated systems simultaneously and work well with different servers That's it, I hope that you have now a more clear understanding of the WD color-coding of its hard drive series. As always thank you for reading and I hope you will have a great day. If you would like to read more helpful articles and tips about various software and hardware visit errortools.com daily.
Read More
Could not configure one or more components
If you are trying to install or upgrade your Windows 10 computer but suddenly encountered an error message saying, “Windows Could not configure one or more system components”, read on as this post will show you how you can fix the problem. You are not alone in experiencing this problem as other users also reported having the same scenario. Some of them reported getting the following error message:
“Windows could not configure one or more system components. To install Windows restart the computer with error code 0xc1900101-0x30018.”
When you check on the Windows 10 rollback log, you will see a part with the “iisetup.exe” that’s related to the abort. Usually, the upgrade process completes over 50% and gets stuck and then rolls back later on and generates the error logs. This kind of error, in most cases, appears during the upgrade of Windows 10 and is related to the Internet Information Services or IIS in Windows 10. For some unknown reason, it restricts the installation or the upgrade which causes the error to appear. To fix the “Windows could not configure one or more system components” error, you can try to remove the IIS from the Windows Features or rename the “inetsrv” folder. You could also move all the folders related to IIS to another drive. For more details, refer to the options provided below.

Option 1 – Try to remove the IIS from Windows Features

The IIS is installed from the Windows Features and you can find it at Control Panel > Programs. From there, uncheck the checkbox for the Internet Information Services. Once done, click on the OK button to save the changes. Note that this process will get rid of all the related programs, services, and folders from Windows 10. So if you want to, you can just install them later on or use an offline installer from the official site of Microsoft.

Option 2 – Try renaming the inetsrv folder

The next option you can check out to resolve the problem is to rename the “inetsrv” folder. If you have uninstalled IIS from the Windows Features, this should remove the folders as well, however, it didn’t remove the folder then you have to delete the folders that are related to the IIS by following these steps:
  • First, you have to boot into the Advanced Recovery Mode and from there, open Command Prompt.
  • Next, execute this command to rename the folder from this location, C:Windowssystem32inetsrv: rename C:/Windows/system32/inetsrv/inetsrv.old
  • Once done, boot into your computer normally and try to upgrade Windows 10 again, and check if the problem is fixed or not.

Option 3 – Try to move the folders related to IIS to a different drive

  • Tap the Win + R keys to launch the Run utility and type “services.msc” in the field and hit Enter to open the Windows Services Manager.
  • Next, look for the Application Host Helper Service from the list of services and stop it.
  • Once done, take ownership of the “WinSxS” folder and then move the *windows-iis*.*” folders to another drive. You can just search using the “*windows-iis*.*” keyword in the Start Search.
  • Next, tap the Ctrl + X keys and paste the folders to another drive.
  • After that, start the update process for Windows 10 again.
Read More
Fix System Interrupts high CPU usage
System Interrupts are operating system processes that function as an alert system for the CPU. So whenever a scenario needs the attention of the CPU, it alerts the CPU about it. In turn, the CPU suspends what it is doing, saves it, and then takes care of that important job and once that job is completed, it resumes back to what it was doing. This indicates that although System Interrupts appears as a process, it’s actually not. As a matter of fact, it is like a manager that reports to the CPU about all interrupts that happen on a hardware level, e.g. hardware interrupts. And if there are lots of interrupts, this means that there might be various errors occurring on a hardware level. As a result, it may take a lot of system resources. And if you consider disabling System Interrupts, stop right there as your computer will almost become useless without it. So if you see System Interrupts consuming high CPU usage in your Windows 10 computer, you can fix it without having to disable it and cause more problems. If System Interrupts takes up more than 5 to 10% of CPU, then you definitely have a problem. This could be happening due to some hardware or driver issue. The first thing you can do is to try rebooting your computer once and see if the issue comes back or not. High CPU usage of System Interrupts is a huge backlog for the CPU and it stays in the loop. If a simple system restart didn’t fix this issue, here are some suggestions you can try.

Option 1 – Try to update the hardware drivers

As stated, the problem might have something to do with hardware drivers so you can try to update these drivers and see if it works.
  • Reboot your computer into Safe Mode with networking support.
  • Tap the Win + R keys on your keyboard to open the Run dialog box.
  • After that, type “devmgmt.msc” in the field and hit Enter or click OK to open the Device Manager.
  • After opening the Device Manager, update all the outdated Hardware drivers on your computer.
  • Next, right-click on all the driver entries that are appropriately labeled, and then click the Update driver option.
  • Now restart your PC and check if the BSOD error is fixed or not.
Note: On the other hand, if a recent update has caused the System Interrupts high CPU usage, then you might want to roll back your hardware drivers to their previous versions. You can check with the Windows Update History to check out any recent updates as well as the previous ones.

Option 2 – Try to disconnect and reconnect all hardware and cables

A lot of users reported that they were able to fix the problem by disconnecting and reconnecting cables and hardware like scanners, printers, cameras can help in fixing the problem. In addition, you can also boot your computer in a Clean Boot State so that you can find the problematic hardware by hit and trial method. Refer to the steps below to do so:
  • Log onto your PC as an administrator.
  • Type in MSConfig in the Start Search to open the System Configuration utility.
  • From there, go to the General tab and click “Selective startup”.
  • Clear the “Load Startup items” check box and make sure that the “Load System Services” and “Use Original boot configuration” options are checked.
  • Next, click the Services tab and select the “Hide All Microsoft Services” check box.
  • Click Disable all.
  • Click on Apply/OK and restart your PC. (This will put your PC into a Clean Boot State. And configure Windows to use the usual startup, just simply undo the changes.)

Option 3 – Try to enable or disable Hardware

If you do not want to remove hardware, you can just disable them using the Device Manager. Note that this can also be applied to the internal hardware.
  • Tap the Win + X + M keys to open the Device Manager.
  • Next, navigate to the device you want to disable.
  • Then right-click on it and choose to disable the device.
Note: Make sure that you disable one device at a time and then give it a couple of minutes and check if there are any changes in the CPU usage to pinpoint the hardware. And if there is no change, you need to enable the device you’ve just disabled and then proceed to disable the next hardware device. If there are changes, then it’s probably the culprit. Just keep in mind that you must no disable any device that is needed to keep your system up and running.

Option 4 – Try to update the BIOS/UEFI

Updating the BIOS/UEFI can help you fix the high CPU usage of System Interrupts but as you know, BIOS is a sensitive part of a computer. Even though it is a software component, the functioning of the hardware depends on it largely. Thus, you must be careful when modifying something in the BIOS. So if you don’t know much about it, it’s best if you skip on this option and try the other ones instead. However, if you are well-versed in navigating the BIOS, then follow the steps below.
  • Tap the Win + R keys to open the Run dialog box.
  • Next, type “msinfo32” in the field and press Enter to open System Information.
  • From there, you should find a search field on the bottom where you have to search for the BIOS version and then press Enter.
  • After that, you should see the developer and version of the BIOS installed on your PC.
  • Go to your manufacturer’s website and then download the latest version of BIOS on your computer.
  • If you are using a laptop, make sure that you keep it plugged in until you have updated the BIOS.
  • Now double click on the downloaded file and install the new BIOS version on your computer.
  • Restart your computer to apply the changes made.

Option 5 – Run the Hardware and Devices Troubleshooter or the Performance Troubleshooter

Hardware and Devices Troubleshooter:
  • The first thing you need to do is click on Start and then on the gear-like icon to pull up the window for Settings.
  • After opening Settings, look for the Update and Security option and select it.
  • From there, go to the Troubleshoot option located on the left-hand side of the list.
  • Next, select Hardware and Devices from the list and open the Troubleshooter and run it. Once it is doing its job, wait for it to complete the process and then restart the system.
  • After the system restarts, check if the problem’s now fixed. If not, refer to the next option given below.
Performance Troubleshooter:
  • Tap the Win + R keys to open the Run dialog box.
  • Type “exe /id PerformanceDiagnostic” in the field and hit Enter to open the Performance troubleshooter.
  • Then click on Next to get started. Wait until the process is completed.
Read More
Razer unveils their first internal PC hardware
razer pc hardware componentsRazer is a well-known brand among PC gamers and users, it started as a peripheral manufacturer focused on keyboards and mouse but after years passed Razer expanded its inventory offerings. It soon started offering headphones and lately has branched into wider product lines like gaming chairs and protection masks. It is not a big surprise that Razer is expanding into other branches of the PC industry. This time, however, it has revealed not one but three new hardware for your PC. Case fans, all in one liquid cooler and power supply. There are not many details about the products themselves but one thing is one hundred percent confirmed, they come with Razer Chroma, all of them, even the fans.

Katana Chroma ATX PSU

razer power supplyMost interesting for me personally is Razers Katana, the power supply unit. It is a modular power supply ranging from 750W to 1200W with the additional option of Titanium rated one with an impressive 1600W of power. Power supply will start shipping in early 2022 and at the time of writing this article no price range has been released.

Razer Hanbo AIO

razer water coolingHanbo liquid cooler will feature an optimized intake design so it can ensure greater heat transfer and fluid dynamic for improved reliability and silent operation. Radiator comes in 240mm size with two fans and a larger one of 360mm with three fans. The pump will be able to rotate in any direction of full 360 degrees so it can fit in any case. Hanbo will be released in November this year but no pricing has been released so far.

Razer Kunai Chroma case fans

razer case fansKunai fans will boast high static pressure performance with lowered noise. They will go as far as 2200rpm for the 120mm version where the 140mm version will go up to 1600rpm. They will come with addressable LEDs and up to eight fans will be able to be connected to Razer’s PWM fan controller that will come with a magnet at the back for easy attachment to any steel part of PC casing. PWM will use Razer’s Synapse software to customize pulse width modulation in order to improve airflow and noise. PWM will be priced at $49.99 in the Razer Store and it is available for preorder. Fans are priced at $44.99 for one 120mm or $129.99 for a three-pack of 120mm. One 140mm will go for $49.99 and a three-pack will be $129.99.
Read More
How to Repair BSOD Stop Error code 0xc000021a in Windows 10

Error code 0xc000021a - What is it?

Error code 0xc000021a occurs when the system is unable to start or there’s a failure in critical system processes. Normally, it would take about several seconds for the system to boot and while on the startup process, error code 0xc000021a may take place to block the system to boot up. Users will get a blue screen of death (BOSD) when this error occurs. When upgrading to Windows 10, be careful; you might encounter other error messages such as error code 8007002c

Solution

Restoro box imageError Causes

There are several reasons why error code 0xc000021a occurs. It is important to have a full understanding of what caused the blue screen of death before attempting to fix the error by yourself. See below for a few common causes:

Computer malware has infiltrated your device.

• Important files such as Winlogon.exe and Csrss.exe are damaged. Winlogon.exe file is responsible for handling the login and logout processes while Csrss.exe is a vital part of Microsoft Client or Server ‘Runtime Server Subsystem’. Once one of these files is damaged or deleted, a stop error will occur.

• When there are mismatched system files installed or system upgrading process failed or still incomplete.

• Premature unloading of Wbemprox.dll

• Newly installed third-party software is not compatible with the operating system.

• There are corrupted, outdated, or incorrectly configured device drivers.

• There’s insufficient space in the system partition. Once the system partition is full, certain errors such as error code 0xc000021a will manifest.

• Windows registry is corrupted or damaged due to a software or system change. This means there are registry entries that are not cleared after uninstalling an application.

Further Information and Manual Repair

In fixing error code 0xc000021a, you might want to try and manually do so. Manual repair methods can give users effective and efficient solutions, addressing the root problems in relation to Windows error codes. Once the manual repair method is correctly implemented, users will be able to resolve issues immediately. However, there might be instances when a Windows professional is needed. In such cases, seek help from a certified Windows expert or you might want to consider using an automated tool whenever necessary.

Method One: Convert the Drive or Partition from NTFS to GPT

In order to fix Error code 0xc000021a in Windows 10, you might need to convert the partition or drive from NTFS to GPT. See below for the procedure: 1. Shut down your device then put in the Windows installation USB key or DVD. 2. Boot your device to the USB key or DVD in UEFI mode. 3. Inside the Windows Setup, open a Command Prompt window by pressing Shift + F10. 4. Type diskpart in the Command Prompt window to open the diskpart tool. 5. Type list disk to identify which drive to reformat. 6. Select which drive to reformat by typing select disk in the command prompt. Afterward, type clean then hit Enter. Once done, type convert gpt to be able to convert the drive from NTFS to GPT. Finally, type exit and press Enter. You can now close the Command Prompt window. 7. Once the partition or drive is converted from NTFS to GPT, the user can now continue the Windows Setup installation. NOTE: Select Custom in choosing which installation type to use. The drive will then appear as a single area of unallocated space. Choose that unallocated space then select Next. At this point, Windows will now begin the installation.

Method Two: Fix System File Errors

There are times when system files get corrupted or damaged which will result in system failure. If this is the case, you can use a Windows free tool to repair corrupted or damaged system files. 1. Right-click on the Start button then selects Command Prompt (Admin) from the list to open a Command Prompt window. 2. Once the Command Prompt appears, type sfc /scannow then hit Enter. Wait until the process completes. If the process is completed and it doesn’t report any error or issues that remain unsolved, you might want to employ the next method.

Method Three: Reset Windows 10

Resetting Windows will delete all software and user accounts installed in the operating system and will reinstall a fresh Windows. 1. Boot your device using a Windows installation USB key or DVD. Select Repair your computer to locate the Troubleshoot option. Afterward, choose Reset this PC. NOTE: If the device is able to boot the system, you can reset Windows without using a Windows installation USB key or DVD. You just have to boot the device then navigate to Settings in the Start button. Choose Update & Recovery then select Recovery found on the left pane. Choose Reset this PC option then select Go back to an earlier build and Advanced startup. Select Get Started button found in the Reset this PC tab. 2. Depending on your device’s condition, you can either select Keep my files or Remove everything. Both options will remove all applications installed in the device and will revert to default settings. 3. Choose either Just remove my files or Remove files and clean the drive depending on the situation. If you choose the Remove files and clean the drive option, the procedure will take longer as it will erase all the files permanently. In this case, deleted files cannot be recovered. However, if you don’t want to remove files permanently, select Just remove my files. 4. Once you’ve decided how to reset your system, click on Next once the Warning screen appears. Afterward, choose Reset once prompted. When the process completed, click on Continue.

Method Four: Download an Automated Tool

Can’t seem to put up with the long and technical manual repair process? You can still fix this error by downloading and installing a powerful automated tool that will surely get the job done in a jiffy!
Read More
How to Allow or deny Apps permissions
As you know, each one of the applications that you use in your Windows 10 computer has its own set of permissions by default. These applications either allows or denies the interactions between a few other applications, depending on their own needs. This is why you might suddenly encounter a message that says,
“This app wants to access your pictures” or “This app wants to access your account info”
both of which are followed by two buttons that will ask you to Allow or Deny the action. You can always click on any of the given options. This will determine the permission of the application. Users in Windows 10 are given the option to either allow or deny applications in accessing their account information like name, picture and other account information. Thus, in this post, you will be guided on how you can change the Privacy settings of these apps to allow or deny them permission to access not just your account info but for all users, as well as specific apps in Windows 10. The user account information is part of the Privacy data in Windows 10 that you can control easily using the Settings app. In fact, you can revoke or grant access permission for your account information, all the users and specific applications to do that, follow each one of the instructions provided below carefully.

Allow or deny apps permission to account info for yourself:

Step_1: The first thing you have to do is open Settings. From there, select Privacy. Step_2: After that, scroll and look for Account info and select it. Step_3: Now turn off the toggle button for the “Allow apps to access your account info” option if you want to deny apps permission to your account info. But if you want to allow them access, simply turn the toggle button on. Keep in mind that when you allow access or permission, you can select which apps can access your picture, name, and other account info by simply using the settings on the page you’re currently in.

Now if you want to allow or deny apps to access your account info for all the users, here’s what you have to do:

Step_1: First, open Settings and click on the icon for Privacy. Step_2: Next, scroll down until you see the Account info located on the left side and then click on it. Step_3: After that, click on the Change button under the “Allow access to account info on this device” section. If you want to deny account info access for all other users, then turn the toggle button off. Doing so will automatically disable not just the account info access for all users but also for all the apps as well.

On the other hand, if you want to allow or deny account info access to specific apps, you can do so by following these steps:

Step_1: As you did earlier, go to Settings and click on the Privacy icon. Step_2: After that, scroll down and select Account info located on the left side. Step_3: Now turn on or off the toggle button under the “Choose which apps can access your account info” section if you want to deny or allow specific apps permission to access Account Info. If you’ve turned on the toggle button under the “Allow apps to access your account info”, all the apps get access permissions by default.
Read More
1 2 3 171
Logo
Copyright © 2023, ErrorTools. All Rights Reserved
Trademark: Microsoft Windows logos are registered trademarks of Microsoft. Disclaimer: ErrorTools.com is not affiliated with Microsoft, nor claims direct affiliation.
The information on this page is provided for information purposes only.
DMCA.com Protection Status