How to Fix KMODE_EXCEPTION_NOT_HANDLED Error On Windows 10
KMODE_EXCEPTION_NOT_HANDLED – What is it?
Some users installing or upgrading to Windows 10 experienced the theKMODE_EXCEPTION_NOT_HANDLED Blue Screen of Death (or commonly known as BSOD) error. This error can be due to different types of things, ranging from software to driver issues. When you experience this BSOD error while trying to install Windows 10, it will prompt you to restart your computer every single time you experience it. In most cases, you will also not be able to proceed with the Windows 10 set-up.
Solution
Error Causes
The “KMODE_EXCEPTION_NOT_HANDLED” error is normally caused by:
Hardware incompatibility
A faulty device driver or system service
Further Information and Manual Repair
You won’t be able to successfully upgrade or set up Windows 10 if you continue to encounter this BSOD error. Note that this error will always prompt your computer to restart every time it happens, preventing you from completing the Windows 10 set-up.
If you’re not tech-savvy or not capable of debugging this issue, it’s highly advisable to proceed with the basic troubleshooting techniques available in this link.
After troubleshooting, below you’ll find a few solutions to rectify the issue.
Method 1 – Check The Cause of The BSOD Error
Two common causes of the KMODE_EXCEPTION_NOT_HANDLED issue are hardware incompatibility and faulty device driver or system service.
If you experience this error, check first if any of your newly installed hardware is compatible with Windows 10. You can find the required hardware for Windows 10 from this link.
If all your hardware is compatible with Windows 10, you might need to check the device driver or system service. Review the bug check message. If any of the drivers you have is listed in the message, either disable or uninstall them before upgrading or setting up Windows 10.
You might also find it useful to check the System Log available in the Event Viewer for other error messages that can help you figure out the driver or device that’s causing the error. Running hardware diagnostics can also be useful.
Method 2 – Disable (or preferably uninstall) Software Before Upgrading
If you’re upgrading Windows 10 from Windows 7 or Windows 8.1, you might need to disable or uninstall the software first.
First, try uninstalling your Antivirus utility before starting the upgrade. Restart a few times before starting the Windows 10 installation.
If you’re upgrading using the Windows 10 update, make sure that you disconnect from your Wi-Fi or Internet LAN (Ethernet) connection as soon as the download reaches 100% before attempting to start the set-up.
Other users also reported that the cause of the KMODE_EXCEPTION_NOT_HANDLED issue is BitDefender. If this is what happened in your case, it will show in the error message such as KMODE_EXCEPTION_NOT_HANDLED (bdselfpr.sys). Users reported that a common solution for this is renaming the file. In the case of BitDefender, try renaming it to bdselfpr.s__. However, make sure to do this cautiously. Sometimes, renaming a file will even do more damage than good.
Method 3 – Disable/Disconnect From Hardware
If you’re connected to any general USB devices (such a smart card reader), disable it. If your computer is connected to other external devices, disconnect all of them. Examples of this include gaming controllers, printers, external hard disk, USB keys, and other non-essential devices).
Method 4 – Other Troubleshooting Steps
Other troubleshooting steps include:
Upgrade using an .ISO file, instead of directly upgrading from Windows Update. When you do this, make sure you’re disconnected from the Internet during installation. If the process started and you forgot to disconnected, it’s best to restart the installation.
If you’re connected to a domain while trying to set up Windows 10, disconnect and use a local account.
If you’re using a SCSI hard disk, connect a thumb drive with the drivers for your storage device. While Windows 10 is setting up, click on the Custom Advanced Option. Using the thumb drive, use the Load Driver command to load the SCSI drive.
Another possible cause of this error is due to BIOS incompatibility. BIOS issues can be solved by upgrading your version of your system BIOS. If you don’t know how to do this, refer to your BIOS manufacturer’s website.
Method 5 – Use A Trusted Automated Tool
If you still experience the error after doing the methods above, you might want to try a powerful and trusted automated tool to fix the job.
Due to the latest android malware security analyst, there are alarmingly 5.8 million downloads of applications that will steal your Facebook data, your Facebook login credentials!
Russian anti-malware company Dr.Web has found Trojan apps that steal your Facebook login credentials by tricking users into entering their private information in order to eliminate in-app ads.
All of the applications have been removed from the play store and cannot be installed anymore but please do check your phone in order to remove them from your phone as well.
List of malware applications:
If by any chance you have any application from this list, consider uninstalling it from your phone for security reasons.
PIP Photo
Processing Photo
Rubbish Cleaner
Inwell Fitness
Horoscope Daily
App Lock Keep
Lockit Master
Horoscope Pi
App Lock Manager
During the investigation, Dr.Web analysts found an additional Trojan app that had previously made its way onto the Google Play Store. Image editing software app EditorPhotoPip had already been removed but could be downloaded through aggregator websites.
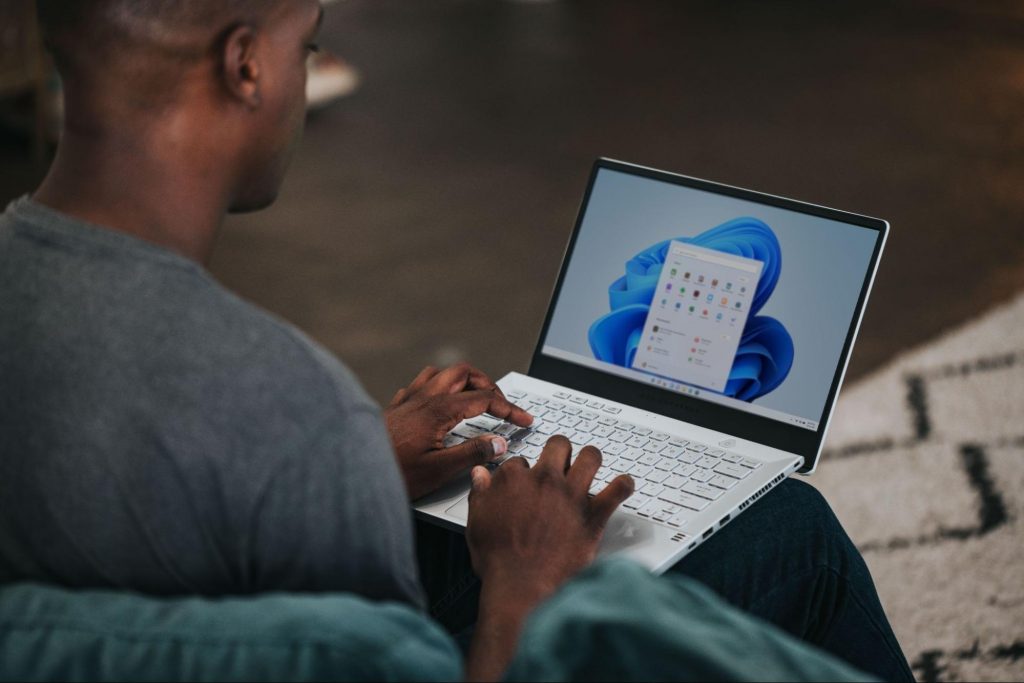
Loving Windows 11 so far? We sure are. Microsoft has clearly decided to take its OS to the next level and keeps showing it through every update. It makes you wonder what’s next - and today, you’ll find out!
Tons of new features have been leaked, and we can probably expect them with the 23H2 update. Here’s everything you need to know so far.
What’s Windows 11 23H2 bringing?
Credit: Windows on Unsplash
There are plenty of new features already confirmed for Windows 11. The only issue is we don’t know for sure if they’re coming with the 23H2 update or separately, at a different time. Whatever the case, a lot of them are pretty exciting.
Here’s an overview of what we might be getting this fall.
Windows Copilot. Microsoft wants to add this AI-powered feature based on chatbots like Bing Chat and ChatGPT to assist users with all kinds of actions and tasks on the platform. As part of this development, the integration of first- and third-party plugins and the Bing Chat AI will be enhanced. This is a pretty amazing addition to look forward to, if you ask us.
Dynamic Lighting. RGB lovers will rejoice upon this one! Dynamic Lighting will allow you to control your RGB-powered components directly through the Windows Settings, allowing smooth integration of your favorite peripherals with your OS. No need for third-party software anymore!
Taskbar enhancements. Microsoft has announced some neat improvements to the Windows 11 taskbar. For one, we’ll be able to hide the Time and Date now, which is extremely useful for focus, but also for clean screenshots. Another change is the ability to shut down programs directly from the Taskbar, without having to run the Task Manager.
Expanding native support for archive formats 7-zip, rar, gz and others on the libarchive open-source projects.
Microsoft Store AI features. The theme of AI power is clearly being taken up a notch, because the Microsoft Store seems to be getting several awesome features in this regard. One of them is AI hub, which “curate the best AI experiences built by the developer community and Microsoft” (Windows Developer Blog). We’re not sure what that means exactly, but we sure can’t wait to see.
Another is AI-generated keywords, designed to improve the discoverability of apps you’re searching for. Moreover, the AI-generated review summary is designed to give us a simpler experience looking at reviews. Huge numbers of reviews will be compiled into a summary that’s easy to scan and lets us discover new content faster.
Other Microsoft Store improvements. Business owners will be happy to hear that Microsoft Store ads will now reach 150+ regions worldwide, significantly increasing the audiences they can target. Furthermore, there will be enhancements to the Backup and Restore functionality to give users a more seamless experience in case they switch devices.
File Explorer changes. Rumor has it that Microsoft is working on a Gallery to be embedded within the File Explorer. The addition of a Recommended section might be on the horizon as well.
Widget Panel update. The introduction of the Widget Panel in itself was exciting for many. As a next step in the development of this feature, Microsoft is planning to make it possible to pin widgets to the desktop.
Presence sensor. You might actually already have this one, as it was rolled out as part of Moment 3 for compatible devices. With the Presence sensing app, found in the Privacy settings, you can decide which (if any) apps use APIs to detect the state of your activity on Windows. This can significantly enhance privacy and security, as you can have apps containing sensitive data lock automatically when unattended. If you’re a laptop user, it can also be beneficial to your battery life.
Bluetooth LE. Microsoft is adding support for Bluetooth Low Energy, a functionality that allows reduced battery consumption when devices are connected.
Adding more languages to the Live Captions feature. This specification is only as powerful as the languages it supports. Microsoft is reportedly working on expanding the list with 10 more languages.
Summary
We’ve got some interesting stuff to look forward to with the next major Windows 11 update. And these are just the things the Internet’s actually heard of, so who knows what else Microsoft might be planning? It remains to be seen, hopefully just a few months from now. 23H2 has been released on October 31st.
Disk partitioning is a concept that’s been around for so long, but is still only familiar to few. If done right, it can help get your computer in perfect order.
Today we bring you a simple definition of disk partitioning, its pros and cons, and a quick tip on how to do it properly to reap its full benefit!
Definition and purpose
The simplest way to define disk partitioning would be: it’s exactly what it sounds like. It means taking a hard disk drive and separating it into different segments. These segments are called partitions. You can visualize it as cutting a cake into smaller pieces - not necessarily of the same size, though.
So what is the purpose of these pieces?
Well, when you first get a hard drive, it’s basically just a bunch of unallocated storage space. Until there’s at least one partition, this space is unusable to your operating system. Once you create a partition, your OS will recognize it as usable storage space.
You can choose to create a single partition and use it for all your files, from program files to personal data. A lot of off-the-shelf computers come with one primary partition like this and a small secondary one reserved for recovery purposes.
Whether or not you want to split your disk into more than one segment is up to you. We would generally recommend it, though. The whole point of partitioning is for each segment to have its own purpose.
So treating all your storage space as a single unit containing different file types would be like constructing an office building with only one massive room for everything - day-to-day work, conferences, interviews, etc. And all of this for different departments of the company. You can see how this might get a little messy.
Creating multiple partitions eliminates the task of running several different types of files from the same place. This takes a heavy load off the entire process of accessing data.
Disk partitioning also brings a ton of other benefits to the table. An important disclaimer, though: there are disadvantages too. We will walk you through both sides to help you get an objective idea and make an informed decision.
Source: Kina on Unsplash
What are the benefits of disk partitioning?
1. Better file organization
This is the most obvious and perhaps the biggest advantage of partitioning your hard drive.
As we already mentioned, partitioning allows you to create separate segments for different file and data types. You wouldn’t want to use the same partition for your system files and for games, would you?
If organization and time management are important to you, then multiple partitions are the right solution. Searching for specific files will be much easier overall. Say you have one hard drive, but three partitions: C for the system files alone, D for multimedia files and documents, and E for games and apps. Your computer loads the system from C without interference from the other two, and you know exactly where to look when searching for a file.
2. Easy reinstallation
File management isn’t the only thing made faster and simpler thanks to partitioning. If you opt for creating multiple segments on your drive, reinstalling Windows will be easy peasy.
That’s because all you need to do is format the partition your system is on. Then you reinstall the OS on it, and there you go. Now you have a clean installation, with all your files saved on other partitions intact. You can even make a copy of your system partition, so you can revisit the exact same installation in the future if you want. And the whole time your pictures, music, documents stay exactly where you left them.
Source: Andrew M on Unsplash
3. Possibility of using multiple file systems
By now you’ve understood that partitions function completely separately. This means that, if for some reason you need multiple file system capabilities, partitioning will allow that.
One segment could be used for, say, an NTFS file system, while another could run ext or APFS.
4. Running different OSes
You’re an avid Windows user but need to use Linux on the side? No problem. You don’t need to buy a separate computer or anything. The possibility of running different file systems also means you can use partitioning to run multiple operating systems.
Doesn’t that sound enticing? One machine for multiple totally different uses!
5. Backup and recovery made simple
Data loss can happen on any disk, partitioned or not. However, it’s much easier to get it back on a partitioned one. You know where you stored what, and each partition can be backed up exactly as it is. It’s also a lot faster to back up single partitions than entire hard drives.
Ultimately this also means a faster path to recovery. If you lose or accidentally delete important files and data, you might want to use a recovery tool like Recuva to scan for them and get them back. Recuva is even powerful enough to recover data from damaged hard drives. But no matter how powerful, scanning a whole drive is strenuous for any recovery tool. Scanning independent partitions is a lot more convenient than that, and will get you to your goal more efficiently.
6. Optimized performance
Now, let’s keep in mind that computer performance is influenced by a number of factors. Partitioning alone isn’t what makes it better or worse. However, it can contribute to optimization. It’s easier for your computer to scan, say, a 40 GB partition to fetch the system file it needs than scanning the entire capacity of your drive.
7. Improved security (possibly*)
Separate partitions can help make your system more secure. Firstly, they minimize file corruption. If one partition gets corrupted, the others should remain unaffected. And keeping in mind the previous point about backup and recovery, ‘fixing’ the damaged partition would be much easier than fixing the entire hard drive.
Partitioning also improves security in terms of malware protection. A malicious attack on one partition is easier to deal with than malware on the whole drive. If your system partition gets infected, you can simply reinstall your OS and that should do the trick.
*Do keep in mind that partitioning can’t defend you against more advanced attacks. So make sure not to give in to a false sense of security.
What are the disadvantages of partitioning?
1. Data is still vulnerable
Yes, it’s easier to back up and recover data from independent partitions. And yes, partitioning may help protect separated files and data to a higher degree. But remember: everything is still on a single physical drive. So while digital errors and issues may be easier to deal with on partitioned drives, physical damage obviously won’t be.
If your hard drive is destroyed in some way, all data on it will be gone. That’s why, if you have crucial files on your PC, it’s important to give them the proper backup treatment before it’s too late.
2. Disbalance of space
Allocating storage space on separate partitions may be a little more tricky than you think. You may fill up one partition a lot faster than another. So on one side you’re struggling with space, and on another you have too much of it to spare. Imagine nearly filling up your system partition and then it turns out you need a lot more space for its updates than you thought.
That’s why you really have to be sure you actually have enough files of different types that you need help managing efficiently. Otherwise you’ll just create a struggle and disbalance in terms of storage.
3. Increased risk of error
If done incorrectly, partitioning can lead to more harm than good. Aside from space disbalance, there is an increased risk of incorrect partition sizes and formatting. Plus, human error is also a factor: in a moment of distraction, you may erase one partition when you meant another. Undoing such mistakes will definitely be tedious and time-consuming.
4. SSDs eliminate the need of partitioning
SSDs (solid-state drives) don’t function in the same way that HDDs do. They have faster read times and can organize files on their own. This quite literally eliminates the need for organization on your part.
Partitioning: yes or no?
The bottom line is that multiple partitions might not be necessary for the average user. But if you’re planning on storing many file types or different file and operating systems on the same PC, then you should give it a shot. It’s also an excellent solution for businesses, of course.
And if our pros and cons list isn’t enough to help you decide, you can always send us a message and we’ll help you make the right choice.
Decided to partition your hard drive?
If you’ve decided to give it a go, you definitely should make sure to do it right.
The two most effective and reliable ways to partition are using the built-in options on Windows or investing in a dedicated partitioning tool, like the EaseUS Partition Master. Which one you'll opt for depends on your specific needs.
Option 1 may be more suitable for users with at least some level of experience. In this case, you’d have to know exactly which steps to take without making errors. This is done in Disk Management on Windows 10/11. From there, you can select the partitions you’d like to split into different volumes of selected sizes.
If this is your first time partitioning, we highly suggest you either consult professionals for this or move on to option 2. The EaseUS partitioning software is specifically designed for beginners, with an intuitive interface helping you succeed in the process. All you need to do is pick the Partition Master package tailored to your needs and follow their guide.
Each package offers technical support as well, and even free upgrades (to varying degrees based on your subscription). Plus, all of this is valid for not one, but two PCs.
It’s the perfect solution for a smooth and error-free partitioning process. If you want to organize your hard drives efficiently and make the most of all your space without doing irreparable damage, it’s definitely worth the investment.
Microsoft has presented its next version of their flagship product, Windows 11, and feelings are divided among users.
Some users like it very much and eager to upgrade, some do not like the graphic overhaul it went through, but overall I think Microsoft has done a good job with it.
Here in this article, we will discuss some of the new features which Windows brings to the table, well at least ones that were showed, I am sure there are plenty more which we will see once OS has been released.
New Start menu
One of the first things that everyone saw when Microsoft has unveiled Windows 11 is its Start menu. Funny enough this is what has caused most of the divide among users, some find it interesting, and some do not like it. Truth is, it is different, and it is centered in the middle instead of the lower left part of the screen.
It has been confirmed however that the Start menu can be moved to any part of the screen so if you want, you could place it on the lower left as it has always been.
Live tiles do not longer exist in the Start menu, instead, we have styled simple icons.
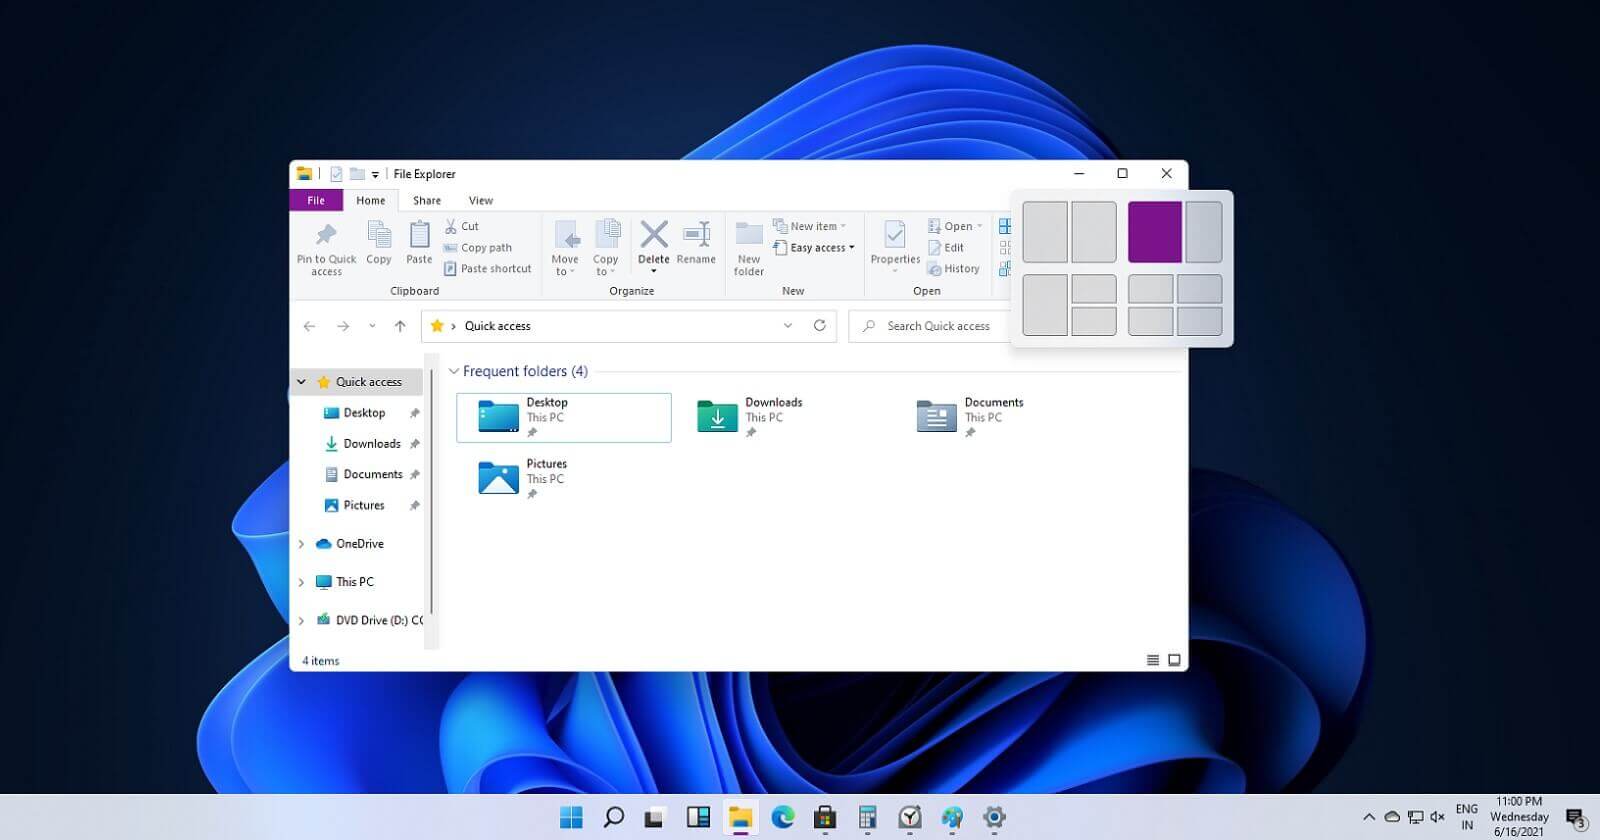
Windows 11 Snap controls are great
If you have used the cascade option in previous Windows versions then it is most likely that you will like the new Snap controls.
You can quickly snap windows side by side, or arrange them in sections on your desktop just by hovering over maximize button on the title bar.
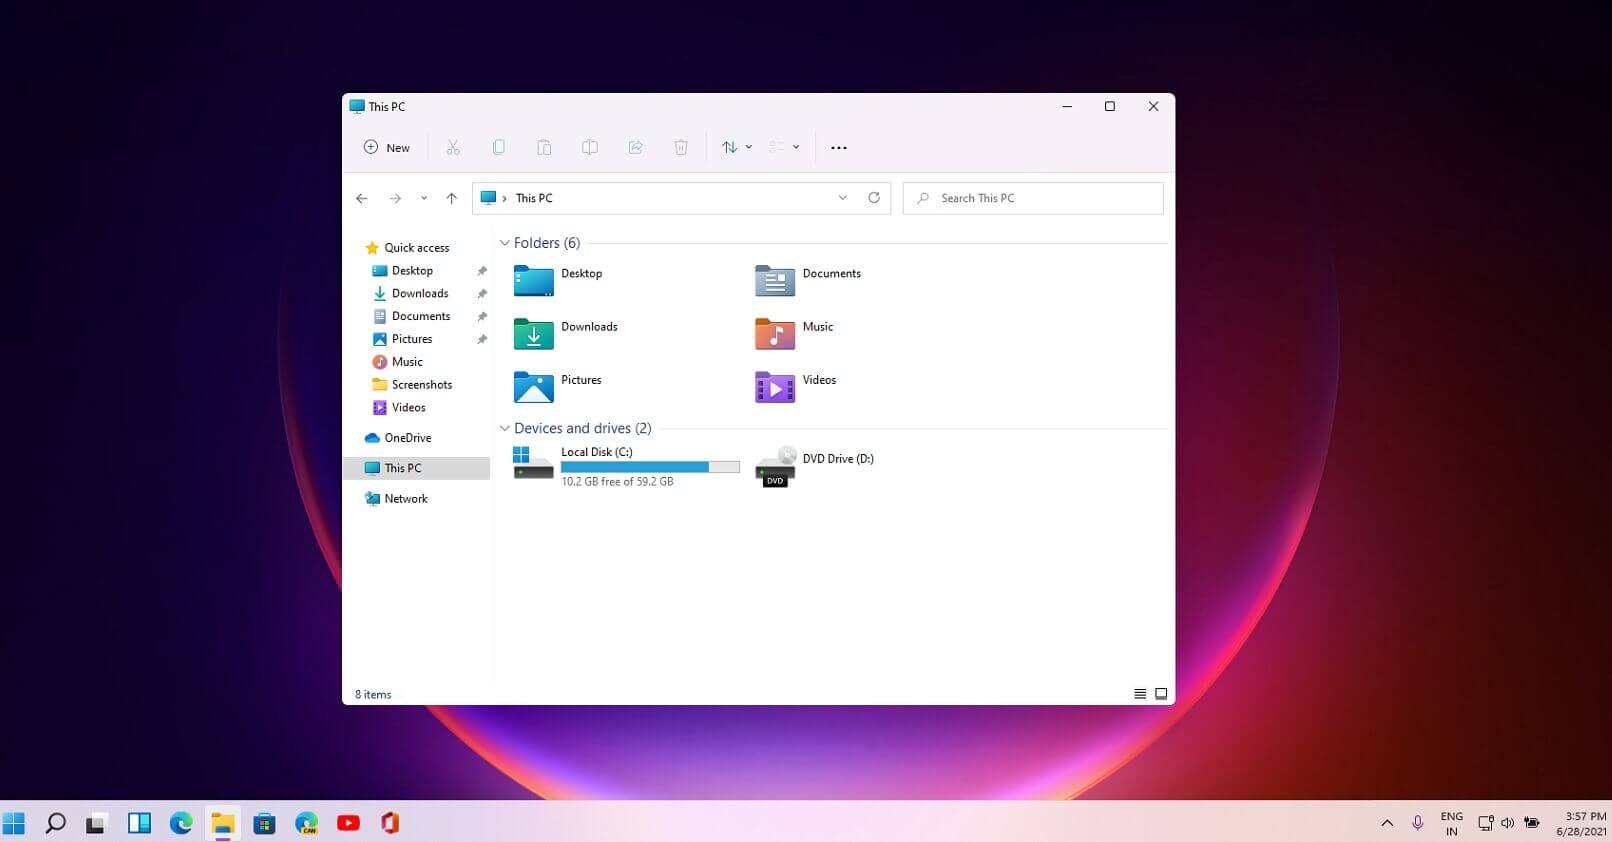
Windows 11 File Explorer
File explorer has gone through some visual and design changes, the ribbon on top has been completely removed and replaced with a header-like feature with a slick and clean design.
The header contains a nice organized and designed single row of icons like cut, paste, copy, rename, delete, and new folder icons.
Settings app ovberhaul
The settings app also has gone through visual and design changes. It has a new design that is very visually appealing and navigation has been simplified and more organized. Finding the right and desired setting is much faster and clearer now.
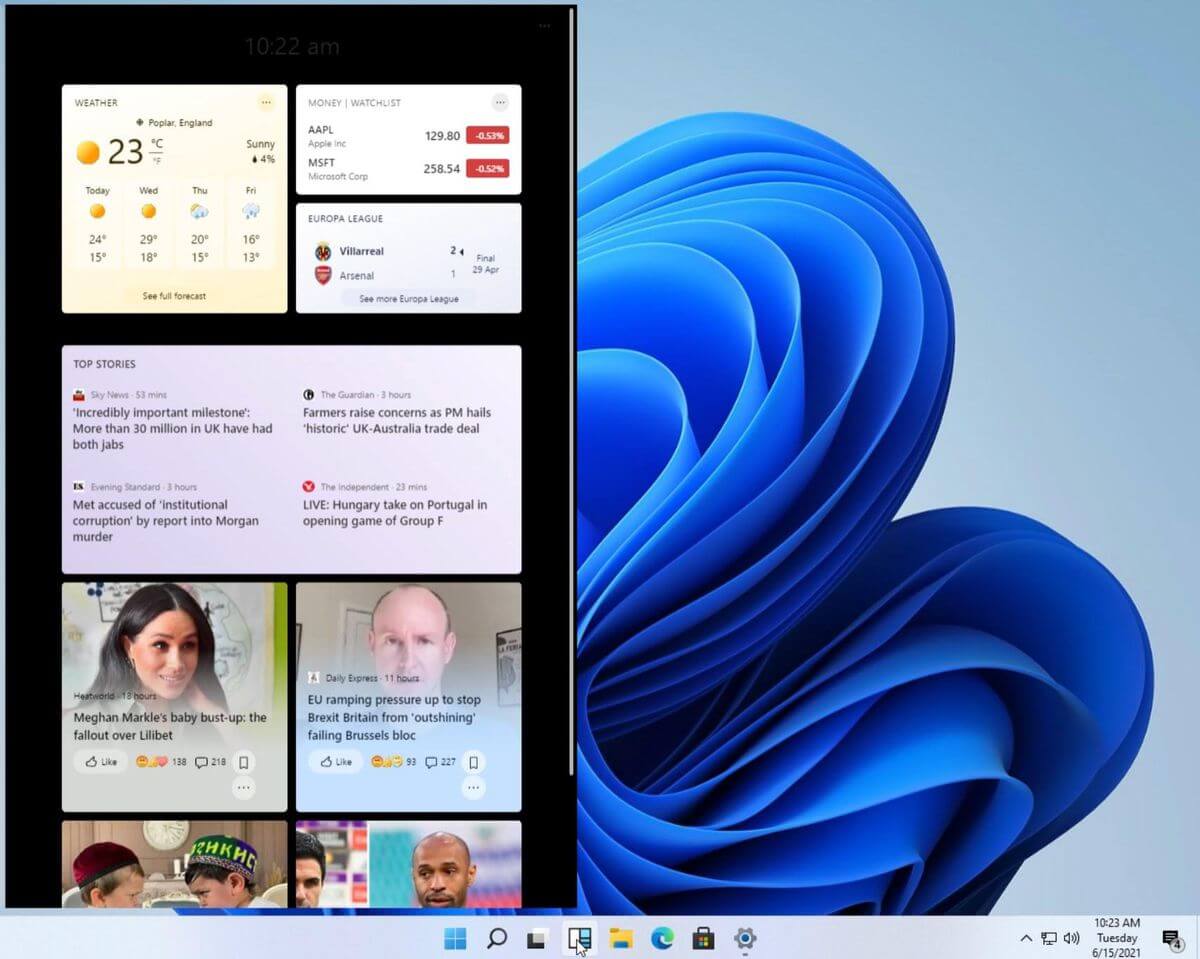
Widget tab makes comeback in Windows 11
Yes, widgets are back but not like you remember them.
Instead of being all-time present at your desktop like once they used to be, now there is a button on the taskbar which brings the widget bar up that contains desired widgets. This way they are easily accessible and do not clutter desktops.
So far we have weather, news, calendar, and stocks widget but we will see how development on these goes. I expect to have community-made widgets like in old days for all of our needs.
XBOX app
The new Xbox app is now integrated into Windows 11, offering quick access to Xbox Game Pass games, the social parts of the Xbox network, and the Xbox store.
Security and TPM 2.0 in Windows 11
As widely known by now Windows 11 will require you to have a TPM 2.0 module capable CPU in order to install it.
This system requirement has caused a lot of controversies but essentially it seems that MS's goal is to protect your personal data by using this module.
The upside of course is that your data will be protected much more than in previous Windows versions, the downside, of course, will be that you will need newer hardware to run OS on it.
and that is essentially it, keep on tuned on more Windows 11 information and overall articles tied to PC and technology here at errortools.com
Random freezing in a Windows in the middle of work can be a very frustrating experience and can even cost us the loss of work. From time delays to sometimes complete crashes this behavior is something that every PC user wants to avoid or at least have very little of.
In this article, we will cover solutions on what to do and how to fix the random freezing of computers.
Run a virus scan on your computer.
Viruses and other malware can cause freezes and other issues in your computer, run a complete system scan for any kind of viruses and malware and if needed remove them.
Uninstall applications that you are not using
Besides taking your hard drive space some applications can have and require to have some services always running on your computer which can cause some issues, if an application is not needed and it is not used, removing it might solve freezing issues.
Increase RAM memory
Sometimes the problem with freezing is not a software issue, having less RAM memory than the application requires can cause the application not to work properly and it can cause freezing of the entire system since precious RAM can not be allocated to the required application.
Run system checker
Corrupted Windows system files can cause freezing of the entire system, to fix this, start the command prompt in administrator mode and type sfc /scannow
Keep running applications to a minimum
Having too many applications running in the background can drain system resources and can cause system freezes because of lack of memory. Close applications that are running in the background and keep them minimal.
Delete files and folders which you are not using
Having many files and/or folders on the hard drive can cause a lot of system resources to be wasted, from indexing size to less free space for caching. If you have files that you no longer need, removing them will free up space and can increase performance and introduce the stability.
Run memory check
Memory issues could lead to system freezing. When an application needs to write or read to a corrupted memory cluster, freezing will occur since it can not. To check memory bring up run dialog and type in ti mdsched.exe, click on restart now and let the memory test finish.
Update all drivers
Hardware issues can cause freezing of applications and having the latest drivers can make a world of difference. Make sure that you have all device drivers to the latest versions.
Optimize Disk drives and check for errors
Windows 10 has built-in tools to check hard drives for errors and to optimize them, use them in order to see if this issue is causing freezes.
Clean your registry
A Clean registry is a happy registry and Windows is appreciating it. Make sure that you do not have any keys which you do not need in the registry and that long-forgotten application trails are deleted for good.
Upgrade SSD firmware
Like updating drivers, updating firmware is also important, and having the latest firmware for your SSD can help a lot, newer firmware can eliminate freezing if the issue was in Windows not using SSD properly.
Update BIOS
Like updating SSD firmware can help so it can update Firmware on your BIOS. Make sure that you have the latest firmware version and freezing can go away if that was the issue.
If you have encountered the NO_USER_MODE_CONTEXT Blue Screen error when using your computer, read on as this post will walk you through a couple of suggestions you can try to resolve this Stop error. This kind of Blue Screen error can occur when a program is trying to leverage the use of a system driver but fails to do so. Some of the common causes of this BSOD error are incompatible or corrupted drivers, incorrect configuration of entries in the Registry, damaged memory locations, malware infection, and many more. In addition, this Stop error does not often occur and indicates that an attempt to enter user mode with no context was made.
If this is the first time you’ve restarted your computer after you’ve installed additional hardware, you have to remove the hardware and then restart your computer once again and then check the Microsoft Hardware Compatibility List to confirm that the hardware and its drivers are compatible with your operating system. If it doesn’t help, you can check out the given suggestions below to fix the NO_USER_MODE_CONTEXT Blue Screen error in Windows 10.
Option 1 – Try to update or rollback your device drivers
The first thing you can try to fix the NO_USER_MODE_CONTEXT Blue Screen error is to either update or roll back the device drivers. It is most likely that after you updated your Windows computer that your driver also needs a refresh. On the other hand, if you have just updated your device drivers then you need to roll back the drivers to their previous versions. Whichever applies to you, refer to the steps below.
Open the Devices Manager from the Win X Menu.
Then locate the device drivers and right-click on them to open the Properties. Note that the main drivers that might be the cause behind the NO_USER_MODE_CONTEXT Blue Screen error will be listed under the “ID ATA/ATAPI controllers” section as well as the “Storage controllers” section.
After that, switch to the Driver tab and click on the Uninstall Device button.
Follow the screen option to completely uninstall it.
Finally, restart your computer. It will just reinstall the device drivers automatically.
Note: You can also directly download the relevant drivers of your computer from the manufacturers’ website. So if you have an SSD, the issue might be due to an old storage driver.
Option 2 – Try running System File Checker or SFC scan
System File Checker or SFC is a built-in command utility that helps in restoring corrupted files as well as missing files. It replaces bad and corrupted system files to good system files. To run the SFC command, follow the steps given below.
Tap Win + R to launch Run.
Type in cmd in the field and tap Enter.
After opening Command Prompt, type in sfc /scannow
The command will start a system scan which will take a few whiles before it finishes. Once it’s done, you could get the following results:
Windows Resource Protection did not find any integrity violations.
Windows Resource Protection found corrupt files and successfully repaired them.
Windows Resource Protection found corrupt files but was unable to fix some of them.
Reboot your PC.
Option 3 – Try running the Memory Diagnostic Tool
The Memory Diagnostic tool in windows can help resolve the NO_USER_MODE_CONTEXT Blue Screen error by checking and automatically fixing any memory-based issues. To run it, refer to these steps:
Tap the Win + R keys to open Run and type exe and hit Enter to open the Windows Memory Diagnostic Tool.
After that, it will give two options such as:
Restart now and check for problems (Recommended)
Check for problems the next time I start my computer
Once your computer has restarted, perform a basic scan or you could also go for the “Advanced” options such as “Test mix” or “Pass count”. Simply tap the F10 key to start the test.
Note: After you select your preferred option, your computer will restart and check for memory-based issues. If it finds any issues, it will automatically fix them.
Option 4 – Perform System Restore
First, tap the Win + R keys to open the Run dialog box.
After that, type in “sysdm.cpl” in the field and tap Enter.
Next, go to the System Protection tab then click the System Restore button. This will open a new window where you have to select your preferred System Restore point.
After that, follow the on-screen instructions to finish the process and then restart your computer and check if the problem is fixed or not.
Option 5 – Run the Blue Screen Troubleshooter
Troubleshooting Blue Screen of Death errors wouldn’t be complete without the Blue Screen troubleshooter. As you know, it is a built-in tool in Windows 10 that helps users in fixing BSOD errors like NO_USER_MODE_CONTEXT. It can be found on the Settings Troubleshooters page. To use it, refer to these steps:
Tap the Win + I keys to open the Settings panel.
Then go to Update & Security > Troubleshoot.
From there, look for the option called “Blue Screen” on your right-hand side and then click the “Run the troubleshooter” button to run the Blue Screen Troubleshooter and then follow the next on-screen options. Note that you might have to boot your PC into Safe Mode.
Error 429 is a type of runtime error. It sometimes occurs when you use the new operator or the CreateObject function in Microsoft Visual Basics to create an instance of a Microsoft Office application.
The error code is displayed on your computer screen in the following format:
Runtime Error ‘429’: Active X component Can’t Create Object
Solution
Error Causes
The runtime error code 429 is triggered for several reasons. These include:
Mistake in the application
Incorrect system configuration
Missing ActiveX components in the application
Damaged Active X and class application components
DLL required by the application is damaged
Active X object was not registered properly
Corrupted applications
Corrupted Windows registry
Class ID issues
The runtime error code 429 not only causes you inconvenience as it hampers your ability to access programs but delays in repairing this error code can lead to serious PC damages such as system freezes, crashes, and failures.
Further Information and Manual Repair
To resolve the runtime error 429 on your PC, try the following recommended solutions:
1. Re-register the Application Causing the Error
Identify the Office application causing the error and re-register it. For instance, if Office Excel is the prime cause of the error message pop up, simply re-register it.
Click on the start menu and then run. Then type this in “: C:/Program Files/Microsoft Office/Office/Excel.exe /regserver” and press OK.
This will hopefully resolve the issue.
2. Go to The Microsoft Windows Script Update Page and Download Microsoft Updated Installation File
This will also assist you in repairing runtime error 429.
Simply follow the installation wizard and update your MS Office Applications. The corrupted files and missing components in them would be easily corrected by the update file. However, if this doesn’t work, then this means that the cause is more crucial than you think.
It is either related to damaged Active X objects or a corrupted Windows registry.
3. Repair the Active X objects and the Registry
To repair both the registry and the Active X objects in one go, it is advisable to download Restoro.
This is an advanced, next-generation, highly and multi-functional PC repair tool. It is deployed with powerful and numerous utilities like a registry cleaner, Active X and class scanner, privacy error detector, and system stability module.
The registry cleaner embedded in this repair tool enables you to wipe out obsolete, unnecessary, malicious, and invalid files and registry entries saved in the registry. It frees up your disk space, repairs damaged DLL files and the registry thus resolving the runtime error 429 on your system.
The Active X object and Class feature identifies and scans Active X issues on your PC and resolves them right away.
Besides this, with this error tool, you can also scan for viruses and also improve your PC performance.
Why Total System Care?
Total System Care is a one-stop solution to resolve all kinds of PC-related issues including the runtime error 429.
To run it on your system, you don’t have to be a computer programmer. It is very easy to operate. It has easy navigation and a user-friendly interface. There is nothing complex about it. It is safe and efficient. It resolves all PC issues in a few seconds.
You can run it in the background while performing other tasks on your system.
Furthermore, it is compatible with all Windows versions.
Click here to download Total System Care and resolve the Runtime Error 429 on your system today.
Corefoundation.dll error is a DLL error code associated with Apple software such as iTunes, MobileMe, QuickTime and etc. To understand this error better, first you need to understand what corefoundation.dll file is.
Corefoundation.dll is a Dynamic Link Library file that is used by Apple software products. This file is created by Apple computer Inc and is designed to help open up some of the media files that you might have on your PC.
DLLs help promote modularization of code, efficient memory usage, code reuse and reduced disk space allowing the operating system and the programs to load and run faster and take less disk space on the computer.
Error Messages
This error pops on the screen when there is an issue related to Apple software products on your system. Corefoundation.dll error is displayed on the computer screen in any one of the following formats:
“The program can not start because corefoundation.dll is missing from your computer. Try reinstalling the program to fix this problem”."This application has failed to start because CoreFoundation.dll was not found. Re-installing the application may fix this problem."“The procedure entry point_CFBundleCopyFileTypeForFileData could not be located in the dynamic link library corefoundation.dll.”"MobileMe Control Panel cannot continue as Apple Application Support is missing or outdated. Please uninstall and reinstall the latest version of iTunes and MobileMe Control Panel to fix this issue.”
Though this error code is not fatal but if it is not fixed immediately it will hamper your ability to load and run Apple programs on your system.
Solution
Error Causes
Corefoundation.dll error can be triggered due to several reasons. Here are some of the most common corefoundation.dll error causes:
Outdated PC drivers
Viral infection
Damaged Windows registry files
Corrupted corefoundation.dll file
Missing corefoundation.dll file
Incorrectly installed third-party software
Further Information and Manual Repair
To fix this issue on your computer here are some of the best, easy and quick do it yourself methods that you can try:
Method 1: Download the Original Corefoundation.dll File
If the underlying reason for corefoundation.dll error is file corruption or it goes missing, then the best way to resolve is to download the original corefoundation.dll file. Once you download it, paste it to its exact location.
DLL files are normally located in the following location C:\Windows\System32. Once you paste it, register the file by typing ‘regsvr corefoundation.dll’ at the command prompt. When the process is complete, restart your PC to activate changes.
Alternatively, you can uninstall and re-install any Apple Software you may have on your Windows Computer. To do that, Open the Control Panel, navigate to "Install/Uninstall a Program", search for Apple software, and uninstall them.
Method 2: Update Window Drivers
If the error code is related to outdated drivers, then it is recommended that you update them promptly to resolve the corefoundation.dll error on your PC.
This can be done by using a driver update wizard from within Device Manager. The driver update wizard walks you through the entire drive update process, making updating a hassle-free process.
Method 3: Download Restoro
If the error still persists, then try method 3. Sometimes the cause of corefoundation.dll can be viral infection or registry issues. Viruses may enter your PC unknowingly through phishing emails and downloads which can corrupt and damage your dll files.
Also, if you don’t clean your registry frequently, unnecessary and obsolete files may accumulate in the registry like cookies, junk files, internet history and temporary files. These files take up a lot of disk space corrupt DLL files and lead to disk fragmentation.
Regardless of what the issue is, Restoro is your one-stop PC Fixer. It is a multi-functional and user-friendly repair tool embedded with 6 different scanners including a registry cleaner and an antivirus. It scans and removes all types of viruses and cleans and restores the registry too.
Click here to download Restoro and resolve the corefoundation.dll error today!
EasyPDFCombine is a browser extension by Mindspark Inc. This extension claims to offer users an easy and fast way to combine different PDF documents into a single file for easy access and sharing.
When installed this extension changes your default search engine to MyWay.com, it also hijacks your home page and new tab page, also changing it to search powered by MyWay.
While browsing the internet with this extension you will see additional pop-up ads, injected ads in search results, and sponsored content throughout your browsing sessions.
This extension has been marked as a Browser Hijacker by several anti-virus programs and it is not recommended to keep on your computer.
About Browser Hijackers
Browser hijack is a common type of internet fraud where your web browser settings are altered to allow it to carry out things you do not intend. Browser hijacker malware is developed for a variety of reasons. In general, browser hijacking is used for earning ad revenue from forced advert clicks and website visits. While it may seem harmless, these tools were created by malicious individuals who always look to take full advantage of you, so that hackers could make money from your naivety and distraction. They not only screw up your web browsers, but browser hijackers can also modify the system registry, making your computer susceptible to other malicious programs.
How to know whether the web browser is hijacked?
There are many symptoms of browser hijacking. Here are a few of them:
1. the browser’s homepage is modified2. you find yourself regularly directed to a different webpage than the one you intended3. the main web browser settings are modified and undesirable or insecure resources are put into the trusted sites list4. you are finding new toolbars you haven’t witnessed before5. you see a lot of pop-up ads on your computer screen6. your web browser gets sluggish, buggy crashes often7. Inability to navigate to certain websites, especially antivirus as well as other security software websites.
How browser hijacker infects computers
Browser hijackers attack computers via malicious email attachments, downloaded infected computer files, or by checking out infected sites. They may also originate from any BHO, browser extension, add-on, toolbar, or plug-in with the malicious objectives. Also, certain shareware and freeware can put the hijacker in your computer through the “bundling” technique. A good example of a well-known browser hijacker is the most recent Chinese malicious software known as “Fireball”, which has infected 250 million computers around the world. It acts as a hijacker but can be turned into a fully functioning malware downloader later on.
The presence of any browser hijacker malware on your system can drastically diminish the web browsing experience, monitor your internet activities that result in severe privacy concerns, develop system stability issues and ultimately cause your PC to slow down or to a practically unusable condition.
How you can remove browser hijackers
Certain browser hijacking can be easily stopped by finding and removing the corresponding malware program from your control panel. At times, it could be a challenging job to identify and delete the malicious program because the associated file will be running as part of the operating system process. You should think of doing manual repairs only if you’re a tech-savvy individual since there are risks associated with tinkering around with the system registry and HOSTS file.
Browser hijackers could be effectively removed by installing and running anti-malware software on the affected PC. Among the best tools for fixing browser hijacker infections is SafeBytes Anti-Malware. It helps you remove any pre-existing malicious software in your computer and gives you real-time monitoring and protection from the latest threats.
What you can do if Virus Stops You From Downloading Or Installing Antivirus?
Malware could potentially cause all kinds of damage when they invade your system, starting from stealing your personal details to erasing data files on your PC. Some malware is meant to hinder or prevent things that you’d like to do on your PC. It may not allow you to download anything from the web or prevent you from accessing a few or all websites, especially antivirus sites. If you’re reading this, odds are you’re stuck with a malware infection that is preventing you to download and/or install Safebytes Anti-Malware software on your PC. Follow the instructions below to remove malware through alternate ways.
Download the anti-virus in Safe Mode with Networking
If the malware is set to run automatically when Windows starts, entering Safe Mode may block this attempt. Since only the minimal programs and services launch in safe mode, there are rarely any reasons for issues to occur. The following are the steps you need to follow to start into the Safe Mode of your Windows XP, Vista, or 7 computers (check out Microsoft site for instructions on Windows 8 and 10 computers).
1) At power-on/startup, hit the F8 key in 1-second intervals. This would conjure up the Advanced Boot Options menu.2) Choose Safe Mode with Networking using arrow keys and hit ENTER.3) When this mode loads, you will have an internet connection. Now, get the malware removal application you need by using the web browser. To install the program, follow the directions in the setup wizard.4) After installation, do a complete scan and let the software program delete the threats it discovers.
Utilize an alternate internet browser to download antivirus software
Some viruses might target vulnerabilities of a specific browser that block the downloading process. If you appear to have a virus attached to Internet Explorer, then switch to an alternate web browser with built-in security features, such as Firefox or Chrome, to download your favorite anti-malware program – Safebytes.
Install anti-malware on a USB drive
To successfully remove the malware, you should approach the problem of installing anti-virus software on the affected PC from a different angle. To run antivirus using a USB pen drive, follow these simple measures:
1) Download Safebytes Anti-Malware or MS Windows Defender Offline onto a virus-free PC.2) Insert the USB drive onto the same computer.3) Run the setup program by double-clicking the executable file of the downloaded application, with a .exe file format.4) When asked, choose the location of the USB drive as the place where you would like to store the software files. Do as instructed on the screen to finish up the installation process.5) Unplug the USB drive. Now you can utilize this portable anti-malware on the affected computer.6) Double click the Safebytes Anti-malware icon on the pen drive to run the program.7) Click on the “Scan Now” button to start the virus scan.
SafeBytes Anti-Malware - More Protection For You
In order to protect your PC from various internet-based threats, it is important to install an anti-malware program on your computer system. But with countless numbers anti-malware companies in the market, these days it is hard to decide which one you should purchase for your personal computer. A few are really worth your money, but many aren’t. While looking for anti-malware software, choose one that offers solid, efficient, and complete protection against all known viruses and malware. Among few good applications, SafeBytes Anti-Malware is the highly recommended program for the security-conscious individual.
SafeBytes is a powerful, real-time antivirus application that is made to assist the common computer end user in safeguarding their PC from malicious internet threats. This program could easily detect, remove, and protect your personal computer from the most advanced malware threats including adware, spyware, trojan horses, ransomware, PUPs, worms, parasites as well as other potentially harmful software applications.
There are lots of great features you will get with this security product. Below are some of the features you may like in SafeBytes.
Live Protection: SafeBytes offers 100 % hands-free live protection and is set to observe, prevent and eliminate all threats at its very first encounter. It will continuously monitor your computer for hacker activity and also gives users superior firewall protection.
World-class AntiMalware Protection: Using its enhanced and sophisticated algorithm, this malware removal tool can find and remove the malware threats hiding in your computer effectively.
“Fast Scan” Abilities: This software has got one of the fastest and most efficient virus scanning engines in the industry. The scans are very accurate and take a little time to complete.
Web Security: SafeBytes checks and gives a unique safety rating to every single website you visit and block access to web pages known to be phishing sites, thus protecting you against identity theft, or known to contain malware.
Very Low CPU and RAM Usage: SafeBytes gives total protection from internet threats at a fraction of the CPU load because of its advanced detection engine and algorithms.
Premium Support: SafeBytes gives you 24/7 technical support, automatic maintenance, and upgrades for the best user experience.
SafeBytes can keep your personal computer protected from most advanced malware threats automatically with little or no input needed from you again. There is no doubt that your computer system will be protected in real-time as soon as you put this software program to use. So if you are looking for the best anti-malware subscription for your Windows-based PC, we suggest the SafeBytes Anti-Malware application.
Technical Details and Manual Removal (Advanced Users)
If you’d like to manually remove EasyPDFCombine without the use of an automated tool, it might be possible to do so by deleting the program from the Microsoft Windows Add/Remove Programs menu, or in cases of browser extensions, going to the browser’s AddOn/Extension manager and removing it. You’ll probably also want to reset your internet browser.
Finally, check your hard drive for all of the following and clean your Windows registry manually to get rid of leftover application entries following an uninstallation. Please keep in mind that only experienced users should try to manually edit the system files simply because deleting any single vital registry entry results in a major problem or even a computer crash. Additionally, certain malware is capable of replicating itself or preventing deletion. It is advised that you carry out the removal process in Safe Mode.
A surprisingly large amount of things present at your home can and do interfere with your wi-fi signal making it weak so devices are dropping it, having trouble connecting, or being slow.
Hello and welcome to our latest article where we will take a look at all things that are present in a lot of homes but are very bad for your WI-Fi signal.
Bad router placement
Having a router in a bad position can have some really large effects on WI-Fi signal strength and its availability. Usually, we do not give great attention to where we are placing our router but it has been proved over and over again that being close to certain objects does indeed have a great influence on the wireless signal strength and performance.
So, what are these objects and bad positions where we could place the router and effectively kill his Wi-Fi capabilities?
Fish Tanks
Water will block all radio waves including Wi-FI signals and waves themselves, so having a router next to the aquarium or any large source of water is a bad idea. You should always look at water as something bad for your Wi-Fi and move your router away from it as far as possible.
Bookshelves
Paper is another story and example of the dampening effect on radio waves. Did you know that various patterns of paper are used in silent rooms and recording studios in order to eliminate sound reflection from surfaces? Well besides absorbing sound waves, the paper also absorbs Wi-Fi signals and if you have a large bookshelf with a lot of books packed one beside another you just have a great wall of signal absorbing.
Mirrors
The problem with mirrors is in their coating that goes over the glass in order to turn it into the mirror, that coating is metal and as such, it is absorbing signals in large amounts. If you have an old or high-quality mirror that has a silver coating things are even worse since silver will absorb even more waves than modern cheap ones.
TV
Yup, TV is also on this list and for a similar reason as a mirror, although TV does not have coatings of metal, they have something even worse: a large metal plating on the back. Metal plating is there to produce structural integrity of the TV set and provide it with shielding from electromagnetic waves and as such it will prevent Wi-Fi waves as well. Do not place the router behind your TV.
Things that influence signals in homes
Any kind of metal decoration
Now when we covered mirrors and TV because of the metal they have, we must take a look at the metal itself. Any kind of metal stuff that you might have like baskets, figures, statues, frames, etc will effectively block your signal.
Kitchen appliances and Home utilities
Kitchen appliances like refrigerators, microwaves, ovens, stoves, etc. along with home appliances and utilities like dishwashers, washing machines, dryers, etc are large metal objects enclosed in a metal cage that will block signals from spreading further and it is no secret that most kitchens have weaker Wi-Fi because of this reason.
Home gyms
This is a logical conclusion as to everything explained so far if you have a workout room or small gym at home it is probably filled with weights that are metal and have mirrors inside, all of that will interfere and block signals.
Things blocking your Wi-Fi that you have no easy control over
Walls
Thick walls will dampen signals, thick walls from bricks will dampen even more and concrete walls will kill it almost completely. Any kind of metal reinforcement wiring inside walls will reduce and kill signals as well.
Floors and ceiling
This is somewhat important if you have a floor beneath or under the room where is your router located, but for the same reason how walls are blocking your signal floor and ceiling can do it as well, especially since most of the time they are made of some stronger material like concrete with metal fence inside.
Heating systems
If you have a heating system that is composed of metal radiators with water inside, then in terms of Wi-Fi signal strength you have an aquarium but in a metal box, and as such it will greatly reduce signal strength.


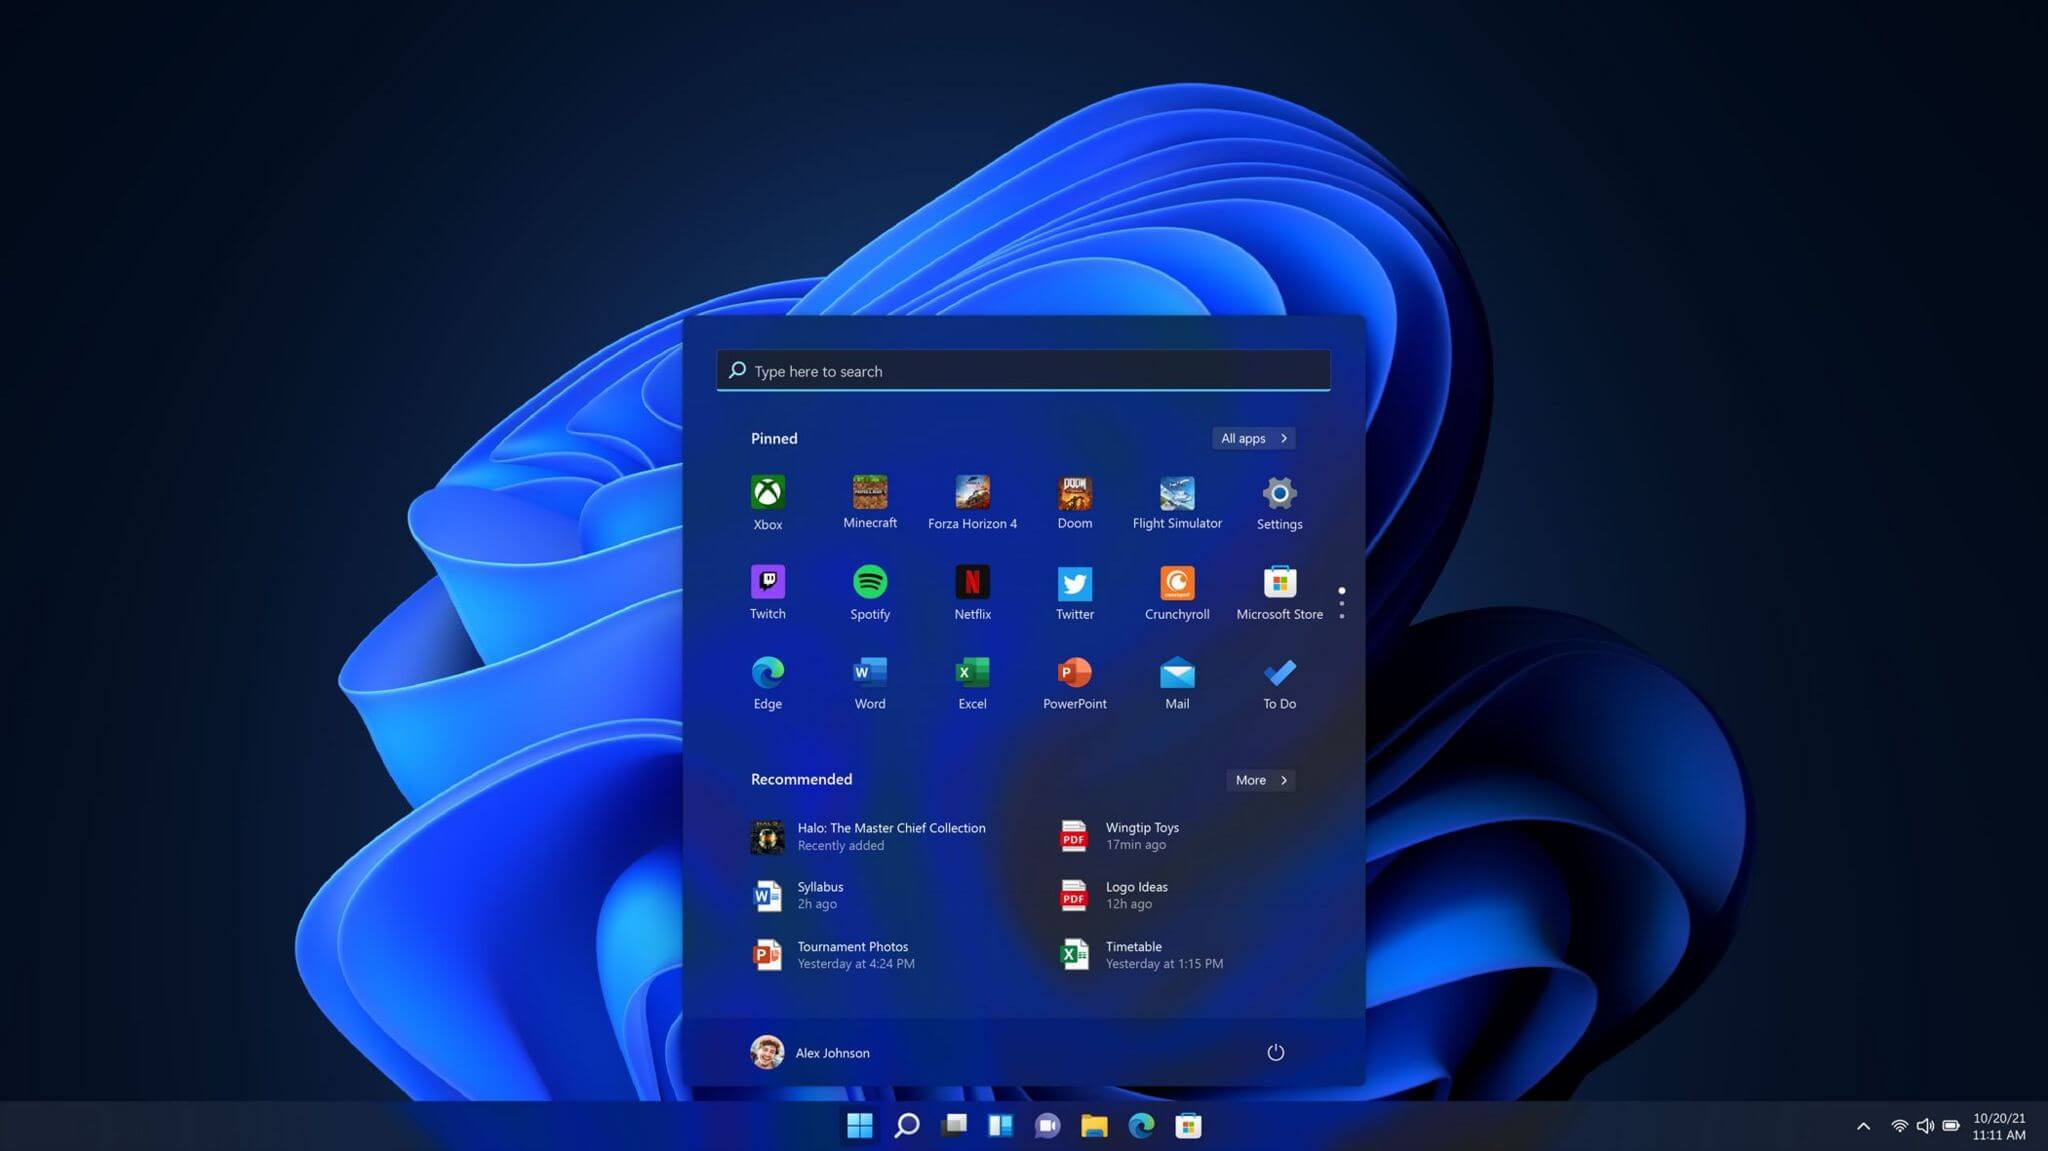 One of the first things that everyone saw when Microsoft has unveiled Windows 11 is its Start menu. Funny enough this is what has caused most of the divide among users, some find it interesting, and some do not like it. Truth is, it is different, and it is centered in the middle instead of the lower left part of the screen.
It has been confirmed however that the Start menu can be moved to any part of the screen so if you want, you could place it on the lower left as it has always been.
Live tiles do not longer exist in the Start menu, instead, we have styled simple icons.
One of the first things that everyone saw when Microsoft has unveiled Windows 11 is its Start menu. Funny enough this is what has caused most of the divide among users, some find it interesting, and some do not like it. Truth is, it is different, and it is centered in the middle instead of the lower left part of the screen.
It has been confirmed however that the Start menu can be moved to any part of the screen so if you want, you could place it on the lower left as it has always been.
Live tiles do not longer exist in the Start menu, instead, we have styled simple icons.
 If you have used the cascade option in previous Windows versions then it is most likely that you will like the new Snap controls.
You can quickly snap windows side by side, or arrange them in sections on your desktop just by hovering over maximize button on the title bar.
If you have used the cascade option in previous Windows versions then it is most likely that you will like the new Snap controls.
You can quickly snap windows side by side, or arrange them in sections on your desktop just by hovering over maximize button on the title bar.
 File explorer has gone through some visual and design changes, the ribbon on top has been completely removed and replaced with a header-like feature with a slick and clean design.
The header contains a nice organized and designed single row of icons like cut, paste, copy, rename, delete, and new folder icons.
File explorer has gone through some visual and design changes, the ribbon on top has been completely removed and replaced with a header-like feature with a slick and clean design.
The header contains a nice organized and designed single row of icons like cut, paste, copy, rename, delete, and new folder icons.
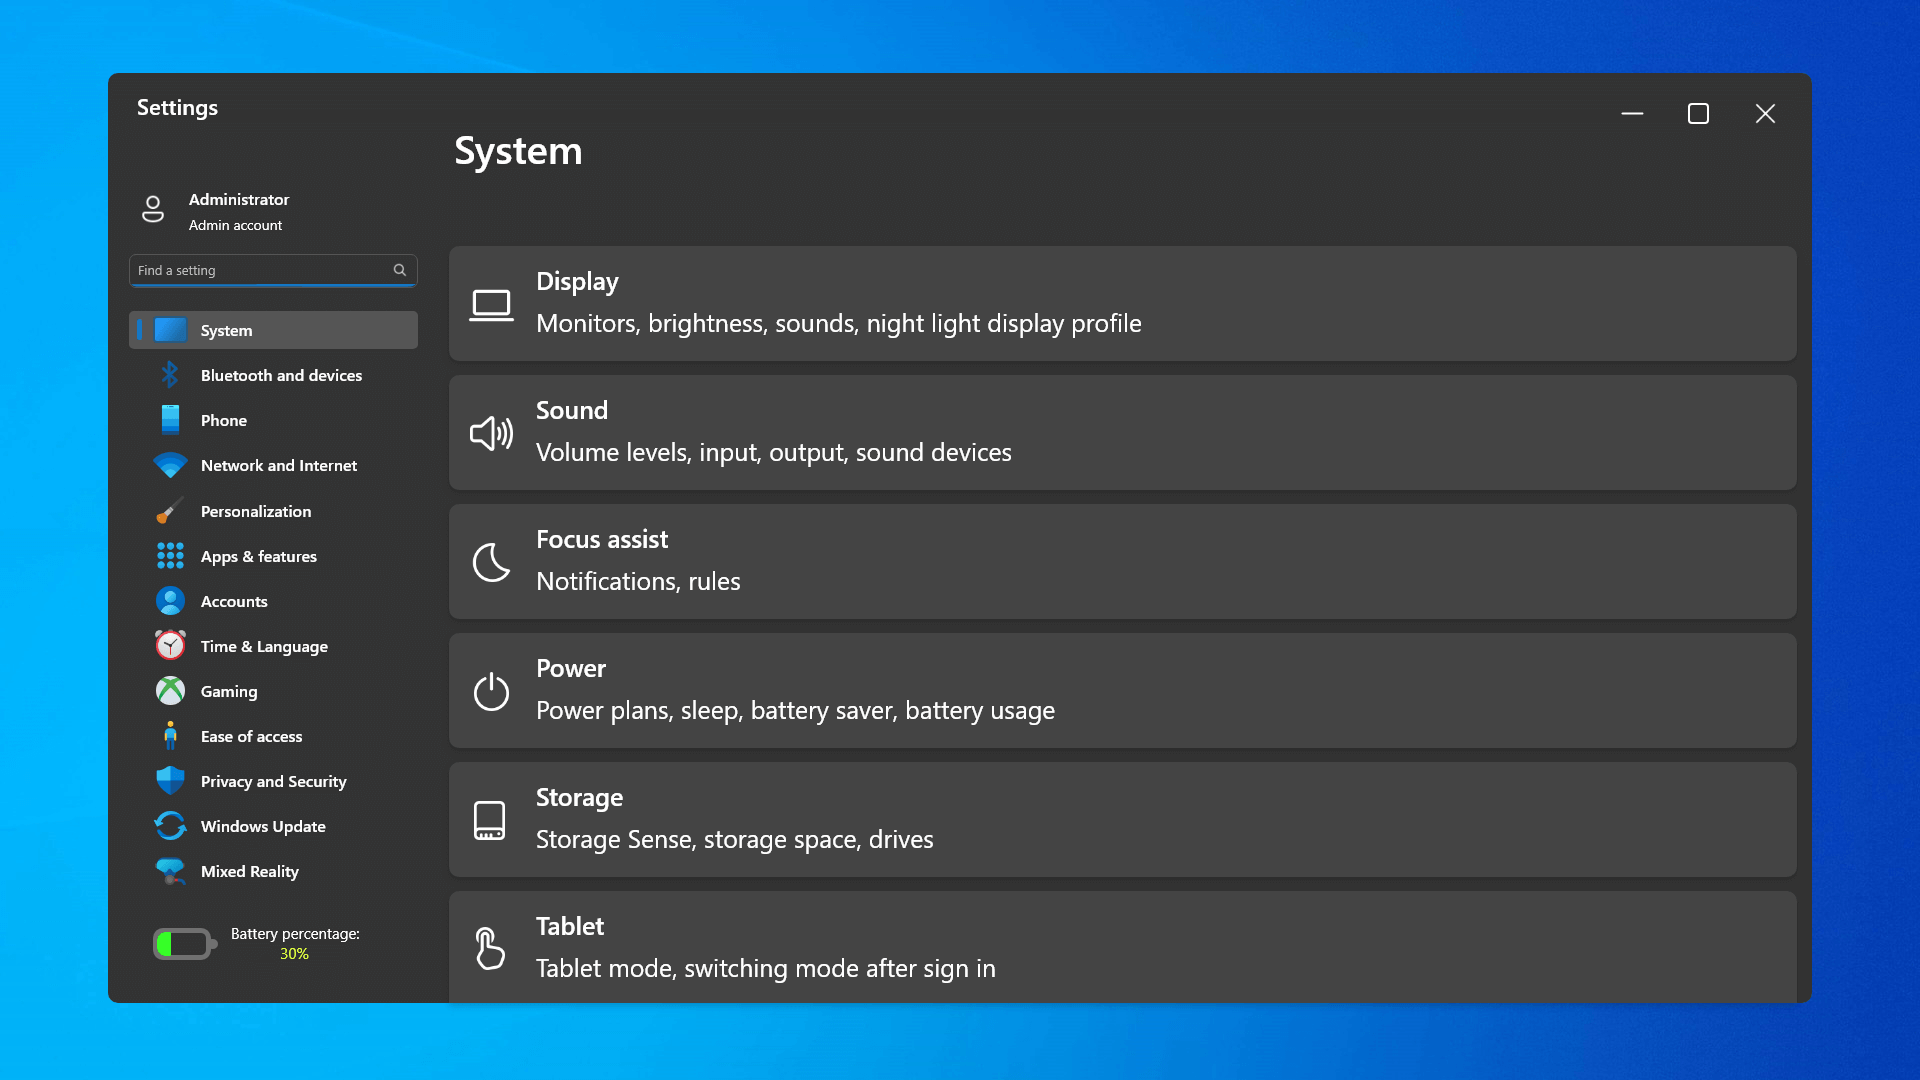 The settings app also has gone through visual and design changes. It has a new design that is very visually appealing and navigation has been simplified and more organized. Finding the right and desired setting is much faster and clearer now.
 Yes, widgets are back but not like you remember them.
Instead of being all-time present at your desktop like once they used to be, now there is a button on the taskbar which brings the widget bar up that contains desired widgets. This way they are easily accessible and do not clutter desktops.
So far we have weather, news, calendar, and stocks widget but we will see how development on these goes. I expect to have community-made widgets like in old days for all of our needs.
Yes, widgets are back but not like you remember them.
Instead of being all-time present at your desktop like once they used to be, now there is a button on the taskbar which brings the widget bar up that contains desired widgets. This way they are easily accessible and do not clutter desktops.
So far we have weather, news, calendar, and stocks widget but we will see how development on these goes. I expect to have community-made widgets like in old days for all of our needs.
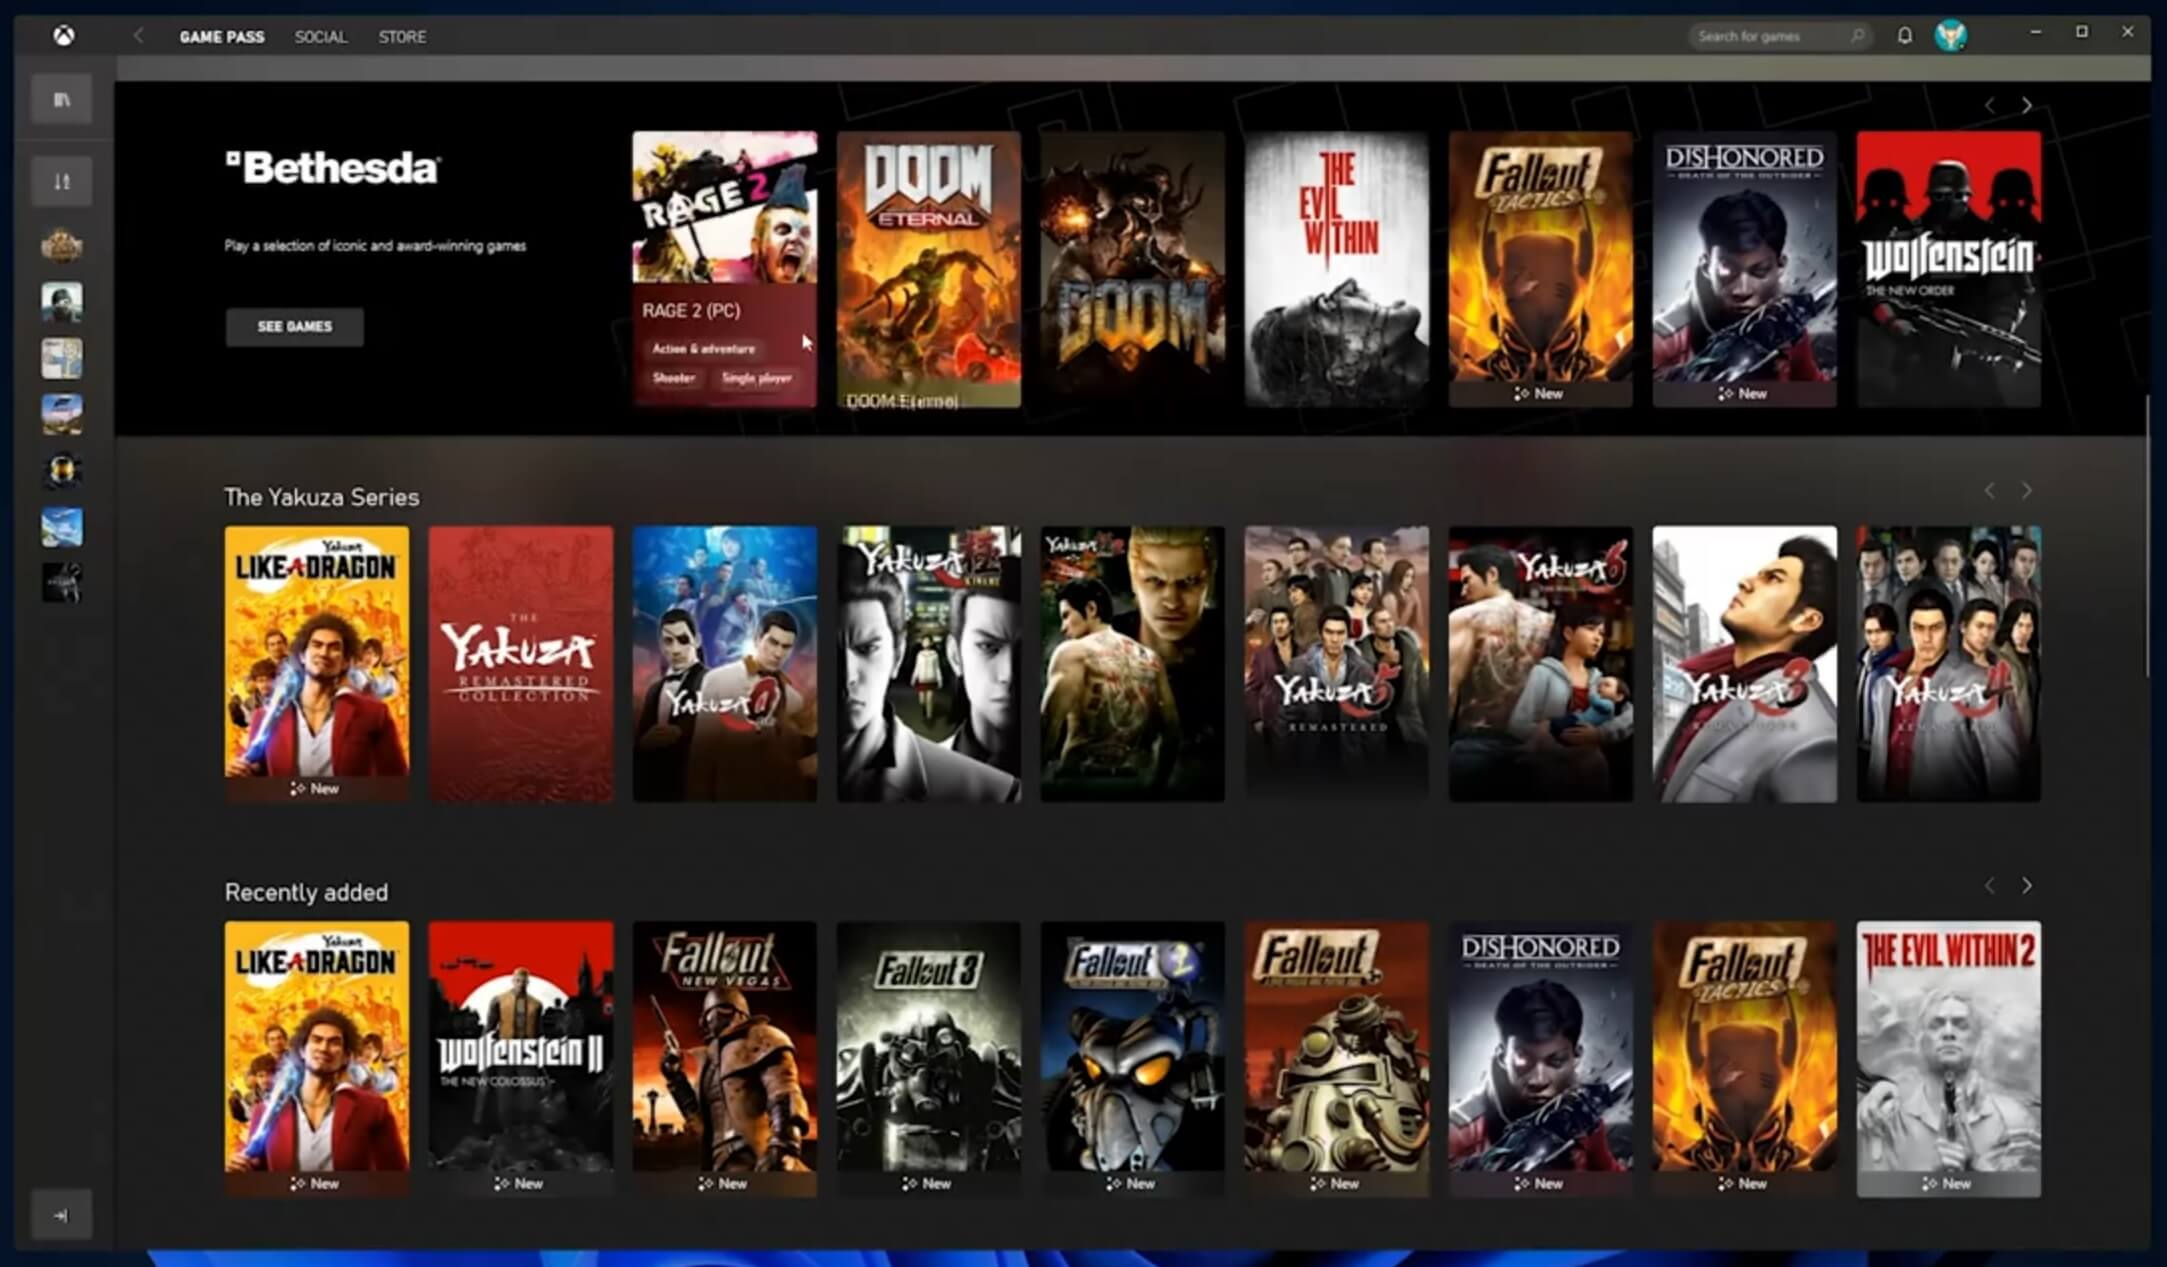 The new Xbox app is now integrated into Windows 11, offering quick access to Xbox Game Pass games, the social parts of the Xbox network, and the Xbox store.
 As widely known by now Windows 11 will require you to have a TPM 2.0 module capable CPU in order to install it.
This system requirement has caused a lot of controversies but essentially it seems that MS's goal is to protect your personal data by using this module.
The upside of course is that your data will be protected much more than in previous Windows versions, the downside, of course, will be that you will need newer hardware to run OS on it.
and that is essentially it, keep on tuned on more Windows 11 information and overall articles tied to PC and technology here at errortools.com
As widely known by now Windows 11 will require you to have a TPM 2.0 module capable CPU in order to install it.
This system requirement has caused a lot of controversies but essentially it seems that MS's goal is to protect your personal data by using this module.
The upside of course is that your data will be protected much more than in previous Windows versions, the downside, of course, will be that you will need newer hardware to run OS on it.
and that is essentially it, keep on tuned on more Windows 11 information and overall articles tied to PC and technology here at errortools.com 