A lot of controversies and mixed emotions have come from statements about Windows 11 minimum system requirements, especially ones linked to TPM.
Naturally, each time some software company giant announces how things are must have there are people who go out and prove them wrong.
This time Raspberry Pi community was one which demonstrated that not only Raspberry Pi does not have a TPM module, it can run the full desktop version of Windows 11
Raspberry Pi 4 and things you need for Windows 11 installation
In order to actually install Windows 11 on your Pi, there are certain things that you will need. Check out the below list and prepare everything.
Raspberry Pi 4 4GB or 8GB
A 32GB or larger SSD via a USB 3 caddy. Best for performance or 16GB or larger microSD card
USB boot enabled, see below.
A micro SD card with the latest Raspberry Pi OS
Windows 10 PC
USB to Ethernet or WiFi dongle
Bluetooth dongle (if you want Bluetooth)
Keyboard, mouse, HDMI, and power for your Raspberry Pi
Configuring Pi to boot from SSD
In order to boot from SSD be sure that firmware and bootloader are up to date on the latest version and upgrade if needed. Be aware that this firmware update can only be performed using the official Raspberry Pi OS.
Also if you are eager and want to use a standard microSSD card instead of an SSD to run Windows 11 feel free to skip this entire section.
Boot from microSSD with the latest Raspberry Pi OS on it.
Update firmware and OS using the terminal by typing sudo apt update sudo apt full-upgrade sudo rpi-update
Reboot your Pi
Install the latest version of bootloader again using the terminal with the command sudo rpi-eeprom-update -d – a
Reboot Pi
Launch raspi-config on your Pi via terminal with sudo raspi-config
Select option 3 (Boot options – Configure options for start-up) from boot options
Select Boot ROM version and press ENTER
Select latest and then OK
Select NO when prompted to reset boot ROM to defaults on the latest version boot ROM selected screen. Press OK
Select Boot order and press ENTER
Select USB Boot and click on OK and remove microSD card from Pi
Select Finish and click on NO when prompted to reboot
Creating Windows 11 installation image for Pi 4
In order to install Windows 11 on our Pi, we must create an installation image, follow the steps below explaining the process.
Download Windows on Raspberry imager and extract it into the win11 folder
Open Imager and allow it to make changes to your computer, set your language, and click on next
Select storage drive where you would like to install Windows
Set device type and click on next
Select our Windows 11 ISO image we created and click on next
On the drivers screen select Use the latest driver package available on the server
On UEFI firmware select screen choose Use the latest firmware available on the server
On configuration screen click on next
Check your setting on the installation overview and if everything is ok click on install
Wait for the whole process to be finished
Once the process is completed, close Windows on Raspberry imager, take out SSD or microSSD card from PC and connect it on your Pi along with Pi peripherals.
Setting Windows 11 on Pi
In order to actually use Windows 11 on our Raspberry Pi we now have to set up the Windows 11 install using the standard post-installation setup sequence.
Power up Pi and press ESC when prompted
Go to Device manager and press ENTER
Select Raspberry Pi Configuration
Select Advanced configuration
Set Limit RAM to 3GB to a disabled state, press F10 to save, and ESC to exit.
Select Display configuration
Set the resolution to desired option and press ENTER, F10 to save, and ESC to exit
Go to CPU configuration
Check if the CPU clock is set to default, if not set it
Press ESC to go back all the way to the main menu
Select Continue to exit BIOS and boot your Raspberry Pi with Windows 11 on it
And there you have it, fully working Windows 11 OS on Raspberry Pi despite what Microsoft says
Note that due to lack of some drivers performance can be less than optimal, for example, full HD videos will not work since there are no compatible graphic drivers for Pi and some other stuff like Wi-Fi will also cause some issues but overall Windows 11 is working pretty well.
Error 1753 is an RPC endpoint mapper error code. This code is typically displayed as "EPT_S_NOT_REGISTERED" or sometimes as the hexadecimal value 0x6D9. Error 1735 indicates that there are no more endpoints available from the endpoint mapper.
To understand this better, basically, RPC is an inter-process communication (IPC) method.
This is used by clients and servers for communication purposes. RPC is used by programs to execute programs on a server computer. The perfect example of this is Microsoft Outlook. You communicate with Microsoft Exchange Server using RPC.
This enables you to send and receive emails. When you use Microsoft Outlook to send emails, your computer sends a message to the server computer in an obscure coding.
The server responds to your computer with another message that contains the results of the executed program. This is all being carried at the backend of the running program.
Integral to this is the endpoint. The endpoint includes the name, port, or a group of ports on a computer that is monitored by the server for incoming client requests. This is a network-specific address to be precise.
The endpoint mapper is the part of the RPC subsystem that is responsible for dynamically assigning endpoints to the server. When this function fails it leads to error 1753 message display. It shows that RPC service is not available.
Solution
Error Causes
The error code 1753 indicating RPC endpoint mapper service failure is triggered due to multiple reasons. These include:
Windows registry damage and corruption
Malfunctioning of the hardware
Spyware intrusion or viral infections
Device driver conflicts
Further Information and Manual Repair
This error code may cause a great deal of inconvenience to execute programs that are dependent on the server. It can lower your productivity and performance. To avoid the hassle, it is advisable to repair the error 1753 immediately.
The best way to resolve this error 1753 in seconds is to download Restoro. By using this repair tool, you can fix the error right away for free without paying hundreds of dollars to a professional expert.
Restoro is a new and innovative PC fixer integrated with an automated algorithm and intuitive technology that enables users to sit back and relax while Restoro runs on the system and detects all PC-related issues in the shortest time.
In just a few clicks you can resolve even the mightiest PC issues like the error code 1753 RPC endpoint mapper problem and resume back to the program in no time.
Why Restoro
It is efficient and user-friendly. Restoro can be used by users of all levels so even if this is your first experience using a repair tool, you don’t have to worry. To operate it, you don’t have to be a computer programmer or have sound technical expertise.
It is simple and very easy to use. The layout is simple and neat complimented nicely with easy navigation and a sophisticated user interface.
Restoro is a high and multi-functional error tool embedded with powerful, performance-driven, and value-adding utilities, all in one.
So, whether the error code 1753 is triggered due to a viral infection on your system or registry corruption, you don’t have to look for different tools to resolve the error, simply run Restoro to fix the issue right away.
Restoro includes a dynamic registry cleaner that detects all registry issues and wipes out the clutter from the hard disk like junk files, internet history, and invalid entries which is by the way the number cause for registry corruption leading to error 1753.
It clears up disk space and RAM and repairs the misconfigured system files and corrupt registry in seconds thus resolving error 1753.
Restoro also functions as a system optimizer thus boosting the speed and performance of your PC massively and reducing boot time.
In addition to this, it also has a backup feature. This tool is embedded for safety purposes. This feature enables you to create backup files on your PC before you start system repair. This helps you recover data in the event of data loss during system repair.
To get started:
Click here to download and install Restoro on your system
After installation, run it to scan for errors like 1753
Error code 0x8007007e occurs in Windows 8 or 8.1 when users attempt to, but fail to successfully use Windows Update. When this occurs, Windows 8 or 8.1 users will not be able to access updates or certain web pages. This error manifests itself via the following common symptoms:
Error code 0x8007007e is usually caused by a malfunction within your system. This malfunction may be due to several issues such as malware on your device, or the accidental removal of a registry entry or system file.
Further Information and Manual Repair
To correct issues related to error code 0x8007007e in Windows 8.1, users may need to employ one or several manual repair methods. Users will not necessarily need technical skills to accomplish this task. However, if you are uncertain of your skills or you are unable to resolve the issue after completing the tasks below, consult a Windows repair technician or use an automated tool.
Method one: System File Checker
System File Checker (SFC) enables users to check their system for corrupt or missing system files. You will need to use Command Prompt. To access System File Checker on Windows 8 or 8.1, follow the instructions below.
Step one: Tap or use the mouse to click Search
Step two: Type Command Prompt in the Search box
Step three: Select Command Prompt, and then click Run as administrator
Step four: Type password if prompted by Command Prompt to do so or simply click Allow
Whether you run Windows 8 or 8.1 operating system on your computer, System File Checker will begin to find and repair missing or corrupted system files. If, however, you are unable to successfully complete the task via Command Prompt, repeat the steps above. You may also consider help from a professional or simply move to the next manual repair method listed below.
Method two: Perform a Clean Boot
A Clean Boot will help users determine if error code 0x8007007e in Windows 8.1 is caused by a problem associated with startup programs. Problems may arise when there is conflict among programs that run in the background when users turn on their device. To run a clean boot, follow the steps below:
Step one: Click the Start button and type msconfig in the search box
Step two: Click Services tab
Step three: Click Hide all Microsoft Services box then select Disable All
Step four: Click Startup tab
Step five: Select Disable All, then OK
Step six: Restart the computer then check if you can now update the system
If the Clean Boot is successful, you will be able to successfully update your system without receiving error code 0x8007007e. However, if the error code reappears while you attempt to access updates or web pages, proceed to the next manual repair method below.
Method three: Scan for Malware
Since error code 0x8007007e in Windows 8 or 8.1 can be caused by issues related to malware, it’s important for users to check their system using a powerful antivirus or anti-malware software. If you do not have one on your system, you will need to download such software as soon as possible.
Once you have the software on your PC, run a scan to check if your computer has been infected. If malware is indeed on your device, remove it using the anti-malware tool.
Method four: Run System Restore Tool
Another effective manual repair method relates to System Restore. This tool enables Windows users to restore their computer to an earlier period of time in which the error code was not present. When done properly, it can effectively resolve error code 0x8007007e. Before running this tool, however, be sure you select a time in which all important files and programs are present so as not to lose them.
Method Five: Use an Automated Tool
If you wish to always have at your disposal a utility tool to fix these Windows 8 and other related issues when they do arise, download and install a powerful automated tool.
We have all experienced Windows errors over time and that can range from simple ones that will do very little to no harm and can be even system breaking making us lose our work or completely making the PC unusable. No one likes them but they happen, and usually, they happen once we least expect them.
No matter how frequent and unpleasant they might be there are ways to keep them at the minimum and even avoid them.
We will discuss steps that you can take in order to do this, simple tips and guides on how to keep your computer in top form and eliminate not just Windows, but any kind of errors altogether.
Keep your hardware clean
Believe it or not, some serious Windows errors like the dreaded blue screen of death can come from hardware issues not from the software at all. It is very important to keep your computer clean and with enough air flow so it can function properly.
Keeping applications on the drive might seem harmless but sadly that is not the case. Some applications have a certain impact on the system itself after all most of them are tweaking registry entries in Windows and sometimes having too many applications means an increased possibility of conflict over certain resources even when they are not running.
Some applications like adobe creative suite, for example, will have certain services always running in the background, and more of these kinds of applications you have, more services, more places for unexpected errors when they collide. Some of them will also install certain dependencies that could be problematic.
The general idea is: if you are not using it, uninstall it and you will be safer and more resilient to errors inside OS.
Do not use pirated or cracked software
Besides moral and law implications that using pirated or cracked software might bring you there are also certain other things that might be problematic. Certain "free" software might come packet with some problematic malware, for example, it is not uncommon for attackers to use some popular software to pack their malicious application with it.
Other things might be wrong and incomplete tweaking with application in order to bypass security and thus bringing some instability due to scripts needed to run in order to achieve this goal.
Keep your drivers updated
Errors can also come from old drivers or bad drivers, device manufacturers are not all-knowing and perfect, and sometimes drivers can wreak havoc on the system. Having updated drivers can minimize any kind of unexpected behaviors inside the operating system making it more stable and reliable.
You can check your driver version in the control panel inside the Windows OS and then compare it to the ones found on the manufacturer's site, if there are newer available it is recommended to download and install them,
Keep software updated
Applications can have bugs, and bugs can lead to certain errors both in the system and when using the app as well. It is in your best interest to get the latest patch or newer version of the software in order to avoid these unpleasant experiences.
Also, certain codecs and extensions that are installed directly in Windows can also have some unpredictable behavior, updating is the best solution to keep them in line.
Keep Windows updated
Same as with drivers and applications, Windows itself is not immune from bugs and some unpredictable issues. Luckily Microsoft is always working on fixes and features of Windows but in order to actually have benefited from that work, you will need to keep Windows updated. Sometimes a bad update can introduce some errors but you can always roll back to the previous and wait for them to fix everything and then download them all.
Check the health of your hardware regularly
Hardware components have their life cycle, more quality ones tend to last longer but eventually, they will reach the end of their lifecycle. There are a lot of testers for various components in your computer that can check different things and provide you with information about the state of your components.
If you are on Windows 11, Microsoft has included a basic health app inside OS, just type PC health check in search and start the app. For some more detailed information and advanced checks, you will have to use a custom application. There are plenty of them specialized for single components like RAM, SSD, etc. A simple google search with providing you with top results and most of them are free for personal use.
Remember, a faulty component or component that is reaching its life cycle can produce many errors inside the operating system.
A copy of Windows gets into a grace period when it is installed on a computer which means that you can use your Windows computer without any constraints on its feature. However, if you suddenly encounter an error code 0xC004F009 then this means that the grace period has already expired. In such cases, you will see the following error message on your screen:
“Error Code 0xC004F009, The Software Licensing Service reported that the grace period expired.”
One of the possible causes of this error is that it could be that the grace period has already expired way before the system was activated which is a result of which the system is in the Notifications state at this moment.
The error code 0xC004F009 has something to do with MAK-enabled computers in an enterprise when it comes to Volume Licensing. One of the reasons that this error pops up is due to the possibility that the computer was not activated yet even when it was already connected to the Enterprise. Another most likely cause of the error is when the system was never connected with the Enterprise at all and the given grace period has expired before your computer system is activated. Whatever the real cause of this error, this post will guide you in fixing it. Just refer to the instructions given below to fix it.
Option 1 – Try activating Windows using the command-line tool
First, you need to obtain your MAK key from the IT administrator.
Once you have it, tap the Win + R keys on your keyboard and then type “cmd” in the field and hit Enter to open an elevated Command Prompt.
After that, type this command and hit Enter to install the product key or replace the existing one: Slmgr.vbs –ipk <your mak key>
Next, type another command and hit Enter: slmgr.vbs –ato
Once you’ve executed the given commands, Windows should be activated after it connects to Microsoft servers and then gives it some time and try to check if error code 0xC004F009 is now fixed or not.
Option 2 – Try activating Windows using your mobile phone
Activating Windows 10 can also be done using your phone. Just note that you have to call Microsoft to do so.
In the Start Search box, type in “Slui 4” and tap Enter.
Next, select your country and click on Next.
Keep the window open and call the toll-free number of the country you’re from.
Afterward, a confirmation ID should be given by the automated system which you must take a note of.
Finally, in the box on the window, type in the confirmation ID and click on the Activate button. That should do it.
Option 3 – Try to prolong the grace period
On the other hand, it is also possible for you to prolong the grace period but you might have to get another genuine Windows key for that. Before you proceed, you need to create a System Restore point first afterwards, refer to the steps given below to increase the grace period of the Software Licensing Service on your Windows 10 computer.
Tap the Win + R keys to open the Run dialog box and type “Regedit” in the field then hit Enter to open the Registry Editor.
After that, navigate to this registry key: HKEY_LOCAL_MACHINESOFTWAREMicrosoftWindowsCurrentVersionSetupOOBEmediabootinstall
Next, change the value of the “mediabootinstall” key to “0”.
Now open Command Prompt with admin privileges and then type this command and hit Enter: slmgr –rearm
The command you just entered will add another grace period to your system activation. After that, you have to obtain a new key and then activate Windows.
Option 4 – Try running the Windows 10 Activation Troubleshooter
You can also try to run the Windows 10 Activation troubleshooter to help resolve the error code 0xC004F009.
Go to Settings and then select Activation.
After that, click on the Windows Activation and then troubleshoot. This will help you address most of the commonly found activation issues in Windows devices.
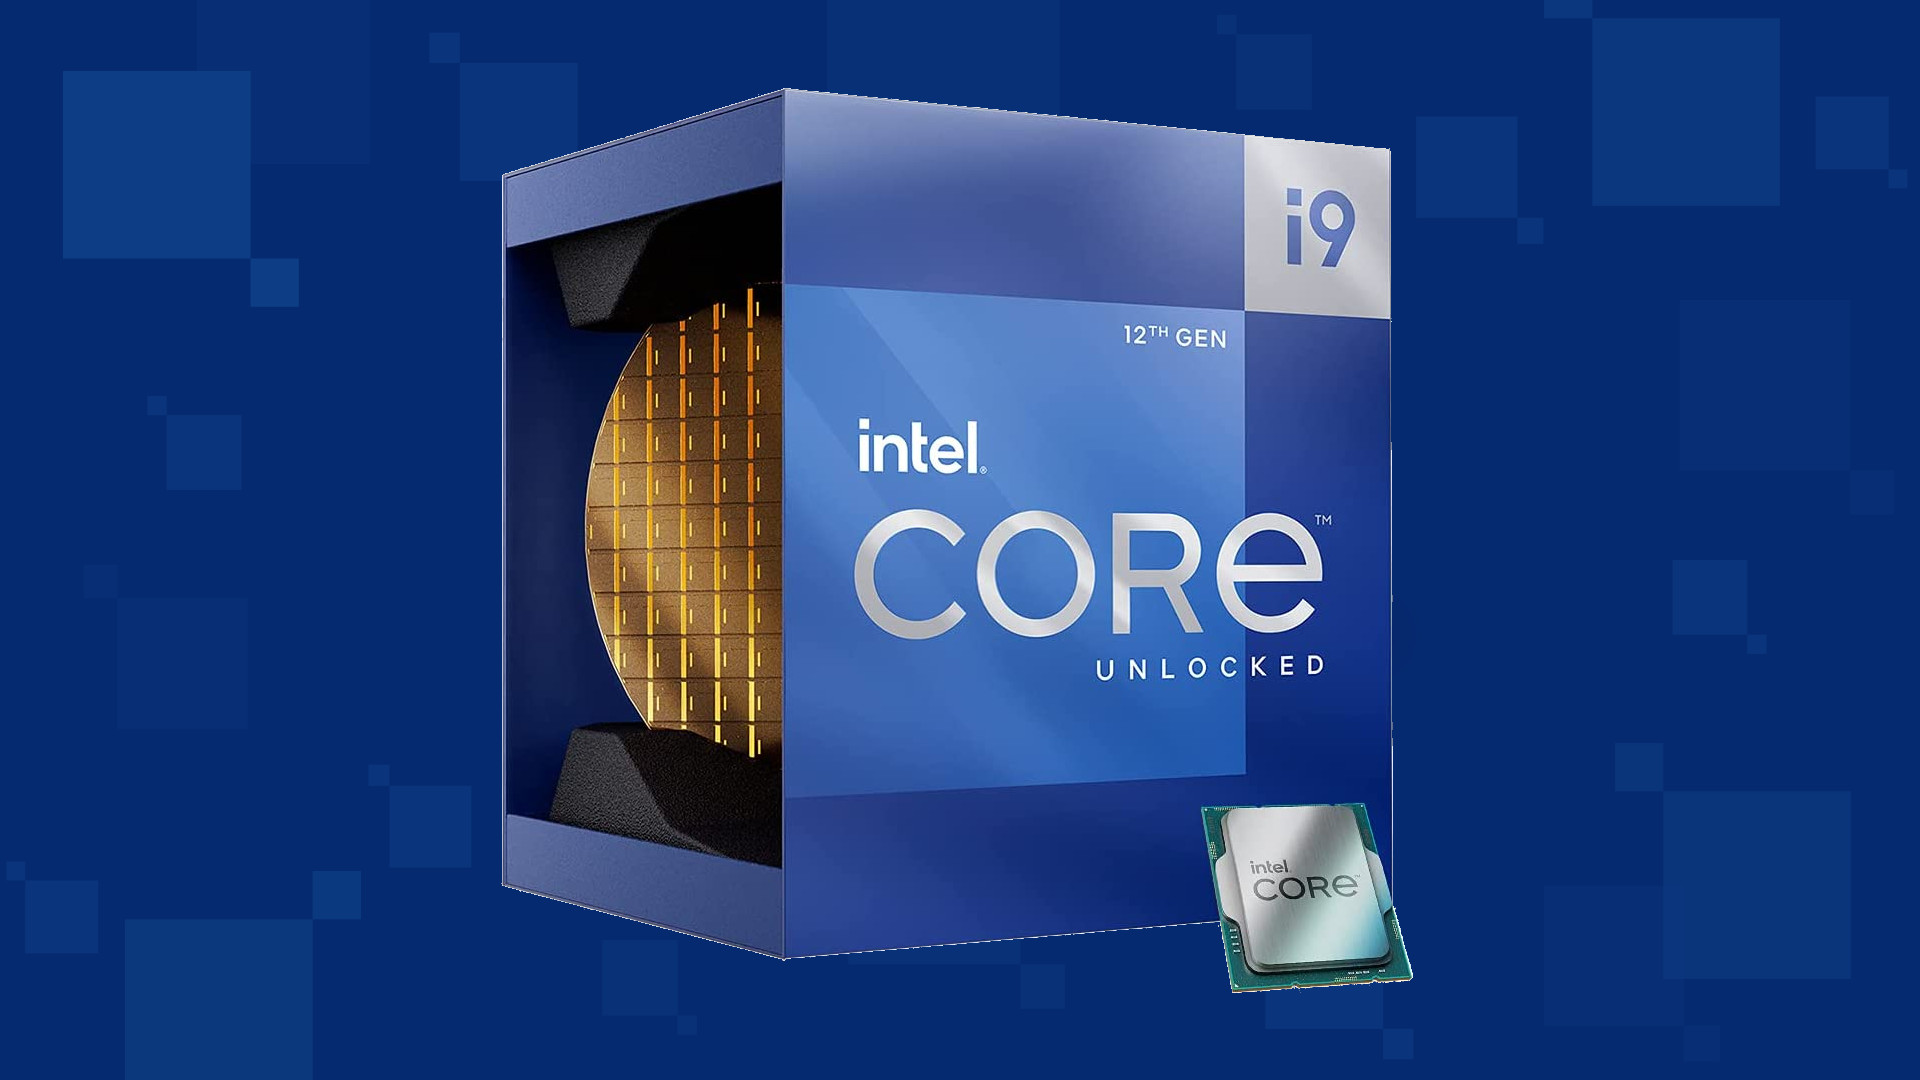
Due to its hybrid core technology, the Alder Lake line of processors had some DRM issues with some game titles where DRM protection software detected hybrid core design switching via manager as a hack attempt and prevented the game from working properly. Over 50 titles were affected by this issue, now only 3 remain still affected but it is being worked on them so that can be also resolved.
Intel says that the remedy to the issue for these games is the scroll lock fix which can be done so by enabling Legacy Game Compatibility mode from the BIOS of your motherboard. When running the said games, you can press scroll lock to park the E-cores on Intel's Alder Lake Desktop CPUs to get rid of DRM issues.
Certain motherboard manufacturers such as MSI and Gigabyte have made this even easier through software tools with which you don't have to access the BIOS. All you need to do is select a button in the tool which works on both Windows 11 and Windows 10 operating systems and you will enable compatibility mode.
Netflix was one that made streaming service standard and even after some stumbles even today it is still a respected service.
So in that spirit, we are bringing you the list of all new and old movies and TV series releasing to NETFLIX this September.
September 1
Turning Point: 9/11 and the War on Terror — NETFLIX DOCUMENTARY
How to Be a Cowboy — NETFLIX ORIGINAL
Agatha Christie’s Crooked House (2017)
Anjaam (1994)
Barbie: Big City Big Dreams (2021)
Brave Animated Series (Season 1)
Crocodile Dundee in Los Angeles (2001)
Green Lantern (2011)
House Party (1990)
El Patron, radiografia de un crimen / The Boss: Anatomy of a Crime (2014)
HQ Barbers (Season 1)
Letters to Juliet (2010)
Level 16 (2018)
Los Carcamales / Oldsters (Season 1)
Kid-E-Cats (Season 2)
Kuroko’s Basketball (Season 3)
Marshall (2017)
Welcome Home: Roscoe Jenkins (2008)
September 2
Afterlife of the Party — NETFLIX FILM
Q-Force — NETFLIX ORIGINAL
The Guardian
September 3
Dive Club (Season 1) — NETFLIX ORIGINAL
Money Heist (Season 5) — NETFLIX ORIGINAL
Sharkdog (Season 1) — NETFLIX FAMILY
Worth (2021) — NETFLIX ORIGINAL
September 5
Bunk’d (Season 5)
September 6
Countdown: Inspiration 4 Mission to Space (Season 1 – Episodes 1 & 2) — NETFLIX DOCUMENTARY
Shadow Parties (2021)
September 7
Kid Cosmic (Season 2) — NETFLIX ORIGINAL
Octonauts: Above & Beyond (Season 1) — NETFLIX ORIGINAL
On The Verge (Season 1) — NETFLIX ORIGINAL
UNTOLD: Breaking Point — NETFLIX DOCUMENTARY
If I Leave Here Tomorrow: A Film About Lynyrd Skynyrd (2018)
September 8
Into the Night (Season 2) — NETFLIX ORIGINAL
JJ + E — NETFLIX FILM
The Circle (Season 3) — NETFLIX ORIGINAL
Show Dogs (2018)
September 9
Blood Brothers: Malcolm X & Muhammad Ali — NETFLIX DOCUMENTARY
The Women and the Murderer (2021) — NETFLIX DOCUMENTARY
September 10
Firedrake the Silver Dragon (2021) — NETFLIX ORIGINAL
Metal Shop Masters — NETFLIX ORIGINAL
Kate — NETFLIX FILM
Pokemon Master Journey: The Series (Part 1) — NETFLIX ANIME
Prey — NETFLIX FILM
Lucifer (Season 6) — NETFLIX ORIGINAL
Lucifer season 6 poster cast
September 13
Crime Stories: India Detectives (Season 1) — NETFLIX DOCUMENTARY
September 14
You vs. Wild: Out Cold — NETFLIX FILM
The World’s Most Amazing Vacation Rentals — NETFLIX ORIGINAL
September 15
Countdown: Inspiration4 Mission to Space (Season 1 – Episodes 3 & 4) — NETFLIX DOCUMENTARY
Too Hot to Handle Latino — NETFLIX ORIGINAL
Nailed It! — NETFLIX ORIGINAL
Schumacher — NETFLIX DOCUMENTARY
September 16
Safe House (2012)
Birth of the Dragon (2017)
He-Man and the Masters of the Universe (Season 1) — NETFLIX ORIGINAL
My Heroes Were Cowboys (2021) — NETFLIX DOCUMENTARY
September 17
Chicago Party Aunt — NETFLIX ORIGINAL
Sex Education (Season 3) — NETFLIX ORIGINAL
Tayo and Little Wizards (Season 1) — NETFLIX FAMILY
The Stronghold (2020) — NETFLIX FILM
September 22
Dear White People (Season 4) — NETFLIX ORIGINAL
Confessions of an Invisible Girl — NETFLIX FILM
September 23
A StoryBots Space Adventure (2021) — NETFLIX ORIGINAL
September 24
Ganglands (Season 1) — NETFLIX ORIGINAL
Midnight Mass — NETFLIX ORIGINAL
My Little Pony: New Generation — NETFLIX FAMILY
If you suddenly encounter an error saying, “Something happened and this app couldn't be installed. Error Code: 0x80244018”, when trying to install apps on your Windows 10 computer, then you’ve come to the right place as this post will help you in resolving the problem.
It’s not just you that’s experiencing this problem right now as several users also reported getting this error they try to apply a Windows update or download and install the application from Microsoft Store. There could are several reasons why you’re getting this error. It could be caused by a third-party application, or it could be that the update is blocked by your VPN or proxy server, or that the BITS service is disabled. In addition, the error could also be due to some glitch in the component services or it could be that the system files are corrupted. Whatever the cause is, you can fix the error by following any of the given options below.
Option 1 – Run the Windows Update Troubleshooter
Running the Windows Update Troubleshooter can help in fixing Error Code 0x80244018. To run it, go to Settings and then select Troubleshoot from the options. From there, click on Windows Update and then click the “Run the troubleshooter” button. After that, follow the next on-screen instructions and you should be good to go.
Option 2 – Put your PC in a Clean Boot State
It could be that some third-party application is the one that’s causing the problem so it’s best if you put your computer in a Clean Boot state. During this state, you can start the system with a minimum number of drivers and startup programs that will surely help you in isolating the root cause of the issue.
Log onto your PC as an administrator.
Type in MSConfig in the Start Search to open the System Configuration utility.
From there, go to the General tab and click “Selective startup”.
Clear the “Load Startup items” check box and make sure that the “Load System Services” and “Use Original boot configuration” options are checked.
Next, click the Services tab and select the “Hide All Microsoft Services” check box.
Click Disable all.
Click on Apply/OK and restart your PC. (This will put your PC into a Clean Boot State. And configure Windows to use the usual startup, just simply undo the changes.)
After that, try to install the Windows app again.
Note: If you are able to install the app without any trouble at all then it means that the error is caused by some third-party application on your computer. You need to look for the culprit and uninstall it once you found it.
Option 3 – Restart BITS
The Background Intelligent Transfer Service or BITS is a part of the Windows Update service and is the one that manages the background download of Windows Update, as well as scans for new updates and so on. And if Windows Update is experiencing some problems, you can try restarting BITS but make sure that you have admin privileges to do so.
Tap the Win + R keys to open the Run dialog box.
Next, type “services.msc” in the field and hit Enter to open Windows Services.
From the list of Services, look for the Background Intelligent Transfer Service and double-click on it to open Properties.
After that, you need to set the Startup type to “Automatic (Delayed Start) and click on Apply.
Now click the Stop button to stop BITS and then click the Start button to restart the service.
Click OK to save the changes made and then restart your PC.
Option 4 – Disable the Proxy server
Tap the Win + R keys to open the Run dialog box.
Then type “inetcpl.cpl” in the field and hit Enter to pull up the Internet Properties.
After that, go to the Connections tab and select the LAN settings.
From there. Uncheck the “Use a Proxy Server” option for your LAN and then make sure that the “Automatically detect settings” option is checked.
Now click the OK and the Apply buttons.
Restart your PC.
Note: If you are using a third-party proxy service, you have to disable it.
Option 5 – Try disabling the VPN
As mentioned, if you are using VPN, this could be the reason why you’re getting Error Code 0x80244018 so the most obvious thing to do is for you to turn off the VPN and try to run the Windows Update once more. And if you use a VPN software that works using their software, you can just completely exit or log-off from its account. On the other hand, if you are using a built-in Windows 10 VPN, you can simply turn it off or delete all the settings you have created there. Although it’s understandable that you might have to use a VPN connection to connect to the work network, you really have to disable it at least after you’ve successfully installed the app.
Option 6 – Reset Windows Update components
Open Command Prompt with admin privileges.
After that, type each one of the following commands and hit Enter after you key in one after the other.
net stop wuauserv
net stop cryptsvc
net stop bits
net stop msiserver
Note: The commands you entered will stop the Windows Update components such as Windows Update service, Cryptographic services, BITS, and MSI Installer.
After disabling WU components, you need to rename both the SoftwareDistribution and Catroot2 folders. To do that, type each one of the following commands below, and don’t forget to hit Enter after you type one command after the other.
Next, restart the services you’ve stopped by entering another series of commands. Don’t forget to hit Enter after you key in one command after the other.
net start wuauserv
net start cryptsvc
net start bits
net start msiserver
Close Command Prompt and reboot your PC.
Option 7 – Run the System File Checker Scan
System File Checker or SFC is a built-in command utility that helps in restoring corrupted files as well as missing files. It replaces bad and corrupted system files with good system files that might be the cause why you’re getting the Error Code 0x80244018. To run the SFC command, follow the steps given below.
Tap Win + R to launch Run.
Type in cmd in the field and tap Enter.
After opening Command Prompt, type in sfc /scannow
The command will start a system scan which will take a few whiles before it finishes. Once it’s done, you could get the following results:
Windows Resource Protection did not find any integrity violations.
Windows Resource Protection found corrupt files and successfully repaired them.
Windows Resource Protection found corrupt files but was unable to fix some of them.
Restart your PC.
Option 8 – Run the DISM tool
You can also run the DISM Tool as it helps in repairing the Windows System Image as well as the Windows Component Store in Windows 10. Using this built-in tool, you have various options such as the “/ScanHealth”, “/CheckHealth”, and “/RestoreHealth” which could help in fixing the Error Code 0x80244018.
Open the Command Prompt with admin privileges.
Then type in the following commands and make sure to hit Enter right after you type each one of them:
Dism /Online /Cleanup-Image /CheckHealth
Dism /Online /Cleanup-Image /ScanHealth
exe /Online /Cleanup-image /Restorehealth
Do not close the window if the process takes a while as it will probably take a few minutes to finish.
Device drivers serve as a connection between the hardware in your computer and the operating system. So if any of the device drivers fail, the concerned hardware will stop communicating with Windows. And when you encounter some network-related issues, you can run the Network Adapter troubleshooter to fix them. However, this built-in troubleshooter does not work all the time as there are still problems that it can’t fix on its own and you’ll see the following error message:
“Windows could not find a driver for your network adapter.”
If you encounter this kind of error, read on as this post will help you in fixing the problem but before you get started in troubleshooting the problem, try running the Network Adapter Troubleshooter again.
Open the Search bar on your computer and type in “troubleshoot” to open the Troubleshoot settings.
Next, scroll down and select the “Network Adapter” option from the right pane.
Then click on the Run Troubleshooter” button.
After that, your computer will check for any possible errors and will pinpoint the root cause of the problem if possible.
Refer to each one of the solutions given below to get started:
Option 1 – Update the Network Adapter drivers
Of course, the first thing you can try to do is to update the Network Adapter drivers to resolve the error.
Tap the Win + R keys to launch the Run window and then type in the “devmgmt.msc” command and hit Enter to open the Device Manager window.
Under the Device Manager, you will see a list of drivers. From there, look for the Network Adapters and expand it.
Then right-click on each one of the Network drivers and update them all.
Restart your PC and see if it helped in fixing the BSOD error.
Note: If updating the network drivers didn’t help in fixing the “Windows could not find a driver for your network adapter” error, you can also try to uninstall the very same drivers and restart your Windows 10 PC. After that, the system itself will reinstall the drivers you just uninstalled. Alternatively, you can also download and install the drivers from the manufacturer’s website directly.
To reinstall the network adapter driver, refer to these steps:
Open the Devices Manager from the Win X Menu.
Then locate the device drivers and right-click on them to open the Properties.
After that, switch to the Driver tab and click on the Uninstall Device button.
Follow the screen option to completely uninstall it.
Finally, restart your computer. It will just reinstall the device drivers automatically.
Option 2 – Try running the Hardware and Devices Troubleshooter
Apart from the Network Adapter Troubleshooter, you can also run another built-in troubleshooter in Windows, the Hardware and Devices Troubleshooter, as it can also help you in resolving the “Windows could not find a driver for your network adapter” error.
The first thing you need to do is click on Start and then on the gear-like icon to pull up the window for Settings.
After opening Settings, look for the Update and Security option and select it.
From there, go to the Troubleshoot option located on the left-hand side of the list.
Next, select Hardware and Devices from the list and open the Troubleshooter and run it. Once it is doing its job, wait for it to complete the process and then restart the system.
After the system restarts, check if the problem’s now fixed. If not, refer to the next option given below.
Option 3 – Try performing a System Restore
You might also want to perform a System Restore that might help you in fixing the error. You can do this option either by booting into Safe Mode or in System Restore. If you are already in the Advanced Startup Options, just directly select System Restore and proceed with the next steps. And if you have just booted your PC into Safe Mode, refer to the steps below.
Tap the Win + R keys to open the Run dialog box.
After that, type in “sysdm.cpl” in the field and tap Enter.
Next, go to the System Protection tab then click the System Restore button. This will open a new window where you have to select your preferred System Restore point.
After that, follow the on-screen instructions to finish the process and then restart your computer and check if the problem is fixed or not.
Error Code 40 is a device driver error that users encounter on any Windows 2000 and later operating systems. It occurs when the peripheral device that you connect to your PC cannot be accessed due to a change in the system registry.
This is due to the presence of invalid sub-keys of the device driver in the system registry.
It is a common error that users come across and appears on your PC with either of the following messages:
“Information in the registry entry for this driver is invalid”
OR
"Windows cannot access this hardware because its service key information in the registry is missing or recorded incorrectly. (Code 40)"
Solution
Error Causes
As mentioned above, the error code is triggered when the device driver’s invalid sub-keys appear in the registry, effectively changing it. This happens when the windows system files get damaged due to the following factors:
An incomplete program uninstallation
An incomplete program installation
Hardware is not removed properly
System recovery from viruses
An improper system shut down
Factors such as incomplete installations or uninstallations or an improper system shut down can cause files to become damaged that threaten the health of your computer.
Removing viruses from the computer is also another factor as it removes the entries in the Windows system files which contain the viruses including spyware or malware
Further Information and Manual Repair
Fixing Error Code 40 is similar to fixing other device manager error codes. Here are a few methods you can try.
Method 1 – Use System Restore
You can use system restore to eliminate the problem. Here is how you can use it:
Log in using an Administrator account
Click ‘Start’ button and select All Programs > Accessories > System Tools > System Restore
Click ‘Restore my computer to an earlier time’ and click ‘Next’
Select the last Windows restore point from the ‘On this list, click a restore point’ list, and click ‘Next’
Click ‘Next’ on the confirmation window to proceed
Restart your PC after restoration is complete
By restoring the system via a last saved system checkpoint, you can obtain undamaged Windows system registry files that can help avert the error code.
Method 2 – Manually uninstall then reinstall the device driver
If using system restore also does not work in removing the error code, you may have to resort to manually uninstalling and then reinstalling the device driver causing the problem.
This would be necessary since the remaining incomplete files due to a partial removal or installation of programs is what contributes to the error code. By uninstall and reinstalling the device driver program, it would lead to the completion of the files.
You can do this by firstly logging in as Administrator and open Device Manager. Select the device that is causing the problem and double click it and make sure that the peripheral is connected properly to the PC. Upon opening, click on the ‘Driver’ tab and then select ‘Update Driver’.
Make sure to refer to the system documentation that you received with your PC or computer to check for the motherboard details and driver specifics.
Method 3 – Use software to automatically download the driver
Manually uninstalling and reinstalling the driver will do the trick, however, it may be time-consuming especially when you would have to resort to your hardware user manual.
Therefore, using a program such as DriverFIX can save you a lot of time and frustration in having your device work properly on your computer.
DriverFIX, with its user-friendly approach to help you fix your PC issues, comes with an integrated database that detects which drivers you need to reconfigure within just a few seconds and downloads it automatically.
It further ensures that your drivers are installed in their entirety leaving no room for any incomplete files to remain that create Error Code 40.
It also has the added advantage of being able to backup and restores your files should there be the slightest possibility of system file damage.
Thus, registry damage can be averted by letting the software roll back the system files to an earlier healthy checkpoint. Driver Assist is the answer to fixing your PC error codes accurately and quickly.
Click here to download DriverFIX to fix Error Code 40 quickly and effectively!
Error 2032 is a Windows stream error. The error is generated when running applications like Flash. It shows that the application is unable to request ads from server.
Error Causes
The error 2032 is triggered due to multiple reasons including:
The URL cannot be located or is blocked
HTTP Service is not found
Incorrect proxy settings
Automatic cookies handling
Corrupt Flash Player
Viral infection
Registry issues
Further Information and Manual Repair
Here are some easy and best do it yourself methods to resolve the error 2032 on your system:
Fix the Proxy Settings
To do this, first, go to the start menu and press RUN, type regedit in the RUN box and press enter. Now from the left-hand panel of the registry path open: HKEY_CURRENT_USERSoftwareMicrosoftWindowsCurrentVersionInternet Settings. Now double click the proxyenable string and replace its value with 0.
After that, right-click on proxy server and select delete option. Then exit Regedit and restart your PC to activate changes.
Verify the URL
Sometimes the error 2032 may be generated due to wrong or incorrect URL in the HTTP Service URL property. So, verify your URL and look for typos. Specifying the correct URL can fix the error right away.
Check Cookies Handling
Automatic cookies handling can also trigger this error code. Therefore, to resolve the error, it is advisable to disable automatic cookies handling. This can be done by launching your web browser.
Go to tools and then press the privacy tab. Now click on the advance tab from settings and un-check override automatic cookie handling. To confirm changes press OK.
Uninstall and then Reinstall the Flash Player
It is possible your Flash Player is corrupt. Therefore, another way to fix error 2032 is to uninstall the Flash Player and then reinstall it on your system.
Scan for Viruses
Programs usually get corrupted due to two reasons, viruses or registry issues. Therefore, to remove viruses on your PC, download and run an antivirus program.
 Raspberry Pi 4 and things you need for Windows 11 installation
 Error Causes
 Intel says that the remedy to the issue for these games is the scroll lock fix which can be done so by enabling Legacy Game Compatibility mode from the BIOS of your motherboard. When running the said games, you can press scroll lock to park the E-cores on Intel's Alder Lake Desktop CPUs to get rid of DRM issues.
Certain motherboard manufacturers such as MSI and Gigabyte have made this even easier through software tools with which you don't have to access the BIOS. All you need to do is select a button in the tool which works on both Windows 11 and Windows 10 operating systems and you will enable compatibility mode.
Intel says that the remedy to the issue for these games is the scroll lock fix which can be done so by enabling Legacy Game Compatibility mode from the BIOS of your motherboard. When running the said games, you can press scroll lock to park the E-cores on Intel's Alder Lake Desktop CPUs to get rid of DRM issues.
Certain motherboard manufacturers such as MSI and Gigabyte have made this even easier through software tools with which you don't have to access the BIOS. All you need to do is select a button in the tool which works on both Windows 11 and Windows 10 operating systems and you will enable compatibility mode.  Netflix was one that made streaming service standard and even after some stumbles even today it is still a respected service.
So in that spirit, we are bringing you the list of all new and old movies and TV series releasing to NETFLIX this September.
Netflix was one that made streaming service standard and even after some stumbles even today it is still a respected service.
So in that spirit, we are bringing you the list of all new and old movies and TV series releasing to NETFLIX this September.
