A lot of controversies and mixed emotions have come from statements about Windows 11 minimum system requirements, especially ones linked to TPM.
Naturally, each time some software company giant announces how things are must have there are people who go out and prove them wrong.
This time Raspberry Pi community was one which demonstrated that not only Raspberry Pi does not have a TPM module, it can run the full desktop version of Windows 11
Raspberry Pi 4 and things you need for Windows 11 installation
In order to actually install Windows 11 on your Pi, there are certain things that you will need. Check out the below list and prepare everything.
Raspberry Pi 4 4GB or 8GB
A 32GB or larger SSD via a USB 3 caddy. Best for performance or 16GB or larger microSD card
USB boot enabled, see below.
A micro SD card with the latest Raspberry Pi OS
Windows 10 PC
USB to Ethernet or WiFi dongle
Bluetooth dongle (if you want Bluetooth)
Keyboard, mouse, HDMI, and power for your Raspberry Pi
Configuring Pi to boot from SSD
In order to boot from SSD be sure that firmware and bootloader are up to date on the latest version and upgrade if needed. Be aware that this firmware update can only be performed using the official Raspberry Pi OS.
Also if you are eager and want to use a standard microSSD card instead of an SSD to run Windows 11 feel free to skip this entire section.
Boot from microSSD with the latest Raspberry Pi OS on it.
Update firmware and OS using the terminal by typing sudo apt update sudo apt full-upgrade sudo rpi-update
Reboot your Pi
Install the latest version of bootloader again using the terminal with the command sudo rpi-eeprom-update -d – a
Reboot Pi
Launch raspi-config on your Pi via terminal with sudo raspi-config
Select option 3 (Boot options – Configure options for start-up) from boot options
Select Boot ROM version and press ENTER
Select latest and then OK
Select NO when prompted to reset boot ROM to defaults on the latest version boot ROM selected screen. Press OK
Select Boot order and press ENTER
Select USB Boot and click on OK and remove microSD card from Pi
Select Finish and click on NO when prompted to reboot
Creating Windows 11 installation image for Pi 4
In order to install Windows 11 on our Pi, we must create an installation image, follow the steps below explaining the process.
Download Windows on Raspberry imager and extract it into the win11 folder
Open Imager and allow it to make changes to your computer, set your language, and click on next
Select storage drive where you would like to install Windows
Set device type and click on next
Select our Windows 11 ISO image we created and click on next
On the drivers screen select Use the latest driver package available on the server
On UEFI firmware select screen choose Use the latest firmware available on the server
On configuration screen click on next
Check your setting on the installation overview and if everything is ok click on install
Wait for the whole process to be finished
Once the process is completed, close Windows on Raspberry imager, take out SSD or microSSD card from PC and connect it on your Pi along with Pi peripherals.
Setting Windows 11 on Pi
In order to actually use Windows 11 on our Raspberry Pi we now have to set up the Windows 11 install using the standard post-installation setup sequence.
Power up Pi and press ESC when prompted
Go to Device manager and press ENTER
Select Raspberry Pi Configuration
Select Advanced configuration
Set Limit RAM to 3GB to a disabled state, press F10 to save, and ESC to exit.
Select Display configuration
Set the resolution to desired option and press ENTER, F10 to save, and ESC to exit
Go to CPU configuration
Check if the CPU clock is set to default, if not set it
Press ESC to go back all the way to the main menu
Select Continue to exit BIOS and boot your Raspberry Pi with Windows 11 on it
And there you have it, fully working Windows 11 OS on Raspberry Pi despite what Microsoft says
Note that due to lack of some drivers performance can be less than optimal, for example, full HD videos will not work since there are no compatible graphic drivers for Pi and some other stuff like Wi-Fi will also cause some issues but overall Windows 11 is working pretty well.
The touchscreen feature inside Windows 11 is a pretty good thing but sometimes can be very impractical. The screen can easily and constantly get dirty due to fingers touching it all the time and there are users that do not wish or want to have this feature at all.
If you are one of the mentioned users and for any reason, you do not wish to have a touchscreen-enabled then sit back and relax, we have you covered in this tutorial on how to fully disable touchscreen inside Windows 11.
Turn off touchscreen via device manager
Click on the Windows Search icon in the taskbar
Type Device Manager
Click on Device Manager from the list of results
Inside locate Human Interface Devices and click on the right arrow
In the list, find HID-Compliant Touch Screen and select Disable Device
Click on Yes to confirm
Disable it via Windows Terminal
Right-click on the Windows icon in the taskbar
Click on Windows Terminal (admin)
Inside run this command: Get-PnpDevice | Where-Object {$_.FriendlyName -like '*touch screen*'} | Disable-PnpDevice -Confirm:$false
Conclusion
No matter which method you prefer, both of them will disable the touch screen inside Windows 11. Thank you for reading trough article and I hope to see you again. Take care.
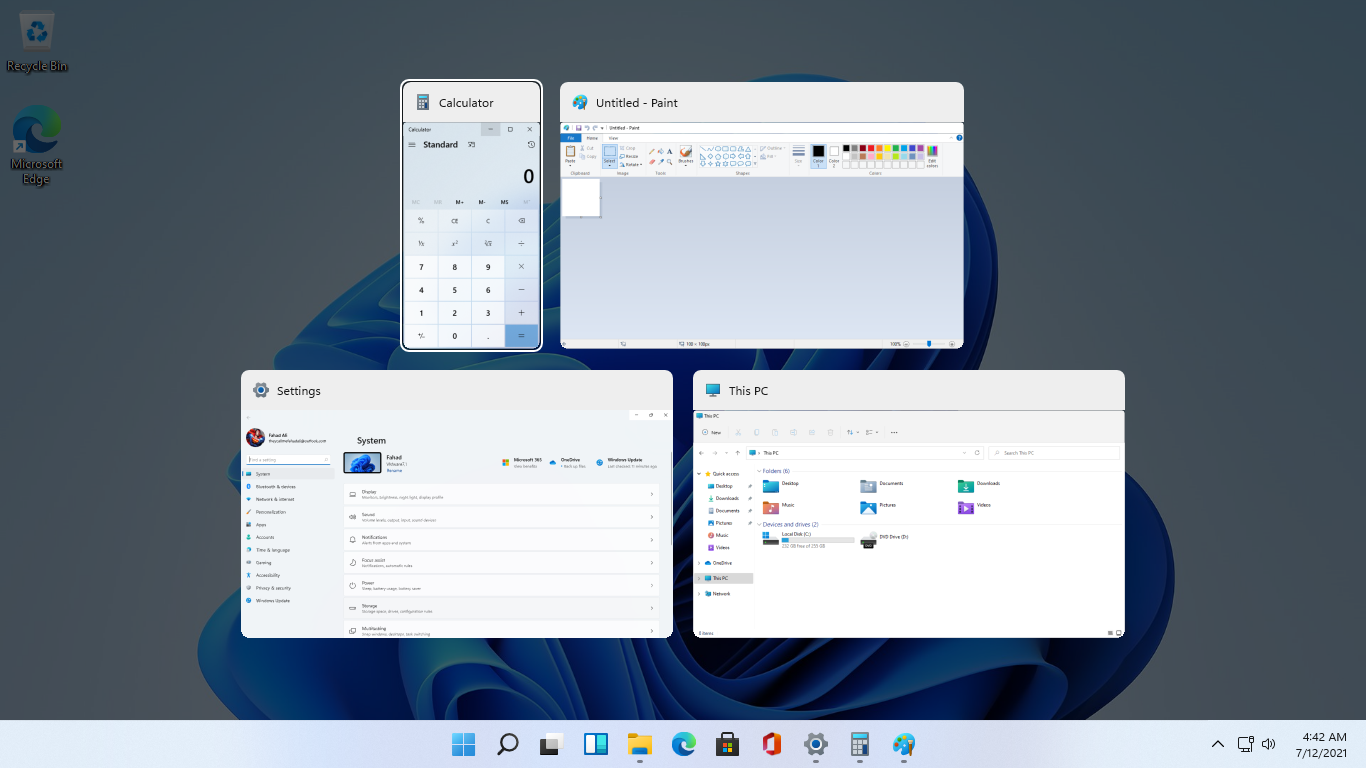
As in previous Windows 10, inside Windows 11 also when you press the ALT + TAB key combination you will get a preview of all running applications along with all Browser tabs so you can go through them and pick the one you want to switch to.
Alto, I personally am a big fan of alt-tabbing, I must admit that I am not a big fan of having multiple browsers tabs on screen when I do press key combo. Luckily there is a very easy way to turn this feature off.
Turning browsers tabs thumbnails off
Press ⊞ WINDOWS + I to open settings
Click on System in the sidebar
Scroll down and select Multitasking
Find Alt + Tab section and click on the drop-down menu
Pick Open Windows Only
Close settings
Now when you press the ALT + TAB key combination you will still see your browser but only an active tab in it instead of all tabs as different preview thumbnails.
As we near the end of 2022 we look at the current best antivirus software for popular platforms, why they are the best, and why you should get them.
Avira, a great free Antivirus
Avira has been around a long time with its free antivirus version of the larger protection suite. It had its ups and downs but the latest versions are really great. With high-speed scans and low system impact, Avira antivirus is really one of the best free antivirus software currently on the market.
The software itself has also received UI & UX updates making it straightforward and easy to use. The virus scanning engine is the same as in paid version that ranks among the top engines in the world for this type of work. The package also gives you some great browser protection and a good firewall as well, there is really no excuse to skip on this if you want a free solution.
The only thing that we would say is not so great in Avira is reporting some false positives, sometimes even for MS updates, it is rare but it can happen.
Malwarebytes, a powerful Windows antivirus
Malwarebytes Premium is easy to use, simple antivirus solution that shies away from complicated UI, and simply put, it just works. Its scanning engine is well-known and places among the top and best in the world often finding some malware that other can miss.
Another great thing is its integration with Windows itself, it is one of the rare applications that can and will work incredibly well beside your typical Windows protection tools so you can have both of them running at the same time.
Installation and running are really simple and every typical PC user will find it as easy as walking in the park. On the other hand, sadly system impact is a little high and it will have issues running on lower-end systems due to its memory requirements.
Intego MAC Internet Security X9, the best Mac antivirus
Gone are the days when MAC had no virus issues, since MAC rose in popularity among the users, also rose the number of viruses and malware. The system itself has some great protection built it inside but for more security and better control of it, you will need a third-party dedicated solution.
Intego was made by Mac antivirus experts who have been building this kind of software last 25 years. The interface is easy to use and premade presets are really helpful, but the security suite can also be customized to fit your needs and desires.
Since this is only available as a security suite, you are getting a firewall and some other security tools along with your antivirus that will run as a part of it.
The bad side is that scans can sometimes run slow, most of the time they are OK in terms of speed but occasionally they can switch to slower speeds and impact scanning time to some annoying times. Also, there is no webcam protection nor VPN service included where others on this list have them.
Bitdefender mobile security: best Android protection
While protection is not only needed for your gaming or workstation, software suites that are dealing with mobile and tablet security exist. The best of them is the Bitdefender antivirus mobile suite. Low on system resources and low on performance impact with the really great virus detection rate Bitdefender is at the top of suites for your phone.
Consistent high virus detection packed with low battery impact is great but the suite comes with tons of other tools as well like browser security tools, email protection, and real-time link and notification protection.
The application will always scan each file and newly installed application in the background and alert and cut off any found threat. App itself is easy to install and use and most of the time it will do everything in the background for you but offer you customization if you need it.
The package also includes VPN and application lock that will let you protect the critical applications from being accessed as well as an online account scanner. Anti-theft and anti-loss tools, which allow you to find, remotely lock or wipe a stolen or lost device, add yet another layer of protection.
One thing that is missing from this great package is fraudulent call protection. Newer Android phones have this feature inside but it would be nice if Bitdefender had it as well.
Bitdefender, the best antivirus software
Now that we have covered specific cases of each platform, there is one player that has all of them covered and with a quality product, that player is BitDefender and it is great. Personally, this is my protection suite of choice and as I type this it is running in the background.
Bitdefender has it all, low system impact, as a matter of fact, it is one, if not, the lowest performance impact engine on the market currently and that is packed with a great and highly consistent virus & malware detection suite. Along with real-time malware protection, browser security, and anti-spam tools, you also get anti-phishing defenses, ransomware protection, and a strong firewall.
Bitdefender scores are very high in both the zero-day threat and real-world protection tests at AV-Test, an established organization that tests antivirus software. Despite being tested against tens of thousands of well-known and widespread malware threats, the software consistently achieves a 100% blocking rate.
The suite also comes with a restricted free VPN and with parental controls as well. Webcam and microphone protection are also included in the suite and on top of all, it has great pricing plans and constant discounts.
BitDefender is really a great package and it might sound too good, but after years and years of personally using it I have not had single malware or virus issue, the only thing that I would put as a negative is that system is severely slowed down when system scans are performed so be sure to run or schedule them when you are not using your computer. This, of course, can put some people off and I will admit it is a serious drawback but for me, the security of my workstation is more important than leaving the computer for 20 or so minutes in order to perform a full scan of the system.
Internal Error 2503 mostly pops up on Windows 8. It occurs when you try to uninstall or install software on Windows 8. The error code message may vary and displayed in different formats such as:
The installer has encountered an unexpected error installing this package. This may indicate a problem with this package. The error code is 2503.Called RunScript when not marked in progressThe installer has encountered an unexpected error installing this package. This may indicate a problem with this package. The error code is 2503.Called Install Finalize when no installation is in progress
Solution
Error Causes
Some of the most common causes for internal error 2503 are:
Permission not granted to access the Windows Installer Folder
Viruses
Problems with Windows Installer
Further Information and Manual Repair
To repair this issue on your PC without any professional assistance, try the DIY methods given below:
Method 1
Internal error 2503 may occur when your account has limited privileges. You don’t have the privilege to use or access the Windows Installer folder.
Your inability to access this folder hampers you from successfully install or uninstall the desired program on your PC. To gain access, you need to ensure you have permission.
For this navigate to the C:\windows folder. Here find the installer folder and then right-click and choose properties.
After that click on the security tab and check if the System and Administrator account has Full access permission.
For that make sure the system group option has ‘all’ selected to allow you full permission.
Method 2 - Re-register Windows Installer
Another alternative to resolve internal error 2503 is to re-register Windows Installer.
To do this, go to Start and click Run. Now type ‘msiexec /unreg’ in the Run box and then press enter.
Follow the same steps and now type ‘msiexec /regserver’ in the box and then press enter. This will resolve the issue.
Method 3 - Remove Viruses
If internal error 2503 is triggered by a viral infection on your PC, then it is advisable to download an antivirus and scan your entire system.
Viruses are notorious for system failures and pose data security threats. If not removed timely, these malicious programs can damage your PC.
To remove all viruses on your system, run an antivirus. An antivirus detects all malicious software programs including viruses, malware, adware, and spyware. Delete all the malicious files found right away.
This will help resolve internal error 2503.
New malware with extensive spyware capabilities steals data from infected Android devices and is designed to automatically trigger whenever new info is read to be exfiltrated. The spyware can only be installed as a 'System Update' app available via third-party Android app stores as it was never available on Google's Play Store. This drastically limits the number of devices it can infect, given that most experienced users will most likely avoid installing it in the first place. The malware also lacks a method to infect other Android devices on its own, adding to its limited spreading capabilities.
However, when it comes to stealing your data, this remote access trojan (RAT) can collect and exfiltrate an extensive array of information to its command-and-control server. Zimperium researchers who spotted it observed it while "stealing data, messages, images and taking control of Android phones."
What happens when malicious software is installed
"Once in control, hackers can record audio and phone calls, take photos, review browser history, access WhatsApp messages, and more," they added. Zimperium said its extensive range of data theft capabilities includes:
Stealing instant messenger messages;
Stealing instant messenger database files (if the root is available);
Inspecting the default browser's bookmarks and searches;
Inspecting the bookmark and search history from Google Chrome, Mozilla Firefox, and Samsung Internet Browser;
Searching for files with specific extensions (including .pdf, .doc, .docx, and .xls, .xlsx);
Inspecting the clipboard data;
Inspecting the content of the notifications;
Recording audio;
Recording phone calls;
Periodically take pictures (either through the front or back cameras);
Listing of the installed applications;
Stealing images and videos;
Monitoring the GPS location;
Stealing SMS messages;
Stealing phone contacts;
Stealing call logs;
Exfiltrating device information (e.g., installed applications, device name, storage stats).
How does it work?
Once installed on an Android device, the malware will send several pieces of info to its Firebase command-and-control (C2) server, including storage stats, the internet connection type, and the presence of various apps such as WhatsApp. The spyware harvests data directly if it has root access or will use Accessibility Services after tricking the victims into enabling the feature on the compromised device. It will also scan the external storage for any stored or cached data, harvest it, and deliver it to the C2 servers when the user connects to a Wi-Fi network. Unlike other malware designed to steal data, this one will get triggered using Android's contentObserver and Broadcast receivers only when some conditions are met, like the addition of a new contact, new text messages, or new apps being installed.
"Commands received through the Firebase messaging service initiate actions such as recording of audio from the microphone and exfiltration of data such as SMS messages," Zimperium said.
"The Firebase communication is only used to issue the commands, and a dedicated C&C server is used to collect the stolen data by using a POST request."
Camouflage
The malware will also display fake "Searching for the update.." system update notifications when it receives new commands from its masters to camouflage its malicious activity. The spyware also conceals its presence on infected Android devices by hiding the icon from the drawer/menu. To further evade detection, it will only steal thumbnails of videos and images it finds, thus reducing the victims' bandwidth consumption to avoid drawing their attention to the background data exfiltration activity. Unlike other malware that harvests data in bulk, this one will also make sure that it exfiltrates only the most recent data, collecting location data created and photos taken within the last few minutes.
If you would like to read more helpful articles and tips about various software and hardware visit errortools.com daily.
Hello everyone, in today's tips and tricks we will focus on providing you with various solutions on how to solve the Device not migrated error that appears after the Windows update has been performed. Sometimes sadly updates to our operating systems can introduce us to various issues that look scary but in reality, they are solvable and not so scary at all. After all who would not find this message concerning, especially when it happens in the middle of work.
The first thing that would pop into my mind is that I have lost tons of work and that something in my hardware has gone very wrong and it is dead. Luckily that is not the case and this error means that due to Windows update drivers were not properly transferred due to some compatibility issues, maybe it was a corrupt update file, etc. Of course, the reason could be hardware malfunction as well, but if everything was working fine before the update, it is a software issue, and I must say it is a common one and fixable. Please keep reading this guide in order to fix the Device not migrated error.
Update the Driver
You should always try this first, if the device is not recognizable, try updating its driver and see if the problem vanishes. In order to update the driver, we will need first to locate which device has not been migrated properly, we will do this with help of a search engine on the internet like google for example. So open your browser of choice, go to a search engine (google for example) and type in the search box first line from your error message, yes, that scary one. You will be given which device has malfunctioned and was not migrated properly, now we will locate the device and update its drivers. To do this press WINDOWS + X on your keyboard to bring up Windows secret menu and choose device manager.
Find device inside device manager, right-click on it, and choose properties. Go to the events tab and make sure that the device has migration issues.
You have now 3 options for updating the driver, you can do it manually, automatically, or with the driver installer. We will cover all 3 options so you choose which one best suits you.
OPTION 1: Manually.Close the Properties tab, go to the device manufacturer website and download the latest driver, if there are no drivers there, the only executable installer for the device skip this step and try the other 2. After you have downloaded the driver package from the website, right-click on the device and choose update driver.
Now navigate to the folder where you have downloaded your driver package and update the driver. Reboot your system.
OPTION 2: Automatic update.Close the Properties tab, right-click on the device and choose to uninstall.
Once the device is uninstalled, restart your system, and Windows will automatically search and install the latest driver for the device.
OPTION 3: Via driver installer.
If you have downloaded .EXE or executable driver installer from device manufacturers web site try installing it, if the installation fails, try using compatibility mode for the installer. Navigate where the installer is located, right-click on it, and choose properties. Go to compatibility TAB and try installing it with administrator privileges in Windows 8 mode.
Reboot your system after this step.
This should solve the issues, however, if the issue still persists, follow the next steps.
Verify the Corrupted System Files
Press WINDOWS + X on the keyboard to open the hidden system menu and choose Command prompt (administrator)
In the command prompt type in: sfc /scannow and press ENTER.
The scanning process and repair of files will take around 15 min. Leave it to finish completely, do not restart, work on the computer or shut it down while the process is active, and only after it is finished reboot your system.
Update Windows.
If your Windows is not updated sometimes this issue can be resolved by updating it on the latest version.
Click on start and then on settings.
Once the settings screen is opened, find and click on Update and Security.
Go to the Windows update tab and click on DOWNLOAD or click on check for updates for the latest Windows fix.
Reset BIOS to factory settings.
Sometimes BIOS not being properly configured can cause issues in Windows itself and prevent it from detecting PnP devices thus creating this error. Restoring BIOS back to the factory setting can help.
Turn off your computer and turn it back on. Press delete, f12, f11, or any other key which will take you to BIOS (default key is delete but sometimes manufacturers map this to another one. Once your screen turns ON you will see in the bottom message which key needs to be pressed in order to enter BIOS).
Sadly since every BIOS could be different we can not cover step by step guide for each but you need to find the option where you load BIOS defaults, click on it save, and exit. Your computer will restart and boot into Windows, check to see if the problem still persists.
Update BIOS
BIOS can cause issues with certain PnP devices when the newest Windows update is rolled. If reverting BIOS to the factory setting has not been successful try update.
Go to your motherboard manufacturer website, find the update and read step by step guide there since updating BIOS differs from version to version and from manufacturer to manufacturer.
After the update is done, restart the computer and hopefully, the error is gone.
Perform a System Restore
If everything else fails, perform a system restore to get Windows back into the state before the update was installed and when everything was working fine.
Press WINDOWS + R on the keyboard to open the run dialog.
In the run dialog, type control panel and press enter to enter control panel, locate recovery and click on it.
Inside the recovery screen click on Open System Restore.
Choose a date when everything was working in order, the best bet is the date before Windows update and roll it back.
Click on date, and then on next.
What is PyLocky ransomware? And how does it execute its attack?
PyLocky ransomware is a file-locking malware created in order to lock important files and demand ransom from victims in exchange for data recovery. This new ransomware uses the .lockymap extension in marking the files it encrypts. It starts to execute its attack by dropping the following malicious payload in the system:
After dropping its malicious payload, this crypto-malware connects the infected computer to a remote server where it downloads more malicious files and places them on system folders. It then applies a data gathering module used to gather data about the user and the computer. The malicious files that were downloaded earlier along with the data obtained are used for another module called stealth protection. This allows PyLocky ransomware to execute its attack without detection from any security or antivirus programs installed in the system. It also modifies some registry keys and entries in the Windows Registry such as:
Once all the modifications are carried out, PyLocky ransomware will begin encrypting its targeted files using a sophisticated encryption cipher. Following the encryption, it adds the .lockymap extension to each one of the encrypted files and releases a ransom note named “LOCKY-README.txt” which contains the following content:
“Please be advised:All your files, pictures document and data has been encrypted with Military Grade Encryption RSA ABS-256.Your information is not lost. But Encrypted.In order for you to restore your files, you have to purchase a Decrypter.Follow these steps to restore your files.1* Download the Tor Browser. ( Just type in google “Download Tor“2‘ Browse to URL: http://4wcgqlckaazungm.onion/index.php3* Purchase the Decryptor to restore your files.It is very simple. If you don’t believe that we can restore your files, then you can restore 1 file of image format for free.Be aware the time is ticking. Price will be doubled every 96 hours so use it wisely.Your unique ID :CAUTION:Please do not try to modify or delete any encrypted file as it will be hard to restore it.SUPPORT:You can contact support to help decrypt your files for you.Click on support at http://4wcgqlckaazungm.onion/index.php”
How does PyLocky ransomware spread over the web?
PyLocky ransomware spreads using malicious spam email campaigns. Creators of this threat embed an infected attachment to spam emails and send them using a spambot. Crooks may even use deceptive tactics to trick you into opening the malware-laden immediately which is something you must not do. Thus, before opening any emails, make sure that you’ve thoroughly checked them.
To successfully obliterate PyLocky ransomware from your computer, refer to the removal guide laid out below.
Step 1: Launch the Task Manager by simply tapping Ctrl + Shift + Esc keys on your keyboard.
Step 2: Under the Task Manager, go to the Processes tab and look for the process named facture_4739149_08.26.2018.exe and any suspicious-looking process which takes up most of your CPU’s resources and is most likely related to PyLocky ransomware.
Step 3: After that, close the Task Manager.
Step 4: Tap Win + R, type in appwiz.cpl and click OK or tap Enter to open Control Panel’s list of installed programs.
Step 5: Under the list of installed programs, look for PyLocky ransomware or anything similar, and then uninstall it.
Step 6: Next, close the Control Panel and tap Win + E keys to launch File Explorer.
Step 7: Navigate to the following locations below and look for PyLocky ransomware’s malicious components such as facture_4739149_08.26.2018.exe and LOCKY-README.txt as well as other suspicious files, then delete all of them.
Step 11: Delete the registry keys and sub-keys created by PyLocky ransomware.
Step 12: Close the Registry Editor and empty the Recycle Bin.
Try to recover your encrypted files using the Shadow Volume copies
Restoring your encrypted files using Windows Previous Versions feature will only be effective if PyLocky ransomware hasn’t deleted the shadow copies of your files. But still, this is one of the best and free methods there is, so it’s definitely worth a shot.
To restore the encrypted file, right-click on it and select Properties, a new window will pop up, then proceed to Previous Versions. It will load the file’s previous version before it was modified. After it loads, select any of the previous versions displayed on the list like the one in the illustration below. And then click the Restore button.
After so many years World of Warcraft is still among the most played MMORPG games in the world. It is still constantly updated with new content and tweak graphically in order to be relevant and fresh. But even the best or most popular ones can still have some minor issues and bugs from time to time. CAS System Was Unable to Initialize is the error that was reported lately by WOW players all around the globe and it happens in multiple Windows systems.
In this guide, we will take with this issue and provide you with solutions on how to fix it so you can get back to enjoying the game itself.
Repair WOW
In battle.NET launcher select WOW and click on Options
Click on Scan and Repair
Let the process finish and then launch the game again
Clean Windows registry
Windows cleaning registry operation is a complex task and we will not cover each possible scenario here, instead of trying manually to find issues and clean registry download and install third party registry cleaner software.
Run WOW with command line argument
One of the solutions for this particular error is to run WOW with a specific command line switch:
Run battle.NET client as administrator by right-clicking on it and choosing run as administrator
If you are not signed in, sign in now
Click on World of Warcraft to select it
Click on options
Click on Game settings
Check the box associated with Additional command-line arguments
When the box is selected you should've able to add inline argument or switch, add -uid wow_engb and confirm
Run World of Warcraft
Enable Secondary logon service inside Windows
It was reported that enabling this service can fix the issue.
Press ⊞ WINDOWS + R to open the run dialog
Inside run dialog type in services.msc to open services windows
Locate the Secondary Logon service
Right-click on Properties from the context menu
Inside the properties, screen click on the general tab
Change the Startup type to Automatic and hit Apply to save the changes
Run World of Warcraft
Delete the cache folder
Both indices and cache folder needs to be deleted in order to reset corrupted data. Make sure that both World of Warcraft and battle.NET are fully closed
For this step to work, you will need to go into the folder where you have installed the World of Warcraft game. By default this is in C:/Program Files/World of Warcraft/ but if you have used another folder go there via file explorer.
Once you are inside the folder locate the indices folder and delete it
After that locate and delete the cache folder as well
Restart your computer and start battle.NET
Remove read-only attribute from WoW folder
Another reason for CAS System Was Unable to Initialize error is because the World of Warcraft folder has been set to read-only and since the client does not have write privileges it will throw this error. To remove the read-only attribute from the folder go to your World of Warcraft installation folder but do not enter it
Right-click on it instead and choose properties
Under properties uncheck the read-only box and confirm.
Run World of Warcraft
If you are trying to restore your computer using a System Image that has been created by the Windows Backup and Restore tool but encountered an error message instead that says, “Windows cannot find a system image on this computer”, you’ve come to the right place as this post will walk you through in fixing this error. Here’s the complete context of the error message:
“Windows cannot find a system image on this computer, Attach the backup hard disk or insert the final DVD from a backup set and click Retry. Alternatively, close this dialog for more options.”
In the error message, you are offered two choices – to either Retry or Cancel the operation. You can try to select Retry to try again but you will most likely get the same error if you do so. This kind of error can occur if the name of the WindowsImageBackup folder or any of its sub-folders has been modified. On the other hand, this error can also pop up if this folder or any of its sub-folders have gone missing or have become corrupted. To resolve the error, you can try to move the WindowsImageBackup folder or check its sub-folders. You can also try to isolate the System Image file or rename the System Image folder or remove all the unwanted sub-folders as well as use Command Prompt in Repair mode.
Option 1 – Try to move the WindowsImageBackup folder
The WindowsImageBackup folder must be stored in the root of the volume where it is stored, in line with the functioning of the System Restore utility. For example, if the WindowsImageBackup folder is stored in the “C:/Backups/System Restore Backups/New” location, then you have to move it to the C: drive as well.
Option 2 – Try to check the subfolders of the WindowsImageBackup folder
The classification of folders and files plays an important part to restore in restoring a computer from a System Restore point. Thus, if have modified the names of any files or folders inside the WindowsImageBackup folder, then you need to set the defaults. After that, run System Restore again and check if it fixes the error.
Option 3 – Try to isolate the System Image file
If the System Image file is stored in a USB storage device along with various System Restore images, then it’s no wonder why you’re getting this error. To set things right, you have to make sure that the System Restore image you wish to restore your computer from, is the only one that’s present at the root of the USB storage device.
Option 4 – Try renaming the System Image folder
If you have renamed the System Image folder prior to running System Restore, then it is most likely the reason why you’re getting the “Windows cannot find a system image on this computer” error. This error pops up because the System Restore utility in Windows 10 looks out for the WindowsImageBackup folder so if you have renamed it, you need to change its name back to what it originally was to fix the error.
Option 5 – Try to remove all the sub-folders of the WindowsImageBackup folder
If you have stored some foreign files inside the WindowsImageBackup folder, you need to get rid of them right away and return the folder to its default state as this folder must be left alone and should not be meddled with if you want to run System Restore smoothly.
Option 6 – Try to use Command Prompt in Repair Mode
Open Command Prompt while your computer is in the Repair Mode.
Next, type and enter this command where you need to replace “<Partition Letter>” with your drive’s letter: dir <Partition Letter>
After you’ve found the WindowsImageBackup folder in any of the partitions, type and enter this command: dir <Parition Letter>WindowsImageBackup /s
The command you entered will display all the contents of the folder exceeding 10 GB in total size. You can check and confirm the integrity of the folder and if you find that the integrity is violated, then it is the reason why you’re getting the error.
Once a tedious and unfriendly task of installing fonts has been severely made easier and more user-friendly. As technology advances daily so do some tasks. One of these tasks which today look unnecessarily complicated is fonts installation in Windows. What was once complicated navigation to control panel with an administrative account, today is two-click with the mouse anywhere, well anywhere on your hard drive, but still a great improvement nonetheless.
Ok, so you have found cool new font which you like very much and you are eager to try it out, but how do you install it in Windows so your other software can find it and use it?
The task is incredibly easy, let's presume that you have downloaded desired font or fonts to your hard drive from the internet, they are nicely placed in a folder, all you have to do is select which one you would like to install, right-click on any one selected and click on install. That's it, that is all that you need to do.
Now in order to remove fonts first, you will have to go to the folder which has all fonts installed in the system. The location of this folder is conveniently enough c:\Windows\Fonts. In there select all fonts that you would like to uninstall from the system and simply delete them, that's it.
 Raspberry Pi 4 and things you need for Windows 11 installation
 If you are one of the mentioned users and for any reason, you do not wish to have a touchscreen-enabled then sit back and relax, we have you covered in this tutorial on how to fully disable touchscreen inside Windows 11.
 As in previous Windows 10, inside Windows 11 also when you press the ALT + TAB key combination you will get a preview of all running applications along with all Browser tabs so you can go through them and pick the one you want to switch to.
Alto, I personally am a big fan of alt-tabbing, I must admit that I am not a big fan of having multiple browsers tabs on screen when I do press key combo. Luckily there is a very easy way to turn this feature off.
Turning browsers tabs thumbnails off
As in previous Windows 10, inside Windows 11 also when you press the ALT + TAB key combination you will get a preview of all running applications along with all Browser tabs so you can go through them and pick the one you want to switch to.
Alto, I personally am a big fan of alt-tabbing, I must admit that I am not a big fan of having multiple browsers tabs on screen when I do press key combo. Luckily there is a very easy way to turn this feature off.
Turning browsers tabs thumbnails off


 The first thing that would pop into my mind is that I have lost tons of work and that something in my hardware has gone very wrong and it is dead. Luckily that is not the case and this error means that due to Windows update drivers were not properly transferred due to some compatibility issues, maybe it was a corrupt update file, etc. Of course, the reason could be hardware malfunction as well, but if everything was working fine before the update, it is a software issue, and I must say it is a common one and fixable. Please keep reading this guide in order to fix the Device not migrated error.
 Find device inside device manager, right-click on it, and choose properties. Go to the events tab and make sure that the device has migration issues.
 You have now 3 options for updating the driver, you can do it manually, automatically, or with the driver installer. We will cover all 3 options so you choose which one best suits you.
OPTION 1: Manually.
Close the Properties tab, go to the device manufacturer website and download the latest driver, if there are no drivers there, the only executable installer for the device skip this step and try the other 2. After you have downloaded the driver package from the website, right-click on the device and choose update driver.
You have now 3 options for updating the driver, you can do it manually, automatically, or with the driver installer. We will cover all 3 options so you choose which one best suits you.
OPTION 1: Manually.
Close the Properties tab, go to the device manufacturer website and download the latest driver, if there are no drivers there, the only executable installer for the device skip this step and try the other 2. After you have downloaded the driver package from the website, right-click on the device and choose update driver.
 Now navigate to the folder where you have downloaded your driver package and update the driver. Reboot your system.
OPTION 2: Automatic update.
Close the Properties tab, right-click on the device and choose to uninstall.
Now navigate to the folder where you have downloaded your driver package and update the driver. Reboot your system.
OPTION 2: Automatic update.
Close the Properties tab, right-click on the device and choose to uninstall.
 Once the device is uninstalled, restart your system, and Windows will automatically search and install the latest driver for the device.
OPTION 3: Via driver installer.
If you have downloaded .EXE or executable driver installer from device manufacturers web site try installing it, if the installation fails, try using compatibility mode for the installer. Navigate where the installer is located, right-click on it, and choose properties. Go to compatibility TAB and try installing it with administrator privileges in Windows 8 mode.
Once the device is uninstalled, restart your system, and Windows will automatically search and install the latest driver for the device.
OPTION 3: Via driver installer.
If you have downloaded .EXE or executable driver installer from device manufacturers web site try installing it, if the installation fails, try using compatibility mode for the installer. Navigate where the installer is located, right-click on it, and choose properties. Go to compatibility TAB and try installing it with administrator privileges in Windows 8 mode.
 Reboot your system after this step.
This should solve the issues, however, if the issue still persists, follow the next steps.
Reboot your system after this step.
This should solve the issues, however, if the issue still persists, follow the next steps. The scanning process and repair of files will take around 15 min. Leave it to finish completely, do not restart, work on the computer or shut it down while the process is active, and only after it is finished reboot your system.
 Go to the Windows update tab and click on DOWNLOAD or click on check for updates for the latest Windows fix.


 In the run dialog, type control panel and press enter to enter control panel, locate recovery and click on it.
 Inside the recovery screen click on Open System Restore.
 Choose a date when everything was working in order, the best bet is the date before Windows update and roll it back.
 Click on date, and then on next.